
Ronin RavenEye - Remote control DJI - Free user manual and instructions
Find the device manual for free Ronin RavenEye DJI in PDF.


| Product Type | Remote Control Module for DJI Ronin Series |
| Dimensions | 140 × 75 × 40 mm |
| Weight | 200 g |
| Power Supply | Built-in LiPo battery, USB-C charging |
| Battery Life | Up to 2 hours continuous operation |
| Charging Time | Approximately 90 minutes |
| Wireless Connection | Wi-Fi 2.4/5 GHz, Bluetooth 5.0 |
| Control Range | Up to 400 m (line of sight) |
| Compatible Gimbals | DJI Ronin 2, RS 2, RS 3, RS 3 Pro, RS 4 |
| Key Functions | FPV view, gimbal control, camera trigger, parameter adjustment |
| Display | 1.1 inch OLED screen |
| Cleaning and Maintenance | Wipe with a soft, dry cloth. Avoid solvents. |
| Safety Precautions | Do not expose to water, extreme temperatures, or physical shock. Use only approved chargers. |
| Spare Parts and Repairability | Battery replacement available. Contact DJI support for repairs. |
| Operating Temperature | -10°C to 40°C |
Frequently Asked Questions - Ronin RavenEye DJI
User questions about Ronin RavenEye DJI
0 question about this device. Answer the ones you know or ask your own.
Ask a new question about this device
Download the instructions for your Remote control in PDF format for free! Find your manual Ronin RavenEye - DJI and take your electronic device back in hand. On this page are published all the documents necessary for the use of your device. Ronin RavenEye by DJI.
USER MANUAL Ronin RavenEye DJI
RavenEye Image Transmission System
User Guide
2020.10v1.0

In the Box
| Image Transmitter × 1 | Cold Shoe to 1/4" Screw Adapter × 1 | USB-C Cable (40cm) × 1 |
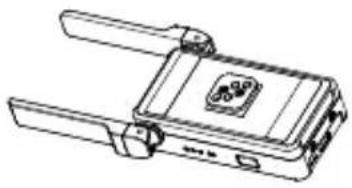 | 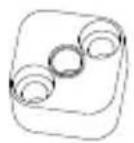 |  |
| USB-C to USB-C Cable (20cm) × 1 | Mini-HDMI to HDMI Cable (20cm) × 1 | Mini-HDMI to Mini-HDMI Cable (20cm) × 1 |
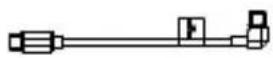 |  |  |
| Mini-HDMI to Micro-HDMI Cable (20cm) × 1 | M4 Screw (10mm) × 2 | Allen Wrench (3mm) × 1 |
 | [Level] |  |
Introduction
DJI RONIN™ RavenEye Image Transmission System is used to transmit a wireless video signal so that users can access the camera view remotely. When used with DJI RS 2 or DJI RSC 2, users can also track subjects with ActiveTrack 3.0 and use remote control features. RavenEye also supports Ronin-S and Ronin-SC and can be used separately with the camera only.

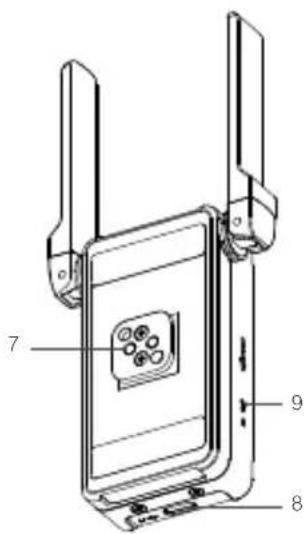
- Antennas
Transmit the wireless signal.
- HDMI Port (Mini HDMI)
For connecting to the HDMI port of the camera.
- RSS Camera Control Port (USB-C)
For connecting to the shutter control port of the camera when not used with DJI RS 2 or DJI RSC 2. For
connecting to the shutter control port of the camera when not used with DJI RS 2 or DJI RSC 2 (coming soon).
- Battery Level Indicators
Indicate the battery level.
- Status LED
Indicates the system status.
- Power Button
Press and hold to power on or off. Press six times to reset the default Wi-Fi password to 12345678 (the battery level indicators will blink three times when the password is successfully reset. A new password must be set in the Ronin app). Press and hold for 10 seconds to force shutdown.
- Cold Shoe
For connecting to the gimbal or camera.
- Power/Communication Port (USB-C)
For charging and communicating with DJI RS 2 and RSC 2.
- Reserved LED
Reserved LED currently without a function.
Installation and Connection
There are three ways to use RavenEye.
Method 1: use RavenEye with DJI RS 2 or RSC 2 (DJI RS 2 is used as an example below)
- Attach the image transmitter to the gimbal via the cold shoe. Adjust the antennas as shown and keep them away from motor.
- Connect the HDMI™ port of the image transmitter to the HDMI port of the camera using the provided HDMI cable according to the camera model.
- Connect the power/communication port of the image transmitter to the image transmission port of the gimbal using the provided USB-C to USB-C cable.
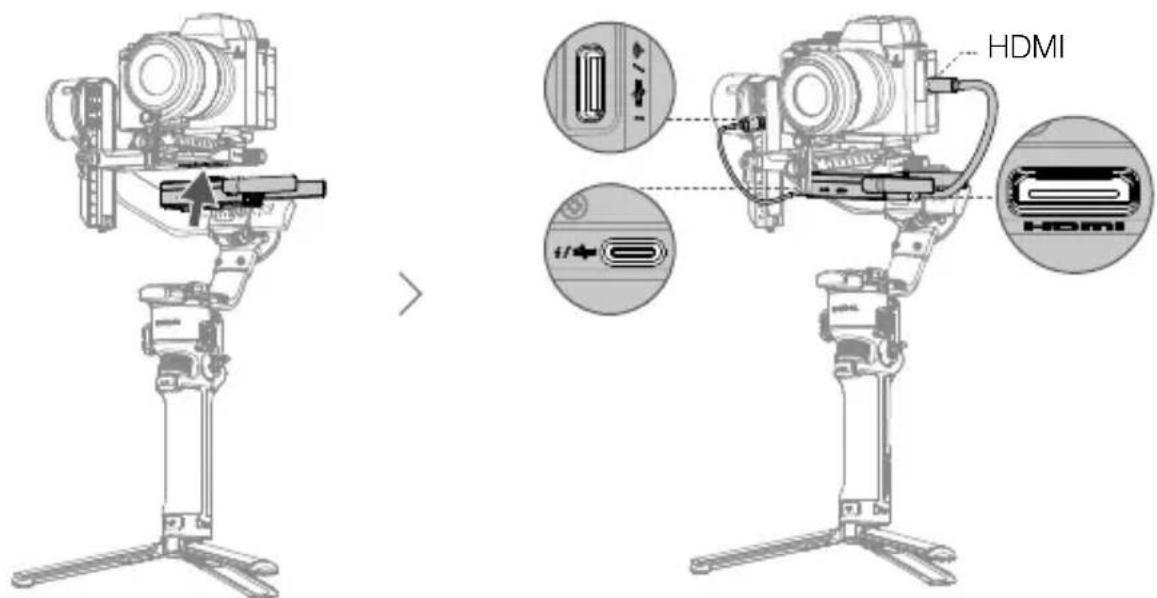

- If the cold shoe of the gimbal is not available, you can attach the cold shoe to 1/4" screw adapter with the image transmitter and use with a device that has a 1/4" screw hole.
- Connect the shutter control port of the camera to the RSS camera control port of the gimbal.
Method 2: use RavenEye with Ronin-S or Ronin-SC (Ronin-S is used as an example below)
- Attach the image transmitter to the camera.
- Connect the HDMI port of the image transmitter to the HDMI port of the camera using the provided HDMI cable according to the camera model.
- Connect the shutter control port of the camera to the RSS camera control port of the image transmitter or to the RSS camera control port of the gimbal. If connected to the RSS camera control port of the image transmitter, the camera can only be controlled in the Ronin app. The buttons on the gimbal cannot control the camera. If connected to the RSS camera control port of the gimbal, the camera can be controlled using the buttons on the gimbal as well as in the Ronin app.
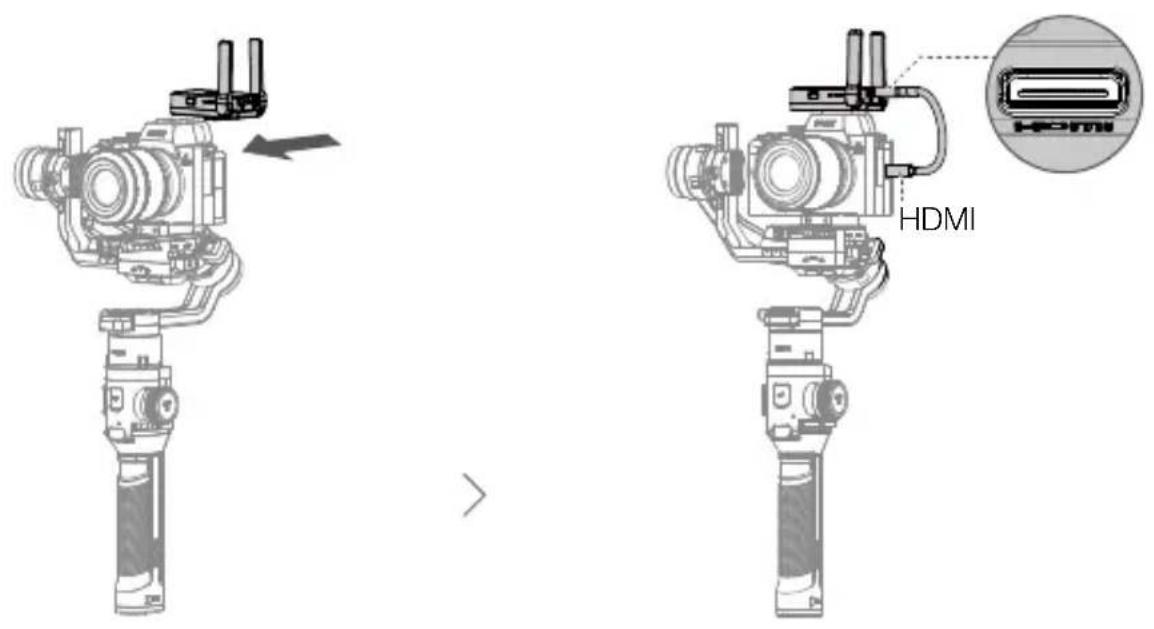

- Refer to the official DJI website for the most updated Camera Compatibility List and DJI Ronin RavenEye Image Transmission System Compatibility List to select the proper HDMI cable and camera control cable.
• The gimbal needs to be balanced after mounting RavenEye. - When used with Ronin-S or SC, you can use the Ronin app to control the camera and access the camera view. Gimbal movements cannot be controlled and ActiveTrack and Force Mobile are unavailable.
Method 3: use RavenEye with only the camera
- Attach the image transmitter to the camera.
- Connect the HDMI port of the image transmitter to the HDMI port of the camera using the provided HDMI cable according to the camera model.
- Connect the shutter control port of the camera to the RSS camera control port of the image transmitter. Connect the mobile device and the image transmitter via Wi-Fi. You can use the mobile device to control the camera and access the camera view.


- It is recommended to turn off the Bluetooth on your mobile device to avoid interference.
- The camera view can also be accessed on the touchscreen of DJI RS 2. Slide down on the touchscreen from the top to enter the camera view.
Status LED Descriptions
Power on the gimbal, camera, and image transmitter. The Status LED indicates the status of the image transmitter.
Status LED Descriptions
Solid red Not connected
Solid blue HDMI or Wi-Fi connected and the Ronin app launched
Solid green Both HDMI and Wi-Fi connected, and the camera view can be accessed on the Ronin app
Using RavenEye via the Ronin App
Launch the Ronin app. Tap "Connect to RavenEye" and follow the onscreen instructions to start.

- When using RavenEye with DJI RS 2, disconnect the Bluetooth connection between the mobile device and gimbal and connect the Wi-Fi in order to use the Ronin app and RavenEye.
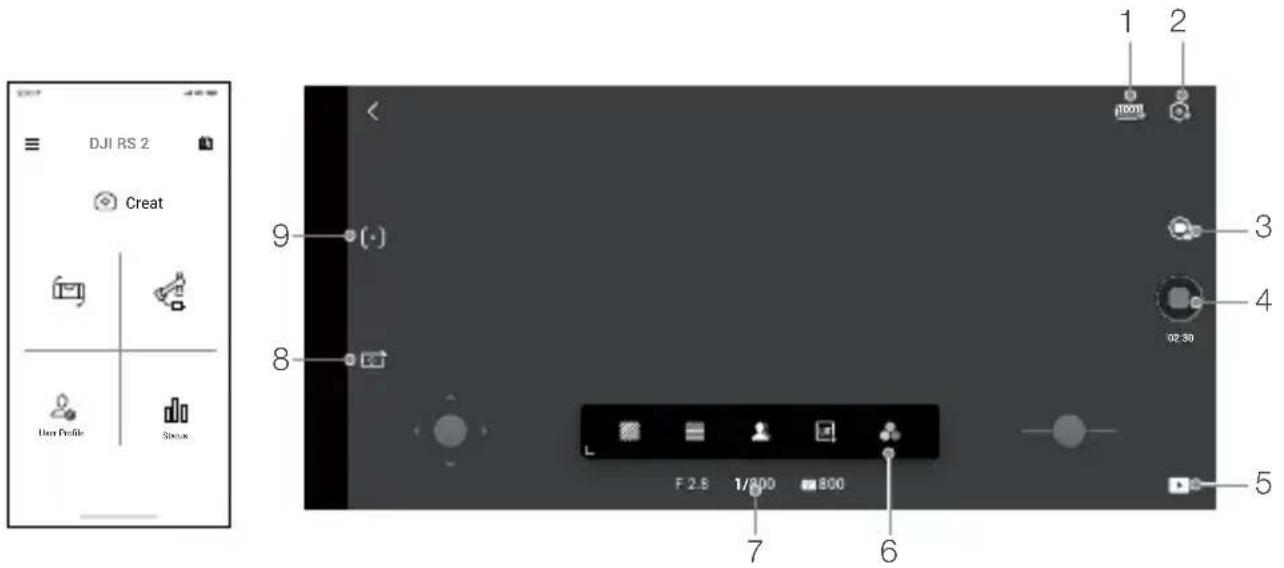
1. Battery Level Display
100 : indicates the battery level of the image transmitter.
2. System Settings
:tap to set the parameters.
RavenEye Assistant: tap to enable the display of RavenEye Assistant.
Guide Frame: tap to choose from 3 x 3, 6 x 4, or Golden Ratio.
Aspect Marker: tap to choose from 2.35:1, 1.82:1, 16:9, 9:16, or 4:3.
Safety Zone Marker: tap to choose from 96%, 93%, 90%, 88%, 85%, or 80%.
Focus Peaking Threshold: tap to adjust the focus accuracy. The smaller the value, the larger the detected edge.
Center Marker: tap to choose from Center Point, Diagonals, or Center Point+Diagonals.
Marker Color: tap to choose from red, green, blue, white, or black.
Marker Width: tap to choose the marker width.
Shutter: tap to set the function of the shutter button. Select Shoot to set the shutter button to start shooting,
Cache to start caching, or Shooting Plus Cache to start shooting and caching simultaneously.
Max Cache: tap to choose from 1 GB, 2 GB, 4 GB, 8 GB, and none.
Wi-Fi Settings: tap to set the Wi-Fi name, password, frequency, and channel. Reconnect the Wi-Fi if the Wi-Fi name or password are changed.
About: tap to view the serial number and the firmware version of RavenEye.
3. Shooting Mode
: tap to switch between photo or video mode.
4. Shutter/Record Button
: tap to take a photo or start or stop recording.
5. Playback
: tap to view photos and videos.
6. RavenEye Assistant
: tap to open RaveEye Assistant.
Zebra Pattern: helps to identify if the subject is overexposed or underexposed. The Zebra Pattern indicates
overexposure.
False Color: helps to identify underexposure and overexposure. Blue indicates underexposure. Red indicates overexposure.
Focus Peak: the edge of the focus area displays red.
LUT: users can import a LUT file to the UserLut folder of the Ronin app (iOS) or the Ronin/UserLut folder in the root directory of the mobile phone (Android) to add a filter.
Single Color: tap to check the RGB and view the quality of the exposure according to the noise of the video.
7. Camera Settings
8001: displays aperture, shutter speed, and ISO settings.
8. Remote Control
: tap to use Virtual Joystick or Force Mobile.
9. ActiveTrack
[·]: When tracking a person, it is recommended to select and confirm the person in the center of the camera view by pressing the trigger once. When tracking an object, it is recommended to select and confirm the object by dragging a box around it in order to recognize the object better. The gimbal begins to track after recognizing the object successfully.
For optimal performance, it is recommended to set the ActiveTrack speed to 20 when using a lens with an equivalent focal length of 24 mm (tested with Sony α7 III). Increase the ActiveTrack speed when using a lens with an equivalent focal length less than 24 mm. Decrease the ActiveTrack speed when using a lens with an equivalent focal length more than 24 mm.
Specifications
| Operating Frequency 2.400-2.4835 GHz; 5.725-5.850 GHz | |
| Weight 126 g | |
| Dimensions 82×63×24 mm | |
| Transmitter Power (EIRP) 2.400-2.4835 GHz | : < 25 dBm (FCC), < 20 dBm (CE/SRRC/MIC) |
| 5.725-5.850 GHz: < 25 dBm (FCC/SRRC), < 14 dBm (CE) | |
| Battery Capacity 2970 mAh | |
| Compatible Charger 5 V/2 A | |
| Charging Time Approx. 2 hr and 30 min | |
| Runtime Approx. 3 hr and 30 min | |
| Max Transmission Distance | 200 m (SRRC/FCC) |
| (unobstructed, free of interference) | 100 m (CE) |
| Latency | 60 ms |
| Operating Current/Voltage | 900 mA/3.7 V |
| Operating Temperature | 0° to 45° C (32° to 113° F) |
The terms HDMI, HDMI High-Definition Multimedia Interface, and the HDMI
Logo are trademarks or registered trademarks of HDMI Licensing Administrator, Inc.
RONIN is a trademark of DJI OSMO.
Copyright © 2020 DJI OSMO All Rights Reserved.


- RAVENEYE IMAGE TRANSMISSION SYSTEM
- IN THE BOX
- INTRODUCTION
- INSTALLATION AND CONNECTION
- METHOD 1: USE RAVENEYE WITH DJI RS 2 OR RSC 2 (DJI RS 2 IS USED AS AN EXAMPLE BELOW)
- METHOD 2: USE RAVENEYE WITH RONIN-S OR RONIN-SC (RONIN-S IS USED AS AN EXAMPLE BELOW)
- METHOD 3: USE RAVENEYE WITH ONLY THE CAMERA
- STATUS LED DESCRIPTIONS
- USING RAVENEYE VIA THE RONIN APP
- BATTERY LEVEL DISPLAY
- SYSTEM SETTINGS
- SHOOTING MODE
- SHUTTER/RECORD BUTTON
- PLAYBACK
- RAVENEYE ASSISTANT
- CAMERA SETTINGS
- REMOTE CONTROL
- ACTIVETRACK
Brand : DJI
Model : Ronin RavenEye
Category : Remote control