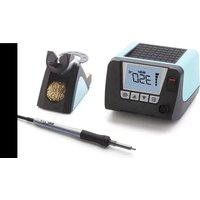
WXair 70 - Welding machine Weller - Free user manual and instructions
Find the device manual for free WXair 70 Weller in PDF.

User questions about WXair 70 Weller
0 question about this device. Answer the ones you know or ask your own.
Ask a new question about this device
Download the instructions for your Welding machine in PDF format for free! Find your manual WXair 70 - Weller and take your electronic device back in hand. On this page are published all the documents necessary for the use of your device. WXair 70 by Weller.
USER MANUAL WXair 70 Weller
natural_image
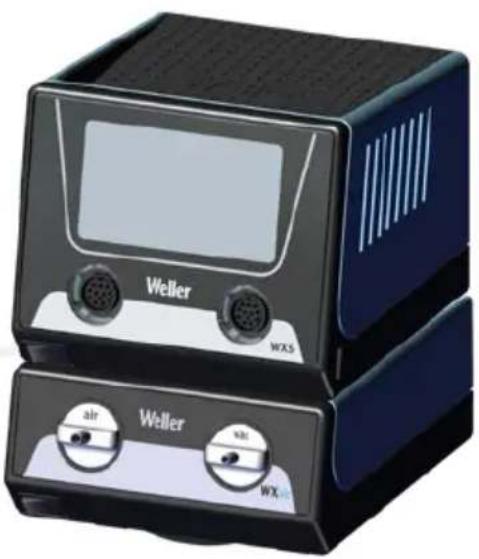
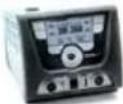
3D rendering of a Weller air vent with labeled buttons (air, vac, wx) on a blue and black casing (no additional text or symbols)GB Translation of the original instructions
natural_image
Circular icon with a lowercase 'i' in the center, commonly used to denote information (no additional text or symbols)
text_image
Weller® www.weller-tools.comwww.weller-tools.com
text_image
Weller®WXsmart menu

VIDEO

FAQ


text_image
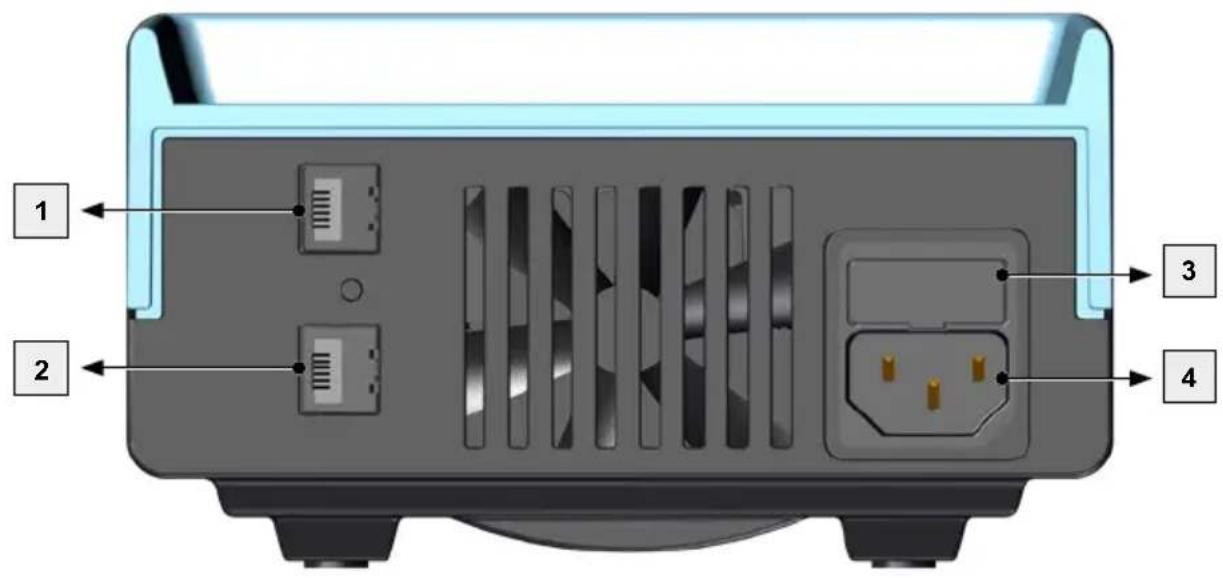
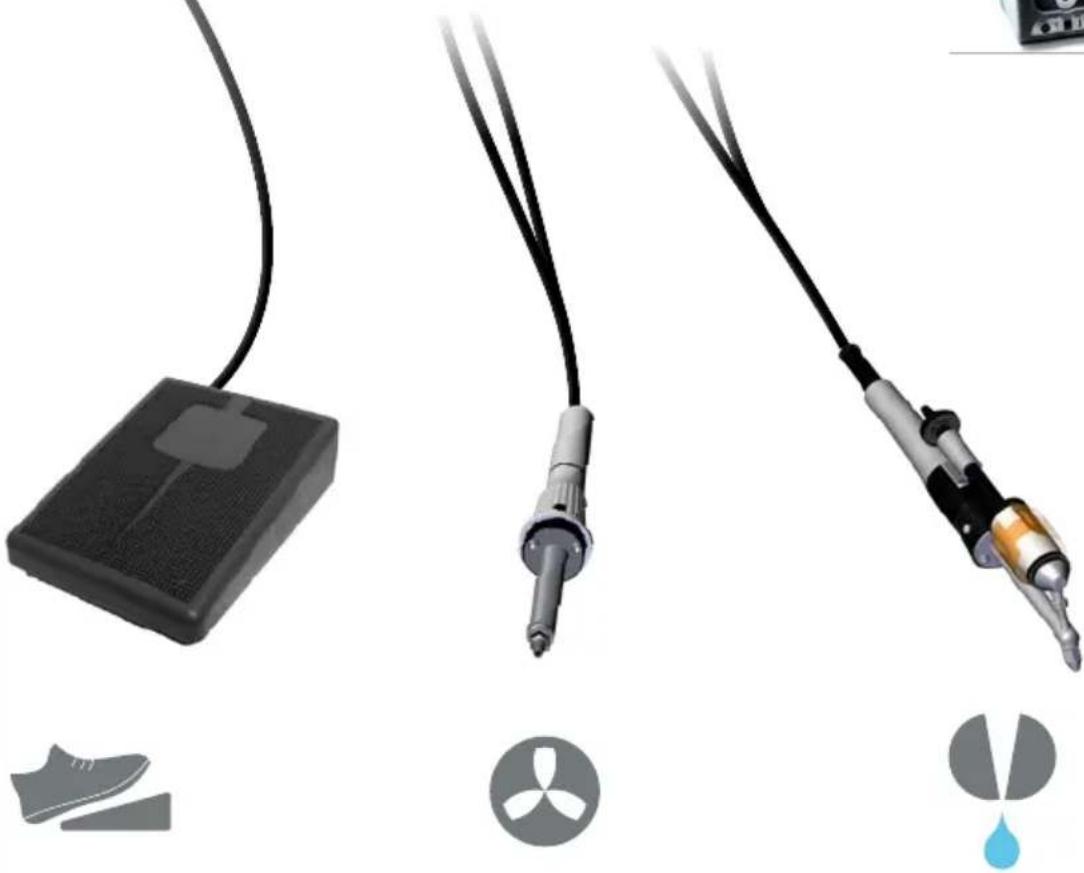
1 2 3 4| 1 | DE | Fußschalter | FI | Poljinkytkin | LV | Pedālis |
| GB | Footswitch | GR | Ποδοδιακόπτης | LT | kojinis jungiklis | |
| ES | Interruptor de pie | TR | Ayak pedali | BG | Педален превключвател | |
| FR | Pédale de commande | CZ | Nožní spínač | RO | Comutator de picior | |
| IT | Interruttore a pedale | PL | Przełącznik nožny | HR | Nožna sklopka | |
| PT | Interruptor de pé | HU | Lábkapcsoló | RU | Педальный выключатель | |
| NL | voetschakelaar | SK | Nožný spínač | CN | 脚踏 | |
| SV | Fotströmbrytare | SL | Nožno stikalo | KO | 풋 스위치 | |
| DK | Fodkontakt | EE | Jalglüliti | JP | フットスイッチ | |
| 2 | DE | Schnittstelle | FI | Liitäntä | LV | Saskarne |
| GB | Interface | GR | Θύρα διεπαφής | LT | Sąsaja | |
| ES | Interfaz | TR | Arabirim | BG | Интерфейс | |
| FR | Interface | CZ | Rozhrani | RO | Interfajā | |
| IT | Interfaccia | PL | Interfejs | HR | Sučelje | |
| PT | Interface | HU | Interfész | RU | Интерфейс | |
| NL | Interface | SK | Rozhranie | CN | 接口 | |
| SV | Gränssnitt | SL | Vmesnik | KO | 인터페이스 | |
| DK | Interface | EE | Liides | JP | インターフェース |
| 3 | DE Netzsicherung | FI Verkkosulake | LV Elektriskā tikla drošinātājs |
| GB Mains fuse | GR Ηλεκτρική ασφάλεια δικτύου | LT Tinklo saugiklis | |
| ES Fusible | TR Șebekė sigortasi | BG Мрежов предпазител | |
| FR Fusible secteur | CZ Sítová pojistka | RO Siguranță de rețea | |
| IT Protezione della rete | PL Bezpiecznik sieciowy | HR Mrežni osigurač | |
| PT Fusível de rede | HU Hálózati biztosíték | RU Предохранитель электросети | |
| NL Netbeveiliging | SK Sieťová poistka | CN 电源保险丝 | |
| SV Nätsäkring | SL Omrežna varovalka | KO 메인 퓨즈 | |
| DK Netsikring | EE Võrgukaitse | JP メインヒューズ |
| 4 | DE | Netzanschluss | GR | Σύνδεση στο δίκτυο τουρεύματος | LT | Tinklo jungtis |
| GB | Mains connection | Присъединяване към | ||||
| ES | Conector principal | TR | Şebeke bağlantısı | BG | мрежата | |
| FR | Connexion secteur | CZ | Sítová prípojka | RO | Racord de conectare la rețea | |
| IT | Collegamento alla rete | PL | Przyłącze sieciowe | HR | Mrežni priključak | |
| PT | Ligação à rede | HU | Hálózati csatlakozás | RU | Розетка для подключения | |
| NL | Netaansluiting | SK | Sietová prípojka | к сети | ||
| SV | Nätanslutning | SL | Omrežni priključek | CN | 电源 | |
| DK | Strømtilslutning | EE | Võrguühendus | KO | 전원 연결부 | |
| FI | Verkkoliitäntä | LV | Elektriskā tīkla pieslēgums | JP | 電源接続 |
text_image
Weller air vac WXair 5 65
DE An/Aus - Knopf
GB On/off button
ES Botón de encendido/apagado
FR Bouton On/Off (marche/arrêt)
IT Pulsante On/Off
PT Botão Ligar/Desligar
NL Aan-uitknop
SV Av/På - knapp
DK Tænd/sluk-knap
FI Päälle-/poiskytkentäpainike
GR Kouμπί On/Off
TR Açma/Kapatma düğmesi
CZ Spínač ZAP/VYP
PL Przycisk włączania-wyłączania
HU Be / Ki - gomb
SK Gombík Žap/Vyp
SL Gumb za vklop/izklop
EE Sisse/Välja - nupp
LV leslēgšanas/izslēgšanas poga
LT „Jj. / išj.“ mygtukas
BG Бутон за вкл/изкл
RO Buton de pornire/oprire
HR Gumb za uključivanje/isključivanje
RU Кнопка ВКЛ/ВЫКЛ
CN 开/关 - 按钮
KO ON/OFF 버튼
JP ON/OFF ボタン
6
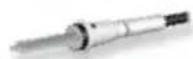
DE Luftanschlussnippel für Heißluftkolben
GB Air connection nipple for hot air tools
Boquilla de conexión del
ES aire para el soldador de aire caliente
FR Raccord de connexion d'air pour fers à air chaud
IT Nipplo di collegamento aria per saldatore ad aria calda
PT Niples de ligação de ar para ferros de soldar por ar quente
NL Luchtaansluitnippel voor heteluchtbout
SV Luftanslutningsnippel för het-luftspenna
DK Lufttilslutningsnippel til varm-
luftskolbe
text_image
Weller air vac WXair 8 8 7
DE Vakuumanschluss
GB Vacuum connection
ES Toma de vacío
FR Raccord de vide
natural_image
Close-up of a dark, grid-patterned surface with no visible text or symbolsT0058771713
natural_image
Simple line drawing of an open box with a dotted arrow pointing upward (no text or symbols)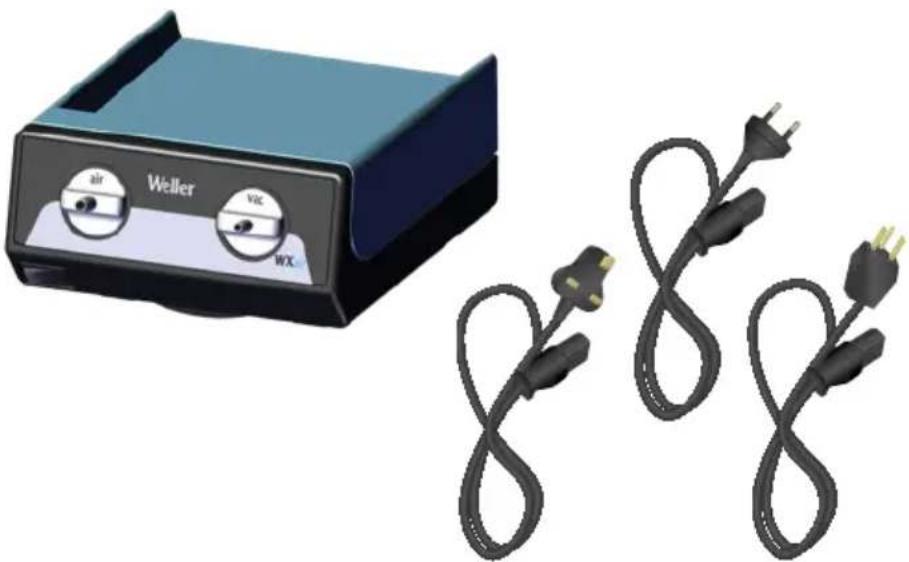
natural_image
Exterior view of a Weller air vent and two black 8-pin electrical plugs (no text or symbols on main components)2
text_image
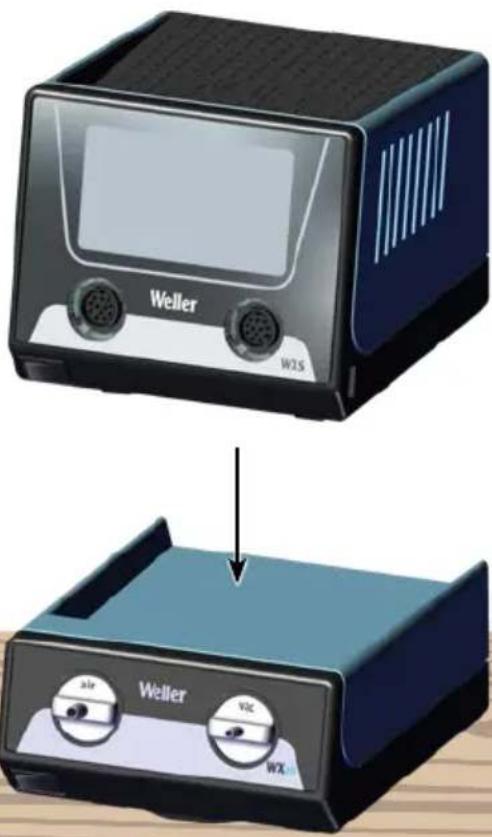
Weller W2S Weller air VZC WX...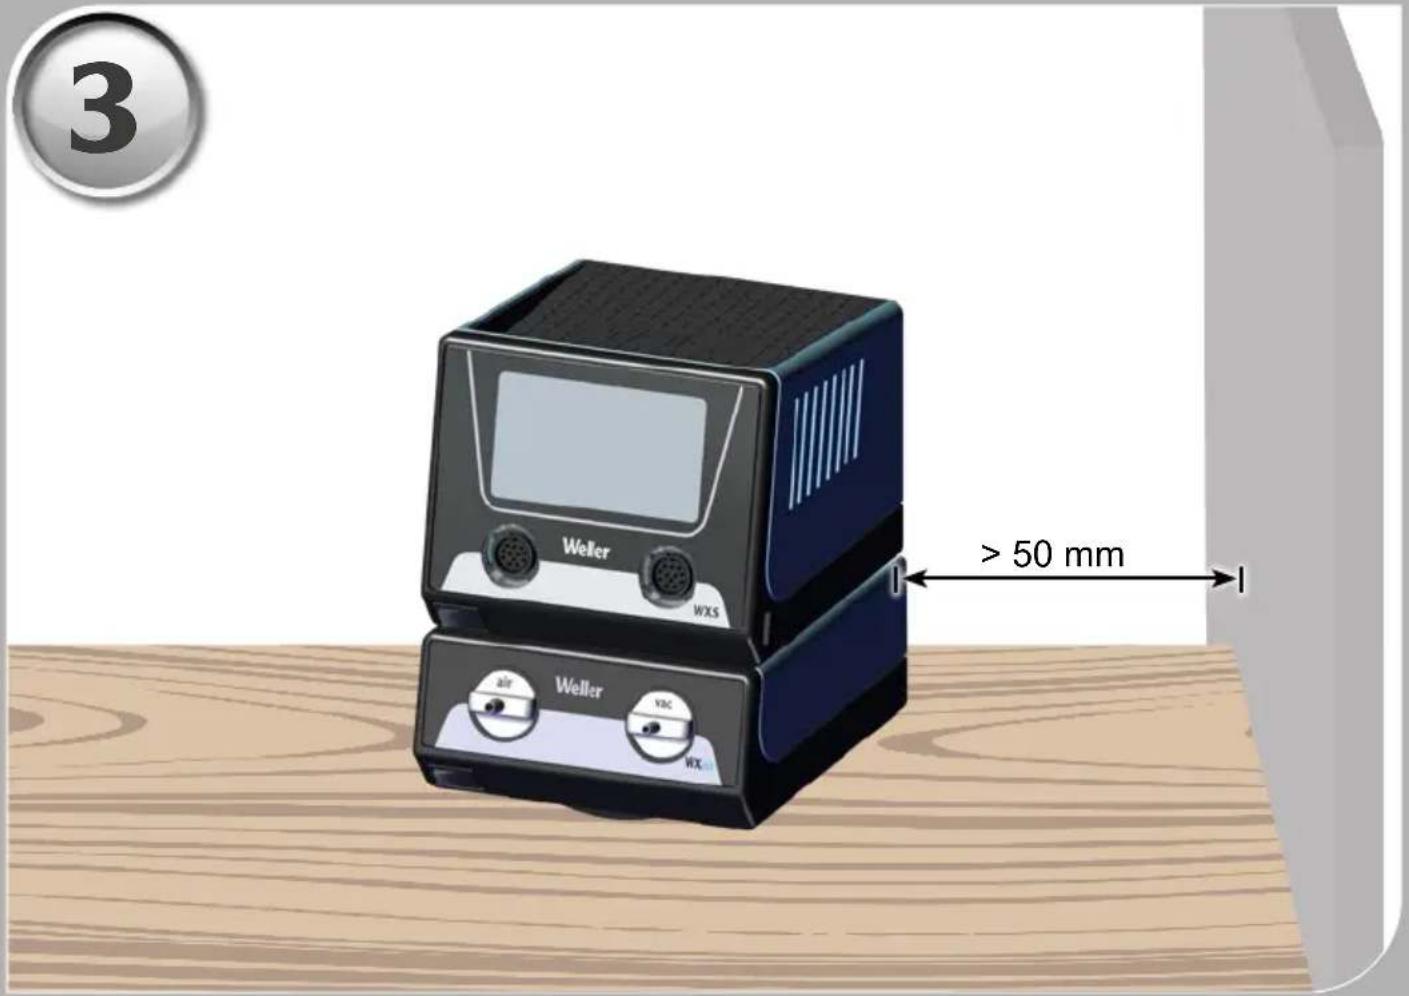
text_image
3 Weler WXS > 50 mm Weller VAC RX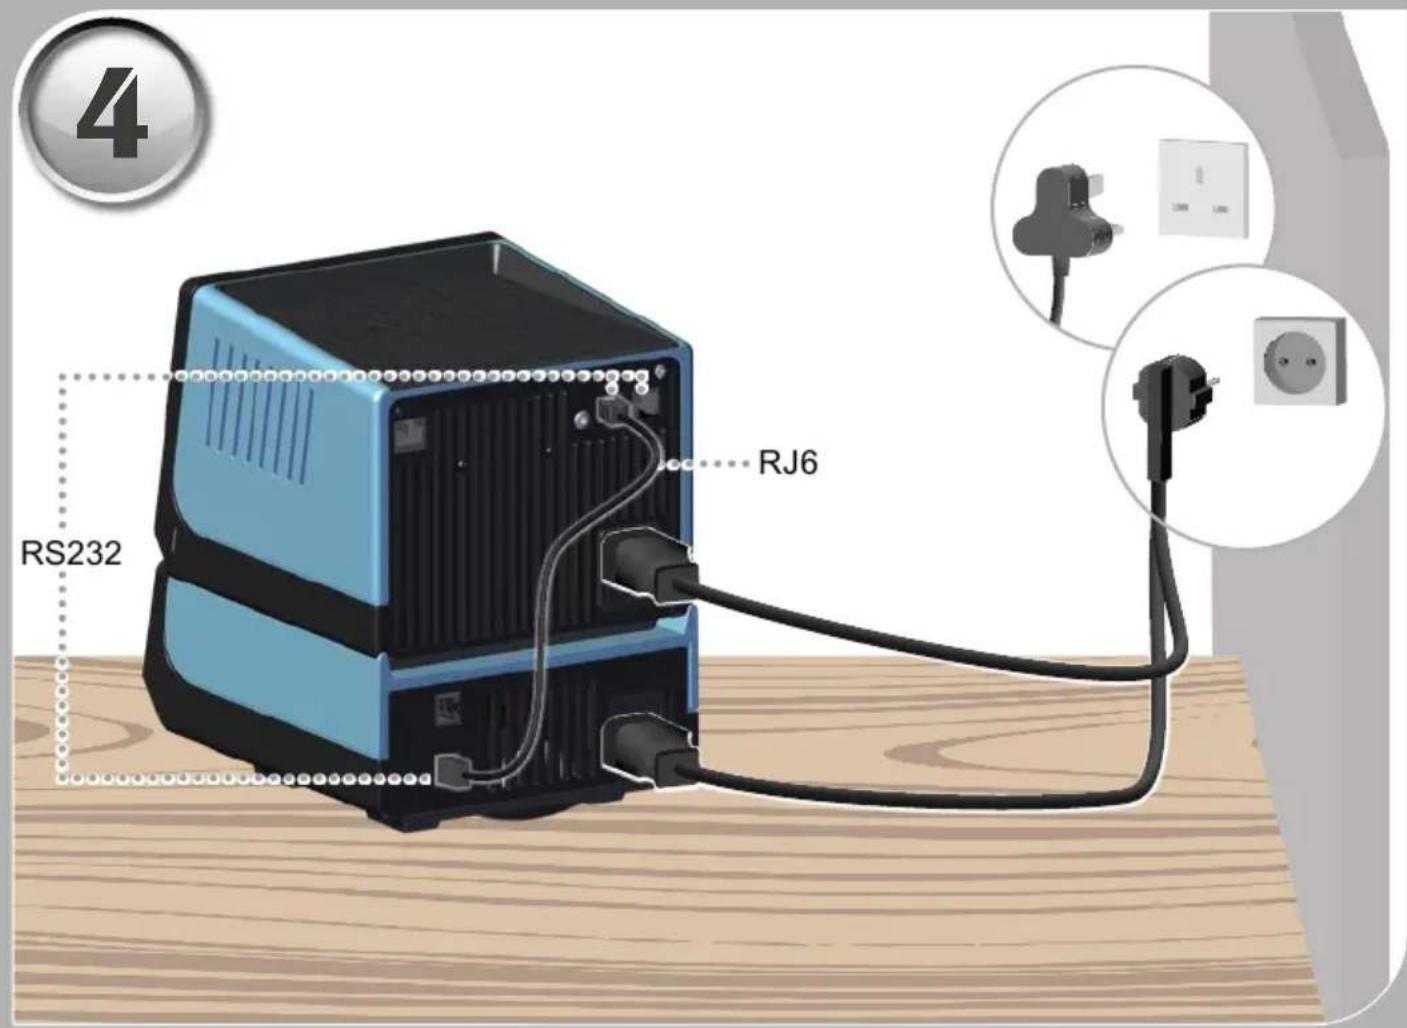
text_image
RS232 RJ6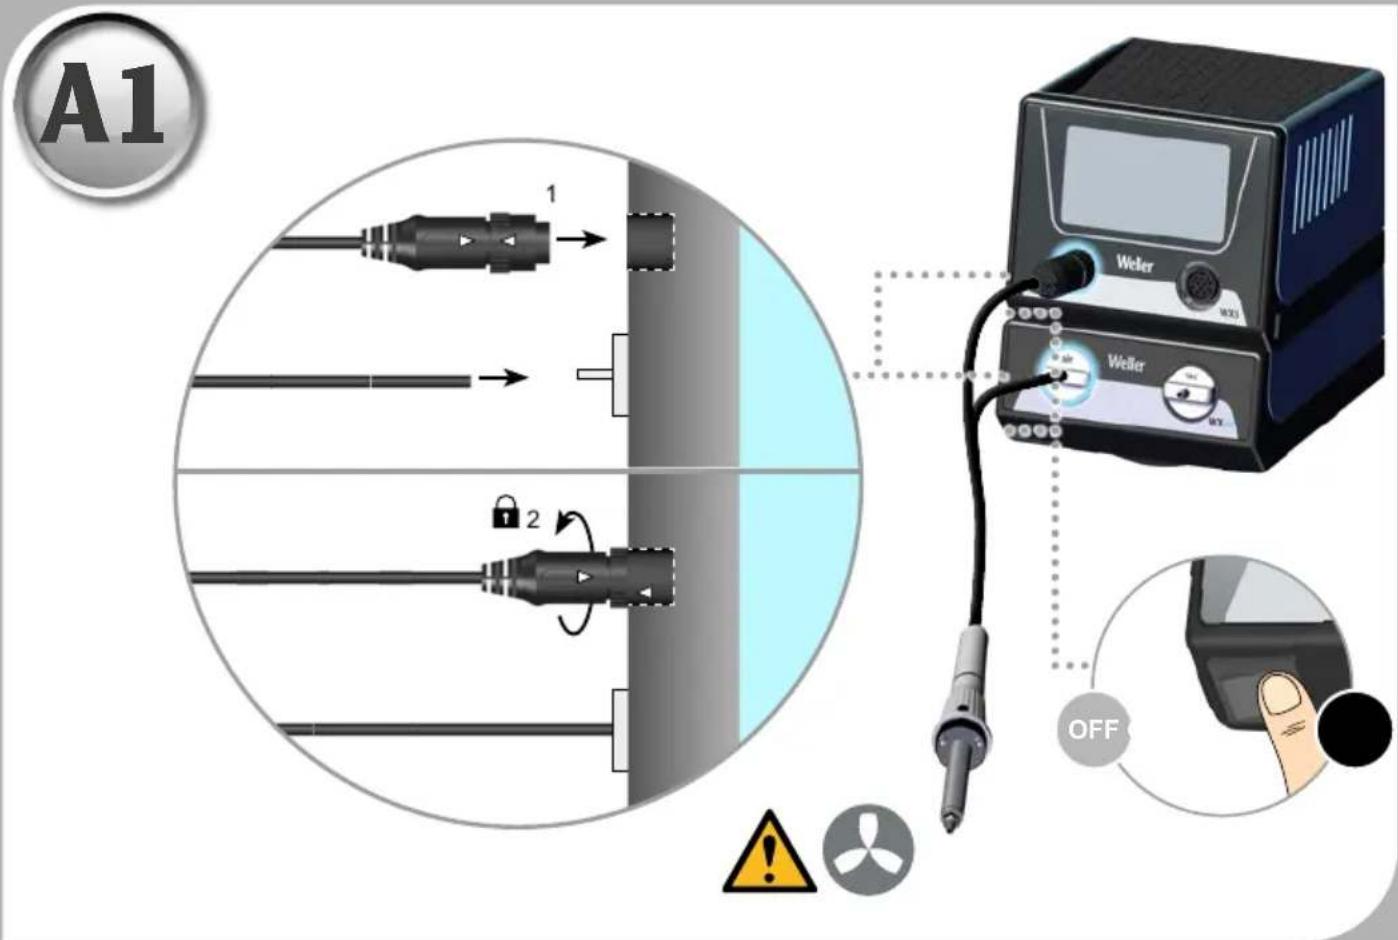
text_image
A1 1 2 Weler Weler OFF ▲ ▼ ○ ■ ○ ●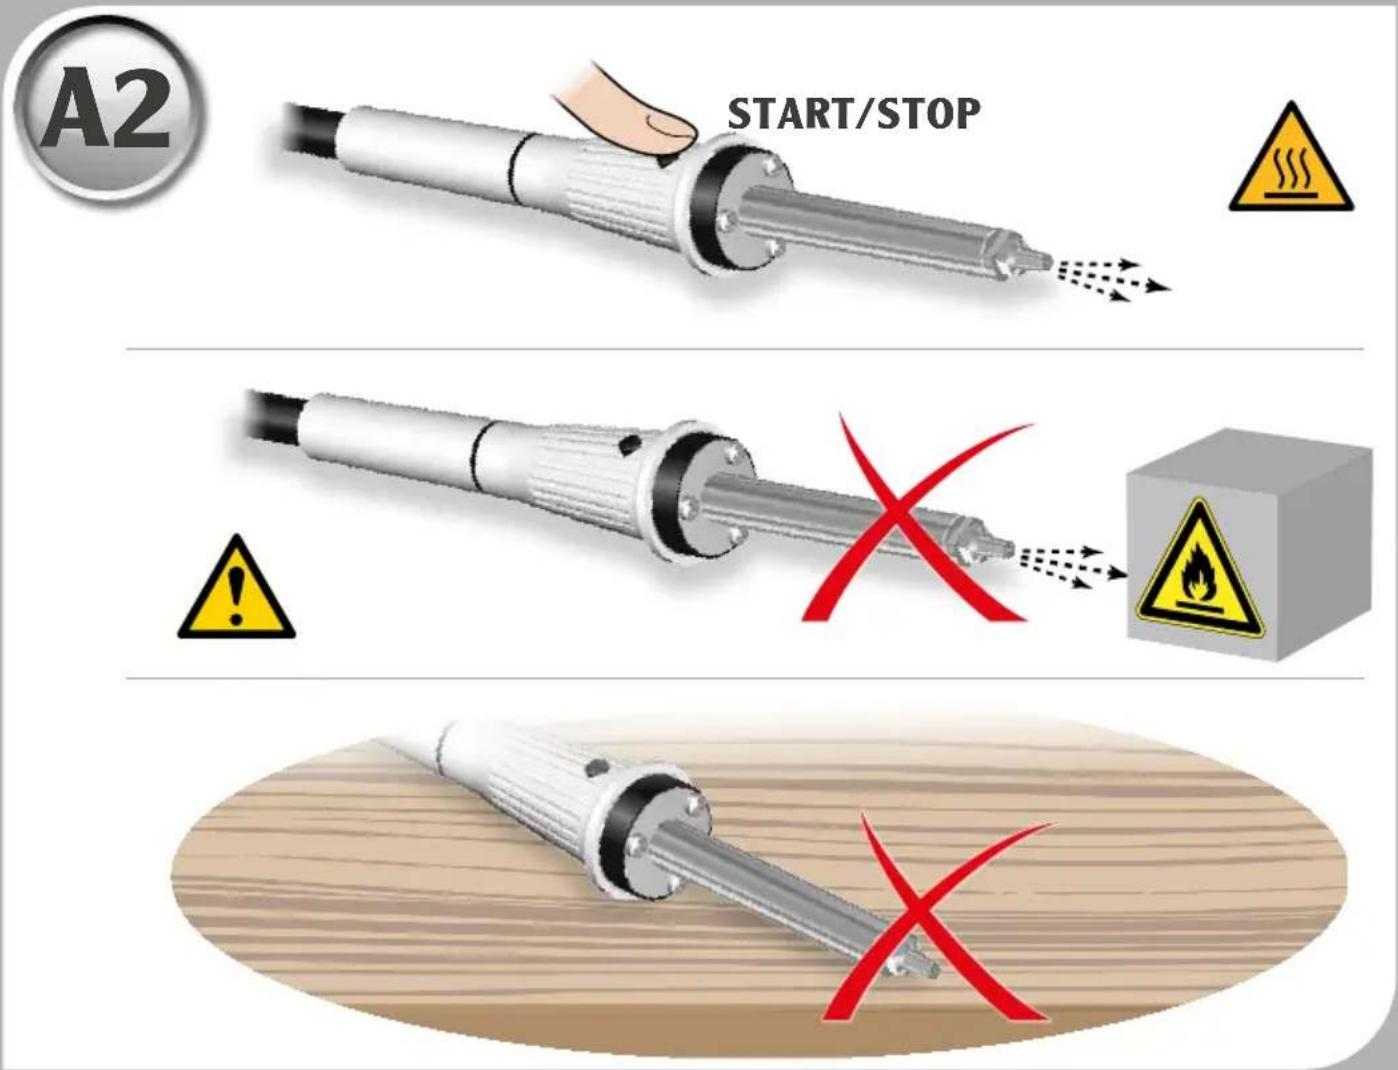
text_image
A2 START/STOP ⚠️ ⚠️ ⚠️ ⚠️ ⚠️ ⚠️ ⚠️ ⚠️ ⚠️ ⚠️ ⚠️ ⚠️ ⚠️ ⚠️ ⚠️ ⚠️ ⚠️ ⚠️ ⚠️ ⚠️ ⚠️ ⚠️ ⚠️ ⚠️ ⚠️ ⚠️ ⚠️ ⚠️ ⚠️ ⚠️ ⚠️ ⚠️ ⚠️ ⚠️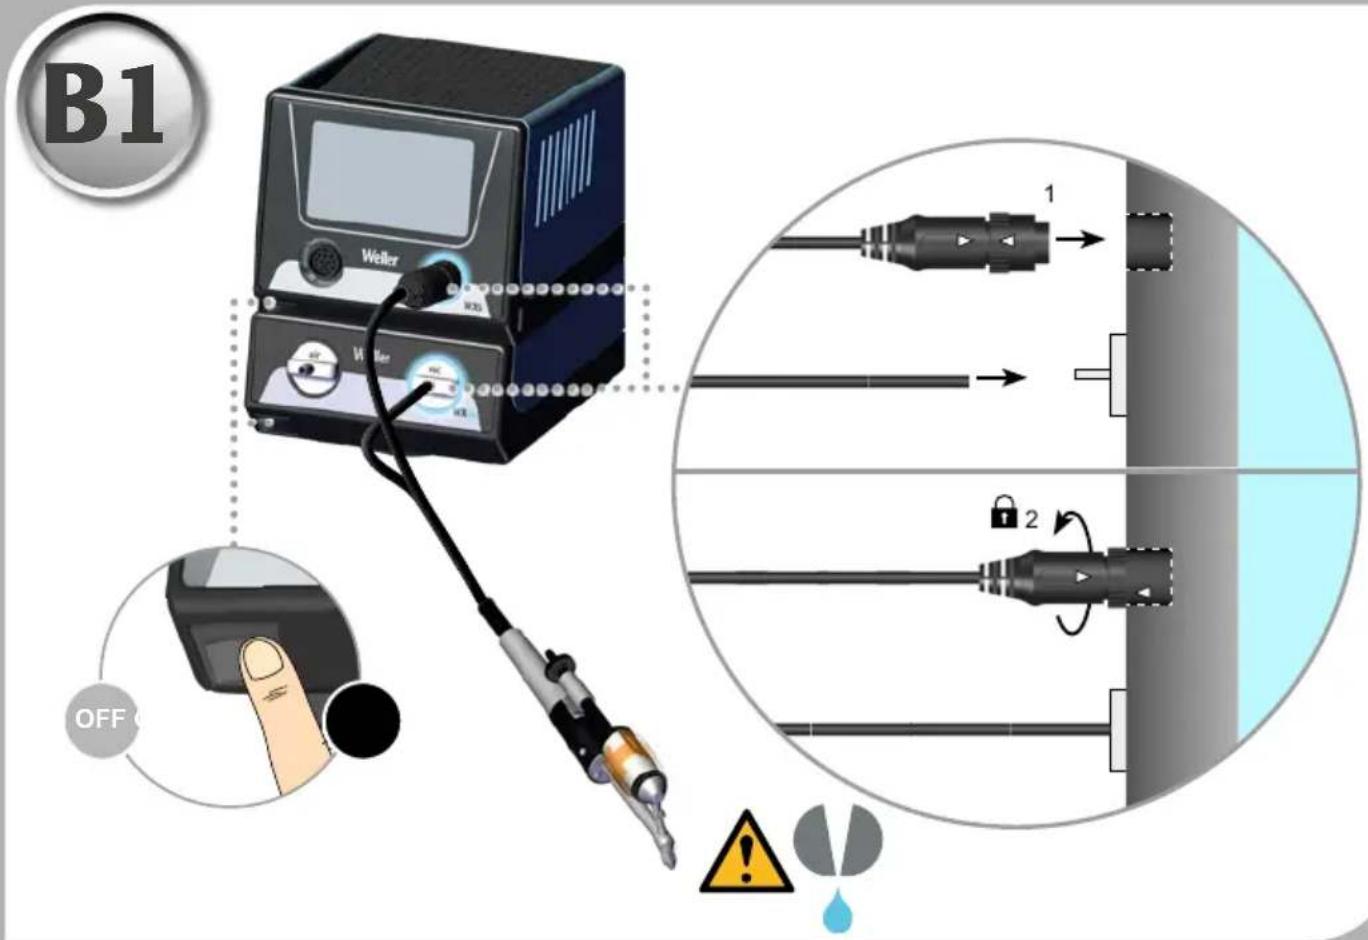
text_image
B1 Weller OFF 1 2
text_image
B2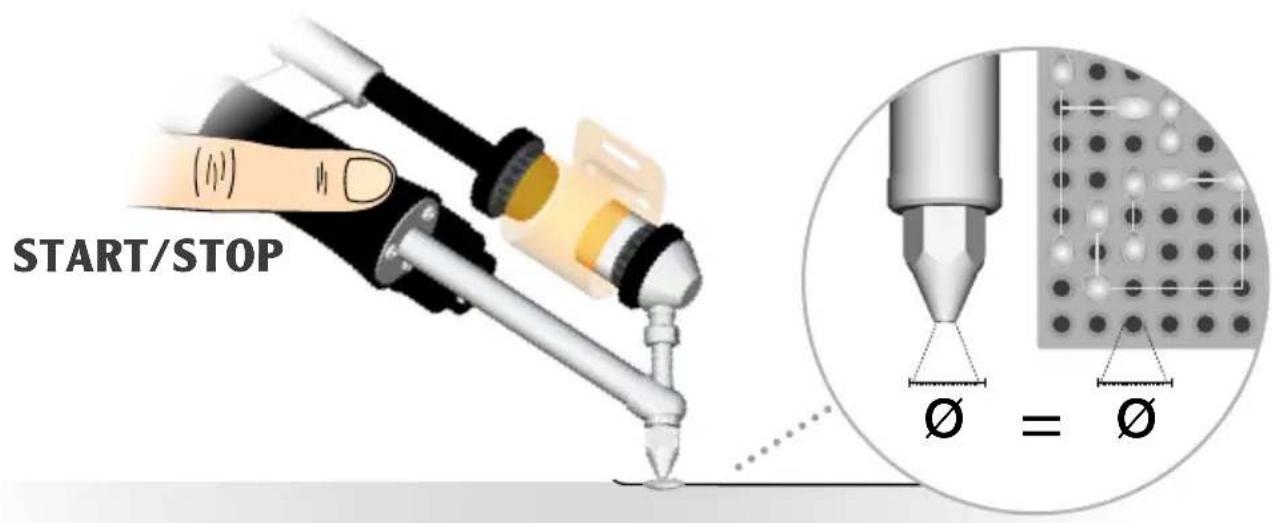
text_image
START/STOP Ø = Ø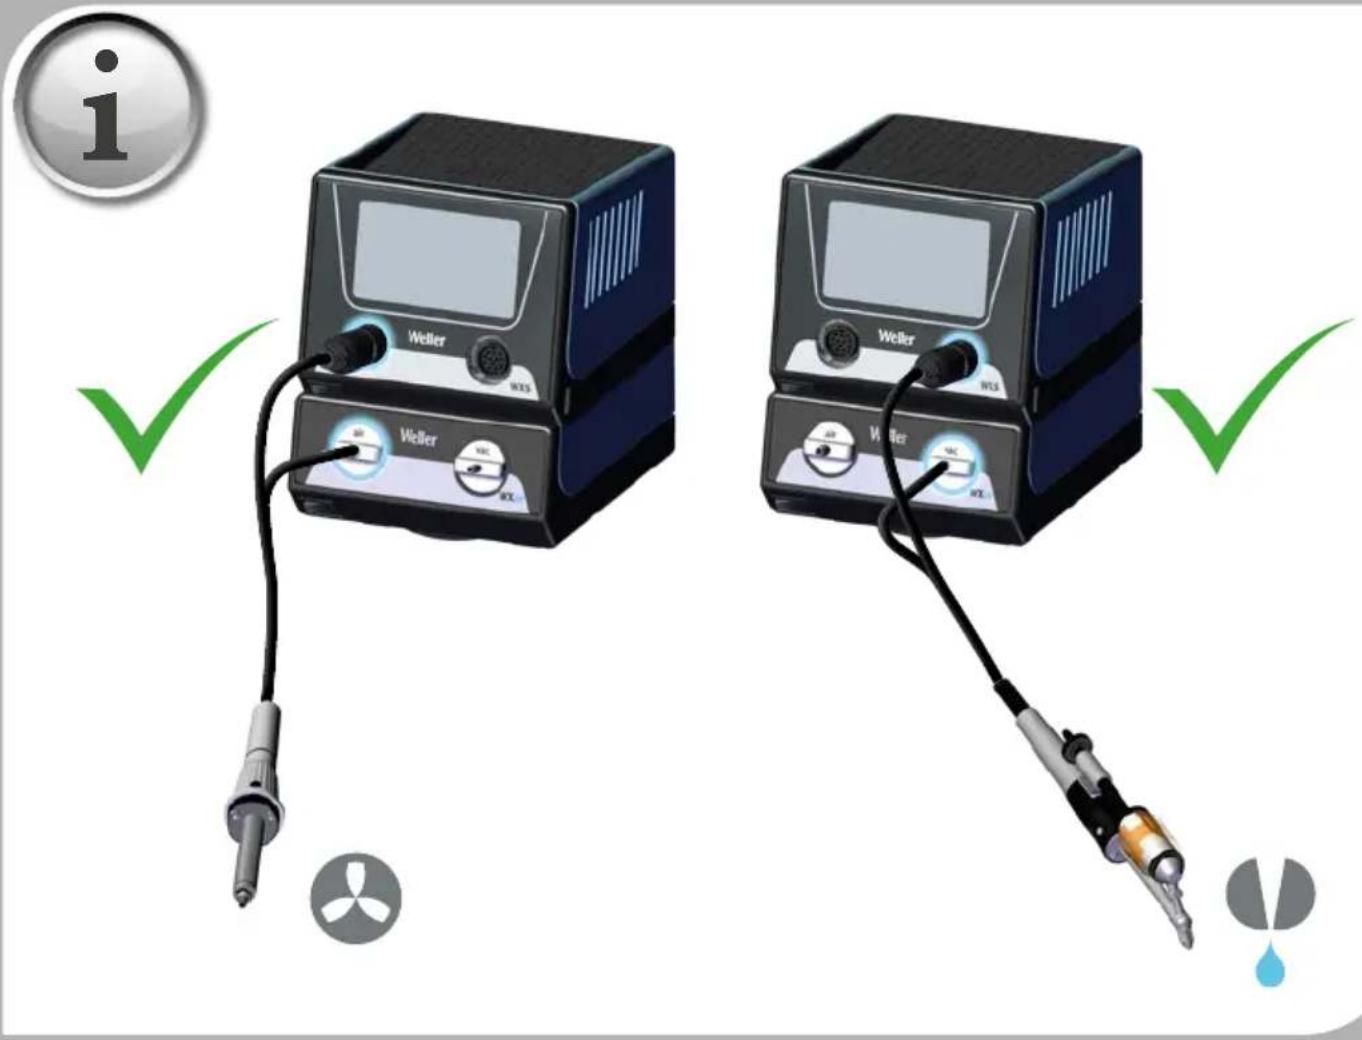
text_image
i Weller WLS Weller WLS Weller WLS Weller WLS Weller WLS Weller WLS Weller WLS Weller WLS Weller WLS Weller WLS Weller WLS Weller WLS Weller WLS Weller WLS Weller WLS Weller WLS Weller WLS Weller
natural_image
Circular button with a lowercase 'i' in the center, commonly used to indicate information (no additional text or symbols)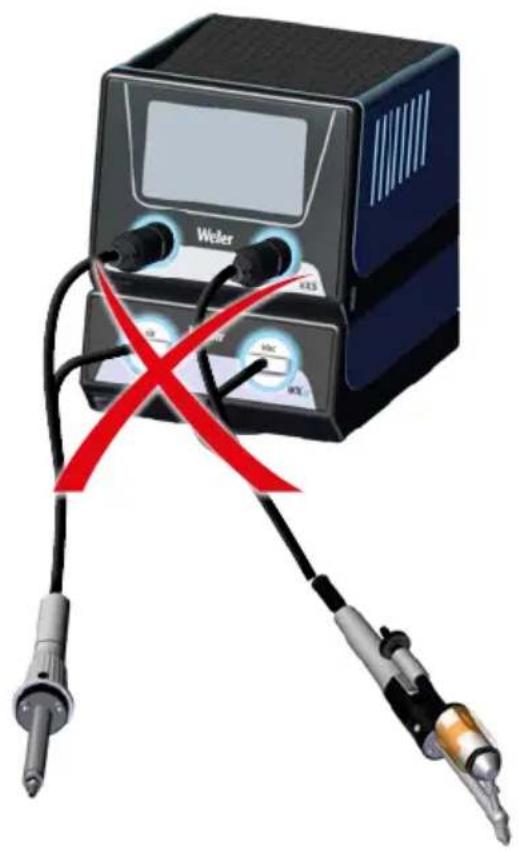
natural_image
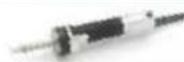
Illustration of a soldering iron mill with a red X-shaped warning symbol (no text or symbols on the device itself)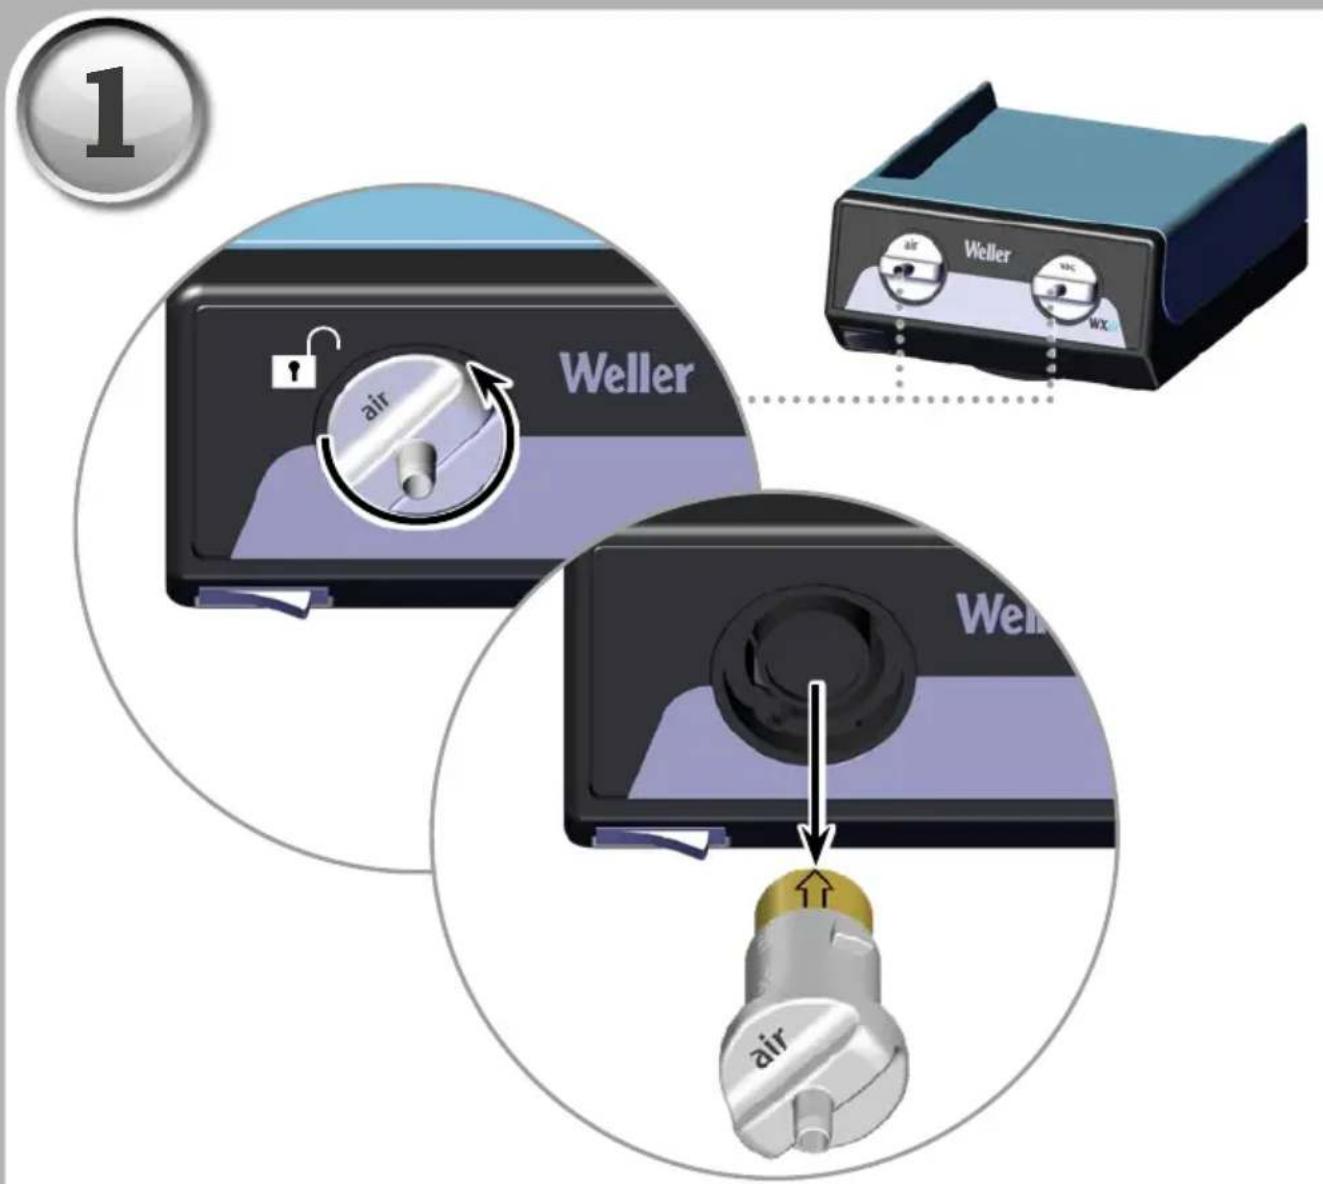
text_image
1 Weller air Weller air
text_image
2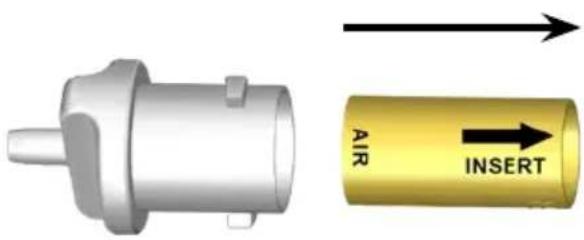
text_image
AIR INSERT3
text_image
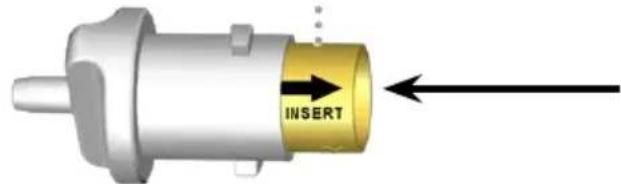
INSERT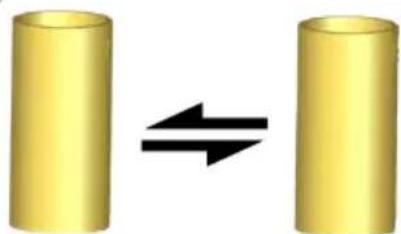
natural_image
Two yellow cylinders with a black double-headed arrow between them, no text or symbols present.AIR:
T0058759725
VAC:
T0058759726
4

text_image
Weller Weller WX air Weller air
natural_image
Illustration of a Weller device with labeled ports (air, vol, WX) and a screen, no readable text or symbols beyond branding.

WXsmart
WX1

WX2

WXD2

WXA2

natural_image
Three electronic components with visible wiring and accessories (no text or symbols)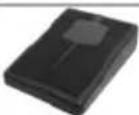
T0051312099N
WXHAP 200 WXDP 120
WXDV 120
| DE Deutsch | Sicherheitshinweise | Bestimmungsgemäße Verwendung | Benutzergruppen | Pflege und Wartung | Garantie | Technische Daten | Symbole | Original Konformitätserklärung | 16 |
| EN English | Safety information | Specified Conditions Of Use | User groups | Care and maintenance | Warranty | Technical Data | Symbols | Original declaration of conformity | 20 |
| ES Español | Advertencias de seguridad | Aplicación De Acuerdo A La Finalidad | Grupo de usuarios | Cuidado y mantenimiento | Garantía | Datos Técnicos | Símbolos | Declaración de conformidad original | 24 |
| FR Français | Consignes de sécurité | Utilisation Conforme Aux Prescriptions | Groupes d'utilisateurs | Entretien et maintenance | Garantie | Caractéristiques Techniques | Symboles | Déclaration de conformité d'origine | 28 |
| IT Italiano | Avvertenze per la sicurezza | Utilizzo Conforme | Gruppi utenti | Cura e manutenzione | Garanzia | Dati Tecnici | Simboli | Dichiarazione di Conformità originale | 32 |
| PT Portugues | Indicações de segurança | Utilização Autorizada | Grupos de utilizadores | Conservação e manutenção | Garantia | Características Técnicas | Símbolos | Original da declaração de conformidade | 36 |
| NL Nederlands | Veiligheidsinstructies | Voorgeschreven Gebruik Van Het Systeem | Gebruikersgroepen | onderhouden | Garantie | Technische Gegevens | Symbolen | Origineel conformiteitsverklaring | 40 |
| SV Svenska | Säkerhetsanvisningar | Använd Maskinen Enligt Anvisningarna | Användarkategorier | skötsel och underhåll | Garanti | Tekniska Data | Symboler | Ursprunglig försäkran om överensstämmelse | 44 |
| DK Dansk | Sikkerhedsanvisninger | Tiltænkt Formål | Brugergrupper | Pleje og vedligeholdelse | Garanti | Tekniske Data | Symboler | Original overensstemmelseserklæring | 48 |
| FI Suomi | Turvallisuusohjeet | Tarkoituksenmukainen Käyttö | Käyttäjäryhmät | aseman hoito ja huolto | Takuu | Tekniset Arvot | Symbolit | Alkuperäinen vaatimustenmukaisuusvakuutus | 52 |
| GR Ελληνικα | Υποδείεις ασφαλείας | Xρήση σύμφωνα με το σκοπό προορισμού | Ομάδες χρηστών | Φροντίδα και συντήρηση της συσκευής | Εγγύηση | Τεχνικά στοιχεία | Σύμβολα | Γνήσια Δήλωση πιστότητας | 56 |
| TR Türkçe | Güvenlik uyariları | Kullanim | Kullanıcı grupları | temizliği ve bakımı | Garanti | Teknik Veriler | Semboller | Orijinal uygunluk beyanı | 60 |
| CZ Český | Bezpečnostní pokyny | Použití v souladu s určením | Uživatelské skupiny | Údržba a servisní práce ohledně | Záruka | Technické údaje | Symboly | Originální prohlásení o shodě | 64 |
| PL Polski | Bezpieczeństwo | Użytkowanie | Grupy użytkowników | Pielęgnacja i konserwacja urządzenia | Gwarancja | Dane Techniczne | Symbole | Oryginalna deklaracja zgodności | 68 |
| HU Magyar | Biztonsági utasítások | Rendeltetésszerű használat | Felhasználói csoportok | Ápolás és karbantar-tás | Garancia | Műszaki Adatok | Szimbóluomok | Eredeti megfelelőségi nyilatkozat | 72 |
| SK Slovensky | Bezpečnostné pokyny | Používanie v súlade s určeným účelom použitia | Skupiny používatel’ov | Ošetrovanie a údržba | Záruka | Technické údaje | Symboly | Originálne vyhlásenie o zhode | 76 |
| SL Slovenščina | Varnostna navodila | Uporaba v skladu s predpisi | Skupine uporabnikov | Nega in vzdrževanje | Garancija | Tehnični Podatki | Simboli | Originalna Izjava o skladnosti | 80 |
| EE Eesti | Ohutusjuhised | Kasutusotstarbele vastav käitamine | Kasutajarühmad | Hooldamine ja teenindami-ne | Garantii | Tehnilised Andmed | Sümbol | Originaal-vastavusdeklaratsioon | 84 |
| LV Latviski | Saugos taisyklés | Naudojimas pagal paskirtj | Naudotoju grupés | |prastiné ir techniné priežiūra | Garantija | Techniniai duomenys | Simboliai | Atitikties deklaracijos originalas | 88 |
| LT Lietuviškai | Drošības norādes | Atbilstoša lietošana | Lietotāju grupas | Apkope un kopšana | Garantija | Tehniskie dati | Simboli | Originālā atbilstības deklarācija | 92 |
| BG Български | Инструкции за безопасна работа | Използване по предназначение | Потребителски групи | Обслужване и поддържане | Гаранция | Технически данни | Символи | Оригинална Декларация за съответствие | 96 |
| RO Român | Indicații de securitate | Utilizarea conformă cu destinația | Grupe de utilizatori | Іngrijirea și întreținerea curentă | Garantia pentru produs | Date tehnice | Simboluri | Declarație de conformitate originală | 100 |
| HR Hrvatski | Sigurnosna upozorenja | Namjenska uporaba | Skupine korisnika | Njega i servisiranje | Jamstvo | Tehnički podaci | Simboli | Originalna izjava o sukladnosti | 104 |
| RU Русский | Указания по технике безопасности | Использование по назначению | Группы пользователей | Уход и техническое обслуживание | Гарантия | Технические характеристики | Символы | Оригинальная декларация о соответствии | 108 |
| CN 中文 | 安全信息 | 规定的使用条件 | 用户群体 | 小心维护 | 保修 | 技术资料 | 符号/标志 | 符合标准说明原件 | 113 |
| KO 한국어 | 안전정보 | 규정된 사용조건 | 사용자 그룹 | 관리 및 유지보수 | 보증 | 기술자료 | 표지 | 표준설명 부품에 부합되어야 한다. | 116 |
| JP 日本語 | 安全に関する情報 | 指定の使用条件 | ユーザーグループ | 保守及びメンテナンス | 保証規定証 | 仕様諸元 | シンボル | オリジナルの適合宣言書 | 120 |

Read these instructions and the safety guidelines carefully before starting up the unit and starting work.
Failure to observe the safety regulations results in a risk to life and limb.
Keep these instructions in a place that is accessible to all users. Please adhere to the operating instructions of the connected devices.
Specified Conditions Of Use
Supply unit for WELLER WX soldering tools. Use the soldering station / desoldering station / hot air station exclusively for the purpose indicated in the operating instructions of soldering and desoldering under the conditions specified herein.
Safety information
For safety reasons, children and youths under the age of 16, as well as persons who are not familiar with these operating instructions, may not use the device. Children should be supervised in order to ensure that they do not play with the tool.
This appliance can be used by children aged from 8 years and above and persons with reduced physical, sensory or mental capabilities or lack of experience and knowledge if they have been given supervision or instruction concerning use of the appliance in a safe way and understand the hazards involved. Children shall not play with the appliance.
Cleaning and user maintenance shall not be made by children without supervision.
Keep other persons well away from your workplace.
The work area is out of bounds for children and unauthorised persons. Never allow other persons to touch the soldering tool or cable.

WARNING
Electrical shock
Connecting the control unit incorrectly poses a risk of injury due to electric shock and can damage the device.
- Carefully read the attached safety information, the safety information accompanying these operating instructions as well as the operating instructions for your control unit before putting the control unit into operation and observe the safety precautions specified therein.
- Only connect WELLER tools.
If the device is faulty, active electrical conductors may be bare or the PE conductor may not be functional.
• Repairs must always be referred to a Weller-trained specialist.
- If the electrical tool's power supply cord is damaged, it must be replaced with a specially prefabricated power supply cord available through the customer service organisation.
Protect yourself against electric shocks. The handles on soldering tools with an antistatic design are conductive.
- Avoid touching earthed objects such as pipes, heaters, cookers and refrigerators.
- Do not use the soldering tool in a damp or wet environment.
- Never work on voltage-carrying parts.

WARNING
Risk of burns
Risk of burns from the soldering tool while the control unit is operating. Tools may still be hot long after they have been switched off.
• Always place the soldering tool in the safety rest while not in use.
- Only connect the vacuum and hot air at the designated points.
- Do not direct hot air soldering tools at people or inflammable objects.
Store your soldering tool in a safe place. When not in use, units and tools should be stored in a dry, high or locked area out of the reach of children. Make sure that unused soldering tools are free of voltage and de-pressurised.

WARNING
Fire hazard
Covering the soldering iron or the safety holder poses a fire hazard. Always keep objects well away from the soldering iron and safety holder.
• Always keep objects well away from the soldering iron and safety holder.
- Keep all combustible objects, liquids or gases well away from the hot soldering tool.
The power cable must only be plugged into the power socket or adapter approved for this purpose. Check to see if the mains voltage matches the ratings on the nameplate. Make sure the machine is switched off before plugging in.
Do not use the cable for purposes other than those for which it is intended. Never carry the unit by the cable. Do not use the cable to pull the plug out of the socket. Protect the cable against heat, oil and sharp edges..
Be alert. Pay attention to what you are doing. Be smart when using the unit. Do not use the soldering tool if you are having difficulty concentrating.
Avoid abnormal posture. Arrange your work station in an ergonomically correct way. Avoid bad posture when using the unit, as this can lead to postural problems.
The soldering tool must be operated only in perfect technical working order. Safety devices must not be deactivated.
Faults and defects must be repaired immediately.
Before using the unit / tool, safety devices must be carefully checked to make sure that they are functioning properly and in the manner intended. Check that moving parts are functioning properly and are not sticking, and whether parts are damaged. All parts must be correctly fitted and must satisfy all the requirements necessary to guarantee troublefree operation of the unit.
Use the correct tool. Use only accessories or auxiliary devices which are included in the list of accessories or approved for use by the manufacturer. Use WELLER accessories or auxiliary devices on original WELLER equipment only. The use of other tools and other accessories can cause injury.
Secure the tool. Use clamping fixtures to hold the workpiece.
Starting up the device
Caution!
Please adhere to the operating instructions of the connected devices.
Make sure the machine is switched off before plugging in.
After switching on the device, the microprocessor carries out a self-test and reads out the values of the parameters stored in the tool.
Check to see if the mains voltage matches the ratings on the nameplate.
The set-point temperature and fixed temperatures are stored in the tool. The actual temperature value increases to the set-point temperature (= soldering tool is heated up).
Desoldering
Carry out soldering work as directed in the operating instructions of your connected soldering tool.
Handling the soldering tips
- Coat the selective and tinnable soldering tip with solder when heating it up for the first time. This removes oxide coatings which have formed during storage and impurities from the soldering tip.
- Make sure that the soldering tip is well coated with solder during breaks between soldering work and prior to storage of the device.
- Do not use aggressive fluxing agents.
• Always make sure that the soldering tips are fitted properly. - Select as low a working temperature as possible.
- Select the largest possible soldering tip shape for the application.
Rule of thumb: the soldering tip should be roughly as large as the soldering pad.
- Coat the soldering tip well with solder to ensure that there is efficient heat transfer between the soldering tip and the soldering area.
- Prior to extended breaks between soldering work, switch off the soldering system or use the Weller function to reduce the temperature when the soldering equipment is not in use.
- Coat the tip with solder prior to storage if you do not intend to use the soldering iron for an extended period of time.
- Apply solder directly to the soldering area, not to the soldering tip.
- Change the soldering tips using the designated tool.
- Do not apply mechanical force to the soldering tip.
WARNING
Flammable gases and liquids may not be extracted. The device may only be used with correctly fitted and suitable filter cartridges.
Replace filter cartridges when full.
This device may only be used at room temperature and indoors. Protect against moisture and direct sunlight.
User groups
Due to differing degrees of risk and potential hazards, several work steps may only be performed by trained experts.
| Work step User groups | |
| Default soldering parameters | Specialist personnel with technical training |
| Replacing electrical replacement parts | Electricians |
| Default maintenance intervals | Safety expert |
| Operation Filter change | Non-specialists |
| Operation Filter change | Technical trainees under the guidance and supervision of a trained expert |
| Replacing electrical replacement parts |
Care and maintenance
WARNING

Before doing any work on the machine, pull the plug out of the socket. Leave the unit to cool down.
Clean the operator panel, if dirty, using a suitable cleaning cloth.
Seal ports which are not in use with covering caps.
Check all connected cables and hoses on a regular basis. If power tools are damaged, they must be immediately removed from use.
Filter change
Regularly check the main filter for vacuum, and replace it if necessary.
Contaminated filters must be treated as special waste. Dispose of replaced equipment parts, filters or old devices in accordance with the rules and regulations applicable in your country. Wear suitable protective gear.
Warning
Working without a filter can result in irreparable damage to the vacuum unit.
- Check before starting soldering whether a main filter is inserted.
Repairs must always be referred to a Weller-trained specialist.

Use original replacement parts only.
Warranty
Claims by the buyer for physical defects are time-barred after a period of one year from delivery to the buyer. This does not apply to claims by the buyer for indemnification in accordance with §§ 478, 479 BGB (German Federal Law Gazette).
We shall only be liable for claims arising from a warranty furnished by us if the quality or durability warranty has been furnished by use in writing and using the term „Warranty“.
The warranty shall be void if damage is due to improper use and if the device has been tampered with by unauthorised persons.
For more information please visit www.weller-tools.com.
Symbols
Caution!
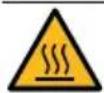
Warning! Risk of burns!

Read the operating instructions!
Before performing work of any kind on the unit, always disconnect the power plug from the socket.
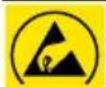
ESD-compatible design and ESD-compatible workstation
Equipotential bonding

Desoldering

Hot air

CE mark of conformity

British Conformity Mark

Fuse

Safety transformer
Firmware Update
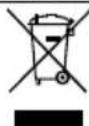
Disposal
Do not dispose of electric tools together with household waste material! In observance of European Directive 2012/19/EU on waste electrical and electronic equipment and its implementation in accordance with national law, electric tools that have reached the end of their life must be collected separately and returned to an environmentally compatible recycling facility.
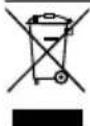
Disposal - UK
Do not dispose of electric tools together with household waste material! In observance of British Directive 2013 No. 3113 on waste electrical and electronic equipment and its implementation in accordance with national law, electric tools that have reached the end of their life must be collected separately and returned to an environmentally compatible recycling facility.
Error messages and error clearance
| Message/symptom Possible cause Remedial measures | ||
| No vacuum at desoldering tool | Vacuum not connectedDesoldering nozzle cloggedPump faulty | Connect vacuum hose to vacuum connectionService desoldering nozzle using cleaning tool |
| Insufficient vacuum at desoldering tool | Filter cartridge on desoldering tool fullMain filter full | Change filter cartridge on desoldering tool fullChange the main filter element on the soldering station |
| Hot air tool has no air | Air hose not connectedMain filter full | Connect or check air hoseChange main filter cartridge on soldering station |
Technical Data
| WXair | |
| Dimensions L x W x H 197 mm x 153 mm x 86 mm7,75 inch x 6,02 inch x 3,38 inch | |
| Weight 1,4 kg | |
| Mains supply voltage 100-240 V AC | 50/60 Hz; |
| Power consumption 70 W | |
| Safety class I, antistatic housing | |
| Fuse T4A | |
| max. Vacuum 70 kPA | |
| Maximum quantity supplied 18 l/min | |
| Ambient temperature 10 - 40°C | |
Subject to technical alterations and amendments.

⚠ BRĪDINĀJUMS | Apdegumu risks
EN EC declaration of conformity
We hereby declare that the products described herein comply with the following guidelines:
Authorised to compile technical documentation.
UK declaration of conformity
We hereby declare that the products described herein comply with the following guidelines:
SI 2008 No.1597, SI 2012 No.3032, SI 2016 No.1091
Besigheim, 2021-09-15
Philippe Buidin
Managing director
Authorised to compile technical documentation.
Apex tool Group (UK Operations) Limited
Piccadilly, Tamworth
Staffordshire B78 2ER
Product Registration
text_image
Weller® Product registration Register your Weiler product Self-accepts to the best support, warranty and supplies. Register how Registration Detail Product Type* Serial Number Product Type Weller® Weller Tools GmbH Carl-Benz-Straße 2 D-74354 Besigheim Made in Mexico Designed & Engineered in Germany Serial Numberwww.weller-tools.com/registration
GERMANY
Weller Tools GmbH
Carl-Benz-Straße 2
74354 Besigheim
Apex Tool Group, LLC.
Weller Professional Tools Division
1000 Lufkin Road
Apex, NC 27539
+1 919-362-8381
info@weller-tools.com
CHINA
Apex Tool Group
Room 302A,
NO 177 Bibo Road
Shanghai, 201202
Tel: +86 (21) 60880288
Fax: +86 (21) 60880289
GREAT BRITAIN
Apex tool Group (UK Operations)
Limited
Piccadilly, Tamworth
Staffordshire B78 2ER
www.weller-tools.com
© 2021, Apex Tool Group, LLC.
Weller® is a registered Trademark and registered Design of Apex Tool Group, LLC.
Weller®