SW0501000F02 - Lighting Livarno Lux - Free user manual and instructions
Find the device manual for free SW0501000F02 Livarno Lux in PDF.

| Product type | LED lamp for outdoor use |
| Brand | Livarno Lux |
| Model | SW0501000F02 |
| IAN article number | 313676 |
| Production date | 12/2018 |
| Warranty | 3 years |
| Light source | 80 LEDs (40 x 0.2W RGB + 40 x 0.2W white) |
| LED lifespan | 20,000 h |
| Battery | Lithium-ion 18650, 3.7 V, 2600 mAh |
| Solar panel | Integrated polycrystalline |
| Power supply unit | Model SW0501000-F02, input 100-240 V~, output 5 V/1 A |
| Remote control | Infrared with CR2025 battery, 3 V lithium |
| Dimensions | Lampshade diameter 34 cm, mounted height approx. 150 cm |
| Protection rating | IP44 (lamp only, without power supply unit) |
| Usage | Indoor and outdoor (power supply unit for indoor use only) |
| Functions | On/off, color dimmer, automatic change, dusk sensor, remote control with flicker effects and speed |
| Charging modes | Solar panel or USB power supply |
| Charging time | Approximately 6 h with power supply (varies with solar) |
| Cleaning | Slightly damp cloth, avoid harsh products, do not immerse |
| Safety | Do not open, do not modify, avoid explosive environments, keep out of reach of children |
| Spare parts | Bulb not replaceable, battery not user-replaceable, remote control battery replaceable (CR2025) |
| Distributor | Tradix GmbH & Co. KG |
| After-sales service | ZA Les Anguillaires 1, 31410 Noe, France - Hotline: 00800 30012001 |
Frequently Asked Questions - SW0501000F02 Livarno Lux
User questions about SW0501000F02 Livarno Lux
0 question about this device. Answer the ones you know or ask your own.
Ask a new question about this device
Download the instructions for your Lighting in PDF format for free! Find your manual SW0501000F02 - Livarno Lux and take your electronic device back in hand. On this page are published all the documents necessary for the use of your device. SW0501000F02 by Livarno Lux.
USER MANUAL SW0501000F02 Livarno Lux
Before reading, please unfold the illustrations page and familiarise yourself with all device functions. The illustration numbers appear in the corresponding position within the text.
OK
- Introduction ......5
- Safety 6
- Scope of delivery 6
- Technical specifications ....6
- Safety information 7
- Safety instructions for rechargeable batteries 7
- Safety instructions regarding batteries .....8
- Start-up 8
- Operation 9
- Replacing the infrared remote control battery .... 10
- Troubleshooting 10
- Cleaning and care instructions ..... 10
- Conformity declaration ..... 10
- Disposal 10
- Warranty ....11
- Warranty conditions ..... 11
- Distributor 11
- Service address ..... 11
1. Introduction
Congratulations!
With your purchase you have chosen a high-quality product. Make yourself familiar with the product before starting to use it. Carefully read the following instruction manual. Use the product only as described and only for the specified areas of application. Keep this instruction manual for future reference. When transferring this product to third parties, also include all documents.
Explanation of symbols
The following symbols and signal words are used in these operating instructions, on the LED outdoor free-standing lamp (hereafter referred to as "lamp") or on the packaging.

WARNING!
This signal symbol/word indicates a hazard with a medium level of risk which, if not avoided, may result in death or serious injury.

CAUTION!
This signal symbol/word indicates a hazard with a low level of risk which, if not avoided, may result in minor or moderate injury.
NOTE!
This signal word warns of possible property damage.
Note about handling these operating instructions

This symbol indicates indoor and outdoor usage.

This symbol indicates usage.

This symbol indicates interior use only.

This symbol indicates potential danger to children.

This symbol indicates the age rating of the product.

This symbol indicates potential danger in relation to electric shocks.

This symbol indicates potential danger in relation to overheating.

This symbol indicates potential danger in relation to explosions.

This symbol indicates potential danger from handling batteries.

This symbol indicates direct current.
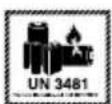
This symbol indicates possible hazards associated with handling lithium batteries.
This symbol indicates the polarity of the USB port.

This symbol indicates an independent operating device.

This symbol indicates alternating current.

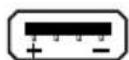
⊕ This symbol indicates the polarity.

Short-circuit proof safety transformer

SMPS (Switch mode power supply unit) switching power supply unit that converts an non-stabilized input voltage into a constant output voltage

This symbol indicates the Protection Classes.

This symbol indicates protection class II.

This symbol indicates Protection Class III.


These symbols inform you about the disposal of the packaging and product.


These symbols inform you about the disposal of the batteries and rechargeable batteries.


This symbol provides information about the FSC certificate.

The "Tested Safety" seal (GS mark) certifies that a product meets the re-ments of the German Product Safety Act (SG). The GS mark indicates that if used as led, the safety and health of people are not lingered. It is a voluntary safety sign.

Mark of conformity (see chapter "13. Declaration of Conformity"): Products that are marked with this symbol fulfil all cable Community regulations of the Europe-onomic Area.
2. Safety
2. Safety
Intended use
! WARNING!
Risk of injury!

The product may not be used near liquids or in damp spaces. There is a risk of injury!

The product is intended for both indoor and outdoor use.
NOTE!
In outdoor areas, the lamp may only be used with a battery operation. The mains power adapter is
not designed for outdoor use.
The product is not intended for commercial use. Different use or a modification to the product are not deemed as intended use and may lead to risks, such as injuries and damage. The distributor assumes no liability for damage that results from improper use.

The lamp is not suitable for a room lighting in the home.
This lamp is a special product, since the light source can withstand extreme physical conditions of -20 °C.
3. Scope of delivery (A1)
1 x LED outdoor free-standing lamp 1 consisting of:
- Lampshade (1 x)
with an integrated solar panel - Metal posts [3 x]
- Metal base (1 x) 1c
x Infrared remote control 2
x Mains power adapter 3
x Operating instructions (without Fig.)
4. Technical specifications
Type: LED outdoor free-standing lamp IAN 313676
Tradix Item No.: 313676-19-A
PO31000422
Protection class IP44 (only LED outdoor floor lamp without mains power adapter.)
LEDs: Max 40 x 0.2 W (RGB) & 40 x 0.2 W (white)
LED service life: 20,000 h
3 brightness levels SMD LEDs
4 brightness levels / colour change RGB LEDs
Lithium-ion battery 18650:
3.7 V = - - - , 2,600 mAh
Integrated polycrystal solar panel:
6 V=---, max. 200 mA
The lamp may only be operated with the following mains power adapter:
Mains power adapter with USB output
Model: SW0501000-F02
Input: 100-240 V\~
50-60 Hz, max. 200 mA
Output: 5 V = -, 1,000 mA
- Polarity:
2 different charging options:
- Solar panel (integrated) or mains power adapter
- Charging time mains power adapter: approx. 6 hours
The charging time through the solar panel depends on the respective solar radiation. Infrared remote control, incl. CR2025 battery,
3 V—Lithium
LED outdoor floor lamp dimensions:
- Lampshade diameter: 34 cm
- Height of lamp assembled: approx. 150 cm
Production date: 12/2018
Warranty: 3 Years
5. Safety information
! WARNING!
Risk of injury!

If children play with the lamp, mains power adapter or the packaging, they may injure themselves!
- Do not let children play with the lamp, mains power adapter or packaging.
- Supervise children near the lamp and the mains power adapter.
- Keep the lamp and mains power adapter out of the reach of children.
! WARNING!
Risk of injury!
The lamp may not be manipulated! There is a risk of injury!
- The housing may not be opened under any circumstances and the lamp may not be manipulated/modified. Manipulations/modifications may cause life-threatening injuries due to electric shock. Manipulations/modifications are prohibited for approval reasons (CE).
- The light source of the lamp cannot be replaced. When the service life of the light source has expired, the complete lamp must be replaced.
! WARNING!
Risk of injury!
A defective lamp may not be used! There is a risk of injury!
- Do not use the lamp in the case of malfunctions, damages or defects. If you find a defect in the lamp, have it checked and repaired if necessary,
before putting it back into operation.
! WARNING!
Risk of injury!
Do not use in an explosive environment! There is a risk of injury!
The lamp may not be used in potentially explosive (Ex) environments. The lamp is not approved for use in an environment containing flammable liquids, gases or dust.
! WARNING!
Risk of injury
Not suitable for children under the age of 8! There is a risk of injury!
- Children over the age of 8, as well as persons with impaired physical, sensory or mental capabilities or a lack of experience and knowledge, must be supervised when using the lamp and/or be instructed on the safe use of the lamp, and understand the resulting dangers.
- Children may not play with the lamp.
- Maintenance and/or cleaning of the lamp may not be performed by children without supervision.
Observe national regulations!
- Observe the applicable national provisions and regulations for the use and disposal of the lamp.
Pay attention to ambient conditions!
- The lamp may not be used in ambient temperatures below -20 °C.
6. Safety information about the battery
! WARNING!
Fire and explosion hazard!
- Keep the lamp away from heat sources and direct sunlight, since the battery may explode if overheated. There is a risk of injury.
Do not operate the lamp in its packaging! There is a risk of fire!
! WARNING!
Risk of injury!
Do not touch leaked batteries with bare hands! There is a risk of injury!
- Leaked or damaged batteries may cause acid burns if they come into contact with skin. Do not touch leaked batteries with bare hands; therefore, ensure that you wear appropriate protective gloves in such a case!
NOTE!
The lamp has a built-in rechargeable battery that cannot be replaced by the user. In order to avoid hazards, the battery may only be removed or recharged by the manufacturer or its service agent or by a similarly qualified individual.
When disposing of the lamp, please note that this lamp contains a rechargeable battery.
7. Safety instructions regarding batteries
! WARNING!
Fatal danger!
Batteries may not be swallowed! There is a risk of fatal injuries!
- Batteries should not be stored near children. Batteries may be fatal if swallowed, so this article and its batteries must be stored out of reach for small children.
- If a battery has been swallowed, please consult a doctor without delay!
! WARNING!
Fire and explosion hazardl
- Never recharge non-rechargeable batteries, do not short-circuit and/or open them. This may result in overheating, risk of fire or bursting.
- Keep the product away from heat sources and direct sunlight, the batteries may explode if overheated. There is a risk of injury.
! WARNING!
Risk of injury!
Do not touch leaked batteries with bare hands! There is a risk of injury!
- Leaked or damaged batteries may cause chemical burns if they come into contact with skin. Do not touch leaked batteries with bare hands; therefore ensure that you wear appropriate protective gloves in this case!
- Only use type CR2025 batteries from the same
manufacturer.
Insert the batteries into the designated battery compartment with the correct polarity.
Do not use combinations of old and new batteries or rechargeable batteries.
Store batteries in a dry and cool, not damp, place.
Never throw batteries into fire.
Do not short-circuit batteries.
Disposable batteries also lose part of their energy during storage.
Remove the batteries if the device is not in use.
Discharged batteries must be immediately removed in order to avoid battery leakage and thus damage to the device.
Empty batteries or used rechargeable batters must be disposed of properly.
Store disposable batteries separately from discharged batteries, in order to avoid mix-ups.
8. Start-up
NOTE!
Before the start-up
The lamp battery must be charged for 6 hours with the included mains power adapter 3 before the first use. The battery is permanently installed inside the lamp.
The battery can be recharged using the mains power adapter 3 at a wall outlet, or by means
of a 5 solar panel. During the charging process, the charging lamp lights up 6 red. When the battery is 100% charged, the red charging light will go out 6. Please refer to the technical data for charging times.
8.1 Charging via mains power adapter (B1)
NOTE!
The mains power adapter is designed for indoor use only.
Only use the supplied mains power adapter for charging!
-
Open the tab 4a of the connection socket 4 on the underside of the lampshade 1a.
-
Plug in the connector plug 3a of the mains pow-
er adapter 3 into the connection socket 4.
- Insert the mains power adapter into the wall outlet.
NOTE!
Make sure that the cable is firmly plugged into the USB socket of the mains power adapter.
- When charging is complete, remove the mains power adapter 3 from the wall outlet and pull out the connection plug 3a from the connection socket 4. Close the tab 4a of the connection socket 4 again.
NOTE!
The battery is equipped with overcharging protection. A continuous operation by means of the mains power adapter 3 is possible.
8.2 Charging via solar panel
The solar panel 5 is firmly attached at the top of the lampshade. The lamp can be charged by means of the integrated 5 solar panel.
NOTE!
The charging time using solar panels 5 depends on the intensity of solar radiation.
The effective charging power of the installed solar panel based on solar intensity of 1,000 W/m² is approx. 80 mA.
Charging by solar panel is intended as a supportive charging option for outdoor areas in order to prolong the lighting duration. A complete charging of the battery can only be performed through a mains power adapter in the interior area.
8.3 Structure of the lamp (B2)
-
Screw-connect the metal base 1c and the three metal posts 1b as shown.
-
Lastly screw-connect the lampshade 1a with the upper metal post 1b.
9. Operation
9.1 Operation on the lampshade (C1)
9.1.1 Switching the lamp on/off
- Press and hold the On/Off + Dimmer COLOR button (a) for approx. 2 seconds to turn on the lamp.
- Press and hold the On/Off + Dimmer COLOR button (a) for approx. 2 seconds to turn off the lamp.
9.1.2 Modes
When the lamp is on, you can use the On/Off + Dimmer COLOR button to switch through the individual modes by pressing the On/Off + Dimmer
COLOR button 1x at a time as follows:
- warm white brightness level I
- warm white brightness level II
- warm white brightness level III
- automatic colour change
- red
- green
- blue
yellow
- orange
- pink
- purple
9.1.3 Sensor OFF/ON Modes
With the Sensor OFF / Sensor ON button (b) you can switch between the following modes.
- Sensor OFF: The lamp must be switched on and off manually.
- Sensor ON: The lamp switches on automatically in darkness (at an illuminance of less than approx. 120 lux) and switches off automatically in bright light.
9.2 Operation with the infrared remote control
9.2.1 Activating the infrared remote control (C2)
The infrared remote control battery ② is protected against unloading with a foil (c) when delivered. Pull it out as shown before using it for the first time. The infrared remote control is now ready for use.
9.2.2 Switching options with the infrared remote control (C3)
ON = Switch on the lamp
OFF = Switch off the lamp
PLAY/PAUSE = Automatic colour change mode COLOUR = colour selection (sequence, 1x press each: red, green, blue, yellow, orange, pink, purple) BRIGHT± = brightness levels (4) of the individual colours (except white)
CANDLE - flickering effect (similar to a burning candle)
SPEED - Change the speed of the colour change in the automatic colour change mode
WHITE: Light level selection in warm white mode
(sequence, 1x press each: Brightness level I, brightness level II, brightness level III)
10. Replacing the infrared remote control battery
If your infrared remote control 2 no longer functions, it may be that the battery is empty and must be replaced.
To replace the infrared remote control 2 batteries, proceed as follows: (D1)
- Push the battery compartment lock inward as shown.
- Pull out the battery compartment as shown, and remove the depleted battery.
- Insert a new battery into the battery compartment as shown.
NOTE!
Only use type CR2025 batteries. Make sure that the polarity is correct when inserting a new battery. (For information on how to dispose of used batteries, see Chapter "14. Disposal".)
-
Push the battery compartment back into the infrared remote control until you hear it click into place. Your infrared remote control is now ready for use again.
-
Troubleshooting
| ERRORS POSSIBLE CAUSE AND REMEDY | |
| No function of the lamp | For operation via the mains power adapter:- Power supply 3 and/or the USB cable are not fully inserted.- Check that the power outlet is working properly.- Check the fuses of the building.For solar operation:- The battery is not sufficiently charged.- Make sure the solar panel is exposed to sufficient sunlight.- Charge the lamp with the mains power adapter. |
| ERRORS POSSIBLE CAUSE AND REMEDY | |
| No functionInfrared remote control | - The battery is dead.- Replace the battery as described under "10. Replacing the infrared remote control battery". |
12. Cleaning & care instructions
! WARNING!
Risk of injury!
Before cleaning, switch off the lamp and disconnect it from the electrical circuit. There is a risk of electric shock!
- for heavy soiling, please use a slightly moistened cloth.
- do not use any harsh detergents/chemicals
- do not immerse in water
- store in a cool, dry place, protected from UV light
13. Conformity declaration
CE This device complies with the fundamental requirements and other relevant regulations of the European Electromagnet-
ic Compatibility Directive 2014/30/EU, as well as the Low-Voltage Directive 2014/35/EU and the RoHS Directive 2011/65/EU. The complete original conformity declaration is available from the importer.
14. Disposal
The packaging and operating instructions are made of 100% environmentally friendly materials, which you may dispose of at local recycling centres.
Disposal of the battery
- Defective or used rechargeable batteries have to be recycled in accordance with Directive 2006/66/EC and its amendments.
- Batteries and disposable batteries are not permitted to be disposed of with household waste. They contain harmful heavy metals. Marking: Pb (= lead), Hg (= mercury), Cd (= cadmium). You are legally obligated to return used batteries and rechargeable batteries. After use, you can either return batteries to our point of sale or in
the direct vicinity (e.g. with a retailer or in municipal collection centres) free of charge. Batteries and rechargeable batteries are marked with a crossed-out waste bin.

The product may not be disposed of with normal household waste. Please find out about disposal options for the product from local authority or town administration.
15. Warranty
Warranty of the Tradix GmbH & Co. KG.
Dear customer, this device comes with a three-year warranty, valid from the date of purchase. In case of defects of this product, you will have legal rights towards the seller of this product. These legal rights shall not be limited by our warranty as set out below.
16. Warranty conditions
The warranty term starts on the date of purchase. Please keep the original receipt in a safe place. This document is required as proof of purchase. If within a period of three years following the date of purchase, this product displays material or manufacturing defects, we shall - at our discretion - repair or replace the product free of charge. This warranty assumes that within a period of three years the defective device and the proof of purchase (receipt) are submitted and that a brief written description of the defect, including when it occurred, is provided.
If the defect is covered by our warranty, you shall receive a repaired or a new product. The repair or exchange of the product does not commence a new warranty term.
17. Distributor
Breitefeld 15, 64839 Münster / Germany
Hotline: 00800 30012001 (gratis, mobilnet kan
variere)
E-Mail: tradix-dk@teknihall.com
IAN 313676
12/2018
piles rechargeables 22
Breitefeld 15, 64839 Münster / Germany
natural_image
Blank white image with no visible content, text, or symbols
natural_image
Blank white image with no visible content, text, or symbols
natural_image
Blank white image with no visible content, text, or symbols.
natural_image
Blank white image with no visible content, text, or symbols.
natural_image
Completely blank white image with no visible content, text, or symbols.
natural_image
Blank white image with no visible content, text, or symbols.
natural_image
Blank white image with no visible content, text, or symbols.
natural_image
Completely blank white image with no visible content, text, or symbols.
natural_image
Blank white image with no visible content, text, or symbols.
natural_image
Blank white image with no visible content, text, or symbols.
natural_image
Blank white image with no visible content, text, or symbols.
natural_image
Blank white image with no visible content, text, or symbols.
natural_image
Blank white image with no visible content, text, or symbols.
natural_image
Blank white image with no visible content, text, or symbols.
natural_image
Blank white image with no visible content, text, or symbols.
natural_image
Blank white image with no visible content, text, or symbols.
natural_image
Completely blank white image with no visible content, text, or symbols.
natural_image
Completely blank white image with no visible content, text, or symbols.
natural_image
Completely blank white image with no visible content, text, or symbols.
natural_image
Completely blank white image with no visible content, text, or symbols.
natural_image
Completely blank white image with no visible content, text, or symbols.
natural_image
Completely blank white image with no visible content, text, or symbols.
natural_image
Completely blank white image with no visible content, text, or symbols.
natural_image
Completely blank white image with no visible content, text, or symbols.
natural_image
Completely blank white image with no visible content, text, or symbols.
natural_image
Completely blank white image with no visible content, text, or symbols.
natural_image
Completely blank white image with no visible content, text, or symbols.
natural_image
Blank white image with no visible content, text, or symbols.
natural_image
Completely blank white image with no visible content, text, or symbols.
natural_image
Completely blank white image with no visible content, text, or symbols.
natural_image
Completely blank white image with no visible content, text, or symbols.
natural_image
Completely blank white image with no visible content, text, or symbols.
natural_image
Completely blank white image with no visible content, text, or symbols.
natural_image
Completely blank white image with no visible content, text, or symbols.
natural_image
Completely blank white image with no visible content, text, or symbols.
natural_image
Completely blank white image with no visible content, text, or symbols.
natural_image
Completely blank white image with no visible content, text, or symbols.
natural_image
Completely blank white image with no visible content, text, or symbols.
natural_image
Blank white image with no visible content, text, or symbols.
natural_image
Completely blank white image with no visible content, text, or symbols.
natural_image
Completely blank white image with no visible content, text, or symbols.
natural_image
Completely blank white image with no visible content, text, or symbols.
natural_image
Completely blank white image with no visible content, text, or symbols.
natural_image
Blank white image with no visible content, text, or symbols
natural_image
Blank white image with no visible content, text, or symbols
natural_image
Blank white image with no visible content, text, or symbols
natural_image
Blank white image with no visible content, text, or symbols
natural_image
Blank white image with no visible content, text, or symbols
natural_image
Blank white image with a thin gray horizontal line at the bottom (no text or symbols)
natural_image
Blank gray image with no visible content, text, or symbols
natural_image
Blank gray image with no visible content, text, or symbols