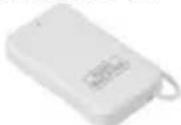
Plug 2141 - Alarm system Burg Wächter - Free user manual and instructions
Find the device manual for free Plug 2141 Burg Wächter in PDF.

| Product Type | Connected Plug (Smart Plug) |
| Brand | Burg Wächter |
| Model | Plug 2141 |
| Supply Voltage | AC 110 V ~ 230 V, 50/60 Hz |
| Maximum Current | 10 A |
| Maximum Power | 2300 W |
| Radio Frequency | WLAN 2.4 GHz (802.11 b/g/n) |
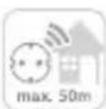
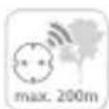
| Radio Range (open field) | Up to 200 m (depending on environment) |
| Weight | 59 g |
| Operating Temperature | -20 °C to 45 °C |
| Ambient Conditions | Indoor and dry |
| LED Indicator | Yes (flashing for search, pairing, on/off) |
| Main Functions | Manual and remote on/off via app, timer programming, smart scenarios (if-then) |
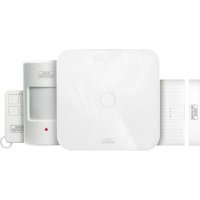
| Compatibility | BURGprotect alarm system |
| Care and cleaning | Slightly damp cloth, without chemicals or abrasives |
| Safety | Do not paint, do not modify, use indoors and dry |
| Warranty | 2 years |
| Package contents | 1x BURGprotect PLUG 2141, 1x quick guide |
Frequently Asked Questions - Plug 2141 Burg Wächter
User questions about Plug 2141 Burg Wächter
0 question about this device. Answer the ones you know or ask your own.
Ask a new question about this device
Download the instructions for your Alarm system in PDF format for free! Find your manual Plug 2141 - Burg Wächter and take your electronic device back in hand. On this page are published all the documents necessary for the use of your device. Plug 2141 by Burg Wächter.
USER MANUAL Plug 2141 Burg Wächter
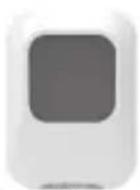
natural_image
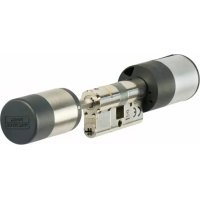
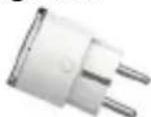
Close-up of a white cylindrical electrical connector with metallic blades and a terminal pin (no visible text or symbols)de Bedienungs- und Montageanleitung
en Assembly and user manuals
fr Notice d'installation et d'utilisation
nl Bedienings- en montagehandleiding
it Istruzione d'uso e montaggio
pt Manual de instruções e de montagem
dk Betjenings- og monteringsvejledning
cz Návod k použití a instalaci
hu Kezelési és szerelési útmutató
www.burg.biz
Language
de Deutsch 3
en English 10
fr Français 17
nJ Nederlands 24
it Italiano 31
pt Português 38
dk Dansk 45
cz Čeština 52
hu Magyar 59
Aufbau

text_image
max. 2300W max. 50m max. 200m2 | Deutsch
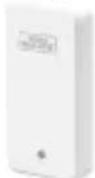
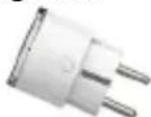
PLUG 2141
Lieferumfang
1x Kurzanleitung
1x BURGprotect™ PLUG 2141
Produktbeschreibung
text_image
Meme 3L/40000000000000000 Service Alaska Takaraki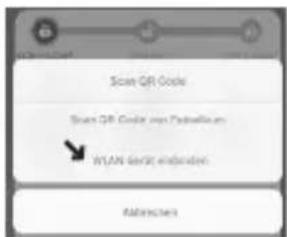
text_image
File Sub File 32 Microsoft Word Please switch this type of assembly File Plug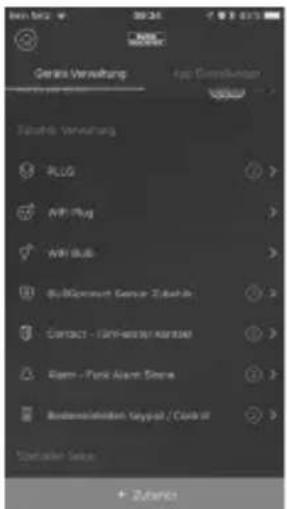
text_image
Genre Verwaltung Top Consensus Tikendi Verwaltung PLG AVI Plug AVI Plug Microsoft Genus 2.000 CONTACT - CAPI-MOSSEM/ASISUM Rigem - Park Asset Store Risdermaatken Keypot / Color #Hinweise:
text_image
Sensor Alarm Drop - Labor Control measures Scantext_image
Outdoor Sirene Indoor SireneSmoke 2050
text_image
Rauchmelder Vibrations-SensorMotion 2010
text_image
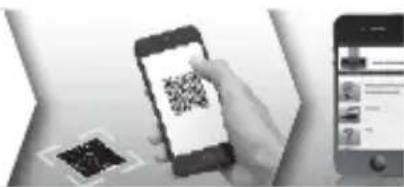
QR code scanning interface with smartphone and mobile app icons, showing payment optionsItems included in delivery
1x Quick Installation Guide 1x BURGprotect™ PLUG 2141
Features
The BURGprotect PLUG is an optional accessory of the BURGprotect product range. With this accessory, by installing the PLUG between the socket and a device connected, this can be switch on or off automatically or manually.
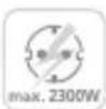
Maximum one consumer with a max. output of 2300 W may be connected.
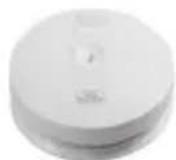
Structure
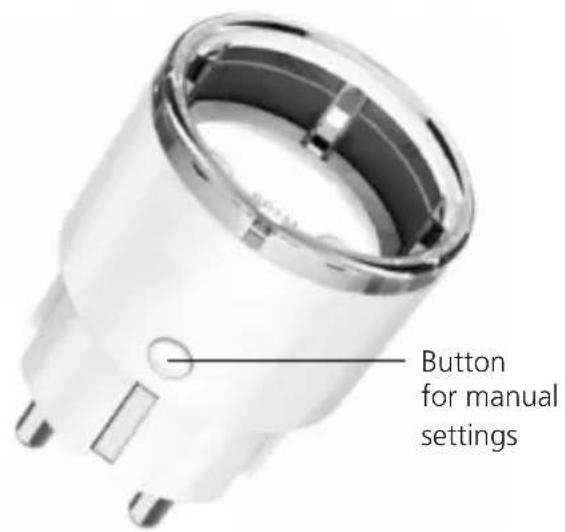
text_image
Button for manual settings

Technical Data
| Voltage | AC 110 V~230 V |
| Max. current 10 A (MAX) | |
| Max. output 2300 W | |
| Frequency 50 Hz / 60 Hz | |
| WLAN radio frequency 2.4 GHz 802.11b/gn | |
| Max power output 2300 W | |
| Operating temperature -20°C~45°C | |
| Ambient conditions dry in doors | |
| Weight 59 g | |
LED status display
| LED display Meaning | |
| Flashes 1x per second | The socket is searching for a network connection. Note: If the socket has not yet been configured, keep the button pressed for 5 seconds to change to the pairing mode (configuration). |
| Flashes quickly several times per second | The device is in pairing mode (configuration). Please carry out the setup using the BURG-protect App. |
| Illuminates Socket on | |
| Does not illuminate | Socket off |


Connecting the device with the BURGprotect BASE
-
Start the BURGprotect App.
-
Put the PLUG in the socket and wait for it to flash (pairing mode).
Note:
- If the PLUG does not automatically change to the pairing mode, keep the button on the side of the device pressed for approx. 5 seconds. The light on the PLUG now flashes.
-
If the PLUG should be reset and reconfigured, when in a switched on state, keep the button on the side of the device pressed for > 10 seconds. The device deletes the existing data and then restarts the pairing mode.
-
Open the "Dashboard"
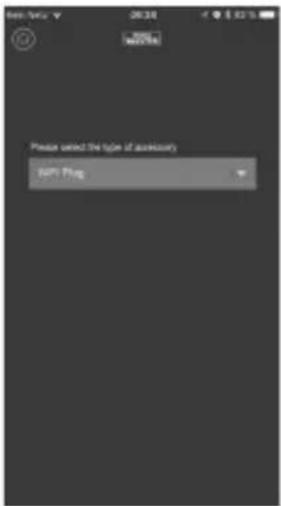
"Accessories" -> "Integrate WLAN device"
- Select „BURGprotect PLUG 2141“ from the list of devices and tap on the button „Integrate device“.
- After selecting your WLAN network, enter the WLAN password and tap on „Next”. Now the device is automatically added to your list of devices.
text_image
Please select the type of accessory SAP Flag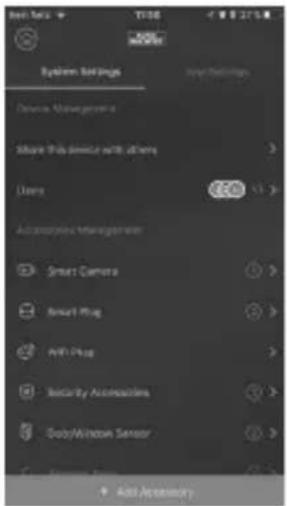
text_image
System Settings Device Management Show This remote with all rights Users Accessories Management Smart Camera Smart Plug All Plug Security Accessories BabyWindow Sensor Add AccessoryNote:
- Make sure that you have connected your smartphone to a 2.4 GHz router. If necessary, deactivate the active 5 GHz frequency for the period of the setup.
- During setup of the PLUG, no second device may be in the pairing mode. For the time of the setup, deactivate other devices in pairing mode.
The PLUG set up can then be found in the quick selection menu of the App and in the device list. Tapping on the respective PLUG switches this device connected on or off.

text_image
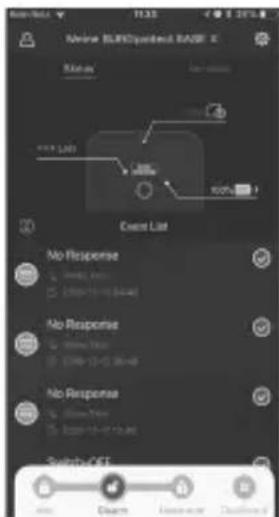
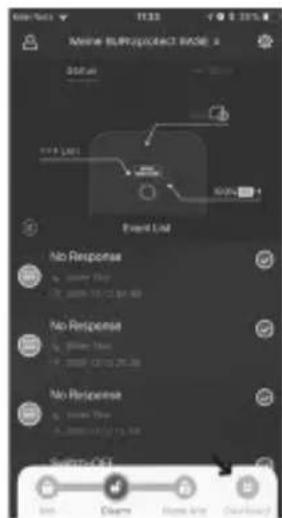
Maihe BLPROSPACB B2001 6 Status No Response No Response No Response Start/End Start/End Start/End Start/End Start/End Start/End Start/End Start/End Start/End Start/End Start/End Start/End Start/End Start/End Start/End Start/End Start/End Start/End Start/End Start/End Start/End Start/End Start/End Start/End Start/End Start/END Start/End Start/End Start/End Start/End Start/End Start/End Start/End Start/End Start/End Start/End Start/End Start/End Start/End Start/End Start/End Start/End Start/End Start/End Start/End Start/End Start/End Start/End Start/End Start/End Start/Event Start Downstart Downstart Downstart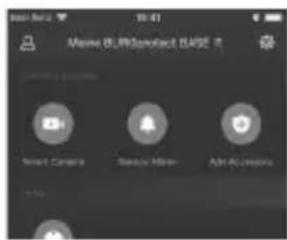
text_image
Name: i.piocontact.SASE 8 Smart Camera Device Manager Add Accessories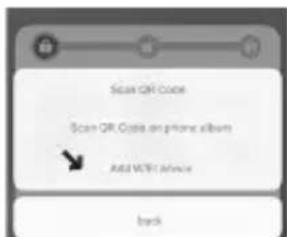
text_image
Scan QR Code Scan QR Code on phone albums Add WiFi Address Back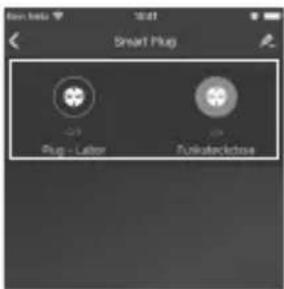
text_image
Smart Plug Plug - Labor PinksterednessPLUG 2141
English | 11


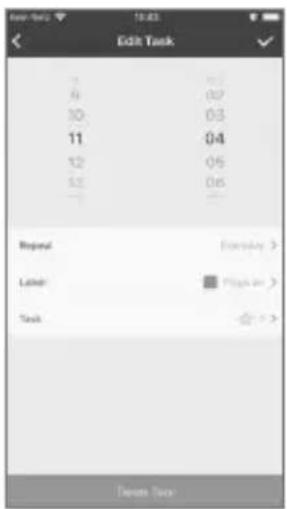
Scenario setup
- Open the device manager by tapping on the "gearwheel" icon at the top right:
- In the device manager, scroll down until the function group "Scenarios setup" appears.
- Select "Autom. functions". The following options are displayed:
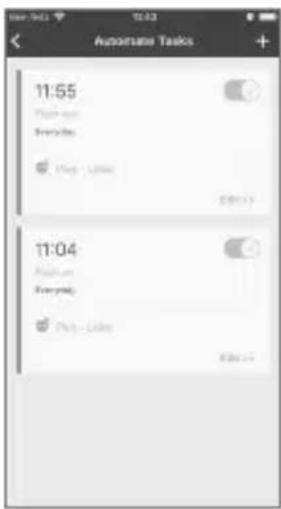
Automatic Functions – Timer Program timely defined processes.
a. Select "Autom. functions"
b. Add new functions by tapping on the + symbol at the top right.
c. Set the time and the repeat option. Then assign a useful name for the function, e.g. "Living room lamp on". Lamp As an option, you can mark the function in colour.
text_image
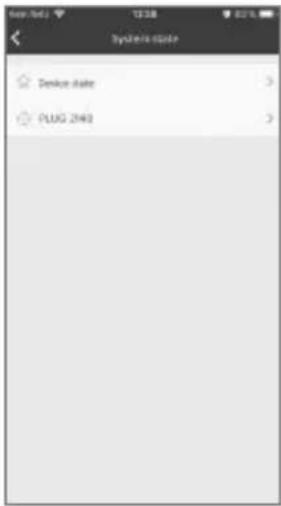
Enter Task 10:03 Edit Task 7 8 9 10 11 12 52 Repeat Lasted: Task 07 07 03 04 05 06 Everyday > Play on > Delete Taskd. Select "System status" > "Function socket PLUG" > and the function socket with the designation specified by you that you want to switch. Make a check in which state (On / OFF) the function socket should change to.
text_image
System Status Device State PLUG 2460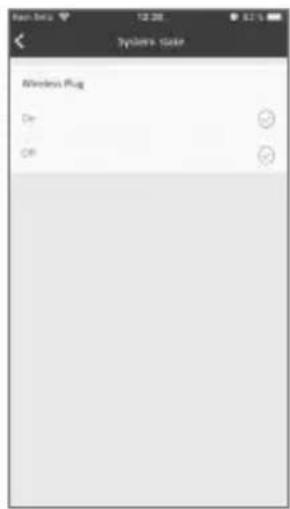
text_image
Windows Plug On Offe. Go back two times with the < arrow to the "Add task" menu and save the entry by tapping on the check at the top right.
text_image
11:55 Play on Everyday Play - Limes 11:04 Play on Everyday Play - LimesNote: For recurring time limited processes, add one one automatic switch on and one automatic switch off function each per function socket.


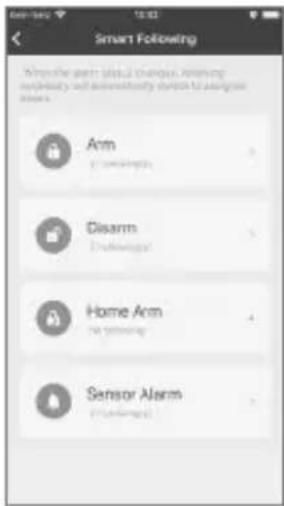
Smart Following - Scene programming
Programming of "If-Then" functions. For example, switching on a light or radio by a BURGprotect function socket when an alarm is activated.
- Select "Smart Following" Now you can see an overview of the four system states Active/Deactivate/Home/Alarm
- Select a system state that should trip an action when this is activated. (Example: Alarm)
text_image
Smart Following When the arm is a social group, according to the privacy and availability of this for all users. Arm Disarm Home Arm Sensor Alarm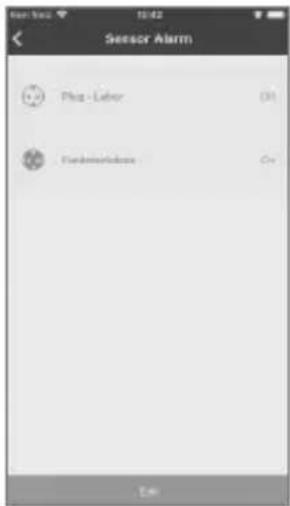
text_image
Sensor Alarm Plug - Labor Funderworkbox Error- You are provided with an overview of available actuators. Select "Edit" to set the states that the function socket should assume when the system state selected (example; Alarm) is activated.
Note: If, after an alarm has been tripped, you a the socket to switch off again after confirming the alarm, define the state "Deactivate" of the Smart Following function.
Use the plug
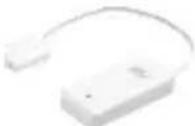
1. Manual turn ON/OFF
Press the button, with LED indicator, on Plug to switch between power on and power off mode.
2. Remote turn ON/OFF
To control the Plug remotely: Start the App and press "more", expand the toolbar by, if Plug isn't already added to your favorites, start setup by "Plug". Now you can control the Plug remotely or check the actual state of it.
3. Reset the Plug
Keep holding the reset button in 10 seconds, the smart switch would be reset as the LED indicator keep flashing.
Correct location for installation
The radio signal of the sensor is highly dependent on environmental conditions. Metal objects, concrete surfaces, walls, and metal cables all reduce its range, etc. Other radio devices and environmental conditions can also interfere with its operation.
IMPORTANT NOTE: The alarm can only work as well as permitted by its installation and environment. The alarm can indicate dangerous situations but it cannot prevent them.
The device must not be painted, varnished or altered in any way.


General safety precautions and safety instructions
CE-compliance
This appliance complies with the CE guidelines. If you require an EC Declaration on Conformity for this device for this device, please send a request to: info@burg.biz
Attention
Any changes or modifications to this appliance which have not been explicitly approved of by the respective regulatory authority, may lead to a prohibition of usage of this appliance.
Limitation of liability
This device complies with the technical standards in force at the time of production. We constantly strive to ensure that our products are technologically cutting edge and that our handbooks are kept up to date. We therefore reserve the right to undertake technical changes and modifications or adjustments to the instructions without providing advance notice.
The instructions must be carefully followed. We accept no liability for damage, as a result of e.g. incorrect use or installation, improper handling, insufficient or poor maintenance, disregard of safety guidelines or general conditions of use.
When installed and used correctly and under the conditions specified, this device performs the functions described in the handbook. As the alarm is dependent upon the specific arrangement put in place by the customer, there is no guarantee that it will be triggered.
Safety guidelines
Please read the instructions carefully.
No liability can be assumed for any damage which may result from failure to follow instructions.
The device must be used only for the purpose specified in the instructions. The device should work effectively as an alarm in an emergency! Please check regularly that the device is in working order and that the batteries are charged. This will ensure that it functions correctly in the event of a (hopefully unlikely) emergency.
The device may malfunction when exposed to unexpectedly high electromagnetic radiation, manipulation or other influences.
The device must not be installed in damp areas or near electrical devices which emit radiation.
Battery-operated devices must not be used in high temperatures, near sources of heat or exposed to direct sunlight.
Ensure that packaging and contents are kept well away from children to avoid any risk of suffocation.
Please keep instructions in a safe place.
IMPORTANT NOTE: The device may not function correctly if installed in an inappropriate location.


Cleaning
Use only a damp cloth for cleaning. Ensure that no water enters the device. Do not use any readily infl ammable, chemical, corrosive, abrasive or sharp cleaning materials.
Guarantee
BURG-WÄCHTER products comply with the technical standards in force at the time of production and adhere to our own quality standards.
The guarantee only covers defects which can be proved to have resulted from production or material defects at the time of purchase. The guarantee expires after two years; further claims are excluded.
A short description of any defects identified must be made in writing and the device returned to the place it was bought, together with the original packaging. After the device has been tested, and within an appropriate period of time, the guarantor will decide whether or not to repair or exchange the item.
Any defects or damage which may have resulted from transport, inappropriate or improper use, wear and tear etc. are not included in the guarantee.
The battery is not included in the guarantee.
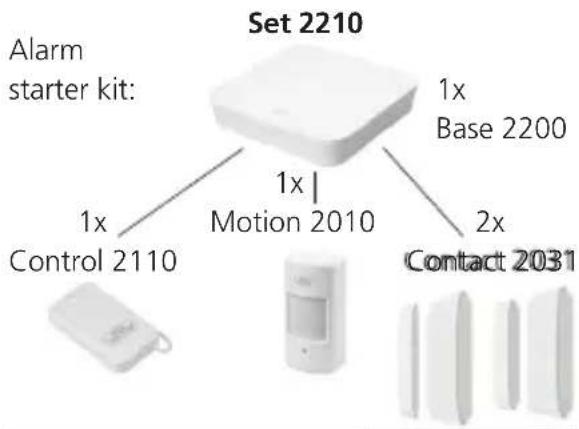
You can find more Accessories on our homepage www.burg.biz or by App:
text_image
Mobile phone scanning QR code with accompanying app interface screenshot showing user profile and contentAdditional accessory (e.g.)
flowchart
graph TD
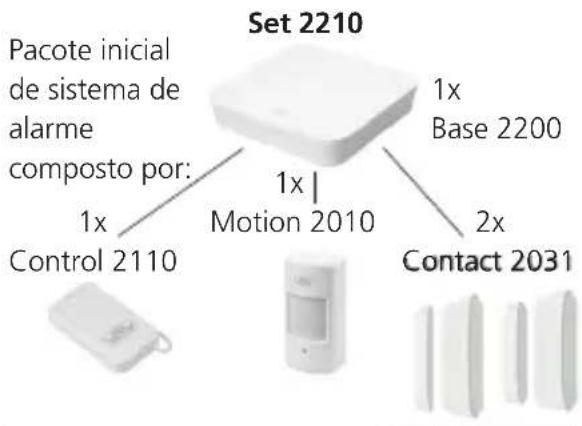
A["Set 2210"] --> B["1x Base 2200"]
A --> C["1x Motion 2010"]
A --> D["2x Contact 2031"]
E["Control 2110"] --> F["Device icon"]
G["Mobile device"] --> H["Display screen"]
I["Mobile phone"] --> J["Image panel"]
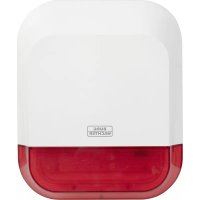
Sirene 2151

Outdoor Siren
Noise 2160
Indoor Siren
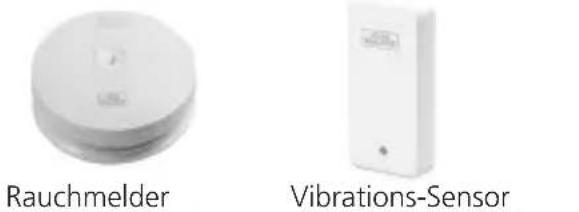
Smoke 2050
Smoke detector
Vibrancy 2020
Vibrancy sensor
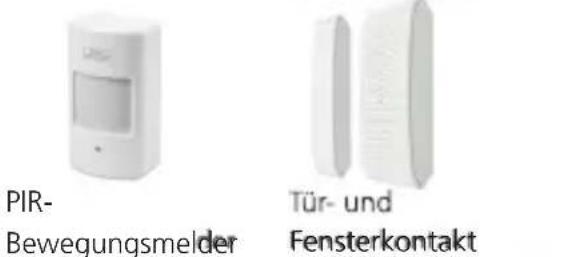
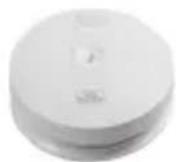
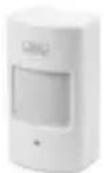
Motion 2010
PIR-sensor
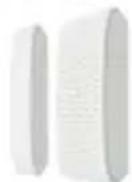
Contact 2031
Door- and window contact
Water 2060
Water detector
Keypad 2100

RFID-Keypad
Control 2110
Remote control
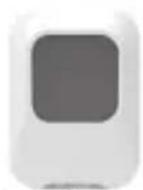
Plug 2141
Plug socket
English
15PLUG 21


Disposal
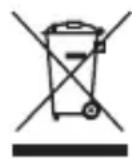
Please be aware that electrical and electronic equipment and batteries shall not be disposed of as household waste, but rather collected separately. Please obtain information on the collecting points for electrical waste from the responsible authority of you municipality.

BURG-WÄCHTER KG hereby declares that this device complies with Directive 2014/53/EU, (RED) 2014/30/EU, (EMC), 2011/65/EU (RoHS), and (2014/35/EU).
The full text of the EU Declaration of Conformity can be found on www.burg.biz.
If you have technical questions about this device, please read the detailed user manual and the FAQ sheet which you will find on the following website: www.burg.biz.
If, however, you still have questions, please send an e-mail to: alarm-service@burg.biz
Copyright
All rights reserved. This publication may not be reproduced, stored in a retrieval system or transmitted, in any form or by any means (electronic, mechanical, photocopying, recording or otherwise), without the written prior permission of BURG-WÄCHTER KG. No reproduction of any part or excerpts thereof are permitted. Errors excepted. Specifications are subject to change without notice for quality improvement.
All companies or products mentioned in this publication are trademarks, registered trademarks or brands of the respective company.
Subject to technical changes without notice. Errors excepted.


text_image
Event List No Response No Response No Response Switch-Off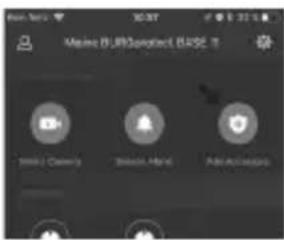
text_image
Meine (F) RIP/Service (RIP) Blink / Security Service Hand Edit Accounts
text_image
Scan QR Code Scan QR Code on phone albums Add WiFi video backtext_image
Please select the type of auxiliary A#F1 Plug
text_image
System Settings Device Management Share This device with offers Users Automated Management Smart Camera Smart Plug AVI Plug Security Accessories DigitalWindow Sensor Add AccessibilityRemarques :
text_image
Edit Task 0 03 10 03 11 04 12 05 13 06 ... Repeat Entry Step > Label Page 10 Task 7.5 Delete Timetext_image
System Status Wireless Plug On Offtext_image
Smart Following When the smart install design is replacing through a network to ensure that it is designed Arm Disarm Home Arm Sensor Alarm
text_image
Sensor Alarm Flag - Latency 0% Extensations OKtext_image
QR code scanning interface with smartphone and mobile app icons, showing payment options"Toebehoren" -> "WLAN-apparaat integreren"
text_image
Admiral BLIND/Periodical RABF Status Event List No Response No Response No Response Switch OFF OK Change Resource Default
text_image
Name: SUPERProduct SERVICE Smart Camera Window Help Add Accounts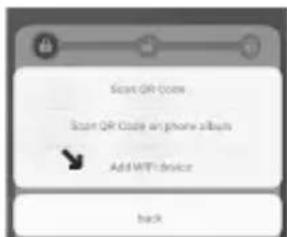
text_image
Scan QR Code Scan QR Code on phone albums Add WiFi device Backtext_image
Add Please submit the type of accessory Add Plug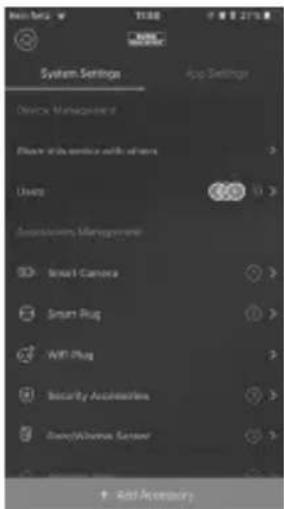
text_image
System Settings Device Management Device with device with sensors Usage Automotive Management Smart Camera Smart Plug AMT Plug Security Accessories Smart/Chrome Sensor Add AccessoryAanwijzingen:
text_image
Automated Tasks 11:55 Please go Everyday 11:04 Big on Everyday Big - Lessontext_image
Smart Following When the day of March is important, it's usually completely recognized as an emergency response. Arm Disarm Home Arm Sensor Alarm
text_image
Seesor Alarm Plug - Laber Funkseewaldow Ontext_image
Mobile phone scanning QR code with accompanying screenshot showing app interface and payment optionsOverig toebehoren:
text_image
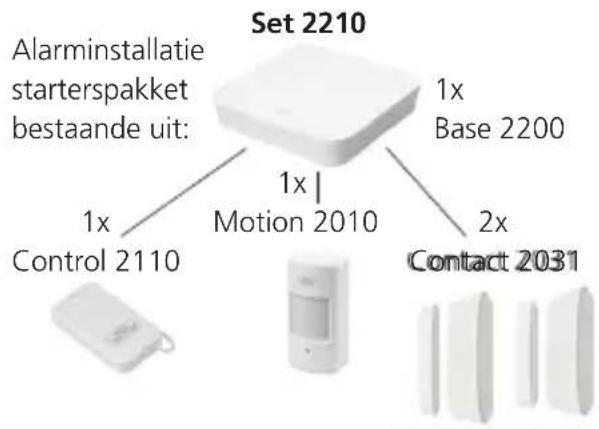
Set 2210 Alarminstallatie starterspakket bestaande uit: 1x Control 2110 1x Motion 2010 1x Base 2200 2x Contact 2031Sirene 2151

Outdoor sirene
Noise 2160
Indoor Sirene
Smoke 2050

Rookmelder
Vibrancy 2020

Trillingssensor
Motion 2010
PIR-
bewegingsmelder
Contact 2031
Deur- en
raamcontact
Water 2060
Watermelder
Keypad 2100
RFID-toetsenblok
Control 2110
Afstandsbediening
Plug 2141
Contactdoos
Nederlands
29PLUG 21


text_image
Meine SubProject2023 Event Log No Response No Response No Response SubProject1 Add Delete Finish and Outcome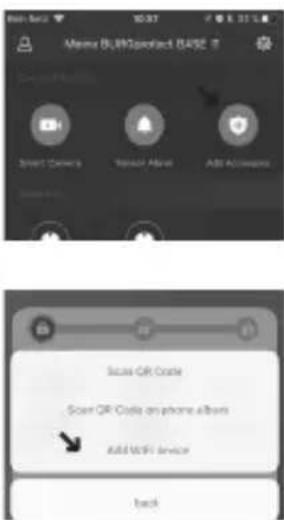
text_image
Meiss BLU@point 0452 Smart Owners Ranacr Aliya Add Accounts Secure QR Code Secure QR Code on phone albums Add WiFi Service Backtext_image
File Save Add Add/Plug Please select this type of necessary File Plug
text_image
System Settings Device Management Device Tools device with buttons Users Smart Camera Smart Plug AMT Plug Security Accessories Security Sensors Stop Settings Stop AccessoriesAvvertenza:
text_image
Edit Task Repeat: Label: Task:text_image
System status Wireless Plug On Offtext_image
Smart Following When the arm is a unique location, it's not necessarily necessary to be designed. Arm Disarm Home Arm Sensor Alarm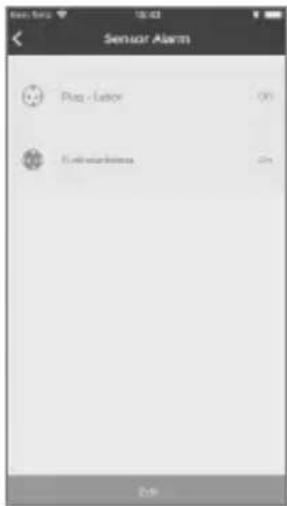
text_image
Sensor Alarm Plan - Labor Electricity 0% Electricity 0%text_image
QR code scanning interface with smartphone and mobile app screenshot showing QR code scanning instructionstext_image
None BLKOSpeedout BAGS 2 Status Event List Event List No Response No Response No Response Switch OFF Start Change Some and Cancel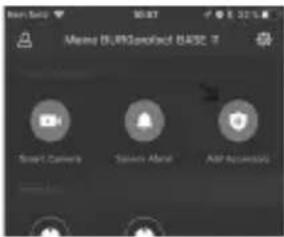
text_image
New Sale 50 KB Moving 18.00 Specified B452.17 Smart Camera Student Alert App Accessories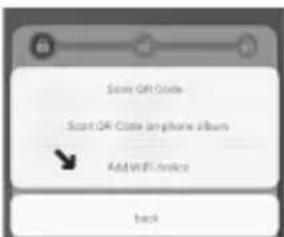
text_image
Scan QR Code Scan QR Code on phone album Add WiFi Phone Backtext_image
Please switch the right of necessary Auto Plug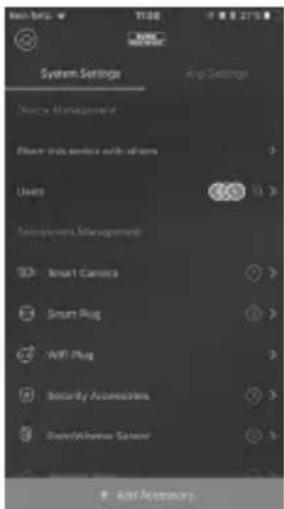
text_image
System Settings Device Management Device Info service with servers Users Smart Camera Smart Plug ViFi Plug Security Accessories Smart/Revenue Sensor Add AccessoryIndicações:
text_image
System is state Desktop state PLUG 2940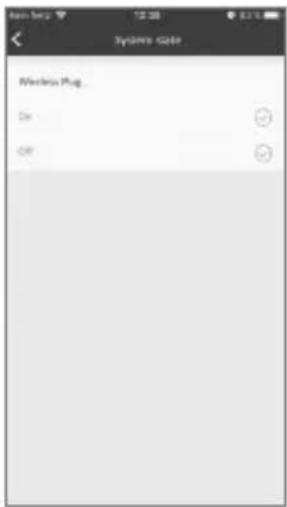
text_image
Systemo scale Wackerix Plug On Offtext_image
Smart Following Arm the arm sites a change. Remaining newness will enhance visibility in the smart- options. Arm Disarm Home Arm Sensor Alarm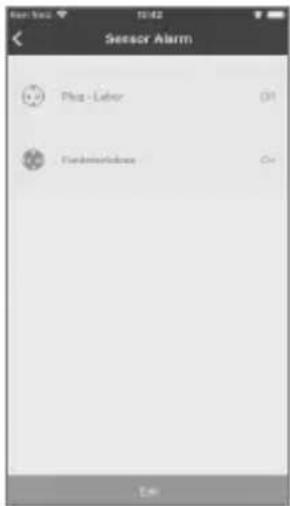
text_image
Sensor Alarm Plug - Labor Funderworkbox Ontext_image
Black-and-white photo showing a hand holding a smartphone displaying a QR code, with a small inset image of a small object and a mobile app interface visible.Outros acessórios:
text_image
Set 2210 Pacote inicial de sistema de alarme composto por: 1x Control 2110 1x Motion 2010 1x Base 2200 2x Contact 2031Sirene 2151
Outdoor Sirene
Noise 2160
Indoor Sirene
Smoke 2050
Detetor de fumo
- Åbn "Dashboard" -> "Tilbehør" -> "Integrere WiFi-enhed"
text_image
Event List No Response No Response No Response System-Off OK Cancel Home Area Download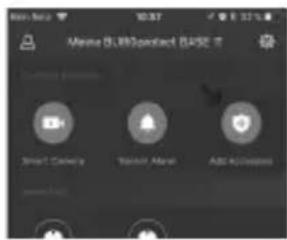
text_image
Meine 01.00point (BASE) Smart Camera Security Alert Add Accounts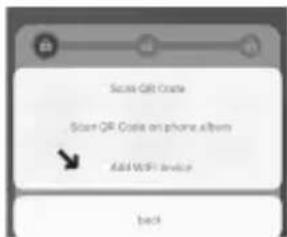
text_image
Secure QR Code Store QR Code on phone album Add WiFi device backtext_image
Add Plug Please select the type of accessory Add Plug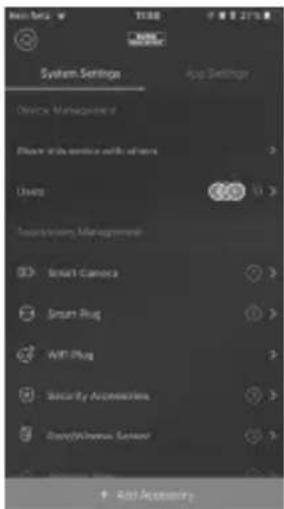
text_image
System Settings Device Management Device with device with sensors Usage Transporting Management Smart Camera Smart Plug AMT Plug Security Accessories Smart/Chrome Sensor Add AccessoryOplysninger:
text_image
Smart Plug Plug - Labor Full- \% of the plugScenarier setup
text_image
System scale Western Plug On Offtext_image
Accumate Tasks 11:55 Please call Everyday 10:00 - 12:00 11:04 Please call Everyday 10:00 - 12:00Smart Following - scener programming
text_image
Smart Following When the smart alarm is designed following: recovery and what's ability to be designed Arm Disarm Home Arm Sensor Alarm
text_image
Sensor Alarm Plug - Labor OK Control buttons OKtext_image
QR code scanning interface with smartphone, mobile app, and document handling optionstext_image
Event Subscription MACB is Status No Response No Response No Response System-OCT Start Cancel Home Event Download
text_image
Meine 6.09Contact Base Smart Camera Master Alert Add Applications
text_image
Scan QR Code Scan QR Code on phone album Add WiFi Service Backtext_image
Please send the type of accessory WiFi Ping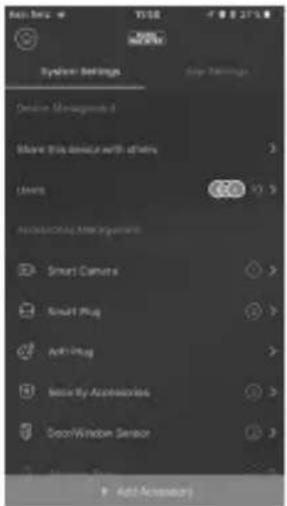
text_image
System Settings Options Management Move this device with others Camera Add Existing After Installation Smart Camera Smart Plug Anti-Pug Make by Accessories Door-Wire Sensor Add AccessoriesUpozornění:
text_image
Smart Following When the week is 2018, I change, changing, secondary and automatically switches to existing user. Arm Disarm Home Arm Sensor Alarm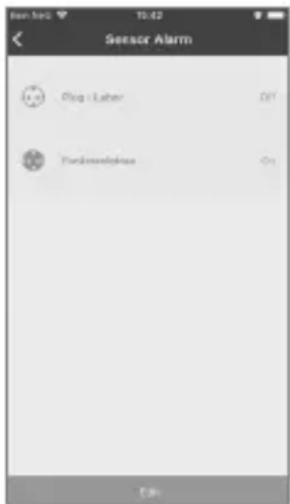
text_image
Sensor Alarm Plug - Labor Forkinsoniantext_image
Mobile phone scanning QR code with accompanying screenshot showing app interface and payment optionstext_image
Scan QR Code Scan QR Code on phone album Add WiFi Service Backtext_image
Please select the type of accessors WiFi Flag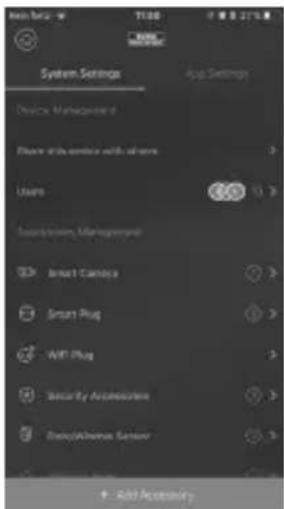
text_image
System Settings Device Management Place with device with users Users Smart Camera Smart Plug WIFI Plug Sensor by Accessories Stereo/Aluminum Sensor Add AccessoryMegjegyzés:
text_image
Edit Track 1 2 3 4 5 6 7 8 9 10 11 12 13 14 15 16 17 Repeat Reply Label Previous Track Delete Tracktext_image
Smart Following When the next session is completed, following necessary will automatically switch to designed Arm Disarm Home Arm Sensor Alarm