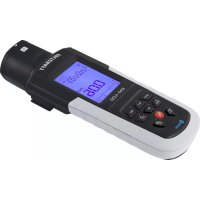
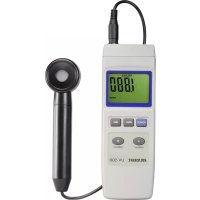
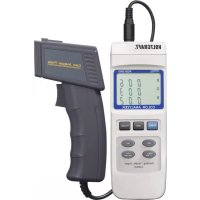
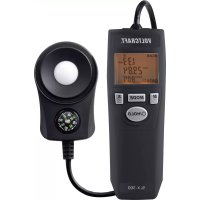
LX1108 - Detector VOLTCRAFT - Free user manual and instructions
Find the device manual for free LX1108 VOLTCRAFT in PDF.
Download the instructions for your Detector in PDF format for free! Find your manual LX1108 - VOLTCRAFT and take your electronic device back in hand. On this page are published all the documents necessary for the use of your device. LX1108 by VOLTCRAFT.
USER MANUAL LX1108 VOLTCRAFT
These Operating Instructions accompany this product. They contain important information on setting up and using your Voltage Detector. You should refer to these instructions, even if you are buying this product for someone else.
Please retain these Operating Instructions for future use!
Abmessungen (LxBxH) 200mm x 68mm x 30mm
Messtoleranzen
In purchasing this Voltcraft® product, you have made a very good decision for which we should like to thank you.
You have acquired an above-average quality product from a brand family which has distinguished itself in the field of measuring, charging and network technology by particular competence and permanent innovation.
With Voltcraft®, you will be able to cope even with difficult tasks as an ambitious hobbyist just as much as a professional user. Voltcraft® offers you reliable technology at an extraordinarily favourable cost-performance ratio.
We are certain: your investment in a Voltcraft product will at the same time be the start of a long and profitable co-operation.
We wish you much enjoyment with your new Voltcraft® product!
Table of contents
Page
Introduction 18
Intended Use 19
Safety instructions 20
Scope of Delivery. 21
Controls 22
Starting operation 23
Making a measurement 24
RS232-Interface. 26
Maintenance and Cleaning 27
Disposal of flat batteries 28
Troubleshooting 29
Disposal 29
Technical Data and Measurement Tolerances 30
Intended use
The Luxmeter is a digital measuring instrument which can measure light intensity in Lux units and in Foot-candle (Fc).
A graded filter can be selected for various light sources, in order to measure the actual strength of light.
Measurements are made via aOTO-element with a filter, that separates the visible light spectrum in order to be measured. The resulting measurements are shown in an LCD bar display as a value ranging from 0 to 400000 Lux.
The momentary value can be held or the the minimum/maximum values stored.
A series interface is available. A 9-V block battery (type 1604A) is required for operation.
Measurements must not be carried out under unfavourable ambient conditions.
The following are unfavourable ambient conditions:
- excessive dampness or humidity
- dust or combustible gases, vapours or solvents
- Electrical storms or stormy conditions and strong electrostatic fields, etc
Use other than that described above will lead to damaging the product.
No part of the product may be modified or converted!
The safety instructions should be observed without fail!
Safety instructions

Please read through the operating instructions completely before setting up the system; they include important information necessary for correct operation.
The guarantee will lapse if damage is incurred as a result of non-compliance with the operating instructions! We shall not be held liable for any consequential damage or loss!
We do not accept any liability for personal injury or damage to property caused by incorrect handling or non-observation of the safety instructions! In such cases the guarantee will lapse.
This device left the factory in perfect condition in terms of safety engineering.
To maintain this status and ensure safe operation, you, as the user, must comply with the safety instructions and warnings contained in these instructions for use. The following symbols and notices must be observed:

Note! Read the operating instructions!
An exclamation mark in a triangle indicates important information in these operating instructions which are to be followed strictly.

This equipment is CE-tested and thus meets the EMC directive 89/336/EEC and the low-voltage directive 73/23/EEC.
For reasons of safety and official registering (CE) altering or converting this unit yourself is not permitted.
Measuring devices and their accessories are not toys and should be kept away from children!
In commercial institutions, the accident prevention regulations of the Employer's Liability Insurance Association for Electrical Systems and Operating Materials are to be observed.
In schools, training centres, computer and self-help workshops, handling of measuring instruments must be supervised by trained personnel in a responsible manner.
Do not switch the measuring instrument on immediately after it has been taken from a cold to a warm environment. The condensation water generated could destroy the device. Allow the device to reach room temperature before switching it on.
Do not leave the packaging material lying around carelessly. Plastic film and/or bags, polystyrene parts, etc. can be dangerous in the hands of children.
You should also heed the safety instructions in each chapter of these instructions.
Scope of delivery
Luxmeter
Light sensor
Operating instructions
Operating controls
See fold-out section
1 Function buttons
2 Operational buttons
3 3/4-digit LCD with bar display
4 Connection for the light-sensor
5 RS232-Interface
6 Battery compartment at rear
7 Light-sensor (white cap)
Display symbols
HOLD Momentary reading is held
PEAK The highest reading is held continuously
REC Storage of readings for minimum and maximum values is made

An under-line means that it is "below measurement range"

An upper-line means that it is "above measurement range"

Battery replacement symbol; please replace the batteries immediately to avoid measuring errors!
x100/x10 The displayed readings must be multiplied
FL Value filter for fluorescent lights.
Hg Value filter for mercury vapour lamps
Na Value filter for sodium vapour lights
LUX Standard unit for light strength (lm/qm)
Ft-cd Standard English unit for light strength (lm/qft)
Button functions
POWER Power switch; to switch the unit on and off
HOLD This holds the momentary measurement, and when pressed longer activates the PEAK function.
REC Storing mode for minimum and maximum values
Lux/FC Switch to change between the two measurement scales
"RANGE" Button for selecting the value range switch
ZERO Reset button for 40 Lux range
SOURCE Selects the value filter for the corresponding light source
Initial operation
Inserting the batteries
Before using the Luxmeter for the first time a 9V block battery must be installed. Battery installation is described in the "Maintenance and Cleaning" section.
Connecting the light sensor
A light sensor with cover is included with this device. Connect the 4-pin plug of the light sensor to the "INPUT" on the measuring device so that the flat side of the plug is facing down towards the bottom of the unit. Make sure that the plug is firmly inserted otherwise inaccurate measurements will be made.
Remove the corrugated protective covering on the sensor before making any measurements.
Making measurements

Make sure you are a safe distant from hot sources of light. There is risk of burning!
Never stare directly into a bright light source. This could cause damage to your eyes
The Luxmeter has various extra functions that ease operation and handling.
These extra functions are:
Auto power OFF function
In order to avoid that the operating life of the battery is shortened unnecessarily, an automatic switch-off function has been implemented. The device will be automatically turned off if no button is pressed for longer than 10 minutes. You can switch the device back on with the "Power" button.
The Auto-Power-OFF function is deactivated as soon as you go into "REC" mode.
HOLD/Peak function
Pressing the "HOLD" button holds the measurement made at that moment. Press again to switch back to the continuous measuring mode.
A Peak has also been built in to measure continuous peak values. Press the "HOLD" button for 2-3 seconds to go to this mode. "HOLD" appears on the display. Only the momentary highest value will be displayed. Press the "HOLD" button again for 2-3 seconds to go out of this mode.
REC MAX./MIN. function
By pressing the "REC" button you can save the maximum and minimum values. Pressing the "REC" button again and again will display each value one after the other. The corresponding function will appear in the display
The stored information is deleted when the device is turned off or by keeping the "HOLD" button pressed down.
Press the "HOLD" button again for 2-3 seconds to go out of this mode.
Zero reset
To increase measuring accuracy in lower scales (40 Lux) the value input can be reset.
Switch the Luxmeter to the 40 Lux range, close the sensor's corrugated protective cap and press the "ZERO" button. The display will be rest to "0.00".
Changing the measuring scale
The Luxmeter can give readings based on two different scales.
When turned on the device automatically indicates values in Lux (=lm/sm = lumen per square metre).
By pressing the "Lux/Fc" button you can change the scaling in display to "Foot-Candle" (Ft-cd = lm/qft = lumen per square foot).
Making measurements
Proceed as follows for the measurement:
- Press the "POWER" key to switch the measuring equipment on. A functional check will first be made.
-
Press the "SOURCE" button to select the appropriate value filter.
-
"Operational status (no symbol displayed)" for lamps. sunlight or unknown light source,
- "FL" for fluorescent lamps,
- "Hg" for mercury vapour lamps
- "Na" for sodium vapour lamps.
You can switch between functions by continuously pressing the button
- Place the sensor under the light source that is to be measured.
- Using the "RANGE" button select the appropriate measuring scale. A dash line is displayed if the value is over or under the given range (upper line = over measuring range; lower line = under measuring range).
- After completing measurements press the "POWER" button for approx. 2 seconds. The meter will then turn itself off.
- There is a fold-out stand on the rear of the Luxmeter. A socket is also included to mount the device on a stand.
RS232-Interface
The Luxmeter is installed with a serial interface for exchanging data with a computer. This can be found on the right hand side under the lid. The interface is in the form of a 3.5mm jack plug socket and requires a compatible data cable, which is an optional extra.
The data cable is made up of the following:
| Jack plug 3.5 mm mono 9 pin Sub-D socket for PC | |
| Middle contact > Pin 4 | |
| Outer contact > Pin 2 | |
| Between Pin 2 and Pin 5 a 2,2 KOhm resistance is necessary. | |
The serial data signal is made up of 16 Bits in the following order:
Each data bit has the following function:
| D0 End signal | |
| D1 to D8 Measuring values (D1 = lowest digit, D8 = highest digit). If 1234 is displayed then the bit rate is: "00001234" | |
| D9 Decimal point (DP) is in the relevant position; 0= no DP; 1=1DP; 2=2DP; 3=3DP | |
| D10 Polarity; 0=positive; 1=negative | |
| D11+D12 Units shown in display; 15 = Lux; 16 = Ft-cd | |
| D13 Data bits for over-run display = 1; under-cut = 2 | |
| D14 4 | |
| D15 Start symbol | |
The RS232 data format is: 9600, N, 8, 1
Maintenance and cleaning
The Luxmeter is maintenance-free apart from the need to replace the batteries and cleaning it once in a while. Use a clean, lint-free, anti-static and dry cloth to clean the device. Do not use any abrasive or chemical agents or detergents containing solvents.
Replacing the battery
If the battery symbol appears in the display, the batteries have to be replaced as soon as possible to prevent inaccurate measurements.
Proceed as follows to replace the batteries:
- Switch off the measuring instrument.
- Loosen the battery compartment screw on the back off the unit, and slide the lid off in the direction of the arrow.
- Replace the flat batteries with new one of the same type (1604A).
- Close the Luxmeter again carefully in the reverse order.
Do not leave flat batteries in the device. Even batteries protected against leaking can corrode and thus release chemicals which may be detrimental to your health or destroy the battery compartment.
Disposal of flat batteries.
You, as the ultimate consumer, are bound by law (Battery order) to return used batteries and accumulators; disposing of them in the household waste is prohibited!

Batteries/accumulators containing hazardous substances are marked by the symbols alongside. These symbols also indicate that it is prohibited to dispose of these batteries in the household waste.
The heavy metals concerned are: Cd = cadmium, Hg = mercury, Pb = lead.
You can return flat batteries/accumulators free of charge to the collection points in your community, our branches or anywhere else where batteries or accumulators are sold.
Troubleshooting
In purchasing the Luxmeter you have acquired a product which has been designed to the state of the art and is operationally reliable.
Problems and disturbances may, however, still arise.
For this reason, the following is a description of how you can eliminate possible malfunctions yourself.
Always adhere to the safety instructions!
| Fault Possible cause | |
| The measuring device Is the battery dead? does not work. Check the charge condition of the battery. | The battery dead? Check condition of the battery. |
| No measuring value is Inco being displayed; only Check the sensor (protective cap?!) dashes is visible. | Correct measuring range? Check the sensor (protective cap?!) and change the area. |
| No measured value alteration. | Is the HOLD function active? |

Repairs other than those just described should only be performed by an authorised electrician.
Disposal
If the device has reached the end of its operational life, please dispose of accordingly.
Technical Data and Measuring Tolerances
Technical Data
Display 3/4-digit LCD
Sensor Photo-Diode with Filter
Spectrum 470 to 690 nm according to the
CIE Standard
Battery 1x 9V Block battery (006P, MN1604)
Current consumption ............approx. 8mA
Operating temperature . 0^ to 50^
Rel. air humidity < 80% (non-condensing)
Temp. for gar. accuracy +18^ to +28^
Weight (without batteries).....approx. 280 g
Dimensions (LxWxH) 200mm x 68mm x 30mm
Measurement tolerances
Accuracy of measurement in ± (\% of the reading (= rdg)+ temperature coefficient). The accuracy is valid for 1 year at a temperature of +23^ + /5^ , and at a relative humidity of less than 80% , non-condensing, and a colour temperature of up to 2856^ .
Temperature coefficient: + / - 0,5% every ^ C difference from the given environmental temperature.
| Measurement range | Display area Accuracy Resolution | |
| 40.00 Lux 0 ~ 40,00 0.01 Lux400.0 Lux 36,0~ 4000 0.1 Lux4000 Lux 360~ 40000 1 Lux400000 Lux | ±(3% + 0,5%from Measure-Range)>100000 Lux not specified | 100 Lux |
| Measurement area | Display area Accuracy | Resolution |
| 4,000 Fc 0 ~ 3,40.00 Fc 3,35 ~ 37,20 0.01 Fc 400.0 Fc 33,5 ~ 372,0 0.1 Fc 4000 Fc 335 ~ 3720 1 Fc 40000 Fc 930 ~ 37200 10 Fc | ±(3% + 0,5% from Measure-Range) >9300 FC not specified |
Light spectrum of the sensor

F Introduction
Cher(e) client(e),
Dimensions (L x l x h). 200mm x 68mm x 30mm
Copyright 2014 by Voltcraft

Legal notice
This is a publication by Conrad Electronic SE, Klaus-Conrad-Str. 1, D-92240 Hirschau (www.conrad.com).
All rights including translation reserved. Reproduction by any method, e.g. photocopy, microfilming, or the capture in electronic data processing systems require the prior written approval by the editor. Reprinting, also in part, is prohibited. This publication represents the technical status at the time of printing.
Copyright 2014 by Voltcraft

Information legales
Copyright 2014 by Voltcraft
V4_1114_01/HK
ManualGo.com