1082 - Thermometer Testo - Free user manual and instructions
Find the device manual for free 1082 Testo in PDF.
| Product type | Waterproof food thermometer |
| Brand | Testo |
| Model | 1082 |
| Dimensions (L x W x H) | 144 x 60 x 24.5 mm |
| Weight (with batteries, without sheath) | 162 g |
| Power supply | 3 AAA batteries (1.5 V) |
| Battery life | Approx. 2500 h (at 23 °C) |
| Measuring range | -50 to +300 °C / -58 to +572 °F |
| Accuracy | ±0.5 °C (-30 to +70 °C); ±0.2 °C (-20 to +70 °C) for probe |
| Resolution | 0.1 °C / 0.1 °F |
| Measuring rate | 2 measurements per second |
| Response time (t99) | 10 s (in non-stagnant liquids) |
| Operating temperature | -20 to +60 °C |
| Protection rating | IP67 (with supplied probe connected) |
| Display | LCD 1 line with status line |
| Functions | Auto-Hold, Hold, Min, Max, adjustable auto-off |
| Supplied probe | Immersion/penetration probe type T (thermocouple) |
| Minimum immersion depth | 22 mm |
| Standards | EN 13485 (class 1, S/T, E) |
| Warranty | 2 years |
| Maintenance and cleaning | Neutral solution; protective sheath dishwasher-safe |
| Safety | Do not use on live parts; avoid explosive areas and medical diagnostics |
Frequently Asked Questions - 1082 Testo
User questions about 1082 Testo
0 question about this device. Answer the ones you know or ask your own.
Ask a new question about this device
Download the instructions for your Thermometer in PDF format for free! Find your manual 1082 - Testo and take your electronic device back in hand. On this page are published all the documents necessary for the use of your device. 1082 by Testo.
USER MANUAL 1082 Testo
Watertight temperature measuring instrument
Thermomètre étanche
natural_image
Interior view of a white plastic enclosure showing two blue cylindrical batteries with yellow markings (no visible text or symbols)natural_image
Close-up of a medical device with two metallic connectors (no visible text or symbols)natural_image
Close-up of a medical or laboratory device with a pointed tip and arrow pointing to a component (no visible text or symbols)natural_image
Close-up of a medical device with a white arrow pointing to a connector (no visible text or symbols)natural_image
Interior view of a battery pack with two blue cylindrical batteries and a small AC input outlet (no visible text or symbols)Please read this document through carefully and familiarise yourself with the operation of the product before using it. Keep this documentation to hand so that you can refer to it when necessary.
enfr
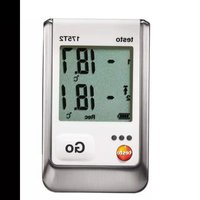
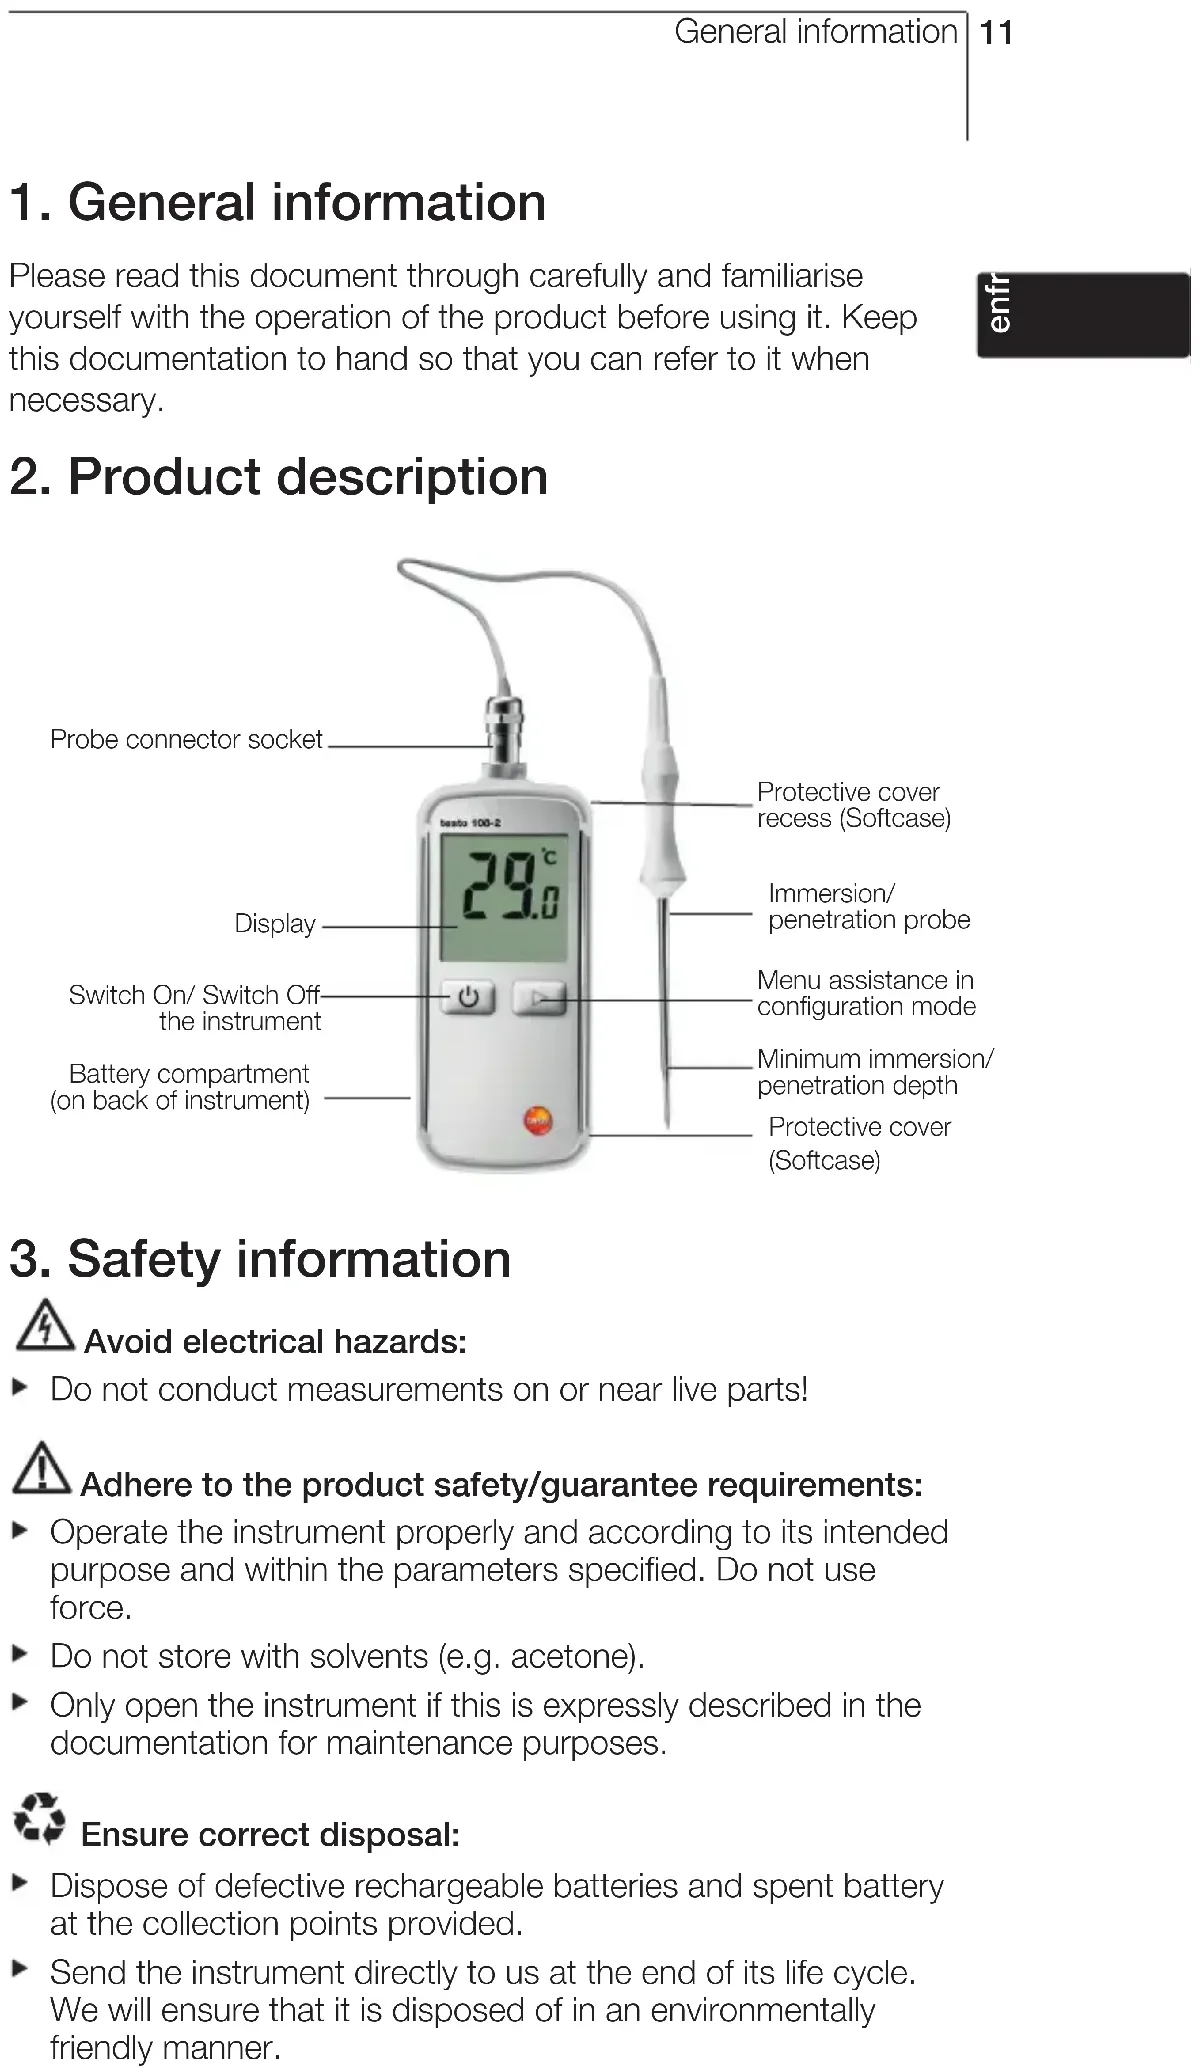
2. Product description
text_image
Probe connector socket 79°C Display Switch On/ Switch Off the instrument Battery compartment (on back of instrument) Protective cover recess (Softcase) Immersion/ penetration probe Menu assistance in configuration mode Minimum immersion/ penetration depth Protective cover (Softcase)3. Safety information

Avoid electrical hazards:
▶ Do not conduct measurements on or near live parts!

Adhere to the product safety/guarantee requirements:
▶ Operate the instrument properly and according to its intended purpose and within the parameters specified. Do not use force.
▶ Do not store with solvents (e.g. acetone).
▶ Only open the instrument if this is expressly described in the documentation for maintenance purposes.

Ensure correct disposal:
▶ Dispose of defective rechargeable batteries and spent battery at the collection points provided.
▶ Send the instrument directly to us at the end of its life cycle. We will ensure that it is disposed of in an environmentally friendly manner.
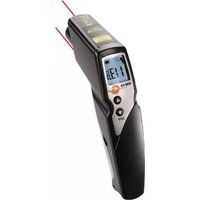
4. Intended Use
The testo 108-2 is a watertight food thermometer.
The product is designed for the following tasks/areas:
- Food sector: production, food service, spot check measurement
- Measuring liquids, pastes and semi-solid materials

The following product components are designed for continuous contact with foodstuffs in accordance with Regulation (EC) 1935/2004:
The immersion/penetration probe from the tip up to 1 cm before the probe's handgrip or the plastic housing. If provided, the information about penetration depths under point 7.2 in the instruction manual or the mark(s) on the immersion/penetration probes should be noted.
The product may not be used in the following areas:
• Potentially explosive areas
- For diagnostic measurements in the medical sector
5. Technical data
| Feature Values | |
| Sensor type Thermocouple Type T (included) | |
| Measurement range -50...+300 °C/-58...+572 °F (only applies to metallic probe points) | |
| Measurement Parameter Temperature in °C/°F | |
| Resolution 0.1°C/°F | |
| Instrument accuracy ±0.5 °C (-30...+70 °C)(Ambient temperature ±0.5 °C ±0.5% of the measurement value +23°C ±3°C) (-50...-30 °C/+70...+300 °C) | |
| Probe accuracy ±0.5 °C (-40...-20 °C)±0.2 °C (-20...+70 °C)±0.5 °C (+70...+125 °C)±0.4% of the measurement value (+125...+300 °C) | |
| Adjustment time t99 10 s (measured in moving liquid) | |
| Measurement rate 2 measurements per second | |
| Operating temperature | -20...+60 °C/-4...+140 °F |
| Transport/storage temperature | -30...+70 °C/-22...+158 °F |
| Power supply | 3 x AAA batteries |
| Battery life | 2500 h (typically at 23 °C ) |
| Housing TPE/PC + 20%GF, ABS/PET, ABS + PC + 10%GF/TPE | |
| Protection class | IP67 (the probe included in the set is connected)) |
| Instrument dimensions | 144 x 60 x 24,5 mm |
| Weight | 162 g (instrument incl. batteries, without soft case), 54 g probe) |
| Display | LCD, one-line, with status line |
| Standards | EN 13485Certificates: see www.testo-international.com,Service&Support | Download Center (registration required) |
| EC Directive | 2004/108/EC |
| Functions | Auto-Hold, Hold, Min, Max |
| Warranty | 2 years, terms of warranty: see websitewww.testo.com/warranty |

text_image
testo 108 EN 13485 ACCORDING TOInformation on standards
This product complies with the guidelines as per EN 13485 standard, performance: S, T (storage, transportation), environment: E (transportable thermometer)
Accuracy class: 1
Measuring range: -50...+300 °C
According to EN 13485, the measuring instrument should be checked and calibrated regularly under the terms of EN 13486 (recommended frequency: yearly).
Contact us for more information.
entry
6. Initial operation
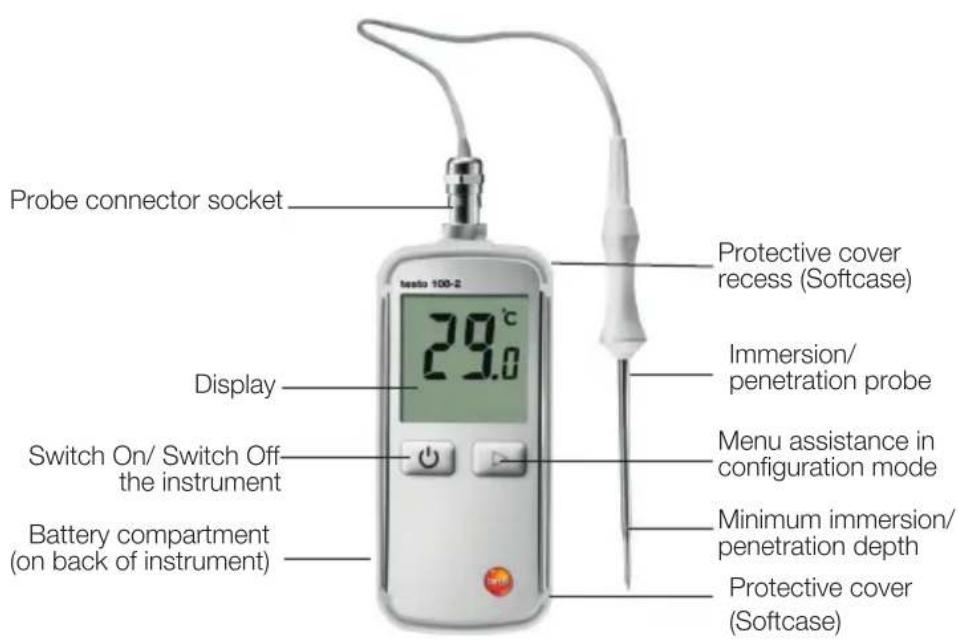
6.1 Protective casing (Softcase)
The protective casing (Softcase) supplied with the testo 108-2 protects it from impact and contamination.
In addition, the probe can be safely stowed in the recess of the supplied protective casing (Softcase) on the side of the appliance.
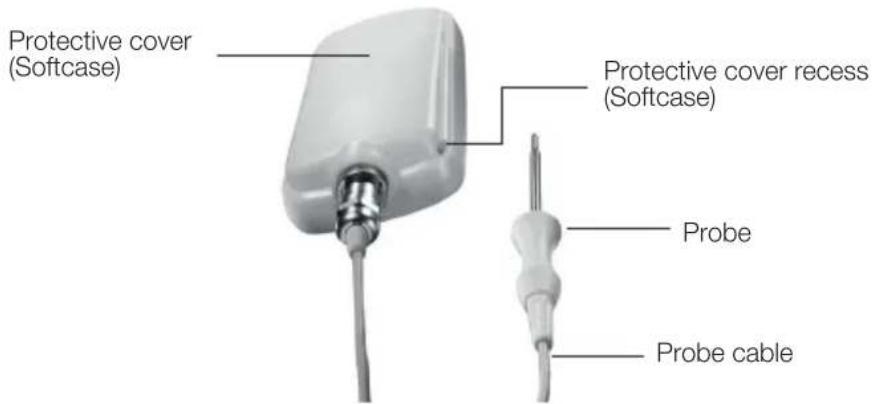
text_image
Protective cover (Softcase) Protective cover recess (Softcase) Probe Probe cable6.2 Inserting batteries
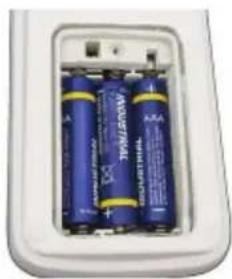
natural_image
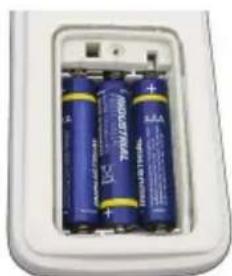
Interior view of a white plastic enclosure showing three blue cylindrical batteries with gold contacts (no text or symbols visible)1 Loosen the screw to the battery compartment.
2 Open the battery compartment.
3 Insert batteries (3 x AAA). Observe the polarity!
4 Close the battery compartment.
5 Tighten the screw.
7. Operation
7.1 On / Off.
▶ Switch the instrument on: Press quickly.
- Display test appears. The instrument is ready for measurement.
▶ Switch off the instrument: Hold down for at least 3 seconds
Factory settings
The instrument is set up for the delivery as follows:
▶ Unit: °C
▶ Probe type: T
▶ Auto off-Time: 10 min (instrument automatically switches off 10 mins after switching on).
▶ Auto-Hold: off
To edit the settings see how to adjust the instrument.
7.2 Measuring
! Observe the required immersion/penetration for correct measuring result: at least 22 mm.
! The housing must be exposed to a maximum operating temperature of -20 to +60 °C. The measurement range from -50 to +300 °C is only applicable to metallic probe points.
√Instrument is switched on.
▶ Immerse/place the probe into the object being measured.
- The current measurement value is shown. Wait until the measurement value does not change any more.
7.3 During measurement
1 Press ▷: Hold is displayed.
- The measuring value currently displayed is frozen.
2 Press ▷: Min is displayed.
- The minimum measuring value from this measurement is displayed.
3 Press ▷: Max is displayed.
- The maximum measuring value from this measurement is displayed.
4 Press in order to switch back to the measuring mode.
Deleting min/max measuring values
▶ Press and hold.
- CLr appears on the display, the min/max measuring values are deleted.
When the instrument is switched off, the min/max measuring values are deleted automatically.
en
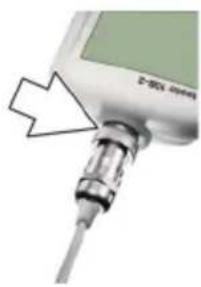
7.4 Attach probe
natural_image
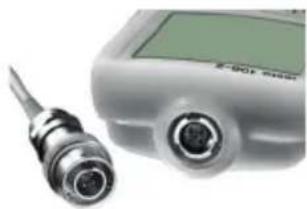
Close-up of a medical device with two metallic connectors (no visible text or symbols)1 Hold probe by the knurled nut, position it on the probe socket and twist into the socket in a clockwise direction, applying pressure.
natural_image
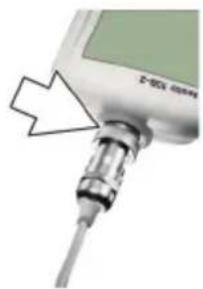
Close-up of a medical or laboratory device with a pointed tip and arrow pointing to a component (no visible text or symbols)2 Secure the probe in the socket by twisting the knurled nut.
natural_image
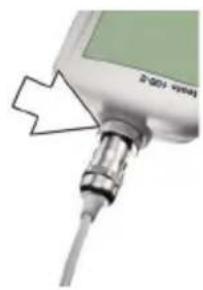
Close-up of a medical or laboratory device with a pointed tip and connector (no visible text or symbols)3 The probe is fitted correctly once it snaps into place and the probe connection is resting directly on the soft case and the housing with no gaps / grooves.
8. Setting up the instrument
In the set-up menu the unit, Auto-off -Time and Auto-Hold can be changed.
! The set-up menu must always be completely run through, also if the only one parameter has been changed.
√Instrument is switched off.
1 Switching the instrument on: Press quickly.
- Display test appears.
2 hold pressed down for about 3 sec during Displaytest.
- Configuration mode is opened, after presetting °C or °F is displayed.
3 Choose °C or °F unit: ▷ press and confirm with ⏻.
- After presetting 10, 30, 60 or off are displayed.
4 Auto-off Time 10, 30, 60 or off choose: press and confirm with ⏻.
- After presetting, Auto-Hold on or off is displayed.
5 Select AutoHold on or off: press , confirm .
- The configuration is finished. With the new settings, the instrument changes in measurement mode.
9. Service and Maintenance
9.1 Changing the batteries
natural_image
Interior view of a battery pack with two blue cylindrical batteries (no visible text or symbols)1 Loosen the screw on the battery compartment.
2 Open the battery compartment.
3 Insert batteries (3 x AAA). Observe the polarity!
4 Close the battery compartment.
5 Tighten the screw.
9.2 Cleaning the instrument
Only use weak, commercially available neutral/household cleaning agents (e.g. washing-up liquid) to clean the instrument. Do not use aggressive cleaning agents or solvent!
Protective cover (Softcase) can be cleaned with washing up liquid.
The housing and probe can be disinfected using an alcohol-based spray. In doing so, always follow the manufacturer's instructions.
√The probe included in the set is connected.
- Clean the housing and probe under running water and rub dry with a towel.
10. Questions and Answers
| Question Possible causes Possible solution | |
| lights on. Batteries dead. Change batteries. | |
| -- - lights on. Measurement range exceeded Measurements can onlyor fallen below. be carried out in therange specified. | |
| Instrument cannot be Batteries dead. Change batteries.switched on. | |
| Instrument switches itself off. The instrument switches itself Switch the instrument on. -off automatically as per the If required: To change theconfigured Auto-off-Time.Auto-Off-Time see how toset up the instrument. |
If we were not able to answer your question, please contact your local dealer or Testo's Customer Service. For contact details, please visit www.testo.com/service-contact.
natural_image
Interior view of a white plastic battery pack with two cylindrical batteries, one open and one closed (no visible text or symbols)natural_image
Close-up of a medical device with two connected cables (no visible text or symbols)text_image
2-901 Spinenatural_image
Close-up of a medical or laboratory device with a pointed tip and metallic connector (no visible text or symbols)natural_image
Interior view of a white plastic enclosure showing three blue cylindrical batteries (no visible text or labels)natural_image
Interior view of a white battery pack with two blue cylindrical batteries and a small terminal block (no visible text or symbols)natural_image
Three-panel image showing a medical device with connectors and a close-up of the internal component, no visible text or symbols.natural_image
Interior view of a white plastic appliance showing two blue batteries with gold contacts and one partially open (no visible text or symbols)www.testo.com/service-contact.
natural_image
Two blue cylindrical batteries with yellow labels inside a white plastic housing (no visible text or symbols)natural_image
Close-up of a medical device with two metallic connectors (no visible text or symbols)natural_image
Close-up of a medical or laboratory device with a pointed tip and arrow pointing to a greenish component (no visible text or symbols)natural_image
Close-up of a medical or laboratory device with a pointed tip and metallic connector (no visible text or symbols)natural_image
Interior view of a white plastic enclosure showing three blue cylindrical batteries (no visible text or labels)natural_image
Interior view of a battery pack with two blue cylindrical batteries and one white plastic housing (no visible text or symbols)√Instrument is ingeschakeld.
▶ Dompel-/insteeksonde in meetobject dompelen/steken.
natural_image
Close-up of a silver electronic device with two metallic connectors (no visible text or symbols)natural_image
Close-up of a medical device with a needle inserted, showing internal components and a green screen (no visible text or symbols)natural_image
Close-up of a medical or laboratory device with a pointed tip and metallic shaft (no visible text or symbols)natural_image
Interior view of a battery pack with two blue cylindrical batteries and one white outline (no visible text or symbols)natural_image
Interior view of a white plastic enclosure showing two blue battery packs with visible internal components (no text or symbols)natural_image
Close-up of a medical device with a metallic connector and a screen (no visible text or symbols)