PL125T2 - Thermometer VOLTCRAFT - Free user manual and instructions
Find the device manual for free PL125T2 VOLTCRAFT in PDF.

| Brand | Voltcraft |
| Model | PL125T2 |
| Product type | Dual-channel digital thermometer |
| Intended use | Temperature measurement in laboratory and industrial areas |
| Dimensions (L x H x D) | 62 x 28 x 162 mm |
| Weight | 184 g |
| Power supply | 3 AAA 1.5 V batteries |
| Measurement range (type K) | -200 °C to +1372 °C |
| Measurement range (type J) | -210 °C to +1100 °C |
| Accuracy | ±0.15% rdg +1 °C (> -100 °C); ±0.5% rdg +2 °C (< -100 °C) |
| Resolution | 0.1 °C/°F/K (<1000); 1 °C/°F/K (≥1000) |
| Display units | °C, °F, K |
| Main functions | T1/T2 measurement, T1-T2 difference, MAX/MIN/AVG, hold (HOLD), backlight, auto power off, recording (18000 data points), Voltsoft software |
| Included sensors | 2 type K thermocouples (cable 94 cm) |
| PC connection | USB (cable 194 cm) |
| Internal memory | 18000 records |
| Operating temperature | 0 to +50 °C |
| Operating humidity | max. 80% (<31 °C), decreasing linearly to 50% (≤40 °C) |
| Maintenance and cleaning | Clean with a soft, dry cloth; do not use aggressive cleaning agents |
| Safety | Do not measure body parts or conductive parts; use indoor, dry; keep out of reach of children |
| Spare parts and repairability | Type K thermocouples included; type J sensors optional; AAA batteries; Voltsoft PRO software optional; repair by specialist |
| General information | Manual available in French; technical support Conrad (France: 0892 897 777) |
Frequently Asked Questions - PL125T2 VOLTCRAFT
User questions about PL125T2 VOLTCRAFT
0 question about this device. Answer the ones you know or ask your own.
Ask a new question about this device
Download the instructions for your Thermometer in PDF format for free! Find your manual PL125T2 - VOLTCRAFT and take your electronic device back in hand. On this page are published all the documents necessary for the use of your device. PL125T2 by VOLTCRAFT.
USER MANUAL PL125T2 VOLTCRAFT
Below please find the software installation procedures for the "Voltsoft" software:
- Insert the CD into the DVD drive of your computer.
- The installation will start automatically. If not, please go to your CD-ROM directory, and open the installation file "autorun.exe".
- Select your desired language from German, English and French.
- Follow the instructions on the dialog box, select the destination for the installation and complete the installation.
- For further information, please refer to the operating instructions on the CD provided.
- The enclosed software is the "Voltsoft" standard edition. The professional version ("Voltsoft" PRO data logger software, No. 10 13 33) is an optional item which you can purchase separately. If you purchase the professional version, you will get the license key. Follow the steps in the "Voltsoft" user manual, to register and upgrade your software to the professional version.
- "Voltsoft" software updates to the latest version of the "Voltsoft" program are available when the program is running and the Internet is connected; or check for the latest "Voltsoft" update via "http://www.conrad.com".
"Voltsoft" system requirement:
- Pentium 233 MHz or faster
- at least 1 GB RAM
- at least 2 GB of available space on the hard disk
- USB 2.0 / 3.0 Port(s)
• Microsoft Windows XP SP2 / Vista™ SP2 / 7
Thank you for your kind attention.
Your VOLTCRAFT team
© Impressum
© Copyright 2014 by Conrad Electronic SE V1_0114_02-JH
Legal notice
This note is a publication by Conrad Electronic SE, Klaus-Conrad-Str. 1. D-92240 Hirschau (www.conrad.com).
All rights including translation reserved. Reproduction by any method, e.g. photocopy, microfilming, or the capture in electronic data processing systems require the prior written approval by the editor. Reprinting, also in part, is prohibited.
This note represents the technical status at the time of printing. Changes in technology and equipment reserved.
© Copyright 2014 by Conrad Electronic SE
F REMARQUE IMPORTANTE
VERSION 01/14
"Voltsoft" systeemeisen:
- Pentium 233 MHz of sneller
• Tenminste 1 Gbyte RAM - Tenminste 2 Gbyte beschikbare ruimte op de harde schijf
- USB 2.0 / 3.0-poort(en)
• Microsoft Windows XP SP2 / Vista™ SP2 / 7
© Copyright 2014 by Conrad Electronic SE
Colofon
© Copyright 2014 by Conrad Electronic SE
D Impressum
These operating instructions are a public mail by Canadian Electronic SE, Canada-Central-St. 1, D-32240 Hoadau (www.onad.com). All rights including transaction reserved. Reproduction by any method, e.g., technology, monitoring, or the capture in electronic data processes to provide required the prior action contained by the order. Journal 12, 59 in part, is part filled.
These operating instructors represent the sector of relation to the interest pricing. Changes in technology and equipment received. © Copyright 2014 by Conrad Electronic BE
© Copyright 2014 by Conrad Electronic SE
NL Colofon
text_image
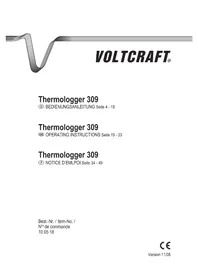
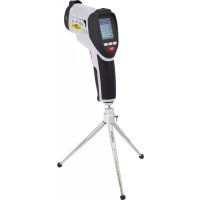
VOLTCRAFT.PL-125-T2USB VS Temperature measuring instrument
OPERATING INSTRUCTIONS
Page 18-30
PL-125-T2USB VS
These Operating instructions accompany this product. They contain important information on setting up and using the device. You should refer to these instructions, even if you are buying this product for someone else.
Please retain these Operating Instructions for future use! A list of the contents can be found in the Table of contents, with the corresponding page number, on page 18.
www.business.conrad.at
- Introduction ...... 19
- Intended Use.... 20
- Delivery content 20
- Symbol explanation.... 21
- Safety instructions....21
- Operating elements.... 22
- Software installation 22
- Inserting/replacing the batteries....23
- Operation 23
- USB connection 28
- Maintenance and cleaning 29
- Disposal 29
- Technical data 30
Dear Customer,
In purchasing this Voltcraft® product, you have made a very good decision for which we would like to thank you.
Voltcraft® - In the field of measuring, charging and network technology, this name stands for high-quality products which perform superbly and which are created by experts whose concern is continuous innovation.
From the ambitious hobby electronics enthusiast to the professional user, products from the Voltcraft® brand family provide the optimum solution even for the most demanding tasks. And the remarkable feature is: we offer you the mature technology and reliable quality of our Voltcraft® products at an almost unbeatable price-performance ratio. In this way, we aim to establish a long, fruitful and successful co-operation with our customers.
We wish you a great deal of enjoyment with your new Voltcraft® product!
All names of companies and products are trademarks of the respective owner. All rights reserved.
If there are any technical questions, contact:
Germany:
Phone: +49 9604 / 40 88 80
Fax: +49 9604 / 40 88 48
E-mail: tkb@conrad.de
Mon. to Thur. 8.00am to 4.30pm, Fri 8.00am to 2.00pm
2. INTENDED USE
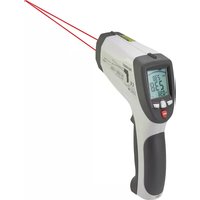
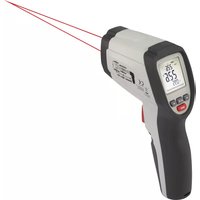
This product is designed for temperature measurement and is especially suitable for use in laboratories and industrial areas. Temperature measurement is done via one or two temperature sensor(s). Temperature can be measured with temperature sensors of type K and J. Measured values can be frozen on the screen. The product can display the minimum, maximum and average value of a particular measurement process. Temperature can be displayed in °C (Celsius), °F (Fahrenheit) or K (Kelvin). The product features an auto-off and a backlight function. The product is capable of providing two measurements. The product can also calculate the difference between the measured values T1 and T2 and provide the maximum, minimum and average difference of the measured values T1 and T2. Power is supplied by three AAA batteries. Use only in a dry indoor environment.
Measurements should not be carried out under unfavourable ambient conditions. Adverse conditions are:
- Moisture or excessive humidity
- Dust and flammable gases, vapours or solvents.
- Thunderstorms or similar conditions such as strong electrostatic fields, etc.
Unauthorised conversion and/or modification of the device are inadmissible because of safety and approval reasons (CE). Any usage other than described above is not permitted and can damage the product and lead to associated risks such as short-circuit, fire, electric shock, etc. Please read the operating instructions thoroughly and keep them for further reference.

Observe all safety instructions and information within this operating instructions.
3. DELIVERY CONTENT
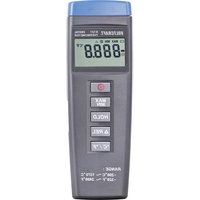
• Temperature measuring instrument
• Temperature sensor (K-type) x 2
- USB cable
- 3 x AAA battery
- Software CD
- Operating instructions
4. SYMBOL EXPLANATION

An exclamation mark in a triangle indicates important instructions in this operating manual which absolutely have to be observed.
The triangle containing a lightning symbol warns of danger of an electric shock or of the impairment of the electrical safety of the device.

The symbol can be found when you are to be given tips and information on operation.
5. SAFETY INSTRUCTIONS

Read the operating instructions carefully and especially observe the safety information. If you do not follow the safety instructions and information on proper handling in this manual, we assume no liability for any resulting personal injury or damage to property. Such cases will invalidate the warranty/guarantee.

Persons / Product
- The product is not a toy and should be kept out of reach of children!
- When used in conjunction with other devices, observe the operating instructions and safety notices of connected devices.
- Protect the main unit from extreme temperatures, direct sunlight, strong jolts, high humidity, moisture, flammable gases, vapours and solvents.
- Do not place the product under any mechanical stress.
- If it is no longer possible to operate the product safely, take it out of operation and protect it from any accidental use. Safe operation can no longer be guaranteed if the product:
-is visibly damaged,
-is no longer working properly,
-has been stored for extended periods in poor ambient conditions or
-has been subjected to any serious transport-related stresses.
- In schools, training facilities, hobby or self-service workshops, handling of electrical devices must be monitored by trained personnel.
- When operating on commercial premises, the relevant accident prevention regulations of workers' compensation boards for electrical equipment must be observed.
- Make sure there are no devices with strong electric or magnetic fields such as transformers, motors, cordless telephones and radio-controlled devices in the vicinity of the product as these can influence the product.
- Do not switch the product on immediately after it has been taken from a cold to a warm environment. The condensation that forms might destroy the product. Allow the product to reach room temperature before switching it on.
Batteries / Rechargeable batteries
- Correct polarity must be observed while inserting the batteries.
- Batteries should be removed from the device if it is not used for a long period of time to avoid damage through leaking. Leaking or damaged batteries might cause acid burns when in contact with skin, therefore use suitable protective gloves to handle corrupted batteries.
- Batteries must be kept out of reach of children. Do not leave the battery lying around, as there is risk, that children or pets swallow it.
- All the batteries should be replaced at the same time. Mixing old and new batteries in the device can lead to battery leakage and device damage.
- Batteries must not be dismantled, short-circuited or thrown into fire. Never recharge non-rechargeable batteries. There is a risk of explosion!
Miscellaneous
- Consult an expert when in doubt about operation, safety or connection of the device.
- Maintenance, modifications and repairs are to be performed exclusively by an expert or at a qualified shop.
6. OPERATING ELEMENTS
- Sensor connection ports
- ▲ T1·T2 button
- LC display
- UNITS button
-
REC ENTER button
-
USB socket
- HOLD ▼ button
- On / off button
- MAX MIN button
- SET button
7. SOFTWARE INSTALLATION
The software included provides an interface for retrieving the recorded data from the measuring instrument. You will need a CD-ROM drive on your computer to install the software.
- Insert the CD into the CD-ROM drive of the personal computer (PC).
- The installation should start automatically. If not, open the CD-ROM drive in your operation system and run the "setup.exe" by double-clicking it.
-
Click the button NEXT to continue the installation process.
-
Read the license agreement, select if you accept it or not, then press the button NEXT. Note that if you do not accept it, the installation will not start.
- To change the installation directory, press the button CHANGE. Then press the button NEXT to continue.
- Check the installation overview and then press the button INSTALL to start the installation.
- The software will be installed in a few minutes. Press the button FINISH to finish the installation.
8. INSERTING/REPLACING THE BATTERIES
- Unscrew the screw on the battery compartment cover using a Phillips screwdriver and take off the cover of the battery compartment.
- Insert three AAA batteries, observing the correct polarity. Take note of the labelling on the inside of the battery compartment.
- Close the battery compartment.

Replace the batteries when the battery icon appears on the display.
9. OPERATION

- Do not measure the temperature of live parts or leads, as touching them might cause a potentially lethal electric shock. Also, the thermometer and sensor could be damaged.
- The sensor included with delivery can only be used for measurements in dry environments and on surfaces with a temperature of >-20 °C and <+250 °C. It is not suitable for use in humid environments or to measure the temperature of fluids.
- The accuracy is only assured when the thermometer is operated at a temperature range of +18 °C to +28 °C (excluding the temperature sensor).
- The thermometer (excluding the temperature sensor) must not be used outside the operating temperature range. Please note the specifications on operating temperature in the Technical Data section.
- You can utilize the entire measurement range of the thermometer with optionally available temperature sensors.
Basic functions
- Connect the temperature sensor to port T1/T2 on the top of the device. Only one direction is possible. Please note the polarity labelling on the temperature sensors' plug and on the side of the port.

You can also connect a temperature sensor of type J to the thermometer; these are optionally available.
-
Press the on/off button (8) to switch the device on.
-
The instrument will undergo a quick self test. It will show the amount of memory available. If the memory is full, you will see the word "FULL" on the display. Follow the instructions in the sub-chapter "Adjusting settings" to clear the memory.
-
Wait until the display becomes stable.
-
Place the sensor at the locations which you want to measure.
-
The display will show the temperature reading of the T1 / T2 sensor respectively. If no temperature sensor is connected, four horizontal bars will be displayed instead of a temperature reading.
-
Press the UNIT button to switch between Celsius (C), Fahrenheit (F) and Kelvin (K).
-
Press the HOLD ▼ button (7) to hold the reading on the display. HOLD will appear on the top part of the display. Press the HOLD ▼ button (7) again to return to the display of real-time temperature readings.
-
Press the SET button (10) to activate/deactivate the backlight.
-
Press the on/off button (8) to switch the device off. If no button is pressed for 20 minutes, the device will automatically power off.

The section “Adjusting settings” describes how to deactivate the auto-off function.
Special functions
▲ T1·T2 button (2)
| Press once: • The positions of the real-time readings of T1 and T2 switch. | |
| Press twice: | • The difference between the readings (T1 - T2) appears on top.• The read-time reading of T1 appears underneath. |
| Press three times: | • The difference between the readings (T1 - T2) appears on top.• The read-time reading of T2 appears underneath. |
| Press four times: • Return to normal display mode. | |
Maximum / minimum function
Press the ◀ MAX MIN button (9) in the normal display mode to use the function.
| Press once: | The indication MAX appears on the display.The real-time reading T1 appears on topThe maximum value of the current measurement process of T1 appears underneathThe point in time at which the maximum value was measured is displayed at the lower edge of the display in minutes and seconds (min:sec) or in hours and minutes (hour:min).▲T1·T2 buttonPress once:-Switch the real-time reading from T1 to T2.- Shows the maximum reading (MAX) of the current measurement process of T2.Press twice:- Shows the current difference between the readings (T1 - T2) on top.-Shows the maximum difference underneath.- Point in time, at which the maximum difference is measured, is displayed at lower edge of the display in minutes and seconds (min:sec) or in hours and minutes (hour:min).Press three times:-Switch back to real-time and maximum reading of T1. |
| Press twice: | The indication MIN appears on the display.The real-time reading of T1 appears on top.The minimum value of the current measurement process of T1 appears underneath.The point in time, at which the minimum value was measured, is displayed at lower edge of the display in minutes and seconds (min:sec) or in hours and minutes (hour:min). |
| Press twice: | ▲ T1·T2 buttonPress once:-Switch the real-time reading from T1 to T2.- Shows the minimum reading (MIN) of the current measurement process of T2.Press twice:-Shows the current readings' difference (T1 - T2) on top.-Shows the minimum difference underneath.- Point in time, at which the minimum difference is measured, is displayed at lower edge of the display in minutes and seconds (min:sec) or in hours and minutes (hour:min).Press three times:- Switch back to real-time and minimum reading of T1. |
| Press three times: | The real-time reading of T1 appears on top.The average value (AVG) of the current measurement process of T1 appears underneath.The running total time of the current measurement process is displayed at lower edge of the display in minutes and seconds (min:sec) or in hours and minutes (hour:min).▲ T1·T2 buttonPress once:-Switch the real-time reading from T1 to T2.- Shows the average reading (AVG) of the current measurement process of T2.Press twice:-Shows the current readings' difference (T1 - T2) on top.-Shows the average difference underneath.- The point in time, at which the average difference is measured, is displayed at lower edge of the display in minutes and seconds (min:sec) or in hours and minutes (hour:min).Press three times:-Switch back to real-time and average reading of T1. |

Press and hold the MAX/MIN button for approx. two seconds to return to normal display mode.
Recording function
- Press and hold the REC ENTER button (5) for approximately three seconds during any measurement to record the measured values. The word REC will be displayed on the screen when the measured values are being recorded. If the memory is full, the word REC will flash. Follow the instructions in the sub-chapter "Adjusting settings" to clear the memory.
- Press and hold the REC ENTER button (5) again for approximately three seconds to stop recording.

Data can only be retrieved via the software. Refer to the chapter SOFTWARE INSTALLATION for software installation information. Refer to the chapter OPERATION > Adjusting Settings to change the sampling rate of the new records.
Hold function
- Press the HOLD ▼ button (7) during any measurement to freeze the measurements. The word HOLD will be displayed on the screen when the measured values are being recorded.
- Press the HOLD ▼ button (7) to unfreeze the measurements.
Adjusting settings
- Press and hold the SET button (10) to enter the set up mode. SETUP will appear on the lower part of the display.
- Press the ▲ T1·T2 button (2) or HOLD ▼ button (7) to switch between the setting parameter.
- Press the REC ENTER button (5) to enter the setup page of the parameter.
-
In the setup page of a parameter, press the ▲ T1·T2 button (2) or HOLD ▼ button (7) to adjust the value.
-
To return to the normal display mode, press and hold the SET button.
| Display Parameter Description | ||
| Type Sensor type Select between J type or K type sensor. | ||
| SLP Auto turn off mode | Turn the auto turn off mode on (on) or off (oFF).When the sleep mode is turned on, the measuring instrument will be turned off when it is idle for 15 minutes. | |
| tiE Time setting | Press the button | ◄ MAX MIN button to switch between the values in the time setup page.The top four digits show the year setting (YYYY), below it, you will find the month setting and the date setting (MMDD).At the bottom part of the display, you will find the time setting. (HH:MM). |
| rAt Sampling rate | Set the sampling | rate for real-time display / recording.You will see the current sampling rate (mm:ss) after entering the setup page.Press the◄ MAX MIN button to switch between the values in the time setup page.Press the▲T1·T2 button (2) or HOLD▼button (7) to adjust the value. |
| CLR1 Clear memory | Shows the | amount of empty memory.Clear the internal memory. Select YES to clear and no to keep the memory. |
| TI OFFSET T1 | offset value Set the | offset value of measurement T1. |
| T2 OFFSET T2 | offset value Set the | offset value of measurement T2. |
Determining any deviation of a sensor's measurement accuracy
- Turn the thermometer on and place the relevant sensor in an optional temperature calibrator or in any other reference location with a known and stable temperature.
- Wait until the thermometer's display has stabilised.
- If there is a difference, you can manually compensate it (see section "Adjusting settings").
10. USB CONNECTION
- Insert the mini USB plug of the mini USB cable into the USB socket (6) of the measuring instrument.
- Insert the USB plug of the mini USB cable into a vacant USB port on a personal computer (PC).
- Start the software "Multiple Data Logger" and follow the instructions under the "Help > Help topics".
11. MAINTENANCE AND CLEANING
• No maintenance is necessary for the device apart for occasional cleaning and the changing of the battery.
- Clean the exterior of the device with a soft, dry cloth or brush only.
- Never use aggressive or chemical cleaning agents, since this might damage the surface of the housing or impair operation.
12. DISPOSAL
Product

Electronic devices are recyclable waste and must not be disposed of in the household waste.
At the end of its service life, dispose of the product according to the relevant statutory regulations.
Remove any inserted (rechargeable) batteries and dispose of them separately from the product.
Batteries / Rechargeable batteries
You as the end user are required by law (Battery Ordinance) to return all used batteries/rechargeable batteries. Disposing of them in the household waste is prohibited!

Contaminated (rechargeable) batteries are labelled with this symbol to indicate that disposal in the domestic waste is forbidden. The designations for the heavy metals involved are: Cd = Cadmium, Hg = Mercury, Pb = Lead (name on (rechargeable) batteries, e.g. below the trash icon on the left).
Used (rechargeable) batteries can be returned to collection points in your municipality, our stores or wherever (rechargeable) batteries are sold.
You thus fulfil your statutory obligations and contribute to the protection of the environment.
13. TECHNICAL DATA
| Operating voltage: 3 x 1.5 V/DC, battery type AAA | |
| Current consumption: approx. 7.6 mA | |
| Measuring range: | -200 °C to +1372 °C / -328 °F to +2501 °F (K type)-210 °C to +1100 °C / -346 °F to +2012 °F (J type) |
| Accuracy: | ±0.15 % rdg +1 °C / 1.8 °F (> -100 °C / -148 °F)±0.5 % rdg +2 °C / 3.6 °F (< -100 °C / -148 °F) |
| Temperature sensor measuring range(included): | -20 °C to +250 °C / -4 °F to +482 °F |
| Resolution: | 0.1 °C/°F/K (<1000)1 °C/°F/K (≥1000) |
| Memory size: 18000 | |
| Cable length: | (USB) 194 cm(Temperature sensor) 94 cm |
| Operating temperature: 0 to +50 °C / +32 to | +122 °F |
| Operating humidity: | max. 80 % (< +31 °C / +87 °F)linearly decreasing to 50 % (≤ +40 °C / +104 °F) |
| Storage temperature: -10 to +50 °C / +14 to | +122 °F |
| Storage humidity: <80 % | |
| Dimensions (W x H x D): 62 x 28 x 162 mm | |
| Weight: 184 g | |