AEP - Coffee machine ASTORIA - Free user manual and instructions
Find the device manual for free AEP ASTORIA in PDF.

| Product type | Professional espresso coffee machine |
| Brand | Astoria |
| Model | AEP |
| Power supply | 230-400 V, 50/60 Hz (depending on version) |
| Maximum power | Up to 7.1 kW (depending on version) |
| Boiler pressure | 0.8 - 1.4 bars |
| Coffee dispensing pressure | 8 - 9 bars |
| Boiler capacity | 5 to 23 liters (depending on version) |
| Main functions | Coffee, steam, hot water, cappuccino, cup warmer (optional) |
| Dose programming | Yes, by button or programming lever |
| Materials | Stainless steel |
| Intended use | Professional (non-domestic) |
| Warranty | 12 months on all parts (excluding electrical/electronic parts and wear and tear) |
| Routine maintenance | Daily cleaning of filters, portafilters, group head, steam wand |
| Periodic maintenance | Descaling and annual check by qualified technician |
| Safety | Safety valve (1.9 bar), high temperature protection, emergency stop |
| Spare parts | Filters, portafilters, gaskets, shower head, steam wand, etc. |
| Repairability | Technical interventions reserved for an authorized technician |
| Water supply pressure | 1.5 - 5 bars max |
| Ambient operating temperature | 5 - 40°C |
| Noise level | < 70 dB |
| Gas supply (option) | Available on some models |
Frequently Asked Questions - AEP ASTORIA
User questions about AEP ASTORIA
0 question about this device. Answer the ones you know or ask your own.
Ask a new question about this device
Download the instructions for your Coffee machine in PDF format for free! Find your manual AEP - ASTORIA and take your electronic device back in hand. On this page are published all the documents necessary for the use of your device. AEP by ASTORIA.
USER MANUAL AEP ASTORIA
CMA MACCHINE PER CAFFÈ S.r.l.
Via Condotti Bardini, 1 - 31058 SUSEGANA (TV) - ITALY - Tel. +39.0438.6615 - Fax +39.0438.60657 - www.astoria.com - info@astoria.com
CE
MACCHINA PER CAFFÈ ESPRESSO
Use and maintenance manual. Instructions for the user.
MACHINE A CAFÉ ESPRESSO
IMPORTANT: Read carefully before use - Store for future reference
Content rights The partial reproduction and dissemination of the contents in this document without the prior written consent of the Manufacturer is forbidden. The Company logo is owned by the Manufacturer of the Machine.
Responsibility We are constantly striving to improve the accuracy of the information published in each Manual, but there may be some inaccuracies. We assume no responsibility for any errors or omissions, or for damages resulting from the use of this document.
EN EC DECLARATION OF CONFORMITY
2011/65/UE Direttiva RoHS - Directiva RoHS - Directive RoHS - RoHS Directive
RoHS-Richtlinie - Directiva RoHS - Directiva privind interzicerea substantelor periculoase (RoHS)
2009/142/CE Direttiva apparecchi a gas - Directiva aparatos de gas - Directive pour les appareils au gaz - Gas appliances Directive
Richtlinie für Gasverbrauchseinrichtungen - Directiva sobre aparelhos a gás - Directiva privind aparatele consumatoare de combustibili gazosi (applicable solo per i modelli con gas - applicable solamente a los modelos con gas - applicable seulement aux modèles avec gaz - applicable for models with
gas kit only nur fuer die Ausluenrungen mit Gas erforderlich - aplicavei somente para os modelos com gas - aplicabila humai in cazui modeleior cu gaz)
Date d'émission - Date of Issue
Each machine is accompanied by the PED Declaration of Conformity - see example below
FR DÉCLARATION DE CONFORMITÉ CE
EN EC DECLARATION OF CONFORMITY
Conformity evaluation procedure
Classification: Category 1
Technical specification applied: I.S.P.E.S.L. Tomes M, S, VSR and PIVG (ex E) rev. 95
text_image
Technical diagram of a coffee machine with numbered parts for identificationtext_image
Technical diagram of a portable coffee machine with numbered components for identificationnatural_image
Line drawing of a portable coffee machine with control panel and buttons (no text or symbols)text_image
Diagram of a laboratory setup with labeled components including gauges, tubing, and a beaker with liquid level indicator.natural_image
Line drawing of a coffee maker with two separate views: one showing a cylindrical container and the other showing a bowl (no text or symbols)natural_image
Mechanical setup diagram showing a lever mechanism with a curved arrow indicating rotation (no text or symbols present)
natural_image
Technical line drawing of a mechanical device with lever and base components (no text or symbols)
natural_image
Mechanical setup diagram showing a lever mechanism with a rotating arrow and base components (no text or symbols)
natural_image
Line drawing of a person handling large cylindrical objects next to a mug and a table with items (no text or symbols)text_image
PROG. STOPtext_image
PROG. STOPnatural_image
Illustration of a hand pouring liquid into a cup on a table with a mirror and glass nearby (no text or symbols)natural_image
Line drawing of a person using a large cylindrical device on a desk with a mug and a small object nearby (no text or symbols)text_image
PROG. STOPnatural_image
Illustration of a hand pouring liquid into a cup on a table with a coffee mug and mirror (no text or symbols)natural_image
Illustration of a hand inserting a small electrical outlet into a wall (no text or symbols)6.8.4 Versione SAE
PROGRAMMAZIONE
natural_image
Line drawing of a coffee maker with a large cylindrical object and a cup on a table (no text or symbols)
text_image
PROG. STOP
text_image
PROG. STOP
natural_image
Illustration of a hand pouring liquid into a cup on a wooden surface (no text or symbols)
text_image
PROG. STOPnatural_image
Technical line drawing of a sewing machine with no visible text or symbolsEROGAZIONE CAFFE'
natural_image
Line drawing of a person using a large cylindrical device to interact with a coffee cup and a wall-mounted device (no text or symbols)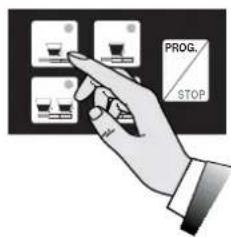
text_image
PROG. STOP
natural_image
Illustration of a person pouring liquid from a bottle into a cup on a table (no text or symbols)natural_image
Illustration of a glass mug with a straw and liquid, no text or symbols presentnatural_image
Diagram of a device control panel with an arrow indicating rotation (no text or symbols present)natural_image
Illustration of a glass jar with a straw and a funnel inside, no text or symbols presenttext_image
Diagram showing a device with labeled components and directional arrow, including a numbered label '6' pointing to a button.
Manovrare con prudenza la lancia vapore tramite l'apposito gommino antiscottatura (6).
natural_image
Illustration of a coffee maker with a glass lid and a small cup above it (no text or symbols)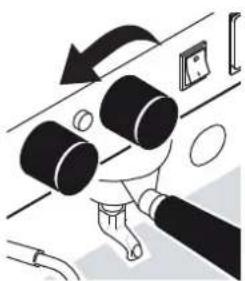
natural_image
Illustration of a hand adjusting a cylindrical component with an arrow indicating rotation (no text or symbols)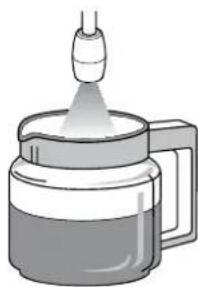
natural_image
Illustration of a coffee maker with a glass cup and a spool of liquid, emitting vapor (no text or symbols)
natural_image
Illustration of a coffee maker with a glass cup emitting powder from a spool (no text or symbols)text_image
PROG. STOP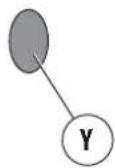

natural_image
Illustration of a coffee maker with a glass chimney emitting vapor (no text or symbols)
text_image
PROG. STOPEROGAZIONE ACQUA CALDA
natural_image
Illustration of a glass mug with liquid and a small droplet above it (no text or symbols)
text_image
Diagram showing a dropper emitting liquid into a container with a labeled Y component above itnatural_image
Illustration of a coffee maker pouring liquid into a mug (no text or symbols)natural_image
Diagram of a mechanical device with an upward arrow indicating direction (no text or symbols present)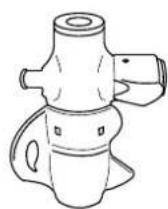
6.13 Scaldatazze (optional)
text_image
Technical diagram of a coffee machine with labeled parts, showing internal components and base stations.
natural_image
Simple line drawing of a water surface with two cylindrical objects and a rectangular object above it (no text or symbols)text_image
Diagram showing a hand holding a small container with two bowls, one labeled '水煮器' (water煮器) and the other '水煮器' (water煮器).natural_image
Line drawing of a hand holding a square object with a pointed tip, no text or symbols presenttext_image
Technical diagram of a mechanical assembly with numbered components labeled 1, 2, and 3natural_image
Illustration of a glass beaker with a stirring rod and liquid, no text or symbols present1.1 Guidelines for reading the Manual 28
1.2 Storing the Manual 28
1.3 Method for updating the Instruction Manual 28
1.4 Recipients
1.5 Glossary and Pictograms 29
1.6 Guarantee
1.7 Customer service
2. IDENTIFICATION OF THE MACHINE ....30
2.1 Make and model designation 30
2.2 General description 30
2.3 Intended use 30
2.4 Machine description.... 31
2.5 Data and CE marking 32
3. STORAGE 32
4. INSTALLATION 32
5. COMMISSIONING....33
6. OPERATION....33
6.1 Safety precautions 33
6.2 Level of training and information required of the user ..... 33
6.3 Safety functions 33
6.4 Emissions 33
6.5 Turning the machine on and off 34
6.6 Water replacement 35
6.7 Preparing the machine 35
6.8 Coffee dispensing.... 36
6.9 Dispensing of steam 38
6.10 Manual dispensing of hot water 39
6.11 Automatic dispensing hot water 39
6.12 Dispensing of cappuccino (optional) 40
6.13 Cup warmer (optional) 40
6.14 Suggestions on how to obtain a good cup of coffee ..... 40
7. MAINTENANCE AND CLEANING ....41
7.1 Safety precautions 41
7.2 DPI characteristics 41
7.3 Periodic Maintenance.... 42
7.4 Maintenance after a brief machine inactivity 42
7.5 Malfunctions and solutions. 43
7.6 Cleaning operations 44
- SPARE PARTS 46
- DECOMMISSIONING....46
- DISMANTLING ....46
- DISPOSAL 46
11.1 Information for disposal 46
11.2 Environmental information.... 46
- GLOSSARY 47
- ALPHABETICAL INDEX OF TOPICS ....48
[Non-Text]
[Non-Text]
30
30
31
[Non-Text]
[Non-Text]
[Non-Text]
[Non-Text]
[Non-Text]
[Non-Text]
33
[Non-Text]
33
33
[Non-Text]
35
[Non-Text]
36
[Non-Text]
[Non-Text]
[Non-Text]
[Non-Text]
[Non-Text]
[Non-Text]
[Non-Text]
41
41
42
[Non-Text]
[Non-Text]
44
1. INTRODUCTION
Please read this manual in its entirety before using the device, in order to optimize machine performance and operate it safely.
The espresso coffee maker that you have purchased has been designed and manufactured with innovative methods and technologies which ensure long lasting quality and reliability.
This Manual will guide you in discovering the advantages of purchasing our product. You will find information on how to get the best of your appliance, how to always keep it efficient and what to do if you should have any problems.
Keep this Manual in a safe place. If you lose it, you can ask the Manufacturer for another copy.

Before using the machine, read the instructions contained in this publication and follow the guidelines carefully. Keep this manual and all publications attached in an accessible and secure place. This document assumes that in the locations where the machine is installed, the relevant safety standards and work hygiene are observed.
The instructions, drawings and documentation contained in this manual are technical and confidential, the sole property of the Manufacturer, and may not be reproduced in any way, either in full, or in part.
The Manufacturer reserves the right to make any improvements and/or modifications to the product. We guarantee that this Manual reflects the technical state of the appliance at the time it is marketed.
We take this opportunity to invite customers to make any proposals for improving the product or the Manual.
1.1 Guidelines for reading the Manual
The Manual is divided into separate chapters. The sequence of chapters responds to the temporal logic of the life of the machine.
Terms, abbreviations and pictograms are used to facilitate the immediate understanding of the text.
This Manual is constituted by a cover, an index and a series of chapters. Each chapter is numbered in sequence. The page number is in the footer.
The first page shows the machine identification data, the last page shows the date and revision of the Instructions Manual.
ABBREVIATIONS
Sect. = Section
Chap. = Chapter
Par. = Paragraph
P. = Page
Fig. = Figure
Tab. = Table
MEASUREMENT UNIT
The measurement units are those provided by the International System (SI).
PICTOGRAMS
Descriptions preceded by these symbols contain information/very important requirements, particularly as regards safety. Failure to comply may result in:
• hazards to the operator safety;
• injury also serious of the machine users (in some cases even death);
- loss of the guarantee;
• manufacturer's liability waiver.

DANGER symbol used in case of danger of permanent serious injury that requires hospitalization, or causes death in extreme cases.

CAUTION symbol used in case of risk of minor injury that requires medical attention.

WARNING symbol used in case of danger of minor injury that can be treated with first aid or the like.

NOTE symbol used to provide important information related to the topic.
1.2 Storing the Manual
The Instruction Manual must be stored carefully and must accompany the machine in all the ownership transfers.
Storage should be favoured by handling it with care, with clean hands and not depositing it on dirty surfaces. Do not remove, torn or arbitrarily modify any of its parts.
The manual must be stored in an environment protected from moisture and heat, in close vicinity of the machine it refers to.
On request, the manufacturer, can provide additional copies of the Instructions Manual of the machine.
1.3 Method for updating the Instruction Manual
The Manufacturer reserves the right to modify and make improvements to the machine without notifying it and without updating the Manual already delivered to the user.
Moreover, in case of substantial changes to the already installed machine involving the modification of one or more chapters of the Instruction Manual, the manufacturer will send the users the chapters affected by the changes or the revision of the entire manual.
It is the users' responsibility, to replace the old document with the new revision.
The manufacturer is responsible for the Italian descriptions; the translations cannot be fully verified; therefore, in case of inconsistency, users must pay attention to the Italian version and possibly contact the Manufacturer, who will make the appropriate changes.

If the manual should become illegible or otherwise hard to consult, the user is obliged to request a new copy from the Manufacturer before carrying out any work on the machine.
It is absolutely forbidden to remove or rewrite parts of the Manual.
The instructions, drawings and documentation contained in this manual are confidential and the sole property of the Manufacturer, and may not be reproduced in any way, either in full, or in part without prior authorization.
Users are responsible for the compliance with the instructions contained in this Manual.
For any incident that should occur as a result of incorrect use of these recommendations, the Manufacturer declines any liability.
1.4 Recipients
The Manual in question is addressed to the User of the machine, that is the person in charge of operating, servicing and cleaning the machine indicated in this document.
QUALIFICATION OF RECIPIENTS OF THE MACHINE
The machine is intended for professional and not generalized use, so it can be used by qualified people, in particular who:
• Have reached the age of majority;
• Are physically and mentally fit for using the machine;
- Are able to understand and interpret the Instruction Manual and the safety requirements;
- Know the safety procedures and their implementation;
- Possess the ability to use of the machine;
- Understand the procedures of use defined by the machine manufacturer.

The appliance must not be used by children or people with reduced physical, sensory or mental capacities, or by people without experience or knowledge, unless they can be supervised or receive instructions for appliance use from a person responsible for their safety.
1.5 Glossary and Pictograms
This paragraph lists uncommon terms or terms with different meaning from the ordinary.
Below is an explanation of the abbreviations used and the meaning of the pictograms to indicate the operator qualification and the machine status; their use allows to quickly and uniquely provide the necessary information for proper use of the machine in safe conditions.
1.5.1 GLOSSARY
User
The person in charge of operating, servicing and cleaning the machine indicated in this manual.
Manufacturer's Qualified Technician
A specialist, specially trained and qualified to make the connection, installation and assembly of the machine; use special equipment (hoists, forklifts, etc.); perform routine or unscheduled maintenance which is particularly complicated or potentially dangerous if performed by the user and with particular attention to aspects of safety and hygiene.

All other glossary entries are shown in Chap."12. GLOSSARY" on page 47.
1.5.2 PICTOGRAMS
PICTOGRAM DESCRIPTION
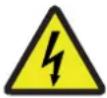 | Electrical hazard |
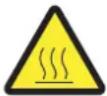 | Danger of high temperature |
 | Mandatory use of protective gloves |
 | Obligation to read the documentation |
1.6 Guarantee
The machine is covered by a 12-month guarantee on all components, except electrical and electronic components and expendable pieces.
1.7 Customer service

text_image
CMA MACCHINE PER CAFFE S.r.l. Via Condotti Bardini, 1 - 31058 SUSEGANA (TV) - ITALY Tel. +39.0438.6615 - Fax +39.0438.60657 E-mail: info@astoria.com - Web-site: www.astoria.com2. IDENTIFICATION OF THE MACHINE
2.1 Make and model designation
The identification and the model of the machine are found on the NAMEPLATE and in the EC DECLARATION OF CONFORMITY provided with the machine.
Below are some of the machine identification data.
2.2 General description
The machine object of this Manual consists of mechanical, electrical, and electronic components whose combined action allows to make milk, coffee and water-based beverages.
This product is manufactured in compliance with EU Directives, Regulations and Standards indicated in the EC DECLARATION OF CONFORMITY provided with the machine.
This machine is designed and constructed to operate only after being properly connected to a hydraulic and electrical network and placed so as to be sheltered from atmospheric agents.
2.3 Intended use
The espresso coffee machine is designed for the professional preparation of hot drinks such as tea, cap-puccino and weak, strong and espresso coffee, etc.
The device is not intended for home use.
The machine can be used in all operational conditions contained or described in this document; any other conditions must be considered dangerous.
PERMITTED USES
All uses compatible with the technical characteristics, operations and applications described in this document that do not endanger the safety of the User or cause damage to the machine or the environment.

All uses not specifically mentioned in this Manual are prohibited and must be expressly authorized by the Manufacturer.
INTENDED USES
The machine is designed exclusively for professional use.
The use of products/materials other than those specified by the Manufacturer, which can cause damage to the machine and dangerous situations for the operator and/or those close to the Machine, is considered incorrect or improper.
CONTRAINDICATIONS OF USE
The machine must not be used:
- For uses other than those listed in par. 2.3, or for uses not mentioned in this Manual;
- With materials other than those listed in this Manual;
• With disabled or not working safety devices.
INCORRECT USE OF THE MACHINE
The type of use and performance this machine is designed for, imposes a number of operations and procedures that cannot be changed, unless previously agreed with the Manufacturer. All allowed practices are contained in this document, any operation not listed and described in this document is to be considered not possible and therefore dangerous.
IMPROPER USE
The only permitted uses are described in the Manual, any other use is to be considered not possible and therefore dangerous.
GENERAL SAFETY
The user must be aware of the risk of accidents, the devices designed for safety, and the general rules on the safety provided by EU directives and by the legislation of the country where the line is installed.
Users should be aware of all machine devices operation.
They must also have fully read this manual.
The maintenance work must be performed by qualified technicians after specially preparing the machine.
Tampering or unauthorized substitution of one or more parts of the machine, the use of accessories that modify the use and the employment of materials other than those recommended in this Manual, may become a cause of accidents.
Version AL
text_image
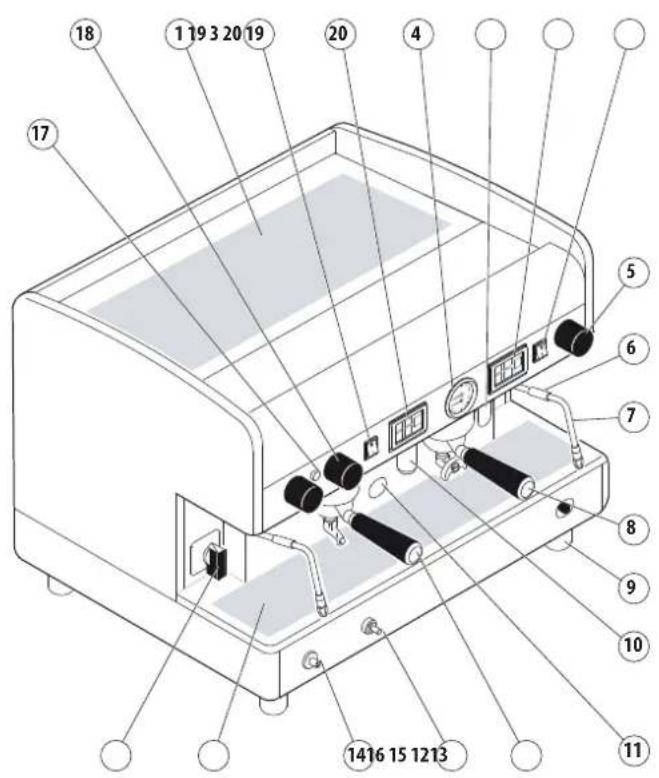
Technical diagram of a coffee machine with numbered parts for identification2.4 Machine description
- Cup heater surface.
- Lever groups.
- Steam boiler water level ( ^** ).
- Pressure gauge.
- Steam knob.
- Anti-burn protection.
- Steam nozzle
-
2-Cup filter holder.
-
Adjustable foot.
-
Hot water nozzle
- Gas burner window (*).
- 1-Cup filter holder.
- Gas safety (*).
-
Gas ignition push button (*).
-
Cup-rest grid
-
ON switch
-
Machine on indicator light.
-
Hot water knob
-
Manual delivery switch.
-
Push button panel
(*) Optional device.
(**) In some versions the optical level is replaced by a green light.
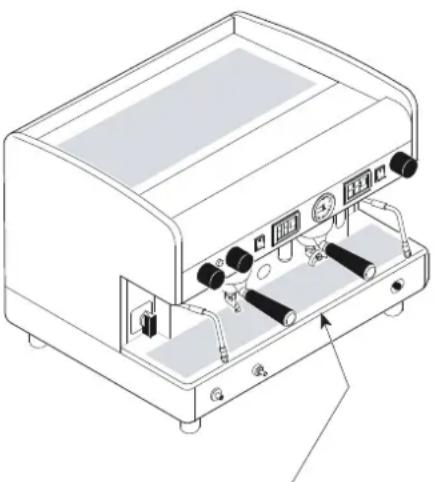
Version AEP - SAE
text_image
Technical diagram of a coffee machine with numbered components for identification2.5 Data and CE marking
The technical data of the machine is shown in the following table:
| TECHNICAL DATA TABLE JUN 1GR COMPACT 2GR 3GR 4GR | ||||||
| Voltage (V) | 120230-400240 | 120230-400240 | 120230-400240 | 120230-400240 | 230-400240 | 230-400240 |
| Frequency (Hz) 50/60 50/60 50/60 50/60 50/60 | ||||||
| Max power (kW) 2.4 kW | 2.4/3.1/3.3 | 3.1 3.1/3.9/4 | 2 5.6/6.0 6.6/7.1 | |||
| Boiler (l) 5 6/8 7 | 10.5/14 | 17/21 | 23 | |||
| Safety valve calibration (bar) | 1.9 bar | |||||
| Boiler operating pressure | 0.8 - 1.4 bar | |||||
| Feed water pressure | 1,5 - 5 bar MAX | |||||
| Coffee dispensing pressure | 8 - 9 bar | |||||
| Operation mode temperature | 5 - 40°C 95° MAX R.U. | |||||
| Sound pressure level | < 70 dB | |||||
natural_image
Line drawing of a portable coffee machine with control panel and buttons (no text or symbols)The CE tag is affixed on the base of the frame under the drain pan
According to the Directive 2006/42/EC, the machine is marked with the CE marking, by which the manufacturer declares, under its own responsibility, that the machine is safe for people and things.
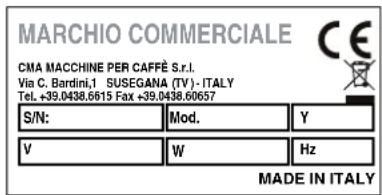
The CE nameplate is affixed to the base of the frame under the drain pan on which the identification data is reported. Below is an example of the nameplate:
text_image
MARCHIO COMMERCIALE CMA MACCHINE PER CAFFE S.r.l. Via C. Bardini,1 SUSEGANA (TV) - ITALY Tel. +39.0438.6615 Fax +39.0438.60657 S/N: Mod. Y V W Hz MADE IN ITALYFor any communication with the Manufacturer, always note the following information:
• S/N - machine serial number;
- Mod. - machine model
• Y - year of manufacture;
The data of the appliance can be seen also on the label located on the package of the machine.

It is forbidden to remove or damage the nameplate. If it needs replacing urgently, always exclusively contact the Manufacturer.
3. STORAGE
The machine is stored by the Manufacturer or the Distributor.
4. INSTALLATION
The installation of the machine must be performed only by the Manufacturer's Qualified Technicians.

During the installation the Qualified Technicians needs to renewal operations of the water contained in the hydraulic circuits.

The base of the machine support must be perfectly level and without irregularities.

The electric system must be equipped with a suitable differential circuit breaker (30 mA).
5. COMMISSIONING
The commissioning of the machine must be performed only by the Manufacturer's Qualified Technicians.
6. OPERATION
6.1 Safety precautions
Even though the machine is provided with all the safety devices required to eliminate possible risks for the User, there are still certain residual risks.
These so-called residual risks are related to machine parts that may pose a danger to the User, if used improperly, or in case of incorrect assessment or deactivation, due to circumventing the prescriptions contained in this Manual.
The machine is also equipped with appropriate warnings placed on residual risk areas, which must be scrupulously observed.
The following residual risks are present during the operation and use of the machine and cannot be eliminated:
Electrical hazard:
When using the electrical appliance, several safety standards must be observed:
- do not touch the appliance with wet or damp hands or feet;
• do not use the appliance if barefooted;
• do not use extensions in rooms where there are showers or baths;
• do not pull the power cord to disconnect the appliance; - the power cord of the appliance must not be replaced by the user. if the cord is damaged, turn the appliance off and contact the Qualified Technician only.
- do not leave the appliance exposed to atmospheric agents (rain, sun, etc...);
• do not access the inside of the machine;
• do not spill liquids on the machine. - do not allow the appliance to be used by children or incapacitated people.
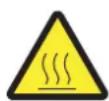
Danger of high temperature:
Some parts of the machine can reach high temperatures:
- avoid contact with the coffee group, the filter holder heater and water, steam and autosteamer spouts;
• do not expose your hands or other body parts to the coffee, steam, or hot water spouts.
6.2 Level of training and information required of the user
All persons using the equipment must be properly trained and informed on the operation and residual risks present during operation.
Users must be able to apply all the good practices in respect of food hygiene principles.

Children must be supervised, to make sure they do not play with the appliance.

Any unauthorised tampering with any parts of the machine renders any warranty null and void.
6.3 Safety functions

Users are obliged to inform the Manufacturer if they encounter defects and/or malfunctions of the machine or accident prevention systems, as well as of any dangerous situation they should become aware of.
In the event of anomalies of the gas supply system (if present), require the intervention of a Qualified Technician.
The gas supply system (if present) must be shut down during long periods of machine downtime (during the night or when the establishment is closed).
It is strictly forbidden to make changes of any kind or extent to the machine and its functions, as well as to this document.

Have routine maintenance and checks of all safety devices performed periodically by the Qualified Technicians.
6.4 Emissions
VIBRATIONS
In conditions of use that meet the indications provided in this manual, any detected vibrations do not give rise to dangerous situations.
SOUND EMISSIONS
The noise level emitted by the machine is on average lower than 70 dB; therefore, there is no obligation to use personal protective equipment for the auditory system.
If the machine emits unusual noises, notify the manufacturer.
ELECTROMAGNETIC ENVIRONMENT
The machine is designed to work properly in an electromagnetic environment of industrial type, falling within the limits of Emission and Immunity provided by current standards.
6.5 Turning the machine on and off
6.5.1 Electric heating
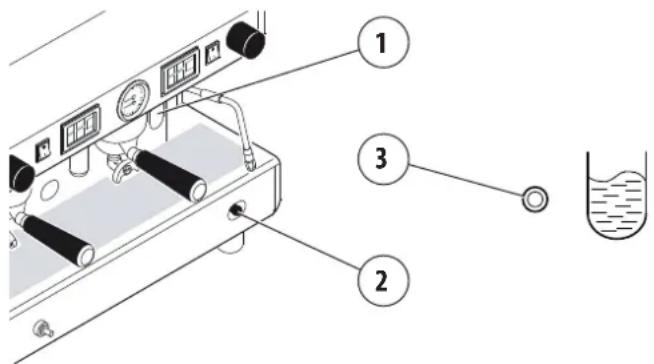
Before starting the machine, make sure that the level of water in the boiler is higher than the minimum level on the level-check window (1).
In some versions of the optical level is replaced by a green light (3): the light is indicates the proper water level of the boiler, slow flashes indicate the phase of water loading.
text_image
Diagram of a laboratory setup with labeled components including gauges, tubing, and a beaker with liquid level indicator.If there is no water (first installation or after boiler maintenance), it is necessary to fill the boiler in advance, so as to prevent overheating of the heating element.
Proceed as follows :
SWITCH
- Open the water supply tap.
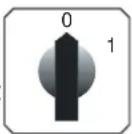
• Using manual fill (2) fill the boiler with water until the optimal level is restored. - Turn the switch to position "1" and wait for the machine to warm up completely.
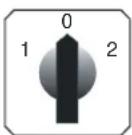
MAIN SWITCH
- Open the water supply tap.
- Turn the main switch to position "1" (electrical power supplied to the pump for automatic boiler filling and machine services) and wait for the boiler to be automatically filled with water;
- Turn the main switch to position "2" (full electrical power supplied, including the heating element in the boiler) and wait for the machine to warm up completely.
6.5.2 Gas heating (if gas system is present)
• Turn the main switch (A) to position 1;
• open the gas valve (B) on the mains;
- hold down the push button (C) and, at the same time, press the on button (D). Once the flame ignites, hold down knob (C) for a few seconds, to allow proper activation of the thermocouple;
- then check through the window (E) that the flame has ignited;
- wait for the operating pressure indicated on the pressure gauge to reach the working value of 1-1.2 bar;
text_image
BADCE6.5.3 Electric + gas heating
(if gas system is present)
• Proceed as indicated in the previous paragraph;
- after checking that the flame has ignited, turn the main switch (A) to position 2. In this way the boiler heating element is powered and operating pressure will be reached more quickly;
- wait for the operating pressure indicated on the pressure gauge to reach the working value of 1-1.2 bar;

during the machine's warm-up phase (roughly 20 minutes), the negative pressure valve will release steam for a few seconds until the valve itself closes.
Do not operate the gas plant when the boiler is empty.
6.5.4 Turning off the machine
Turn off the machine using the switch or the main switch.
6.6 Water replacement
During the installation of the machine, the Qualified Technician must replace the water contained in the hydraulic circuits by following these steps:
- when installation is complete, the appliance has to be started, brought to the nominal working condition and left for 30 minutes in the "ready to operate" condition;
• afterwards, the appliance has to be turned off and emptied of the first water introduced in the whole hydraulic circuit, to eliminate possible initial impurities; - then, the appliance must be once again loaded and brought to the nominal working conditions.
- after reaching the "ready to operate" condition, the following has to be performed:
- for each coffee unit, carry out a continuous delivery, in order to release at least 0.5 litres of the coffee circuit. In the case of several dispensing points matched with the same exchanger/coffee boiler, divide the volume on the base of the number of the dispensing points;
- release the whole volume of hot water inside the boiler (3 litres for 1GR, 6 litres for 2GR, 8 litres for 3GR, 11 litres for 4GR), by performing a continuous delivery from the appropriate nozzle. In the case of several dispensing points, divide the volume on the base of the number of the dispensing points;
- continuously release steam for at least 1 minute for each steam dispensing point.

If the machine remains inactive for a time longer than 1 week, the Qualified Technician must renew 100% of the water contained in the hydraulic circuit, as indicated above.
6.7 Preparing the machine
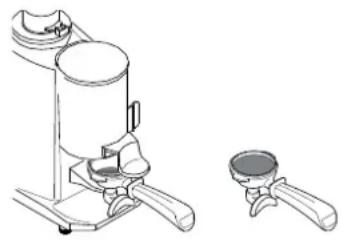
6.7.1 Grinding and dosing coffee
It is important to have a dosing-grinding device next to the machine with which to grind the coffee to use daily.
The grinding and the dosing of the coffee must be done according to that indicated by the manufacturer of the dosing-grinding device. The following points are also to be kept in mind:
• to obtain a good espresso it is recommended not to keep large stocks of coffee grains. Observe the expiry date indicated by the producer;
- never grind large volumes of coffee, it is advisable would be to have the quantity contained in the dosing device and use it if possible by the end of the day.
- never to buy (if possible) already ground coffee, as it expires quickly. If necessary, buy it in small vacuum-sealed packages.
natural_image
Technical line drawing of a mechanical device with two views: top shows a cylindrical component, bottom shows a small bowl (no text or symbols)6.7.2 Preparing the filter holder
- Fill the filter with a dose of ground coffee (circa 6-7 gr.) and press it with the press;
- hook the filter-holder to the unit without closing it too tightly in order to avoid excessive wear of the gasket;
- for the same reason it is recommended to clean the edge of the filter before attaching the filter holder to the dispensing unit;
• follow the procedures specified by the manufacturer of the grinder.
6.7.3 Work surface light On (if present)
To activate the light in the machine compartment, press the switch located under the control front panel.
To switch the light off, select again the same switch.
6.8 Coffee dispensing
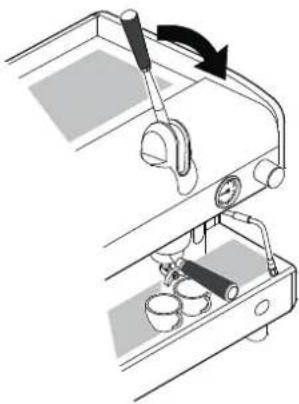
6.8.1 AL version
- Put the coffee cup under the dispensing spout
• pull the lever all the way down; - wait for the short time of the coffee pre-infusion (3÷5 seconds);
- lift the lever until a certain resistance is felt, then release it;
- wait until coffee delivery is complete.
natural_image
Mechanical setup diagram showing a lever mechanism with a curved arrow indicating rotation (no text or symbols present)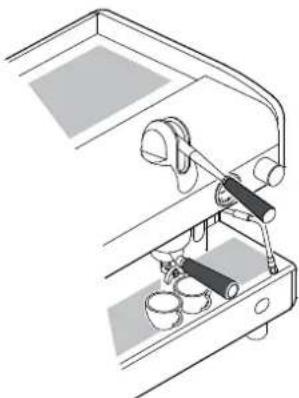
natural_image
Technical line drawing of a mechanical device with lever and base components (no text or symbols)
natural_image
Mechanical setup diagram showing a lever mechanism with a rotating arrow (no text or symbols)
Never perform the above actions without coffee in the filter or without the filter holder attached to the delivery group. The rapid upward movement of the lever may cause damage to the appliance, individuals or property.
Delivery time deepens on grinding and the amount of coffee in the filter holder.
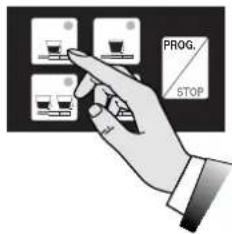
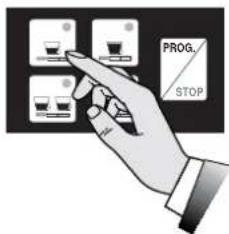
6.8.2 JUNIOR Version
PROGRAMMING
The machine is programmed by default. Should the coffee doses need to be modified, proceed as follows:
- Put the coffee cup under the dispensing spout
- press button for at least 5 seconds, until all leds of the dose buttons are lit;
- press the wanted dose button, for example;
- to confirm the dose, press button; again or button
- repeat this operation for the other dose buttons;
- Programming will be terminated automatically after a few seconds.
natural_image
Line drawing of a person handling large cylindrical objects next to a mug and a table with items (no text or symbols)
text_image
PROG STOP
text_image
PROG. STOP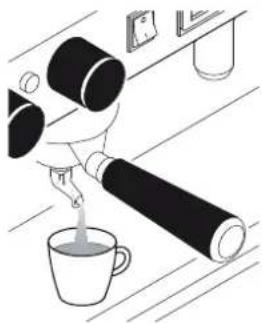
natural_image
Illustration of a hand pouring liquid from a glass bottle into a cup on a table (no text or symbols)
text_image
PROG. STOP iProgramming of every dose must be carried out with ground coffee and not with previously used coffee dregs.
COFFE DISPENSING
- Put the coffee cup under the dispensing spout
natural_image
Line drawing of a person using a large cylindrical device on a desk with a mug and a small object nearby (no text or symbols)- Press the wanted dose button, for example and wait for the coffee to be dispensed (led switching on);
text_image
PROG. STOP• to block the dispensing of coffee in advance, press but-

- in case of anomalies or blocking of the push/button panel, use the manual switch (see AEP version).
natural_image
Illustration of a person pouring liquid from a bottle into a cup on a table (no text or symbols)
Do not remove the filter-holder from the delivery group during coffee dispensing
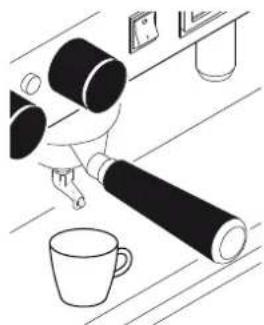
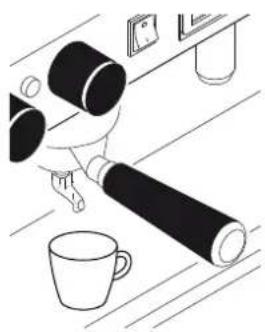
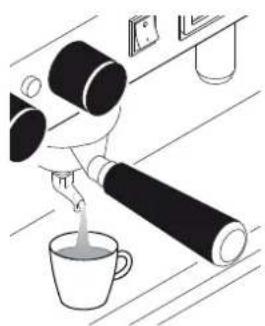
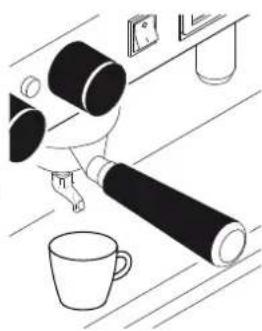
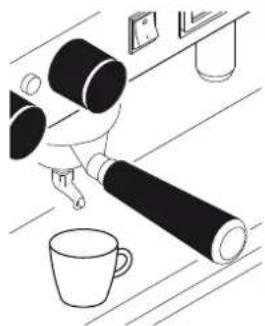
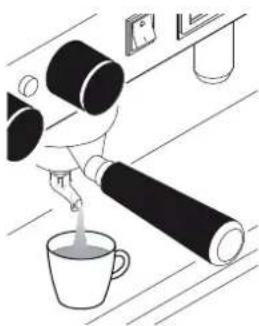
6.8.3 AEP version
- Put the coffee cup under the dispensing spout
- Press the desired delivery switch. The delivery will begin, and it can be stopped using the same switch once the desired amount of coffee is obtained in the cup.
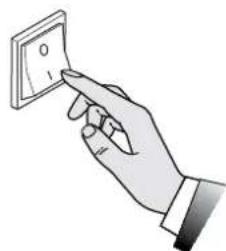
natural_image
Hand holding a wall-mounted electrical socket (no text or symbols visible)6.8.4 SAE version
PROGRAMMING
The machine is programmed by default. Should the coffee doses need to be modified, proceed as follows:
• press the wanted dose button, for example
• Always programme the right hand push-button panel first. In this way all push-button panels get automatically programmed. If necessary, subsequently programme the others;
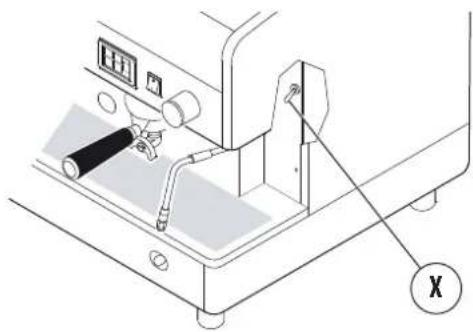
- position to ON programming lever X (see note * on next page) located under the right-hand body front panel;
• position the cup under the dispensing spout;
- press button for at least 5 seconds, until all leds of the dose buttons are lit;
• to confirm the dose, press button PROG.
STOP
- repeat this operation for the other dose buttons;
- on completing the programming, return the programming lever X (see note * on next page) to the OFF position.
natural_image
Line drawing of a coffee maker with a large cylindrical object and a cup on a table (no text or symbols)
text_image
PROG. STOP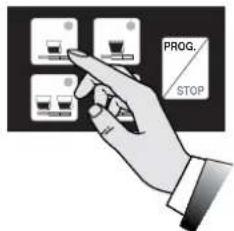
text_image
PROG. STOP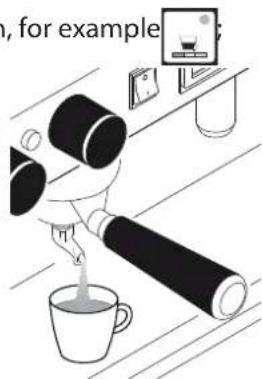
natural_image
Illustration of a person using a large cylindrical device to pour tea from a cup, with a small monitor and stand nearby (no text or symbols)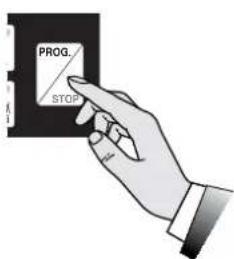
text_image
PROG. STOP
Programming of every dose must be carried out with ground coffee and not with previously used coffee dregs.
NOTE (\*)
• In some models, programming lever X is not fitted.
To enter the programming mode, press button for a minimum of 5 seconds until all leds of the push-button panel are lit. To confirm the dose press either button or the same dose button selected.
- In other models, to access programming it is necessary to use a special key switch.
- To exit programming it is sufficient to wait a few seconds.
natural_image
Technical line drawing of a machine with control panel and mechanical components (no text or symbols)COFFE DISPENSING
- Put the coffee cup under the dispensing spout
- press the desired dose key, for example and wait for the coffee to be dispensed (LEDs coming on);
- to block the dispensing of coffee in advance, press button; again or button PROG; STOP
- in case of anomalies or blocking of the push/button panel, use the manual switch (see AEP version).

natural_image
Line drawing of a coffee machine setup with a cup, tray, and coffee cup (no text or symbols)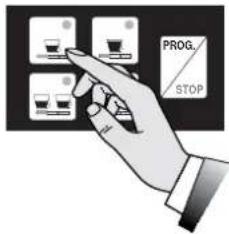
text_image
PROG. STOP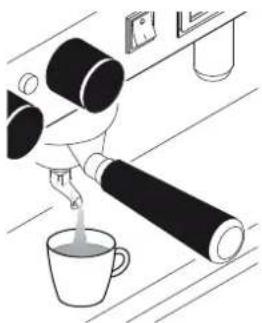
natural_image
Illustration of a hand pouring liquid into a cup on a wooden surface, with no visible text or symbols.Do not remove the filter-holder from the delivery group during coffee dispensing
6.9 Dispensing of steam
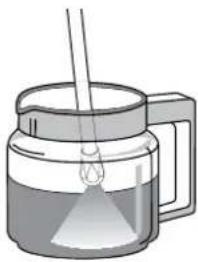
- Immerse the steam nozzle in the liquid to be heated;
natural_image
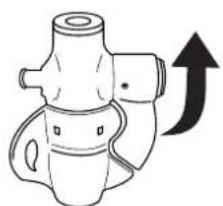
Illustration of a glass pitcher with a handle and a stirring rod (no text or symbols)- rotate the tap knob counter-clockwise;

natural_image
Diagram of a device with a scroll wheel and control panel, showing motion direction (no text or symbols)- the quantity of steam will be proportional to the opening of the tap;
natural_image
Illustration of a coffee maker with a glass lid and a stirring rod (no text or symbols)• to stop the dispensing, rotate the tap knob clockwise;
text_image
e 6
Carefully handle the steam spout through the specific scald-preventing rubber grip (6).
Avoid contact with the steam nozzles, do not direct your hands or other body parts towards the steam nozzle ends.
For optimal foaming, it is recommended to observe the following simple rules:
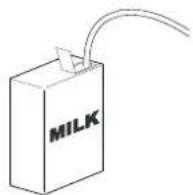
- heat only the amount of milk you intend to use; once heated, it will have to be completely poured from the jug and not heated again:
- foam the milk starting from a temperature of about 4 °C.

To keep the steam nozzle tips in perfect working order, it is advisable to carry out a brief dry delivery after each use. Keep the tips clean at all times using a cloth dampened in lukewarm water. The use of the steam dispensing point (steam nozzle), must always be preceded by condensation draining for at least 2 seconds.
Leave the steam nozzle immersed in the milk only for the heating time required.
Do not open the steam tap with the steam spout immersed in milk while the machine is off.
text_image
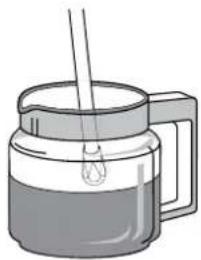
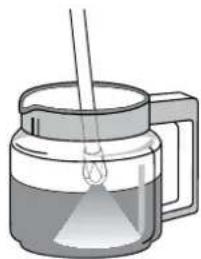
MILK6.10 Manual dispensing of hot water
- Place the jug under the hot water nozzle;

natural_image
Illustration of a coffee mug with liquid and a small container above it (no text or symbols)- rotate the tap knob counterclockwise;
- the delivery of hot water will be proportional to the tap's opening;
natural_image
Illustration of a hand holding three cylindrical objects on a surface, with an arrow indicating rotation (no text or symbols)• to end the dispensing, rotate the tap's knob clockwise;
natural_image
Illustration of a glass jar with a lit funnel emitting vapor, no text or symbols present
Avoid contact with the hot water nozzle, do not direct your hands or other body parts towards the hot water nozzle ends.
6.11 Automatic dispensing hot water
PROGRAMMING
The machine is programmed by default. Should the doses need to be modified, proceed as follows:
- Move the programming lever X (see note *) located under the body RH front panel, to the ON position;
• position the jug under the hot water spout;
- press button for at least 5 seconds, until all leds of the dose buttons are lit;
- Press the hot water dispensing button (Y);
• to confirm the dose press but-
ton PROG. STOP
- on concluding the programming, return the programming lever X (see note*) to the OFF position.
NOTE (\*)
- In some models the programming lever X is not fitted; to enter the programming mode, press
button PROG. STOP for at least 5 seconds, with all push-button panel leds switching on. To confirm the dose, press button PROG. STOP
- In other models, to access programming it is necessary to use a special key switch.
• To exit programming it is sufficient to wait a few seconds.
text_image
Y X

text_image
PROG. STOP
natural_image
Illustration of a coffee maker with a glass chimney emitting vapor (no text or symbols)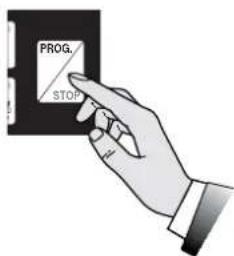
text_image
PROG. STOPDISPENSING HOT WATER
- Place the jug under the hot water nozzle;
- Press the water button (Y) and wait for the dispensing of hot water to take place;
• to halt the dispensing in advance, press again the hot water dispensing button (Y) or press button


Avoid contact with the hot water nozzle, do not direct your hands or other body parts towards the hot water nozzle ends.

natural_image
Illustration of a glass mug with liquid and a small droplet above it (no text or symbols)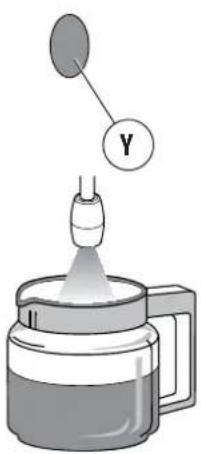
text_image
Diagram showing a dropper emitting liquid into a container with a labeled Y component above it6.12 Dispensing of cappuccino (optional)
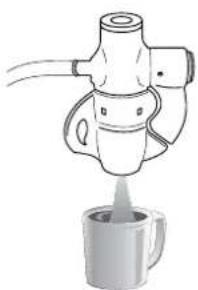
• Put the suction tube in the milk;
- place the jug under the spout of the cappuccino maker;
- open the steam tap, when the desired amount is reached close the steam tap;
• pour the latte into the cups with the coffee.
natural_image
Illustration of a coffee maker pouring liquid into a mug (no text or symbols)
For warm milk without foam, lift the flap of the cappuccino maker upwards.
For better results, we suggest not to dispense directly into the coffee cup, but into a jug or pot, and to then pour the foamed milk on the coffee.
It is recommended to keep the cappuccino maker constantly clean according to the instructions of paragraph "7.5 Malfunctions and solutions." on page 43.
natural_image
Diagram of a mechanical device with an upward arrow indicating direction (no text or symbols present)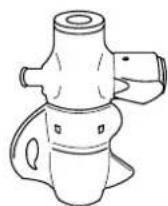
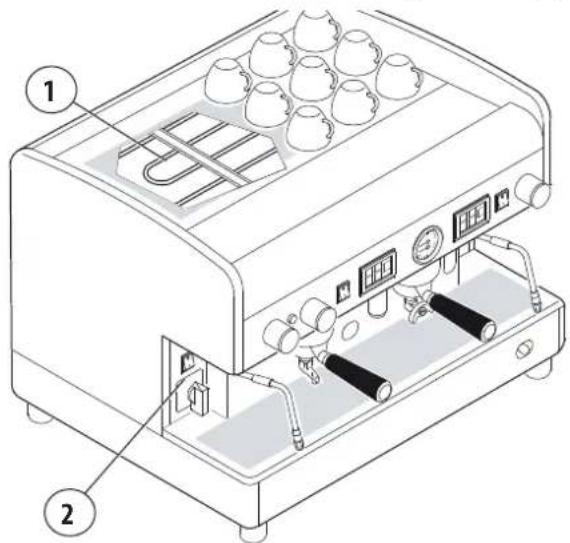
6.13 Cup warmer (optional)
The cup warmer device has the task of warming the cup prior to their use.
- Place the cups on the top shelf (1) of the coffee machine;
• activate the electrical resistor through switch (2).
text_image
Technical diagram of a coffee machine with labeled parts, showing internal components and numbered callouts.
For safety reasons it is advisable not to place cloths or other objects on the cup heater surface to keep the machine from overheating.
6.14 Suggestions on how to obtain a good cup of coffee
Wash daily the filters and filter carrier as instructed in Par. 7.6.3 on page 45. Failure perform this operation will compromise the quality of the coffee dispensed.
To obtain high-quality coffee, it is important that the hardness of the water used does not exceed 6-7°f (French degrees). If the water hardness exceeds these values, it is advisable to use a water filter or softener. Avoid using a water softener if the water hardness is less than 4°f.
If the taste of chlorine in the water is particularly strong, a special filter should be installed.
Do not to store large amounts of coffee beans. If the type of coffee is changed, contact the Manufacturer's Qualified Technician for the water temperature and grind adjustment.
After the machine has not been used for a certain period of time (2-3 hours) carry out a few dry runs. Be sure to carry out regular cleaning and maintenance.
7. MAINTENANCE AND CLEANING
7.1 Safety precautions
The following residual risks are present during the maintenance and cleaning of the machine and cannot be eliminated:

Electrical hazard:
The maintenance and cleaning operations are subject to the behavioural safety rules:
• do not carry out the maintenance with the machine in operation;
• do not soak the machine in water;
• do not spill liquids on the machine or use water jets for cleaning;
• do not to allow the maintenance and cleaning operations to be carried out by children or incapacitated people;
• do not remove the guards and/or parts of the body;
• do not access the inside of the machine;
• do not perform maintenance and cleaning operations other than those described in this manual.
Danger of high temperature:
During the cleaning operations, pay attention to the parts of the machine that can become overheated.
- avoid contact with the dispensing group and water spouts;
• do not expose your hands or other body parts to the coffee, steam, or hot water spouts.

Perform only the maintenance and cleaning operations described in this manual.
All maintenance and cleaning operations not indicated in this document must be performed only and exclusively by the Manufacturer's Qualified Technician.
All maintenance operations must be carried out after disconnecting the power supply, water supply, and after the complete cooling of the machine.
If the problem cannot be solved, turn the machine off and call the Manufacturer's Qualified Technician. Do not attempt any sort of repairs.
The de scaling of the machine must be carried out by the Manufacturer's Qualified Technician to ensure that such operation does not lead to release of hazardous materials for food use.

Any unauthorised tampering with any parts of the machine renders any warranty null and void.
7.2 DPI characteristics
During maintenance and cleaning of the machine, the following PPE are required:

Gloves:
For the protection of all the machine parts in contact with food (filter holders, filters, etc.).
7.3 Periodic Maintenance
Besides carrying out the following Maintenance activities with the specified frequency, ask the Qualified Technician to perform a general check of the machine at least once a year.
| Component Type of intervention Weekly Monthly Quarterly | ||||
| GAUGE Keep the boiler pressure between 0.8 and 1.4 bar. X | ||||
| GAUGE | Periodically check water pressure during coffee delivery: check the pressure indicated on the gauge, which must be in the range 8 to 9 bar. | X | ||
| FILTERS and PORTAFILTERS | Check the condition of the filters. Check for any damage on the edge of the filters and check whether any coffee grounds settle in the coffee cup and replace filters and/or filter holders, as required. | X | ||
| GRINDER-DOSER | Check the ground coffee dose (between 6 and 7 grams per time); check the degree of grinding. The grinders must always have sharp cutting edges. Their deterioration is indicated by the presence of too much powder in the grounds. We recommend calling the Qualified Technician to replace the flat grinders after every 400/500 kg of coffee. For conical grinders, replace every 800/900 kg. | X | ||
| WATER FILTER SOFTENER | Replace the water filter or softener regeneration cartridge with the frequency specified by the manufacturer. | X | ||
| GAS SYSTEM | Check for any gas leaks in the system passing a soapy solution on the pipes. | X | ||
| BOILER | Request the intervention of the Technical Assistance at least every three months to carry out the replacement of the water in the boiler. | X | ||

Problems to the components highlighted in grey require shutting down the machine and the intervention of the Qualified Technician.
7.4 Maintenance after a brief machine inactivity
"Short machine downtime" refers to a period of time exceeding one working week.
When reactivating the machine after this period, the Qualified Technician must change completely the water contained in the hydraulic system, as specified in paragr. "6.6 Water replacement" on page 35.
Furthermore, all operations envisaged for the periodic Maintenance must be carried out, see previous paragraph.
7.5 Malfunctions and solutions.
| Problem Cause Action | ||
| MACHINE LACKING POWER The machine is off. Turn on the machine. | ||
| NO WATER IN BOILER The water supply tap is closed. Open the water supply tap. | ||
| TOO MUCH WATER IN THE BOILER Malfunction of the electrical system or hydraulic system. | Turn off the machine and request the Technical Assistance. | |
| STEAM DOES NOT COME OUT OF THE STEAM SPOUTS | The nozzle sprayer is clogged.The machine is off. | Clean the steam nozzle sprayer.Turn on the machine. |
| STEAM MIXED WITH WATER COMES OUT OF THE STEAM SPOUTS | Malfunction of the electrical system or hydraulic system. | Turn off the machine and request the Technical Assistance. |
| NO DISPENSING | The tap of the water mains is shut.Coffee is ground too fine. | Open the tap of the water mains.Adjust the grinding of the coffee. |
| WATER LEAKS FROM THE MACHINE | The pad does not drain.The drain pipe is broken or detached or the water flow is obstructed. | Check the sewer drain.Check and restore the connection of the drain pipe to the pad. |
| COFFEE IS TOO HOT or TOO COLD Malfunction of the electrical system or hydraulic system. | Turn off the machine and request the Technical Assistance. | |
| COFFEE IS BEING DISPENSED TOO QUICKLY | Coffee is ground too coarsely Adjust the grinding of the coffee. | |
| COFFEE IS BEING DISPENSED TOO SLOWLY | Coffee is ground too finely. Adjust the grinding of the coffee. | |
| WET COFFEE GROUNDS | Dispensing group is dirty.The delivery unit is too coldCoffee is ground too finely.The coffee is too old | Wash the group with the blind filterWait for the group to heat up completelyAdjust the grinding of the coffee.Replace with fresh coffee |
| THE PRESSURE GAUGE INDICATES AN UNACCEPTABLE PRESSURE | Hydraulic system failure | Turn off the machine and request the Technical Assistance. |
| GROUNDS IN CUP | The filter holder is dirty.The filter holes are worn.The coffee is not ground evenly. | Clean the filter holder.Replace the filter.Adjust the grinding suitably. |
| THE CUP IS DIRTY WITH COFFEE SPURTS | Coffee is ground too coarselyThe filter's edge is damaged | Adjust the grinding of the coffee.Replace the filter. |
| THE LEDs OF ALL PUSH-BUTTON PANELSANTIERE LAMPEGGIANO (versione SAE)TIME-OUT LED SWITCH ON (AEP version) | After a few minutes the water automatic charging locks.The device is in time-out.Water from mains missing. | Turn the machine off and then back on.Open the water supply tap. |
| THE COFFEE IS NOT DISPENSED EVENLYTHE COFFEE DOSE IS NOT CORRECTTHE LED OF THE DOSE BUTTON FLASHES | Coffee is ground too finely. Adjust the grinding of the coffee. | |
| COFFEE DISPENSING ONLY VIA THE MANUAL BUTTON | Fault in the electronic system. | Turn off the machine and request the Technical Assistance. |
| SHUTDOWN OF THE ELECTRONIC SYSTEM | Malfunction of the electrical system or hydraulic system. | Turn off the machine and request the Technical Assistance. |
| THE PUMP LEAKS WATER Pump malfunction. | Turn off the machine and request the Technical Assistance. | |
| THE MOTOR STOPS SUDDENLY OR THE THERMAL PROTECTOR INTERVENES DUE TO OVERLOAD | Pump malfunction. | Turn off the machine and request the Technical Assistance. |
| THE PUMP FUNCTIONS BELOW NOMINAL CAPACITY | Pump malfunction. | Turn off the machine and request the Technical Assistance. |
| THE PUMP IS NOISY Pump malfunction. | Turn off the machine and request the Technical Assistance. | |

Problems highlighted in grey require that the machine be switched off and the Manufacturer's Qualified Technician to be called.
7.6 Cleaning operations
7.6.1 General instructions
For perfect hygiene and efficiency of the unit, a few simple cleaning tasks are required. The indications given here are applicable for normal use of the coffee machine. If the machine is used continuously, then cleaning should be performed more frequently.

Do not use alkaline detergents, solvents, alcohol or aggressive substances. The used products/detergents have to be suitable for this purpose and must not corrode the materials of the hydraulic circuits.
Do not use abrasive detergents which may scratch the surface of the body.
Always use perfectly clean and hygienic cloths for cleaning. For washing the filters, filter holders and all machine components, use detergents supplied by the Manufacturer or specific products for cleaning professional coffee machines.
| Cleaning | Daily | Weekly |
| Cappuccino maker:Clean at least once a day or more often in the case of a continued use of the cappuccino maker, following the instructions of par. 7.6.2 on page 45. | X | |
| Body and Grilles:Clean the panels of the body with a cloth dampened in lukewarm water.Remove the drip tray and cup holder grille and wash with hot water. | X | |
| Filter and filter holder:Wash the filters and filter holders daily and weekly, as indicated in par. 7.6.3 on page 45. | X | X |
| Steam spout:Keep the spout clean at all times using a cloth dampened in lukewarm water.Check and clean the ends of the spout, clearing the steam outlet holes with a small needle.Weekly wash as described in par. 7.6.6 on page 46. | X | X |
| Dispensing group:Wash the dispensing unit following the instructions of par. 7.6.4 on page 45.Carry out an internal cleaning on a weekly basis, as speci-fied in par. 7.6.5 on page 45 . | X | X |
| Grinder-dispenser and HopperClean the hopper and the dispenser inside and out with a cloth dampened with warm water.When finished, dry all parts thoroughly. | X |
7.6.2 Cappuccino-maker wash
Use special care in cleaning the cappuccino maker, following the procedures indicated below:
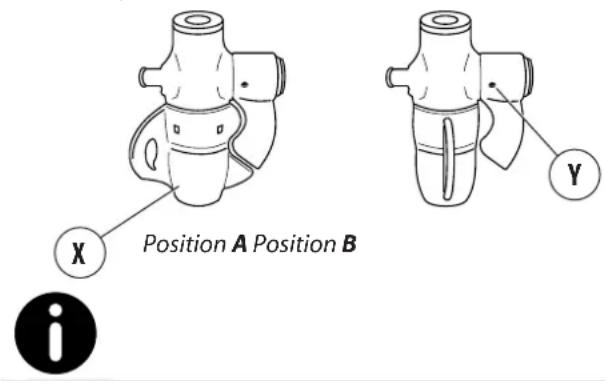
• perform a first washing by immersing the suction tube in water and run a delivery for a few seconds;
- turn the rotating body (X) 90° to position B (closure of milk outlet duct);
- holding the milk suction tube in the air, dispense steam (cappuccino maker dry run);
- wait about 20 seconds to allow for internal cleaning and sterilisation of the cappuccino maker;
- close the steam and put the rotating body back in position A;
- if the air intake hole (Y) is blocked, clear it gently with a pin.
text_image
X Position A Position B Y iClean the cappuccino maker after each continuous use and at least once a day.
7.6.3 Filter and filter-holder cleaning
Daily:
- Soak the filter and filter-holder in hot water overnight so that the fatty coffee deposits can dissolve;
- rinse with lukewarm water.
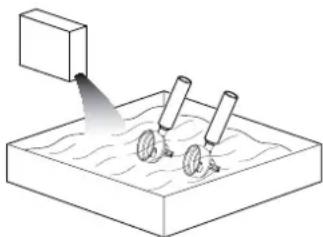
natural_image
Diagram of a mechanical device emitting a beam to a surface with two wheels (no text or symbols)Weekly:
- Use a screwdriver to detach the filter from the filter holder;
- Soak the filter and filter holder in warm water and cleaning agent for 10 minutes.
• rinse with lukewarm water.

Caution: Only immerse the filter holder cup, avoid soaking the handle in water.
The detergent must be diluted in cold water in the doses indicated on the package (see manufacturer).
7.6.4 Washing of dispensing unit (excluding AL version)
Wash the dispensing units daily, as specified here-under:
- From the filter carrier, remove the filter and fit a blind filter (see spare parts);
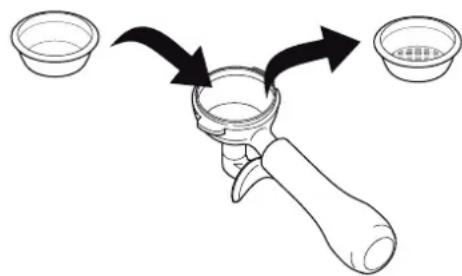
text_image
Diagram showing a hand holding a small container with two bowls, one labeled '水煮器' (water煮器) and the other '水煮器' (water煮器).- Pour the specific detergent (see spares) in the filter carrier with blind filter and hook it to the dispensing unit;
• command some dispensing cycles until clean water will come of the drain;
- remove the filter carrier from the unit and carry out at least one dispensing cycle so as to eliminate the detergent residue.
- Remove the blind filter from the filter carrier, replacing it with the original one.

Do not wash the unit in case of the AL version.

natural_image
Line drawing of a hand holding a square object with a pointed tip, no text or symbols present7.6.5 Perforated disk and containment ring cleaning
Weekly perform the cleaning of the Perforated disk
and containment ring in the following way:
- Loosen the screw (1);
- remove the perforated disk (2) and the containment ring (3);
• carefully wash the two components with hot water; - replace perforated disk and containment ring to its original position by locking everything with the screw.
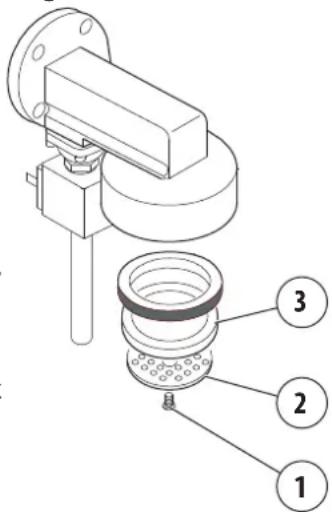
text_image
Technical diagram of a mechanical assembly with numbered parts labeled 1, 2, and 37.6.6 Cleaning the steam spout
Clean the steam spout once a week as follows:
- Immerse the spout in a jug with water and a specific detergent according to manufacturer's instructions;
• heat the solution with the steam of the spout;
- let the spout cool off keeping it immersed in the solution for at least 5 minutes to allow the detergent to rise inside the spout by cooling effect;
- repeat the operation 2 or 3 times until milk is delivered.
natural_image
Illustration of a glass jar with a straw and liquid inside, no text or symbols present8. SPARE PARTS
Machine components and/or parts must be replaced only by the Manufacturer's Qualified Technicians.

The User must not replace the components and/or parts of the machine.
9. DECOMMISSIONING
The machine must be decommissioned by the Manufacturer's Qualified Technician, because the equipment must be disconnected from the electricity and water mains, and all the internal circuits must be emptied of the water.
The commissioning of the machine after this period must be performed only by the Manufacturer's Qualified Technician.

The User must not perform decommissioning after long time and/or commissioning of the machine.
10. DISMANTLING
The dismantling of the machine must be performed by the Manufacturer's. Qualified Technician.
11. DISPOSAL
11.1 Information for disposal
Only for the European Union and the European Economic Area.
This symbol indicates that the product cannot be disposed of with household waste, according to the WEEE Directive (2012/19/EC), the Battery Directive (2006/66/EC) and/or the national laws implementing those Directives.
The product should be handed over to a designated collection point, for example the dealer when purchasing a new similar product, or an authorized collection site for recycling waste electrical and electronic equipment (WEEE), as well as batteries and accumulators. Improper handling of this type of waste can have negative consequences on the environment and human health, due to potentially hazardous substances that are generally associated with this kind of waste.
Your cooperation in the correct disposal of this product will contribute to the effective usage of natural resources and avoid incurring the administrative sanctions provided by law. For more information about recycling this product, contact your local authorities, the body responsible for waste collection, an authorized dealer, or your household waste disposal service.

To dispose of the machine, it is advisable to refer to the Manufacturer's Qualified Technician.
11.2 Environmental information
Inside the machine there is a button lithium battery required for the storage of the data that is placed in the electronic card.
Dispose of the battery in accordance with current local regulations.
12. GLOSSARY
This chapter lists uncommon terms or terms with different meaning from the ordinary.
Below is an explanation of the abbreviations used and the meaning of the pictograms to indicate the operator qualification and the machine status; their use allows to quickly and uniquely provide the necessary information for proper use of the machine in safe conditions.
Danger
A potential source of injury or damage to health.
Dangerous area
Any area in the vicinity of the machine where the presence of a person constitutes a risk to the safety and health of that person.
User
The person in charge of operating, servicing and cleaning the machine indicated in this manual.
Risk
Combination of the probability and severity of an injury or damage to health that can arise in a hazardous situation.
Guard
Machine component used specifically to provide protection by means of a physical barrier.
Personal Protection Equipment (PPE)
Clothing worn or equipment held by the person for the protection of health or safety.
Intended use
The use of the machine in accordance with the information provided in the instructions for use.
Manufacturer's Qualified Technician
A specialist, specially trained and qualified to make the connection, installation and assembly of the machine; use special equipment (hoists, forklifts, etc.); perform routine or unscheduled maintenance which is particularly complicated or potentially dangerous if performed by the user.
User qualification
Minimum level of skills an operator must have to carry out the operation described.
Machine status
The machine status includes the mode of operation and the condition of the safety devices on the machine.
Residual risk
Risks that remain despite adopting the protective measures integrated into the machine design and despite the guards and complementary protective measures adopted.
Safety component:
• required to perform a safety function;
- whose failure and/or malfunction endangers the safety of persons.
13. ALPHABETICAL INDEX OF TOPICS
A
Absorbed power 32
AL group 36
Automatic hot water 39
B
Blind filter 45
C
Cappuccino maker 40
Cappuccino maker cleaning 45
Cappuccino maker wash 45
CE - mark
CE nameplate 32
Coffee - dispensing 36
Coffee grinding 35
Commissioning 33
Cup heater 40
Customer service 30
D
Decommissioning the machine 46
Dispensing group wash 45
E
Electromagnetic emissions 34
Emissions 33
Environmental information 46
F
Filter and filter-holder wash 45
G
Gas-heating 34
Glossary 47
Glossary and pictograms 29
Guarantee 29
|
Identification of the machine 30
Installation 32
Instructions Manual - Update 28
Intended use 30
Internal battery 46
M
Machine cleaning 44
Machine dismantling 46
Machine disposal 46
Machine identification 32
Machine operation 33
Machine storage 32
Machine turn-off 34
Maintenance and cleaning 41
Make/Model of the machine 32
Malfunctions and solutions 43
Manual hot water 39
P
Perforated disk 45
Perforated disk containment ring 45
Periodic maintenance 42
Pictograms 29
PPE - Protective equipment 41
S32
Safety functions 33
Safety precautions 33
Solutions 43
Sound emissions 33
Spare parts 46
Steam 38
T
Technical data 32
Tips 40
Turning the machine on 34
U
User training 33
V
Version AEP 31
Version AL 31
Version JUNIOR 36
Version SAE 31
Vibration 33
Voltage 32
W
Washing of steam spout 46
Table des matières
1. INTRODUCTION 50
text_image
Technical diagram of a coffee machine with numbered parts for identification2.4 Illustration de la machine
text_image
Technical diagram of a coffee machine with numbered components for identificationnatural_image
Line drawing of a laboratory setup with control panel and instrument (no text or labels)text_image
Diagram of a laboratory setup with labeled components including gauges, tubing, and a beaker with liquid level indicator.natural_image
Technical line drawing of a mechanical device with two views: top shows a cylindrical component, bottom shows a small bowl (no text or symbols)natural_image
Line drawing of a person using a large cylindrical device on a desk with a mug and a small framed picture nearby (no text or symbols)text_image
PROG. STOPnatural_image
Illustration of a coffee maker pouring liquid into a cup on a counter (no text or symbols)
natural_image
Illustration of a hand holding a wall-mounted electrical socket (no text or symbols)6.8.4 Version SAE
PROGRAMMATION
natural_image
Line drawing of a coffee maker with a large cylindrical container and a cup on a table (no text or symbols)
text_image
PROG. STOP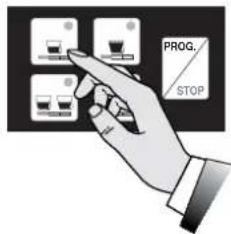
text_image
PROG. STOP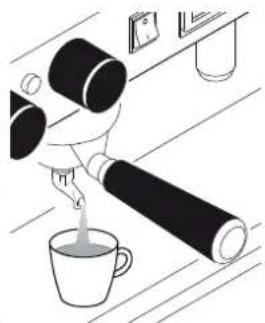
natural_image
Line drawing of a hand pouring liquid into a cup on a counter (no text or symbols)
text_image
PROG. STOPnatural_image
Technical line drawing of a sewing machine with no visible text or symbolsDISTRIBUTION CAFÉ
natural_image
Illustration of a hand holding a large cylindrical object next to a cup and a wall-mounted device (no text or symbols)
text_image
PROG. STOP
natural_image
Illustration of a person pouring liquid from a bottle into a cup (no text or symbols)natural_image
Illustration of a glass mug with a handle and a spoon, containing liquid (no text or symbols)natural_image
Diagram of a device with a scroll wheel and control panel, showing motion direction (no text or symbols)natural_image
Illustration of a glass coffee maker with a straw and a stirring rod (no text or symbols)text_image
Diagram showing a device with labeled parts and directional arrow, likely illustrating a process or operation.
natural_image
Illustration of a steamer with liquid inside, no text or symbols presentnatural_image
Illustration of a hand operating a device with two cylindrical components and an arrow indicating rotation (no text or symbols)natural_image
Illustration of a glass jar with liquid and a dropper emitting vapor (no text or symbols)
text_image
PROG. STOP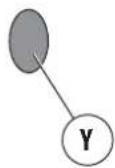

natural_image
Illustration of a coffee maker with a glass chimney emitting vapor (no text or symbols)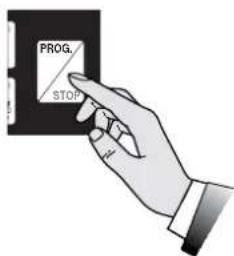
text_image
PROG. STOPDISTRIBUTION D'EAU CHAUDE
natural_image
Illustration of a glass mug with liquid and a small droplet above it (no text or symbols)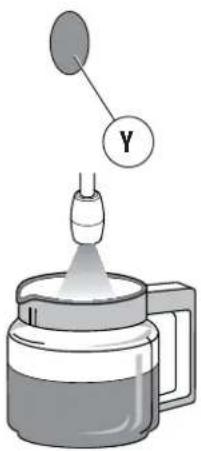
text_image
Diagram of a laboratory setup with a labeled component Y connected to a glass jar, likely illustrating a chemical reaction or filtration process.6.12 Distribution de cappuccino (en option)
natural_image
Illustration of a coffee maker pouring liquid into a mug (no text or symbols)natural_image
Diagram of a mechanical device with an upward arrow indicating direction (no text or symbols present)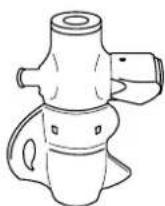
text_image
Technical diagram of a coffee machine with labeled parts, showing internal components and numbered callouts.
text_image
X Position A Position B Y inatural_image
Diagram showing a container pouring liquid into a container with two wheels, no text or symbols presenttext_image
Diagram showing a hand holding a small container with two bowls, one labeled '水煮器' (water煮器) and the other '水煮器' (water煮器).natural_image
Line drawing of a hand holding a square object with a pointed tip, no text or symbols presenttext_image
Technical diagram of a mechanical assembly with numbered parts labeled 1, 2, and 3natural_image
Illustration of a glass jar with a stirring rod and liquid, no text or symbols present8. PIÈCES DE RECHANGE
Identification machine
text_image
Technical diagram of a coffee machine with numbered parts for identificationtext_image
Technical diagram of a portable coffee machine with numbered components for identificationnatural_image
Line drawing of a portable coffee machine with control panel and buttons (no text or symbols)text_image
Diagram of a laboratory setup with labeled components including gauges, tubing, and a beaker with liquid level indicator.natural_image
Technical line drawing of a portable coffee machine and a small bowl (no text or symbols)natural_image
Mechanical setup diagram showing a lever mechanism with a curved arrow indicating rotation (no text or symbols present)
natural_image
Line drawing of a mechanical device with lever and base components (no text or symbols)
natural_image
Mechanical setup diagram showing a lever mechanism with a rotating arrow and base components (no text or symbols)
natural_image
Line drawing of a person handling large cylindrical objects next to a mug and a table with items (no text or symbols)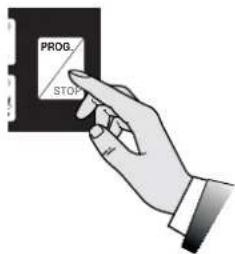
text_image
PROG STOP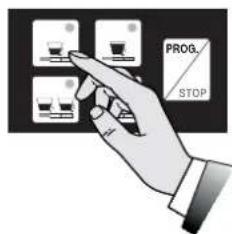
text_image
PROG. STOP
natural_image
Illustration of a hand pouring liquid into a cup on a table with a glass stand nearby (no text or symbols)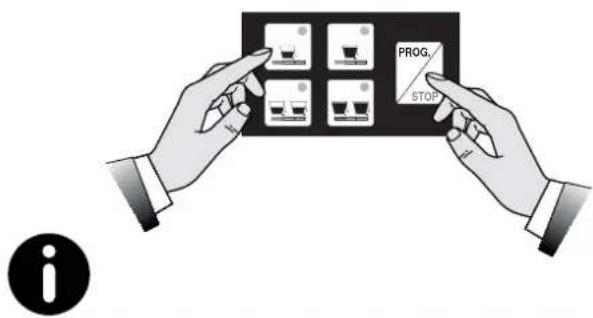
text_image
PROG. STOP inatural_image
Line drawing of a person using a large cylindrical device on a desk with a mug and a small object nearby (no text or symbols)text_image
PROG. STOPnatural_image
Illustration of a coffee maker pouring liquid into a cup on a counter (no text or symbols)natural_image
Hand holding a wall-mounted electrical socket (no text or symbols visible)6.8.4 Modell SAE
PROGRAMMIERUNG
natural_image
Line drawing of a coffee maker with a large cylindrical object and a cup on a table (no text or symbols)
text_image
PROG. STOP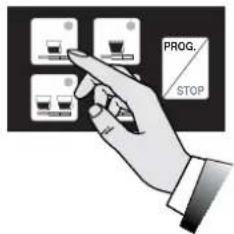
text_image
PROG. STOP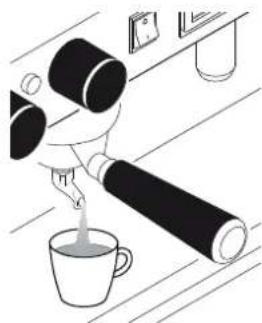
natural_image
Line drawing of a hand pouring liquid into a cup on a wooden surface (no text or symbols)
text_image
PROG. STOPnatural_image
Technical line drawing of a machine tool with labeled component X (no text or symbols beyond basic diagram)KAFFEEAUSGABE
natural_image
Line drawing of a coffee maker with a large cylindrical object and a cup on a wooden table (no text or symbols)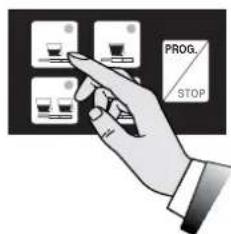
text_image
PROG. STOP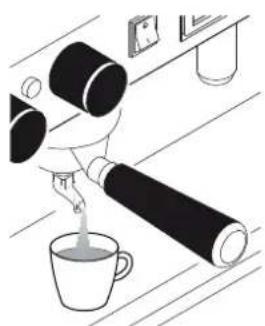
natural_image
Illustration of a hand pouring liquid from a bottle into a cup, with no visible text or symbols.natural_image
Illustration of a glass pitcher with a handle and a spoon, no text or symbols presentnatural_image
Diagram of a device with a scroll wheel and control panel, showing motion direction (no text or symbols)natural_image
Illustration of a coffee maker with a glass lid and a stirring rod (no text or symbols)text_image
Diagram showing a device with labeled components and directional arrows, including a numbered circle marker '6'
natural_image
Illustration of a glass mug with liquid and a small object above it (no text or symbols)natural_image
Illustration of a hand pressing down on a mechanical component with arrows indicating motion (no text or symbols)natural_image
Illustration of a glass mug with a dropper emitting liquid (no text or symbols)
text_image
PROG. STOP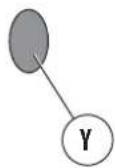

natural_image
Illustration of a coffee maker with a glass chimney emitting vapor (no text or symbols)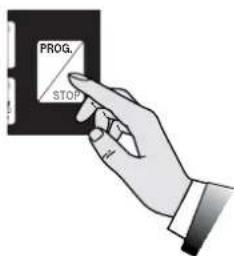
text_image
PROG. STOPHEISSWASSERAUSGABE
natural_image
Illustration of a glass mug with liquid and a small droplet above it (no text or symbols)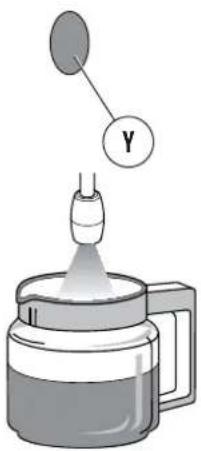
text_image
Diagram of a laboratory setup with a labeled component Y connected to a beaker, showing liquid and light dispersion.natural_image
Illustration of a coffee maker with a cup, no text or symbols presentnatural_image
Diagram of a mechanical device with an upward arrow indicating motion or force (no text or symbols present)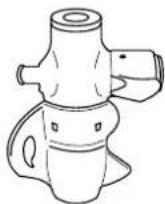
text_image
Technical diagram of a coffee machine with labeled parts, showing internal components and numbered callouts.
text_image
X Position A Position B Ynatural_image
Simple line drawing of a water surface with two water wheels and a rectangular object above it (no text or symbols)text_image
Diagram showing a hand holding a small container with two bowls, one labeled '水煮器' (water煮器) and the other '水煮器' (water煮器).text_image
Technical diagram of a mechanical assembly with numbered components labeled 1, 2, and 3natural_image
Illustration of a glass jar with a straw and liquid, no text or symbols present8. ERSATZTEILE
text_image
Technical diagram of a coffee machine with numbered parts for identificationtext_image
Technical diagram of a portable coffee machine with numbered components for identificationnatural_image
Line drawing of a portable coffee machine with control panel and buttons (no text or symbols)text_image
Diagram of a laboratory setup with labeled components including gauges, tubing, and a beaker with liquid level indicator.natural_image
Line drawing of a portable coffee machine and a small bowl (no text or symbols)natural_image
Mechanical setup diagram showing a lever mechanism with a curved arrow indicating rotation (no text or symbols present)
natural_image
Line drawing of a mechanical device with lever and base components (no text or symbols)
natural_image
Mechanical setup diagram showing a lever mechanism with rotating arrow (no text or symbols)
natural_image
Line drawing of a coffee machine with a cup and coffee cup on a wooden table (no text or symbols)text_image
PROG STOPtext_image
PROG. STOPnatural_image
Illustration of a person pouring liquid from a bottle into a cup on a table (no text or symbols)text_image
PROG. STOP
natural_image
Line drawing of a person using a large cylindrical device on a desk with a mug and a small framed picture nearby (no text or symbols)text_image
PROG. STOPnatural_image
Illustration of a hand pouring liquid into a cup on a counter, with no visible text or symbols.
natural_image
Illustration of a hand inserting a wall-mounted socket into a socket (no text or symbols)6.8.4 Versión SAE
PROGRAMACIÓN
natural_image
Line drawing of a coffee cup and coffee maker on a table with a coffee cup and coffee maker (no text or symbols)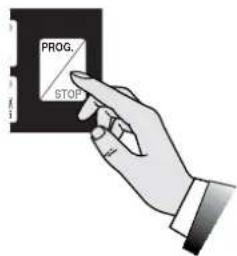
text_image
PROG. STOP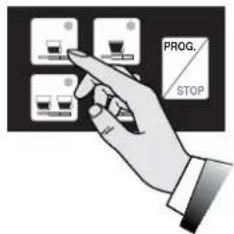
text_image
PROG. STOP
natural_image
Illustration of a hand pouring liquid into a cup on a wooden surface (no text or symbols)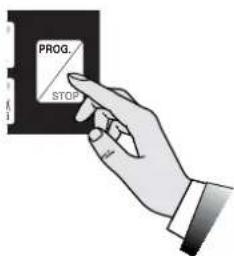
text_image
PROG. STOPnatural_image
Technical line drawing of a sewing machine with no visible text or symbolsSUMINISTRO DE CAFÉ
natural_image
Line drawing of a coffee machine with a cup and coffee cup on a wooden table (no text or symbols)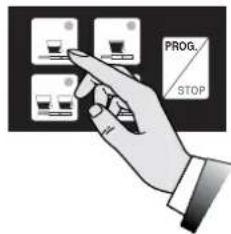
text_image
PROG. STOP
natural_image
Illustration of a hand pouring liquid into a cup on a wooden surface (no text or symbols)natural_image
Illustration of a glass pitcher with a handle and a stirring rod (no text or symbols)natural_image
Diagram of a device control panel with a scroll wheel and directional arrow (no text or symbols)natural_image
Illustration of a glass jar with a side arm holding a test tube, containing liquid (no text or symbols)text_image
Diagram showing a device control panel with labeled components and directional arrows indicating movement or operation.
natural_image
Illustration of a coffee maker with a lid and handle, emitting a droplet above it (no text or symbols)
natural_image
Illustration of a hand pressing down on a mechanical component with arrows indicating motion (no text or symbols)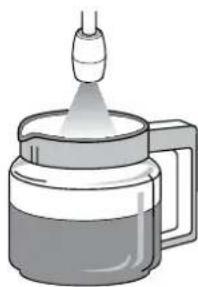
natural_image
Illustration of a spray bottle emitting liquid from a glass container (no text or symbols)natural_image
Illustration of a glass mug with liquid and a small container above it (no text or symbols)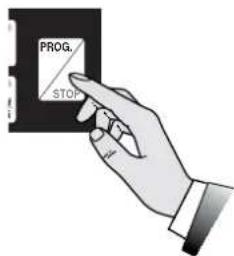
text_image
PROG. STOP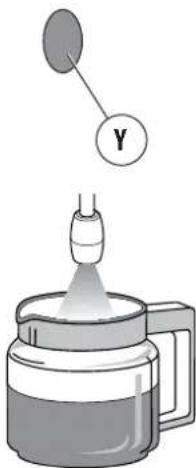
text_image
Y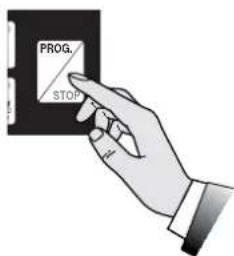
text_image
PROG. STOPnatural_image
Illustration of a glass pitcher with liquid and a small droplet above it (no text or symbols)
text_image
Diagram of a laboratory setup with a labeled component Y connected to a glass jar, likely illustrating a chemical reaction or filtration process.natural_image
Illustration of a medical device dispensing liquid into a cup (no text or symbols)natural_image
Diagram of a mechanical device with an upward arrow indicating motion or force (no text or symbols present)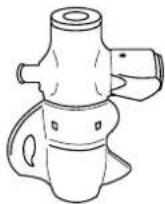
text_image
Technical diagram of a coffee machine with labeled parts, showing internal components and numbered callouts.
natural_image
Simple line drawing of a water surface with two circular objects and a rectangular object above it (no text or symbols)text_image
Diagram showing a hand holding a small container with two bowls, one labeled '水煮器' (water煮器) and the other '水煮器' (water煮器).natural_image
Line drawing of a hand holding a square object with a pointed tip, no text or symbols presenttext_image
Technical diagram of a mechanical assembly with numbered parts labeled 1, 2, and 3natural_image
Illustration of a glass jar with a straw and a dropping funnel inside, no text or symbols present[Non-Text]
8
[Non-Text]
[Non-Text]
[Non-Text]
[Non-Text]
[Non-Text]
[Non-Text]
[Non-Text]
[Non-Text]
[Non-Text]
[Non-Text]
[Non-Text]
[Non-Text]
[Non-Text]
[Non-Text]
[Non-Text]
[Non-Text]
6
[Non-Text]
[Non-Text]
[Non-Text]
[Non-Text]
[Non-Text]
[Non-Text]
[Non-Text]
9
[Non-Text]
[Non-Text]
[Non-Text]
[Non-Text]
[Non-Text]
1. INTRODUÇÃO
text_image
Technical diagram of a coffee machine with numbered parts for identificationtext_image
Technical diagram of a portable coffee machine with numbered components for identificationnatural_image
Technical line drawing of a portable electronic device with control panel and buttons (no text or symbols)text_image
Diagram of a laboratory setup with labeled components including gauges, tubing, and a beaker with liquid level indicator.natural_image
Line drawing of a coffee maker and a small cup (no text or symbols)natural_image
Mechanical setup diagram showing a lever mechanism with a curved arrow indicating rotation (no text or symbols present)
natural_image
Technical line drawing of a mechanical device with lever and base components (no text or symbols)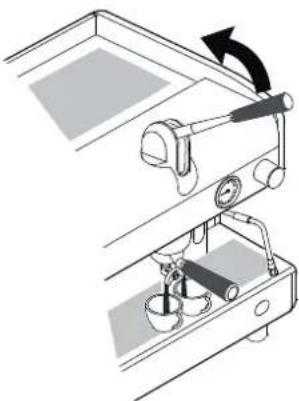
natural_image
Mechanical setup diagram showing a lever mechanism with rotating arrow (no text or symbols)
natural_image
Line drawing of a coffee machine with a cup and coffee cup on a wooden table (no text or symbols)text_image
PROG STOPtext_image
PROG. STOPnatural_image
Illustration of a hand pouring liquid into a cup on a counter (no text or symbols)text_image
PROG. STOP
natural_image
Line drawing of a person using a large cylindrical device on a desk with a mug and a small object nearby (no text or symbols)text_image
PROG. STOPnatural_image
Illustration of a hand pouring liquid into a cup on a counter, with no visible text or symbols.
natural_image
Hand holding a wall-mounted electrical socket (no text or symbols visible)6.8.4 Versão SAE
PROGRAMAÇÃO
natural_image
Line drawing of a coffee maker with a large cylindrical object and a cup on a table (no text or symbols)
text_image
PROG. STOP
text_image
PROG. STOP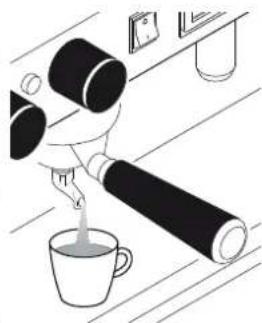
natural_image
Line drawing of a hand pouring liquid into a cup on a wooden surface (no text or symbols)
text_image
PROG. STOPtext_image
Technical diagram of a sewing machine with labeled component X and control panelnatural_image
Line drawing of a coffee machine with a cup and coffee cup on a wooden table (no text or symbols)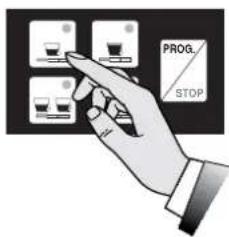
text_image
PROG. STOP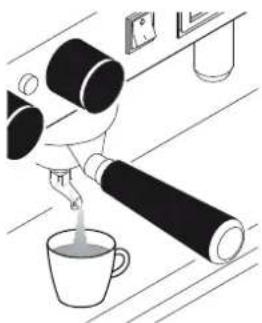
natural_image
Illustration of a hand pouring liquid into a cup on a kitchen counter (no text or symbols)natural_image
Illustration of a glass pitcher with a handle and a spoon, no text or symbols presentnatural_image
Diagram of a device with a scroll wheel and control panel, showing motion direction (no text or symbols)- a saída do vapor será proporcional à abertura da torneira;

natural_image
Illustration of a glass coffee maker with a straw and a stirring rod (no text or symbols)natural_image
Illustration of a coffee maker with liquid and a small container above it (no text or symbols)natural_image
Illustration of a hand pressing down on a mechanical component with arrows indicating motion (no text or symbols)natural_image
Illustration of a hand pouring liquid into a container (no text or symbols)
text_image
PROG. STOP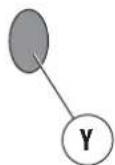
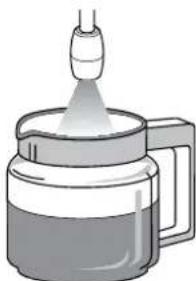
natural_image
Illustration of a glass jar with a dropper emitting vapor, no text or symbols present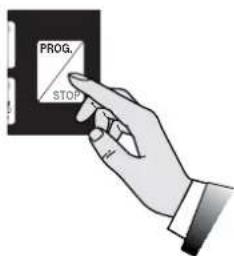
text_image
PROG. STOPnatural_image
Illustration of a glass mug with liquid and a small droplet above it (no text or symbols)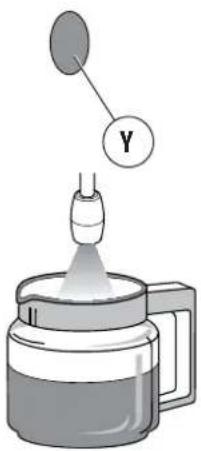
text_image
Diagram showing a dropper emitting liquid into a container with a labeled Y component above itnatural_image
Illustration of a medical device dispensing liquid into a cup (no text or symbols)natural_image
Diagram of a mechanical component with an upward arrow indicating direction (no text or symbols)
6.13 Aquecedor de xícaras (opcional)
text_image
Technical diagram of a coffee machine with labeled parts, showing internal components and numbered callouts.
natural_image
Diagram showing a container pouring liquid onto a surface with two circular objects, no text or symbols presenttext_image
Diagram showing a hand holding a small container with two bowls, one labeled '水煮器' (water煮器) and the other '水煮器' (water煮器).natural_image
Illustration of a hand holding a square object with a pointed tip, emitting a focused beam (no text or symbols)text_image
Technical diagram of a mechanical assembly with numbered parts labeled 1, 2, and 37.6.6 Limpeza do bico de vapor
natural_image
Illustration of a glass jar with a side arm holding a test tube, containing liquid (no text or symbols)text_image
Technical diagram of a coffee machine with numbered parts for identificationtext_image
Technical diagram of a coffee machine with numbered components for identificationnatural_image
Line drawing of a laboratory setup with control panel and instrument (no text or symbols)text_image
Diagram of a laboratory setup with labeled components including gauges, tubing, and a beaker with liquid level indicator.natural_image
Line drawing of a coffee maker with two separate views: one showing its side view and the other showing its front view (no text or symbols present)natural_image
Diagram of a coffee machine with lever mechanism and cup base (no text or symbols)
natural_image
Technical line drawing of a mechanical device with lever and base components (no text or symbols)
natural_image
Mechanical setup diagram showing a lever mechanism with a rotating arrow and base components (no text or symbols)
text_image
PROG. STOP
natural_image
Line drawing of a person handling large cylindrical objects next to a mug and a table with items (no text or symbols)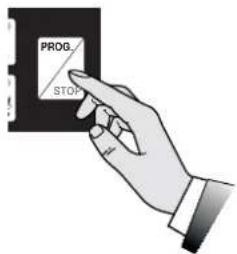
text_image
PROG STOP
text_image
PROG. STOP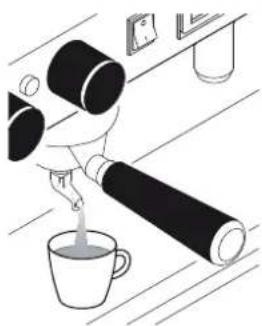
natural_image
Illustration of a hand pouring liquid into a cup on a kitchen counter (no text or symbols)ПРИГОТОВЛЕНИЕ КОФЕ
natural_image
Line drawing of a person using a large cylindrical device on a desk with a mug and a small object nearby (no text or symbols)text_image
PROG. STOPnatural_image
Illustration of a hand pouring liquid into a cup on a table with a mirror and wall (no text or symbols)natural_image
Illustration of a hand holding an electrical outlet with a screw, no text or symbols present6.8.4 Модель SAE
НАСТРОЙКА
natural_image
Line drawing of a coffee maker with a large cylindrical object and a cup on a table (no text or symbols)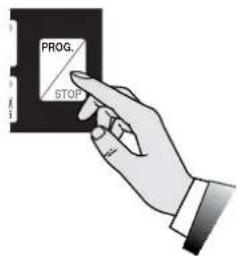
text_image
PROG. STOP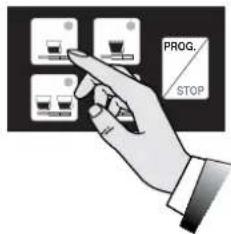
text_image
PROG. STOP
natural_image
Illustration of a hand pouring liquid into a cup on a wooden surface (no text or symbols)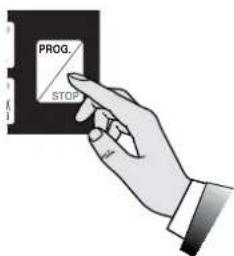
text_image
PROG. STOPnatural_image
Technical line drawing of a machine tool with labeled component X (no text or symbols beyond basic diagram)ПРИГОТОВЛЕНИЕ КОФЕ
natural_image
Line drawing of a coffee machine with a cup and coffee cup beside a table (no text or symbols)text_image
PROG. STOPnatural_image
Illustration of a person pouring liquid from a bottle into a cup (no text or symbols)
natural_image
Illustration of a glass mug with a handle and a spoon, containing liquid (no text or symbols)natural_image
Diagram of a device with a screen and cylindrical component, no visible text or symbolsnatural_image
Illustration of a coffee maker with a glass lid and a stirring rod (no text or symbols)text_image
Diagram showing a device with a screen and a cylindrical component, labeled with number 6
natural_image
Illustration of a glass mug with liquid and a small container above it (no text or symbols)natural_image
Diagram of a hand operating a device with two cylindrical components, showing directional arrows (no text or symbols)natural_image
Illustration of a spray bottle emitting liquid from a glass container (no text or symbols)
natural_image
Illustration of a glass mug with liquid and a small container above it (no text or symbols)
text_image
PROG. STOP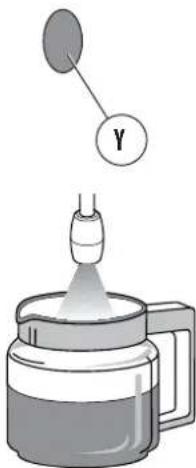
text_image
Diagram showing a droplet being poured into a container with a labeled Y component above it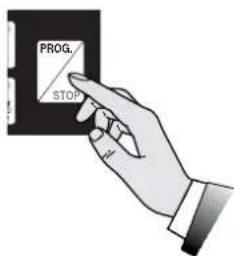
text_image
PROG. STOPПОДАЧА ГОРЯЧЕЙ ВОДЫ
natural_image
Diagram of a mechanical component with an upward arrow indicating direction (no text or symbols present)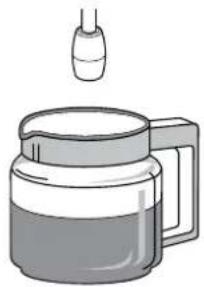
natural_image
Illustration of a glass mug with liquid and a small dropper above it (no text or symbols)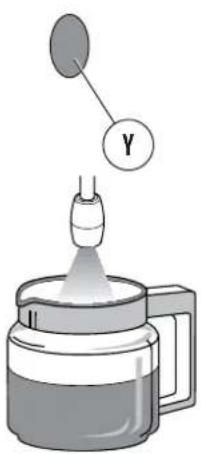
text_image
Diagram showing a dropper emitting liquid into a container with a labeled Y component above it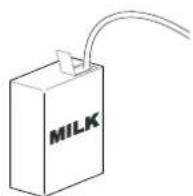
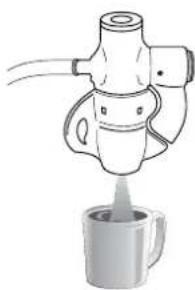
natural_image
Line drawing of a coffee maker pouring liquid into a mug (no text or symbols)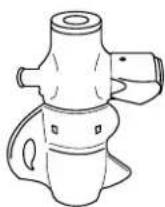
text_image
Technical diagram of a coffee machine with labeled parts, showing internal components and numbered callouts.
natural_image
Simple line drawing of a water contact setup with two cylindrical objects on a rectangular base (no text or symbols)text_image
Diagram showing a hand holding a small container with two bowls, one labeled '无菌菌' (no bacterial growth) and the other '细菌株' (cabbage growth)natural_image
Illustration of a hand holding a square object with a pointed tip, emitting a light beam (no text or symbols)text_image
Technical diagram of a mechanical assembly with numbered parts labeled 1, 2, and 3natural_image
Illustration of a glass jar with a side arm holding a test tube, containing liquid (no text or symbols)8. ЗАПАСНЫЕ ЧАСТИ
Cod. 02000000 - Rev. 10 - 05/2016