USER MANUAL PIXMA TS705a CANON
Read Safety and Important Information (addendum) first.
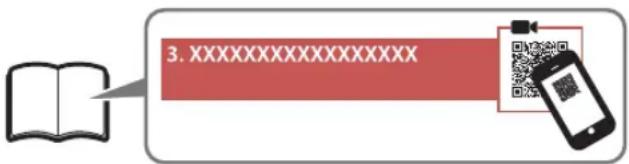
Instructional Videos
Instructions video
Anleitungsvideos
Instructievideo's
Video informativi
Videos instruetionais
Videos instructivos
Eknaieutiko bivteo
Instruktionsfilmer
Instruksjonsvideoer
Instruktionsvideoer
Ohjevideot

http://ij.start.canon


Go
Go

3.XXXXXXXXXXXXX
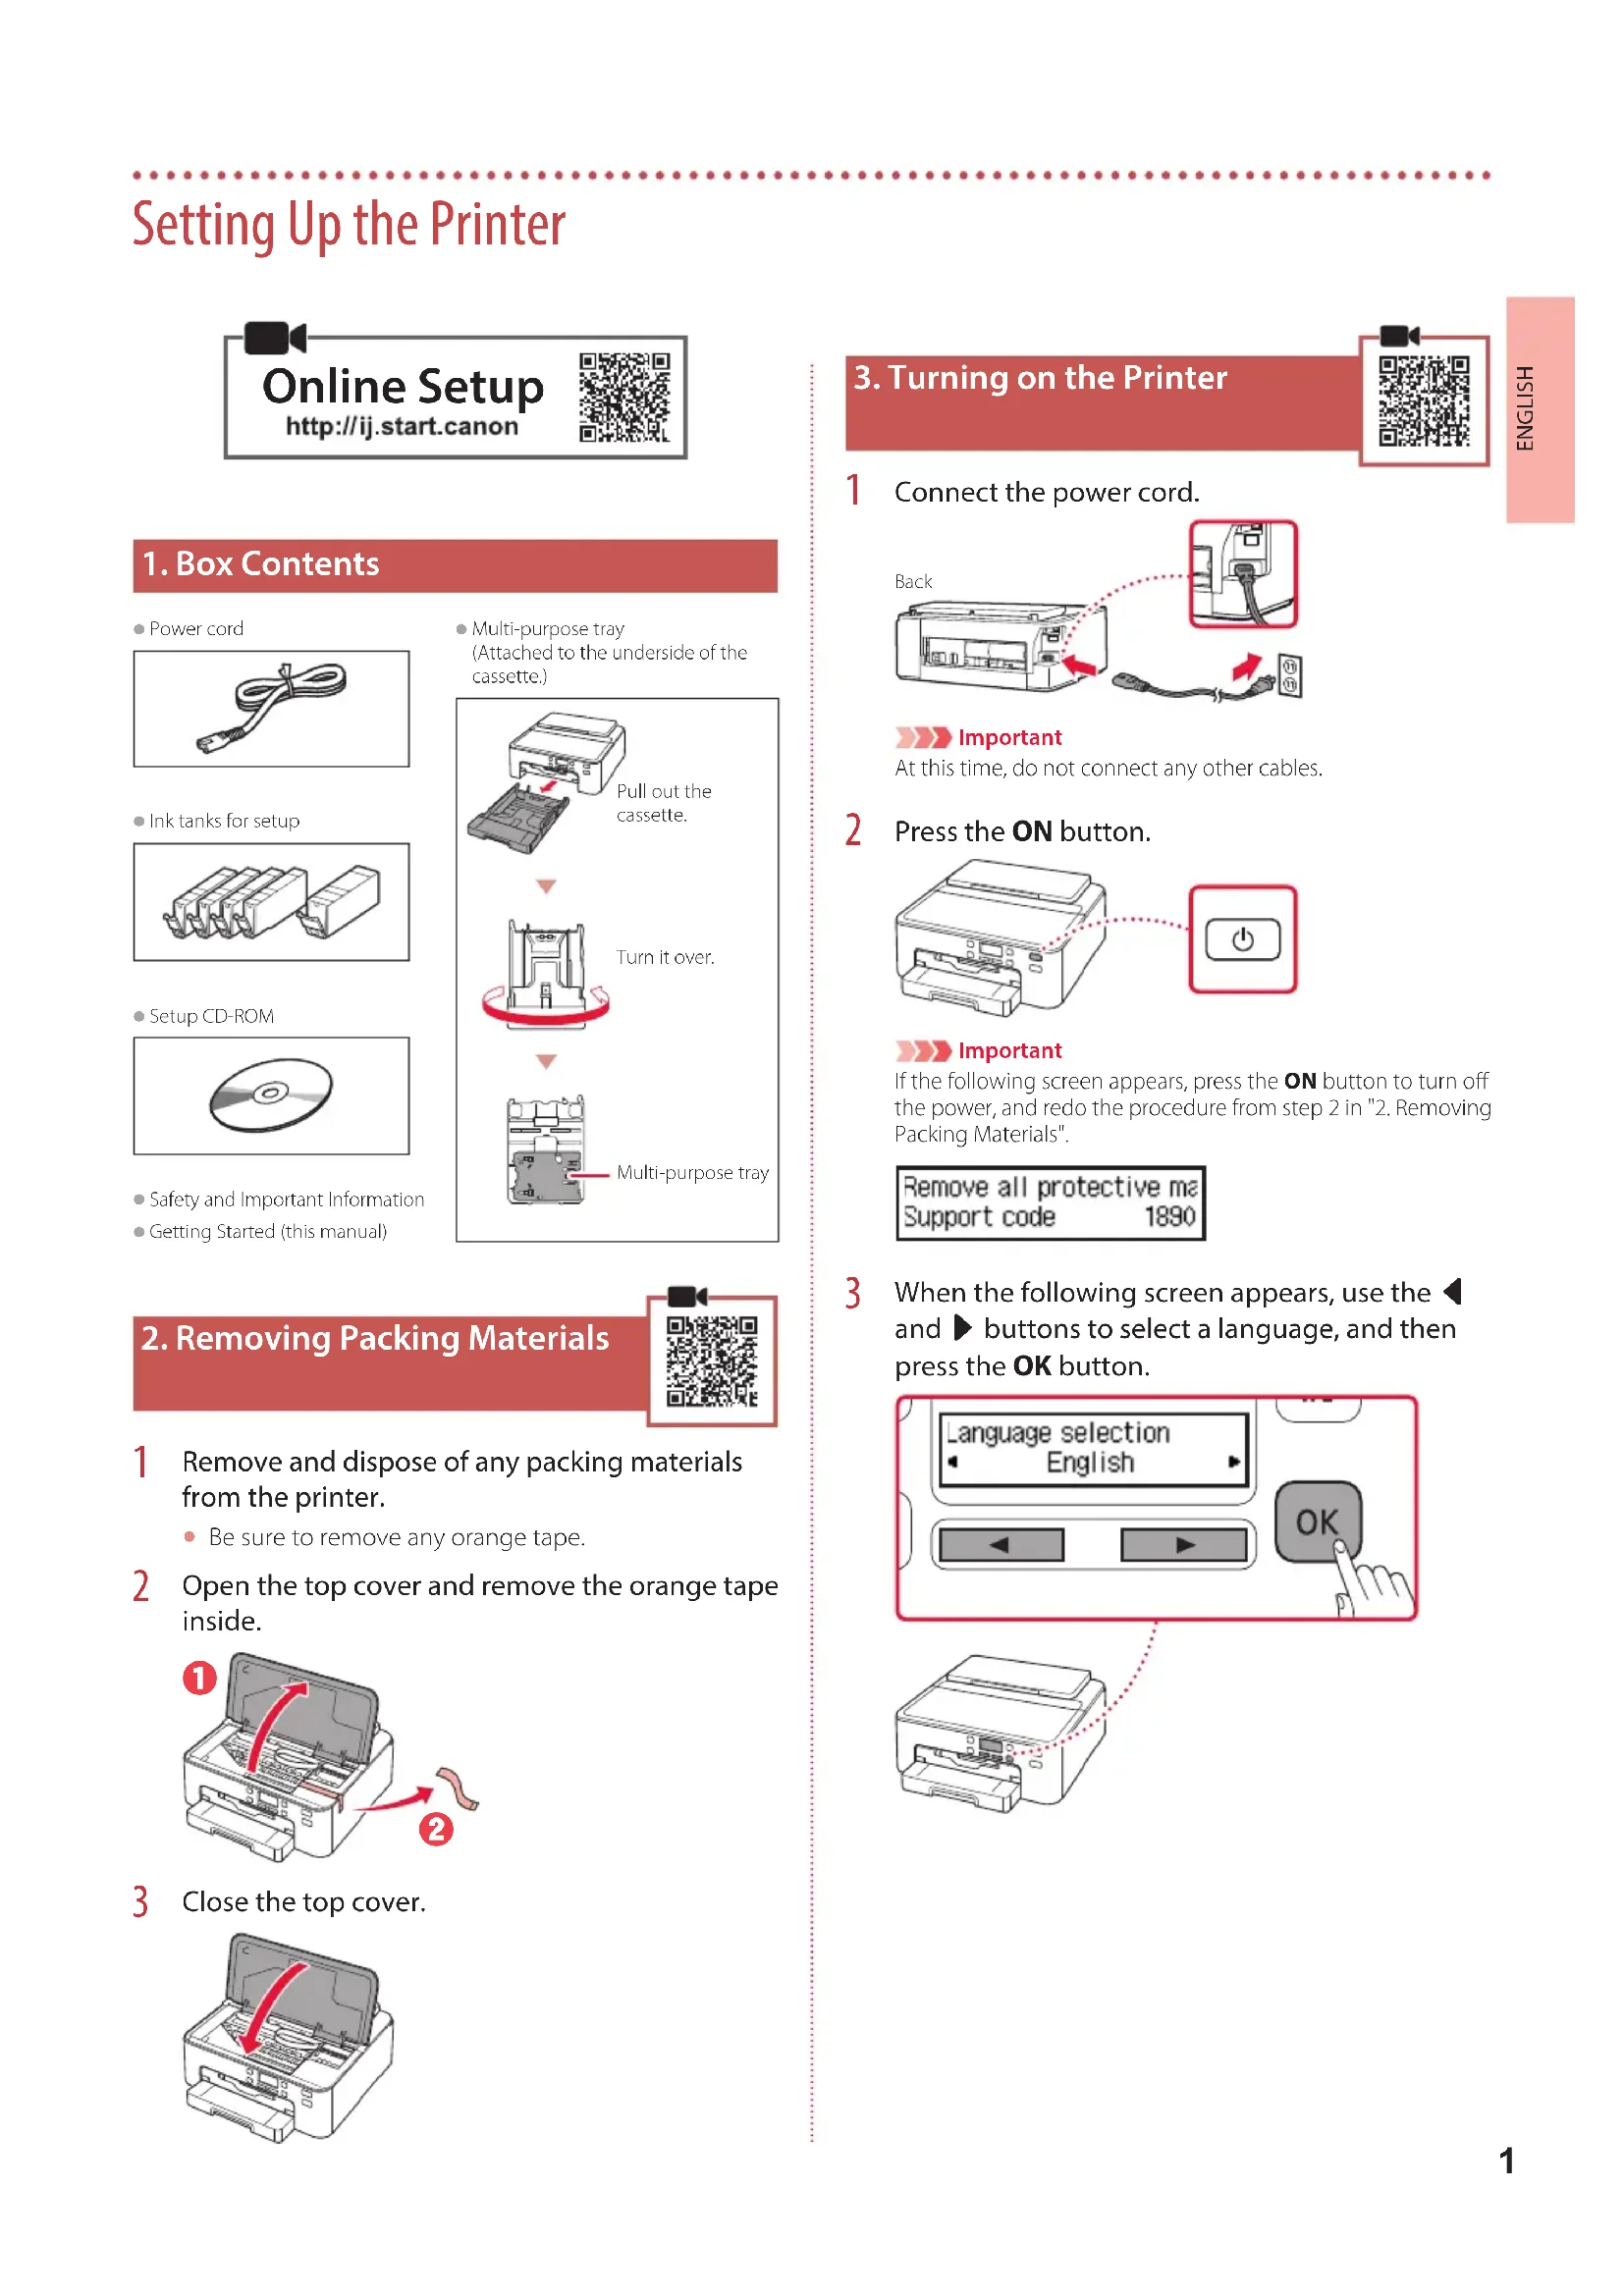
Setting Up the Printer

Online Setup
http://ij.start.canon

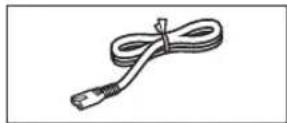
1.Box Contents
Power cord

Safety and Important Information
Getting Started (this manual)
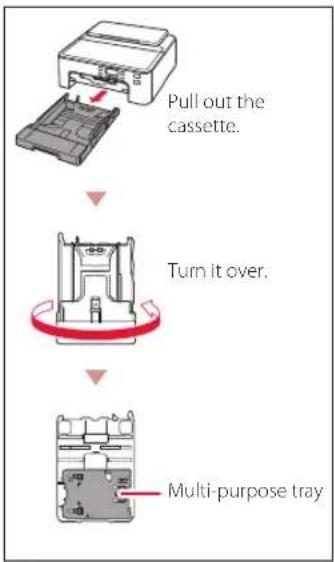
Multi-purpose tray (Attached to the underside of the cassette.)
2. Removing Packing Materials

1 Remove and dispose of any packing materials from the printer.
- Be sure to remove any orange tape.
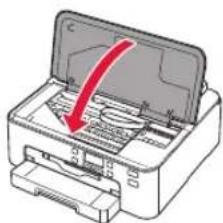
2 Open the top cover and remove the orange tape inside.
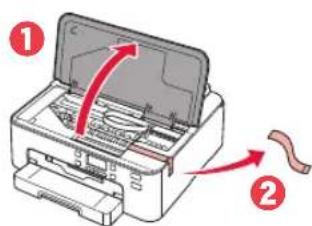
3 Close the top cover.
3. Turning on the Printer

1 Connect the power cord.
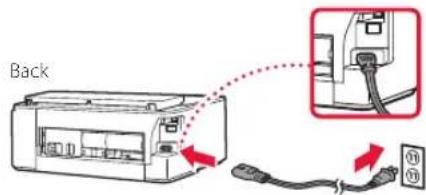

Important
At this time, do not connect any other cables.
2 Press the ON button.
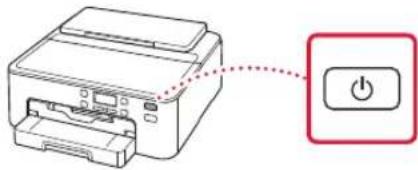

Important
If the following screen appears, press the ON button to turn off the power, and redo the procedure from step 2 in "2. Removing Packing Materials".
Remove all protective me Support code 1890
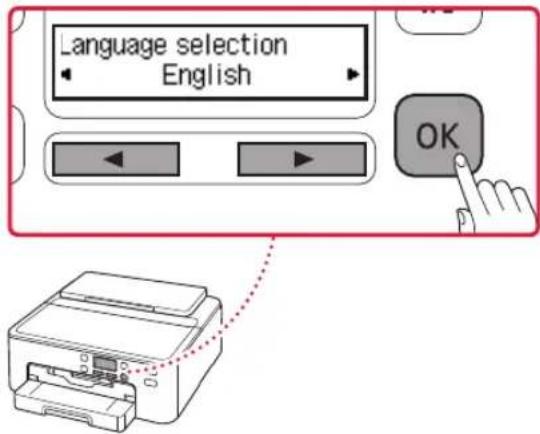
3 When the following screen appears, use the and buttons to select a language, and then press the OK button.
Setting Up the Printer
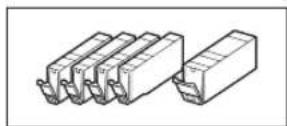
4. Installing the Ink Tanks

1 Open the top cover.
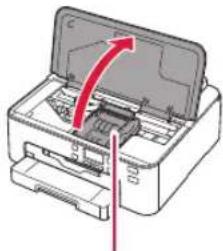
Caution
Do not touch the print head holder until it stops moving.
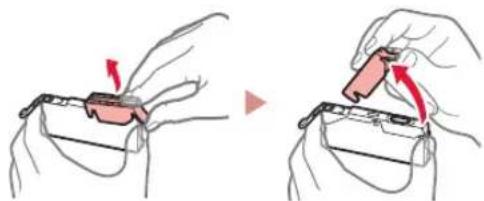
2 Remove the tape and film on the ink tanks.
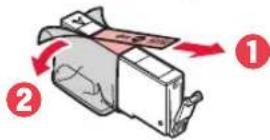
- Check that no tape is left over.
3 Slowly remove the orange cap.
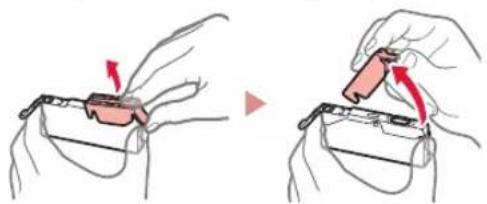

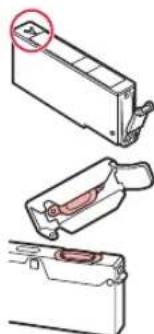
Important
- Do not squeeze the ink tank with the Y-shaped air hole blocked.
- Do not touch the areas shown in red.
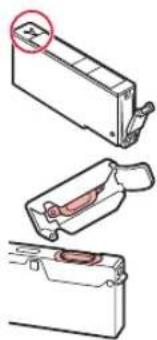
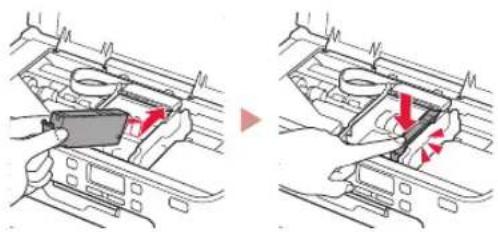
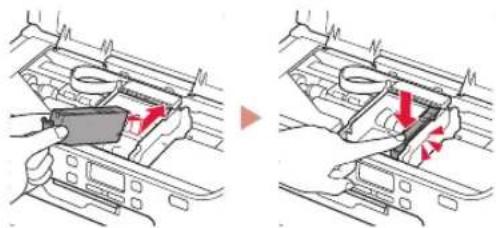
4 Install the ink tanks.
Matching the color of the ink tank to the label on the print head, insert the ink tank into the print head, and press down until it clicks.
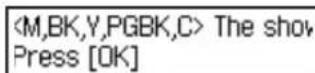
5 Check that the hark appears on the screen.


Important
If the mark is not displayed on the screen even though you have installed the ink tank, the color of the ink tank may be wrong or you may have installed an ink tank, such as one with a different model number, that is not supported by this printer. Either install an ink tank for the correct color or use the provided ink tank for setup.
6 Repeat steps 2 through 5 to install all the ink tanks.
- Check that a dark is displayed on the screen for each color.

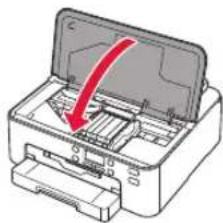
7 Close the top cover.
The printer will start initializing.
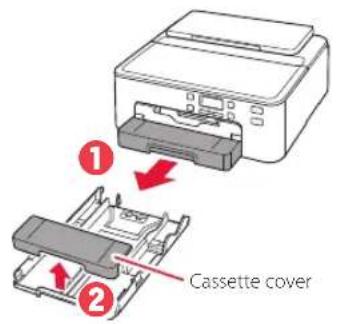
5. Loading Paper


The following screen appears.
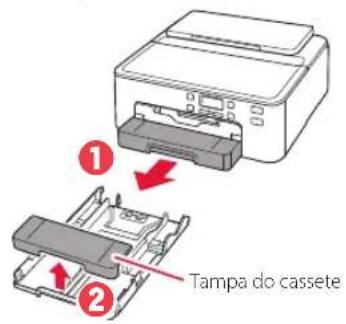
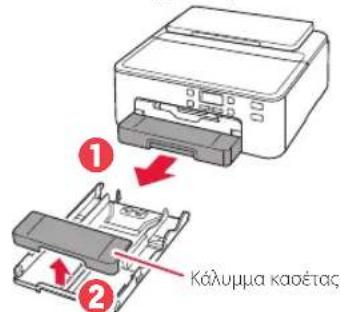
2 Remove the cassette from the printer and remove the cassette cover.
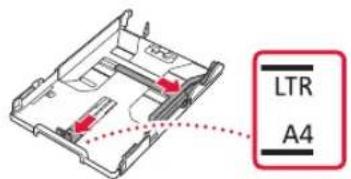
3 Slide apart the paper guides.
- Slide the right paper guide to the right edge. Align the front paper guide with the LTR or A4 mark.
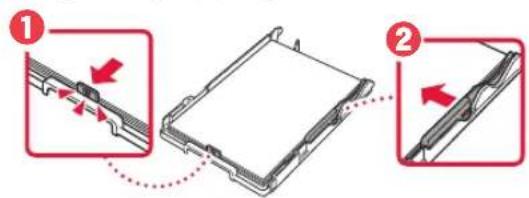
4 Load paper.
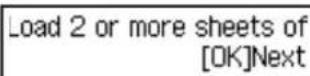
- Load 2 or more sheets of LTR or A4 sized plain paper with the print side facing down.

- Place the paper against the front paper guide, and align the right paper guide to the width of the paper.
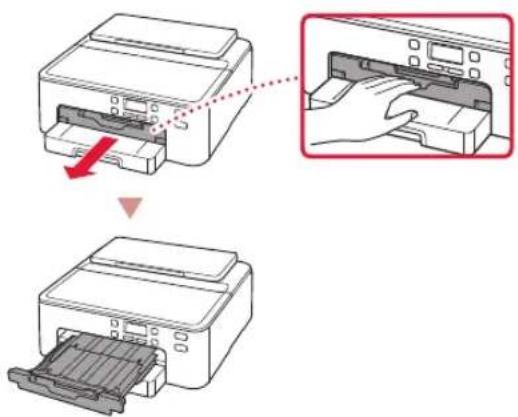
5 Attach the cassette cover and replace the cassette.
- When attaching the cassette cover to the cassette, fit the cassette cover to the shape of the front of the cassette.

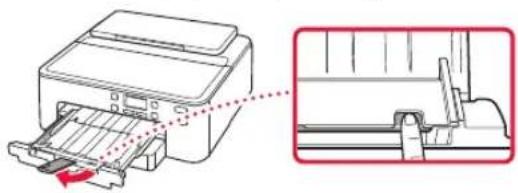
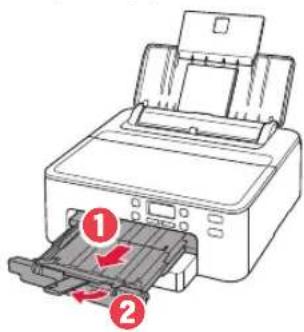
6 Pull out the paper output tray until it stops.

If you do not pull out the paper output tray, an error will occur when printing starts.
Check!
Remove and dispose of any orange protective material.
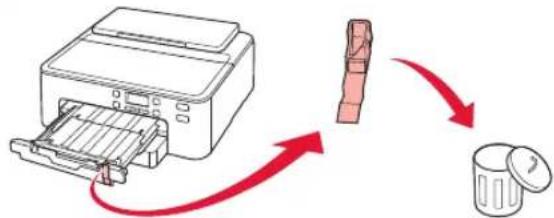
7 Pull out the paper output support.
8 Press the OK button.
Load 2 or more sheets of [OK]Next
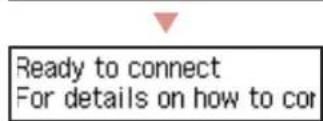
9 Check that Prepare for connection appears on the printer's screen, and then press the OK button.
Prepare for connection [OK]Next

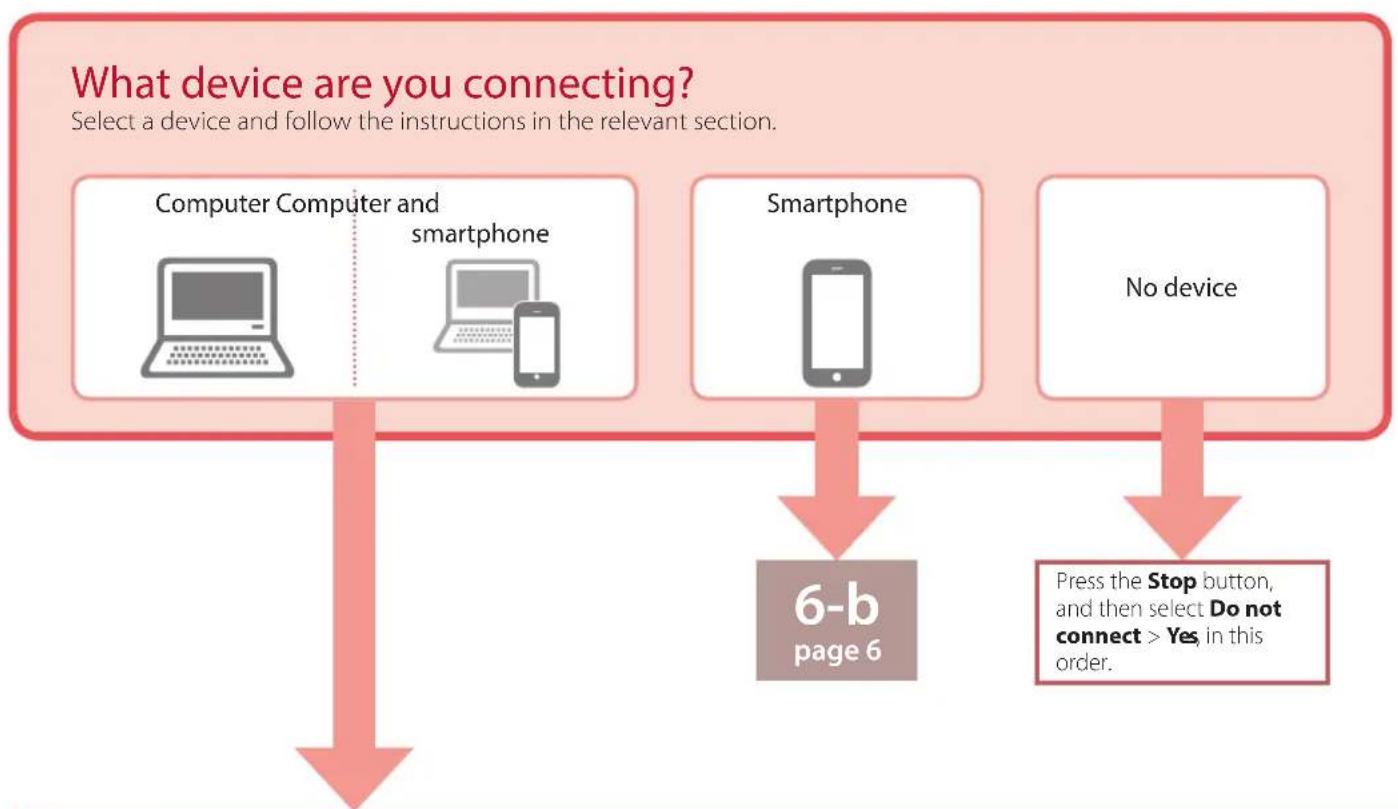
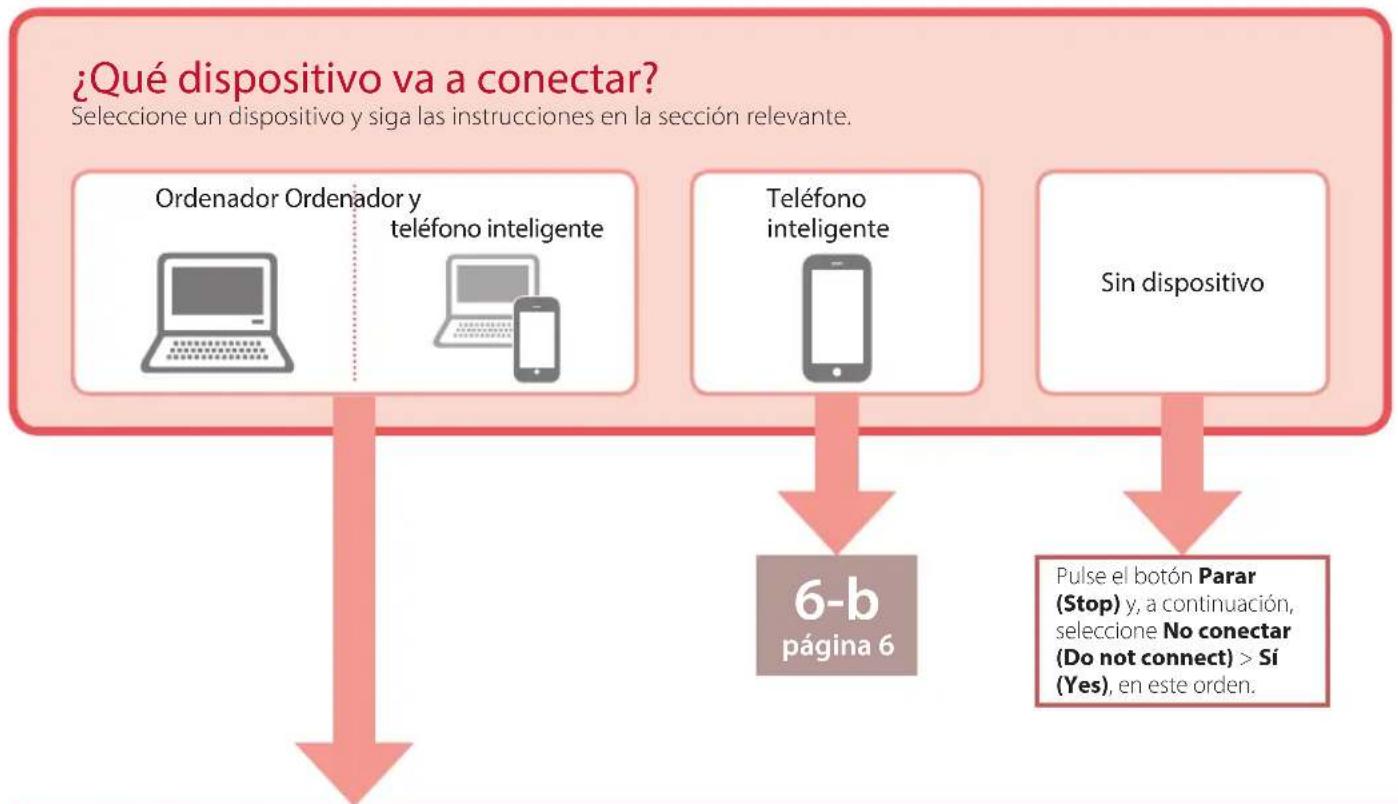
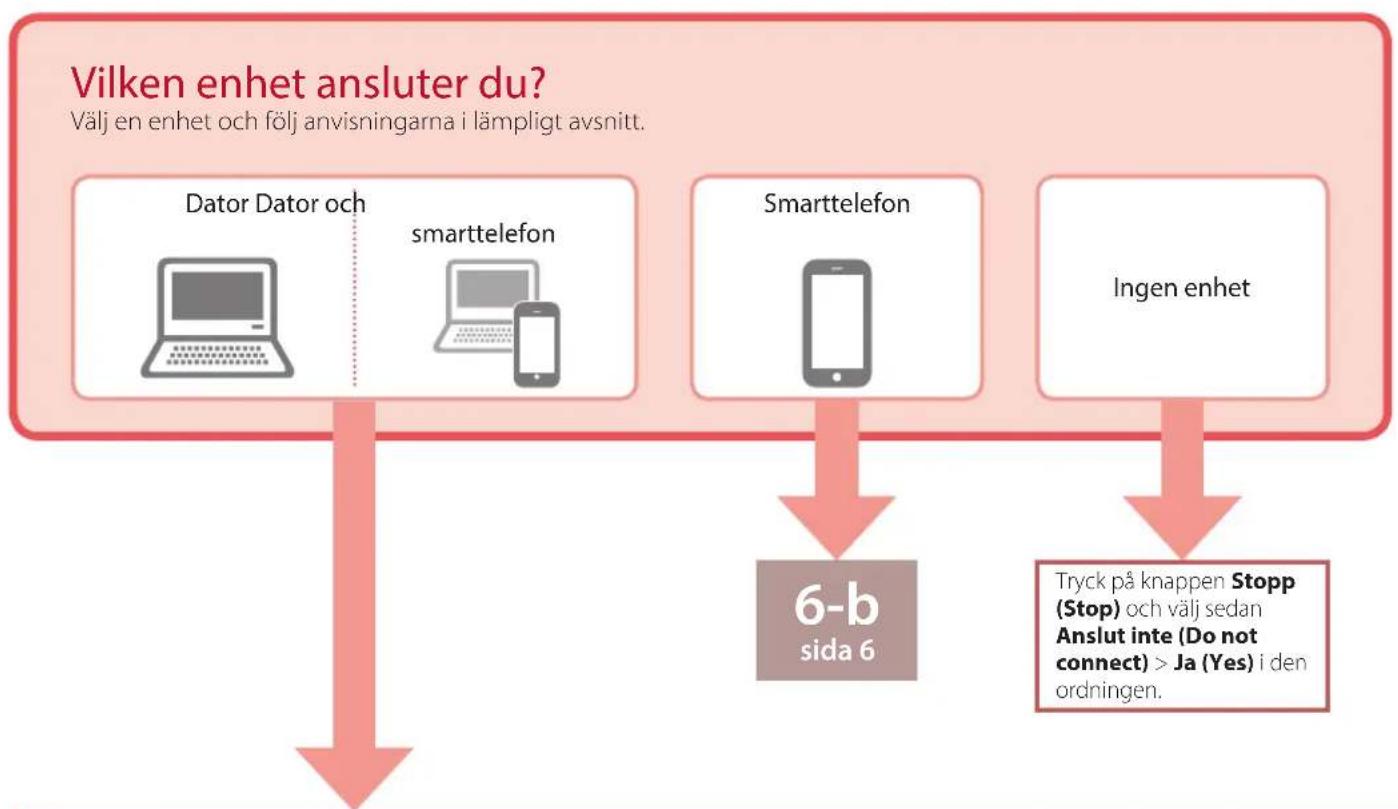
6-a
Connecting to a Computer
If you are using multiple computers, perform these steps on each computer. There are two methods, "A Online Setup" and "B ng the Setup CD-ROM (Windows Only) Provided".


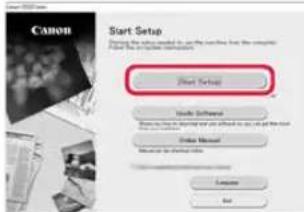
Online Setup
1 Access the Canon website from a computer.

2 Select Set Up.
3 Enter your printer's model name and click Go.
4 Click Start.
5 Click If you have already prepared your printer, go to Connect.
Note
The following steps are for Windows (except Windows 10 in S mode) and macOS users. For other operating systems, continue setup by following the on-screen instructions instead.
6 Click Download.
The setup file is downloaded to your computer.
7 Run the downloaded file.
8 Proceed to step 9 on page 5.
B Using the Setup CD-ROM (Windows Only) Provided
1 Insert the Setup CD-ROM into your computer.

2 Follow the instructions for your version of Windows.
Windows 10/Windows 8.1
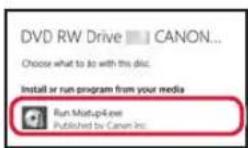
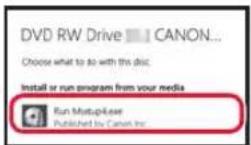
1 Click on the following message when it appears on the right-hand side of your computer screen.
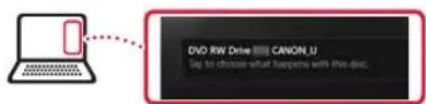

Note
If the message does not appear (or is no longer visible), click the File Explorer icon in the taskbar. On the left-hand side of the window, click This PC. Double click the CD icon that is displayed on the right-hand side. When the content of the CD is displayed, double click Msetup4.exe. Proceed to 3.

Msetup4.exe.
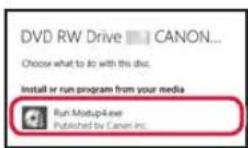
3 If the User Account Control dialog box appears, click Yes
9 Click Start Setup.
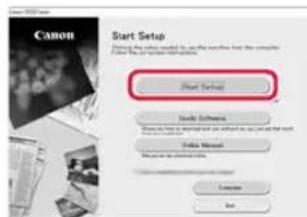
10 Follow the on-screen instructions.
These operations may take some time.
Windows 7
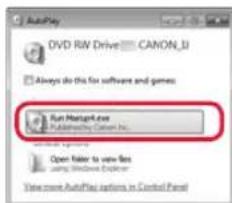
1 Click Run Msetup4.exe.
- When the AutoPlay screen appears, click Run Msetup4.exe.
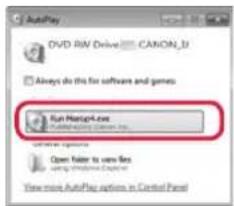

If the AutoPlay screen does not appear, in the Start menu, click Computer. On the right-hand side of the window, double click the CD icon. When the content of the CD is displayed, double click Msetup4.exe.
If the User Account Control dialog box appears, click Continue.
3 Proceed to step 9 below.
11 When the following screen appears, click Exit.
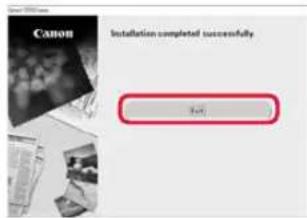
Your printer is now connected to your computer. To connect a smartphone as well, see "6-b. Connecting to a Smartphone" on page 6.
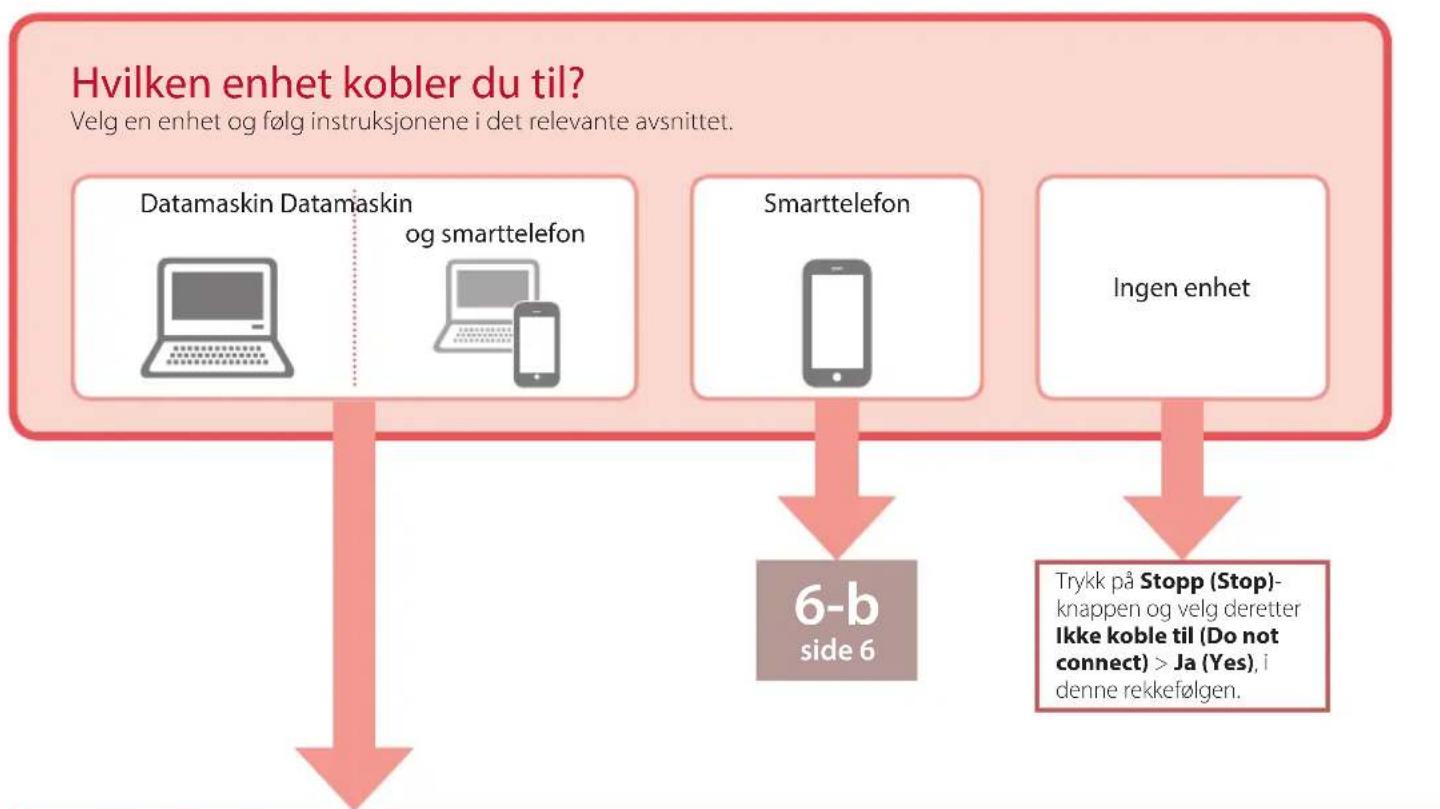
6-b
Connecting to a Smartphone
If you are using multiple smartphones, perform these steps on each smartphone.
Prepare the following before starting.
1 Enable the Wi-Fi setting on your smartphone.
2 Connect your smartphone to the wireless router (if you have a wireless router).
See your smartphone and wireless router manuals for more details.

1 Install the "Canon PRINT Inkjet/SELPHY" app on your smartphone.
- Scan the QR code shown on the right to access the Canon website, and then download the app.

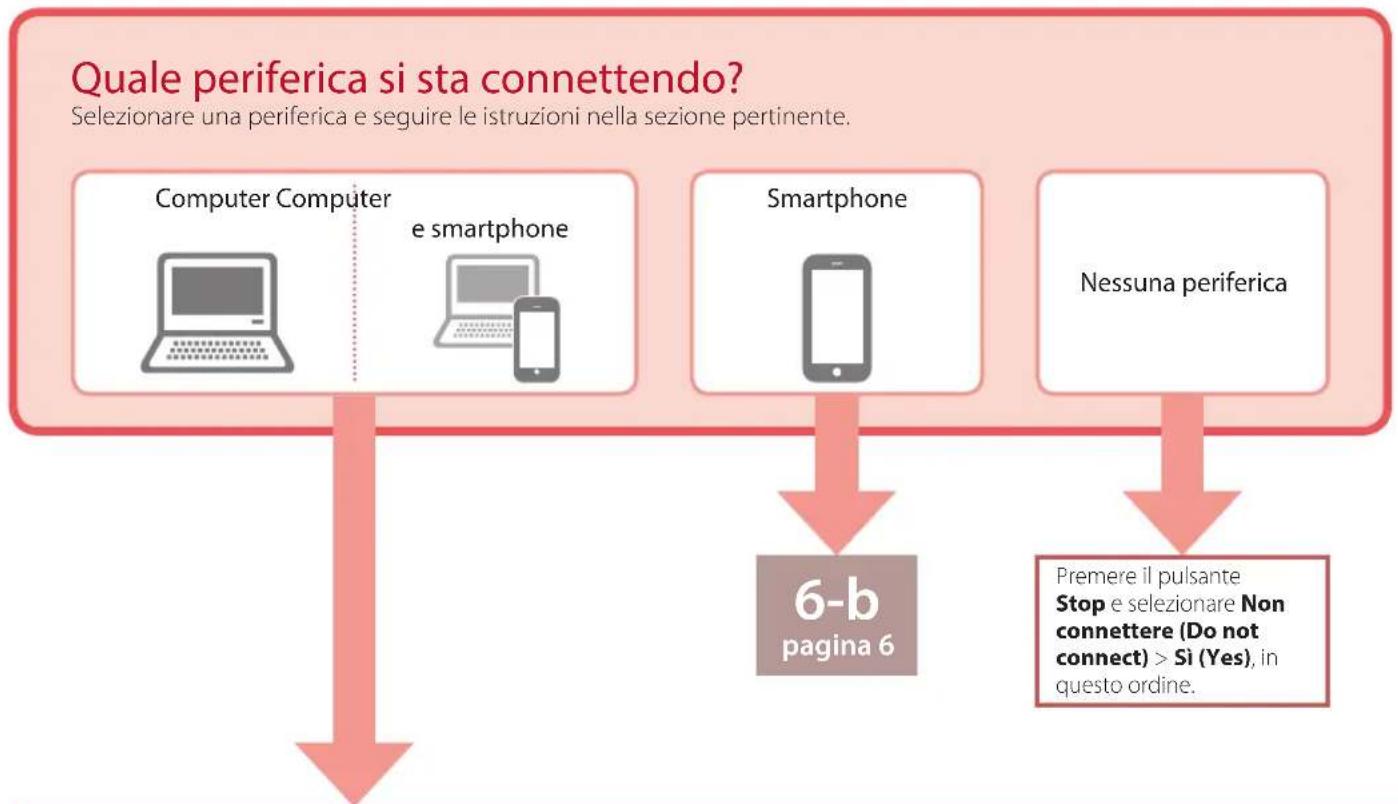
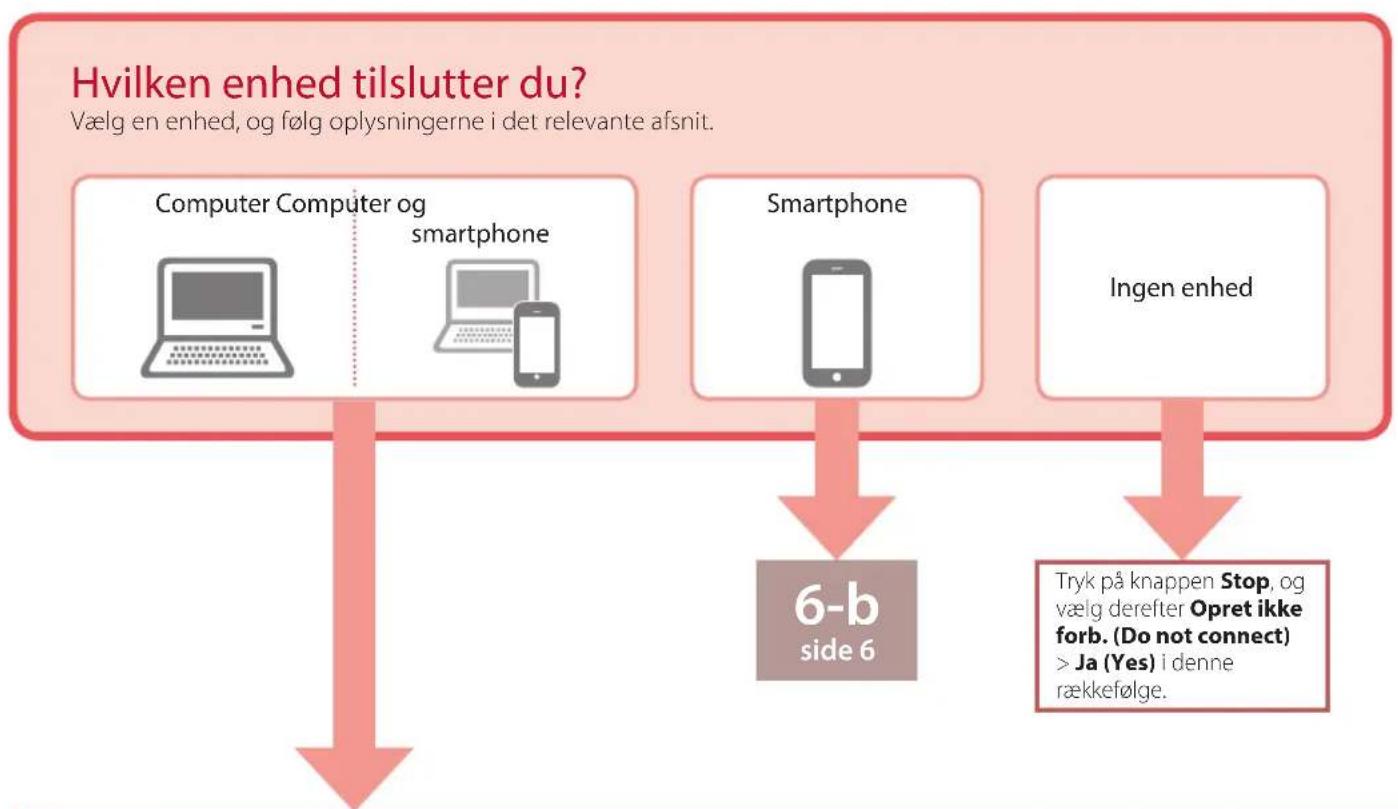
2 Check the printer's screen and proceed to each step.
If the following screen is displayed
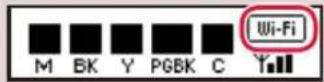
If Fi is d spHed,
If nFFi s nAAS played,
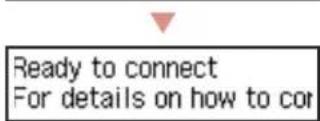
If the following screen is displayed,
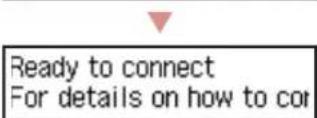
Ready to connect For details on how to cor
Ready to connect For details on how to continue, refer to "Getting Started"
Note
The printer's screen turns off when the printer is idle for 10 minutes. Press a button (except the ON button) on the operation panel to turn on the screen.
If Wi-Fi appears, the printer cannot communicate by Wi-Fi connection. For details, see "Frequently Asked Questions" at http://ij.start.canon/.

3 Open the installed app.
4 Follow the on-screen instructions to add your printer.
Once you have added your printer, you can print from the smartphone. To print photos, see "Loading Photo Paper" on page 8.

Procedures vary for iOS and Android. Follow the instructions for your operating system.
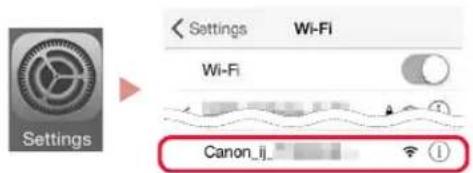
iOS
3 Tap Settings on your smartphone's home screen, and tap Canon_ij_XXXX in the Wi-Fi settings.
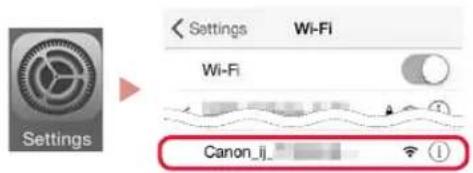

Note
If Canon_ij_XXXX does not appear, follow the procedure in E and then search for Canon_ij_XXXX again.
4 Tap the installed app, and then follow the on-screen instructions to add your printer.
The printer is added with the most appropriate connection method for the environment you are using.
Once you have added your printer, you can print from the smartphone. To print photos, see "Loading Photo Paper" on page 8.

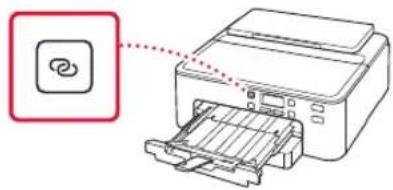
3 Press and hold the Wireless connect button for about 3 seconds.

4 When Follow the instructions on the PC or smartphone, etc. appears on the printer's screen, proceed to D
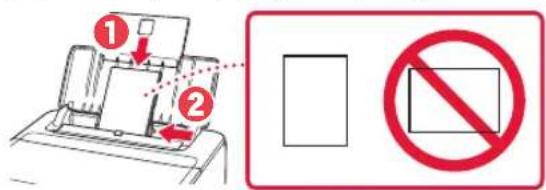
Loading Photo Paper
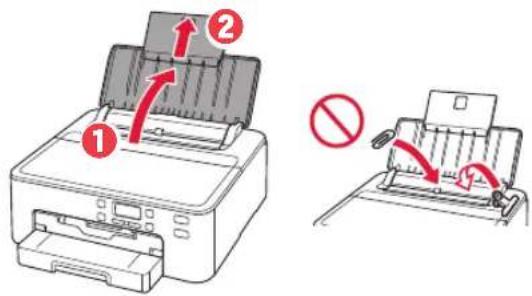
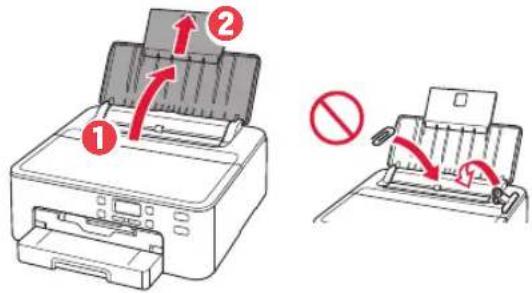
Photo paper can only be loaded in the rear tray.
1 Open the paper support and the paper support extension.
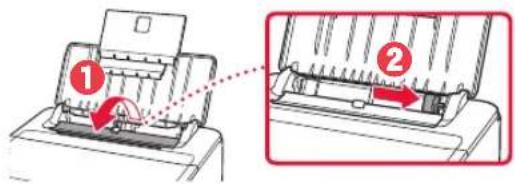
2 Open the feed slot cover and slide the right-hand side paper guide to the far right.
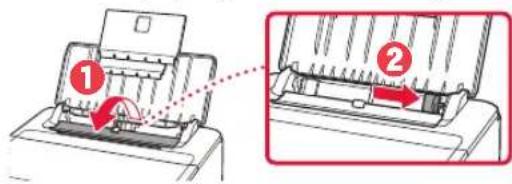
3 Load several sheets of photo paper with the print side facing up and slide the side paper guide against the edge of the paper stack.
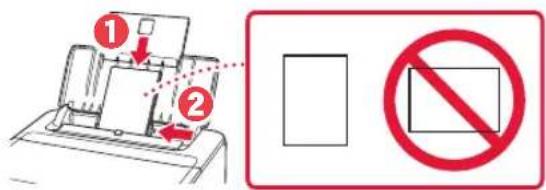
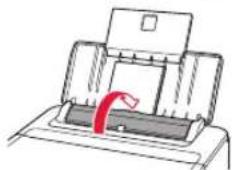
4 Close the feed slot cover.

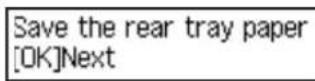
5 When the following screen appears, press the OK button.
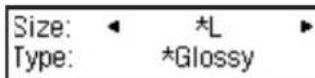
6 Select the paper size and type, and press the OK button.
7 Pull out the paper output tray and the paper output support.
Printing a Disc Label Using the Multi-Purpose Tray
You can print a label on a printable disc using the multi-purpose tray.
For details, open the Online Manual and click Basic Operation>Printing a Disc Label from a Computer
Note
The multi-purpose tray is attached to the underside of the cassette. "1.Box Contents" on page 1
Refer to the back cover of this manual for how to open the Online Manual.
Configuration de l'imprimante
Remove all protective me Support code 1890
Load 2 or more sheets of [OK]Next
Load 2 or more sheets of [OK]Next
Ready to connect For details on how to cor
Remove all protective me Support code 1890
Load 2 or more sheets of [OK]Next
Load 2 or more sheets of [OK]Next
Ready to connect For details on how to cor
Save the rear tray paper [OK]Next
Size: L
Type: Glossy
Remove all protective me Support code 1890
Load 2 or more sheets of [OK]Next
Load 2 or more sheets of [OK]Next
Prepare for connection [OK]Next
6-a
Connessiona un computer
Ready to connect For details on how to cor
Remove all protective me Support code 1890
Load 2 or more sheets of [OK]Next
2 Remova o cassete da impressora e remove a tampa do cassete.
3 Deslize as guias do camel.
Load 2 or more sheets of [OK]Next
Clique em Executor Msetup4.exe (Run Msetup4.
Clique em Executor Msetup4.exe (Run Msetup4.exe).
- Quando aanela Reproducao Automática (AutoPlay) for exibida, clique em Executor Msetup4.exe (Run Msetup4.exe).

Nota
Ready to connect For details on how to cor
Pronto para conectar Para obter detalles sobre como continuar, consulte "Para Comecar"
Nota
Save the rear tray paper [OK]Next
Size: L
Type: Glossy
Remove all protective me Support code 1890
Load 2 or more sheets of [OK]Next
Prepare for connection [OK]Next
6-a
Ready to connect For details on how to cor
Save the rear tray paper [OK]Next
Size: L
Type: Glossy
Remove all protective ma Support code 1890
3 Otae eepavioe i aokovn oovn,
Xpnoiopoioine ta koumuia Kai yia va EneEeTe yawooa, kai, otn ouvexia, nataote TO koupi OK.


Pouon Tou EKUTOWt
4. EykaTaoTaon Tov DoxEiwv uελavnc

1 AvoiTeTo eIavw kALumu.

Anpooxn
Mny ayyieTe Tn 0hKn KepaAic EKTunwnc Mepxip va atapatnoei va takiveitai.
2 ApaipoeTe TnV Taivia KAI Tn EeBpavn ano ta doxexia eAevnc.

ELeyEe 01 8ev Exi npaueiveia Tavia.
3 Apaipoe apya to nptokaia kaumu.

Σημαντικό
MnviieTeTo doxieo medvnc otav unapxei eunokn otny onn aepa oxmuoc Y.
Mny ayicete tic nepioxoc nou anikovcovtae KKKivo xpuua.
4 Eykataohtote ta doxieia eIavnc.
Apou avtiotoxioTe To xpwa Tou Doxoieou eavnc, Teyn Etiketa Tou Bpioketai Naw OTNV KepaIg EKTUNOWC TOnoBETnOte To Doxieo eavnc, eo OTNV KepaIg EKTUNOWC KAIEOTe TO POC Ta KATW MExPI VA KAVEIKAIK.
5 BebaiwOeite oTI eupaviEeTaI To ouuBoLo Otnv oOovn.


Σημαντικό
Eav to oμβoλo δev εμφavicetai otnv oθovn napolo nou exete eykataotnoe i to doxie oελavnc, to xpuα tou doxieou eλavnc μntopei va unv elva oωto n μntopei va exete eykataotnoe eva doxie oελavnc nou dev uiootnpctai ano autov tov kTunwπ, π.x. μe δiaqopetiko apiθo movteλou. Eykataotne eva doxie oελavnc yia to oωto xpωma n xpəniopoɪnote to doxie oελavnc nou napexetai yia tnv eykataotaon.
6 EnavaaβeTa nmuata 2 ec5 yia va tooetnoe ola ta doxieia eA\nC
Load 2 or more sheets of [OK]Next
2 Apaipoe tnv kaoeta ano tov ektuwnk aowc Kai to kaluma tncaaetac.
8 NaTnoTe To KoumuI OK.
Load 2 or more sheets of [OK]Next
Aveepaviotei to ui-ic

Av 8ev eepavioTeI to

Ready to connect For details on how to cor
UoK. Etoiyn ia ouvseon
Tia va ouvexioe, avatpeEte otny evotnta "EKivwvtac"
Eeien
H oBovn tou EKTunwtn oBriVe otav o EKTunwtnc bioketai oe abpaveia yia 10 ae. Patnoe eva koupi (ekto Koumi ON) otov niva ka eitoupyiac ia va evpyoioe tyn oBovn.
Av eepaviotei to ekovidio xunotnc dev nopeia va enikoiuvnoei pe ouvdeon Wi-Fi. Tia aentoupeiec, deite tic «Uxvc epwntoeic» ontneuovon http://ij.start.canon.

3 AvoiTe Tnv EyKATEoTnev n Eaapouyn.

4 Akoouohtote tic odyiec otynov oovnyia va npooeotov kTuwnac.
Apou npooeoge tov ektuwn oac, mnopeite nEvov va ektuwnve ano to smartphone. Ia va ektuwnote toypapiec, avatpeTe otnv evotnta ToTOnEETnon toypapikou xaptiou 8n eia8.

Olaikaiie, diapeouyia iOS kai Android. Aokouhntie ohyie yia to aetoupyko outna nou diaheTe.
iOS
3 PntnoTe PuOioeic (Settings) otyn apxikn oovn tou smartphone kai eT a nT oTe Canon_ij_XXXX oTIC puOioeic Wi-Fi.

Σημειωη
Edv ev epaviote n enoyi Canon_ijXXXX, aokoutheta t th diaikia oto E kal e naaabe Tnv avacnton yia to Canon_ijXXXX.
4
NaTnotE Tnv EYkateoTneVn
epapouyn kai, otn ouvexia,
aokoutheta tic odyiec nou
eupaviciovta otnv oboyn ia va
npootheoetevkTuWtn oac.
O EKTUWTnC npooTetai μe Tnv kataaIaNToepn eBdo OuvdeoN cy to nepiBaAiov Nou xpnooiie.
Apou npootheoetov ektuwnoac, uopeite naov va ektuunwve ano to smartphone.ia va ektuwaete wtoypapiec, avatpeTe otnv evotnta Tonoetnon wtoypapikou xaptiou> otneia 8.

3 KpatnoTe nataevo to koupi Aospuatn ouv8o (Wireless connect) yia πepinou 3 8eutepoAeTTa.
4 Otav eepavioTei to nnuua Akoouo. tic oyniec otov unoloyoiotn h to smartphone kAn. otnv oovn tou EKTUNOT, pOxwpnoTE OTO
TooTheon toypapikou xaptiou
To foTOypaPiko xapri uIopei va tootheTneIe IIOv otyn niow hkn.
1 AvoiTe Tnv unooTnpiEg XapTIOu KAI Tnv ENEKtaoN UOOTnpEgXapTIOU.
2 AvoiTe To kALUmuu unOdoxnc Tpoopodooiac kal oupeTe To dEciO odnyo xapTiou npoc ta dEia ecwCTo Tepu.
3 ToioeTne TnAa pfuAa wfToypapikou xaptiou e Tnv nEupa EKTunwnoc Otpauevn npoc ta naW KAUI opETe Tov IAAivO odnyo xaptiou otnv akpn Tnc oToiBac xaptiw.
4 KkioTe To kaIuMa unOdoxnc TpOpoosoiac.
5 Otav eupavioe i n akolouo oovn, nntote to koupi OK.
Save the rear tray paper [OK]Next
Size: L
Type: Glossy
Remove all protective ma Support code 1890
Load 2 or more sheets of [OK]Next
Load 2 or more sheets of [OK]Next
Prepare for connection [OK]Next

6-a
Ansluta till dator
Ready to connect For details on how to cor
Save the rear tray paper [OK]Next
Size: L
Type: Glossy
Remove all protective me Support code 1890
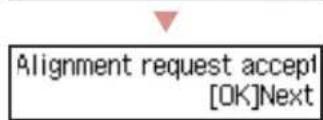
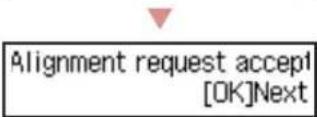
Start alignment to impro No

Load 2 or more sheets of [OK]Next
Load 2 or more sheets of [OK]Next
Prepare for connection [OK]Next
6-a
Koble til en datamaskin
Kikk pa Kjør Msetup4.exe (Run Msetup4.e
3 Hvis dialogboksen Brukerkontokontroll (User Account Control) vises, klikker du pa Ja (Yes).
9
Klikk pā Start oppsett (Start Setup).
Klikk pa Kjør Msetup4.exe (Run Msetup4.exe).
Ready to connect For details on how to cor
Save the rear tray paper [OK]Next
Size: L
Type: Glossy
Remove all protective marks Support code 1890
Load 2 or more sheets of [OK]Next

Prepare for connection [OK]Next
6-a
Tilslutning til en computer
Ready to connect For details on how to cor
Remove all protective ma Support code 1890
Ready to connect For details on how to cor