TV 2500 - Headphones Amplicomms - Free user manual and instructions
Find the device manual for free TV 2500 Amplicomms in PDF.

User questions about TV 2500 Amplicomms
0 question about this device. Answer the ones you know or ask your own.
Ask a new question about this device
Download the instructions for your Headphones in PDF format for free! Find your manual TV 2500 - Amplicomms and take your electronic device back in hand. On this page are published all the documents necessary for the use of your device. TV 2500 by Amplicomms.
USER MANUAL TV 2500 Amplicomms
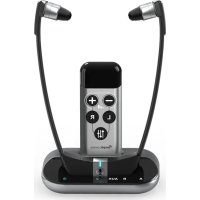
Wireless amplified headset
natural_image
Black amplicomms earbuds with earphones and a power cord, displayed on a circular base (no visible text or symbols on the device body)Übersicht
At a glance
Aperçu
Riepilogo
Overzicht
Información general
Översikt
Características gerais
Please open this page for "At a glance" guide to your TV 2500.
natural_image
Line drawing of a handheld cable connector with a connector inserted (no text or symbols)natural_image
Line drawing of a handheld electronic device with two leads and a base (no text or symbols)natural_image
Technical line drawing of a mechanical device with a close-up view of its internal components (no text or symbols)1 Headset left/right
2 Volume control
3 Power on indicator
4 Microphone button for room monitoring
5 On/Off switch
6 Microphone
7 Volume balance (left/right)
8 Battery
Transmitter base
1 Charging cradle
2 LED Indicator of Tone Clarity
3 Tone Clarity Button
4 LED Indicator of Power
5 LED Charging Indicator for Main Battery (attached to Headset Receiver)
6 LED Charging Indicator for Spare Battery
7 Spare Charging Slot
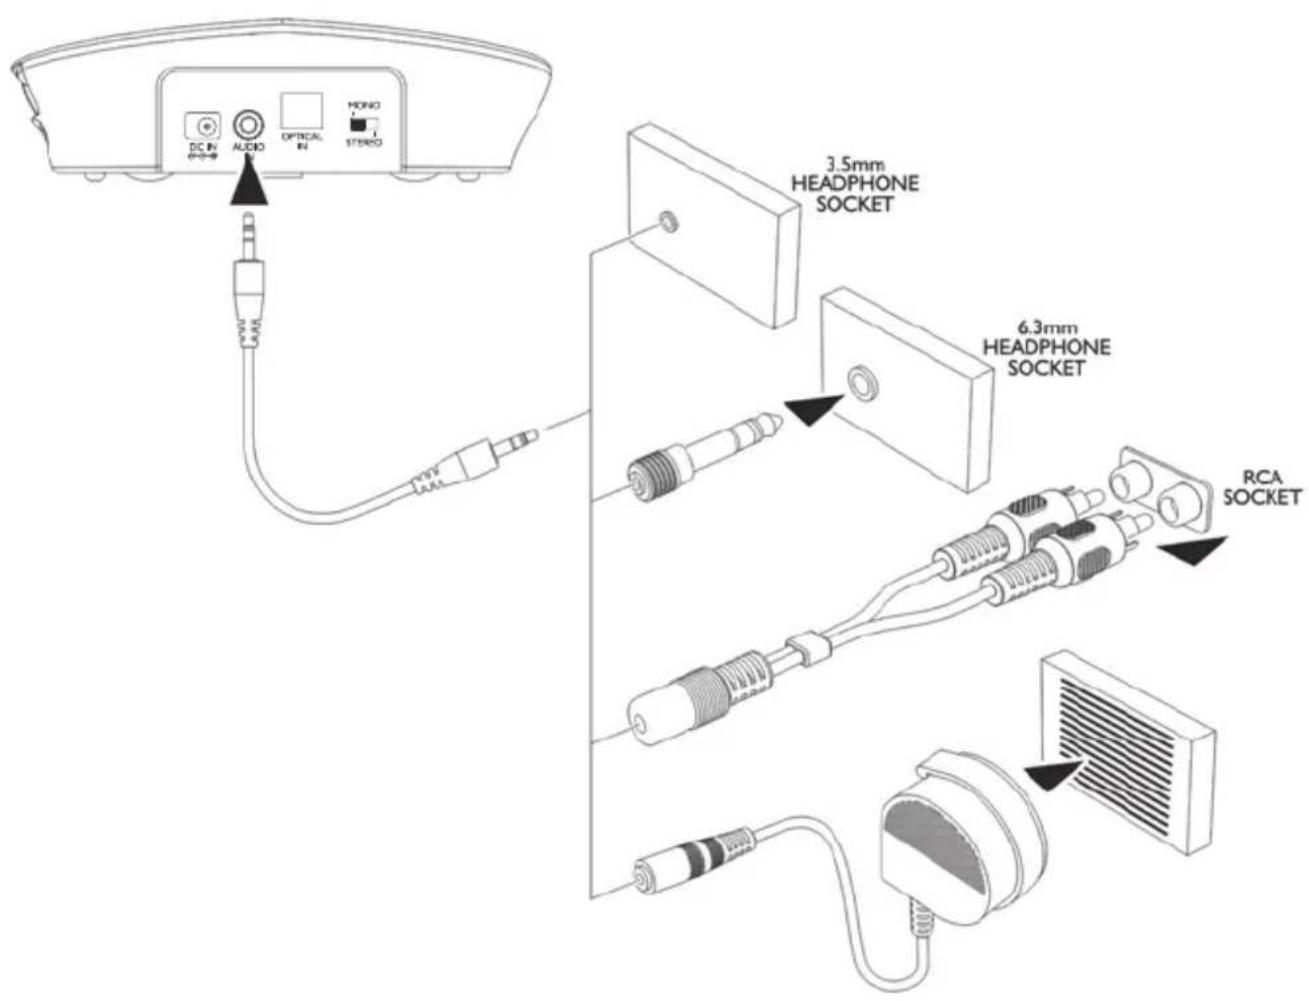
8 DC In
9 Analogue Audio In Socket (3.5 mm)
10 Optical Audio In Socket TOSLINK
11 Mono/Stereo Switch
Please note that only one input (either analogue audio input or optical input/TOSLINK) must be connected.
Getting started
Getting started
Box contents
- 1 Receiver with rubber ear buds size "L" (large)
• 1 Transmitter base
• 1 AC adapter for the transmitter
• 2 Rechargeable batteries for the receiver (Lithium Polymer)
• 1 Optical TOSLINK Digital Audio cable
• 1 Analogue Audio cable (both ends with 3.5 mm stereo plug)
• 1 Adapter cable (RCA) for analogue audio cable
• 1 Adapter plug 6.3 mm to 3.5 mm for analogue audio cable
• 1 External microphone with holder and adapter plug for analogue audio cable - 1 Additional pair of rubber ear buds size "S" (small)
- 1 User guide
Important: please make sure you've read the safety information on page 30 before you set up your device.
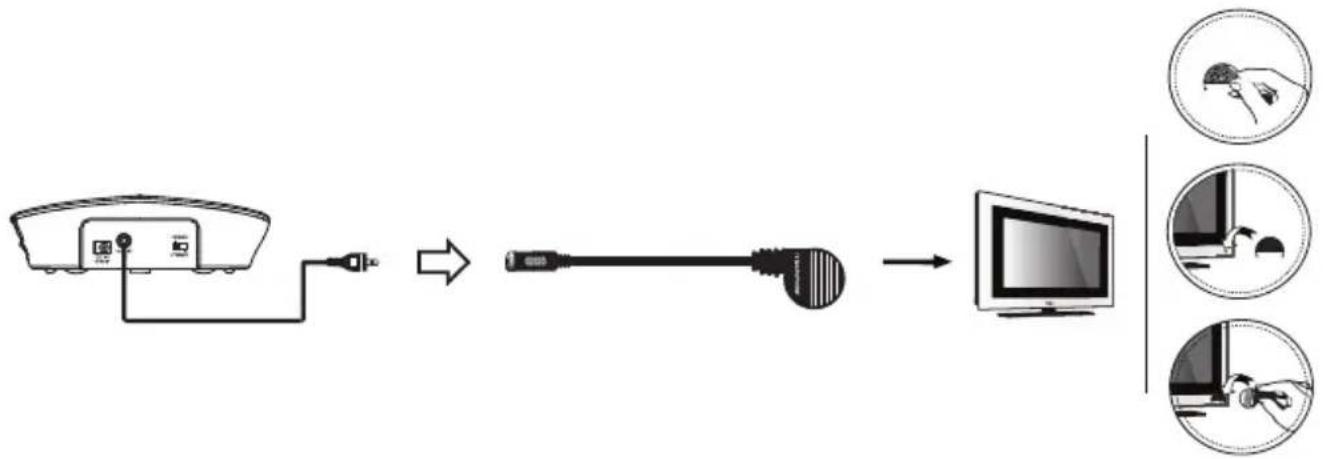
Connecting the transmitter
1 Connect the power adapter to the DC IN input socket located on the transmitter rear panel.
2 Connect the power adapter provided to an electrical outlet.
3 Connect the transmitter to your audio source.
RCA adapter cable, audio cable, 6.3 mm to 3.5 mm adapter plug and an external microphone are provided for various type of connection to your audio source (e.g. TV set, Hi-Fi system, MP3 or iPod).
Please note that only one input (either analogue audio input or optical input/TOSLINK) must be connected.
The green power indicator LED will blink as soon as you have connected the power adapter to the electrical outlet and when the audio signal is detected from the audio source, the green LED indicator will glow constantly.
Using the optical TOSLINK digital audio cable
If your audio source has an optical audio output (TOSLINK/S-PDIF), connect the two devices with the included optical TOSLINK digital audio cable. This connection offers a higher transmission quality and a lower susceptibility to electrical and magnetic interference.
Please make sure the optical TOSLINK digital audio cable does not get bent or folded! Avoid tight bending radii.
Using the adapter (only for analog audio cables)
text_image
DC IN AUDIO OPTICAL IN HONO STUDIO 3.5mm HEADPHONE SOCKET 6.3mm HEADPHONE SOCKET RCA SOCKETSet up the receiver
Installing and charging the battery
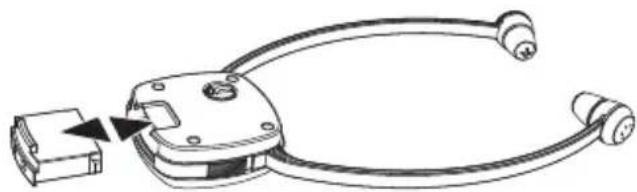
1 Insert a battery into the headset receiver with correct polarity.
natural_image
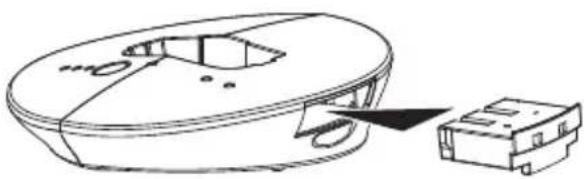
Line drawing of a handheld electronic device with connectors and a small rectangular component inserted (no text or symbols)2 Charge the battery for about 2 hours and 30 minutes before first use. Switch off the receiver (position OFF). Place the receiver into the charging cradle of the transmitter. The charging process starts automatically. The battery LED indicator will be red and will turn to green when the battery is fully charged. This takes about 2 hours and 30 minutes.

natural_image
Line drawing of a handheld electronic device with two leads and a base (no text or symbols)3 Insert the spare battery into the base as indicated in the drawing. The LED will remain red and turn green when it is fully charged after about 2 hours and 30 minutes.
natural_image
Technical line drawing of a device with a circular housing and a small rectangular component attached (no text or symbols)- A fully charged battery provides up to 5 hours of listening enjoyment.
- To conserve battery power, the receiver automatically shuts off if no signal is detected for a period of approx. 5 minutes or when the level is too low. However, if the signal returns to an acceptable level, the transmitter will automatically switch ON again.
Changing the rubber ear buds
Two pairs of ear buds are delivered with the device (L=large/S=small).
The ear buds "L" (large) are already mounted on the headset.
1 For changing the ear buds pick the mounted ear buds at the end and tear them off simply.
2 Position the spare ear buds onto the "open ends" and let them snap into place.
External microphone
If your TV set or HiFi system does not have any audio jack you should use the external microphone.
flowchart
graph LR
    A["TV Device"] --> B["Cable"]
    B --> C["Monitor"]
    C --> D["Screen Icon"]
    style A fill:#f9f,stroke:#333
    style D fill:#bbf,stroke:#333
1 Connect the analogue audio cable to the microphone.
2 Fasten the microphone holder using the adhesive strip adjacent to the speaker grill on the TV and then clip the microphone into the holder so that it locates just above the speaker.
3 Please set a very low volume on the TV / on the HiFi system. The position of the microphone has a decisive influence on the volume - please determine the best position by experimentation.
Note: The output will be in mono when using the microphone.
Please make sure that the microphone is not too close to the sender, otherwise this will result in interference being picked up by the microphone which will be heard as digital noise in the headset.
Setting up an additional receiver (TV 2400-1 / TV 2410NL-1)
Your TV 2400-1 / TV 2410NL-1 is an additional receiver for your TV 2500 / TV 2510NL. After having inserted and charged the battery you will have to register it to the transmitter. There is no limit number of receivers to be registered to the TV 2500 / TV 2510NL transmitter for use together.
Inserting and charging the rechargeable battery
1 Insert a battery into the headset receiver.
2 Charge the battery before first use. Switch off the receiver (position OFF). Place the receiver into the charging cradle of the transmitter. The charging process starts automatically. The battery LED indicator will be red and will turn to green when the battery is fully charged. This takes about 2 hours and 30 minutes.
Alternatively you can use the fully charged spare battery from the transmitter.
Registering the receiver
1 Turn off the transmitter if it is on (disconnect from the mains).
2 Disconnect the audio source input.
3 Turn on the NEW headset, the LED indicator will be flashing on and off slowly.
4 Press the MIC button and hold for 3s, the green LED indicator will flash on and off quickly.
5 Turn on the transmitter immediately (must be done within 9s, or need to redo step 4).
6 If the registration is successful, you will hear a short confirmation tone in the headset and the green light on the headset will automatically stop flashing and will light constantly. This indicates that registration was successful.
7 Reconnect the audio source input.
Operation
Operation
Hearing damage due to high volumes!
This receiver allows you to set higher volumes than conventional headphones. This can cause hearing damage in persons with healthy hearing and especially in children.
- Before putting the receiver on, set the volume on the receiver to a low value.
- Do not continuously expose yourself to high volumes.
1 Switch on the audio source. The green indicator LED on the transmitter will glow constantly.
2 Switch the On/Off switch on the headset receiver to ON position,
3 Flex the head set arms outwards until the ear buds can be inserted in the ear. Please note the ear buds can be angled through a movement up, down or sideways, so as to enter the ear a little deeper. This will improve the sound quality and volume. Gently press the ear buds further into the ear to find a comfortable position for the ear buds and an ideal position for the sound.
4 Adjust the tone clarity setting if necessary.
Note: When the battery level is low you will hear 3 beeps every minute in the headset receiver. The headset receiver will be switched off automatically after 5 minutes.
The microphone button
The microphone opening at the side of the receiver pick up the sounds of your surroundings. When the microphone is switched on, you will hear your surroundings louder. You can hear for example your door bell, your telephone or your conversational partner even when you are wearing the receiver.
Press the button to switch the microphone on. The power on indicator will turn from green to red and two short beeps are to be heard. Make sure that
the microphone opening is not covered!
You can hear your surroundings and you use the receiver as an assistive listening device which helps you to better hear other people.
To switch the microphone off press the button again. The power on indicator will turn to green and you will hear the sound from the audio source.
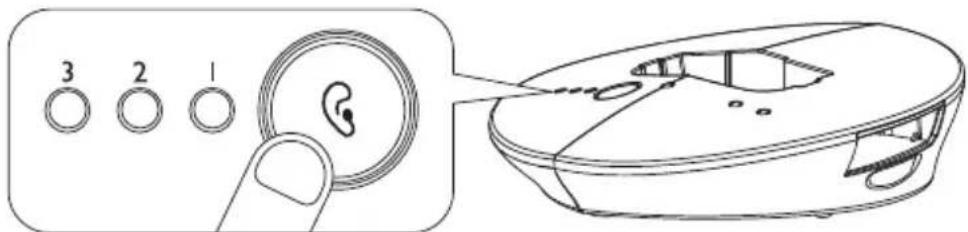
Tone clarity
You can set the tone clarity with the key on the transmitter. Press the depicted key repeatedly. Due to the current setting the indicator LEDs 1, 2, 3 or none of them will glow constantly.
text_image
3 2 1The following table shows the settings. Try out which setting works best for you.
| Setting | EffectLED indicator (orange) | |
| Default Flat | 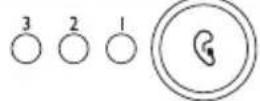 | |
| 1 |  | Bass Boost + Treble Boost |
| 2 | 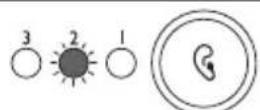 | Treble Boost |
| 3 |  | Bass Boost |
Troubleshooting
No sound
- Ensure that the mains adapter is pushed fully into the power outlet and that its cable is properly connected to the DC IN connector on the transmitter.
- Ensure that the headset receiver power ON/OFF switch is switched to ON.
- The charge level of the battery inside headset receiver may be too low. Recharge the battery or replace it with a fully charged battery.
- Ensure that the TV set, Hi-Fi system or audio component is switched ON and set to a channel that broadcasts an audio signal.
- Use the volume control on the headset receiver to increase the sound level.
- The connected audio/video equipment may not be in playback mode. Start playback on by the equipment.
- The headset receiver output level is set too low. Adjust the volume to a suitable level.
Distortion
- The charge level of the battery inside the headset receiver may be too low. Recharge the battery or replace them with a fully charged battery.
- The headset receiver may be too far away from the transmitter. Move closer to it.
- The audio signal input level is too low. Increase the volume from the audio source.
Appendix
Appendix
Safety Information
Please read this operating instruction manual thoroughly.
Intended use
This device was developed to transmit audio signals from an audio source like TV or HiFi device to a receiver, using cordless transmission. Any other use is considered unintended use.
Unauthorised modification or reconstruction is not permitted. Under no circumstances open the devices or complete any repair work yourself.
Installation location and safety information
- Prevent excessive exposure to smoke, dust, vibration, chemicals, moisture, heat and direct sunlight.
- Furniture polish, over time, may disintegrate the rubber feet of the transmitter which may stain your furniture. To avoid a potential stain, you may want to place the transmitter on a pad or mat.
- This listener allows you to amplify sounds to a loud volume, but listening to earphones at a high volume over an extended period of time may damage your hearing; especially in children. Thus, we suggest that you set the volume to a level that is comfortable to your hearing.
For users wearing a pacemaker
It is recommended that if you have a pacemaker fitted you check with a medical expert or your health adviser before using this product. Switch the device off immediately if you notice or suspect any adverse effects.
Power adapter plug
Attention: Only use the power adapter plug contained in the material supplied since other power adapter plugs could damage the transmitter. Ensure access to the power adapter plug is not obstructed by furniture or such.
Pay attention that the plug and cable are in perfect condition. Kinked or worn cable represents the risk of a fatal accident!
The power adapter plug supplied fulfils the ecodesign requirements of the European Union (Directive 2005/32/EC). This means that, both in an operating state and in an idling state, the power consumption is considerably lower compared to power adapter plugs with an older design.

• Energiesparend
• Economisant
lénergie
• A risparmio di
energia
• Energy efficient
Rechargeable batteries
Attention: Never throw batteries into a fire. Only use batteries of the same type! Pay attention to correct polarity.
Disposal
In order to dispose of your device, take it to a collection point provided by your local public waste authorities (e.g. recycling centre). According to laws on the disposal of electronic and electrical devices, owners are obliged to dispose of old electronic and electrical devices in a separate waste container. The adjacent symbol indicates that the device must not be disposed of in normal domestic waste!
Batteries represent a hazard to health and the environment!
Never open, damage or swallow batteries or allow them to pollute the environment. They may contain toxic, ecologically hazardous heavy metals. You are legally obliged to dispose of power packs and batteries at the point of sale or in the corresponding containers provided at collection points provided by local public waste authorities. Disposal is free of charge. The adjacent symbols indicate that the batteries must not be disposed of in normal domestic waste and must be brought to collection points provided by local public waste authorities.
Packaging materials must be disposed of according to local regulations.
Helpline
If you need some help and you're in the UK, please first check and see if your problem can be solved using the troubleshooting guide on page 28. If it can't , please call us on 0844 800 6503 (using a UK landline, at the time of going to print: calls cost 6p for connection charge and then 5p a minute. Mobile costs may vary). Lines are open Monday to Friday, 9am to 5pm, excluding public holidays.
If you've a claim on your 2-year guarantee, please contact your supplier.
Declaration of conformity
CE
This device fulfils the requirements stipulated in the EU directive:
1999/5 EU directive on radio equipment and telecommunications terminal equipment and the mutual recognition of their conformity.
Conformity with the above mentioned directive is confirmed by the CE symbol on the device.
To view the complete Declaration of Conformity, please refer to the free download available on our website www.amplicomms.com
Maintenance
- Clean the housing surfaces with a soft, fluff-free cloth.
- Never use cleaning agents or solvents.
Technical data
| Transmission mode: | UHF stereo |
| Carrier frequency: | 2.4GHz Digital |
| Range: | Up to 30 meters (open area) |
| Frequency response: | 30 Hz – 20 KHz |
| Max volume | 100 dB |
| Distortion: | < 0.5% |
Signal-to-noise ratio: > 75 dB
Operating voltage (Transmitter): 5 VDC, 550 mA
Operating voltage (Receiver): 3.7 V, 350 mA Lithium Polymer Battery
Operation time: With fully charged battery up to 5 hours
Charging time: For empty battery approx. 2.5 hours
Weight Receiver 53 g
Weight Transmitter 115 g
Guarantee
AMPLICOMMS equipment is produced and tested according to the latest production methods. The implementation of carefully chosen materials and highly developed technologies ensure trouble free functioning and a long service life.
The terms of the guarantee do not apply to the rechargeable batteries or power packs used in the products. The period of guarantee is 24 months from the date of purchase.
All deficiencies resulting from material of production faults which occur during the period of guarantee will be eliminated free of charge. Rights to claims under the terms of guarantee are annulled following intervention by the purchaser or third parties. Damage caused as a result of improper handling or operation, incorrect positioning or storing, improper connection or installation, Acts of God or other external influence are not covered by the terms of guarantee.
In the case of complaints, we reserve the right to repair or replace defect parts or provide a replacement device. Replacement parts or devices become our property.
Rights to compensation in the case of damage are excluded where there is no evidence or intent or gross negligence by the manufacturer.
If your equipment shows signs of defect during the period of guarantee, please return to the sales outlet in which you purchased the AMPLICOMMS equipment together with the purchase receipt. All rights to claims under the terms of guarantee in accordance with this agreement must be asserted exclusively with regard to your sales outlet.
Two years after the purchase of our products, claims under the terms of guarantee can no longer be asserted.
Notes
Récepteur
natural_image
Line drawing of a handheld cable connector with a connector inserted into a housing (no text or symbols)natural_image
Technical line drawing of a mechanical component with a close-up view of its base (no text or symbols)
natural_image
Line drawing of a handheld electronic device with two leads and a base (no text or symbols)natural_image
Line drawing of a handheld cable connector with a connector inserted into a housing (no text or symbols)natural_image
Line drawing of a handheld electronic device with two leads and a base (no text or symbols)natural_image
Technical line drawing of a circular device with internal components and an attached rectangular block (no text or symbols)flowchart
graph LR
    A["Device with cable"] --> B["Switch"]
    B --> C["Wireless cable"]
    C --> D["Computer"]
natural_image
Line drawing of a handheld electronic device with cable and connector (no text or symbols)natural_image
Line drawing of a handheld electronic device with two leads and a base (no text or symbols)natural_image
Technical line drawing of a mechanical component with a close-up view of its internal structure (no text or symbols)natural_image
Line drawing of a handheld cable connector with a connector inserted (no text or symbols)natural_image
Line drawing of a handheld electronic device with two leads and a base (no text or symbols)natural_image
Technical line drawing of a mechanical device with a close-up view of its internal components (no text or symbols)flowchart
graph LR
    A["Monitor"] --> B["Cable"]
    B --> C["Computer"]
    C --> D["Three circular insets showing hand and mouse actions"]
natural_image
Line drawing of a handheld electronic device with connectors and a connector block (no text or symbols)natural_image
Line drawing of a handheld electronic device with two leads and a base (no text or symbols)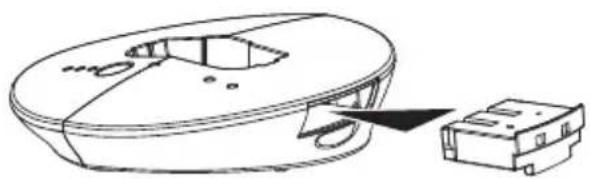
natural_image
Technical line drawing of a mechanical device with a close-up view of its internal components (no text or symbols)flowchart
graph LR
    A["TV Portugal"] --> B["Cable"]
    B --> C["Computer"]
    C --> D["Three circular insets showing a hand holding a device and a mouse on a monitor"]