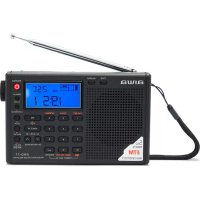
RMD77 - Radio AIWA - Free user manual and instructions
Find the device manual for free RMD77 AIWA in PDF.


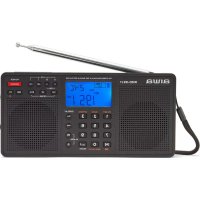
| Product Type | FM/SW/MW/LW DSP Stereo Multiband Radio |
| Brand | Aiwa |
| Model | RMD77 |
| Dimensions (W x D x H) | 141 x 30 x 87 mm |
| Weight (without batteries) | 190 g |
| Power Supply | 3 AA (LR06) batteries or USB 5V adapter |
| FM Band | 87-108 MHz (extendable: 64-108, 76-108, 87.5-108) |
| MW Band | 522-1620 kHz (USA: 520-1710 kHz) |
| LW Band | 153-513 kHz |
| SW Band | 2300-21950 kHz |
| Number of Presets | 550 (100 FM + 100 MW + 100 LW + 250 SW) |
| Output Power | 640 mW |
| Speakers | 2 x 57 mm (250 mW / 8 Ω) |
| Main Functions | Dual alarm (buzzer or radio), sleep timer, ETM (Easy Tuning Mode), ATS (Auto Tuning Storage), LCD backlight, key lock, automatic search, direct keypad entry, digital volume control (30 levels) |
| Maintenance and Cleaning | Turn off and unplug before cleaning; use a damp cloth, no liquid or aerosol cleaners |
| Safety | Do not expose to rain or moisture; use only recommended batteries; do not open the device (risk of electric shock) |
| Spare Parts and Repairs | Use only replacement parts specified by the manufacturer; entrust all repairs to qualified personnel |
| Included Accessories | Aiwa-G Design stereo headphones, carrying case, wrist strap, USB cable, 3 AA Alwa Xtra+ Alkaline Power batteries, user manual |
Frequently Asked Questions - RMD77 AIWA
User questions about RMD77 AIWA
0 question about this device. Answer the ones you know or ask your own.
Ask a new question about this device
Download the instructions for your Radio in PDF format for free! Find your manual RMD77 - AIWA and take your electronic device back in hand. On this page are published all the documents necessary for the use of your device. RMD77 by AIWA.
USER MANUAL RMD77 AIWA
Read these safety instructions before using your device and store them for possible future reference.
- If the cord is damaged, have it repaired by the manufacturer, its service or a similarly qualified person in order to avoid any hazard.
- The power supply must be replaced by a new one in case of malfunction, because this power supply is not repairable.
- The socket-outlet should be installed near the equipment and should be easily accessible.
- The product is not intended for use by persons (including children) with reduced physical, sensory or mental capacity. Persons who have not read the manual, unless they have received explanations by a person responsible for their safety and supervision should not use this unit.
- Children should be monitored to ensure that they do not play with the product.
- When connected the cord should always be readily accessible.
- The apparatus should not be exposed to dripping or splashing of water or liquids and no objects filled with liquids such as flowers vases shall be placed on the product.
- Do not impede the normal ventilation of the product when intended to use.
-
Always leave a minimum distance of 10cm around the unit to ensure sufficient ventilation.
-
Open flame sources, such as candles, should not be placed on top of the device.
- The device is intended for use only in a temperate climate.
12. CAUTION:
Danger of explosion if battery is incorrectly replaced or not replaced by the same type or equivalent.
13. The battery should not be exposed to excessive heat such as sunshine, fire or similar.
14. Different types of batteries, new and used batteries should not be mixed.
15. The battery must be installed according to the polarity.
16. If the battery is worn, it must be removed from the product.
17. The battery must be disposed off safely. Always use the collection bins provided (check with your dealer) to protect the environment.
SAFETY PRECAUTIONS
Thank you for purchasing RMD-77: FM stereo/SW/MW/LW DSP radio.
This is your assurance of quality, performance and value. Our engineers have included many useful and convenient features in this product. Please be sure to read this instruction Manual completely to make sure you are getting the maximum benefit from each feature.
This product was manufactured using the highest quality components and standards of workmanship. It was tested by inspectors and found to be in perfect working order before it left our factory.
Model: RMD-77
TO PREVENT FIRE OR SHOCK HAZARD DO NOT EXPOSE THIS APPLIANCE TO RAIN OR MOISTURE.
CAUTION RISK OF ELECTRIC SHOCK
DO NOT OPEN


LIGHTNING FLASH WITH ARROWHEAD SYMBOL
The lighting flash with arrowhead symbol within an equilateral triangle, it is intended to alert the user of the presence of uninsulated dangerous voltage within the products' enclosure that may be of sufficient magnitude to constitute a risk of electric shock to persons.
EXCLAMATION POINT
The exclamation point within an equilateral triangle, it is used to indicate that a specific component should be replaced only by the component specified in the literature for safety reasons.
WARNING!

The European directive 2002/96/EC on Waste Electrical and Eletronic Equipment (WEEE), requires that old household electrical appliances must not be disposed of in the normal unsorted municipal waste stream.

Old appliances must be collected separately in order to optimize the recovery and recycling of the materials they contain, and reduce the impact on human health and the environment.
The crossed out "wheeled bin" symbol on the product reminds you of your obligation, that when you dispose of the appliance, it must be separately collected.
Notes:
The images appearing in this manual are for reference only.
- Due to continual revision and improvement on our products design and specifications, are subject to change without further notice.
EN4
SAFETY PRECAUTIONS
1. READ INSTRUCTIONS:
All the safety and operating instructions should be read before the product is operated.
2. RETAIN INSTRUCTIONS:
The safety and operating instructions should be retained for future reference.
3. HEED WARNINGS:
All warnings on the product and in the operating instructions should be adhered to.
4. FOLLOW INSTRUCTIONS:
All operating and use instructions should not be followed.
5. CLEANING:
- Turn Off the unit if it's On before cleaning.
- Unplug the unit from the wall outlet before cleaning.
- Do not use liquid cleaners or aerosol cleaners.
- Use a damp cloth for cleaning.
6. WATER AND MOISTURE:
Do not use this product near water.
For example:
Near a bath tub, wash bowl, kitchen sink, or laundry tub; in a wet basement; or near a swimming pool; and the like.
7. ACCESSORIES:
Do not place this product on an unstable cart, stand, tripod, bracket, or table. The product may fall, causing serious injury to a child or adult and serious damage to the product.
Use only with a cart, stand, tripod, bracket, or table recommended by the manufacturer, or sold with the product. Any mounting of the product should follow the manufacturer's instructions, and should use a mounting accessory recommended by the manufacturer. A product and cart combination should be moved with care - quick stops, excessive force and uneven surfaces may cause the product and cart combination to overturn.
B. VENTILATION:
Slots and openings in the cabinet are provided for ventilation and to ensure reliable operation of the product and to protect it from overheating, and these openings must not be blocked or covered. The openings should never be blocked by placing the product on a bed, sofa, rug or other similar surface. This product should not be placed in a built-in installation, such as a bookcase or rack, unless proper ventilation is provided or the manufacturer's instructions have been adhered to.
This product should be operated only from the type of power source indicated on the marking label. If you are not sure of the type of power supply of your home, consult your product dealer or local power company. For products intended to operate from battery power, or other sources, refer to the operating instructions.
10. POWER-CORD PROTECTION:
Power-supply cords should be routed so that they are not likely to be walked on or pinched by items placed upon or against them, paying particular attention to cords at the power plug and jack plug socket. During movement, please take care of the power cord.
For example:
Tie up the power cord with cable tie.
11. NON-USE PERIODS:
The power cord of the product should be unplugged from the outlet when left unused for long periods of time. If the speaker have to be left unused for a long time, please let the battery fully charged, otherwise it will cause damage to the battery.
SAFETY PRECAUTIONS
12. LIGHTNING:
For added protection for this product during a lightning storm, or when it is left unattended and unused for long periods of time, unplig it from the wall outlet and disconnect the antenna or cable system. This will prevent damage to the product due to lightening and power-line surges.
13. POWER LINES:
An outside antenna system should not be located in the vicinity of overhead power lines or other electric light or power circuits, or where it can fall into such power lines or other electric light or power circuits, or where it can fall into such power lines or circuits. When installing an outside antenna system, extreme care should be taken to keep from touching such power lines or circuits as contact with them might be fatal.
14. OVERLOADING:
Do not overload wall outlets, extension cords, or integral convenience receptacles as this can result in a risk of fire or electric shock.
15. OBJECT AND LIQUID ENTRY:
Never push objects of any kind into this product through openings as they may touch dangerous voltage points or short-out parts that could result in a fire or electric shock. Never spill liquid of any kind on the product.
16. SERVICING:
Do not attempt to service this product yourself as opening or removing covers may expose you to dangerous voltage or other hazards. Refer to all servicing to qualified service personnel.
17. DAMAGES REQUIRING SERVICE:
Unplug this product from the wall outlet and refer servicing to qualified service personnel under the following conditions.
a) When the power-supply cord, batteries or plug is damaged.
b) If the product has been exposed to rain or water.
c) If liquid has been spilled, or objects have fallen into the product.
d) If the product does not operate normally by following the operating instructions, adjust only those controls that are covered by the operating instructions, as an improving adjustment of other controls may result in damage and will often require extensive work by a qualified technician to restore the product to its normal operation.
e) When the product exhibits a distinct change in performance it indicates a need for service.
18. REPLACEMENT PARTS:
When replacement parts are required, be sure the service technician has used replacement parts specified by the manufacturer or have the same characteristics as the original part, unauthorized substitutions may result in fire electric shock and other hazards.
19. HEAT:
The product should be situated away from sources such as radiators, heat registers, stoves or other products that produce heat.
EN6
PREPARATION FOR USE
Carefully remove all the components from the carton and remove all packing materials from the components.
Make sure that nothing is accidentally discarded with the packing materials.
If possible, save the carton and packing materials for the unlikely event that the product ever needs to be returned for service. Using the original carton and packing materials is the only proper way to protect the unit from shipping damage.
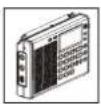
Multiband radio receiver x1
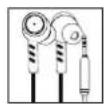
In-ear Alwa-Q Design x1
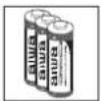
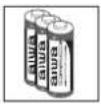
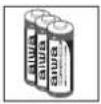
AA Batteries Aiwa Xtra+ Alkaline Power x3 NON-RECHARGEABLE
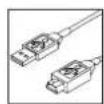
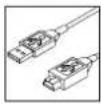
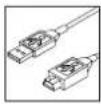
USB cable x1

Wrist strap x1 Carrying pouch x1
User manual x1
Warranty sheet x1
FEATURES OF THE RADIO
- PLL DSP - FM Stereo / MW / LW / SW
- 550 station memories,
(100 presets for each band FM/LM/MW and 250 presets for SW).
World band broadcasting. - Complete LCD display with backlight
- Dual alarm clock function (buzzer or radio broadcasting)
- Charge recharging batteries via USB (5V).
Easy tuning mode (ETM) - Auto tuning storage (ATS)
- Auto scan tuning function with pre-listening for frequency and memory (VF / VM).
High precision tuning.
Key pad for direct entry.
Digital volume control (with 30 adjustable levels). - Sleep timer,
FRONT VIEW
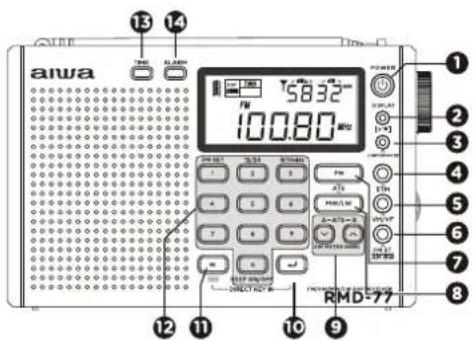
SIDE VIEW
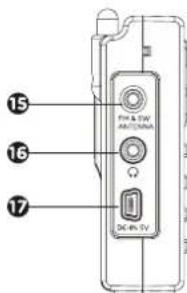
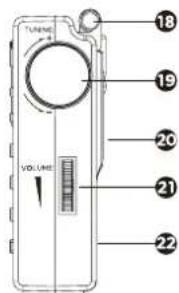
EN8
DESCRIPTION OF CONTROLS I
1 POWER button
DISPLAY/andkeylockfunctionbutton
3 LIGHT/SNOOZE button
ETM (Easy Tuning Mode)
5 VM/VF button
FM ST./AM BW (FM stereo and bandwidth button)
FM/ATS button (FM band selector and Auto Tuning Storage)
3 MW/LW button (MW/LW band selector & Auto Tuning Storage)
SW/ATS button (SW meter band selector & Auto Tuning Storage)
10 [←J]/DELETE (Confirm and delete button)
M/[Memory button and battery charging function)
0-9 Numeric keypad
TIME(Time set)
ALARM (Alarm set)
5 Auxiliary FM & SW Antenna Jack
6 Earphone Jack
USB 5V DC-IN Jack
FM & SW Telescopic Antenna
Tuning knob
Back Stand
Volume Knob
Battery Compartment
SPLAY
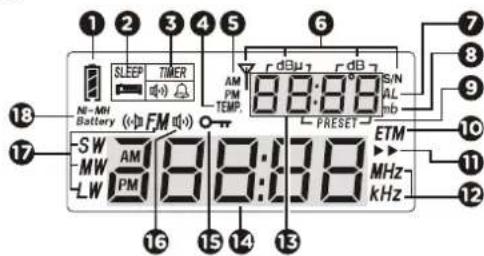
LCD VIEW
EN 9
Battery consumption indicator
Sleep indicator
Alarm on/off indicator
"Alarm on by radio
"Alarm on by buzzer
Temperature (Temp.)
AM, PM indicator for 12-hour format clock
Signal indicators: dBu: Signal strength unit dB: Signal to Noise Ratio (S/N) unit
Alarm time indicator
8 SW meter band indicator
9 Preset memory address indicator
ETM indicator
1 Tuning speed: >" Slow tuning >>" Fast tuning
kHz: Frequency unit for MW, LW & SW; MHz: Frequency unit for FM
Digital number display (4 Digs) With radio off. Local time, alarm time, temperature. With radio on: Local time, signal strength /SNR, alarm time, temperature, memory adress meter band.
Address/meter band. With radio off. Local time. With radio on: Frequency display, band display.
15 Key-lock indicator
FM stereo status indicator
Band indicator
Rechargeable batteries indicator
EN 10
BATTERY INSTALLATION
Batteries must be inserted correctly to avoid damage to the radio. Always remove the batteries when the radio will not be used for a long period of time, as this will cause leakage to the batteries and subsequently damage to your device.
BATTERY INSTALLATION
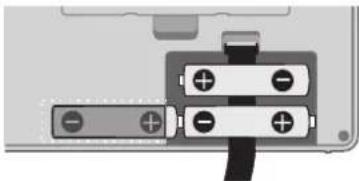
Slide out cover and install 3 AA TYPE battories in the numbered order, making sure to match the polarity markings inside the compartment.
Note:
Make sure that the batteries had been installed over the ribbon inside the compartment. When the batteries need to be replaced, pull the ribbon to remove the batteries easily from the compartment.
BASIC OPERATION
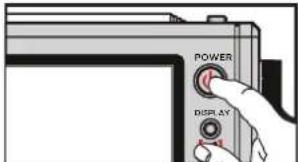
Press POWER ON/OFF button to power on the unit (the display will bright blue, and the word ON will appear); press it again to power OFF (standby mode) the radio (the display will bright blue, and the word OFF' will appear).
KEY LOCK FUNCTION
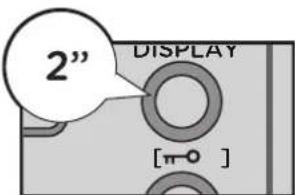
Press and hold the DISPLAY /0 button for two seconds to set the key lock function.
Once the key lock function is enabled, the keyboard of the radio will be lock.
To disable the key lock function, press and hold for two seconds the DISPLAY button.
USING THE ANTENNA
TIPS TO IMPROVE RECEPTION
A. For FM/SW broadcasting:
In case of receiving FM/SW broadcasting, fully extend the telescopic antenna, and adjust its length and direction to get a better reception.
B. For MW/LW broadcasting:
Thoro is magnotic antenna insido the radio. When receiving MW and LW broadcasting, rotate the radio or change its location to achieve optimum reception.
Note:
The bottom of the antenna can be rotated and stretched.
TUNE INTO STATIONS
Press the POWER ON/OFF button to turn on your radio, then select your desired band by pressing the FM. MW/LW. 5W (▲) or (▼) button. Now, you can turn into your favorite stations with any of the following tuning methods:
METHOD 1: ETM (EASY TUNING MODE)
ETM skillfully combines a reception circuit of high quality and high precision dial for easy tuning radio stations.
Using ETM to auto tune and store all available stations into a temporary memory without affecting ATS nor regular memories, please follow below steps:
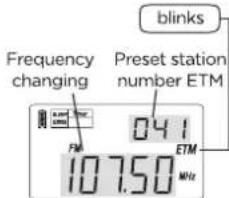
- Press the ETM button to enter on Easy Tuning Mode. The display will show the word ETM.
- Select your desired band, then press and hold the ETM button until the auto scan starts. The auto scan function will store all the available stations in the ETM memory.
- When the auto scan has stopped the searching, turn the TUNING KNOB to select those recently stored stations.
Note:
- If you are unable to turn on the radio, please check that the batteries were installed correctly, the battery capacity is sufficient and the lock function has not been turned on.
EN 12
TUNE INTO STATIONS
TIPS TO IMPROVE RECEPTION
A. For FM stations:
When you are in a different city or country, you should perform the ETM function again instead of using ATS function, because this will not delete any of the stations already stored within the memory.
B. For MW stations:
We highly recommend to perform the ETM function again during night time, as many stations start broadcasting at night.
C. For SW stations:
It is recommendable to perform the ETM function in the morning, afternoon as well as night time, because the transmitting signal of SW is very unstable and usually there are more stations that start broadcasting in the late afternoon.
Note:
While operating ETM to search for stations, a few stations might be missed if there is interference in the surrounding. In this case, you can simply key-in the frequency, then press the ETM button to manually store it into the ETM memory.
METHOD 2: MANUAL TUNING
A. Frequency searching:
Press the VF/VM button to switch into frequency mode, and then rotate the TUNING KNOB knob to select your desired station.
| step band | >Slow tuning mode | >>Fast tuning mode |
| tuning step | tuning step | |
| FM | 0.01 MHz | 0.1 MHz |
| MW | 1kHz | 9/10kHz |
| LW | 1kHz | 9kHz |
| SW | 1kHz | 5kHz |
B. Memory searching:
Press the VM/VF button to switch into memory mode, "VM" will appear on screen.
To rotate the TUNING KNOB to select those stored stations.
METHOD 3: AUTO BROWSE STATIONS
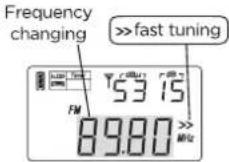
- turn on the radio and press the VM/VF button to switch into frequency mode.
- Press and hold the VM/VF button until the FAST TUNING speed mode"starts scanning from one station to another, staying on each station for about 5 seconds.
- To stop the auto browse function, simply press the VM/VF button again.
Note:
While operating the Auto-browse Station function, you can press the M button anytime to store the current station into memory; the unit will keep on auto browsing the next available station afterwards.
METHOD 4: DIRECT KEYPAD ENTRY
To search for a frequency, turn on the radio and press the VM/VF button to switch into frequency mode, press the numeric keys 0-9 to enter the station frequency directly. To search for those stored stations, press the VM/VM button to switch into memory mode, then press the numeric keys 0-9 to enter the preset memory number directly.
Notes:
- Ignore the decimal point for FM band when inputting the frequency numbers. For example, FM 89.3 MHz, just enter 8.9.3.
- If the entered frequency is not within the covering area, the display would display "Err" (error) symbol.
USING THE STORED STATIONS
There's a total of 550 preset memories within the unit. 100 preset memories for each FM, MW, and LW band, and 250 for SW.
METHOD 1: ATS (AUTO TUNING STORAGE)
- Fully extend the telescopic antenna and then press the FM button to select FM band.
- Press and hold the FM button, until the word "PRESET" appears flashing on screen on screen and the frequency starts advancing; now the radio will start scanning and storing all the available radio stations into the memory.
When the frequency stops, it means that the ATS operation is already done. Then you can rotate the TUNING KNOB to search for those stored stations.
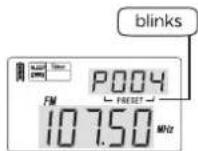

USING THE STORED STATIONS L
MW/LW ATS:
Press the MW/LW button to select MW/LW band, then follow step 2 of FM/ATS.
SW ATS:
Fully extend the telescopic antenna and press the SW (A) or (V) buttons to select SW band.
Modes for SW ATS tuning
A. Using all the meter bands:
Press and hold the () button to ATS the stations within all meter bands.
B. Using the present meter band:
Press and hold the () button to ATS the stations within the present meter band.
Notes:
During ATS process in FM, MW / LW or SW (mode A), pre-stored radio stations will be replaced automatically by the new searched stations.
-
With ATS in SW (mode B), those existing memories will not be replaced; all the newly found radio stations will be stored in the blank memory addresses.
-
If there is too much interference in your surrounding or many mirror/blank stations are being stored during ATS, you should contract the telescopic antenna (FM and SW) or rotate the radio for better reception (MW and LW).
METHOD 2: STORING STATIONS MANUALLY
- Select band and tune to your desired station.
- Press the M button with the word "PRESET" flashing.
- Press the M button again to store the station into memory.
Note that you can also wait for 3 seconds to auto store the station into memory.
METHOD 3: SEMI-AUTO STORING STATIONS
While operating the Auto Browse Station function, you can simply press on the M button to store the station into memory to avoid storing unwanted stations and interfering signals.
- Press the VM/VF button to switch into frequency mode
- Press and hold the VM/VF button until advancing on the screen to auto browse from one station to another.
- While tuning to your desired station, press the M button followed by "PRESET" flashing to directly store the station into the next available memory. The unit will keep on browsing until you deactivate it by pressing on the VM/VF button again.
ED STATIONS
METHOD 1: MANUAL MEMORY TUNING
Press the VM/VF button to enter the memory mode, the word "PRESET" will appear on the screen. Then rotate the TUNING KNOB to scroll through the stored stations one by one.
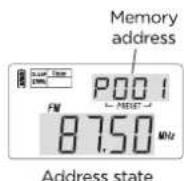
METHOD 2: AUTO BROWSE MEMORY
-
Press the VM/VF button followed by "memory page" that appears in the upper right corner to enter the memory mode.
-
Press and hold the VM/VF button until PRESET flashes to automatically scan from one memory to another, remaining on each station for approximately 5 seconds.
To stop the automatic search memory, simply press the VM/VF button.

METHOD 3: DIRECT KEY IN MEMORY ADDRESS
- Press the VM/VF button to enter the memory mode.
- Press the numeric keys 0-9 to enter the memory address directly, and then press the button (A) to confirm.
The auto scan function will store all the available stations in the ETM memory.
Note:
- If the display shows "----" symbol after entering the number, it means that the entered memory address does not exist.
EN 16
DELETE MEMORY
Press the VM/VF button, and the "Memory address" will flash in the upper right corner of the screen. Then use one of the following methods to remove unwanted stations:
METHOD 1: DELETE A SINGLE MEMORY MANUALLY
Turn the TUNING KNOB to select the memory you want to delete, press and hold the [DELETE] button until the word "DEL" and "memory address" flash; then press the [DELETE] button to erase the unwanted station from memory.
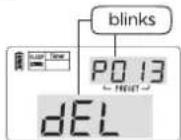
Delete a single station
METHOD 2: SEMI-AUTO DELETE MEMORY
Press and hold the VM button until "PRESET" flashes to automatically search for stored stations, press the [DELETE] button at any time to directly delete unwanted memory. The radio will continue searching until you press any other button to stop this function.
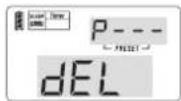
Delete memory
METHOD 3: MANUALLY DELETE ALL MEMORY WITHIN THE BAND
Press and hold the [DELETE] button until the word "ALL" flashes in the upper right corner of the screen, then press the [DELETE] button to erase all memory within the selected band.
SLEEP FUNCTION
- Press and hold the POWER button until "SLEEP" and "ON" or I - 120^ show on the display.
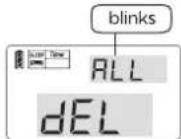
Delete all memories
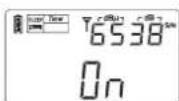
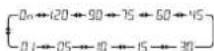
Sleep time range
CLOCK SETTING
- Press & hold the TIME button until hours flashing, then rotate the TUNING KNOB to adjust the hour.
- Press the TIME button, then rotate the TUNING KNOB to adjust the minutes while minutes are flashing. The auto scan function will store all the available stations in the ETM memory.
- Press the TIME button to confirm the setting.
Notes:
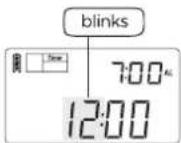
If the TIME button has not been pressed again within 3 seconds, the unit will automatically confirm the setting.
- You can also directly key-in the number to set the clock after pressing and holding the TIME button, this allows the user to set the time by pressing the numeric keys, then you will hear a prolonged beep sound suggesting that the time has been set. For example, to set the clock to 6:35, just enter 0 6 3 5.

ALARM
It is recommended to set the alarm by buzzer if you are not familiar with the local radio frequency and air time.
SETTING THE ALARM BY BUZZER
- Press and hold the ALARM button until the hour flashes in the upper right corner, then turn the TUNING KNOB to set the hours.
- Press and hold the ALARM button, then rotate the TUNING KNOB to adjust the minutes while they're flashing.
- Press the ALARM button again to confirm the setting.
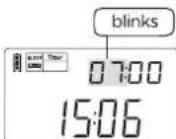
Note:
If the ALARM button has not been pressed again within 3 seconds, the unit will automatically confirm the alarm setting.
EN 18
ALARM
SETTING THE ALARM BY RADIO
Alarm by radio station:
- Turn on the radio, then tune into your favorite station for alarm by radio and adjust your desired alarm volume level.
- Press the button M button with "PRESET" flashing.
- Press the ALARM button immediately and the "OK" symbol will appear on the display to confirm the preset alarm station.
Note:
The radio will turn on automatically playing the preset station when it reaches the alarm time. It will auto turn off as well when it reaches the preset alarm off timer.
TURNING THE ALARM ON OR OFF
You can press the ALARM button repeatedly to activate/deactivate the alarm by buzzer / radio respectively.
If "shows on the display, it means the alarm by buzzer is turned on.
If shows on the display, it means the alarm by radio is turned on.
if 空 does not show on the display, it means the alarm by buzzer / radio is turned off.
SWITCH OFF THE ALARM
Buzzer alarm:
Press the POWER button to turn off the alarm.
Radio alarm:
Press the POWER button to continue listening to the radio, press twice to turn off the station alarm.
Note:
- if the preset alarm is activated when you are listening to the radio, it will auto switch to the preset radio station.
SNOOZE FUNCTION
When the preset alarm is activated, you can press the LIGHT/SNOOZE button to temporarily turn off the alarm, the alarm will sound again 5 minutes later.
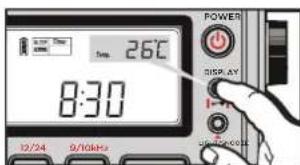
DISPLAY MODE
With radio OFF:
Press repeatedly the DISPLAY button to view temperature or alarm time.
With radio ON:
Press repeatedly the DISPLAY button to view local time, alarm time, temperature or signal strength showing on the upper right corner of the display.
SYSTEM SETTINGS
INTELLIGENT LIGHT FUNCTION
This radio has an intelligent lighting function with which the backlight would be on for 5 seconds when operating any keys or knobs.
You can use the following methods to turn on/off the backlight:
A. Temporary illumination:
Press the LIGHT/SNOOZE button with a "Beep" sound to illuminate the LCD for 5 seconds.
B. Permanent Illumination:
Press and hold the LIGHT/SNOOZE button until a prolonged double beep
"Beep," sound heard for permanently illumination.
Press it again with a double beep sound to turn off the backlight.
Note:
- When the unit is powered by the batteries, please try to avoid setting the backlight to permanent illumination to reduce power consumption.
- When the unit is turned off, the permanent illumination function will be turned off automatically as well.
EN 20
SYSTEM SETTINGS
SETTING THE FM FREQUENCY RANGE
In radio off mode, press and hold the [FM SET] button until "87.5-108MHZ", "64-108MHZ", "76-108MHZ", or "87-108MHZ" appears on the display. Quickly keep pressing on the [FM SET] button to select a suitable frequency range for your local FM.
SETTING MW(AM) TUNING STEP
With radio off, press and hold [9kHz] button until "9kHz" or "10kHz" appears on the display to solicit your desired AM tuning stop.
TURN ON/OFF THE LW
With radio off, press and hold [MW/LW] button until "LW ON" or "LW OFF" appears on the display to turn ON or OFF the LW respectively.
TEMPERATURE
When the AM tuning step is 10 kHz, the temperature displays will auto switch to Fahrenheit °F. When the AM tuning step is 9 kHz, the temperature displays will auto switch to Celsius °C.
MUTE/UNMUTE THE KEY TONE
With radio off, press and hold the [BEEP ON/OFF] button until "ON" or "OFF" appears in the display to activate or deactivate the key tone respectively.
CHARGING FUNCTION
TURN ON/OFF THE CHARGING FUNCTION
With radio off, press and hold the key until "CHA ON" and "NI-MH BATTERY" show on the display to activate the consumption display of recharging batteries and the built-in charging system.
Press and hold the key until "CHA OFF" shows up and "NI-MH BATTERY" disappears to activate the consumption display of regular batteries and turn off the built-in charging function.
INTELLIGENT CHARGING FUNCTION
With radio off, install 3 x AA (LRO6) rechargeable batteries then press and hold the key until
"CHA ON" and "NI-MH BATTERY" displays to activate the built-in charging function.
Use the 5V external adaptor with USB plug to connect with the radio.
The symbol " " will advance from the bottom to the top during power charging. It stops when the batteries are fully charged.
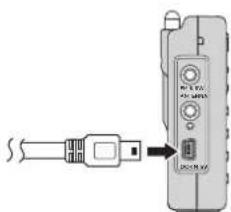
Connect 5V external adaptor with USB plug.
CHARGING FUNCTION
Notes:
- The default setting of this radio is to use regular batteries for power supply. In case of using rechargeable batteries, you should switch the radio system to rechargeable batteries mode in order to show the correct power capacity.
- Uso all the power of the rechargeable battoriles before charging again. This method could extend the life of the batteries and keep them in good condition.
- Three batteries should be used as a group and should never be applied for another use. Also, do not mix battorios with different power capacity to avoid damaging the radio.
- Never attempt to charge a non-rechargeable battery in the radio, this will damage your radio and could be dangerous.
FM STEREO & BANDWIDTH
FM ST. (FM STEREO)
While listening to FM stereo stations, press the [FM ST.] button, the # indicate will appear on the screen to activate the STEREO listening mode. If the received FM transmission signal is too weak, it is recommended to deactivate the stereo function by pressing the [FM ST.] button again.
Note:
The stereo function will not be activated if the FM station is not stereo broadcasting.
AM BW (BANDWIDTH)
Repeat pressing the [AM BW] button to select your desired 6, 4, 3, 2, 1 kHz bandwidth.
Wide band:
It has better audio fidelity when receiving strong signals or local stations.
Narrow band:
It is suitable to receive weak and long distant stations as narrow band is able to limit the interference from adjacent strong signal and reduce background noise.

EN 22
FM/SW RECEPTION
HOW TO IMPROVE FM / SW RECEPTION
Plug in the external wire antenna to the FM & SW ANTENNA jack of this radio, and then hang its end outside the window for better reception of FM and SW.
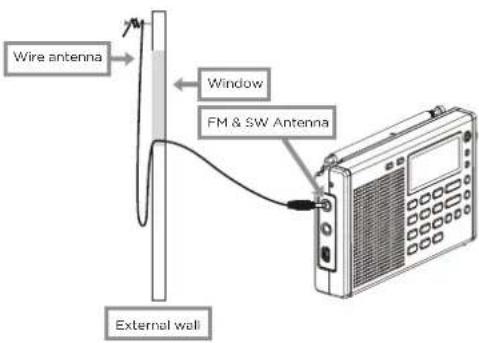
Note:
- When installing an outside antenna system, extreme care should be taken to keep from touching such power lines or circuits as contact with them might be fatal.
USING BATTERIES
- Batteries must be inserted correctly in accordance with the polarity marks to avoid damage to the radio.
- If the battioros haven't been changed in a long time period, the clock of the radio will stop working. However, the pre-stored frequencies are still kept. The clock will work again after now battorios are re-installed.
- When the battery power is low, the ^ symbol on the display will flash advising you to replace the exhausted batteries for new ones. The radio will turn off automatically when the battery power isn't enough.
- Mixing used and new batteries may cause damage to the radio and also display the power capacity incorrectly.
- Remove the batteries from the battery compartment, if the radio is not going to be used for a long period of time. This will prevent the leakage of batteries that may can damage the radio
TROUBLE SHOOTING GUIDE
If a fault occurs, first check the points listed below before taking the speaker to repair. Do not open the radio as there is a risk of electric shock.
| General | ||
| Not able to turn on the radio. | Exhausted batteries. Replace the Batteries installed incorrectly. | Old batteries with new ones. |
| Batteries installed incorrectly. | Install the batteries according to the polarity marks. | |
| POWER button is locked. | Press the button to unlock. | |
| Radio malfunction. | This may be caused by interference, and the computer microchip does not function properly. | Remove and Install the batteries again. If the radio still doesn't work, please contact your nearest dealer for customer service. |
| Radio auto turns off while listening. | Batteries have no power. | Replace all the batteries. |
| Sloop timor is activated. | Turn on the radio again. | |
| Listening to the radio | ||
| The radio cannot store some ATS stations. | Weak frequency signal. Try to search the station manually. | |
| Some stations are being stored with noise using ATS. | There is interference nearby. Relocate the antenna or move the unit to another location. | |
| Only limited FM stations can be received in Japan. | FM frequency is 76-90MHz for Japan. | Turn the radio off and press and hold the [FM SET] button to select FM frequency range. |
| Poor AM reception in USA. | USA uses 10kHz tuning step for AM. | Turn off the radio, repeatedly press and hold the [9/10kHz] button to select 10kHz. |
| When the alarm is activated (alarm by radio), there is only noise with the broadcast. | Maybe you did not set the proper radio alarm station. | Preset your alarm station properly. |
| There is no broadcasting at that radio station. | Make sure there is a radio broadcast in your location. | |
| You are in another area where there is no radio station for your preset frequency. | Or set the alarm by buzzor. | |
TECHNICAL SPECIFICATION
| MODEL: | RMD-77 | ||
| Rated Voltage: | 4.5V | ||
| Power consumption: | 720mW | ||
| Audio output power (L+R): | 245mW x2 (10% distortion) | ||
| Power source: | 1.5V (AA/LRO6) batteries, x3DC USB 5V, 250mA | ||
| AUDIO SECTION | |||
| Frequency ranges | Sensitivity Selectivity | ||
| FM | 87-108MHz | (S/N=30dB) < 3μV | >60dB (±150kHz) |
| EU. USA: | 87.5-108 MHz | ||
| JAPAN: | 76-108 MHz | ||
| RUSSIA: | 64-108MHz | ||
| MW | 522-1620 kHz | (S/N=26dB) < 1mV/m | >60dB (BW=3kHz, ±9kHz) |
| USA: | 520-1710 kHz | ||
| LW | 153-513 kHz | (S/N=26dB) < 10mV/m | >60dB (BW=3kHz, ±9kHz) |
| SW | 2300-21950 kHz | (S/N=26dB) < 20μV | >60dB (BW=3kHz, ±5kHz) |
| FM Stereo crosstalk: | < 35 dB | ||
| Number of preset radio stations: | 550 (100FM + 100MW + 100LW + 250SW) | ||
| AMPLIFIER | |||
| Output power: | 640mW | ||
| Input sensitivity | 310mV | ||
| Frequency response | 300Hz---4kHz | ||
| Audio S/N | FM: 50dBMW: 51dBSW: 51dB | ||
| ACCESSIONS | |||
| In-ear Alwa-Q Design x1 | |||
| Pouch bag x1 | |||
| Wrist strap x1 | |||
| USB cable x1 | |||
| AA Batteries Alwa Xtra+ Alkaline Power x3 | |||
| User manual x1 | |||
| DIMENSIONS & STUFFING | |||
| Dimensions of the speaker: | x2 (O/ 57mm, 250mW/8 Ohm) | ||
| Dimensions of the radio: | W 141° D 30° H 87" mm | ||
| Net weight: | 190g (Batteries not included) | ||
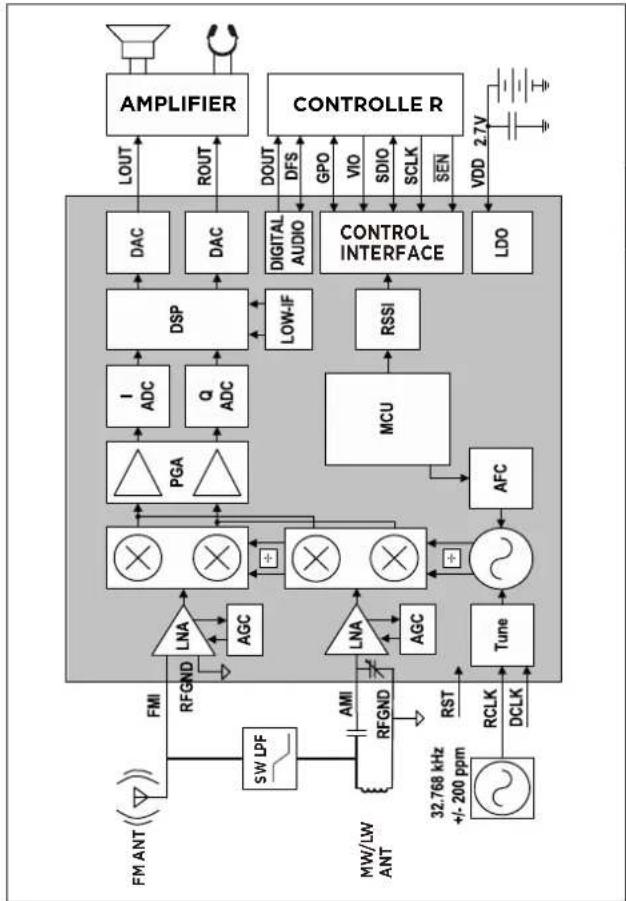
FUNCTIONAL BLOCK DIAGRAM
RMD-77 uses DSP Si4734 microchips (from Silicon Labs, USA) to digitalize the analog AM/FM broadcasting signal base on the modern software technology and radio principles. It can highly improve the radio's sensitivity, selectivity, S/N ratio and interference.
ES 26
ESPANOL
Pilas AA Aiwaa Xtra+ Alkaline Power x3
x2 (O/57mm, 250mW/8 Ohm)
DimensiOnes do la radio:
W141°D30°H87°mm
Peso neto:
RISQUE D'ÉLECTROCUTION NE PAS OUVRIR

ATTENTION: POUR RÉDURE L RISQUE DE ÉLECTROCUION, NE PAS RETIRER LE COUVERCE L'INTEREUR DE L'APPIAREIL. NE COMPORTE A CUNCÈ PEICE UITÉ À L'UTILISATEUR CONFIEZ-EN L'ENTRETÉN I AU PERSONNEL QUALIFÉ
ECLAIR AVEC POINTE DE FLECHE
1. LIRE INSTRUCTIONS:
AM BW (BANDE PASSANTE)
COMMENT A IMPROVE FM / SW RECEPTION
The safety and operating instructions should be retained for future reference.
3. WARNHINWEISE:
In-ear AIwa-Q Design x1
USB-Kabel x1
Bediuningsanleitung x1 Garantleblatt x1
FEATURES DES RADIOS
- PLL DSP - FM Stereo / MW / LW / 5W
550 Stationsspeicher.
METHODE 1: ATS (AUTO TUNING STORAGE)
SCHALTEN SIE DEN ALARM AUS
Buzzer-Alarm:
Batterie AA Aiwa Xtra+ Alkaline Power x3 NON RICARCIBLE
Cavo USB x1
SETTING MW(AM) PUNTO DI TUNING
Batterie AA Alwa Xtra+ Alkaline Power x3
x2 (O/57mm, 250mW/8 Ohm)
W141°D30°H87°mm
Pilhas AA Aiwa Xtra+ Alkaline Power x3 NAO RECARREGAVEL
Cabo USB x1
AJUSTEDAETAPA DE SINTONIA MW (AM)
Pilhas AA Aiwa Xtra+ Alkaline Power x3
x2 (O/57mm, 250mW/8 Ohm)
Dimensoe do rado:
W141°D30°H87"mm
Peso liquido:

- CAUTION:
- SAFETY PRECAUTIONS
- TO PREVENT FIRE OR SHOCK HAZARD DO NOT EXPOSE THIS APPLIANCE TO RAIN OR MOISTURE.
- LIGHTNING FLASH WITH ARROWHEAD SYMBOL
- EXCLAMATION POINT
- WARNING!
- Notes:
- EN4
- READ INSTRUCTIONS:
- RETAIN INSTRUCTIONS:
- HEED WARNINGS:
- FOLLOW INSTRUCTIONS:
- CLEANING:
- WATER AND MOISTURE:
- ACCESSORIES:
- VENTILATION:
- POWER-CORD PROTECTION:
- NON-USE PERIODS:
- LIGHTNING:
- POWER LINES:
- OVERLOADING:
- OBJECT AND LIQUID ENTRY:
- SERVICING:
- DAMAGES REQUIRING SERVICE:
- REPLACEMENT PARTS:
- HEAT:
- EN6
- PREPARATION FOR USE
- FEATURES OF THE RADIO
- FRONT VIEW
- SIDE VIEW
- EN8
- DESCRIPTION OF CONTROLS I
- SPLAY
- EN 9
- EN 10
- BATTERY INSTALLATION
- Note:
- BASIC OPERATION
- KEY LOCK FUNCTION
- USING THE ANTENNA
- TIPS TO IMPROVE RECEPTION
- TUNE INTO STATIONS
- METHOD 1: ETM (EASY TUNING MODE)
- For FM stations:
- For MW stations:
- For SW stations:
- METHOD 2: MANUAL TUNING
- Frequency searching:
- Memory searching:
- METHOD 3: AUTO BROWSE STATIONS
- METHOD 4: DIRECT KEYPAD ENTRY
- USING THE STORED STATIONS
- METHOD 1: ATS (AUTO TUNING STORAGE)
- USING THE STORED STATIONS L
- MW/LW ATS:
- SW ATS:
- Modes for SW ATS tuning
- Using all the meter bands:
- Using the present meter band:
- METHOD 2: STORING STATIONS MANUALLY
- METHOD 3: SEMI-AUTO STORING STATIONS
- ED STATIONS
- METHOD 1: MANUAL MEMORY TUNING
- METHOD 2: AUTO BROWSE MEMORY
- METHOD 3: DIRECT KEY IN MEMORY ADDRESS
- EN 16
- DELETE MEMORY
- METHOD 1: DELETE A SINGLE MEMORY MANUALLY
- METHOD 2: SEMI-AUTO DELETE MEMORY
- METHOD 3: MANUALLY DELETE ALL MEMORY WITHIN THE BAND
- SLEEP FUNCTION
- CLOCK SETTING
- ALARM
- SETTING THE ALARM BY BUZZER
- SETTING THE ALARM BY RADIO
- Alarm by radio station:
- TURNING THE ALARM ON OR OFF
- SWITCH OFF THE ALARM
- Buzzer alarm:
- Radio alarm:
- SNOOZE FUNCTION
- DISPLAY MODE
- With radio OFF:
- With radio ON:
- SYSTEM SETTINGS
- INTELLIGENT LIGHT FUNCTION
- Temporary illumination:
- Permanent Illumination:
- EN 20
- SETTING THE FM FREQUENCY RANGE
- SETTING MW(AM) TUNING STEP
- TURN ON/OFF THE LW
- TEMPERATURE
- MUTE/UNMUTE THE KEY TONE
- CHARGING FUNCTION
- TURN ON/OFF THE CHARGING FUNCTION
- INTELLIGENT CHARGING FUNCTION
- FM STEREO & BANDWIDTH
- FM ST. (FM STEREO)
- AM BW (BANDWIDTH)
- Wide band:
- Narrow band:
- EN 22
- FM/SW RECEPTION
- HOW TO IMPROVE FM / SW RECEPTION
- USING BATTERIES
- TROUBLE SHOOTING GUIDE
- FUNCTIONAL BLOCK DIAGRAM
- ES 26
- ESPANOL
- ECLAIR AVEC POINTE DE FLECHE
- LIRE INSTRUCTIONS:
- AM BW (BANDE PASSANTE)
- COMMENT A IMPROVE FM / SW RECEPTION
- WARNHINWEISE:
- FEATURES DES RADIOS
- METHODE 1: ATS (AUTO TUNING STORAGE)
- SCHALTEN SIE DEN ALARM AUS
- Buzzer-Alarm:
- SETTING MW(AM) PUNTO DI TUNING
- AJUSTEDAETAPA DE SINTONIA MW (AM)
Brand : AIWA
Model : RMD77
Category : Radio