
DAB20 - Radio DENVER - Free user manual and instructions
Find the device manual for free DAB20 DENVER in PDF.
| Product type | DAB+ / FM Radio |
| Brand | Denver |
| Model | DAB20 |
| Power supply | DC mains adapter (included) |
| Radio modes | DAB (Band III) and FM (87.5-108 MHz) |
| Number of presets | 10 for DAB, 10 for FM |
| Display | LCD screen with adjustable backlight (3 levels) |
| Remote control | Yes, with dedicated keys (POWER, MUTE, presets, alarms, navigation) |
| Audio output | 3.5 mm stereo jack (for external speaker, not built-in) |
| Antenna input | 3.5 mm jack for included wire antenna |
| Main functions | Auto and manual search, DRC, equalizer (presets + My EQ), alarms (2), sleep timer, automatic clock update, brightness adjustment |
| Menu languages | English, French, German, Italian |
| Care and cleaning | Clean with a soft, dry cloth. Do not use abrasive products. |
| Safety | Do not expose to moisture. Keep out of reach of children under 3 years. |
| Spare parts and repairability | No spare parts supplied. Repair must be carried out by an approved professional. |
| General information | Compliant with Directive 2014/53/EU. Manufactured by Denver Electronics. |
Frequently Asked Questions - DAB20 DENVER
User questions about DAB20 DENVER
0 question about this device. Answer the ones you know or ask your own.
Ask a new question about this device
Download the instructions for your Radio in PDF format for free! Find your manual DAB20 - DENVER and take your electronic device back in hand. On this page are published all the documents necessary for the use of your device. DAB20 by DENVER.
USER MANUAL DAB20 DENVER
natural_image
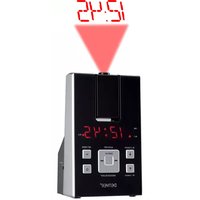
Simple line drawing of a smartphone front panel with a blank screen and handle (no text or symbols)Denver DAB-20
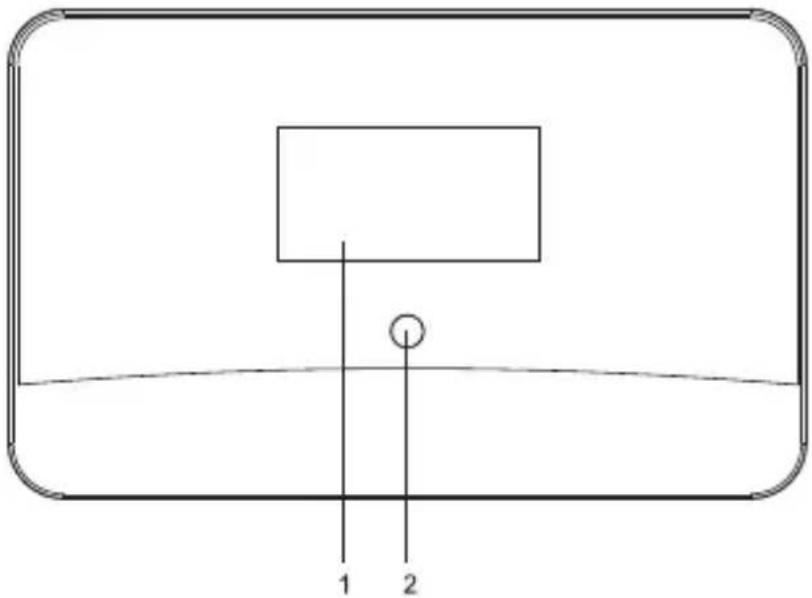
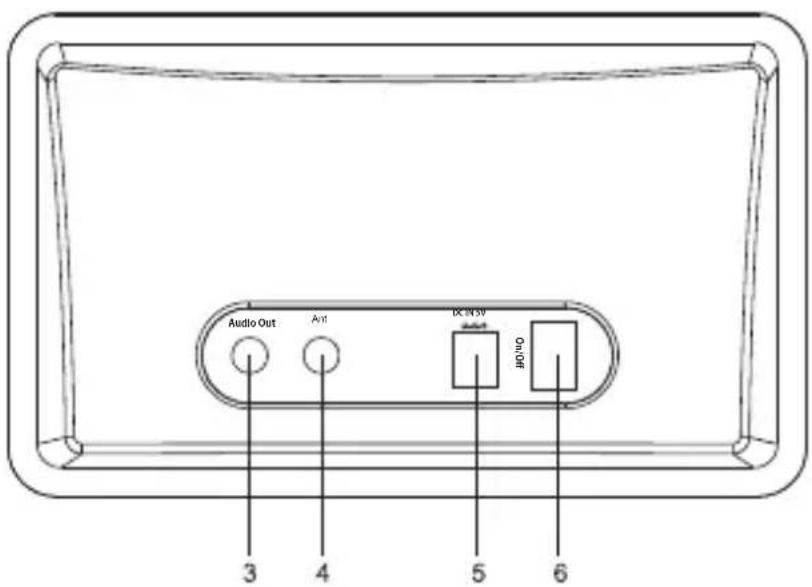
Location of Control
natural_image
Simple line drawing of a basketball hoop with two labeled points (1 and 2), no text or symbols present.- LCD screen
- Remote Control Sensor
- 3.5mm Stereo Audio Out Socket
- 3.5mm Antenna Input Socket
- DC IN socket
- Power On/Off switch

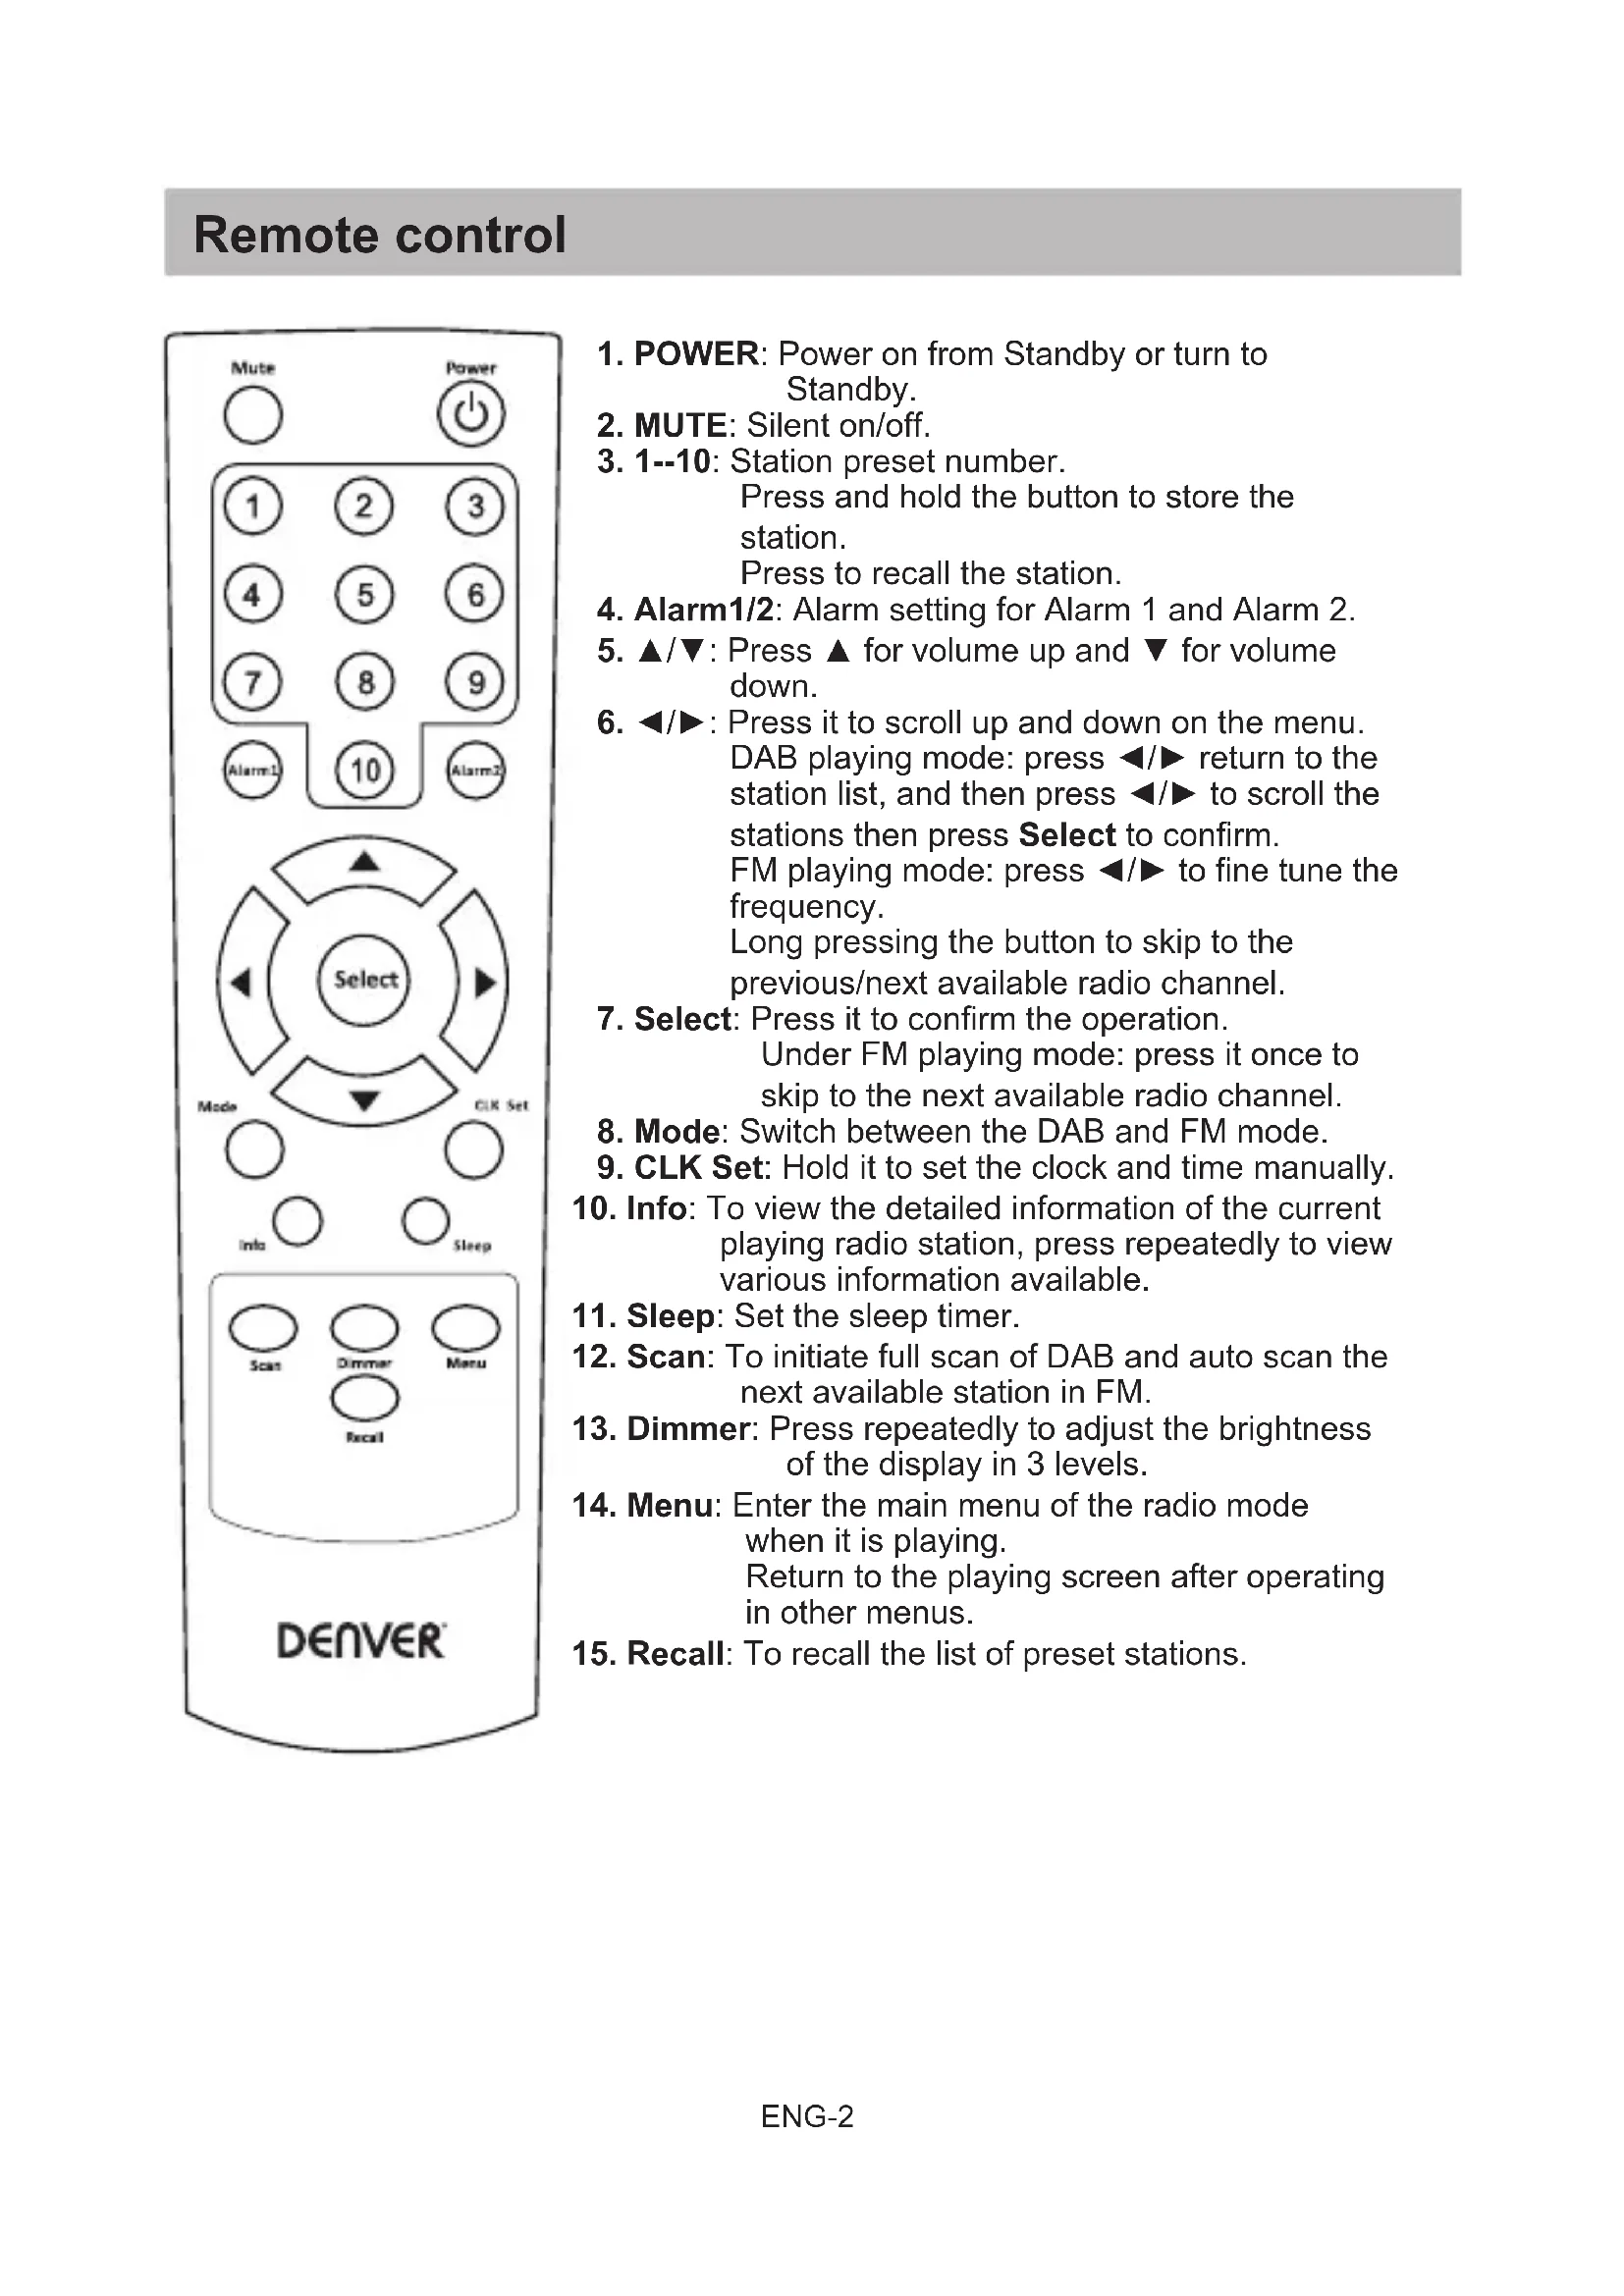
Remote control

- POWER: Power on from Standby or turn to Standby.
- MUTE: Silent on/off.
- 1--10: Station preset number. Press and hold the button to store the station. Press to recall the station.
- Alarm1/2: Alarm setting for Alarm 1 and Alarm 2.
- ▲/▼: Press ▲ for volume up and ▼ for volume down.
- ◀/▶: Press it to scroll up and down on the menu. DAB playing mode: press ◀/▶ return to the station list, and then press ◀/▶ to scroll the stations then press Select to confirm. FM playing mode: press ◀/▶ to fine tune the frequency. Long pressing the button to skip to the previous/next available radio channel.
- Select: Press it to confirm the operation. Under FM playing mode: press it once to skip to the next available radio channel.
- Mode: Switch between the DAB and FM mode.
- CLK Set: Hold it to set the clock and time manually.
- Info: To view the detailed information of the current playing radio station, press repeatedly to view various information available.
- Sleep: Set the sleep timer.
- Scan: To initiate full scan of DAB and auto scan the next available station in FM.
- Dimmer: Press repeatedly to adjust the brightness of the display in 3 levels.
- Menu: Enter the main menu of the radio mode when it is playing. Return to the playing screen after operating in other menus.
- Recall: To recall the list of preset stations.
Start Up
- Use the AC adaptor supplied in the package, connect the pin to the DC IN jack at the rear side of the radio and connect the power plug to the wall socket.
- To get the best reception, place the radio near a window as possible.
- Connect your external powered speaker to the Audio out jack on the radio.
- Plug in the wire antenna supplied in the package to the ANT jack.
- Extend the wire as far as it can go to get the best reception. You may need to move it around to obtain the optimal direction for the best reception.
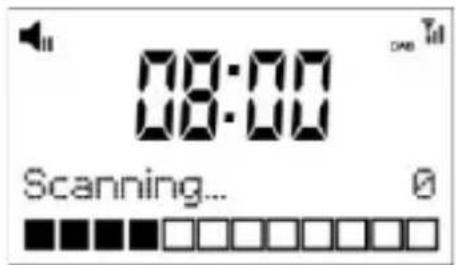
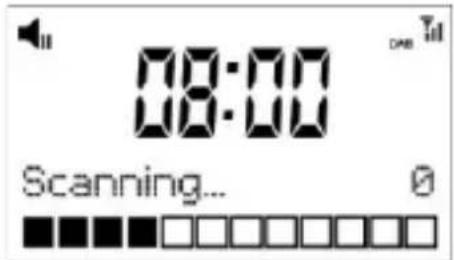
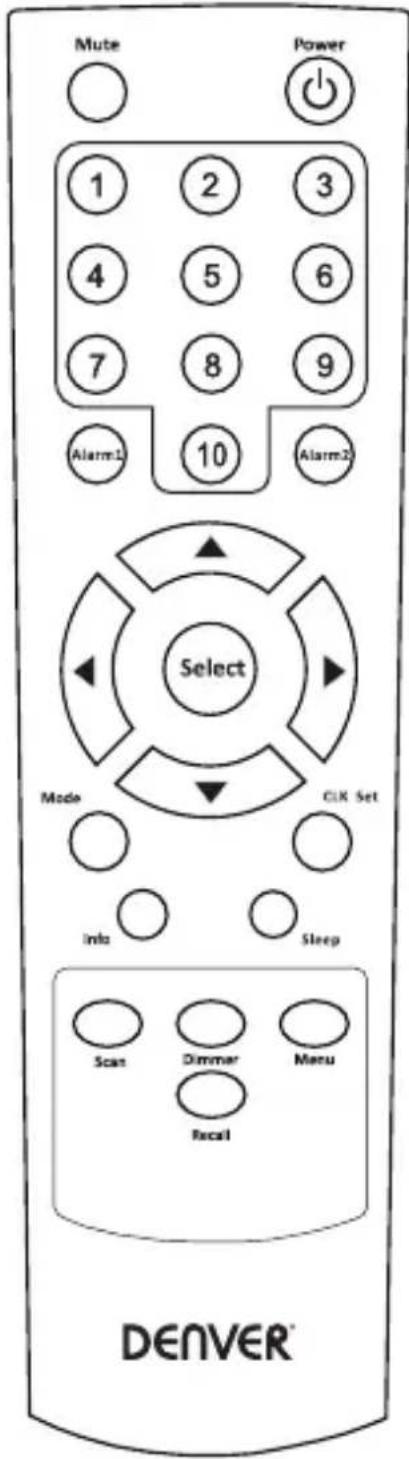
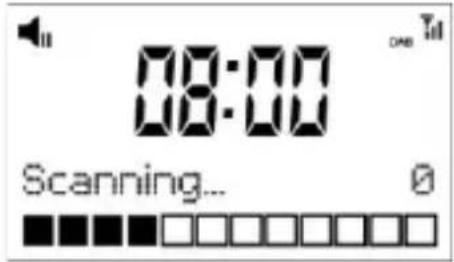
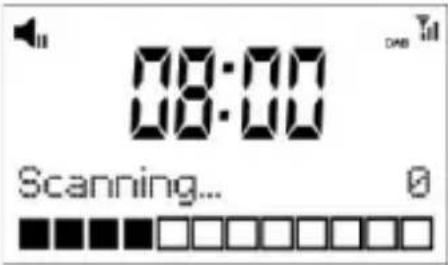
- Power up the radio by using the On/Off switch on the rear side of the radio. The display will light up and display as follow. The radio will start in DAB mode by default and followed by a full scan of the radio stations automatically:
- If there is problem on reception, try moving the antenna around or different direction to improve the reception.
- When the scan is completed, the first station (alphabetically) will begin to play.
- Press the
button once, the radio will change from operation mode to standby mode.
Radio Mode
The DAB Radio has two modes of operation:
○ DAB Radio
- FM Radio
Press the
DAB Radio Operation
- If it is the first time using the radio, it will automatically begin "full scan" for DAB radio stations.
- When scanning is completed, the stations will list in alphanumeric order and the first one will be played.
- The next time you listen DAB mode, it will play the last listened station.
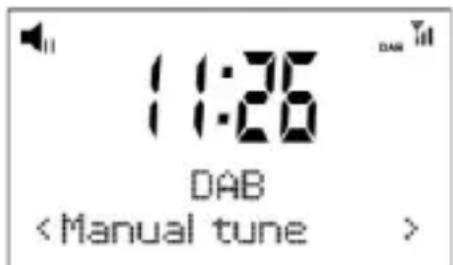
DAB Settings
To view more functions and settings available for the radio, press the
- Full scan
It performs a station scan from channel 5A to 13F or you can pressbutton to do "Full scan"
- Manual tune
This function allows you to check whether a specific frequency can be received in your area and the corresponding signal strength.
When this option is selected, it will show a list of DAB frequencies.
Choose a frequency and it will display a bar of signal strength. If the bar of strength is grayed out, it means the frequency cannot be received in your area.
DRC
Dynamic Range Control (also known as DRC) can make quieter sounds easier to hear when your radio is used in a noisy environment. This function is only available for the DAB.
DRC Off – No compression
DRC High – Maximum compression
DRC Low – Medium compression
Setting the compression to maximum will “boost” the quiet sounds, whilst keeping the loudest sounds at their original level.
Prune
Some DAB services may stop broadcasting or you may not be able to receive a station. Prune stations will delete the DAB stations from your station list that can no longer be received.
System
The following settings are available:
- Equaliser
○ Time - Backlight
○ Language
○ Factory Reset - SW version
- Equaliser
Adjust the sound of the music suits you best. There are already presets of EQ and you can also tailor your prefer style using the "My EQ...".
• Time
There are settings as follow:
- Set Time/Date: This allows the user to manually set the current Time and Date.
- Auto Update: This function will set the radio's time and date automatically with data sent along with the broadcast of either the DAB or FM radio station.
* Note that FM auto Time/Date update may not work in your area, so the DAB auto update option is recommended.
- Set 12/4 Hour: This option will change the format of your clock to either 12 hour or 24 hour format.
- Set Date Format: Changes the date display format between DD-MM-YYYY/MM-DD-YYYY.
- Backlight
Your radio has 3 backlight settings:
Timeout:
This option is used to set the period of time that you wish your display's backlight to remain lit when your radio is in both ON and STANDBY modes. The available options are: On/10 sec/20 sec/30 sec/45 sec/60 sec/90 sec/120 sec/180 sec.
Selecting “On” will force your radio’s backlight to remain on constantly. If you select a specific time delay, after the selected time period has lapsed the display will dim down under the following two situations:
- When the radio is turned on and no operation under selected time out period.
- When the radio turns off into standby mode, the backlight will dim down after the time out period has lapsed.
On level:
This option will determine how bright the display's backlight is lit while the radio is on ON mode. There are 3 options for this setting: High, Medium& Low.
Dim level:
There are 3 brightness levels of the Dimmed backlight available – low/medium/high.
- Language
This setting will change the language in which the menu system is displayed on your radio. There are four languages available: English, French, German, Italian.
- Factory reset
The DAB Radio can be reset to the factory default at any time, once a reset has been performed, the DAB Radio will automatically begin Full scan.
- Select "Factory Reset", the display will show:
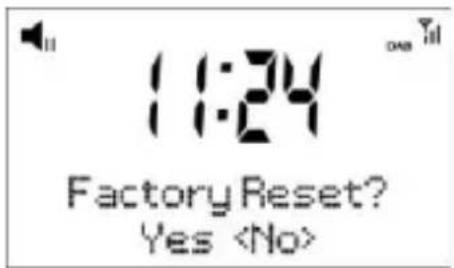
- Press “◀” or “▶” key to choose
, then press “Select” to perform the rest. Important: Once the factory reset is done, all previous settings and presets will be erased.
- SW version
This is to view the software version of your radio. Press
Note: To exit setup, press
- Equalizer
○ Time (tid)
○ Backlight (baggrundslys)
○ Language (sprog)
○ Factory Reset (nulstilling) - SW version (softwareversion)
- Equalizer
Opsætning af alarm
natural_image
Simple line drawing of a smartphone front panel with a blank screen and handle (no text or symbols)Denver DAB-20
Säätimien sijainti

natural_image
Simple line drawing of a basketball hoop with two labeled points (1 and 2), no text or symbols present.
- Full scan
- Scan setting
○ Audio setting - System
- Scan setting
natural_image
Simple line drawing of a smartphone front panel with a blank screen and handle (no text or symbols)Denver DAB-20
natural_image
Simple line drawing of a basketball hoop with two labeled points (1 and 2), no text or symbols present.- LCD-scherm
- Afstandsbedieningsensor
- 3,5mm stereo audio-uitgang
- 3,5mm antenne-ingang
- DC-ingang
- Voeding Aan-/Uitschakelaar

Afstandsbediening

Welcome to Digital Radio
- Scan setting
○ Audio setting
○ System
- Scan setting
Het alarm instellen
natural_image
Simple line drawing of a smartphone front panel with a blank screen and handle (no text or symbols)Denver DAB-20
natural_image
Simple line drawing of a basketball hoop with two labeled points (1 and 2), no text or symbols present.
- Scan setting
○ Audio setting
○ System
- Scan setting
Réglage de l'alarme
natural_image
Simple line drawing of a smartphone front panel with a blank screen and handle (no text or symbols)Denver DAB-20
natural_image
Simple line drawing of a basketball hoop with two labeled points (1 and 2), no text or symbols present.- Visor LCD
- Sensor de controlo remoto
- Tomada de saída áudio estéreo 3,5 mm
- Tomada de entrada de antena 3,5 mm
- Tomada DC IN
- Interruptor On/Off
Controlo remoto
Welcome to Digital Radio
- Scan setting
○ Audio setting
○ System
- Scan setting
Definição de alarme
natural_image
Simple line drawing of a smartphone front panel with a blank screen and handle (no text or symbols)Denver DAB-20
natural_image
Simple line drawing of a basketball hoop with two labeled points (1 and 2), no text or symbols present.
- Scan setting
○ Audio setting
○ System
- Scan setting
Ustawianie budzika
natural_image
Simple line drawing of a smartphone with a blank screen and handle (no text or symbols)Denver DAB-20
natural_image
Simple line drawing of a basketball hoop with two labeled points (1 and 2), no text or symbols present.Welcome to Digital Radio
- Full scan
- Scan setting
○ Audio setting
○ System
- Scan setting
Configurar la alarma
natural_image
Simple line drawing of a smartphone front panel with a blank screen and handle (no text or symbols)Denver DAB-20
natural_image
Simple line drawing of a basketball hoop with two labeled points (1 and 2), no text or symbols present.Welcome to Digital Radio

- Full scan
- Scan setting
○ Audio setting - System
- Scan setting
Weckruf einstellen
natural_image
Simple line drawing of a smartphone front panel with a blank screen and handle (no text or symbols)Denver DAB-20
Kontrollernas placering

natural_image
Simple line drawing of a basketball hoop with two labeled points (1 and 2), no text or symbols present.Welcome to Digital Radio
- Full scan
- Scan setting
○ Audio setting
○ System
- Scan setting
natural_image
Simple line drawing of a smartphone front panel with a blank screen and handle (no text or symbols)Denver DAB-20
Kontrollplassering

natural_image
Simple line drawing of a basketball hoop with two labeled points (1 and 2), no text or symbols present.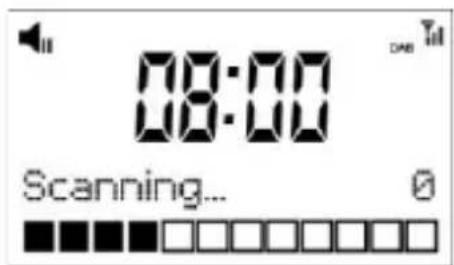
- Full scan
- Scan setting
○ Audio setting - System
- Scan setting
Konfigurere alarm


- Location of Control
- Remote control
- Start Up
- Radio Mode
- DAB Radio Operation
- DAB Settings
- DRC
- Prune
- System
- - Backlight
- Timeout:
- On level:
- Dim level:
- - Language
- - Factory reset
- - SW version
- FM Radio Operation
- Auto Scan
- Manual Tune
- FM Settings
- - Scan setting
- - Audio setting
- Preset stations
- Preset Recall
- Sleep Timer
- Setting of Alarm
- Q & A
- - No DAB reception
- • Radio reception is poor
- - No sound or low volume
- DENVER®
- Betjeningsvejledning
- DAB radioadapter
- Knapper og kontroller
- Fjernbetjening
- Kom godt i gang
- Radiotilstand
- Betjening af DAB-radio
- DAB-indstillinger
- .
- - Equalizer
- Opsætning af alarm
- Säätimien sijainti
- Afstandsbediening
- Het alarm instellen
- Réglage de l'alarme
- Controlo remoto
- Definição de alarme
- Ustawianie budzika
- Configurar la alarma
- Weckruf einstellen
- Kontrollernas placering
- Kontrollplassering
- Konfigurere alarm
Brand : DENVER
Model : DAB20
Category : Radio