WWSS1332C - TV wall mount Tripp Lite - Free user manual and instructions
Find the device manual for free WWSS1332C Tripp Lite in PDF.

| Product Type | Sit-stand workstation for single monitor |
| Brand | Tripp Lite |
| Model | WWSS1332C |
| VESA Compatibility | VESA plates (screws, washers and spacers included) |
| Mounting Methods | Clamp attachment for desk or through-desk mounting |
| Included Components | Support arm, pole, keyboard shelf, upper and lower clamp, cable pass-through, mounting plate, screws, spacers, hex keys |
| Adjustable Screen Height | Yes, with tension adjustment to compensate for weight |
| Adjustable Tilt | Yes, by screw or knob tightening |
| Rotation | Not specified, likely fixed |
| Material | Steel (estimated) |
| Maximum Load Capacity | Not specified, suitable for medium-sized screens (estimated 8-12 kg) |
| Compatible Screen Sizes | Up to 32 inches (estimated from model) |
| Keyboard Shelf | Included, attaches to pole |
| Cable Management | Cable ties included |
| Power | None (mechanical mounting) |
| Recommended Maintenance | Check safety every 3 months |
| Warranty | 5-year limited warranty |
| Support | Visit tripplite.eaton.com/support |
| Country of Origin | Not specified |
| Color | Not specified (likely black) |
Frequently Asked Questions - WWSS1332C Tripp Lite
User questions about WWSS1332C Tripp Lite
0 question about this device. Answer the ones you know or ask your own.
Ask a new question about this device
Download the instructions for your TV wall mount in PDF format for free! Find your manual WWSS1332C - Tripp Lite and take your electronic device back in hand. On this page are published all the documents necessary for the use of your device. WWSS1332C by Tripp Lite.
USER MANUAL WWSS1332C Tripp Lite
natural_image
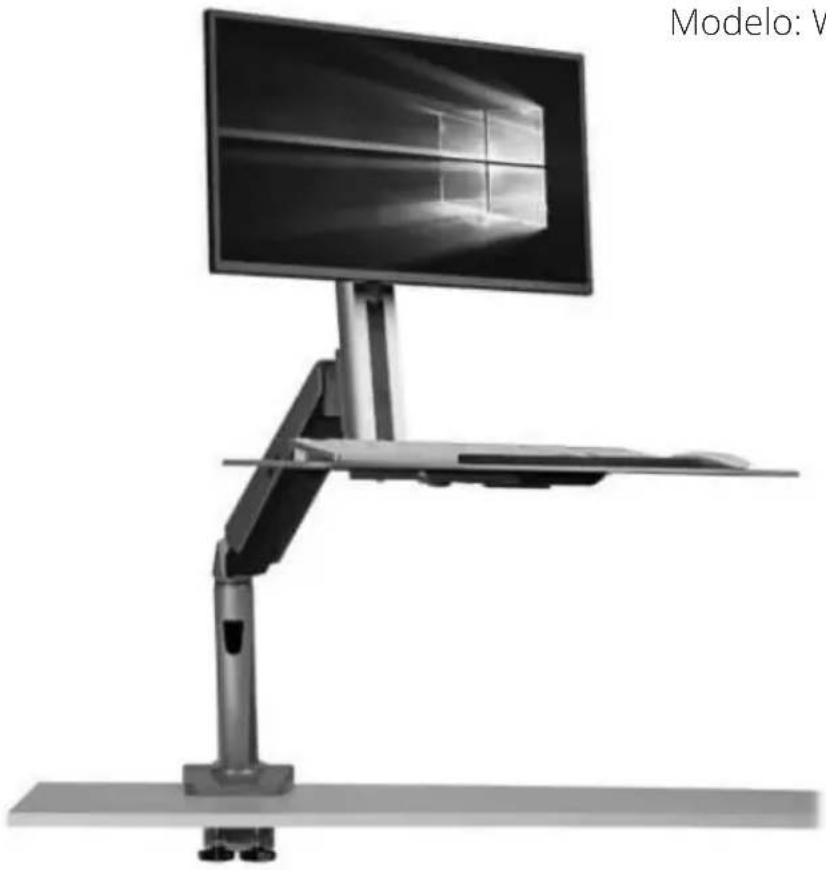
Modern desktop computer setup with a monitor and keyboard, no visible text or symbols on the device itself.Model: WWSS1332C

CAUTION: DO NOT EXCEED MAXIMUM LISTED WEIGHT CAPACITY (17.6 lb. / 8 kg). SERIOUS INJURY OR PROPERTY DAMAGE MAY OCCUR!
Español 11
Français 21
Русский 31
Deutsch 41
Component Checklist

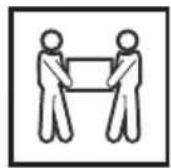
IMPORTANT: Ensure all parts according to the component checklist have been received prior to installation. If any parts are missing or faulty, visit Tripplite.Eaton.com/support for service.

natural_image
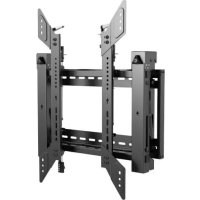
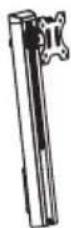
Line drawing of a robotic arm with articulated joints and mounting base (no text or symbols)A
Bracket Arm
x1
B
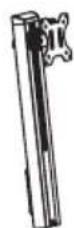
Support Mast
x1

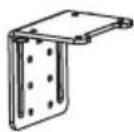
C
Keyboard Shelf
x1
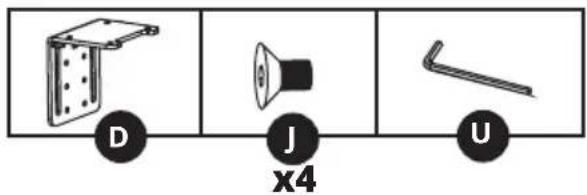
D
Clamp Top
x1
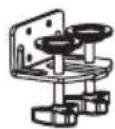
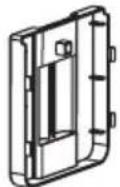
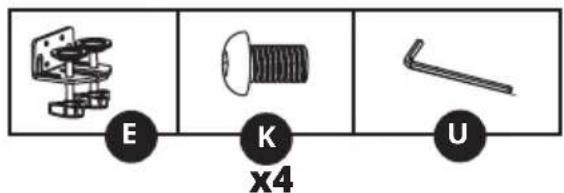
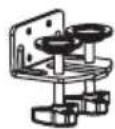
E
Clamp Bottom
x1
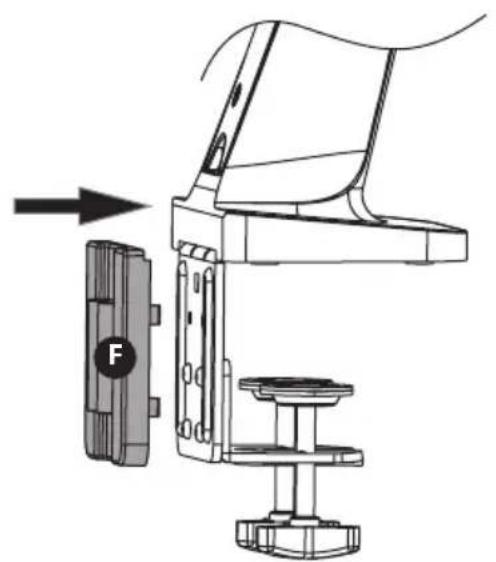
F
Cable Clamp
x1
natural_image
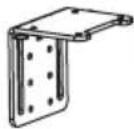
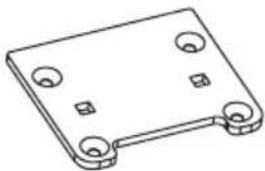
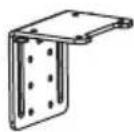
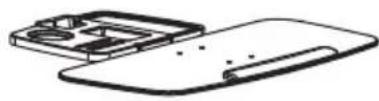
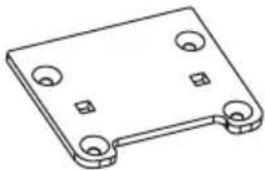
Isometric line drawing of a rectangular electronic component with four circular holes and mounting feet (no text or symbols)G
Grommet Mount Plate
x1
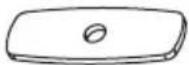
H
Pressure Plate
x2

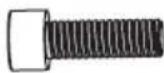
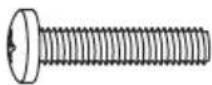
1
M8 × 105
x2
J
M6×10
x4

K
M6×12
x4
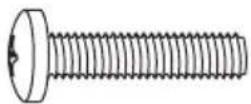
L
M8×25
x2
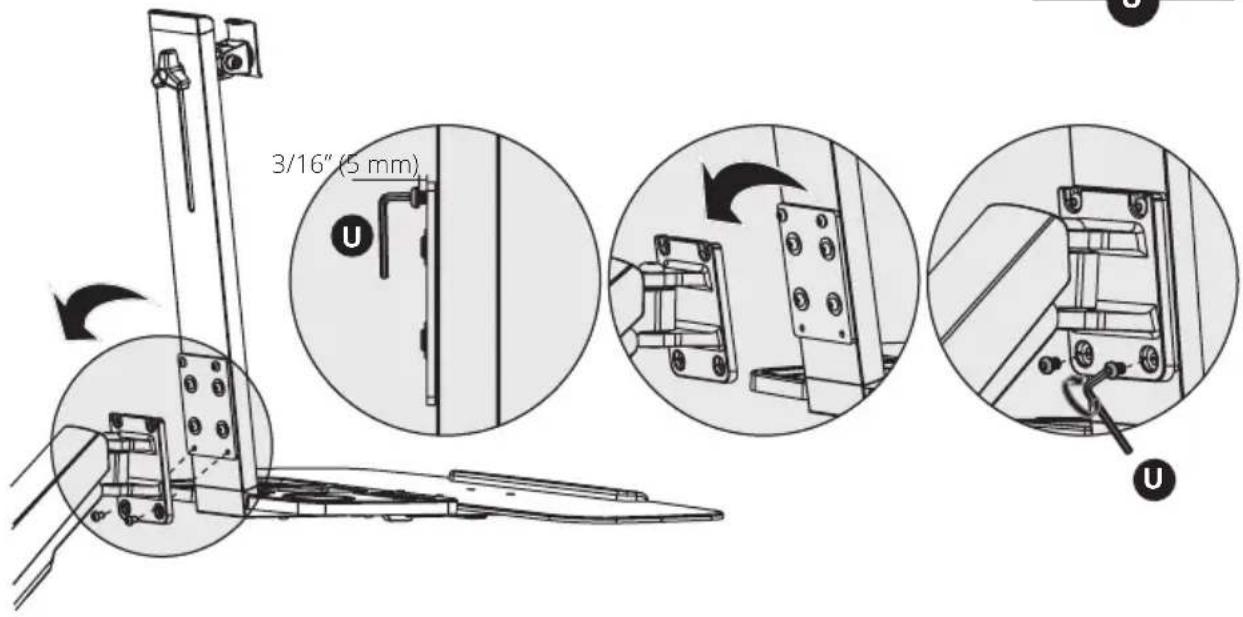
M
M4×12
x4
N
M5×12
x4
0
M4×16
x4
P
M5 × 16
x4
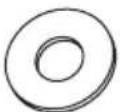
Q
5×12×1
x4

R
D8
x2
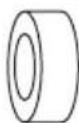
S
8 x 5 Spacer
x4

T
M8
x2
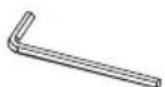
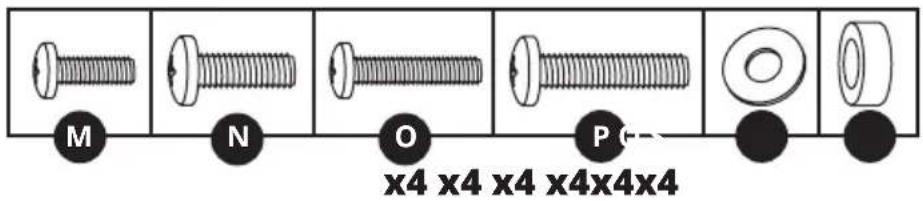
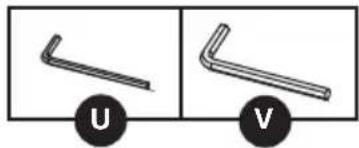
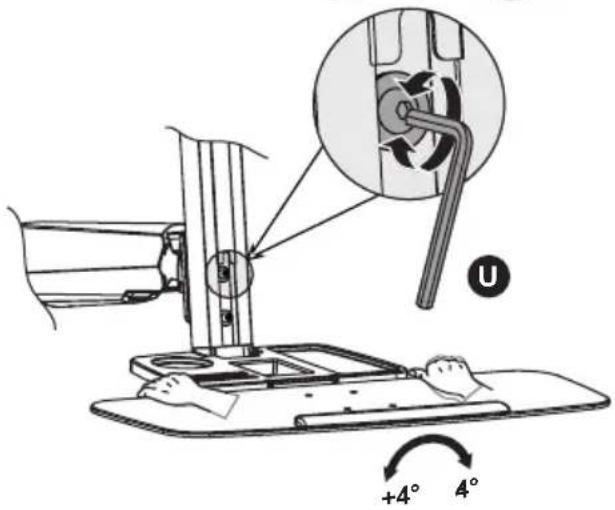
U
4 mm Hex Key
x1
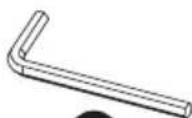
V
6 mm Hex Key
x1
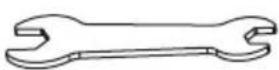
W
Wrench
x1
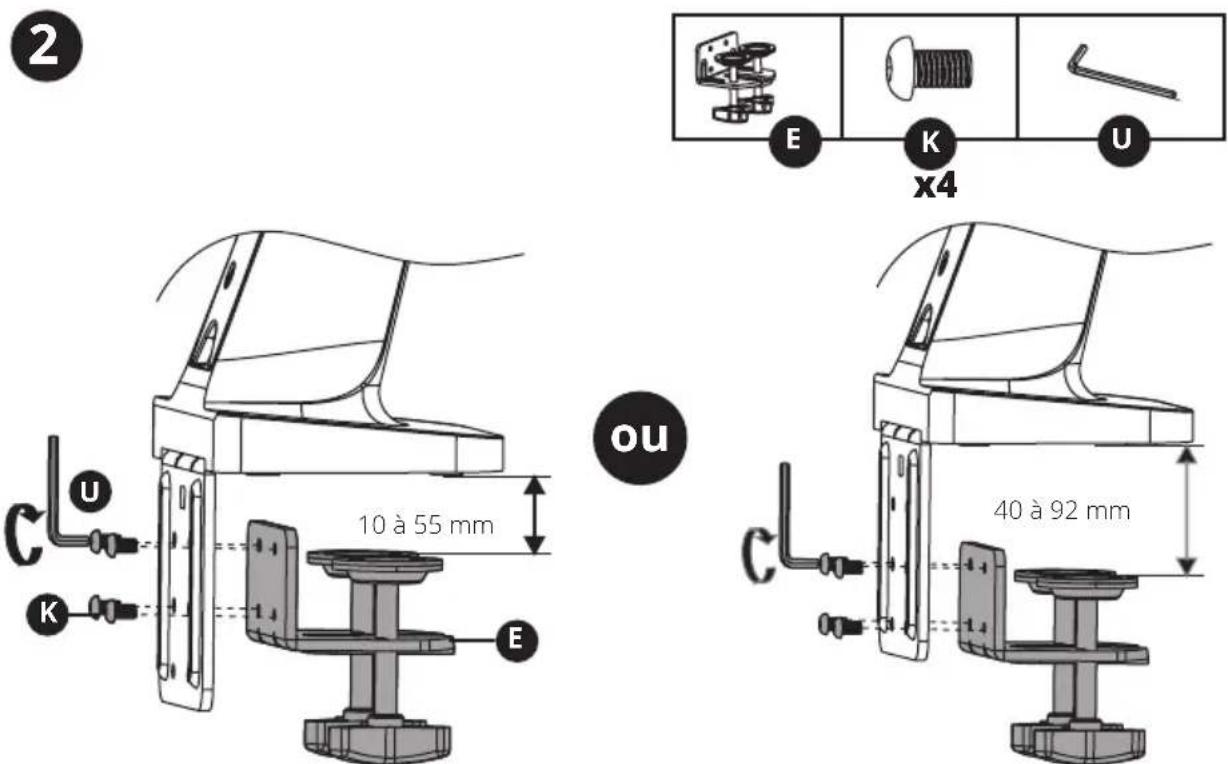
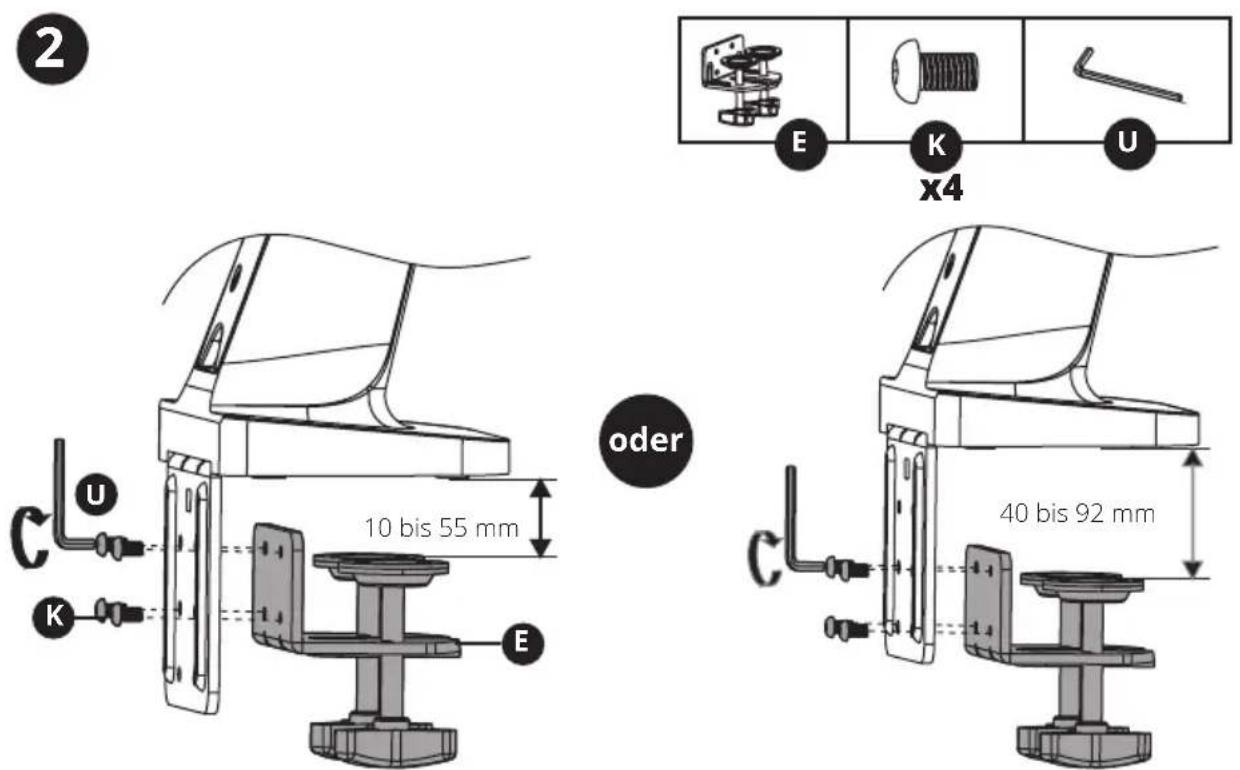
The WWSS1332C Single-Display Sit-Stand Workstation offers two different mounting methods: by desk clamp or by grommet mount. For easy and convenient installation and removal, use the desk clamp mounting option. For a permanent mounting solution, use the grommet mounting option.
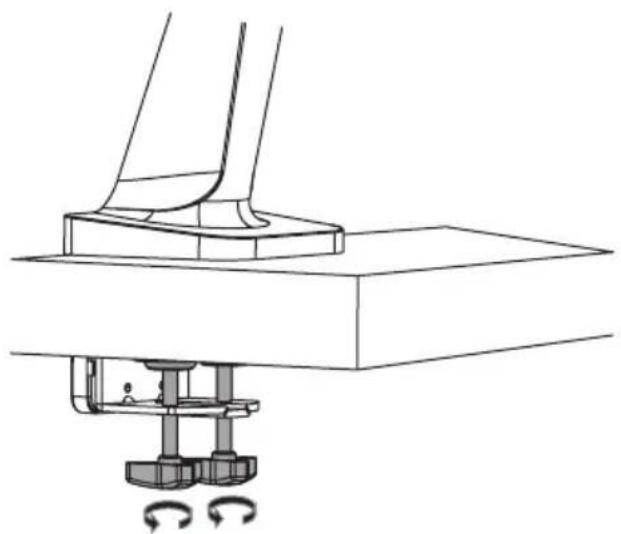
Desk Clamp Assembly – Follow steps 1a-1 to 1a-4 below.
Grommet Mount - Go to page 5 and follow steps 1b-1 to 1b-2.
Step 2 for both mounting options begins on page 6.
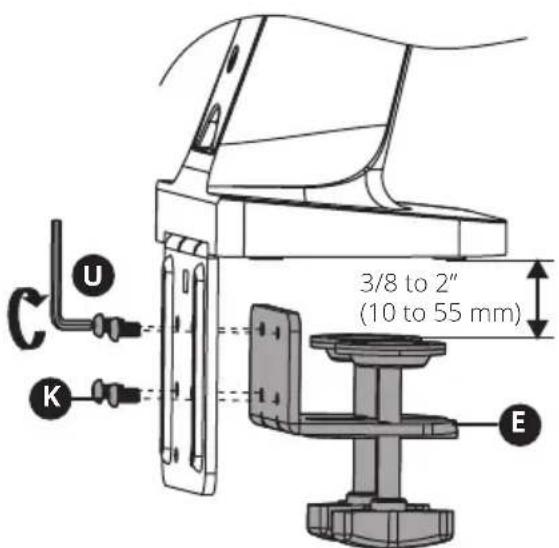
Desk Clamp Assembly Option
Note: For instructions on Grommet Mount Assembly, go to page 5.
1
2
or
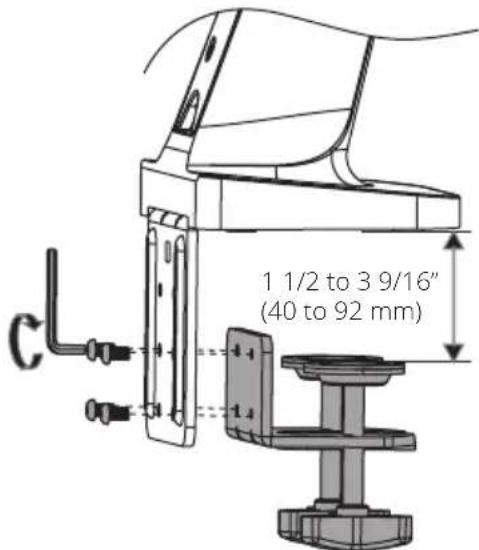
Desk Clamp Assembly Option
1a-3

natural_image
Technical line drawing of a mechanical component with no visible text or symbols1a-4
natural_image
Technical line drawing of a mechanical assembly with no visible text or symbolsTo proceed with step 2 of assembly, go to page 6.
Grommet Mount Assembly Option
Note: For instructions on Clamp Assembly, go to page 3.
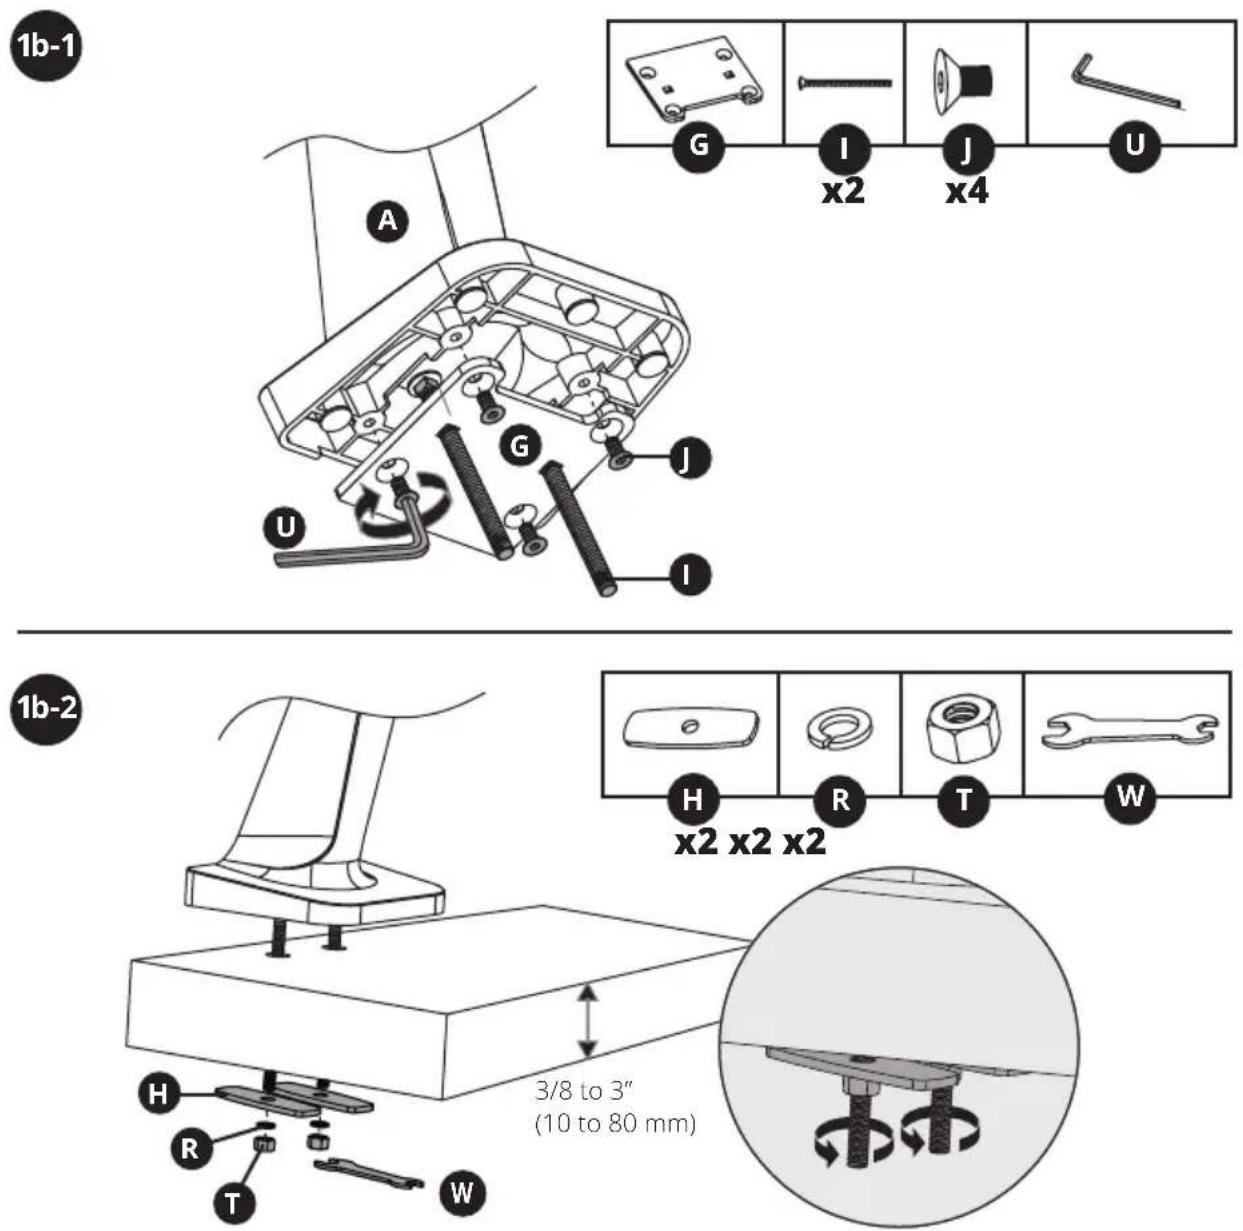
To proceed with step 2 of assembly, go to page 6.
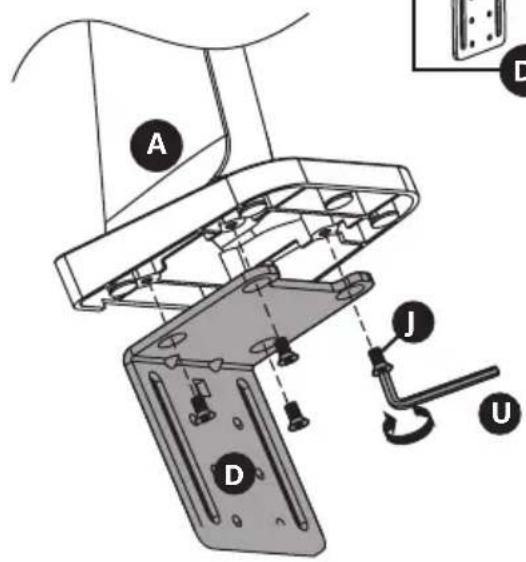
Desk Clamp/Grommet Mount Assembly
2
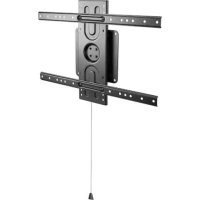
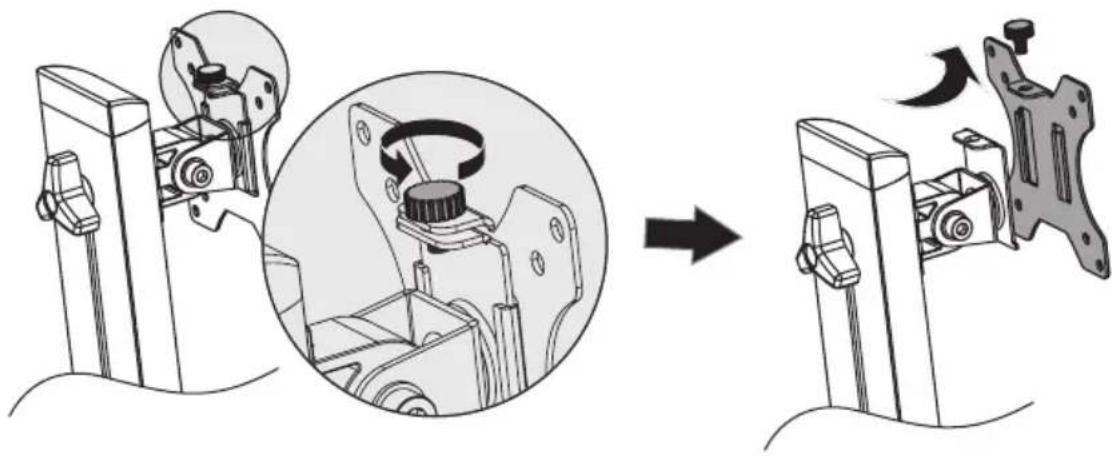
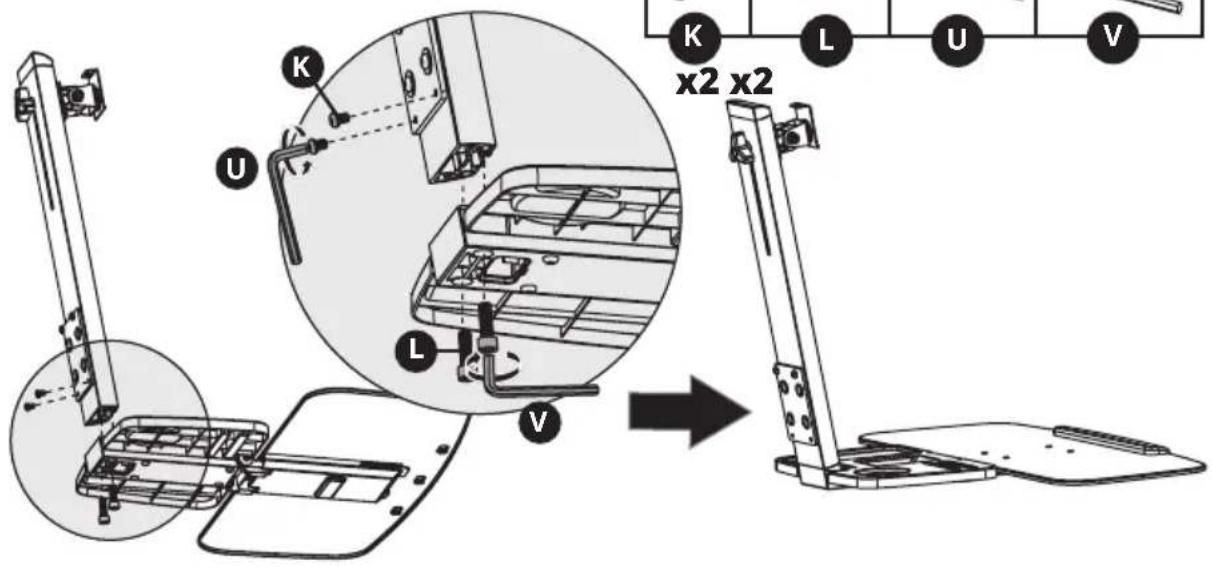
Remove VESA Plate from Support Mast
natural_image
Diagram showing mechanical assembly process: disassembly of a component into a housing, with no visible text or symbols.3
Attach Keyboard Shelf to Support Mast
Desk Clamp/Grommet Mount Assembly
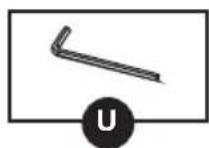
4
Attach Keyboard Shelf and Support Mast Assembly to Bracket Arm
5
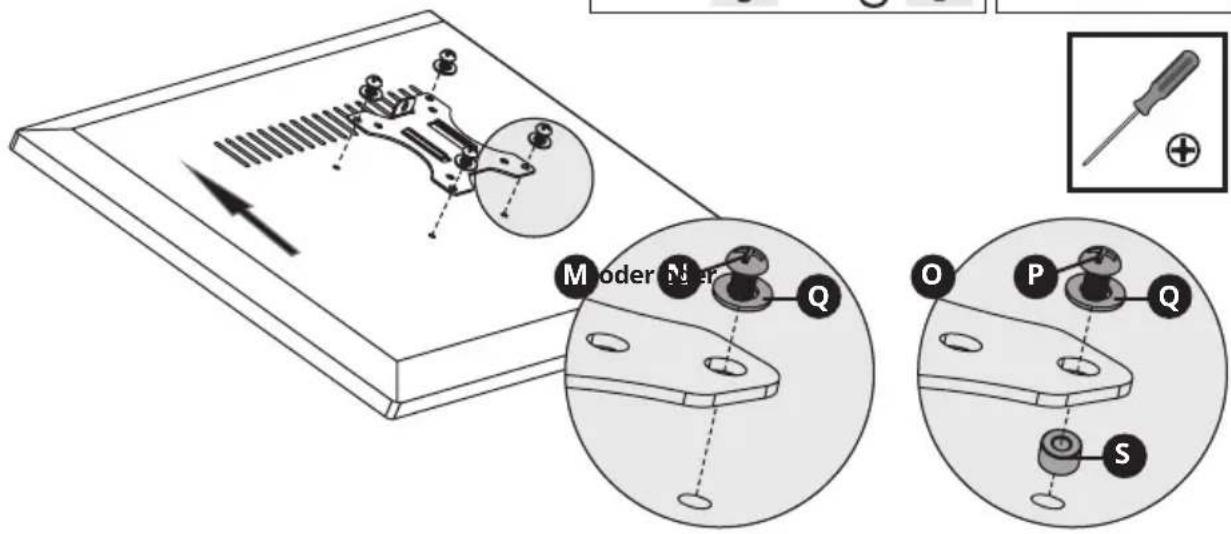
Attach VESA plate to back of display

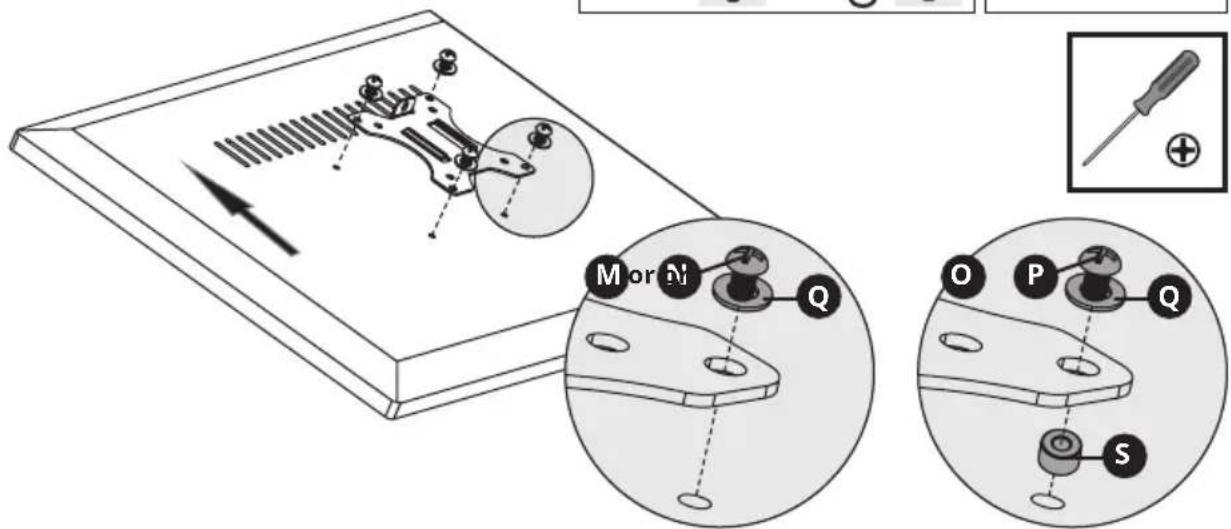
Note: Firmly secure the VESA plate to the display using the appropriate screws, washers and spacers (if necessary).

Do not over-tighten screws.
Desk Clamp/Grommet Mount Assembly

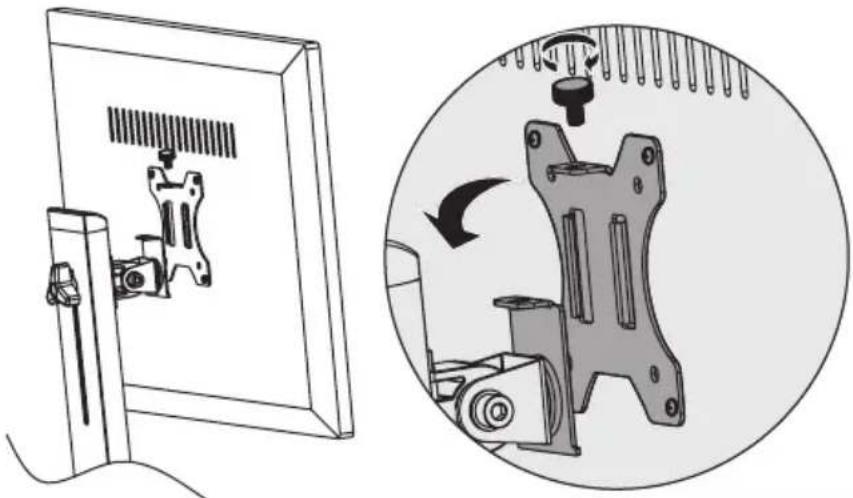
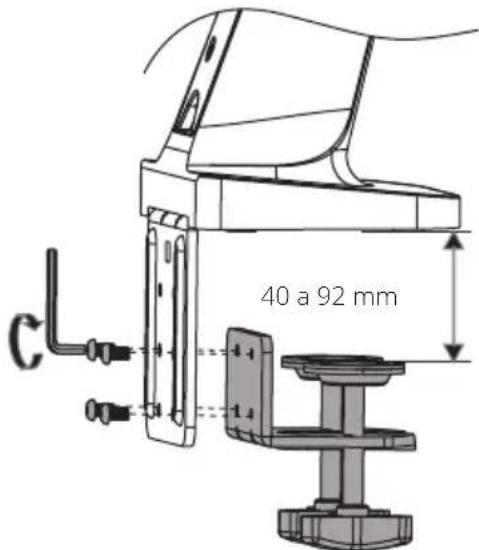
Slide VESA plate and Display on to the Support Mast
natural_image
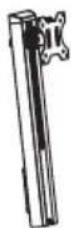
Technical illustration showing a mounted device with a scroll wheel and a circular mechanical assembly with rotating components (no text or symbols)Using an assistant or mechanical lifting equipment, lift the display with attached VESA plate. Slide the VESA plate over the Support Mast bracket. Reattach the top knob to secure the VESA mount (removed in step 1).

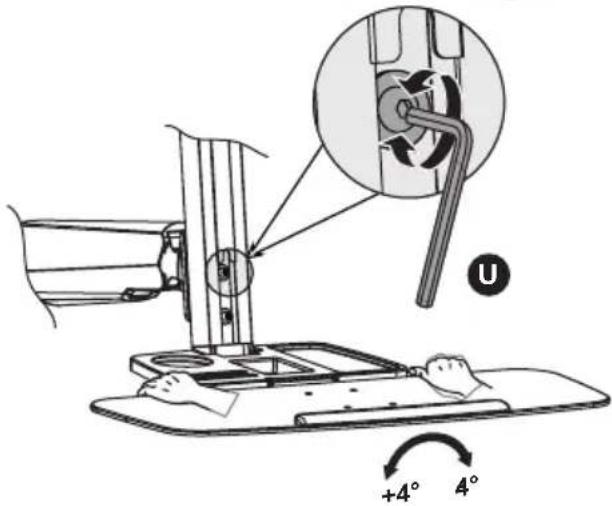
Adjust Bracket Arm tension
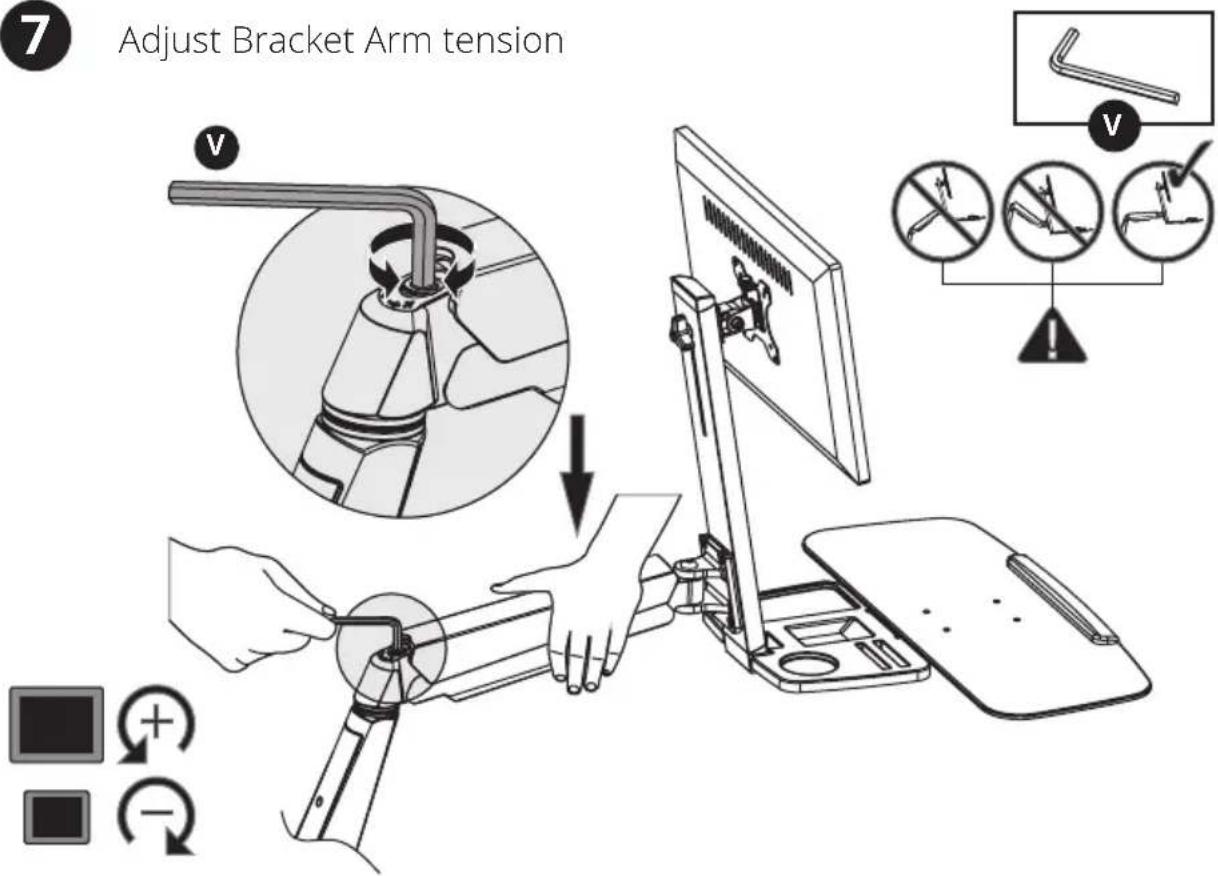
Keep the bracket arm level during tension adjustment. You may need to slightly loosen or tighten the adjustment screw using the provided 6 mm Hex Key, depending on the weight of display installed.
If display settles on its own, rotate adjustment screw towards the "+" symbol.
If display rises on its own, rotate adjustment screw towards the "-" symbol.
Desk Clamp/Grommet Mount Assembly
8
Adjust to the desired location or tilt
natural_image
Two identical L-shaped tool illustrations labeled U and V, shown side by side (no text or symbols on the tools themselves)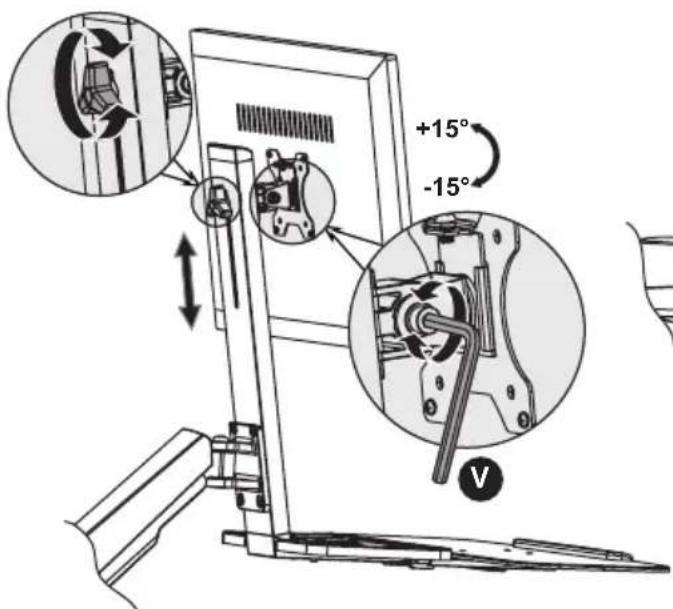
To correct the tilting angle, tighten the adjustment screws using the provided Hex Keys (or tighten the knob).
Maintenance
- Check that the bracket is secure and safe to use at regular intervals (at least every three months).
- Please visit Tripplite.Eaton.com/support if you have any questions.
Warranty and Product Registration
5-Year Limited Warranty
We warrant our products to be free from defects in materials and workmanship for a period of five (5) years from the date of initial purchase. Our obligation under this warranty is limited to repairing or replacing (at its sole option) any such defective products. Visit Tripolite.Eaton.com/support/product-returns before sending any equipment back for repairs. This warranty does not apply to equipment which has been damaged by accident, negligence or misapplication or has been altered or modified in any way.
EXCEPT AS PROVIDED HEREIN, WE MAKE NO WARRANTIES, EXPRESS OR IMPLIED, INCLUDING WARRANTIES OF MERCHANTABILITY AND FITNESS FOR A PARTICULAR PURPOSE. Some states do not permit limitation or exclusion of implied warranties; therefore, the aforesaid limitation(s) or exclusion(s) may not apply to the purchaser.
EXCEPT AS PROVIDED ABOVE, IN NO EVENT WILL EATON BE LIABLE FOR DIRECT, INDIRECT, SPECIAL, INCIDENTAL OR CONSEQUENTIAL DAMAGES ARISING OUT OF THE USE OF THIS PRODUCT, EVEN IF ADVISED OF THE POSSIBILITY OF SUCH DAMAGE. Specifically, we are not liable for any costs, such as lost profits or revenue, loss of equipment, loss of use of equipment, loss of software, loss of data, costs of substitutes, claims by third parties, or otherwise.
PRODUCT REGISTRATION
Visit Triplite Eaton.com/warranty today to register your new product. You'll be automatically entered into a drawing for a chance to win a FREE Eaton Tripp Lite series product. ^+
*No purchase necessary. Void where prohibited. Some restrictions apply. See website for details.
Eaton has a policy of continuous improvement. Specifications are subject to change without notice.
natural_image
Modern office chair with dual monitors and keyboard, no visible text or symbols on the device itselfModelo: WWSS1332C

natural_image
Line drawing of a robotic arm with articulated joints and mounting base (no text or symbols)A
Brazo de Soporte
x1

B
Mástil de Soporte
x1

C
Repisa para Teclado
x1
D
natural_image
Isometric line drawing of a rectangular electronic component with four circular holes and mounting points (no text or symbols)G
0

natural_image
Technical line drawing of a mechanical component with no visible text or symbols1a-4

natural_image
Technical line drawing of a mechanical assembly with no visible text or symbolsnatural_image
Mechanical assembly diagram showing a disassembly process with a magnified inset of the component (no text or symbols present)


natural_image
Technical illustration showing a mounted device with a scroll wheel and a close-up of its mechanical component (no text or symbols present)natural_image
Two identical L-shaped tool illustrations labeled U and V, shown side by side (no text or symbols on the tools themselves)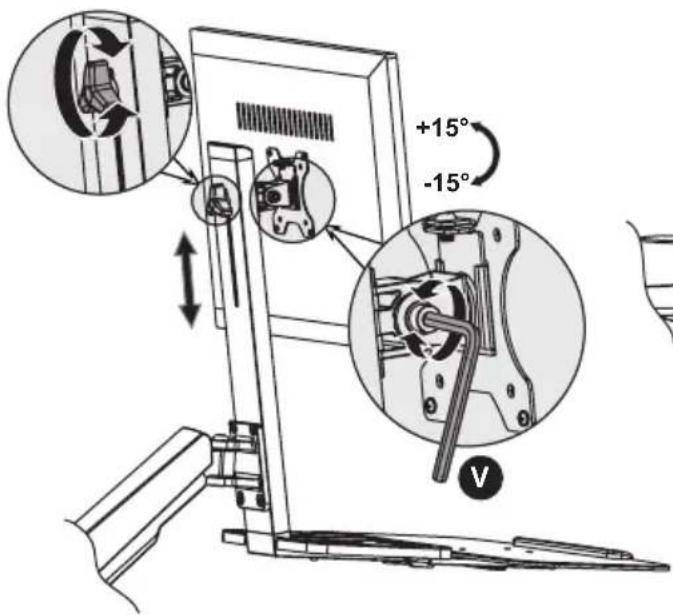

natural_image
Modern desktop workstation with dual monitors and a laptop, no visible text or symbols on the device itself.
MISE EN GARDE : NE PAS EXCÉDER LA CAPACITÉ PONDÉRALE MAXIMUM INDIQUÉE (8 kg). DES BLESSURES GRAVES OU DES DOMMAGES MATÉRIELS RISQUENT DE SE PRODUIRE!
English 1
Español 11
Русский 31
Deutsch 41

natural_image
Technical line drawing of a mechanical component with no visible text or symbols1a-4

natural_image
Technical line drawing of a mechanical assembly with no visible text or symbolsnatural_image
Diagram showing mechanical assembly steps: before and after a close-up of a component being rotated, with no visible text or symbols.


natural_image
Technical illustration showing a mounted device with a scroll wheel and a close-up of its mechanical component (no text or symbols present)natural_image
Two identical L-shaped objects labeled U and V, shown side by side (no text or symbols on the objects themselves)

natural_image
Modern office desk setup with a desktop monitor and laptop, no visible text or symbols on the device itself.МОДЕЛЬ: WWSS1332C

natural_image
Line drawing of a robotic arm with articulated joints and mounting base (no text or symbols)A
Рычаг кронштейна
1 шт.
B
Опора 1 шт.

C
natural_image
Isometric line drawing of a rectangular electronic component with four circular holes and mounting feet (no text or symbols)G
natural_image
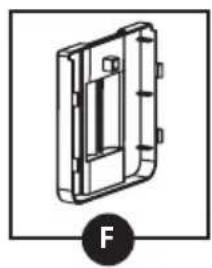
Technical line drawing of a mechanical device with a labeled component 'F' and an arrow indicating direction (no text or symbols beyond the label)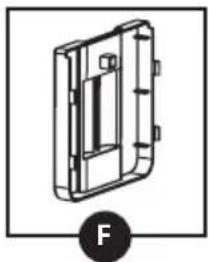
natural_image
Technical line drawing of a mechanical component with no visible text or symbols1a-4

natural_image
Technical line drawing of a mechanical assembly with no visible text or symbolsnatural_image
Diagram showing mechanical assembly steps: disassembly, assembly, and final assembly (no text or symbols)


natural_image
Technical illustration showing a mounted device with a scroll panel and a close-up of its mechanical component (no text or symbols present)natural_image
Two identical L-shaped tool illustrations labeled U and V, shown side by side (no text or symbols on the tools themselves)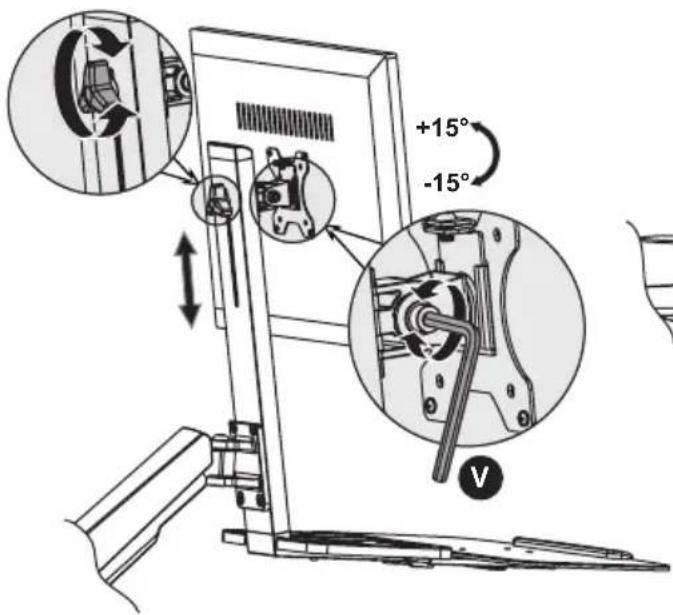
natural_image
Modern desktop workstation with a laptop and monitor, no visible text or symbols on the device itself.
natural_image
Line drawing of a robotic arm with articulated joints and mounting base (no text or symbols)A
Trägerarm
x1
B
Trägermast
x1
C
Tastaturablage
x1
D
Klemme oben
x1
E
Klemme unten
x1
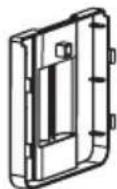
F
Kabelklemme
x1
natural_image
Isometric line drawing of a rectangular electronic component with four circular holes and mounting holes (no text or symbols)G
natural_image
Technical line drawing of a mechanical component with no visible text or symbols1a-4

natural_image
Technical line drawing of a mechanical assembly with no visible text or symbolsnatural_image
Mechanical assembly diagram showing a disassembly process with a magnified inset of the component (no text or labels)