DWM7090HD - TV wall mount Tripp Lite - Free user manual and instructions
Find the device manual for free DWM7090HD Tripp Lite in PDF.

User questions about DWM7090HD Tripp Lite
0 question about this device. Answer the ones you know or ask your own.
Ask a new question about this device
Download the instructions for your TV wall mount in PDF format for free! Find your manual DWM7090HD - Tripp Lite and take your electronic device back in hand. On this page are published all the documents necessary for the use of your device. DWM7090HD by Tripp Lite.
USER MANUAL DWM7090HD Tripp Lite
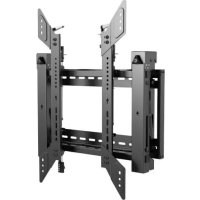
Interactive Flat-Panel Wall Mount
Models: DWM5070HD, DWM7090HD
Espanol 13 • Français 25 • Pycckn 37 • Deutsch 49

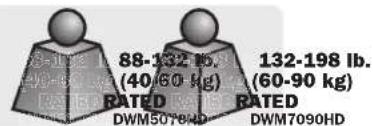
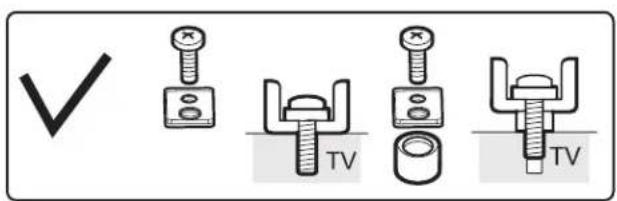
CAUTION:DO NOT EXCEED MAXIMUM LISTED WEIGHT CAPACITY.SERIOUS INJURY OR PROPERTY DAMAGE MAY OCCUR!

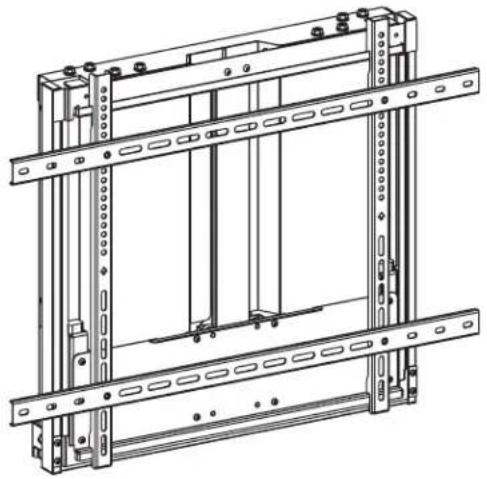
200x200/300x200/300x300
400x200/400x300/400x400
600x400/700x400/800x400
800x500/800x600


DWM5070HD DWM7090HD
WARRANTY REGISTRATION
Register your product today and be automatically entered to win an ISOBAR® surge protector in our monthly drawing!
tripplite.com/warranty


Manufacturing Excellence.
1111 W. 35th Street, Chicago, IL 60609 USA · tripplite.com/support
Copyright © 2021 Tripp Lite. All rights reserved.
Safety Instructions
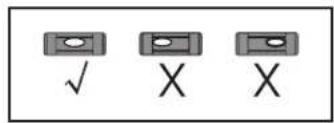
Note: Read the entire instruction manual before you start assembly and installation.

WARNING
- Do not begin the installation until you have read and understood the instructions and warnings contained in this manual. If you have any questions regarding any of the instructions or warnings, please visit tripplite.com/support.
- This mounting bracket was designed to be installed and utilized ONLY as specified in this manual. Improper installation of this product may cause damage or serious injury.
- This product should only be installed by someone of good mechanical ability, with basic building experience and a full understanding of this manual.
- Make sure that the supporting surface will safely support the combined load of the equipment and all attached hardware and components.
- If mounting to wood wall studs, make sure that mounting screws are anchored into the center of the studs. The use of a stud finder is highly recommended.
- Always use an assistant or mechanical lifting equipment to safely lift and position equipment.
- Tighten screws firmly, but do not over tighten. Over tightening can damage the items, greatly reducing their holding power.
This product is intended for indoor use only. Using this product outdoors could lead to product failure and personal injury.
Warranty and Product Registration
5-Year Limited Warranty
Seller warrants this product, if used in accordance with all applicable instructions, to be free from original defects in material and workmanship for a period of 5 years from the date of initial purchase. If the product should prove defective in material or workmanship within that period, Seller will repair or replace the product, at its sole discretion.
THIS WARRANTY DOES NOT APPLY TO NORMAL WEAR OR TO DAMAGE RESULTING FROM ACCIDENT, MISUSE, ABUSE OR NEGLECT. SELLER MAKES NO EXPRESS WARRANTY OTHER THAN THE WARRANTY EXPRESSLY SET FORTH HEREIN. EXCEPT TO THE EXTENT PROHIBITED BY APPLICABLE LAW, ALL IMPLIED WARRANTYES, INCLUDING ALL WARRANTYES OF MERCHANTABILITY OR FITNESS, ARE LIMITED IN DURATION TO THE WARRANTY PERIOD SET FORTH ABOVE; AND THIS WARRANTY EXPRESSLY EXCUSES ALL INCIDENTAL AND CONSEQUENTIAL DAMAGES. (Some states do not allow limitations on how long an implied warranty lasts, and some states do not allow the exclusion or limitation of incidental or consequential damages, so the above limitations or exclusions may not apply to you. This warranty gives you specific legal rights, and you may have other rights which vary from jurisdiction to jurisdiction.)
WARNING: The individual user should take care to determine prior to use whether this device is suitable, adequate or safe for the use intended. Since individual applications are subject to great variation, the manufacturer makes no representation or warranty as to the suitability or fitness of these devices for any specific application.
PRODUCT REGISTRATION
Visit triplite.com/warranty today to register your new Tripp Lite product. You'll be automatically entered into a drawing for a chance to win a FREE Tripp Lite product!*
- No purchase necessary. Void where prohibited. Some restrictions apply. See website for details.
Tripp Lite has a policy of continuous improvement. Specifications are subject to change without notice. Photos and illustrations may differ slightly from actual products.
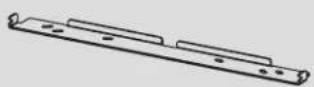
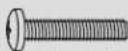
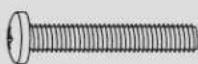
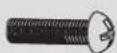
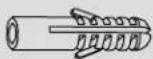
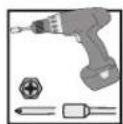
Component Checklist
IMPORTANT: Ensure you have received all parts according to the component checklist prior to installing. If any parts are missing or faulty, visit triplite.com/support for service.

A
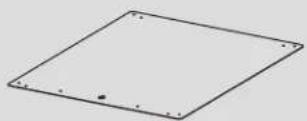
(x1)
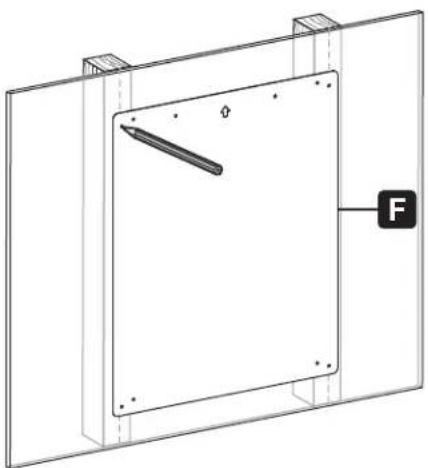
F
(x1)
B
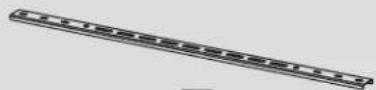
(x1)
D
(x2)
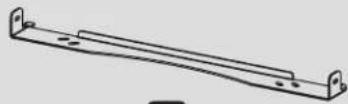
C

(x1)
E
(x2)
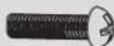
Package M


M5x14
(x4)

M6x14
(x4)

M6x30
(x4)

M8x30
(x4)

M8x50
(x4)

Washer
(x4)

Small Spacer
(x8)

Large Spacer
(x8)
Package P

G
M6x12
(x4)

H
M6x16
(x2)
0
M6x25
(x2)

J
(x4)

K
(x1)
Package W

W-A
(x6)
W-B
(x6)

W-C
(x6)
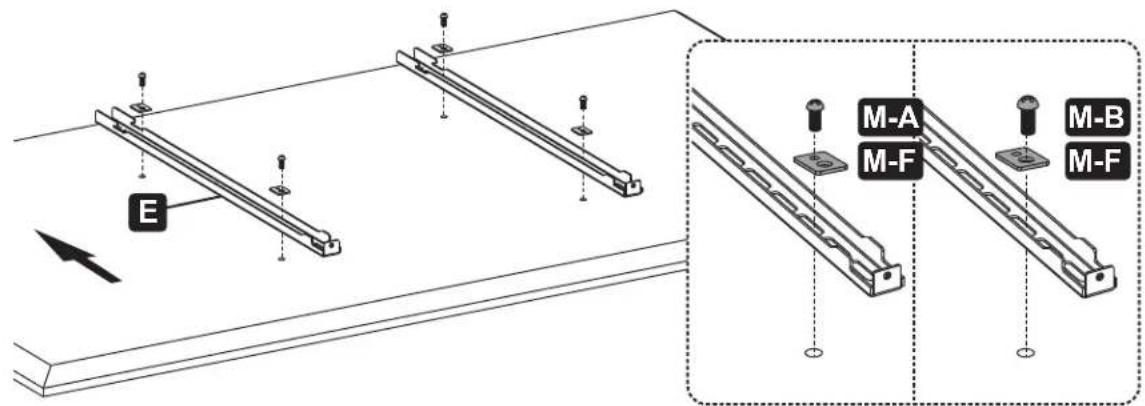
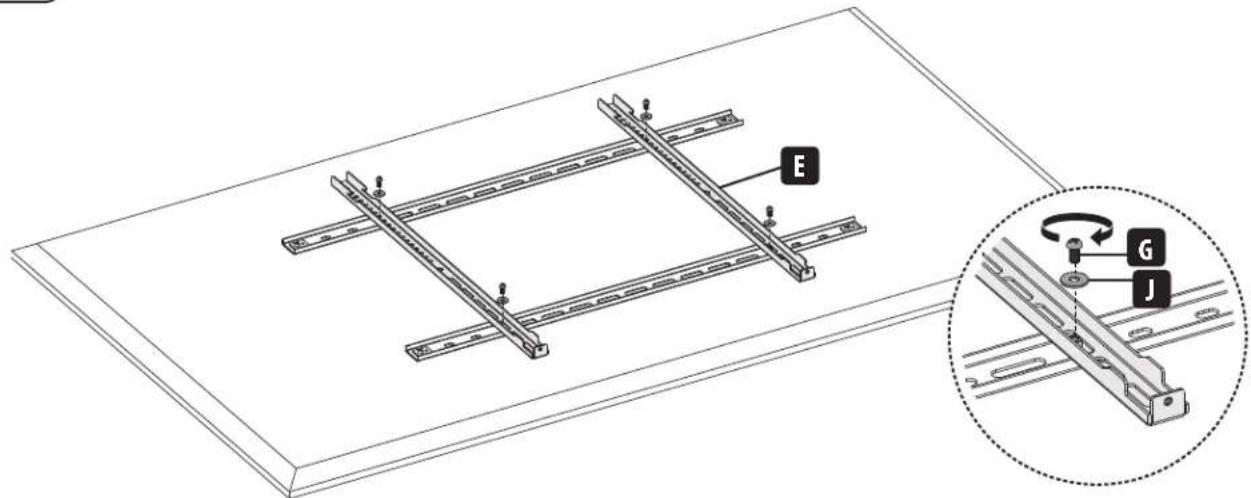
Assembly

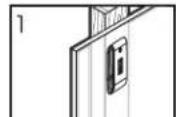
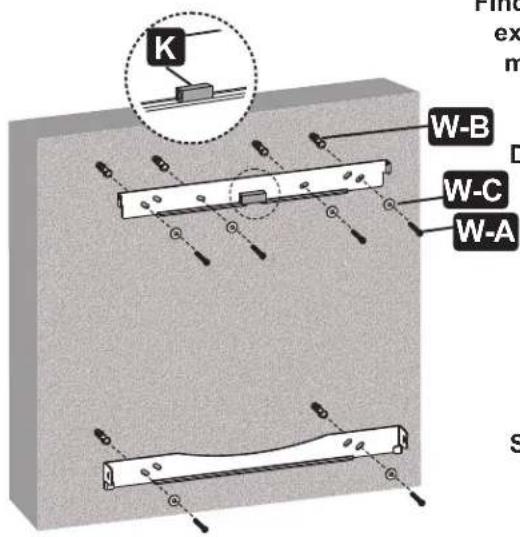
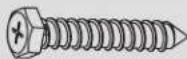
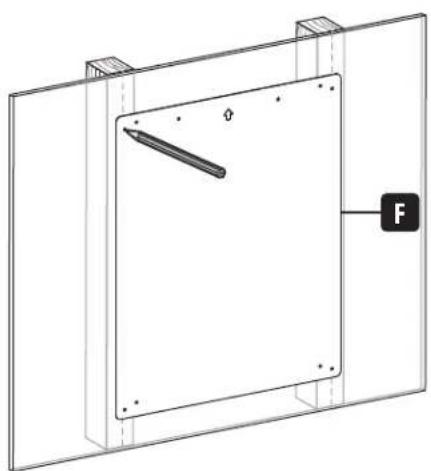
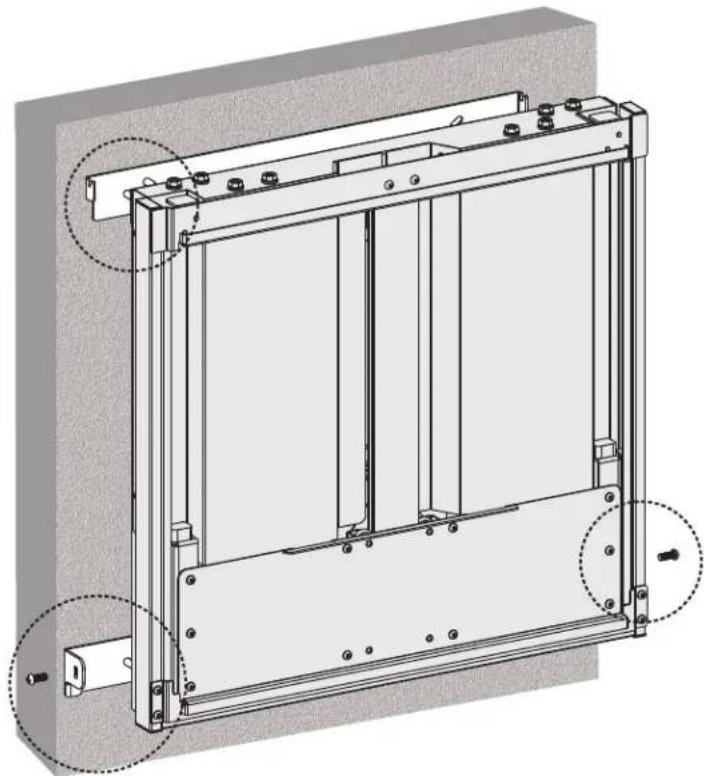
Attach Mount Assembly Brackets to Wall 1a. Mount on Wood Stud Wall

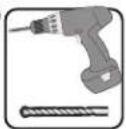
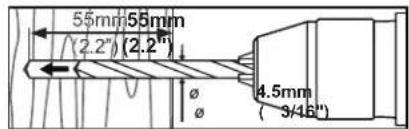
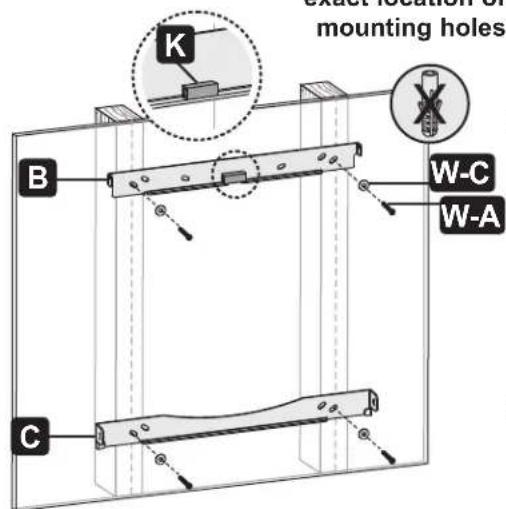
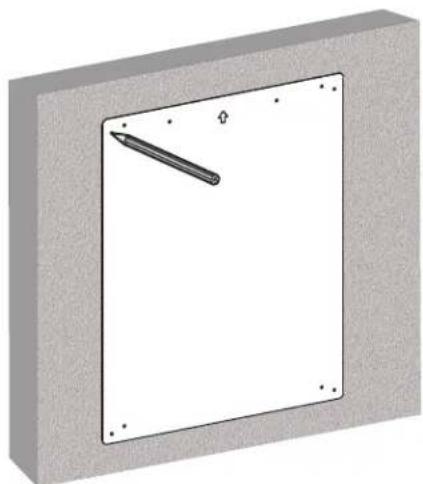
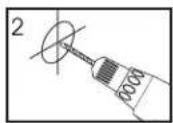
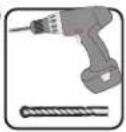
Find and mark the exact location of mounting holes
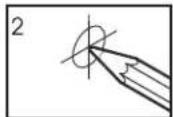
Drill pilot holes
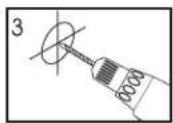

Screw the brackets onto the wall

WARNING
- Make sure that mounting screws are anchored into the center of the studs. Use of a stud finder is highly recommended.
- Installers are responsible to provide hardware for other types of mounting situations.
- Installers must verify that the supporting surface will safely support the combined load of the equipment and all attached hardware and components.
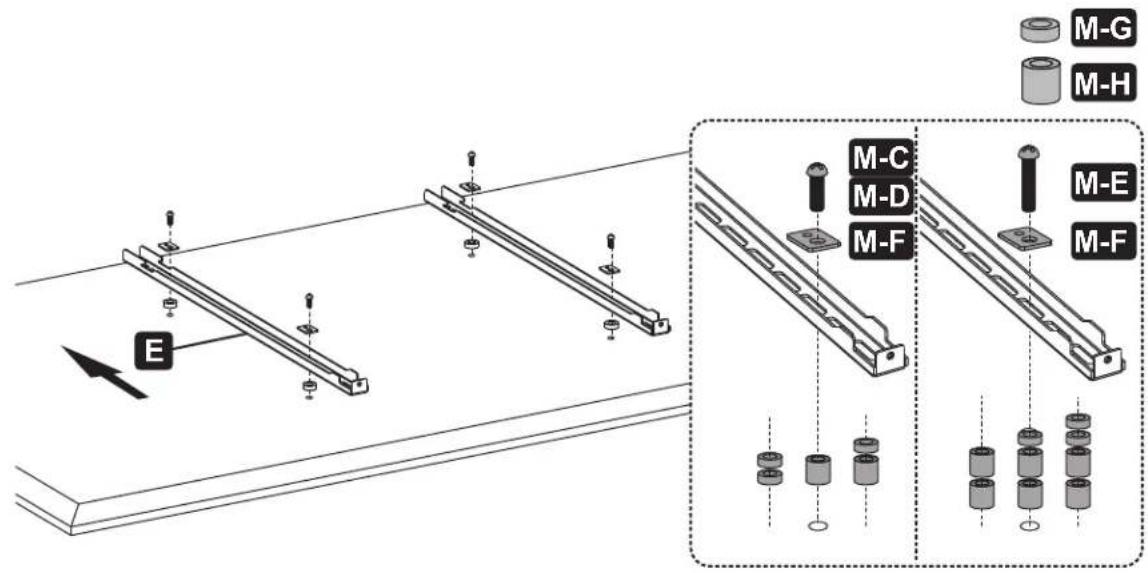
Assembly

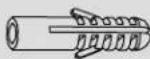
Attach Mount Assembly Brackets to Wall 1b. Mount on Solid Brick and Concrete Block
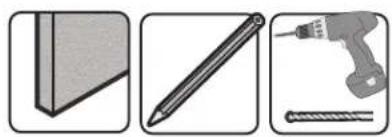
Find and mark the exact location of mounting holes

Drill pilot holes
Screw the brackets onto the wall


WARNING
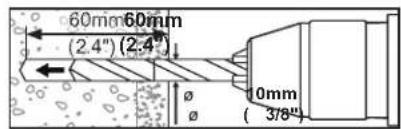
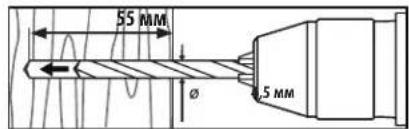
- When installing wall mounts onto a concrete masonry unit (also known as a CMU or "cinder block"), verify that the actual concrete thickness is at least 35mm (1-3/8") in order to hold the concrete anchors. DO NOT DRILL INTO MORTAR JOINTS! Be sure to mount the assembled wall-mount plate with the included concrete anchors, D6 washers and anchor bolts onto solid sections of the blocks. The solid sections can generally be found 25mm (1") toward the middle of the block from either end. An electric drill on a slow setting is suggested to drill the hole rather than a hammer drill so as to avoid breaking out the back of the hole when entering a hollow section.
- Installers must verify that the supporting surface will safely support the combined load of the equipment and all attached hardware and components.
Assembly

Install Adapter Brackets
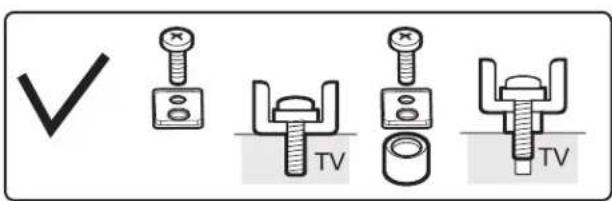
2a. For Flat-Back Screens

Note: Choose appropriate screws, washers and spacers (if necessary) according to the type of screen.
- Position the adapter brackets as close as possible to the center of the display.
- Firmly secure the adapter brackets onto the display using the screws and any other necessary hardware components included with the unit.

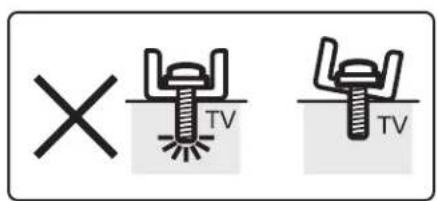
Do not over-tighten screws.
Assembly

Install Adapter Brackets
2b-1. For Recessed Back Screen or to Access A/V Inputs

Note: The horizontal brackets are used ONLY with interactive smart whiteboards that have 600x400/700x400/800x400/800x500/ 800x600 VESA patterns.
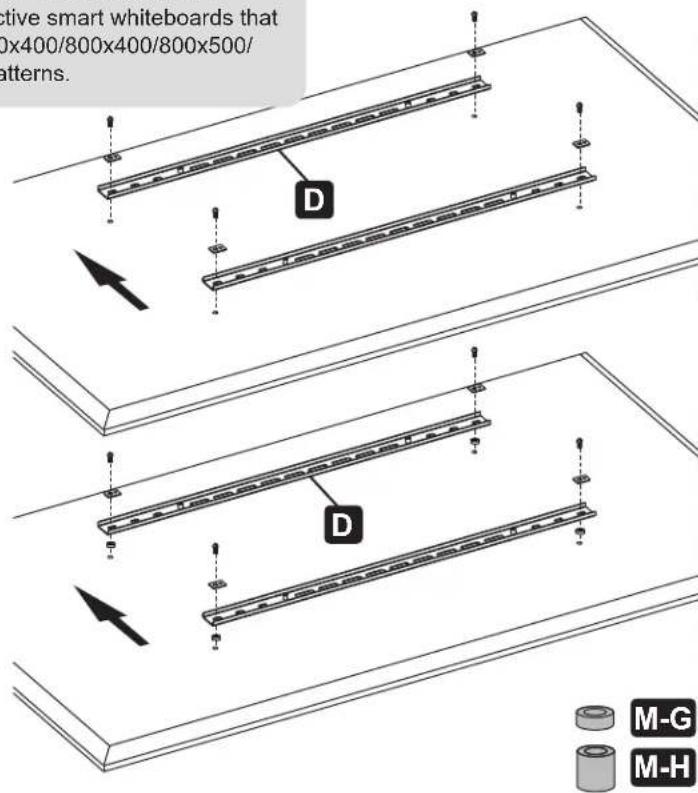
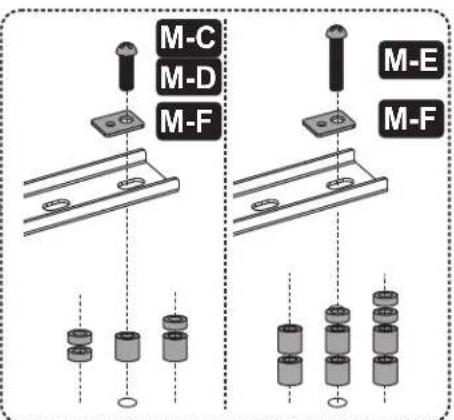
Note: Choose appropriate screws, washers and spacers (if necessary) according to the type of screen.
- Position the adapter brackets as close as possible to the center of the display.
- Firmly secure the adapter brackets onto the display using the screws and any other necessary hardware components included with the unit.

Do not over-tighten screws.

Install Adapter Brackets
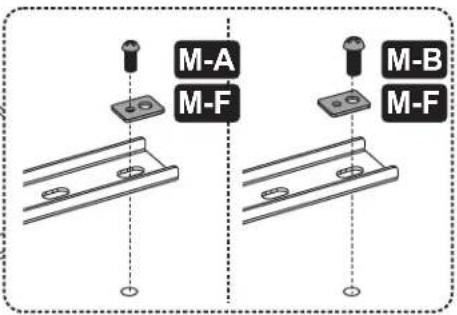
2b-2 For Recessed Back Screen or to Access A/V Inputs


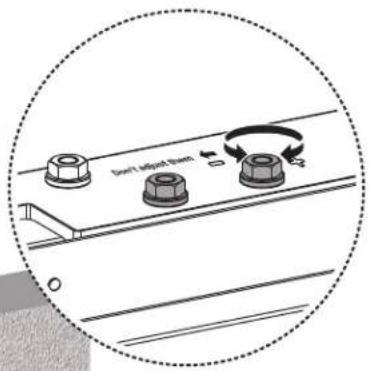
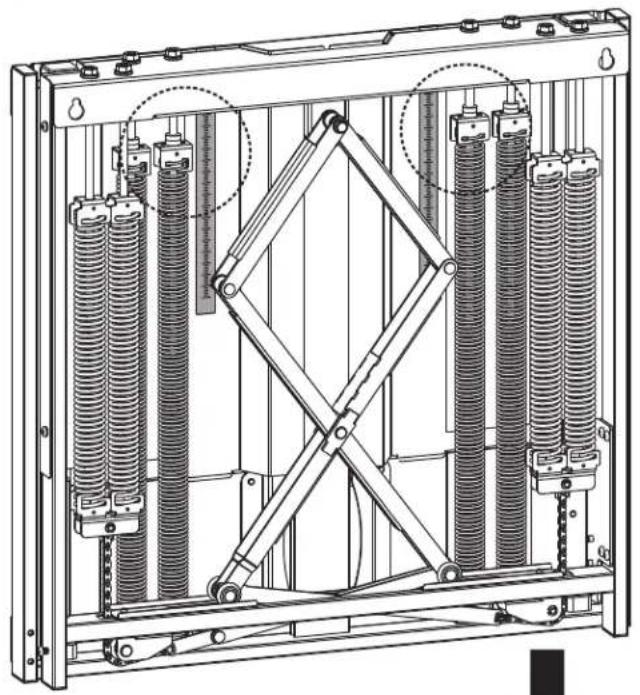
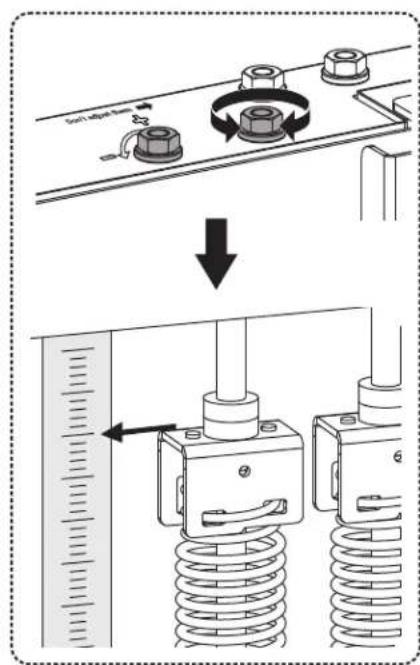
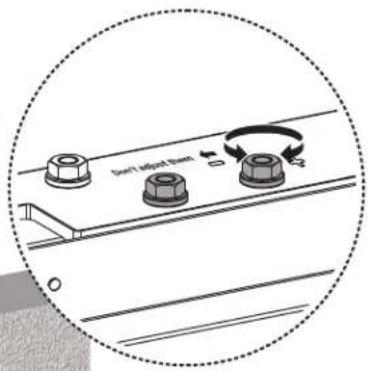
Adjust Balance Bolts
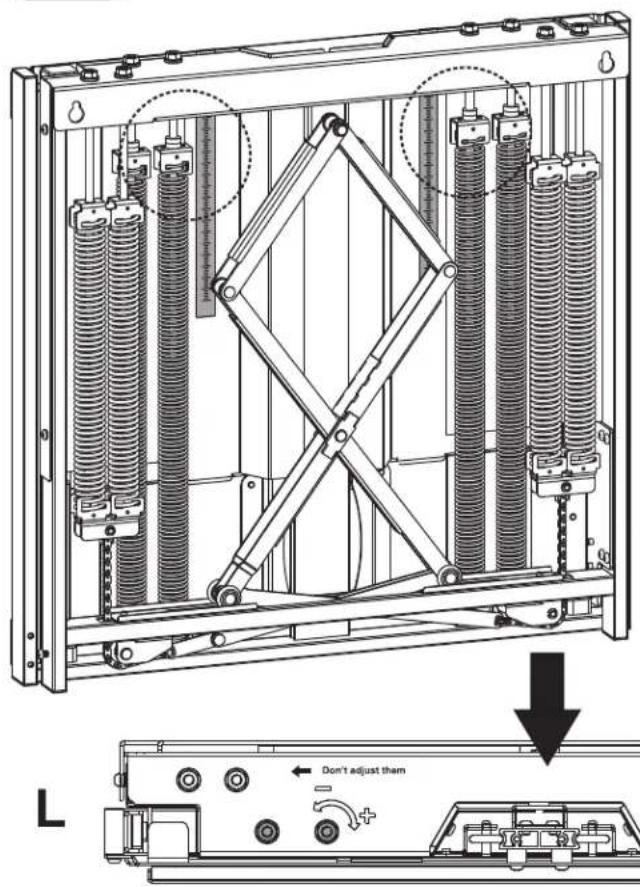
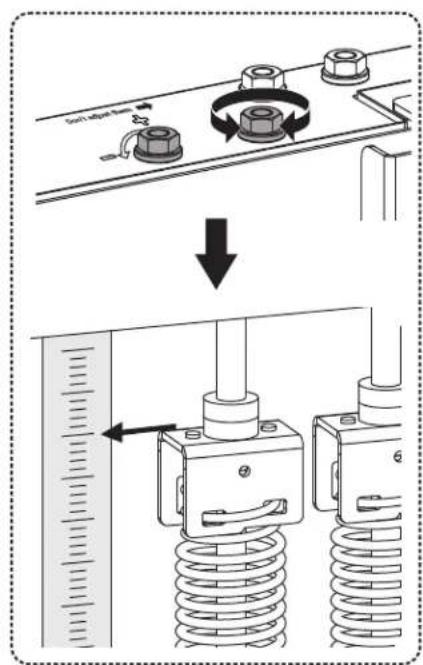
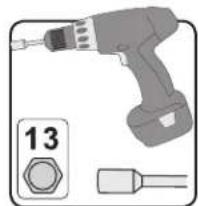
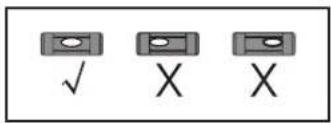
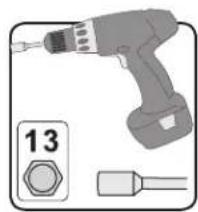
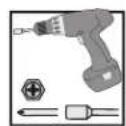
The mount arrives with a default balance setting. Adjust to the number found on the scale that matches the weight of the whiteboard. To properly balance the unit, use a drill with a nut-driver to adjust the four balance bolts (two located on each side, left and right). Alternate between each side until it has achieved a perfect balance.
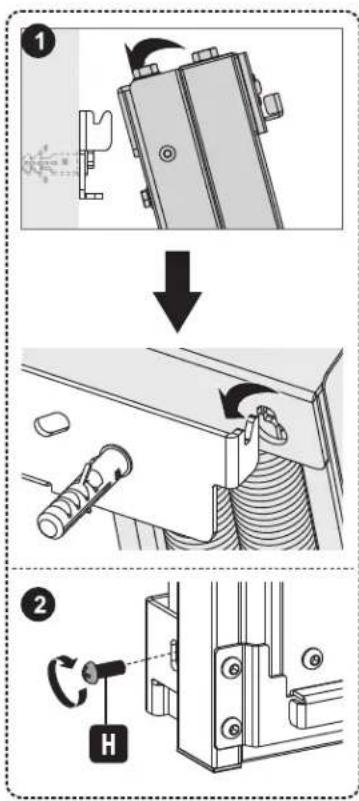
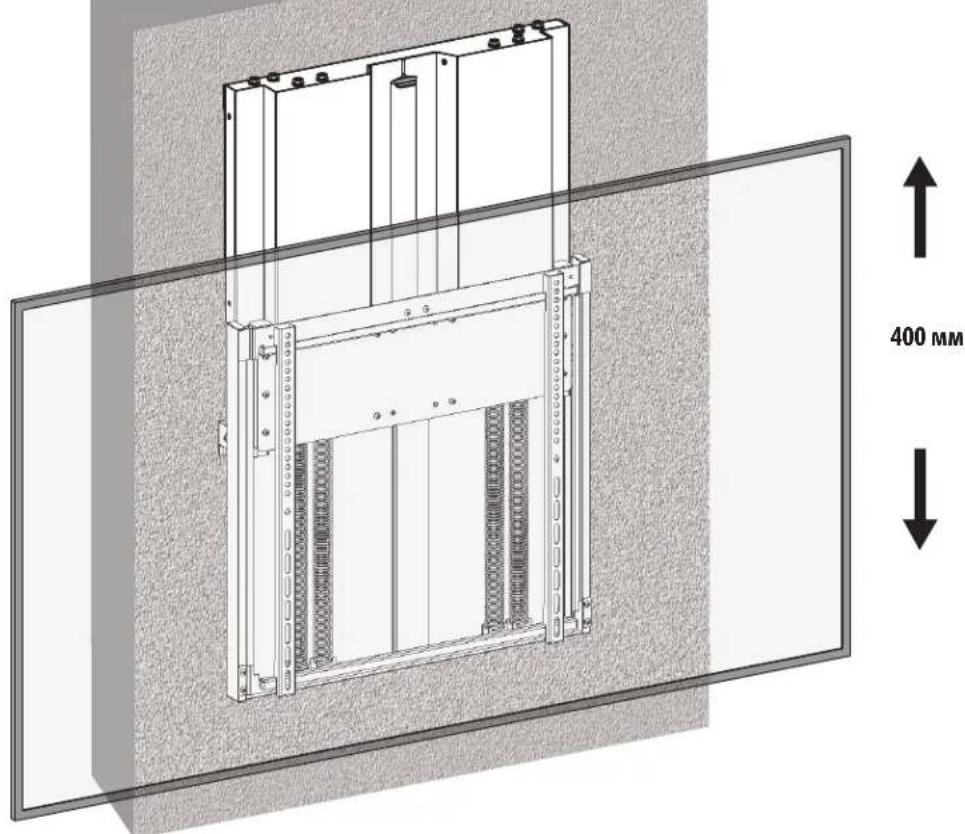
Assembly

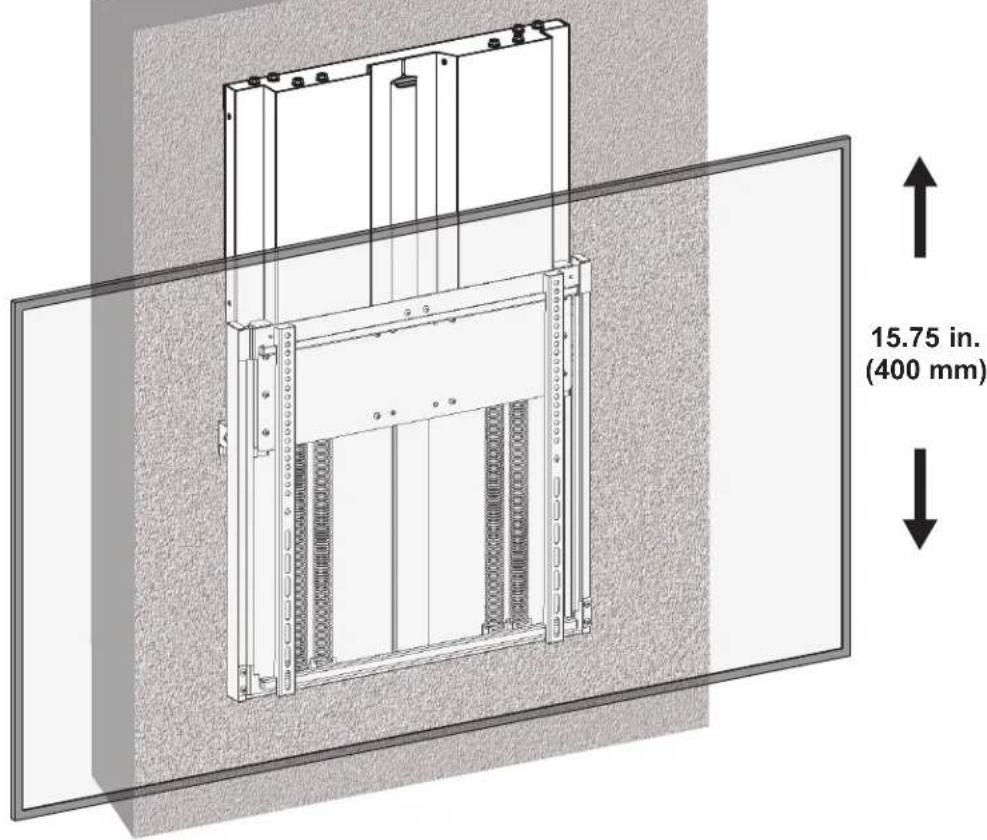
Hang Mount Assembly


Assembly

Hang Display On Mount Assembly

Using an assistant or mechanical lifting equipment, hook the display with attached adapter brackets over the top of the mounted wall-plate. Tighten the two bolts on the bottom of the adapter brackets to secure the unit.
Assembly

Adjustment
To ensure a perfect balance, use a drill with a nut-driver to make fine adjustments.
Maintenance
- Check that the bracket is secure and safe to use at regular intervals (at least every three months).
- Please visit tripblite.com/support if you have any questions.


Manufacturing Excellence
1111 W. 35th Street, Chicago, IL 60609 USA · triplite.com/support
1111 W. 35th Street, Chicago, IL 60609 USA · tripplite.com/support
PykoBODCTBO N0Ib3OBaTeJia
YnaKOBOHyBkOMnneKT M


M-E
M-A
M5x14
(4 wt.)
M-B
M6x14
(4wT.)
M-C
M6x30
(4 wt.)
M-D
M8x30
(4 wt.)
M8x50
(4 wt.)
M-F
Wai6a
(4wt.)
M-G
PpOCTaBkMaMaa
(8wT.)
M-G
TpoCTaBka 60nbwa
(8wT.)
YnaKOBOUHbI KOMJIeKT P

G
M6x12
(4 wt.)

H
M6x16
(2wT.)
0
M6x25
(2wT.)

J
4n.

K
1m.
YnakoBocHybIKomnneKTW
W-A
6U.
W-B
6wT.

W-C
6
Popraok c60pkn

KpenneHne MoHTaXHbIX KpoHsTeiHOB K CteHe
1a. KpenJIeHne K cTeHe c dpeBraHHbIM KapKaacom


BbCBePnIte HnPaBnIouIe OTBepCTH

PnBHTNE KPOHHTHbKCTHe

BHUMAHNE!
Heo6xmo o6ceuHTB BVEpTBbAHNE KpeENHbIX BNHTOB NO CEHTpy 3nEMeHToB KApKaca. CToI uehHO HAcTOrTeNbHO peKOMeHyETcNIOJIb3OBAHHe DeTeKTopa HeoHOpOHOCTei.
- 0TBETCBEHNOCTb 3a 06ecneueHHe NoDxOJaSei KpeNExKHO OChAcTKn DnA pyRnx CnoCo6OB MoTtKa BO3NaIraeTcHa YcTaHOBUnka.
- UCTAHOBUHK 063aH y6eHTbCA B TOM, YTO ONOPHA NOBepxHOCTb C3aNACOM BblEepKHT cyMMapHyIO HArpy3Ky, CO3dABaEMyO 6OpdyoBaHNEM BCEMH BXODIUMM B KOMIINEKT DeTAMM OCHACTKN DpyHM N KOMNOHEHTAMN.
Popraok c60pkn

KpenneHne MoHTaxHbIX KpoHsTeiHOB K CteHe
1b. Kpenenne Hc cnnoHOMy Knpnuy nN 6ToHHOMy 6noky


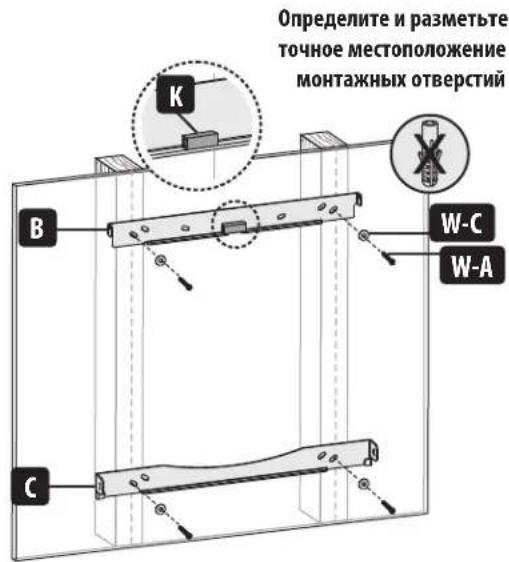
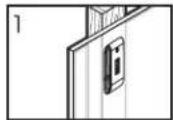
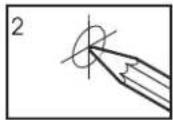
Onpeennte npa3MeTbTe ToHoe MeCTOnIOJXeHHe MOHTaKhbIX OTBepChn
BbCbePnIte HnpaBnIoune OTBePcTna
PnBHTne KpOHTeHbKCTHe

BHUMAHNE!
PnMOHTAXe HAcTeHHbIX KPOHtEHHOB Ha 6EtOHbI CTPONTbHbI 6NOK (u3BecTHbI TAKKcKa 5Cb nnn "uNaKo6eTOnHbI 6NOK") y6eHntEcB B TOM, qTO fakTNuecka TOnuHa 6eToHa cOCTabHnet He MeHee 35 MM C uenbIO o6ecneueHHaNDekaaeH Nkcaau anKepeB dA 6eToHa. HE BBICBEPIIBAITE OTBEPCTNA B WBAX, 3ANONHEHHbIX CTPONTbHBIM PACTBOPOM! INaCTHy dA NaCTehHO rKpenneHH B C6ope 063aTeNbHO CNeDyET MOHTIPoBaTB C NMOUbIO NOCTABnEMbIX B KOMIINEKTE C Hei ANKEpOB DnA 6eToHa, WAn6 D6 N AnKEpHBix 6oITOB CnIOuHbIX qAChx 6NokOB. CnIOuHbI Yeactn O6bYH NoCTABnEMbIX B KOMIINEKTE C Hei ANKEpOB DnA 6eToHa, WAn6 D6 N AnKEpHBix 6oITOB CnIOuHbIX qAChx 6NokOB. CnIOuHbI Yeactn O6bYH NoCTABnEMbIX B KOMIINEKTE C Hei ANKEpOB DIn A 6eToHa, WAn6 D6 N AnKEpHBix 6oITOB CnIOuHbIX qAChx 6NokOB. CnIOuHbI Yeactn O6bYH NoCTABnEMbIX B KOMIINEKTE C Hei ANKEpOB DnA 6eToHa, WAn6 D6 N AnKEpHBix 6oITob CnIOuHbIX qAChx 6NokOB. CnIOuHbI Yeactn O6bYH NoCTABnEMbIX B KOMIINEKTE C Hei ANKEpOB DnA 6eToHa, WAn6 D6 N AnKEpHBix 6oITob CnIOuHbIX qAChx 6NokOB. CnIOuHBI Yeactn O6bYH NoCTABnEMbIX B KOMIINEKTE C Hei ANKEpOB DnA 6eToHa, WAn6 D6 N AnKEpHBix 6oITob CnIOuHBX qAChx 6NokOB. CnIOuHBI Yeactn O6bYH NoCTABnEMbIX B KOMIINEKTE C Hei ANKEpOB DnA 6eToHa, WAn6 D6 N AnKEpHBix 6oITob CnIOuHBX qAChx 6NokOB. CnIOuHBI Yeactn O6bYHo BMeTO nepΦopatopa.
- YctahobuHK 683aH y6eHTbC B TOM, yTO onOpHAR NOBepXHOCTb C3aNACOM BblpeKHT cyMMapHyO Harpy3Ky, c03daBaemyo 60pyoBaHHem N BcEMH BXODIIMM B KOMNIKET DETAAMN OCHACTKN DpyHMN KOMNOHEHTAMN.
Popraok c60pkn

YCTaHOBKa nepexoHbIX KpoHHTeHOB
He nepetarynbaTe BnHTbI.
Popraok c60pkn

YCTaHOBKa nepexoHbIX KpoHHTeHOB
He nepetraHbAte BuHTbl.
yctaHOBKa nepexoHbIX KpoHHTeMHOB
2b-2ДяЗкрана,утанавиьамorо зларно,нлдя поунчени doctуна Кразьемаaydno-/BudeoBXOda
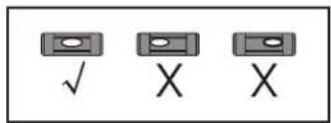
3 PerynipoBka 6aJahncipoBOyHbIX 6oITOB

KpoHHTeMH NoCTaBnTcA
Bc6aHaHcuPOBaHHOM
COCTOHHU, YCTAHOBHHeHHOM Ha 3aBOe-H3rTOBUTene.
YCTAHOBITEHaIshane qinno, COOTBETCTBYOooeeMACCEDO
IpaBbH06aHaHcPOBKn 3y3nOtperyeYtpe
6baHcnpoBouhby60nTa
(noDBA CKaJdoi CTOpHbI, CBAHcPaba)C NMOOJIbE TaJIeKTPueeCKoRrKaIOBepTa.
YepeynteCTopoHbIdo 0octXKeHnNdeanbHor 6aHaHca.
L

R
Popraokc60pkn

HabeunBaHne KpenexKhoro y3na
Popraokc60pkn

HabeunBaHne duCnpe Ha KpenexKbI y3eI


06paHbMcb 3a nmoBIOI BOCNIOB3OBAWUBc MExAHueCckMMIOBemHbIM O6pyoDBAHMe, 3aenite dncnne c npKpeHNHBIM K Hemy nepeoxDHBIM KPOHHTHaAMM 3a BePXMI KpA YCTAOHBNEHOIN PACTMBI DnK pENNEH NCTHe. 3aTnHtE DBA BONHKeY aactn nepeoxDHBX KPOHTeHOBd IyKcaun yctpoiCTBa.
Popraok c60pkn

KoppeKTIpOBKa noIooKeHnA
IJa o6ceuehenHndeanbHoro 6aanaHc taOnhypeRpynpOBky cnEyET BInONHbT pN nOMOUs 3NeKtpueckoro raikobepta.

Texnueckoe o6cnyxmbaHne
Perynepno (he pexe, yem pa3 B TPN Mecaa) npoepaite Haedxhoctb KpeenneHna KpoHtMeHa n 6e0anacchoctb ero hncnoB3oBaHna.
B cnyae Bo3nHKnOBHeNk KaKx-yno BOnpocOB nocTeCTpaHcy triplite.com/support.
Bedienungsanleitung
Manufacturing Excellence.
1111 W. 35th Street, Chicago, IL 60609 USA · tripplite.com/support
Manufacturing Excellence.
1111 W. 35th Street, Chicago, IL 60609 USA · triplite.com/support