DigiFrame 7 Motion - Digital photo frame BRAUN - Free user manual and instructions
Find the device manual for free DigiFrame 7 Motion BRAUN in PDF.

| Product type | Digital photo frame |
| Brand | BRAUN |
| Model | DigiFrame 7 Motion |
| Screen size | 7 inches (17.8 cm diagonal) |
| Supported image formats | JPEG, BMP, PNG |
| Supported audio formats | MP3, AAC |
| Supported video formats | MPEG1, MPEG2, MPEG4, H.264, Motion-JPEG, RM, RMVB, MOV, DivX |
| Storage media | SD/SDHC/MMC card, USB flash drive (USB 2.0) |
| HDMI input | Yes |
| Built-in speakers | 2 x 1 W (stereo) |
| Headphone jack | Yes |
| Remote control | Yes (CR2025 battery included) |
| Power supply | AC adapter (included) |
| Main functions | Automatic slideshow, clock, calendar, brightness/contrast/saturation adjustments, adjustable slideshow speed, USB to SD card copy, on/off timer |
| OSD languages | English, German and others |
| Display mode | Fitted, panorama, automatic |
| Safety | Indoor use only; do not expose to moisture; do not block ventilation slots |
| Care and cleaning | Soft cloth (lens type) with screen cleaner; do not apply liquid directly |
| Package contents | Photo frame, power adapter, remote control, stand, user manual |
Frequently Asked Questions - DigiFrame 7 Motion BRAUN
User questions about DigiFrame 7 Motion BRAUN
0 question about this device. Answer the ones you know or ask your own.
Ask a new question about this device
Download the instructions for your Digital photo frame in PDF format for free! Find your manual DigiFrame 7 Motion - BRAUN and take your electronic device back in hand. On this page are published all the documents necessary for the use of your device. DigiFrame 7 Motion by BRAUN.
USER MANUAL DigiFrame 7 Motion BRAUN
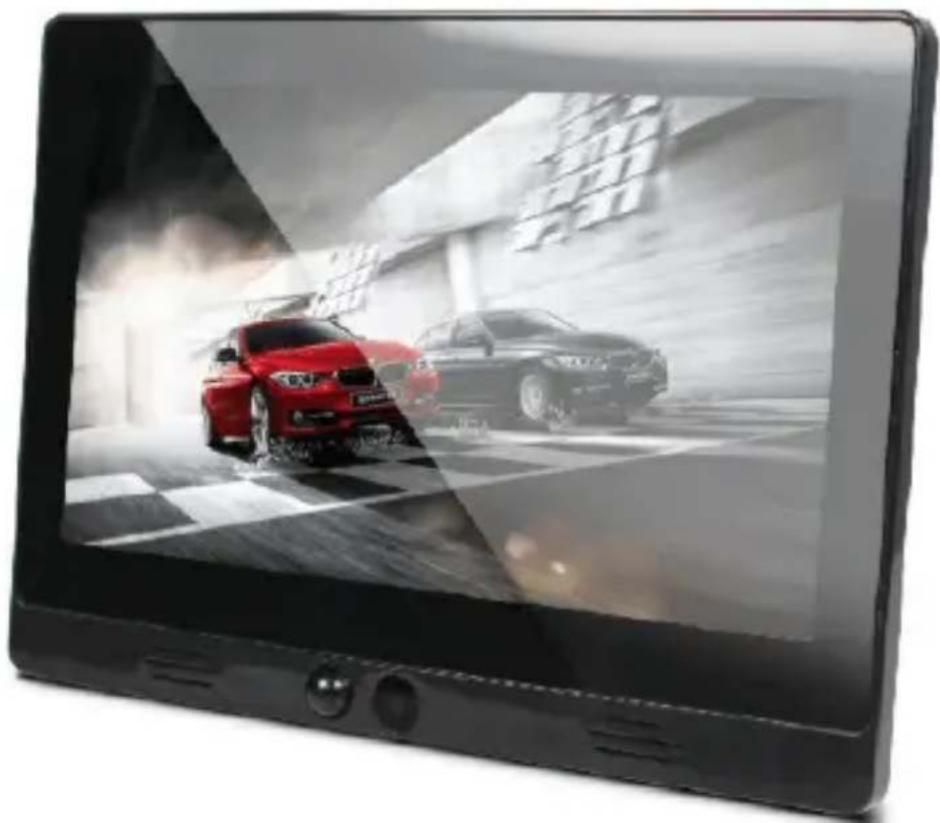
DigiFrame 7 Motion & DigiFrame 10.1 Motion
natural_image
Table monitor displaying a red car on a checkered crosswalk with motion blur effect, no visible text or symbolsDEENESFRITPLRO


natural_image
Blank white rectangle with a thin red border at the bottom (no text or symbols)
natural_image
Blank white rectangle with a red bottom border (no text or symbols)Sicherheitshinweise
natural_image
Line drawing of a device with an open lid and a separate circular component inserted (no text or symbols)text_image
Crisis Language Midstream Bits Midstream Mode Request Mode Display Mode Time Motion Tenset Brightness Camera Saturation Audio Power Auto Play Scroll Subside Copy Refresh Factory Defaultnatural_image
Back view of a black rectangular electronic device with control buttons and a small display screen (no readable text or symbols)Precautions and maintenance
- For indoor use only.
- Do not expose the unit to moisture or condensation to avoid the risk of fire or electric shock.
- Do not block the ventilation holes on the rear of the digital photo frame to avoid overheating.
- Keep the digital photo frame out of direct sunlight.
- Do not disassemble the digital photo frame. Disassembling the digital photo frame will void your warranty.
Cleaning the LCD screen
- Treat the screen carefully. The screen of the digital photo frame is made of glass and it can easily break or be scratched.
- If fingerprints or dust accumulate on the LCD screen, we recommend using a soft cloth, such as used for camera lenses, to clean the screen.
- Moisten the cleaning cloth with the cleaning solution; do not apply cleaning agent directly on the screen.
Warning
Switch the unit off before inserting or removing a memory card or USB device. Failure to do so may cause damage to the memory card, USB device and the unit.
To reduce the risk of fire or electric shock, do not expose this appliance to rain or moisture.
Note: this device is for private use only and not designed for commercial use.
Introduction
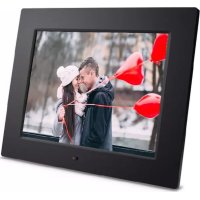
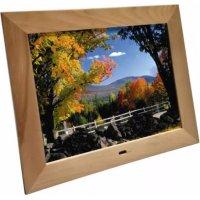
Thank you for your purchase of this digital photo frame. It is designed to allow quick and easy view of photos taken from your digital camera, mobile phone or from a memory storage card. Please read this user manual carefully to learn the correct way to use this digital photo frame.
Features
- Supports picture formats: JPEG / BMP / PNG
- Supports audio formats: MP3, AAC
- Supports video formats: MPEG1, MPEG2, MPEG4, H.264, Motion-JPEG, RM, RMVB, MOV, DivX
- Supports memory cards: SD/SDHC/MMC
- USB connection: USB 2.0
- Supports HDMI In
- Auto slide-show when inserting memory card or USB drive
- Picture & music: slide-show pictures with background music
- Picture display mode: slide-show, preview, zoom, rotate
- Adjustable slide-show speed
- Built-in clock and calendar with slide-show window, scheduled auto on/off
- Adjustable brightness, contrast, saturation
- Built-in stereo speakers (2 x 1W) and earphone jack
- OSD language: English, German and others
Packaging Check List:
-
7" / 10.1" digital photo frame 1 piece
-
user manual 1 p i e c e
-
AC adapter 1 p i e c e
-
remote control 1 piece
-
stand 1 p i e c e
CONTENTS
- Product Overview.... 14
- Remote Control 15
2.1 Installing and replacing the battery.... 16 - Getting started.... 16
- Operating Instructions.... 16
- Photo mode.... 17
- Music mode.... 17
- Video mode.... 18
- Clock.... 18
- Calendar.... 19
- Setting.... 19
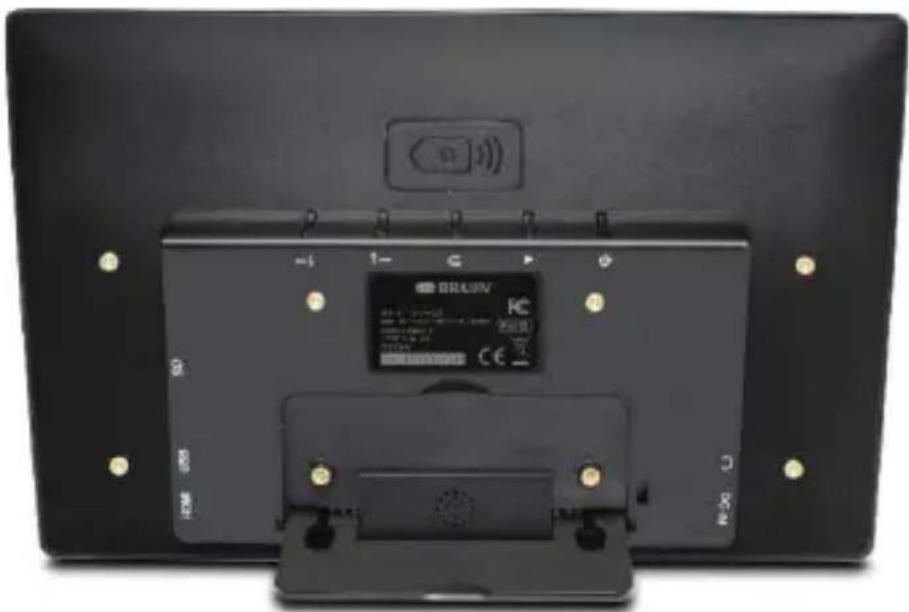
1. Product overview
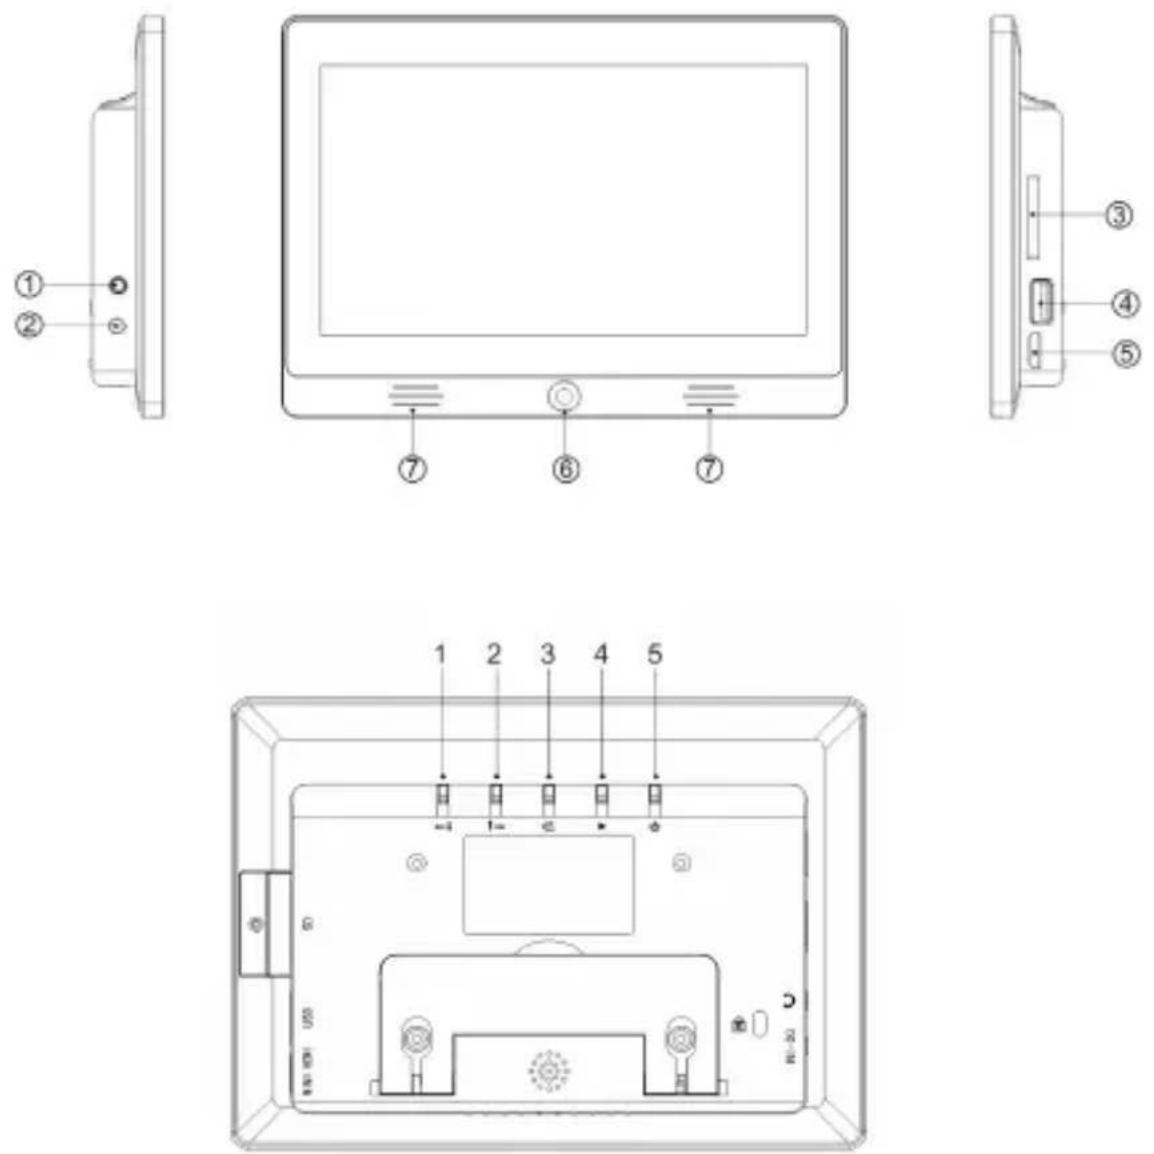
1 EARPHONE JACK 1 RIGHT / DOWN
2 DC IN POWER 2 LEFT / UP
3 SD/MMC CARD SLOT 3 RETURN
4 USB PORT 4 PLAY
5 HDMI 5 POWER
6 RECEIVING WINDOW OF REMOTE CONTROL
7 SPEAKER
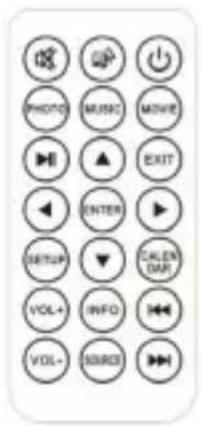
2. Remote Control

: Power unit on/off.

Play photo slideshow with background music.

Mute sound temporarily.

Play photo slideshow.

Play music.

Play video.

Pause or continue playing media.

Return to the previous menu.
▼▲◀▶: Move cursor up/down/left/right.

Confirm selection or toggle pause/play function in playback mode.

Enter setup menu.

Display date and time.

: Turn volume up/down.

Information display.

Choose input source (HDMI or Digital Photo Frame).

: Move back to previous file in playback mode/Move forward to next file in playback mode.
text_image
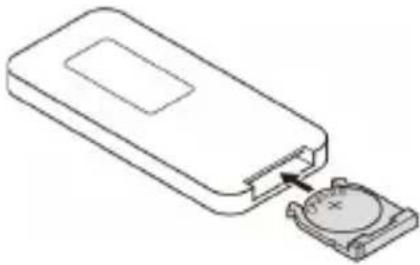
PHOTO MUSIC MOVIE EXIT ENTER SETUP CALENDAR VOL+ INFO VOL+ SOURCE2.1. Installing & Replacing the Battery
natural_image
Line drawing of a device with an open lid and a circular component inserted into it (no text or symbols)Hold the remote control upside down, press the ridged area of the battery cover and pull towards you to remove the tray. Place one cr2025 lithium button-cell battery in the tray with the positive "+" side facing you. Reinsert the tray.
3. Getting Started
- Place the digital photo frame with installed stand on a flat surface. Connect the power adapter to a standard electrical outlet and DC in on the left side of the unit.
- Remove the plastic battery insulator from the battery compartment and make sure the remote control has a battery inserted. Refer to "installing & replacing the battery" if a new battery is needed.
- The unit will start up automatically when powered on. Press power at the rear of the unit or on the remote control to switch the unit on or off.
4. Operating Instructions
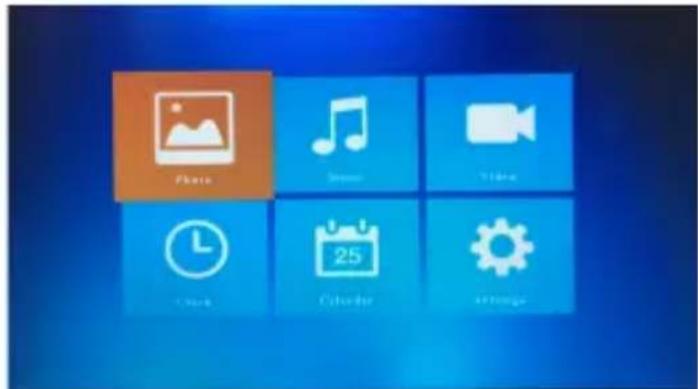
text_image
Photo Dinner Video Clock Calendar SettingsPress ENTER to access the menus, Photo, Music, Video, Clock, Calendar or Setting.
| Photo Picture list | |
| Music Music list | |
| Video Video list | |
| Clock Clock mode | |
| Calendar Calendar mode | |
| Setting Setting menu of digital photo frame | |
5. Photo Mode
-
Select PHOTO and press ENTER to start picture list or press PHOTO on remote control to start slideshow directly.
-
Select memory device from USB or SD Card.
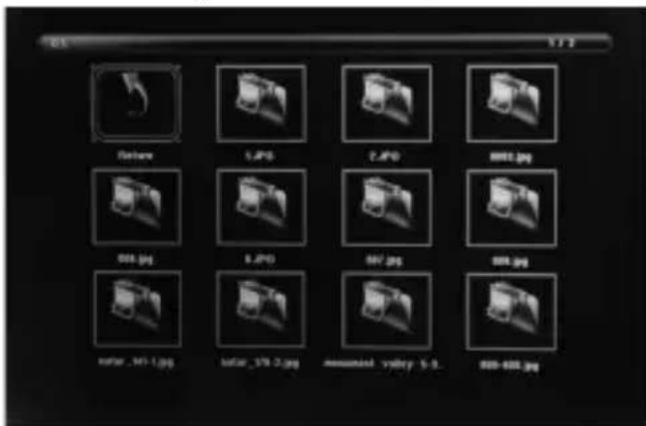
text_image
201 5.7.2 Figure 5.jpg 2.jpg 8883.jpg 664.jpg 6.jpg 887.jpg 888.jpg water_491-1.jpg water_378-2.jpg mmoussed_valley 5-9 888-888.jpg-
Select the photo for full screen display with ▼▲◀▶.
-
To play photo slideshow with background music, press button on remote control. Then photo slide show in turn.
6. Music Mode
-
Select MUSIC and press ENTER to start music list or press MUSIC on remote control to start slideshow directly.
-
Select memory device from USB or SD Card.
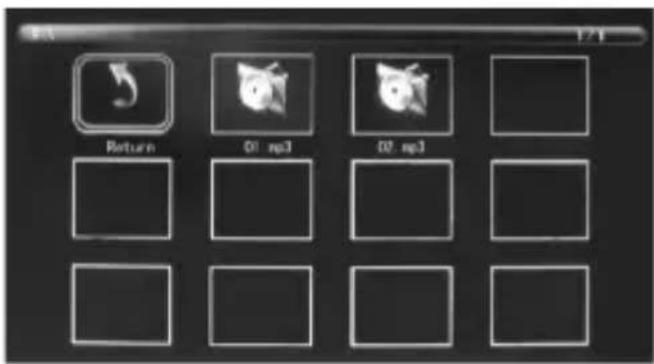
text_image
Return 01 mp3 02 mp3- Select the music in the playlist and press ENTER to start or pause playback. Adjust the
volume by pressing . Press to play the previous or next music.
7. Video Mode
- Select VIDEO and press ENTER to start video list or press MOVIE on remote control to start video playback directly.
- Select memory device from USB or SD Card.
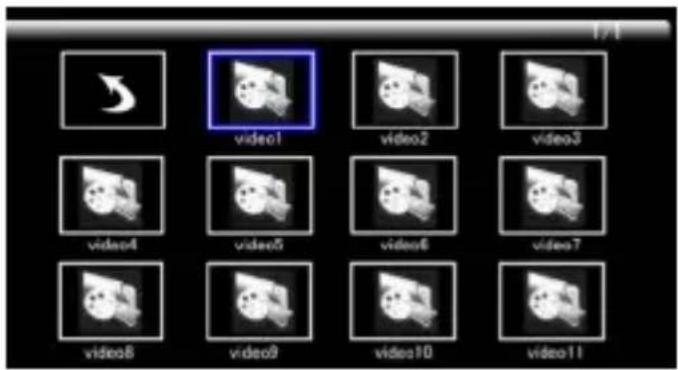
text_image
video1 video2 video3 video4 video5 video6 video7 video8 video9 video10 video11- Select the video in the playlist, then press ENTER to start playback in full screen.
- In video playback mode, press 📋 to pause, press 🏠 button again to continue
playing. Press 🏠 🏠 to play the previous or next video. Adjust the volume by pressing VOL+ VOL-
8. Clock
Select CLOCK and press ENTER to enter.
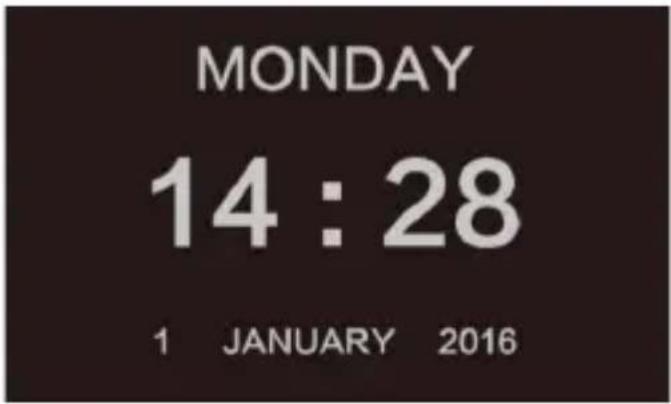
text_image
MONDAY 14 : 28 1 JANUARY 20169. Calendar
Select CALENDAR and press ENTER or press CALENDAR on remote control to enter.
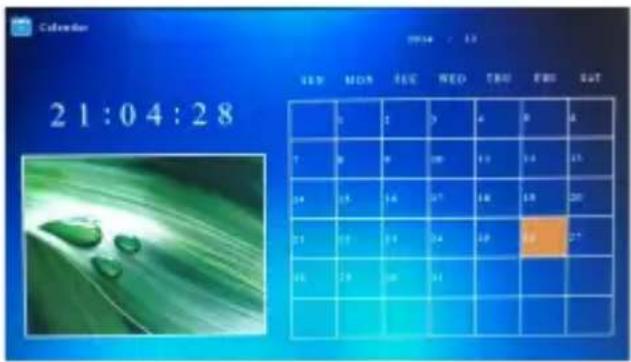
text_image
Calendar 21:04:28 NEW MORN FEE WED TBU FMS OUT 7 8 9 10 11 12 13 14 15 16 17 18 19 20 21 22 23 24 25 26 27 28 29 30 31 32 33 34 35 36 37 40 41 42 43 44 45 50 51 52 53 54 55 56 60 61 62 63 64 6510. Setting
Select SETTINGS and press ENTER to enter.

text_image
User language Sliderbox True Sliderbox Mode Repeat Mode Preview Mode Time 2014 13:14 00:00 Motion Descent Brightness Castor Corrosion Auto Power Auto Play Scroll Subside Copy Ecolects Factory Default-
Press ▲▼ to highlight the menu item.
-
Press ◀▶ to change the value and press ▲▼ to confirm.
Note: after setting a menu item and accessing the next item, the set value will automatically be saved.
| OSD Language Setup of OSD Language | |
| Slideshow Time | Select slideshow time from 3 seconds/5 seconds/10 seconds/30 seconds/60 seconds |
| Slideshow Mode Select from slideshow On/Off | |
| Repeat Mode Select from Off/All/One | |
| Display Mode Select from Fit/Panorama/Auto | |
| Time Set up Date/Month/Year/Hour/Minute/Sec | |
| Brightness Set up brightness from 0 to 100 | |
| Contrast Set up contrast from 0 to 100 | |
| Saturation Set up saturation from 0 to 100 | |
| Auto Power Set up | power on and power off time |
| Auto Play Select from Photo/Music/Video/Photo+Music/Off | |
| Scroll Subtitle Set up color of subtitle. | |
| Copy Auto Copy from USB to SD card | |
| Restore Factory Default | Reset to default factory settings |
text_image
DRUN® CE 1- C P + - + - + - + - + - + - + -natural_image
Line drawing of a device with an open lid and a separate circular component inserted (no text or symbols)text_image
Photo Music Video Clock Calendar SettingsPulse ENTER para acceder a los menús Photo, Music, Video, Clock, Calendar or Setting.
natural_image
Back view of a black electronic device with labeled buttons and a central display (no readable text or symbols beyond basic labels)text_image
PHOTO MUSIC MOVE EXIT ENTER SETUP CALIBN VOL+ IMPO VOL- SOURCEnatural_image
Line drawing of a device with an attached circular component (no text or symbols)natural_image
Line drawing of a device with an open lid and a circular component inserted into it (no text or symbols)text_image
Photo Music Video Clock Calendar Settingsnatural_image
Back view of a black electronic device with a central display and control buttons (no readable text or symbols)natural_image
Line drawing of a device with an open lid and a circular component inserted into it (no text or symbols)text_image
Photo Music Video Clock Calendar Settingsnatural_image
Back view of a black electronic device with a central display and control buttons (no readable text or symbols)natural_image
Line drawing of a device with an open lid and a circular component inserted into it (no text or symbols)text_image
Photo Memory Video Clock Calendar Settingstext_image
QR code image containing encoded data, no visible human-readable textCopyright © 2018 BBAUUn e Photo Techink Gmbh, Germany. All rights reserved.