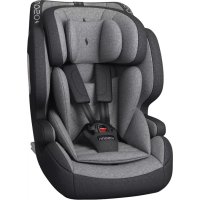
Pluto iSize - High chair Osann - Free user manual and instructions
Find the device manual for free Pluto iSize Osann in PDF.


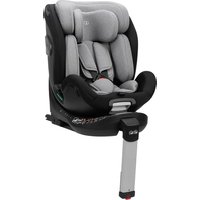
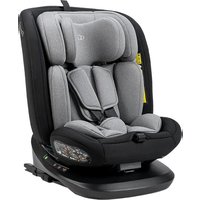
| Product type | i-Size child car seat with booster |
| Brand | Osann |
| Model | Pluto iSize |
| Approval | R129 (i-Size) |
| Compatible child height | 76 - 150 cm |
| Maximum supported weight | 36 kg |
| Minimum age (forward-facing) | 15 months |
| Installation | Isofix + Top Tether |
| Mounting direction | Forward-facing only |
| Child restraint system (76-105 cm) | Integrated 5-point harness |
| Child restraint system (100-150 cm) | Vehicle 3-point seat belt |
| Adjustments | Adjustable headrest (10 positions), adjustable shoulder straps |
| Included accessories | Comfort pads, buckle protector, Isofix insertion aids |
| Cover care | Machine wash at 30°C, delicate cycle. Do not use bleach. Tumble dry low. Do not iron. No dry cleaning. |
| Safety | Green locking indicators on Isofix and Top Tether, 5-point harness, energy absorption |
| Use | Vehicle only |
| Spare parts and repairability | Contact Osann customer service at +49(0)7731 / 970077 |
| Origin | Germany |
Frequently Asked Questions - Pluto iSize Osann
User questions about Pluto iSize Osann
0 question about this device. Answer the ones you know or ask your own.
Ask a new question about this device
Download the instructions for your High chair in PDF format for free! Find your manual Pluto iSize - Osann and take your electronic device back in hand. On this page are published all the documents necessary for the use of your device. Pluto iSize by Osann.
USER MANUAL Pluto iSize Osann
natural_image
Illustration of a car seat with gray and black panels, no text or symbols presentSITZTEILE
Vorderansicht
natural_image
Illustration of a child wearing a seatbelt and holding a device, with no visible text or symbolsLösen der Gurte
natural_image
Illustration of a child wearing a seatbelt and holding a red object, with a downward arrow indicating motion (no text or symbols)Straffen der Gurte
natural_image
Close-up of a mechanical component with a red circular feature and a green tool, no visible text or symbolsnatural_image
Simple line drawing of a hand holding a red object with two black clips above (no text or symbols)INSTALLATION DES KINDERAUTOSITZES
natural_image
Line drawing of a car seat with a highlighted seat area and red arrow indicating left side (no text or symbols)2
natural_image
Illustration of a child sitting in a car seat with a red belt (no text or symbols)natural_image
Line drawing of a car seat with seatbelt and seat, no text or symbols present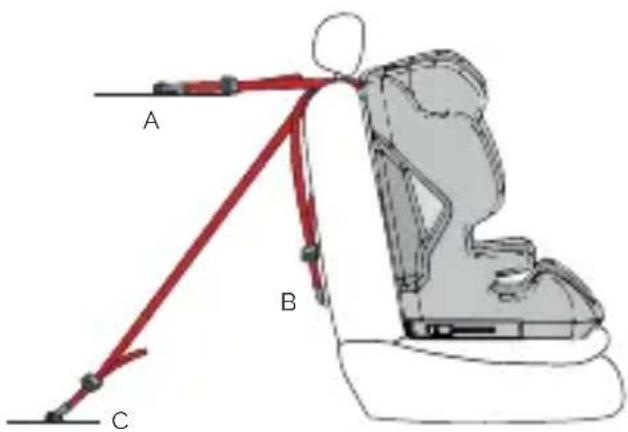
natural_image
Illustration of a child in a car seatbelt being lifted, with a magnified inset showing the seatbelt (no text or symbols present)4b
natural_image
Illustration of a child in a car seatbelt with a red belt, showing the seatbelt being lifted (no text or symbols present)REINIGUNG
Many thanks for opting for our child car seat PLUTO. If you require assistance with this product, please contact our customer service.
WARNING
- Please read through these instructions carefully before use and keep them for subsequent reference in order to guarantee the safety of your child. Non-compliance with the instructions in this manual can result in serious injuries to your child.
NOTE – This is an extended i-Size child restraint system with a seat booster for the extended i-Size child restraint system. Pursuant to Regulation No. 129, it is approved for use in i-Size-compatible vehicle seat positions as specified by the vehicle manufacturers in the instructions for operating the vehicle. In cases of doubt, please contact the manufacturer of the child restraint system or the dealer.
- The child car seat Osann PLUTO is approved for a height of between 76 and 150 cm (max. 36kg).
- The child seat is approved solely for use in the direction of travel.
• IMPORTANT - Do not use the child seat in the direction of travel until the child has reached the age of 15 months
- The child seat can only be used with its own 5-point belt system for children under a height of a 105 ~cm and with a maximum weight of 24 ~kg .
- The child seat CANNOT be used with the 5-point belt system for children who are taller than 105 ~cm and/or weigh more than 24 ~kg .
- From a height of 100 cm (up to a maximum of 150 cm), the 5-point belt system can be removed from the child seat and the child can be strapped in with the 3-point belt of the car.
- If the PLUTO is used for children who are between 135 cm and 150 cm tall, it may be the case that the child seat does not fit into all vehicle types because the vehicle roof is positioned low on the side of the vehicle selected for the installation of the seat.
- If the child is taller than 150cm, the child has to move to the vehicle seat and be strapped in with the 3-point belt of the car.
- The child seat can only be installed with the Isofix fixation & Top-Tether facing forwards.
- For the Isofix installation: Please be sure to read the manual from the car manufacturer.
- Do not use any supporting contact points other than those that are described in the instructions and are marked on the child restraint system.
- Do not use this child seat at home. It has not been designed for use at home and should therefore only be used in your car.
- Do not leave your child unsupervised on the seat at any time.
- The child seat should be replaced if it was exposed to heavy impact during an accident.
- For safety reasons, the child seat must also be affixed in the vehicle when your child is not sitting in the child seat.
- Always make sure that all fixation points that hold the seat holder to the vehicle are firm and that all belts that restrain the child are adjusted to the child's body. Please also ensure that the belts are not twisted.
- Items of luggage or other objects that could cause injury in the event of a collision must be properly secured.
- The rigid items and plastic parts of a child restraint system must be placed and installed so that they cannot get caught by a movable seat or a vehicle door during everyday use.
- Please do not expose the child seat to any direct sunlight. In direct, intense sunlight, the child seat or parts of it get very hot and this could injure your child.
- It is important that low-lying belts hold the pelvis firmly in place. Your child should always be strapped in to avoid the risk of falling.
- It is dangerous to make changes or additions to the device without the approval from the authority responsible. Non-compliance with the installation instructions of the manufacturer of the child restraint system also harbours risks.
- This child seat has been designed for children between 76 and 150 ~cm in height and weighing a maximum of 36 ~kg . Never overload the child seat by transporting more than one child or additional loads in it.
• The child restraint system must not be used without the seat cover. - The seat cover must not be replaced by a cover other than that recommended by the manufacturer as the seat cover is an important component of the restraint performance.
Correct installation in a vehicle
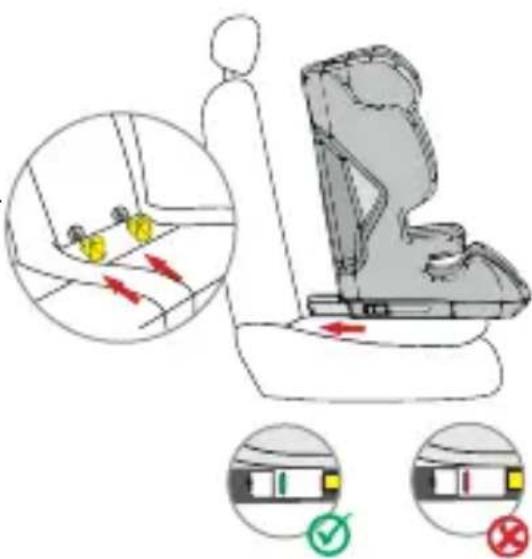
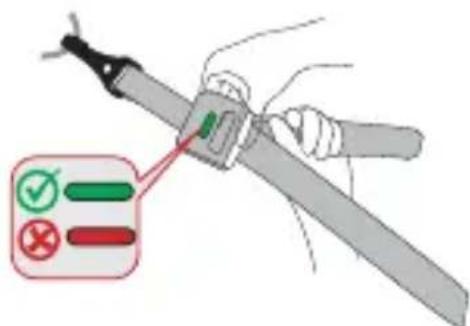
Note: When you install the child seat, lock the Isofix connectors of the seat to the Isofix holder of the vehicle. The locked display window of the Isofix system is shown in green. Hook the Top-Tether into the place envisaged for this in your car and pull it tight until the display window on the Top-Tether belt turns green.
An installation only with the 3-point belt of the car is not possible.
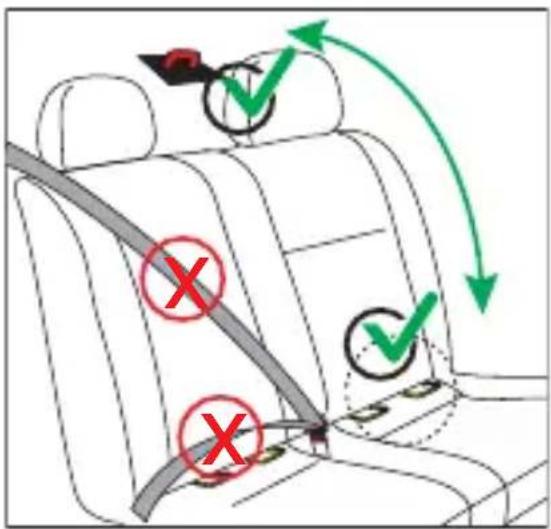
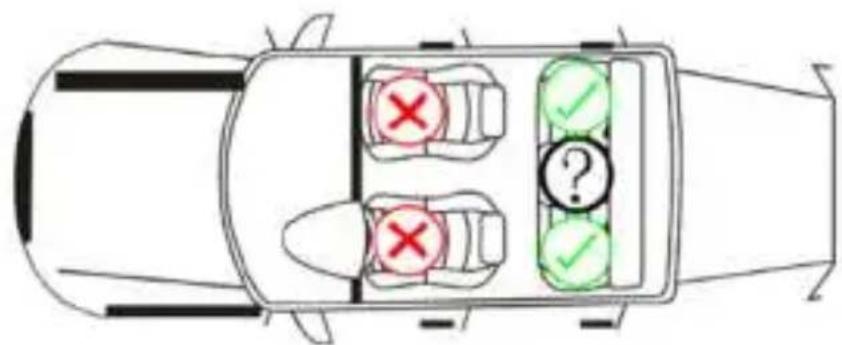
Installation only possible on car seats with Isofix connectors & Top-Tether hook! For this, check the user manual of your car if applicable.
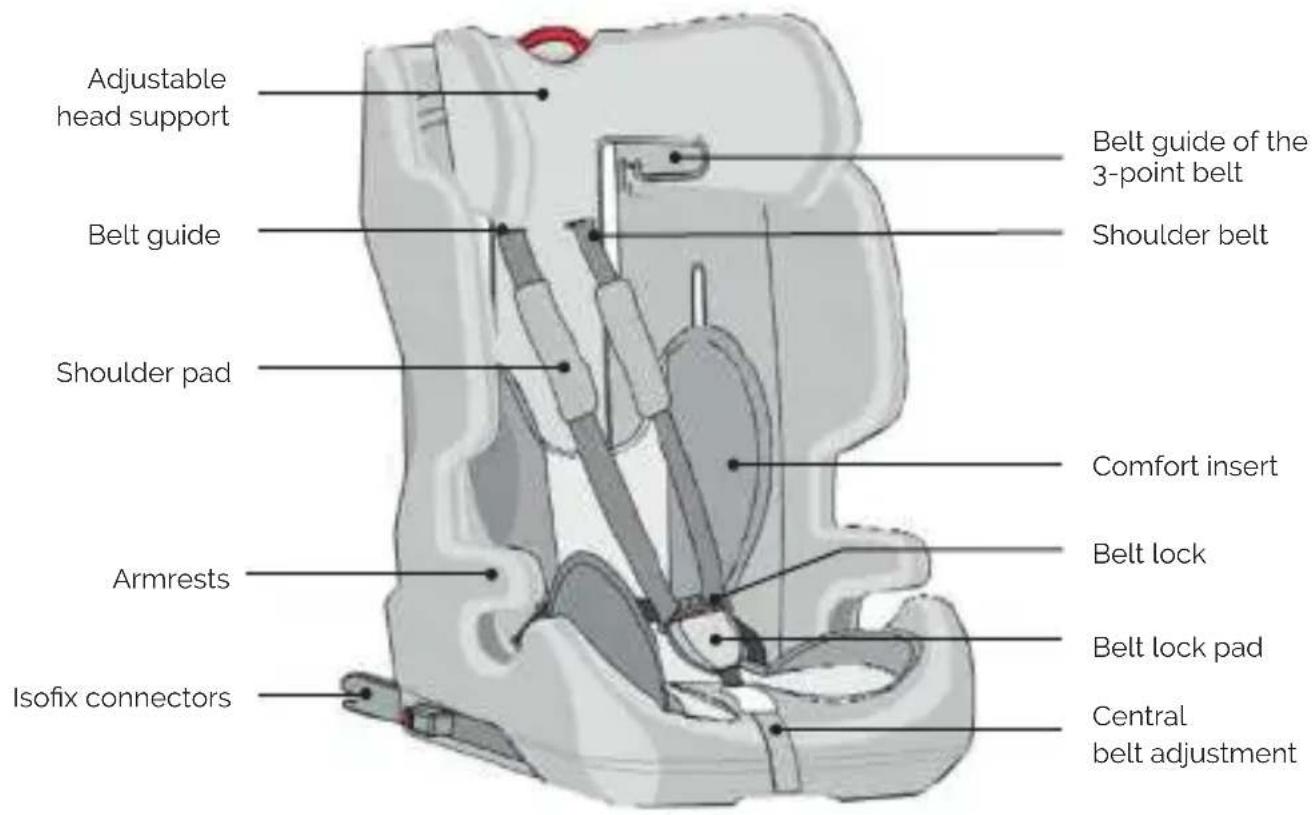
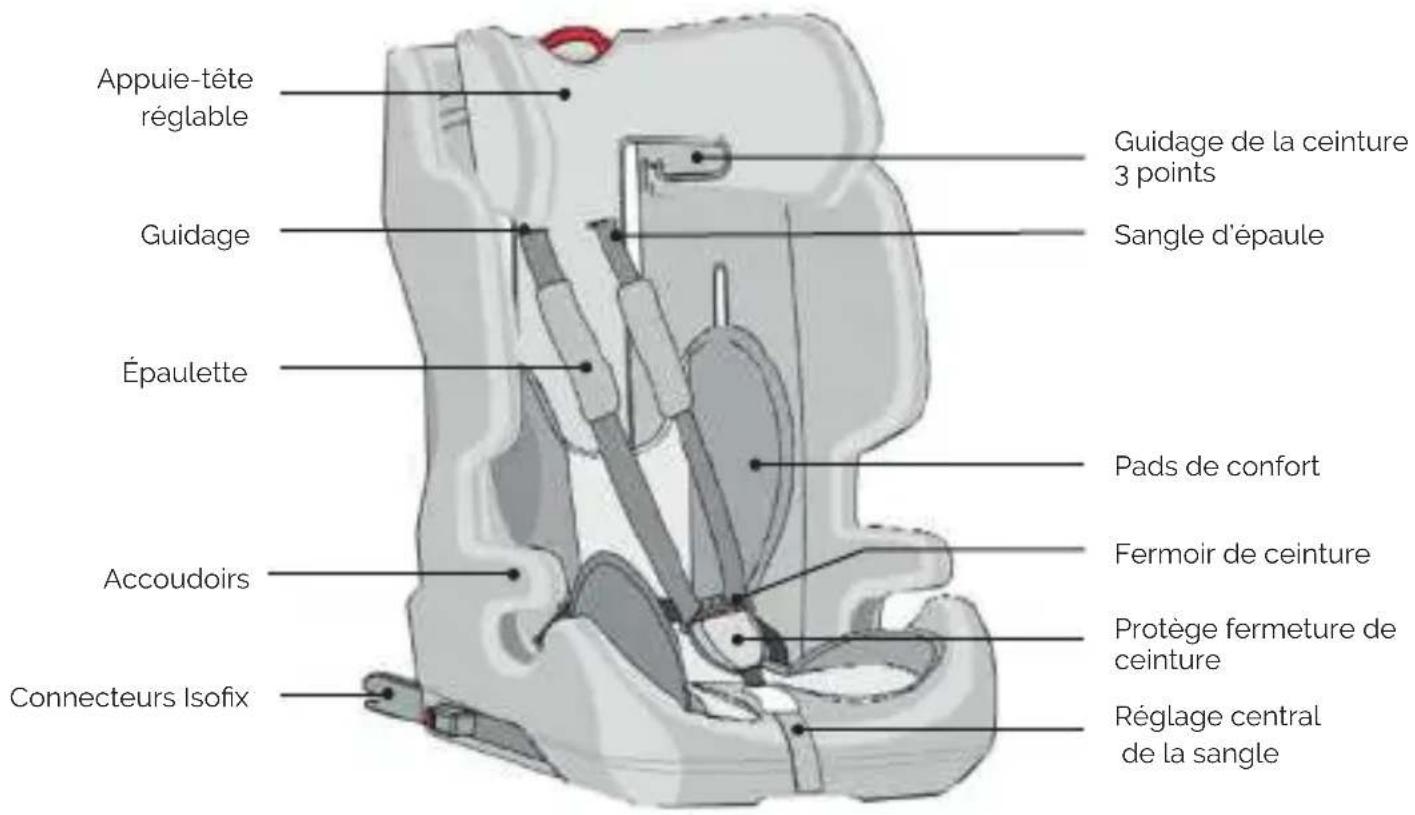
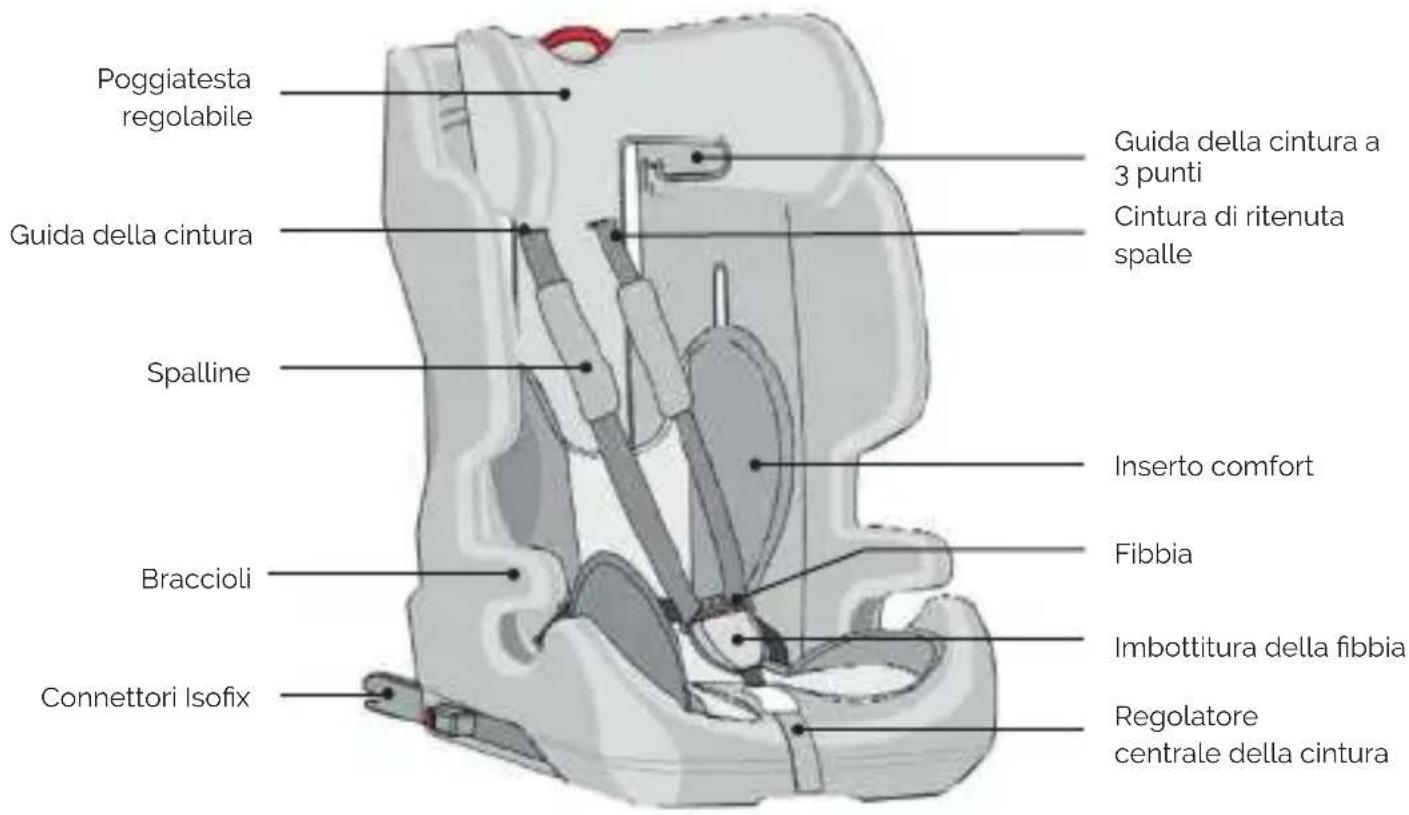
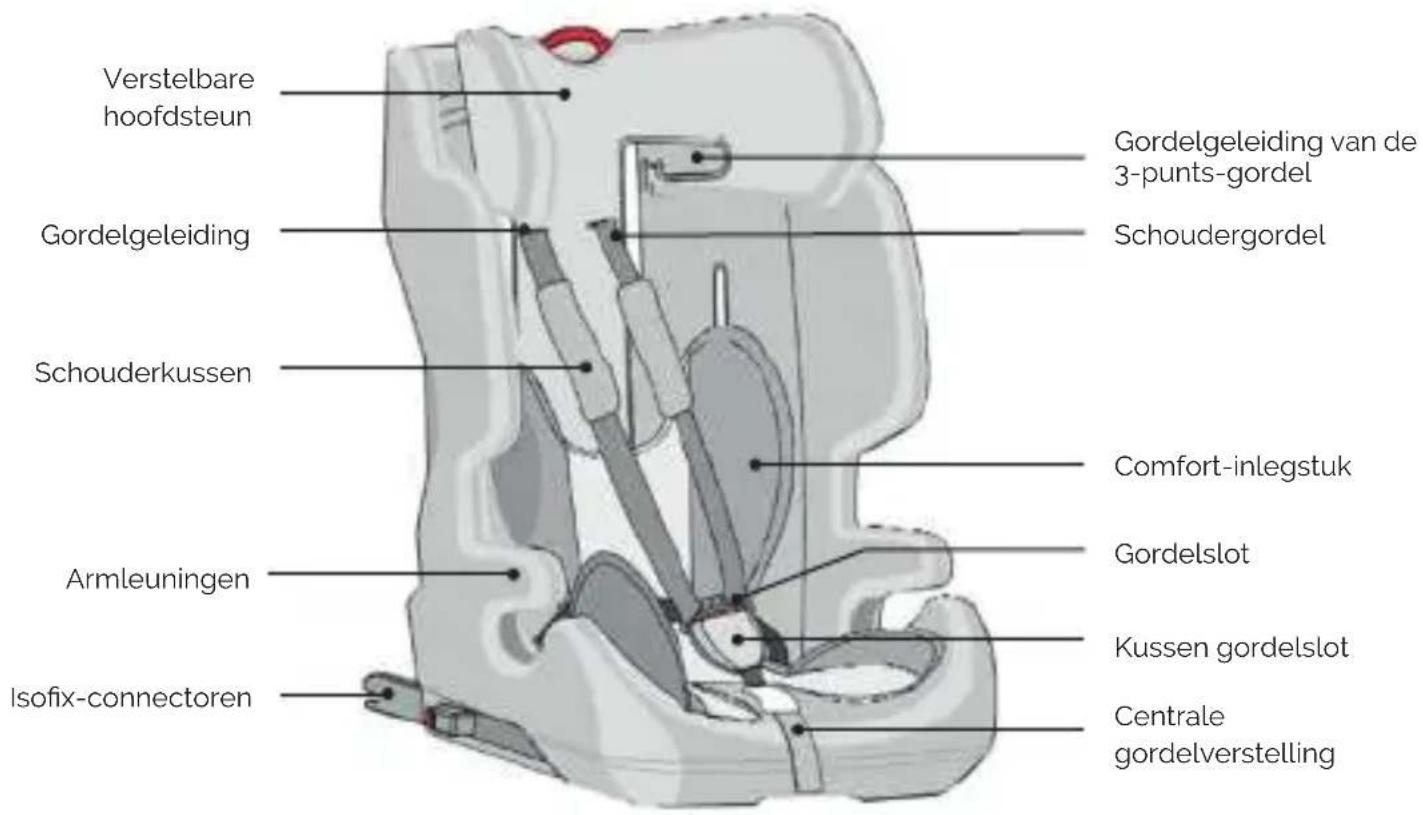
SEAT PARTS
Front view
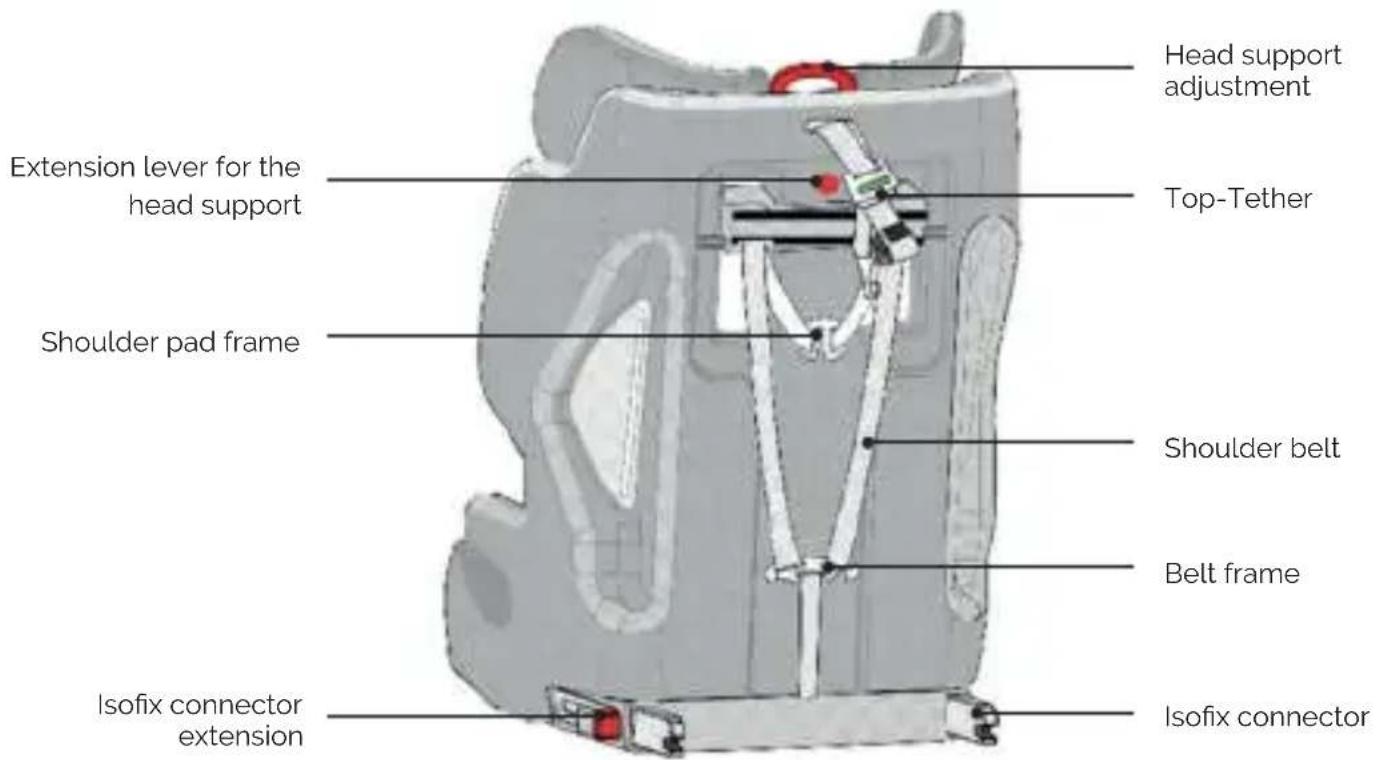
Back view
USE OF THE CHILD CAR SEAT
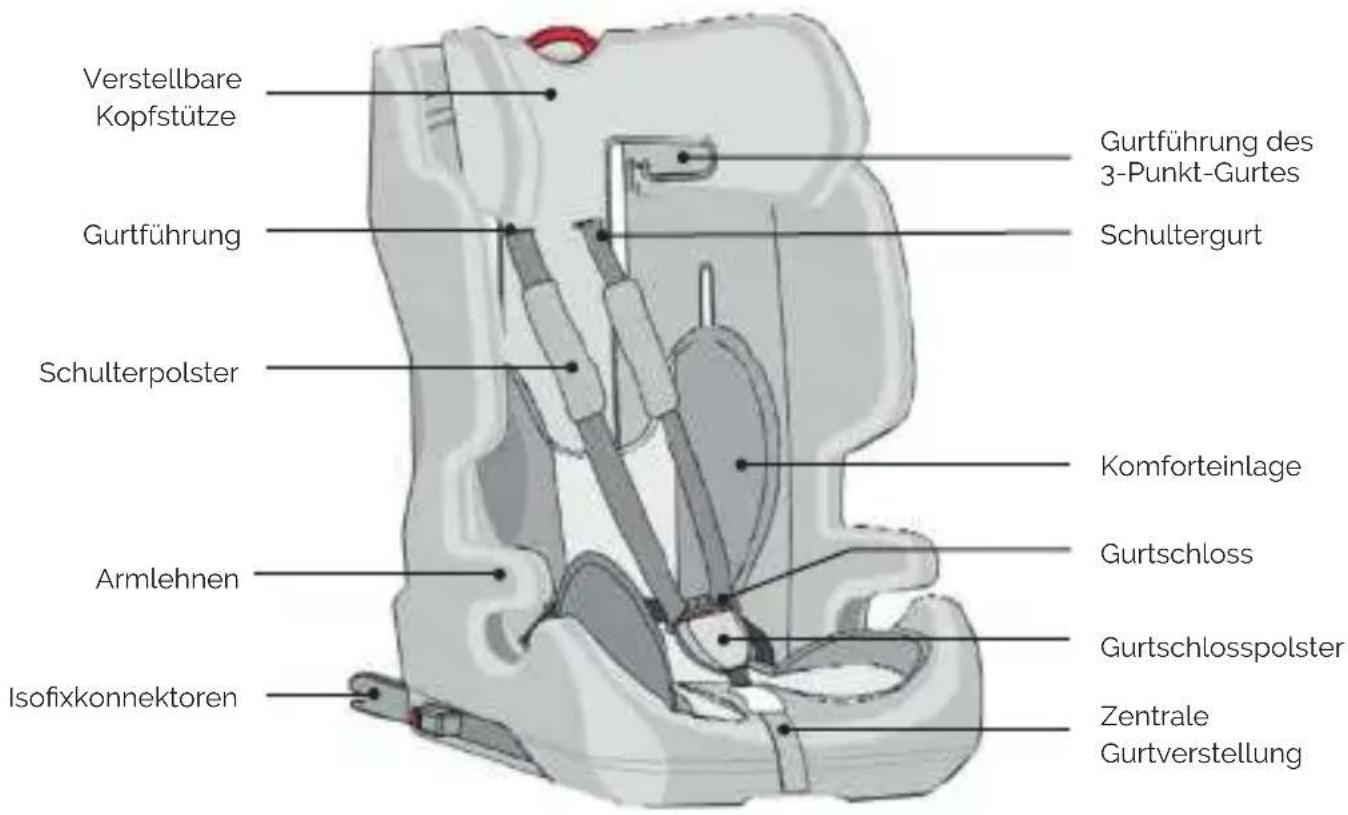
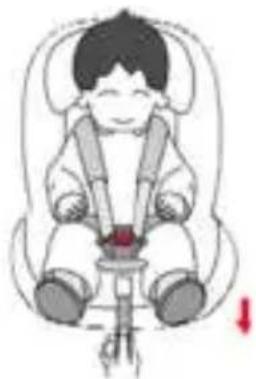
Adjustment of the belt
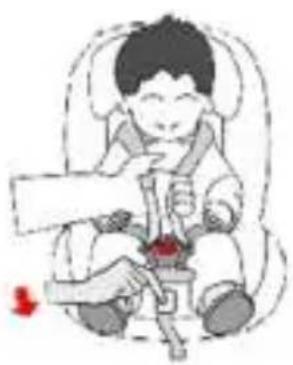
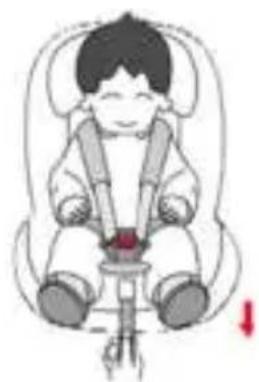
• To loosen the belt, press the button under the seat cover of the front belt adjustment with one hand. Pull the belt towards you with your other hand.
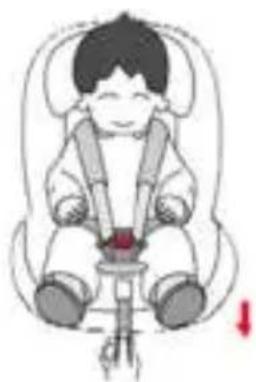
• To tighten the belt, pull on the front adjustment belt.
natural_image
Illustration of a child in a seatbelt using a seatbelt to lift a red object (no text or symbols present)Loosening the belt
natural_image
Illustration of a child wearing a seatbelt and holding a red object, with a red downward arrow indicating a safety or comfort-related symbol (no text or symbols present)Tightening the belt
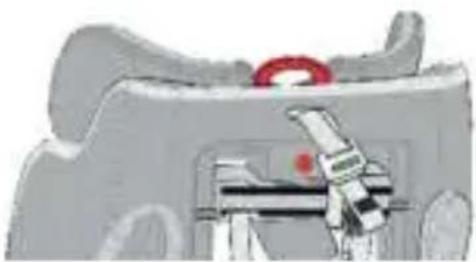
Adjustment of the head support height
- Depending on the height of the child, the head support can be adjusted up to 10 times.
- Loosen the belt and pull the red lever upwards. At the same time, move the head support upwards or downwards. The height of the head support can thus be adjusted 5 times.
- Release the lever and ensure that the head support is locked.
- If the child is 105 cm or taller, the head support can be adjusted another 5 times. To do so, first press the extension lever on the back. Then proceed as before by pulling the head support adjustment upwards.
natural_image
Close-up of a mechanical component with a red circular feature and a green tool, no visible text or symbolsOpening / closing the belt
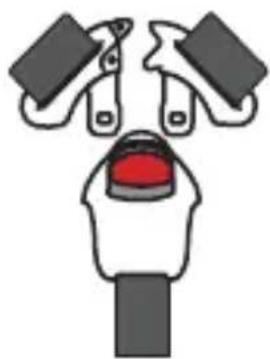
• To unlock the belt, press the red button of the buckle and separate the two tongues of the buckle.
- To lock the belt, first connect the two tongues of the buckle and then insert them together into the buckle.
natural_image
Simple line drawing of a hand with expressive fingers and a red mouth (no text or symbols)Removal of the belt system
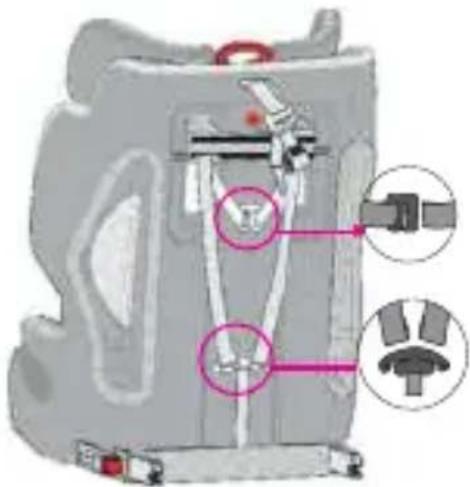
- Loosen the belt
- Unlock the belt and shoulder pad frame on the back.
- Remove the comfort insert from the seat.
- Now pull the belt from the belt guide and remove the shoulder pads and belt buckles. Keep them in a safe place for further use.
• Now stow the belt behind the seat cover.
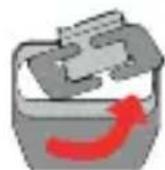
- Place the belt lock for storage in the hollow provided for this purpose in the seat area underneath the seat cover.
Removal of the belt lock
Use of the Isofix system
- Insert the insertion aids provided through the slit in the cushion between the back rest and seating area and into the Isofix holders.
- Ensure that the flat side is pointing downwards. This is not necessary if the vehicle already has firmly installed insertion aids.
- Press the two lateral Isofix connector buttons in order to extend the Isofix connectors to their full length.
- Insert the Isofix connectors into the insertion aids and press until you hear them lock.
- The display on both sides only turns green when the connections have been established. Press the child car seat against the back rest until it is standing securely.
Use of the Top-Tether
- In order to loosen the Top-Tether, press the grey adjustment button with one hand and pull the side of the belt anchor to the required length with your other hand.
- In order to affix the Top-Tether, hang the anchor to the fixation point on the car seat and pull it as tight as possible. The display does not turn green until the belt is locked.
INSTALLATION OF THE CHILD CAR SEAT
Height 76 - 105 cm
1
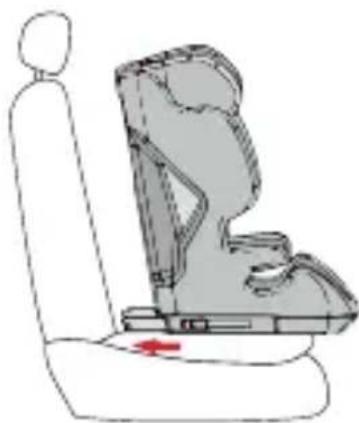
- Press the two lateral Isofix connector buttons in order to extend the Isofix connectors to their full length.
- Place the child seat on the seat of the vehicle.
- Insert the Isofix connectors into the insertion aids and press until they lock.
- The display on both sides only turns green when the connections have been established. Pull the child car seat to the back rest until it is standing securely.
natural_image
Line drawing of a car seat with a highlighted seat area and red arrow indicating a specific location (no text or symbols present)2
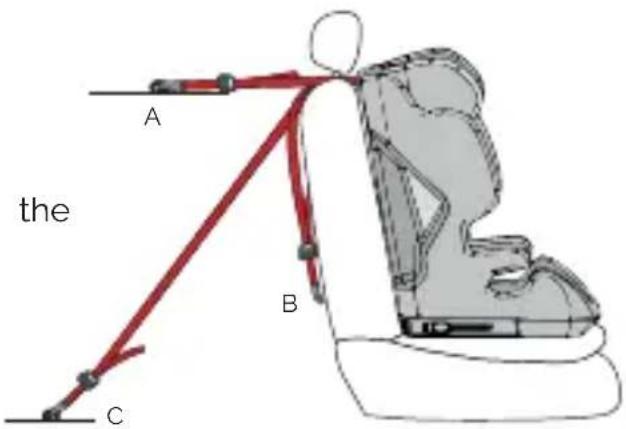
- In order to loosen the Top-Tether, press the grey adjustment button with one hand and pull the side of the belt anchor to the required length with your other hand.
- Fix the anchor to the fixation point on the back of the car seat.
- Pull the Top-Tether tight by pulling on the other side of the belt. Make sure that the display is green.
3
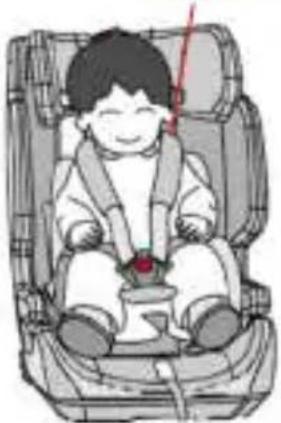
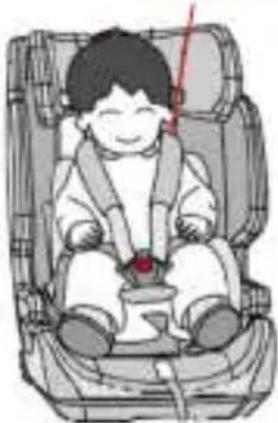
- Unlock the belt buckle of the child car seat and place the belt on the outer side of the seat.
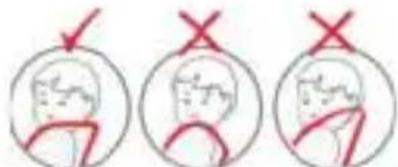
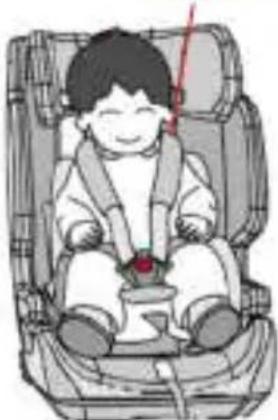
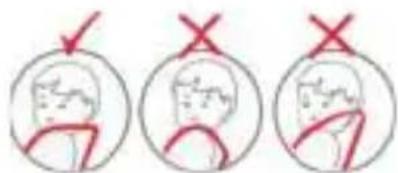
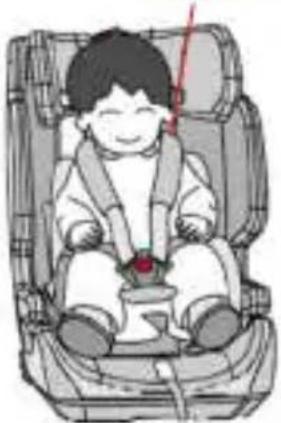
• Put the child in the child car seat. - Adjust the height of the head support so that the shoulder belt remains free.
- Close the belt buckle again until a "click" can be heard.
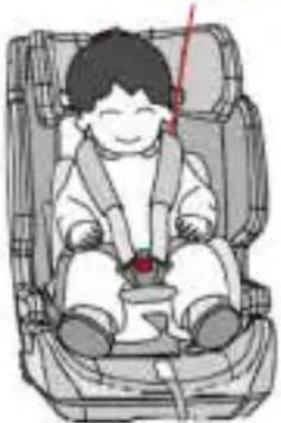
- Pull on the front adjustment belt in order to pull the belt tight. Please ensure that the straps are not twisted.
- Adjust the shoulder pads so that they fit comfortably on the child's chest and shoulders.
natural_image
Illustration of a child sitting in a car seat with a red belt, no text or symbols presentHeight 100 - 150 cm
1
- Remove the belt system as described above in these instructions.
2
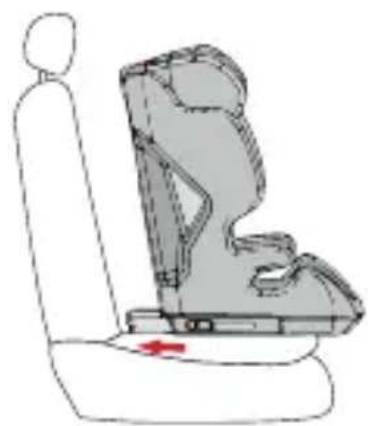
- Press the two lateral Isofix connector buttons in order to extend the Isofix connectors to their full length.
- Place the child seat on the seat of the vehicle.
- Insert the Isofix connectors into the insertion aids and press until they lock.
- The display on both sides only turns green when the connections have been established. Pull the child car seat to the back rest until it is standing securely.
natural_image
Line drawing of a car seat with seatbelt and seat, no text or symbols present3
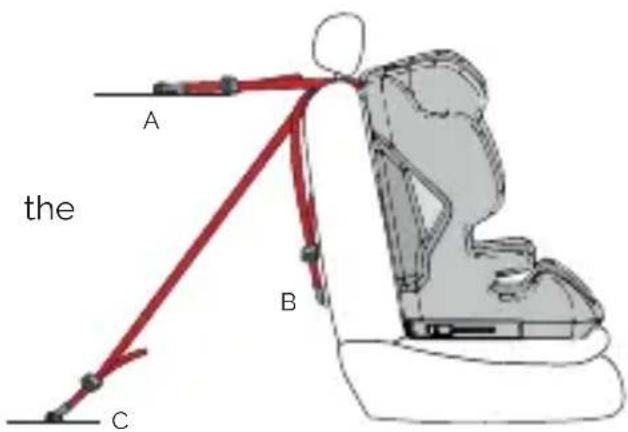
- In order to loosen the Top-Tether, press the grey adjustment button with one hand and pull the side of the belt anchor to the required length with your other hand.
- Fix the anchor to the fixation point on the back of the car seat.
- Pull the Top-Tether tight by pulling on the other side of the belt. Make sure that the display is green.
4
- Put the child in the child car seat.
- Adjust the height of the head support so that the belt guide remains free at the head support.
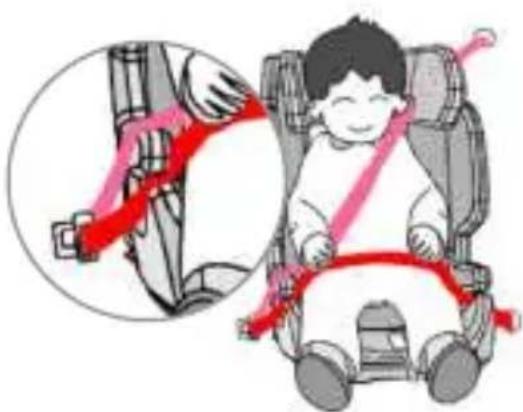
- Insert the safety belt of the car through the belt guide under the head support of the child car seat.
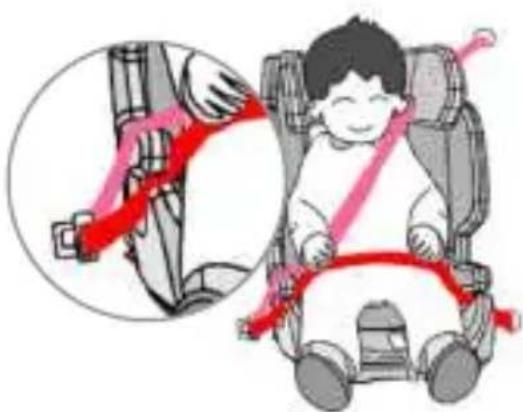
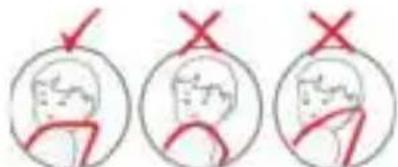
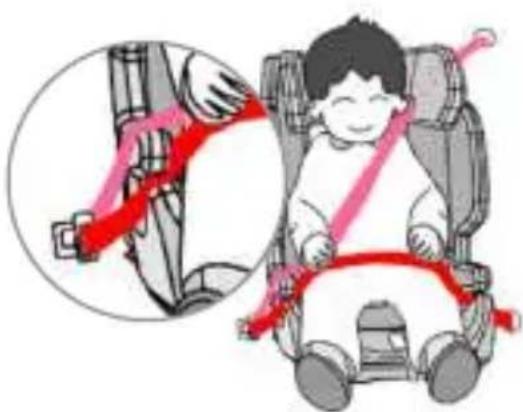
- Ensure the pelvic restraint is positioned as follows:
4a
Height 100 - 125 cm
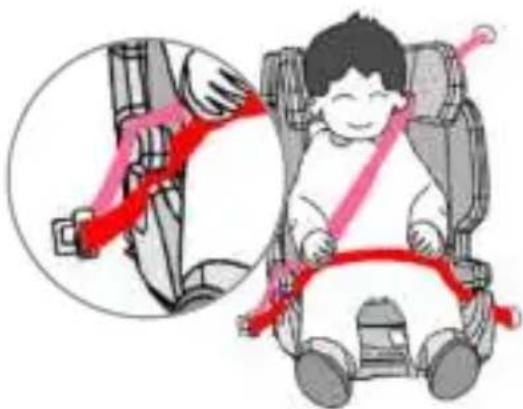
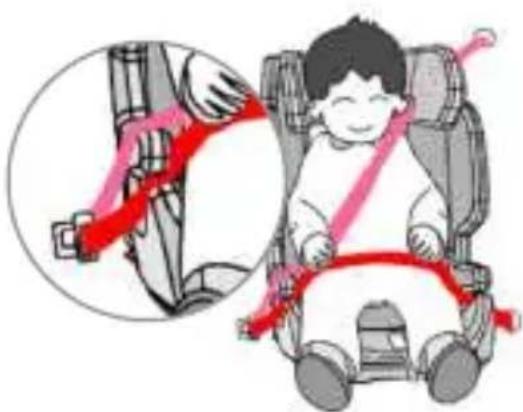
- Please make sure that the diagonal belt is positioned above the armrests.
- The pelvic restraint is guided underneath the armrests.
natural_image
Illustration of a child in a car seatbelt being lifted, with a magnified inset showing the seatbelt detail (no text or symbols present)4b
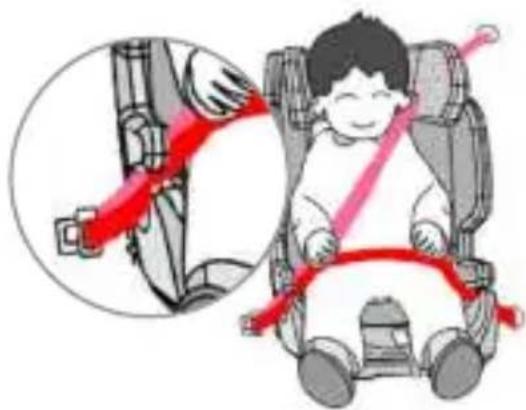
Height 120 - 150 cm
- The diagonal belt as well as the pelvic restraint are guided underneath the armrests.
5
- Please make sure that in particular the pelvic restraint is close fitting and is as low as possible over the pelvis of the child.
- Close the 3-point safety belt with the buckle on the car seat. Make sure that the 3-point safety belt is not twisted.
- Pull the 3-point safety belt of the vehicle as tight as possible and check whether the child car seat is standing securely.
natural_image
Illustration of a child in a car seatbelt with a red belt, showing the seatbelt being lifted (no text or symbols present)CLEANING
This product has been developed taking into account safety, comfort and functionality. Please take the time to read these instructions carefully before using the product and store them in a safe place for future reference.
In order to guarantee long usage of your child car seat, do not use any solvents, abrasives or aggressive cleaning agents. Check the stability of the fabric and of the seams after each wash. When washing the fabric, the instructions on the label (see below) are to be carefully complied with.

Wash at 30^ C, delicate wash
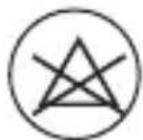
Do NOT bleach
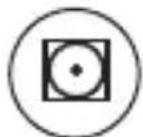
Tumble dry at low temperature
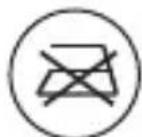
Do NOT iron

Do NOT clean chemically
MAINTENANCE
Regularly check the condition of the product for any damage. In the event of damage, do not use the product and keep it out of the reach of children.
If you have any problems, please contact the Osann Customer Service on +49(0)7731 / 970077.
ÉLÉMENTS DU SIÈGE
Vue frontale
natural_image
Illustration of a child in a seatbelt using a seatbelt to lift a red object (no text or symbols present)natural_image
Illustration of a child wearing a seatbelt and holding a red object, with a red downward arrow indicating a safety or comfort-related symbol (no text or symbols present)Serrer les sangles
natural_image
Close-up of a mechanical component with a red circular feature and a green tool, no visible text or symbolsnatural_image
Simple line drawing of a hand holding a red object with two black clips above (no text or symbols)INSTALLATION DU SIÈGE AUTO
natural_image
Line drawing of a car seat with a highlighted seat area and red arrow indicating a specific seat (no text or symbols present)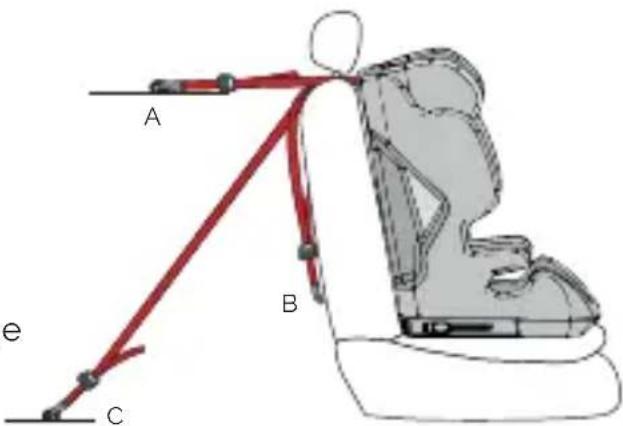
natural_image
Illustration of a child sitting in a car seat with a red belt (no text or symbols)natural_image
Line drawing of a car seat with seatbelt and seat, no text or symbols present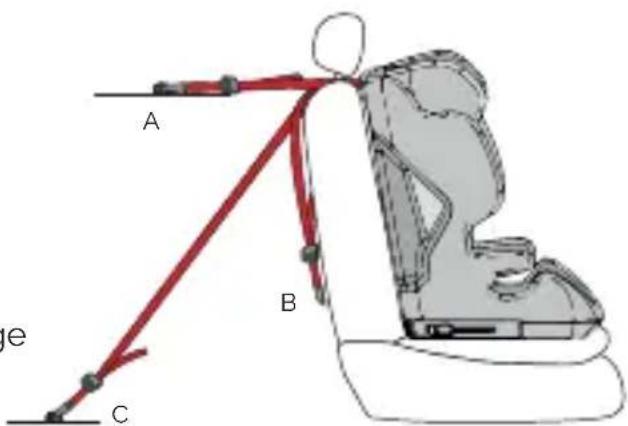
natural_image
Illustration of a child in a car seatbelt using a red safety harness, with an inset showing the same person's seatbelt (no text or symbols present)4b
natural_image
Illustration of a child in a car seatbelt with a red belt, showing the seatbelt and seatbelt connector (no text or symbols present)NETTOYAGE
PARTI DEL SEGGIOLINO
Vista anteriore
natural_image
Close-up of a mechanical component with a red circular feature and a green tool, no visible text or symbolsnatural_image
Simple line drawing of a hand with expressive fingers and a red mouth, no text or symbols presentINSTALLAZIONE DEL SEGGIOLINO AUTO PER BAMBINI
Altezza 76 - 105 cm
1
natural_image
Line drawing of a car seat with a highlighted seat area and red arrow indicating a specific seat (no text or symbols present)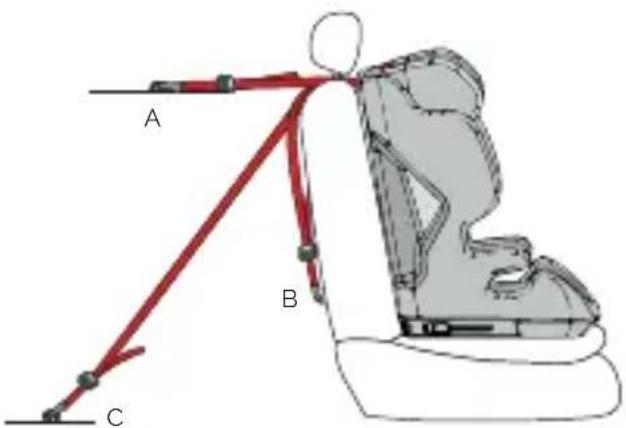
natural_image
Illustration of a child sitting in a car seat with a red belt (no text or symbols)natural_image
Line drawing of a car seat with a red arrow indicating the seat area (no text or symbols present)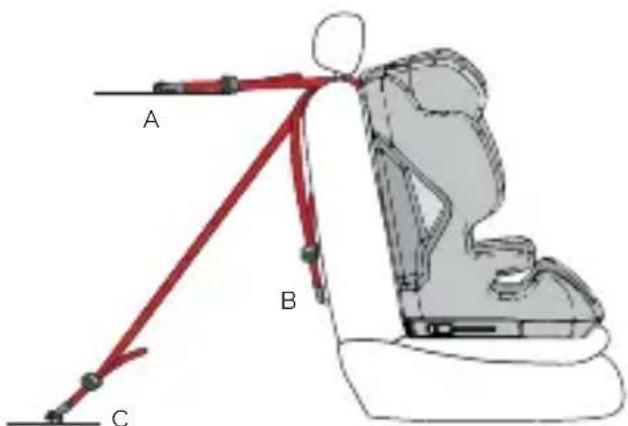
natural_image
Illustration of a child in a car seatbelt using a red safety harness, with an inset showing the same seatbelt (no text or symbols present)4b
natural_image
Illustration of a child in a car seatbelt with a red belt, showing the seatbelt being lifted (no text or symbols present)PULIZIA
ONDERDELEN STOELTJE
Vooraanzicht
natural_image
Illustration of a child in a seatbelt using a seatbelt to lift a red object (no text or symbols present)Gordels losmaken
natural_image
Illustration of a child wearing a seatbelt and holding a red object, with no visible text or symbols.Gordels spannen
natural_image
Close-up of a mechanical component with a red circular feature and a green tool, no visible text or symbolsnatural_image
Simple line drawing of a hand holding a red object with two black clips above (no text or symbols)INSTALLATIE VAN HET AUTOSTOELTJE
natural_image
Line drawing of a car seat with a highlighted seat area and red arrow indicating a specific seat (no text or symbols present)2
natural_image
Illustration of a child sitting in a car seat with a red belt (no text or symbols)natural_image
Line drawing of a car seat with seatbelt and seat, no text or symbols present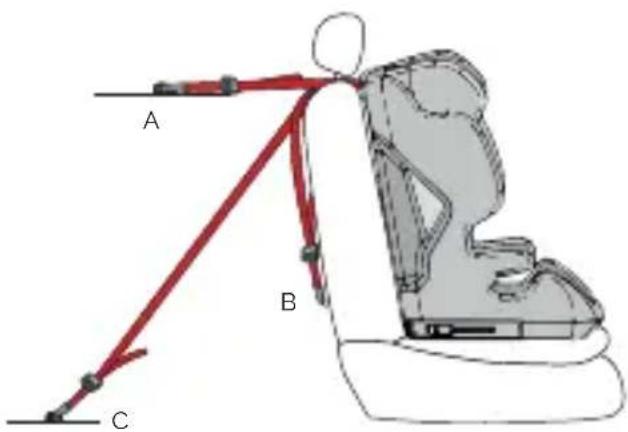
natural_image
Illustration of a child in a car seatbelt being lifted, with a magnified inset showing the seatbelt (no text or symbols present)4b
natural_image
Illustration of a child in a car seatbelt with a red belt, showing the seatbelt and seatbelt (no text or symbols present)REINIGING
Find us on Facebook and Instagram

natural_image
Facebook logo icon (no text or symbols present)
www.facebook.com/Osann.de

natural_image
Instagram logo icon with gradient background (no text or symbols)
www.instagram.com/osann_kids

osann
Osann GmbH
Gewerbestr. 22
D-78244 Gottmadingen

- SITZTEILE
- INSTALLATION DES KINDERAUTOSITZES
- 2
- 4b
- REINIGUNG
- WARNING
- Correct installation in a vehicle
- SEAT PARTS
- USE OF THE CHILD CAR SEAT
- Adjustment of the belt
- Adjustment of the head support height
- Opening / closing the belt
- Removal of the belt system
- Use of the Isofix system
- Use of the Top-Tether
- INSTALLATION OF THE CHILD CAR SEAT
- Height 76 - 105 cm
- 1
- 3
- Height 100 - 150 cm
- 4
- 4a
- Height 100 - 125 cm
- Height 120 - 150 cm
- 5
- CLEANING
- MAINTENANCE
- ÉLÉMENTS DU SIÈGE
- INSTALLATION DU SIÈGE AUTO
- NETTOYAGE
- PARTI DEL SEGGIOLINO
- INSTALLAZIONE DEL SEGGIOLINO AUTO PER BAMBINI
- Altezza 76 - 105 cm
- PULIZIA
- ONDERDELEN STOELTJE
- INSTALLATIE VAN HET AUTOSTOELTJE
- REINIGING
- Find us on Facebook and Instagram
Brand : Osann
Model : Pluto iSize
Category : High chair