
Fino - High chair Osann - Free user manual and instructions
Find the device manual for free Fino Osann in PDF.


| Type of product | Child car seat (Group 0+/1/2/3) |
| Brand | Osann |
| Model | Fino |
| Weight range | 0–36 kg |
| Age range | 0–12 years |
| ECE group | 0+ (0–13 kg), 1 (9–18 kg), 2/3 (15–36 kg) |
| Facing direction | Rear-facing for group 0+, forward-facing for groups 1–3 |
| Installation method | Using vehicle’s three-point seatbelt |
| Harness system | Five-point harness for groups 0+ and 1; removed for groups 2/3 |
| Approval standard | ECE R44/04 |
| Seat cover material | Textile (washable) |
| Cleaning instructions | Wash cover at 30°C delicate cycle, do not bleach, do not iron, do not dry clean, low temp tumble dry |
| Maintenance | Regularly check for damage; replace after a severe accident |
| Key components | Head support (adjustable), comfort insert, belt pads, buckle, belt guides |
| Compatibility | Vehicles with three-point seatbelts approved to ECE R16 or equivalent |
| Warnings | Never use on front seat with active airbag facing rear; never leave child unsupervised |
Frequently Asked Questions - Fino Osann
User questions about Fino Osann
0 question about this device. Answer the ones you know or ask your own.
Ask a new question about this device
Download the instructions for your High chair in PDF format for free! Find your manual Fino - Osann and take your electronic device back in hand. On this page are published all the documents necessary for the use of your device. Fino by Osann.
USER MANUAL Fino Osann
natural_image
Black and gray baby car seat with seatbelt, no visible text or symbolsFino
0+/1/2/3
0-36 kg
DE EN SK PL RO
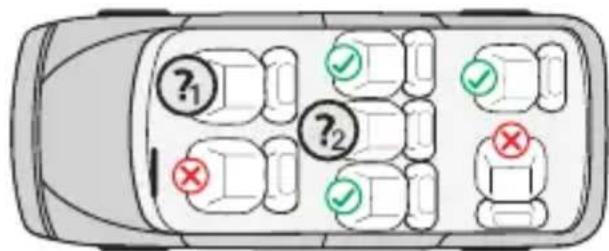
KOMPONENTEN DES KINDERAUTOSITZES
natural_image
Line drawing of a car seat assembly with no text or symbols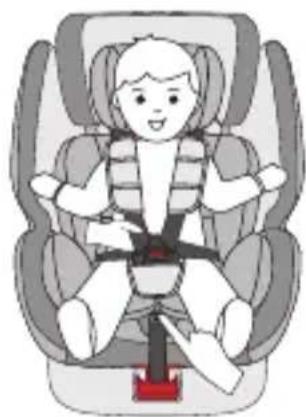
natural_image
Illustration of a child wearing a seatbelt and carrying a red belt, seated in a car cab (no text or symbols)natural_image
Simple line drawing of a human hand holding a red object, with no text or symbols present.DE
INSTALLATION DES KINDERAUTOSITZES
DE
REINIGUNG
Thank you for choosing our Fino child car seat. If you require assistance with this product, please contact our customer service team.
USE
- This product is suitable for children in the ECE group 0+/1/2/3. Weight range: 0-36 kg. Age range: 0-12 years.
- Group 0+ is for children who weigh 0-13 kg. The child car seat is installed in the car with the three-point belt. The child is fastened in using the five-point belt of the child car seat.
- Group 1 is for children who weigh 9-18 kg. The child car seat faces forwards and is secured in the car using a three-point belt. The child is fastened in using the five-point belt of the child car seat.
- Groups 2 and 3 are suitable for children who weigh 15-36 kg. The five-point belt system on the child car seat is removed. The child car seat faces forwards and the child is fastened in with the car's three-point seat belt.
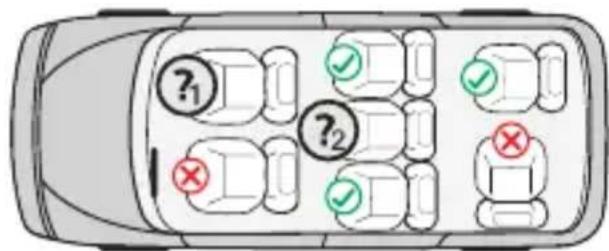
- We recommend installing the child car seat on the rear seat of the vehicle. Do NOT attach the child car seat for rear-facing use in ECE group 0+ to the front seat. It may be used on the front seat if the airbag there can be deactivated. Consult the vehicle manual for information on this.
- This child car seat is only suitable for vehicles that feature three-point safety belts in accordance with ECE R16 or other equivalent standards.
WARNING
- This child car seat is a universal child restraining system. It has been tested according to the most stringent approval criteria and has been approved under Regulation No 44/04.
- It is therefore suitable for general use in vehicles and is compatible with the majority of vehicle seats.
- It is more likely that the seat is compatible if the vehicle manufacturer states that its vehicles are suitable for use with universal child restraining systems.
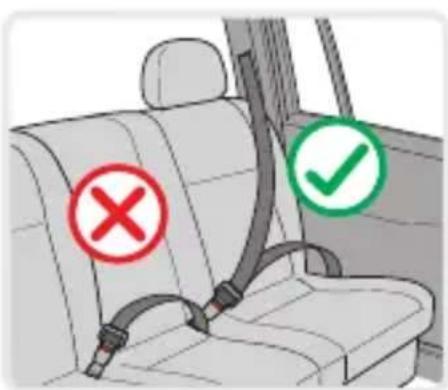
- The child car seat may only be used in vehicles fitted with three-point safety belts which are either permanently installed or have a roller mechanism and are additionally approved according to UN/ECE No. 16 or other equivalent standards.
If you have any doubts, please contact the child car seat manufacturer or the retailer.

(?) Only if the airbag can be deactivated
(?2) Only with three-point belt
EN
WARNING
- Please read through the instructions carefully before use and retain them for subsequent reference in order to guarantee the safety of your child. Non-compliance with the instructions in this manual may result in serious injuries to your child.
- The child seat can only be used with its own five-point belt system for children who weigh under 18 kg (group 0+ and group 1).
- The child seat MUST NOT be used with its own five-point belt system for children who weigh over 18 kg (group 2/3).
- Do not install the seat in a forward-facing direction if the child weighs less than 9 kg.
- Do not use any supporting contact points other than those that are described in the instructions and are marked on the child restraining system.
- Do not use this child seat at home. It has not been designed for use at home and should therefore only be used in your car.
- Do not leave your child unsupervised in the seat at any time.
- Do not place the rear-facing child seat on front seats with an airbag. This may lead to death or serious injuries.
- The child seat should be replaced if it is exposed to heavy impact during an accident.
- For safety reasons, the child seat must also be affixed in the vehicle when your child is not sitting in the child seat.
- Always make sure that all belts that hold the seat holder to the vehicle are secure and that all belts that restrain the child are adjusted to the child's body. Please also ensure that the belts are not twisted.
- Items of luggage or other objects that could cause injury in the event of a collision must be properly secured.
- The rigid items and plastic parts of a child restraining system must be placed and installed so that they cannot get caught by a movable seat or a vehicle door during everyday use.
- It is important that low-lying belts hold the pelvis firmly in place. Your child should always be fastened in to stop them falling out.
- It is dangerous to make changes or additions to the product without approval from the responsible authority. Non-compliance with the installation instructions provided by the manufacturer of the child restraining system is also associated with risks.
- This child seat has been designed for newborns and children weighing up to 36 kg. Never overload the child seat by transporting more than one child or additional loads in it.
- The child restraining system must not be used without the seat cover.
- The seat cover must not be replaced by a cover other than that recommended by the manufacturer as the seat cover is an important component of the restraint performance.
EN

Back view
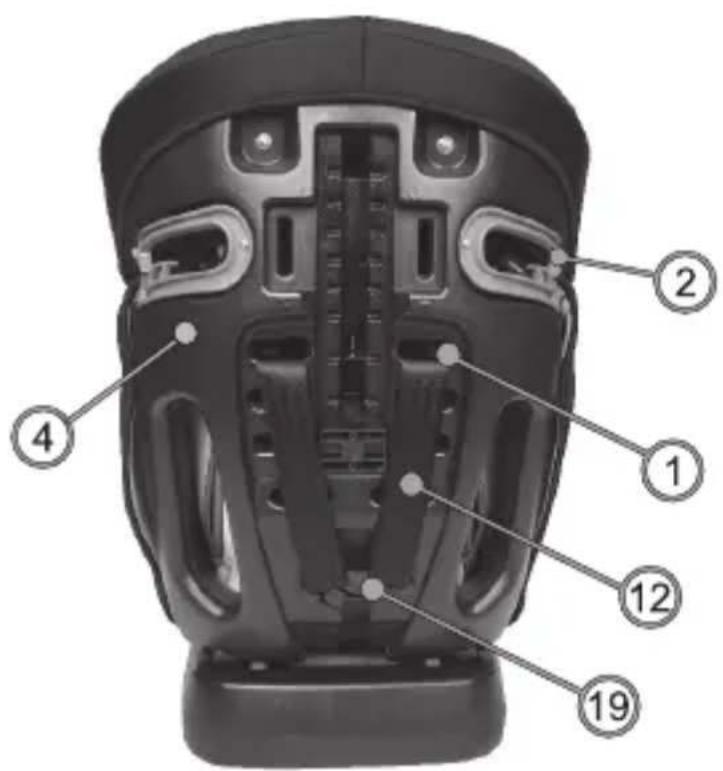
COMPONENTS OF THE CHILD CAR SEAT
- Belt slot
- Belt guide diagonal belt
- Seat cover
- Seat bucket
- Belt guide pelvic restraint
- Base
- Button for adjusting the belt length (under the cover)
- Head support cushion (depending on model)
- Lever for seat angle adjustment
- Adjusting strap seat belt
- Belt pad
- Shoulder belt
- Shoulder pad
- Head support
- Belt lock
- Comfort insert
- Belt guide diagonal belt
- Head support adjustment
- Belt frame
EN
USE OF THE CHILD CAR SEAT
Setting the child car seat tilt angle
- Use one hand to operate the angle adjustment lever on the lower front side of the seat bucket.
- Use your other hand to hold the reverse side of the seat bucket and adjust the angle.
- The maximum angle (blue) only applies to the rear-facing position and the two angles marked in red only apply to the forward-facing position.
Adjusting the belt
• To loosen the belt, press the belt adjustment button at the front of the seat with one hand.
- Use your other hand to hold the buckle in place with the attached belts and then release it.
• To tighten the belt, pull on the front adjusting strap.
Opening/closing the belt
• To release the belt, press the red button on the belt lock and separate the two belt tongues.
• To close the belt, first pull together the two belt tongues and slide these into the belt lock together.

natural_image
Line drawing of a car seat assembly with no text or symbols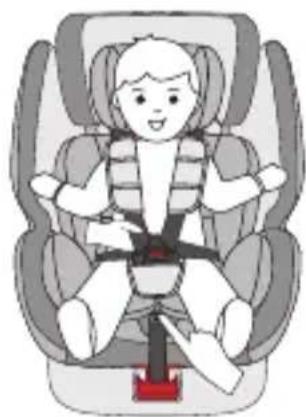
natural_image
Illustration of a child wearing a seatbelt and carrying a red belt, seated in a car cab (no text or symbols)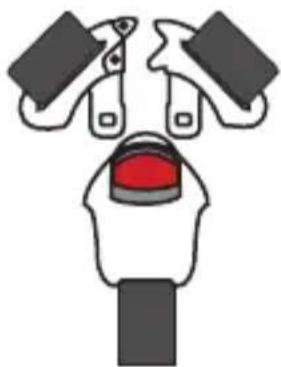
natural_image
Simple line drawing of a human head with abstract shapes and a red eye (no text or symbols)EN
Setting the height of the belt system
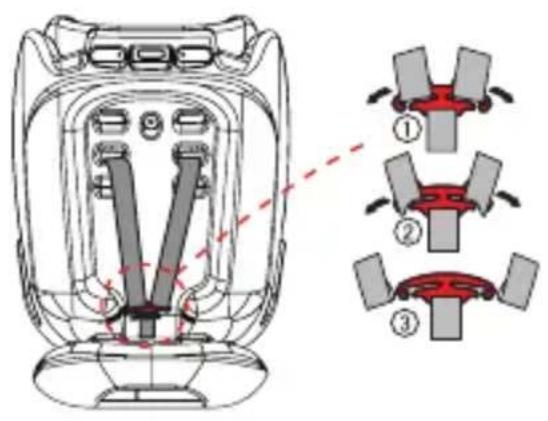
- Loosen the belt
- Unlock the belt and shoulder pad frame on the back and then remove the belt system.
- Now thread the belt system at the desired height and reattach the belt and shoulder pad frame.
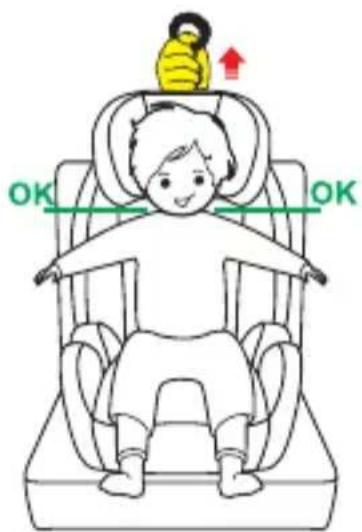
- Pay attention to the correct height of the shoulder belts. These should come out of the seat at the height of the child's shoulders.

natural_image
Illustration of a hand holding a yellow object with red arrows pointing to a curved surface (no text or symbols)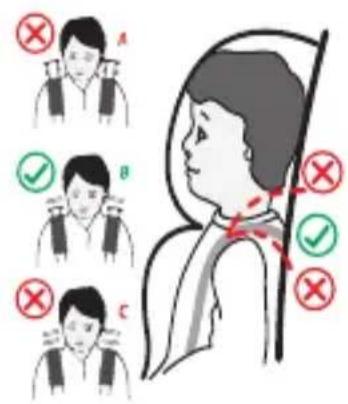
Adjusting the head support
- Loosen the belt and pull the lever on the head support until it is set to the desired height.
- Release the lever and ensure that the head support is locked in place.
EN
Removal of the belt system
- Unlock the belt and shoulder pad frame on the back and then remove the belt system. (a)
- Thread the metal plates (b) of the shoulder belts and the belt lock from the underside of the seat through the openings to the top, thus removing the belts and the belt lock completely from the child car seat.
- Press the button for adjusting the belt length (c) and pull the adjusting strap as far as possible under the cover of the child car seat.
- Please keep all removed parts in a safe place so that they can be reassembled for later use.

INSTALLATION OF THE CHILD CAR SEAT
Group 0+ (rear-facing)
(For children weighing 0-13 kg)
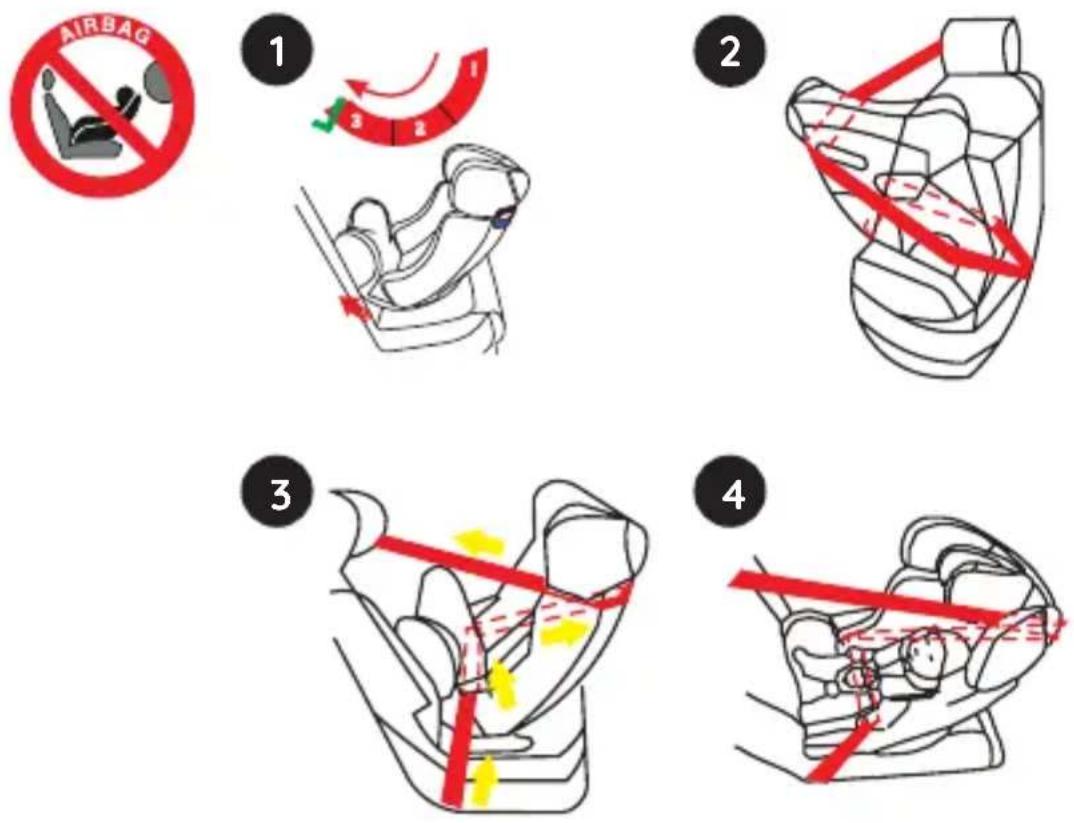
- Place the child car seat in the rear-facing position on the car seat and adjust it to the maximum angle (blue position). (1)
- Open the belt system of the child car seat and then remove the comfort insert.
Take the car's three-point belt and extend it to the maximum length. - Pass the pelvic restraint of the three-point belt through the corresponding belt guides on the seat bucket and insert the buckle of the three-point belt into the car belt lock. Make sure that the pelvic restraint runs between the slots of the belt lock and the belt system of the child car seat and sits well in the slots of the pelvic restraint guide of the child car seat.
- Now take the diagonal belt and thread it through the red belt guide on the head support of the child car seat.
- Now put the comfort insert back into the child car seat and place the belts on the outside of the seat.
- Put the child in the child car seat.
EN
• Make sure that the belt system and head support are correctly adjusted as described above.
- Close the belt buckle again until you hear a click.
- Pull the front adjusting strap in order to tighten the belts. Please ensure that the straps are not twisted.
- Every time you place the child in the child car seat, make sure that the car's three-point belt is tensioned and that the child car seat is properly secured.
WARNING
We recommend installing the child car seat on the rear seat of the vehicle. Do NOT attach it to the front seat for rear-facing use in ECE group 0+. It may be used on the front seat if the airbag there can be deactivated. Consult the vehicle manual for information on this.
Group 1 (forward-facing)
(For children weighing 9-18 kg)
- Place the child car seat in the forward-facing position on the car seat.
Take the car's three-point belt and extend it to the maximum length. - Pull the belt buckle on the three-point belt from the front through the vertical opening on the backrest of the child car seat and continue to pull this through the back behind the five-point belt system on the child car seat and through the next vertical opening to the front again.
- Close the buckle on the three-point belt.
- Now thread the diagonal belt through the belt guide on the head support (part no. 17).
• Make sure that the pelvic restraint runs along the corresponding belt guide (no. 5). - Now pull the three-point belt as tight as possible so that the child car seat has optimum support.
- First, open the belt system on the child car seat.
- Put the child in the child car seat.
• Make sure that the belt system and head support are correctly adjusted as described above. - Close the belt buckle again until you hear a click.
- Pull the front adjusting strap in order to tighten the belts. Please ensure that the straps are not twisted.
- Every time you place the child in the child car seat, make sure that the car's three-point belt is tensioned and that the child car seat is properly secured.

EN
Group 2/3 (forward-facing)
(For children weighing 15-36 kg)
- Remove the belt system as described above.
- Place the child car seat in the forward-facing position on the car seat.
- Now thread the diagonal belt through the belt guide on the head support (part no. 17).
- Put the child in the child car seat.
• Make sure that the head support is correctly adjusted as described above. - Close the buckle on the three-point belt.
• Make sure that the pelvic restraint runs along the corresponding belt guide (no. 5). - Now pull the three-point belt as tight as possible so that it fits snugly against your child's body.
- Every time you fasten your child into the seat, please make sure that the car's three-point belt is not twisted and is correctly positioned in its belt guide on the head support and in the pelvic area.

EN
CLEANING
This product has been developed taking into account safety, comfort and functionality. Please take the time to read these instructions carefully before using the product and store them in a safe place for future reference.
In order to guarantee long-term usage of your child car seat, do not use any solvents, abrasives or aggressive cleaning agents. Check that the fabric and seams are not damaged after each wash. When washing the cover, carefully follow the instructions on the label (see below).

Wash at 30 °C, delicate cycle

Do NOT iron

Do NOT bleach

Do NOT dry clean

Tumble dry at a low temperature
MAINTENANCE
Regularly check the condition of the product for any damage. In the event of damage, do not use the product and keep it out of the reach of children.
If you have any problems, please contact the Osann customer service team on +49 (0)7731/970077.
SÚČASTI DETSKEJ AUTOSEDAČKY
natural_image
Line drawing of a car seat assembly with no text or symbolsNastavenie pásu
- Ak chcete pás uvol'nit', stlačte jednou rukou tlačidlo prestavenia pásu v prednej oblasti sedačky.
- Druhou rukou pevne držte sponu s upevnenými pásmi a potom ju uvolnite.
- Zatiahnite za predný nastavovací pás, aby ste pás napli.

natural_image
Illustration of a child wearing a life vest and seatbelt, sitting in a car seat (no text or symbols)Otvorenie/zatvorenie pásu
natural_image
Simple line drawing of a hand holding a red object, with no text or symbols present.
natural_image
Illustration of a hand holding a yellow object with red arrows pointing to a curved surface (no text or symbols)
INŠTALÁCIA DETSKEJ AUTOSEDAČKY
ČISTENIE
PL
KOMPONENTY FOTELIKA DZIECIECEGO
natural_image
Line drawing of a car seat assembly with no text or symbolsRegulacja pasa
natural_image
Illustration of a child wearing a seatbelt and carrying a red belt, seated in a car cab (no text or symbols)natural_image
Simple line drawing of a human head with abstract shapes and a red eye (no text or symbols)PL
PL
CZYSZCZENIE
COMPONENTELE SCAUNULUI AUTO PENTRU COPII
natural_image
Line drawing of a car seat assembly with no text or symbolsReglarea centurii
natural_image
Illustration of a child wearing a seatbelt and holding a red belt, seated in a car (no text or symbols present)natural_image
Simple line drawing of a human face with expressive eyes and mouth (no text or symbols)RO
INSTALAREA SCAUNULUI AUTO PENTRU COPII
Grupa 0+ (orientare spre spate)
(Pentru copii de la 0 la 13 kg)
CURĂȚARE
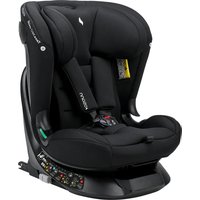
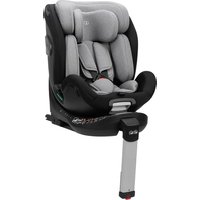
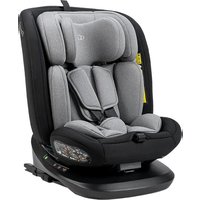
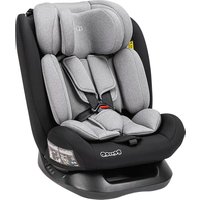
- Fino
- KOMPONENTEN DES KINDERAUTOSITZES
- DE
- INSTALLATION DES KINDERAUTOSITZES
- REINIGUNG
- USE
- WARNING
- EN
- COMPONENTS OF THE CHILD CAR SEAT
- USE OF THE CHILD CAR SEAT
- Setting the child car seat tilt angle
- Adjusting the belt
- Opening/closing the belt
- Setting the height of the belt system
- Adjusting the head support
- Removal of the belt system
- INSTALLATION OF THE CHILD CAR SEAT
- Group 0+ (rear-facing)
- Group 1 (forward-facing)
- Group 2/3 (forward-facing)
- CLEANING
- MAINTENANCE
- SÚČASTI DETSKEJ AUTOSEDAČKY
- Nastavenie pásu
- Otvorenie/zatvorenie pásu
- INŠTALÁCIA DETSKEJ AUTOSEDAČKY
- ČISTENIE
- PL
- KOMPONENTY FOTELIKA DZIECIECEGO
- Regulacja pasa
- CZYSZCZENIE
- COMPONENTELE SCAUNULUI AUTO PENTRU COPII
- Reglarea centurii
- RO
- INSTALAREA SCAUNULUI AUTO PENTRU COPII
- Grupa 0+ (orientare spre spate)
- CURĂȚARE
Brand : Osann
Model : Fino
Category : High chair