
KTD1020 - DVD player Soundmaster - Free user manual and instructions
Find the device manual for free KTD1020 Soundmaster in PDF.

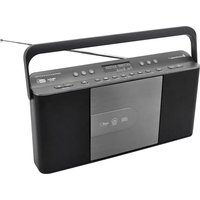
| Product type | DVD player with built-in 10.1-inch TFT screen |
| Brand | Soundmaster |
| Model | KTD1020 |
| Dimensions (approx.) | 260 x 180 x 50 mm |
| Weight (approx.) | 1.5 kg |
| Power supply | DC 12V / 2A power adapter (included) |
| Power consumption | Max. 24 W |
| Screen | 10.1-inch TFT LCD, resolution 1024x600 (estimated) |
| Compatible disc formats | DVD, CD, CD-R/RW, DVD±R/RW |
| Audio formats | MP3, WMA, AAC (depending on source) |
| Video formats | MPEG-1, MPEG-2, MPEG-4 (via USB) |
| Image formats | JPEG |
| Radio | DAB (Band III) and FM (87.5-108 MHz) with RDS |
| Bluetooth | Version 4.2 (estimated), range 10 m, profiles A2DP, AVRCP |
| TV tuner | DVB-T2 / DVB-C (MPEG-4) |
| Connectivity | HDMI, USB 5V/1A (front), CI slot (PCMCIA), DAB/FM antenna |
| Additional functions | Alarm (2), sleep timer, equalizer (6 modes), CD programming, repeat, shuffle |
| Included accessories | Remote control, power adapter, antenna, HDMI cable (not verified) |
| Safety | Class 1 laser product, auto power off after 20 min in standby (ErP) |
| Maintenance | Clean with a soft dry cloth, do not use solvents |
| Operating temperature | 5°C to 35°C |
Frequently Asked Questions - KTD1020 Soundmaster
User questions about KTD1020 Soundmaster
0 question about this device. Answer the ones you know or ask your own.
Ask a new question about this device
Download the instructions for your DVD player in PDF format for free! Find your manual KTD1020 - Soundmaster and take your electronic device back in hand. On this page are published all the documents necessary for the use of your device. KTD1020 by Soundmaster.
USER MANUAL KTD1020 Soundmaster
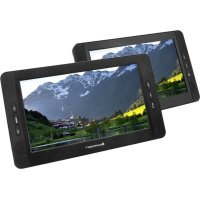
natural_image
Exterior view of a modern audio device with a digital display and a flat-screen photo of snowy mountains in the foreground (no visible text or symbols on main components)DEUTSCH
ENGLISH
FRANÇAIS
NEDERLANDS
ITALIANO
ČEŠTINA
SLOVENSKÝ
24 YELLOW Taste/REPEAT
ohne Abstandshalter
INSTALLIEREN DER BATTERIEN
Festsender speichern
Dynamic Range Compression (DRC)
TV Menü
Bild
Kanalsperre
5s - 10s - 15s - 20s - 25s - 30s - 35s


Electronic Programme Guide (EPG)
Aufnahme Abspielen
Mix
Common Interface Slot (CI)
Schlüssel Begriffe:
HDD: Hard disk drive
DTV: Digital television
SD: Standard definition
HD: High definition


Warnung:
![[00:00:25] 23:25](/content/2026/03/571928/images/768d3647fa1e6df52a52f1c91fbc8d4dd1d151ac909195b4a8e928987387966f.jpg)
Do not dispose of this product with the normal household waste at the end of its life cycle. Return it to a collection point for the recycling of electrical and electronic devices. This is indicated by the symbol on the product, user manual or packaging
The materials are recyclable according to their labeling. By reusing materials or other forms of recycling old devices and packaging, you are making an important contribution to protecting our environment. If necessary, remove batteries and personal data before disposal free of charge and ask your local authority about the responsible disposal point.
| WARNING | ! | |
| Risk of electric shockDo not open! |
Caution: To reduce the risk of electric shock, do not remove the cover (or back). There are no user serviceable parts inside. Refer servicing to qualified service personnel.

This symbol indicates the presence of dangerous voltage inside the enclosure, sufficient enough to cause electric shock.

This symbol indicates the presence of important operating and maintenance instructions for the device

Used batteries are hazardous waste and NOT to be disposed of with the household waste! As a consumer you are legally obligated to return all batteries for environmentally responsible recycling – no matter whether or not the batteries contain harmful substances*)
Return batteries free of charge to public collection points in your community or shops selling batteries of the respective kind.
Only return fully discharged batteries
*) marked Cd = cadmium, Hg = mercury, Pb = lead
- Only use mercury and cadmium-free batteries.
- Used batteries are hazardous waste and NOT to be disposed of with the household waste!!!
- Keep batteries away from children. Children might swallow batteries.
- Contact a physician immediately if a battery was swallowed.
- Check your batteries regularly to avoid battery leakage.
- Batteries shall not be exposed to excessive heat such as sunshine, fire or the like.
- CAUTION: Danger of explosion if battery is incorrectly replaced
- Replace only with the same or equivalent type

CAUTION - INVISIBLE LASER RADIATION WHEN OPENING THE COVER OR PRESSING THE SAFETY INTERLOCK. AVOID EXPOSURE TO THE LASER BEAM.
- The device is equipped with a "Class 1 Laser". Avoid exposure to the laser beam as this could cause eye injuries.
- Use the device in dry indoor environments only.
Safety, Environmental and Setup Instructions
- Protect the device from humidity.
- This apparatus is for moderate climates areas use, not suitable for use in tropical climates countries.
- No objects filled with liquids, such as vases, shall be placed on the apparatus.
- The mains plug or an appliance coupler is used as the disconnect device, the disconnect devices shall remain readily operable.
- Connect this device to a properly installed and earthed wall outlet only. Make sure the mains voltage corresponds with the specifications on the rating plate.
- Make sure the mains cable stays dry during operation. Do not pinch or damage the mains cable in any way.
- A damaged mains cable or plug must immediately be replaced by an authorized service center.
- In case of lightning, immediately disconnect the device from the mains supply.
- Children should be supervised by parents when using the device.
- Clean the device with a dry cloth only.
- Do NOT use CLEANING AGENTS or ABRASIVE CLOTHS!
- Do not expose the device to direct sunlight or other heat sources.
• Install the device at a location with sufficient ventilation in order to prevent heat accumulation. - Do not cover the ventilation openings!
- Install the device at a safe and vibration-free location.
- Install the device as far away as possible from computers and microwave units; otherwise radio reception may be disturbed.
- Do not open or repair the enclosure. It is not safe to do so and will void your warranty. Repairs only by authorized service/ customer center.
- No naked flame sources, such as lighted candles, should be placed on the unit.
- When you are necessary to ship the unit store it in its original package. Save the package for this purpose.
- In case of malfunction due to electrostatic discharge or fast transient (burst), remove and reconnect the power supply.
- If the unit is not using for a long period of time, disconnect it from the power supply by unplugging the power plug. This is to avoid the risk of fire.
TABLE OF CONTENT
LOCATIONS OF CONTROLS ....2
REMOTE CONTROL ....4
MOUNTING STEP....6
MAIN MENU (SOURCE SELECTION)....7
BASIC OPERATIONS....7
EQUALISER....8
TIME/DATE 8
BRIGHTNESS......8
LANGUAGE......8
DAB....8
FM 10
BLUETOOTH....11
CD MODE....12
SLEEP....13
ALARM....13
DTV 14
USB OPERATION....23
FACTORY RESET 23
TROUBLESHOOTING....24
LOCATIONS OF CONTROLS
FRONT VIEW

1 Display
2 Remote sensor
3 Disc door
4 10'1 inch TV
5 ⏻/∃
* Press and hold for power on and power off
* Press to change the source
6 ▲/PAIR
* Press to open the CD-door
* Press and hold to activate the pairing function in BT or disconnect the existing paired BT device
7
* Press to select previous track in CD/USB/FM/BT mode
8 BACK
* Press to return previous menu
9 1/2/3
* IN DAB/FM mode, press to select preset favorite stations
* IN DAB/FM mode, long press to set current station to favorite station
* In CD mode, short press to select number 1/2/3
10
* Press to play and pause in CD, USB, BT
11
* Press to select next track in CD/USB/DAB/FM/BT
12 INFO/MENU
* Press to show the information in CD/USB/DAB/FM
* Press to display the Menu
13 OK
* Press to select or skip selection
VOL+/VOL-
* Rotate to increase or decrease the volume level
NAVIGATE
* Rotate to move down or move up on the menu screen
SIDE VIEW

14 USB / 5V A output
* Connect to a USB device for music playback
* Connect to recharge mobile device
15 HDMI
* Connect the TV to a compatible device using a HDMI lead

16 PCMCIA
Slots for external Conditional Access(CA)-modules.
BACK VIEW

17 DC IN
18 TV connect
19 DAB/FM Antenna
REMOTE CONTROL

1

2
* Turn the unit ON or in STANDBY mode
MIX/SUBT
3
* Selects the subtitle language in DVB-T2/DVB-C
TEXT
4
* To display TV image and teletext simultaneously.
CANCEL/AUDIO
5
* To change the audio language and sound track in DVB-T2/DVB-C.
*Cancel teletext display in DVB-T/DVB-C
TV/♪
* To magnify teletext page
* Switches between TV and Radio mode in DVB-T2/DVB-C
GREEN button/A-B
6
* Teletext Green button in DVB-T2/DVB-C;
* To segment repeat in CD.
RED button/BROWSE
7
* Teletext RED button in DVB-T2/DVB-C;
* Press to turn on/off the browser function in CD.
8

* Press to play/pause in BT/CD/USB。
* To answer the phone call
9

* Press and hold for fast backward in CD and USB
* Press to select previous track in CD and USB
* Press to display the channel list in DAB, FM
10
SOURCE
* Press to select the corresponding AUDIO source. (DAB/FM/BT/TV/CD)
11

* Press to move up on the menu screen
12

* Press to move left on the menu screen
13

* Press to move down on the menu screen
14 MENU
* Press to display the Menu
15 GUIDE
* To display the program guide in DVB-T2/DVB-C.
16 P+/-
* Press to skip the beginning of current/previous/subsequent album
* Press to select previous/next preset channel in FM, DAB and DVB-T2/DVB-C
17 0-9 numeric
18 EQ
* Press to select sound characteristics: Normal/Jazz/Rock/Classic/Pop/My EQ
19 EJECT/▲
* Press to open the CD-door
20 HOLD/INFO
* To hold teletext on current page in DVB-T2/DVB-C;
* To display the current playing program information in DVB-T2/DVB-C/DAB/FM/CD.
21 SUBPAGE/PAGE+/-
* Displays sub pages when in teletext in DVB-T2/DVB-C; Browse the previous page of channel edit/list table in DVB-T2/DVB-C.
22 REVEAL/FAV
* To display the hidden teletext information in DVB-T2/DVB-C;
* To display Favorite list in DVB-T2/DVB-C.
23 BLUE button/ZOOM
* Teletext BLUE button in DVB-T2/DVB-C;
* To zoom in or zoom out the picture in CD and USB.
24 YELLOW button/REPEAT
* Teletext YELLOW button in DVB-T2/DVB-C;
* To repeat playback in CD and USB.
25
* Press to stop playing in CD/USB mode
26
* Press and hold for fast forward in CD and USB
* Press to select the next track in CD and USB
* Press to display channel list in DAB/FM
* Press for fine tuning in FM
* Press and hold for manual tuning in FM
27 ↻/PAIR/
* Press to return to previous menu
* Press and hold to activate the pairing function in BT or disconnect the existing paired BT device
* To cancel the phone call
28 OK button
* To select or skip to subsequent menu in BT/CD/USB
29
* Press to move right on the menu screen
30 TV SETUP
Enter or exit set up menu for TV.
31 V+/-
* Press to increase/ decrease the volume level
32
* Press to mute or resume the sound
33 PROGRAM
* Press to program in CD and preset channel in DAB, FM and DVB-T2/DVB-C
* Long press to save preset channels
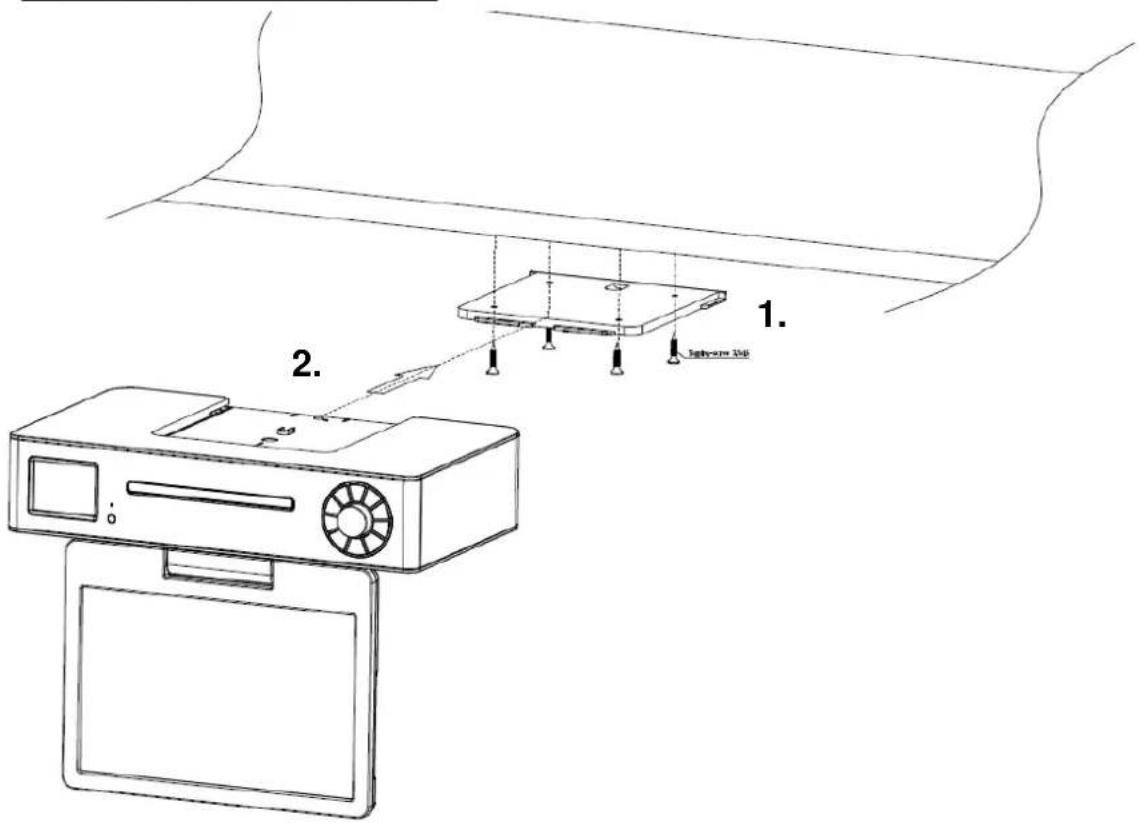
MOUNTING STEP
With spacer

Without spacer

- Press and slide the back cover to open the battery compartment of the remote control.
- Insert two AAA size batteries. Make sure the (+) and (-) ends of the batteries match the (+) and (-) ends indicated in the battery compartment.
- Close the battery compartment cover.
GETTING STARTED / SET UP
Connect the unit to a suitable power source using the power supply provided. After showing a starting screen, it will enter the last used listening mode. When the unit is started for the first time, the setup wizard will be launched automatically.
MAIN MENU (SOURCE SELECTION)
By Pressing "SOURCE" button on the remote control or the "☐on the unit, you can choose between following Modes:
DAB, FM, Bluetooth®, CD, TV (DVB-T2, DVB-C, HDMI, USB)
BASIC OPERATIONS
Power ON/OFF
Press the “◀” knob on the unit or the “◀” button on the remote control to turn the unit on. Press again the “◀” knob or the “◀” button on the remote control to turn the unit off.
Selecting modes
During on mode, press the “∃” button on the unit repeatedly to switch between the modes or press the desired function on the remote control.
Adjusting the volume
Rotate the "VOLUME" knob on the unit or press the "V+/-" button on the remote control to decrease or increase the volume.
NOTE:
If you adjust the volume above 26, then power off and power on again, the volume will restore to the factory setting automatically.
Mute
During playing mode, press the “☒” button on the remote control, the sound will not be heard from the speaker.
Press the “☒” button again, the “V +/-” button on the remote control or rotate the “VOLUME” knob to cancel the mute function. The sound can be heard from the speakers again.
EQUALISER
Several preset EQ modes are available: Normal, Klassik, Jazz, Pop, Rock, and My EQ.
In the My EQ settings, you can create your own EQ with custom bass and treble settings.

TIME/DATE
Set the time manually or automatically update, time format, time zone and daylight.
BRIGHTNESS
You may change the backlight during on - mode to High, Medium or Low. In stanby mode to High or Medium.
LANGUAGE
Change it as your preference.
DAB
The first time you use the unit, or if the station list is empty, the radio automatically performs a full scan to see what stations are available. You may also need to start a scan manually to update the list of stations for one of the following reasons:
New stations may become available from time to time.
➢ Stations close or can no longer be received (In the station list, invalid stations are indicated with a question mark in front of their name).
If reception was not good after the original scan (for example the antenna was not up), this may result in an empty or incomplete list of available stations.
If you have poor reception of some stations causing the audio to break up, you may wish to list only stations with good signal strength.
Press the “☐” button repeatedly on the unit or press the “DAB” button on the remote control until “DAB” is displayed to select the DAB function.
Full Scan
Press the "MENU" button, select with the "▲ / ▼" buttons the function "Full scan" and press the "OK" button to confirm. The unit starts a complete scan. Once a scan is complete, the radio returns to playing the previously selected station or first station on the station list.
Selecting stations
- Use the “▲ / ▼” button on the remote control or rotate the “NAVIGATE” button on the unit to scroll through the list of station.
- Press "OK" on the remote control or on the unit to change station.
Some stations are secondary services associated with a Primary channel and only available at certain times. Any station that has associated secondary services is indicated with a double chevron pointing to the right. The Secondary radio station stations are always listed next to their primary station rather than the normal is indicated with a double chevron pointing left.
Manual tune
As well as the normal method of scanning, you can also manually tune to a particular channel /frequency. This can be useful for adjusting your antenna to achieve the best possible reception and scanning a particular channel to update the station list.
- Press "MENU" button on the unit or remote control.
- Select "Manual tune" and press "OK" to confirm.
- Use the “▲ / ▼” button on the remote control or rotate the “NAVIGATE” knob on the unit to display a particular channel/frequency and press the “OK” button on the remote control or on the unit to tune the selected channel/frequency.
- The display shows a live indication of the received signal strength on the selected frequency.
- Adjustments to your antenna will be manifested in the received signal strength displayed.
Note:
The slightly larger rectangle indicates the audio quality threshold - if the signal strength, as indicated by the solid rectangles, falls below this threshold the audio quality will deteriorate. At the same time the unit scans for any DAB stations on the selected frequency and updates the station list with any new stations found. To listen to any stations found, return to the “Now playing” screen and select the required station from the station list as normal.
Presets
The unit has 40 preset memories for DAB.
Store a station in a preset memory
- Select the desired station.
- Press and hold the "PROGRAM" button on the remote control about 3\~5 seconds until the display shows "Preset Store". Presets (1-40) are displayed as either "Empty" or with the currently stored station name.
- Use the “▲ / ▼” button on the remote control or rotate the “NAVIGATE” knob on the unit to choose a preset memory, then press the “OK” on the remote control or on unit to store the currently playing station. After confirming the preset station is stored, the display reverts to the “Now playing” screen.
Note:
If a preset memory is already occupied, you can simply replace the old one with the new one. It is not necessary to delete the old preset station.
Recall a preset station
Press the "PROGRAM" button briefly, the display will show "Preset Recall". Select one of the listed preset stations by using the "▲ / ▼" buttons on the remote control or rotate the "NAVIGATE" button on unit. Then press the "OK" button on the remote control or on the unit to choose the selected preset station.
DAB Information
While a station is playing, the screen shows the station name and DLS (Dynamic Label Segment) information broadcast by the station such as program name, track title and contact details. Long DLS info, over 16 characters scrolls a cross.
Each time you press the "INFO" button, the next set of information is displayed, cycling through: DLS text, DL Plus information (this is only displayed if broadcast by the station), signal strength, program type, ensemble name, channel number/frequency, signal error rate, bit rate, DAB variant, time and date.
Note: DL Plus presents additional information that can be broadcast by stations and stored temporarily on your radio. To return to the default “Now playing” screen at any time, press and hold the “INFO” button.
Prune (remove stations that are listed but not available)
Press the "MENU" button, select the function "Prune Invalid" and press the "OK" button to confirm.
This removes all invalid stations, indicated in the station list with a “?” in front of the station name.
Dynamic range compression (DRC)
This function reduces the difference between the loudest and quietest audio being broadcast. Effectively, this makes quiet sounds comparatively louder, and loud sounds comparatively quieter.
Note: DRC only works if it is enabled by the broadcaster for a specific station
Change the DRC setting
- Press the "MENU" button on the remote control or on the unit
- Select "DRC" and press "OK" to confirm.
- Select one of the available options: DRC off | low | high.
FM
FM radio mode receives analogue radio from the FM band and displays RDS (Radio Data System) information about the station and show (where broadcast).
Press repeatedly the “☐” button on the unit or the “SOURCE” button on the remote control until “FM”
is displayed to select the FM function.
Scan for a station in FM mode
Automatic scan
Press the "BROWSE" button on the remote control. The unit scans up through the FM band frequencies, showing the current frequency on the screen display. The found radio stations will be stored in the station list.
Manual scan
Press the “|◀/▶▶|” buttons on the remote control or unit to tune manually in 50 kHz steps.
Presets
The unit has 40 preset memories for FM, which works in the same way as DAB mode presets.
FM Information
While FM radio is playing, the screen shows the frequency of the radio station or if RDS information is available, the station name and any further “Radio Text” information.
If no information is available just the frequency, a "NO Radio Text" message is shown.
Each time you press the "INFO" button, the next set of information is displayed, cycling through: RDS Radio Text, program type, frequency, mono/stereo, time and date. To return to the default "Now playing" screen, press and hold the "INFO" button.
Scan settings
By default, FM scans stop at any available station (ALL Stations). This may result in poor quality audio from weak stations. The options are: All stations | Strong stations only.
To change the scan settings, to stop only at stations with good signal strength:
- Press the "MENU" button on the remote control or unit.
- Select "Scan setting", press "OK" to confirm and then select "Strong stations only". Press the "OK" button again to confirm.
Audio settings
By default, all stereo stations are reproduced in stereo. For weak stations, this may result in poor quality audio. The audio quality can be improved using mono. In the “Audio Setting” menu, the options are: Stereo allowed | Forced mono
Play weak stations in mono:
- Press the "MENU" button on the remote control or unit.
- Select "Audio setting", press "OK" to confirm and then select "Forced mono". Press the "OK" button again to confirm.
BLUETOOTH
You can listen to tracks from a media device if it is connected to the unit via Bluetooth. You need to pair your Bluetooth device with this unit before you connect them for the first time.
Pair Bluetooth devices
Note:
The operational range between this unit and a Bluetooth device is approximately 10 meters (without any object between the Bluetooth device and the unit).
Before you connect a Bluetooth device to this unit, ensure that you know the device's capabilities.
➢ Any obstacle between this unit and the Bluetooth device can reduce the operational range.
If the signal strength is weak, your Bluetooth device may disconnect, but it will re-enter automatically into pairing mode.
-
Press the “☐” button repeatedly on the unit or press the “BT” button on the remote control until “Bluetooth” is displayed to select the Bluetooth function. If the unit is not paired to any Bluetooth device, the system enters automatically into pairing mode; or you need to press and hold the “PAIR” button to start pairing.
-
Activate the Bluetooth function on your device and select the search mode. "KTD1020SI" will appear on your Bluetooth device.
-
To disconnect the Bluetooth function, switch to another function on the unit or disable the function from your Bluetooth device.
Tips:
If there is already an existing connection, press the "PAIR" button to re-activate the pairing mode. The existing connection will be interrupted.
The unit will also be disconnected when your device is moved beyond the operational range.
If you want to reconnect your device to this unit, place it within the operational range.
If the device is moved beyond the operational range, when it is brought back, check if the device is still connected to the unit.
If the connection is lost, follow the above instructions to pair your device again to the unit.
Listen Music from your Bluetooth device
If the connected Bluetooth device supports Advanced Audio Distribution Profile (A2DP), you If the device also supports Audio Video Remote Control Profile (AVRCP), you can use this unit's remote control to play music stored on the device.
- Pair your device with this unit.
- Play music via your device (if it supports A2DP).
- Use supplied remote control to control play (if it supports AVRCP).
To pause/resume play, press the “ ” button.
To skip to a track, press the “◀◀” or “▶◀” buttons.
Hands free calling
With an existing Bluetooth connection, you can accept incoming calls with the "button. The call will now be made through the loudspeaker and the built-in microphone. To end the call, press the "" button on the remote control or the "BACK" button on the device.
If the incoming call is to be rejected, press the "→" button on the remote control or the "BACK" button on the device.
CD MODE
Improper operation can result in material damages!
Do not insert any recording media that deviate from the standard CD format (eg: mini-discs) into the CD player. These may not be played and ejected correctly. Insert only one disc at a time into the CD player.
-
Press → button on the unit or "SOURCE" button on remote control repeatedly until "CD" displayed to choose CD.
-
Put a disc (with printing side facing up) inside. The display will say "Loading" and the disc functions will not work while the disc is loading.
The Playback will begin automatically once the table of contents is read. The display will show “No Disc” when the unit is set to CD mode and there is no CD inside.
To pause/resume playback of the CD, press the "button
To switch to the next track, press the " " button once
To fast forward through a track, press and hold the “▶▶” button.
To switch to the previous track, press the “” button twice
To fast backward through a track, press and hold " " button.
To stop CD playback, press the " " button on the remote control.
CD Program
- Set the unit in Stop mode
- Press the "PROGRAM" button on the Remote Control. The display will show "T01 P01" and "T01" flash.
- Choose with “◀◀” or “▶◀” or 0 to 9 on the Remote Control, the track which should be programmed and confirm the track by pressing the “PROGRAM” button on the Remote Control. The display changes to “P02”.
- To choose more tracks do step 3 again.
- If all tracks are programmed press the “▶II” button on the unit or Remote Control to start the programmed playback.
Repeat one track
During playback press the "REPEAT" button on the Remote Control once to repeat playback of the song you are listening to.
Repeat all tracks
During playback press the "REPEAT" button on the Remote Control twice to repeat all songs from the CD. To cancel the Repeat mode press the "REPEAT" button on the Remote Control until all symbols in the display disappear.
SLEEP
To set the sleep timer, choose from Sleep OFF, 15mins, 30mins, 45mins, 60 or 90mins. Once you select a sleep period, the system returns to the “System Menu” screen.
ALARM
There are two versatile wake-up alarms with snooze facility, and a sleep function to turn the system off after a set period. Each alarm can be set to start in a particular mode.
Select Alarm under System settings to set or change an alarm.

Select the alarm number (1 or 2) then configure the following parameters:
- Enable: on/off, Frequency: Daily, Once, Weekends or Weekdays,
- Time
• Mode: Buzzer, CD, DAB, TV or FM, - Preset: Last listened, 1 - 40,
• Volume: 0 - 32
To activate the new settings, press the "Back" button after youre finished.
The screen shows active alarms with an icon at the bottom left.
DTV
Connect cable to the TV socket on the rear of the radio.
If in a poor signal area, to improve picture quality, purchase and install a signal amplifier (not supplied).
Tuning in digital TV
When the TV is switched on for the first time, the following screen will appear, press the ▲▼◀
▶buttons to select your On Screen Display (OSD) language. Select Auto Search and press the
OK button.
Note: You will not be able to select the country mode.
When this screen appears press the ▲ or ▼ buttons to select item, press ◀ or ▶ buttons to select Country or channel.
Press the OK button to confirm the selection.

The auto tune will start and must not be interrupted once started.
When this screen appears, wait for the TV to tune your digital channels. This may take a few minutes.
Once the auto search is completed, the TV will display the target region setting. If more than one regional transmitter is available use
◀▶ to select your primary region preference, then press OK, to leave this menu press ↩.

Please wait for channels to populate the list, there may be a small delay as all channels are correctly allocated.

For your information HD channels are populated in the list from channel 101 onwards.
Once the target region setting or Auto search is completed, the TV will display the first available digital channel. All other available digital channels will be displayed in the Channel List by pressing the
PROGRAM button. For more information, please refer to other sections of the user guide.

Any new/wanted channels can now be edited/sorted to the users desired preference, please refer to the channel edit feature.
Source selection
The following sources are available.
Use the ▲▼ buttons to scroll between inputs and press OK to select the source.
If no source is manually selected using the OK button, the TV will automatically switch to the highlighted input after 15 seconds.
Press the ➕ button to exit the display.
TV channel selection
Press the CH +/ CH – buttons or use the Numeric buttons on the remote control to select a channel you require.

Return
Press the ➤ return button to swap between the channel you are watching and the previously selected channel i.e. If you were watching channel 1 and change to channel 3, press ➤ return button to return channel 1.
Press the ➤ return button again to return to channel 3.
Volume
Press V+/V- buttons to increase or decrease the volume. The volume level will be displayed at the top screen.
Mute
Press the 📂 button to mute the sound. Mute will appear at the top screen.
Press the 📋 button again or V+ button to restore the sound. Mute will disappear from the screen.
Favourite(Digital TV only)
You can enter the Favourite menu while watching a channel by pressing Fav button. The following menu will appear on the screen:
To add a channel to the favourite list, press TV SETUP button and scroll down to the Channel setup. Press the ▶ button to access the menu. Press the ▼ button to select channel Edit then press OK.

In the Channel Edit menu is a list of all available channels. Select the channel that you want to add to Favourite List. Press Fav button to add the selected channel. A heart will appear next to the selected channel. Press ➤ button to exit the menu.
Subtitle
If a channel has subtitles available, you can select the subtitles by pressing the Subt button. Select the required language using the ▲▼ buttons then press OK.

Information
You can view the program information for the channel you are watching by pressing the Info button. The following menu is a typical example of the program details that will be displayed.
![1 BBC ONE West 10:05 16:15 S Q 23:00 Sat Oct 21 2017 Match of the Day 576i DTV SD MPEG MHEG5 Narration Subtitle English 3/10. A Foreign Field: Australian crime drama whey the body of a man is found in a park. it falls to Dr Lucien Blake to find out not just how he died but also the man's true identity.[AD,S]](/content/2026/03/571928/images/6c449e462a1dc761649e13909aa695edd89162df787974d1bef21d87c5b45fe5.jpg)
You can view the information for the next program by pressing the ▶ button.
Audio
In Digital mode press the Audio button to change the audio language and sound track. The following menu will be displayed.
Select the required audio language using ▲▼ buttons then press OK.
Audio language option is dependent on broadcast.

TV/
Press the TV/ musical button to switch between Digital TV and Digital radio modes.
Menus
The setup menus allow you to adjust and control the TV.
- To access the on screen menus, press the TV SETUP button.
- Press the ▲▼▶▶ buttons to navigate around the menu screens and available options.
- To exit the menu press the ➤ or TV SETUP button

Picture settings
This menu gives the options for adjusting the appearance of the TV picture. The following options are available.
Picture Mode – Allows you to select preset levels of contrast, brightness and colour. You can choose from the following settings:
User – Standard – Dynamic – Soft
Brightness – Allows you to increase or decrease the brightness of the picture.
Contrast – Allows you to increase or decrease the contrast of the picture.
Colour – Allows you to increase or decrease the colour of the picture.
Sharpness – Allows you to increase or decrease the sharpness of the picture.
Tint – Allows you to increase or decrease the time of the picture
Colour Temperature – Allows you to change the colour tones of the screen. You can choose from the following settings: Normal – Warm – Cool.
Channel Setup (Digital TV only)
This menu allows you to adjust the channels and the channel settings.
Channel – Allows you to select the channel you want to adjust.
Frequency – Not able to be adjusted.
Country – Not able to be adjusted.
Manual Search – Allows you to manually search and tune the TV.
Auto Search – Allows you to automatically search for channels.
Channel Edit – Allows you to delete, skip and add channels to the Favourite list.
Software Update (OAD) – Allows you to update software via OAD.

Channel Edit
Press the ▲▼ PAGE+ PAGE- buttons to select a channel. You can do the following to a Digital channel using the Coloured buttons:
Red – Press the Red button to delete a channel. Use the ▲▼ buttons to select the channel to be deleted.
Blue – Navigate to the channel you want to skip then press the Blue button.
You will no longer be able to view this channel in normal viewing mode.
TV Setup
This menu allows you to change the general settings for digital TV. The following options are available:
Lock – Allows you to prevent access to certain features of the TV.
Note: The default password is 0000.
Audio Language – Allows you to set primary and secondary audio languages.
Subtitle Language – Allows you to set the subtitle language.
Time Zone – Allows you to change the time zone.
CI Information – Allows you to access the Common Interface Card and its status.
Antenna Power – Allows you to turn on/off the antenna power.
PVR File System – Allows you to setup record file system.


Lock
Allows you to prevent access to certain features of the TV. When the system Lock in ON, the password must be entered to make changes to the locked features.
Lock system – Allows you to lock the system.
Block Program— Allows you to block certain programs and channels.
Parental Guidance – Allows you to restrict programs to suit the viewer age. Only programs suitable for the selected age will be accessible. Select the age of the viewer from the following options:
Off - 4 - 5 - 6 - 7 - 8 - 9 - 10 - 11 - 12 - 13 - 14 - 15 - 16 - 17 - 18
Note: This feature may not be supported by all broadcasters.
Change Password – Allows you to change the password.
Note: The default password is 0000.
- Enter the new password.
- Re-enter the new password to confirm it. The password is now changed.


Functions settings.
This menu allows you to change the following functions:
OSD Language – Allows you to change the on screen display language.
User setup – Allows you to adjust setting for Aspect Ratio, Noise reduction, Sleep timer, OSD time, Auto sleep and headphone.
Reset – Allows you to reset all TV settings back to the default settings.

Aspect Ratio – Allows you to set up aspect ratio:
Auto - Zoom 1 - Zoom 2 - 16:9 - 4:3
Noise Reduction – Allows you to reduce/alter any noise on the images.
The following options are available:
Low - Mid - High - Off
OSD Time – Allows you to set OSD menu display time out.
5s - 10s - 15s - 20s - 25s - 30s - 35s
Electronic Programme Guide
The Electronic Programme Guide displays information about current and future programmes for the highlighted channel. Press the Guide button to display the Electronic Programme Guide. The following menu will be displayed.

Use the ▲▼ PAGE+ PAGE- buttons to navigate through the available channels and programmes.
Press the ▶ ▶ +12H -12H buttons scroll information about programmes for the next seven days.
Press the OK button to watch the currently selected programme (only the first programme on each channel can be selected to watch as the other programmes have not yet started).
Press the Guide or ➤ button to exit the EPG.
Setting a record from the EPG
You can view information about any programme by pressing the Info button. You can also set timer recording from the EPG, select the desired programmes and press RED.
After finished setup, press OK to confirm.
Recorder schedule list will display as below, you can delete schedule here.

Press the Guide or ➤ buttons to exit the EPG.
| Schedule List 23:31 16th Dec DELETE | |||
| Time | Date | Programme Title | Channel Name |
Viewing Recording
To view any recorded program. Press the "INDEX" button on the remote.
(Depending on file size there can be a small delay displaying the list).
Highlight the wanted program and press Info will display program and press play on remote controle.
To delete, highlight in the list and press RED button.
You can list all recorded files by pressing Index button.

You can playback files in the recorded list.
By pressing ▶II or OK to playback.
By pressing ■ to stop.
![[00:00:29] Play Pi IF Pac Nash Power 23:25 [00:00:29] Play Pi IF Nash Power Nash 23:25](/content/2026/03/571928/images/ab824fcbc33e87b3ded0dc4bc318c9d4e41a6b7bfc5284f2a8adb1be8f14921a.jpg)
Press the ▶|| button to enter time shift recording mode.
![[00:00:39/51:30:00] Play Fn Fr Pop. Nad Piano Bip 23:26](/content/2026/03/571928/images/410de42c395194eba9afa9a7e0226e634a4d22b75d08f5e7dd95feaa7a4feee6.jpg)
Press the ▶|| button to enter time shift playback mode.
Press ■ button to exit.
In record, play and time shift mode, you can use ▶ ▶ and OK buttons to select function.
Pause Live TV
To pause live TV, press the Time Shift button, the program will stop. To continue watching press the Play button and the program will resume. To return to live TV press the Stop button.
Please note:
If a memory device is inserted into USB this will take priority and prevent the possibility to fully utilize the "Watch and record" feature.
Digital text
Digital text is an information system that displays text on your TV screen.
Note: No on screen menus can be displayed in text mode. The color, contrast and brightness cannot be altered but the volume can be changed.
Follow the on screen commands. The following menu is an example of the BBC digital text service.
- Press the Text button to select digital text.
- To select the page you require, press the ▲▼ buttons
and press the OK button to select. Alternatively, you can enter the page number using the Numeric buttons. Press the OK button to view the page.
-
Press the ▲▼◀ ▶ buttons to navigate the digital text menus.
-
Use the Red, Green, Yellow and Blue buttons to access the subject shortcuts.
-
To exit digital text press the "Text" button.

Teletext
Teletext is an information system that displays text on the TV screen. Using the teletext control buttons you can view the pages of information that are listed in the teletext index.
Note: No on screen menus can be displayed in text mode. The colour, contrast and brightness cannot be altered but the volume can be changed.
Press the Text button to enter text mode. The text page, normally the index page, will be displayed.
Press the Text button again to exit text mode. The screen will return to video you were viewing.
Mix
Press the Mix button to enter mix mode. The text page will display with the picture behind it.
Cancel
Press the Cancel button to view the program you are watching without any text in the background.
Selecting a page
- To select a page in text mode, find the page number you require on the Index page and enter the page number using the Numeric buttons. The number will appear in the top left hand corner of the screen. A page search will begin. Once the page is found, it will be displayed.
- To return to the Index page, press the Index button.
- To select a Subpage, press the Subpage button.

Subtitle
-
To display subtitles while watching video, press the Text button and go to page 888. The picture will be displayed and provided with subtitles, these will appear at the bottom of the screen. (If provided by program)
-
Press the Text button to exit text mode.
Reveal Information
- Press the Reveal button to reveal concealed information (quiz answers etc.).
- Press the Reveal button again to conceal the information.
Fast text
At the bottom of the teletext screen are subject headings in red, green, yellow and blue.
- Press the Coloured (Red, Green, Yellow and Blue) buttons on the remote control to access these pages.
- Press the Index button to return to the index page.
Page hold
When in text mode and you are viewing a text page with subpages, these will automatically be displayed in order with a delay to allow you to read the page.
- Press the Hold button to stop the next subpage being displayed. The hold symbol will appear in the top left hand corner of the screen.
- Press the Hold button again to continue moving through the sub-pages.
Text enlargement
- Press the Size button to enlarge the text shown on the text mode screen. Once selected, half a page will be displayed at a time.
- Press the Size button again to view second half of the page.
- Press the Size button a third time to return to normal text mode.
Common Interface Slot
The common Interface (CI) slot is designed to accept the Conditional Access Module (CAM) and Smart card in order to view the pay TV programmes and additional services. Contact your Pay per View TV provider to get more information about the modules and subscription.
Note: Conditional Access Modules and Smart cards are sold separately.
Warning! Switch off your TV before any modules are inserted in the CI slot.
The CI slot is located on the rear of your TV. Insert the CAM correctly into the CI slot, then add the smart card to the CAM.

- Turn on the TV.
- If the CAM is detected the TV will display the following message on the screen:
Common Interface Module Inserted
Wait for a few moments until the card is activated.
- Select the relevant digital channel.
- Detailed information on the Smart card in use is displayed.
- Press the OK button to access the card menu. Refer to the module instruction manual for setting details.
- When the module is removed, the following message will appear on the screen:
Common Interface Module Removed.
HDMI Setup
The menu setup of HDMI modes is similar to the TV mode setup, except that Channel Setup is not available.

If there is no signal input when the TV is in HDMI mode, the following screen will be displayed:
If a signal input is not detected within 5 minutes, the TV will go into Standby mode.
Operating the TV
To format your memory device and create a PVR file, press the setup key on the remote. Scroll down through the menu using the ▲▼ keys to Digital TV or Satellite TV.
Press ▶ key to access the menu options and using the ▲▼ keys to select the PVR FILE SYSTEM and press OK.
Using the ▲▼ keys to navigate through the PVR FILE SYSTEM menu options, select CHECK THE PVR FILE SYSTEM and then FORMAT part or all of the USB/HDD.
1. PVR FILE SYSTEM MENU
Select Disk will select the destination disk for recording TV program.
- Check PVR File system.
- Format will format the disk.
- Max record time will limited the max record time.
- After recording, press Index button to display files information. Pressing Info button to display details.

Key to abbreviations:
PVR: Personal video recorder.
HDD: Hard disk drive
DTV: Digital television
SD: Standard definition
HD: High definition
Insert USB or HDD, then enter SELECT DISK.
If using a USB device, default disk name is DISK C:
If using a HDD, and HDD has two or more partitions, the system allows you to select C:/D: disk and so on by pressing ▶ ▶.
Select OK to continue.
Select ➤ to exit.
Note: USB must be in USB (not USB REC) to format.
2. CHECK PVR File System
Allows you to select USB disk or HDD size for recording. Pressing ▼ ▶ to change.
System will show max recording time for SD and HD signal.
You can't select definition for recording. It's determined by the input signal.
Select OK to continue.
Select ↩ to exit.

Allows you to set size for recording. For example, if USB is 4GB. System allows you select 1GB/2GB/3GB/all by pressing ▶ ▶ .
Select OK to continue.
Select ↩ to exit.
3. FORMATTING
If you want to format disk, please note all data will be lost.
Select start to format, during formatting, do not power off the TV, select EXIT to cancel.


Warning:
Please make sure your USB or hard disk has at least 500MB free space and then create PVR file system before you record Digital TV program.
![Play FB FF Prev. Next Pause Stop [00:00:29] (0004:44:26) 1 BBC ONE 23:25](/content/2026/03/571928/images/2ba0f9d1f49b391b662b681db41dafb6896c41cd1c4cd00625c07fc96cc945c0.jpg)
You can list all recorded files by pressing Index button.

You can playback files in the recorded list.
By pressing ▶II or OK to playback.
By pressing ■ to stop.
Press the ▶I button to enter Time shift recording mode.
![[00:00:29] Play TS PF FMC NAC PACER Stop 23:25](/content/2026/03/571928/images/b47a1aa6e005f264fffad34574976753abfa81cdfa2275b664ba2c6507b7d701.jpg)

Press ▶| the button to enter time shift mode, press ■ button to exit.
In record, play and time shift mode, you can use □ ▶ and OK buttons to select function.

USB OPERATION
Usage of USB device
Please note: The file operation system only supports Windows FAT, it does not support FAT32 and NTFS file system.
- Before you use the USB function, you should change the TV to USB source.
- In USB main menu, you should select the media type, press OK For playlist adding or "PLAY" for playback.
- If the drive has multiple partitions, select DISC.
- In photo, music, movie and text play mode, is same as Video

Notes
- This player can play MPEG 2 and JPEG files in USB device.
- When reading MPEG files on the USB device, there may be a long pause.

- In movie playback mode if wanted image is too small press play button to fill whole screen.
- If there are no files on USB devices, on-screen appears "Empty Device". If USB devices have a problem, or the operation is incorrect, the screen displays "Device Error". Please check USB device, or else unplug them then insert them again.
- If a USB device unsupported the unit may "lock up" and become unresponsive to commands. In this event please power down TV and remove USB device and switch on the TV, and then switch the power back on to reset the machine.
- This unit does not support USB On The Go (OTG) technology, so any devices with OTG data exchange mode may not work correctly. Check this out before operation.
- Do not remove the USB whilst it is reading/playing.
- This symbol shown below means an invalid operation has been attempted. Press the effective button again.
FACTORY RESET
A factory reset resets all user settings to default values, so that time, date and presets are lost.
TROUBLESHOOTING
| Error | Remedy |
| The device does not switch on. | Check it the power adaptor is connected properly. |
| Switch automatically off | Due to ErP2 requirements and environmental protection, the unit automatically switches to standby mode when no music is played for more than 15 minutes. |
| No sound. | 1. Turn on the sound as it may be muted2. Increase the volume.3. Pull any connected headphone or speaker from the connector jack. |
| No station is found. | 1. Check the network as well as the access point and firewall.2. The station may not be available currently, try it again later or select another station.3. The link of the station is changed or the station no longer transmits – ask the provider for information.4. The link of manual added station is not correct, make sure it is correct and re-enter. |
| Hiss in FM mode | Check/move the FM antenna or move the radio |
| No stations available / burbling / intermittent in DAB mode. | 1. Move the radio.2. Rescan local stations only (high-strength).3. Check the local DAB coverage. |
| Alarm does not work. | 1. Switch on the alarm.2. Due to the volume setting, refer to the solutions of “No sound”.3. The source of alarm was set to be station but there is no network connection. Change the source of alarm or reconfigure the connection. |
| USB driver or MP3 player is not detected. | 1. Check if the USB driver or MP3 player is plugged properly.2. Some USB hard disks need external power supply, make sure it is connected to the power.3. Not all MP3 players can be read directly on the device – use an USB drive instead. |
| All other undetermined cases. | KTD1020 may process large amount of data after a period of operation, no matter in which mode, it will cause the system freeze or malfunction. Reboot KTD1020 if necessary. |
| The normal function of the product may be disturbed by strong Electro-MagneticInterference. If so, simply reset the product to resume normal operation by following the instruction manual. In case the function could not resume, please use the product in other location. | |
| The device may malfunction when used in areas with strong radio interference. The device will work properly again once there is no more interference. | |
| Under the environment with Conducted Immunity disturbance, the sample may malfunction. It will automatically recover to normal when the Conducted Immunity disturbance stopped. |
The current instruction manual can be downloaded from www.soundmaster.de
Technical changes and misprints reserved
Copyright by Woerlein GmbH, 90556 Cadolzburg, www.soundmaster.de
Duplication only with the permission of Woerlein GmbH.


PROTECTION DE L'ENVIRONNEMENT

24 YELLOW button/REPEAT
sans entretoises

FONCTIONNEMENT DE VOTRE TÉLÉCOMMANDE
DAB, FM, Bluetooth®, CD, TV (DVB-T2, DVB-C, HDMI, USB)
FONCTIONNEMENT DE BASE
Marche/Arrêt
During playing mode, press the “×” button on the remote control, the sound will not be heard
from the speaker.
Press the “☒” button again, the “V +/-” button on the remote control or rotate the “VOLUME”
knob to cancel the mute function. The sound can be heard from the speakers again.
ÉGALISEUR

Sous-titres
Réglages d'image
User – Standard – Dynamic – Soft
Verrouiller
Low - Mid - High - Off
5s - 10s - 15s - 20s - 25s - 30s - 35s

Common Interface Module Removed.
Réglage HDMI


Avertissement :
FONCTIONNEMENT DE L'USB
PROBLEEMOPLOSSING....28
24 YELLOW button/REPEAT
UW AFSTANDSBEDIENING GEBRUIKEN
DAB, FM, Bluetooth®, CD, TV (DVB-T2, DVB-C, HDMI, USB)
ALGEMENE BEDIENINGEN
In-/uitschakelen
- Inschakelen: on/off, Frequency: Daily, Once, Weekends or Weekdays,

Ondertiteling
Beeldinstellingen
User – Standard – Dynamic – Soft
Tv-instelling
Vergrendeling
Aspect Ratio – Hiermee kunt u de beeldverhouding instellen:
Auto - Zoom 1 - Zoom 2 - 16:9 - 4:3
Noise Reduction – Hiermee kunt u ruis op de beelden verminderen/veranderen.
Low - Mid - High - Off
5s - 10s - 15s - 20s - 25s - 30s - 35s

Opname bekijken
Common Interface Module Removed.
Instellen HDMI
Afkortingen:


Waarschuwing:
USB-BEDIENING

Opmerking
24 YELLOW button/REPEAT
UTILIZZARE IL TELECOMANDO
DAB, FM, Bluetooth®, CD, TV (DVB-T2, DVB-C, HDMI, USB)
Subtitle
Blocco
Low - Mid - High - Off
5 sec. - 10 sec. - 15 sec. - 20 sec. - 25 sec. - 30 sec. - 35 sec.

| Schedule List 23:31 16th Dec DELETE | ||||
| Time | Date | Programme Title | Channel Name | |
Slot Common Interface
Common Interface Module Removed.
Impostazione HDMI
Abbreviazioni:
PVR: Personal video recorder
HDD: Disco rigido
DTV: Televisione digitale


Attenzione:

Nota
PROVOZ DÁLKOVÉHO OVLADAČE
DAB, FM, Bluetooth®, CD, TV (DVB-T2, DVB-C, HDMI, USB)
ZÁKLADNÍ OVLÁDÁNÍ
Zapnutí/vypnutí
| Alarm 1 |
| Enable: Daily |
| Time: 07:30 |
| Mode: Internet Radio |
| Preset: Last listened |
| Volume: 10 |

Informace
TV/
Nastavení obrazu
User – Standard – Dynamic – Soft.
Zámek
Nastavení funkci
Low - Mid - High - Off.
5s - 10s - 15s - 20s - 25s - 30s - 35s.

Zobrazení nahrávky
Slot Common Interface
Common Interface Module Removed.
Nastavení HDMI
Vysvětlení zkratek:


Varování:
natural_image
Four transparent cylindrical objects arranged horizontally with control buttons at the top (no text or symbols on objects)
Poznámky
Cadolzburg, www.soundmaster.de
DAB, FM, Bluetooth®, CD, TV (DVB-T2, DVB-C, HDMI, USB)
ZÁKLADNÁ OBSLUHA
Zapnutie/vypnutie

Informácie
Pomocou tlačidiel ▲▼ vyberte požadovaný jazyk zvuku a potom stlačte tlačidlo OK.
Nastavenia obrazu
Uzamknutie
Change Password – umožnuje zmenit' heslo.
Nastavenia funkcií.
5s - 10s - 15s - 20s - 25s - 30s - 35s


| Schedule List 23:31 16th Dec DELETE | |||
| Time | Date | Programme Title | Channel Name |
Zobrazenie záznamu
Common Interface Module Removed.
Nastavenie HDMI


Upozornenie:
D 90556 Cadolzburg, Germany
Tel: +49 9103 71 67 0
Fax: +49 9103 71 67 12
E-Mail: info@soundmaster.de
Internet: www.soundmaster.de
Hereby, Wörlein GmbH declares that this device is in compliance with the essential requirements and other relevant provisions of Directive 2014/53/EU.
A copy of the declaration of conformity can be obtained from the above address.
- YELLOW Taste/REPEAT
- INSTALLIEREN DER BATTERIEN
- Festsender speichern
- Dynamic Range Compression (DRC)
- TV Menü
- Bild
- Kanalsperre
- Electronic Programme Guide (EPG)
- Aufnahme Abspielen
- Mix
- Common Interface Slot (CI)
- Schlüssel Begriffe:
- Warnung:
- TABLE OF CONTENT
- LOCATIONS OF CONTROLS
- FRONT VIEW
- VOL+/VOL-
- NAVIGATE
- USB / 5V A output
- HDMI
- PCMCIA
- DC IN
- TV connect
- DAB/FM Antenna
- REMOTE CONTROL
- MIX/SUBT
- TEXT
- CANCEL/AUDIO
- TV/♪
- GREEN button/A-B
- RED button/BROWSE
- SOURCE
- MENU
- GUIDE
- P+/-
- 0-9 numeric
- EQ
- EJECT/▲
- HOLD/INFO
- SUBPAGE/PAGE+/-
- REVEAL/FAV
- BLUE button/ZOOM
- YELLOW button/REPEAT
- 25
- 26
- ↻/PAIR/
- OK button
- 29
- TV SETUP
- V+/-
- 32
- PROGRAM
- MOUNTING STEP
- GETTING STARTED / SET UP
- MAIN MENU (SOURCE SELECTION)
- BASIC OPERATIONS
- Power ON/OFF
- Selecting modes
- Adjusting the volume
- Mute
- EQUALISER
- TIME/DATE
- BRIGHTNESS
- LANGUAGE
- DAB
- Full Scan
- Selecting stations
- Manual tune
- Note:
- Presets
- Store a station in a preset memory
- Recall a preset station
- DAB Information
- Prune (remove stations that are listed but not available)
- Change the DRC setting
- FM
- Scan for a station in FM mode
- Automatic scan
- Manual scan
- FM Information
- Scan settings
- Audio settings
- BLUETOOTH
- Pair Bluetooth devices
- Tips:
- Listen Music from your Bluetooth device
- Hands free calling
- CD MODE
- CD Program
- Repeat one track
- Repeat all tracks
- SLEEP
- ALARM
- DTV
- Tuning in digital TV
- Source selection
- TV channel selection
- Return
- Volume
- Favourite(Digital TV only)
- Subtitle
- Information
- Audio
- TV/
- Menus
- Picture settings
- Channel Setup (Digital TV only)
- Channel Edit
- TV Setup
- Lock
- Functions settings.
- Electronic Programme Guide
- Setting a record from the EPG
- Viewing Recording
- Pause Live TV
- Please note:
- Digital text
- Teletext
- Cancel
- Selecting a page
- Reveal Information
- Fast text
- Page hold
- Text enlargement
- Common Interface Slot
- Warning! Switch off your TV before any modules are inserted in the CI slot.
- Common Interface Module Inserted
- Common Interface Module Removed.
- HDMI Setup
- Operating the TV
- PVR FILE SYSTEM MENU
- Key to abbreviations:
- CHECK PVR File System
- FORMATTING
- USB OPERATION
- Usage of USB device
- Notes
- FACTORY RESET
- PROTECTION DE L'ENVIRONNEMENT
- FONCTIONNEMENT DE VOTRE TÉLÉCOMMANDE
- FONCTIONNEMENT DE BASE
- Marche/Arrêt
- ÉGALISEUR
- Sous-titres
- Réglages d'image
- Verrouiller
- Réglage HDMI
- Avertissement :
- FONCTIONNEMENT DE L'USB
- UW AFSTANDSBEDIENING GEBRUIKEN
- ALGEMENE BEDIENINGEN
- In-/uitschakelen
- Ondertiteling
- Beeldinstellingen
- Tv-instelling
- Vergrendeling
- Opname bekijken
- Instellen HDMI
- Afkortingen:
- USB-BEDIENING
- Opmerking
- UTILIZZARE IL TELECOMANDO
- Blocco
- Slot Common Interface
- Impostazione HDMI
- Abbreviazioni:
- Nota
- PROVOZ DÁLKOVÉHO OVLADAČE
- ZÁKLADNÍ OVLÁDÁNÍ
- Zapnutí/vypnutí
- Informace
- Nastavení obrazu
- Zámek
- Nastavení funkci
- Zobrazení nahrávky
- Nastavení HDMI
- Vysvětlení zkratek:
- Poznámky
- ZÁKLADNÁ OBSLUHA
- Zapnutie/vypnutie
- Informácie
- Nastavenia obrazu
- Uzamknutie
- Nastavenia funkcií.
- Zobrazenie záznamu
- Nastavenie HDMI
- Upozornenie:
Brand : Soundmaster
Model : KTD1020
Category : DVD player