PCEWB 1187 - Ice Maker PROFICOOK - Free user manual and instructions
Find the device manual for free PCEWB 1187 PROFICOOK in PDF.
User questions about PCEWB 1187 PROFICOOK
0 question about this device. Answer the ones you know or ask your own.
Ask a new question about this device
Download the instructions for your Ice Maker in PDF format for free! Find your manual PCEWB 1187 - PROFICOOK and take your electronic device back in hand. On this page are published all the documents necessary for the use of your device. PCEWB 1187 by PROFICOOK.
USER MANUAL PCEWB 1187 PROFICOOK
PykoBODCTBO no 3KcNpyataun
m = 311
Thank you for choosing our product. We hope you will enjoy using the appliance.
Symbols in these Instruction Manual
Important information for your safety is specially marked. It is essential to comply with these instructions in order to avoid accidents and prevent damage to the appliance:

WARNING:
This warns you of dangers to your health and indicates possible injury risks.

CAUTION:
This refers to possible hazards to the appliance or other objects.

NOTE:
This highlights tips and information.
Contents
Overview of the Components. 3
Special Safety Instructions for this Appliance. 37
Intended Use 39
Unpacking the Appliance 39
Scope of Delivery 39
Overview of the Components 39
Figure A. 39
Figure B. 39
Notes for Use 39
Location 39
Electrical Connection 40
Standby (Standby Mode) 40
Using the "Touchscreen" 40
Ice Cube Size 40
Eco Save (Power Saving Mode) 40
Operation 40
Making Ice Cubes 40
Stop Ice Cube Production 40
Indicator Lamp (Ice Cube Tray Full) 40
Indicator Lamp (Water Refill) 40
Cleaning and Maintenance 41
Ice Cube Container 41
Casing and Interior 41
Drain Residual Water 41
Storage 41
Troubleshooting 41
Technical Data 42
Disposal 42
Meaning of the "Dustbin" Symbol 42
General Notes
Read the operating instructions carefully before putting the appliance into operation and keep the instructions including the warranty, the receipt and, if possible, the box with the internal packing. If you give this appliance to other people, please also pass on the operating instructions.
- The appliance is designed exclusively for private use and for the envisaged purpose. This appliance is not fit for commercial use.
- Do not use it outdoors. Keep it away from sources of heat, direct sunlight, humidity (never dip it into any liquid) and sharp edges. Do not use the appliance with wet hands. If the appliance is humid or wet, unplug it immediately.
- When cleaning or putting it away, switch off the appliance and always pull out the plug from the socket (pull the plug itself, not the lead) if the appliance is not being used and remove the attached accessories.
- Do not operate the appliance without supervision. If you leave the room you should always turn the appliance off. Remove the plug from the socket.
- The appliance and the mains lead have to be checked regularly for signs of damage. If damage is found the appliance must not be used.
- Use only original spare parts.
- In order to ensure your children's safety, please keep all packaging (plastic bags, boxes, polystyrene etc.) out of their reach.

WARNING:
Do not allow small children to play with the foil.
There is a danger of suffocation!
Special Safety Instructions for this Appliance

WARNING:
- Only use drinking water without additives! Additives remain in the water circuit and contaminate the appliance.
- Do not close or seal the vents in the housing.

WARNING:
- Do not damage the refrigerant circuit.
- In case of interruption of operation: To speed up the defrosting do not use mechanical appliances or other means.
- Do not store any explosive substances such as aerosol containers containing flammable propellant inside the appliance.

CAUTION:
Wait at least 2 hours when using the appliance for the first time or after transport so that the refrigerant can sink. Otherwise the compressor may become damaged.
- Always transport and store the appliance upright.
- Do not place the appliance on or directly next to heat sources such as ovens, radiators, etc.
- Place the appliance on a stable, horizontal, and level surface. Maintain a gap of at least 15cm to walls or objects.
- Do not repair the appliance by yourself. Please contact authorized personnel. If a power cord from this appliance becomes damaged, it must be replaced by a special cord which is available from the manufacturer or their customer service.
- This appliance can be used by children aged from 8 years and above and persons with reduced physical, sensory or mental capabilities or lack of experience and knowledge if they have been given supervision or instruction concerning use of the appliance in a safe way and understand the hazards involved.
- Children shall not play with the appliance.
- Cleaning and user maintenance shall not be made by children without supervision.
- Follow the instructions that we have included for you in the chapter on "Cleaning and Maintenance".
Intended Use
It is intended for use in the household and in similar applications, such as:
- In personal kitchen areas in shops, offices and other work areas;
- By guests in hotels, motels and other accommodation;
In bed and breakfast accommodation;
To use for camping;
In agriculture.
It is not intended for the following use:
- In catering and similar wholesale use.
This appliance may not be exposed to the rain.
Unpacking the Appliance
- Remove the appliance from its packaging.
- Remove all packaging materials like foils, filling materials, cable holders, and carton packaging.
- Check the scope of deliveries for completeness.
- If there are missing parts or obvious damage, do not use the appliance. Return it to your retailer immediately.

NOTE:
There may still be dust or production remains on the appliance. We recommend that you clean the appliance as described under "Cleaning and Maintenance".
Scope of Delivery
1 Ice cube maker
1 Fill cup (Measuring beaker)
1 Ice shovel
1 Replacement closure for drainage opening
1 Power supply cord
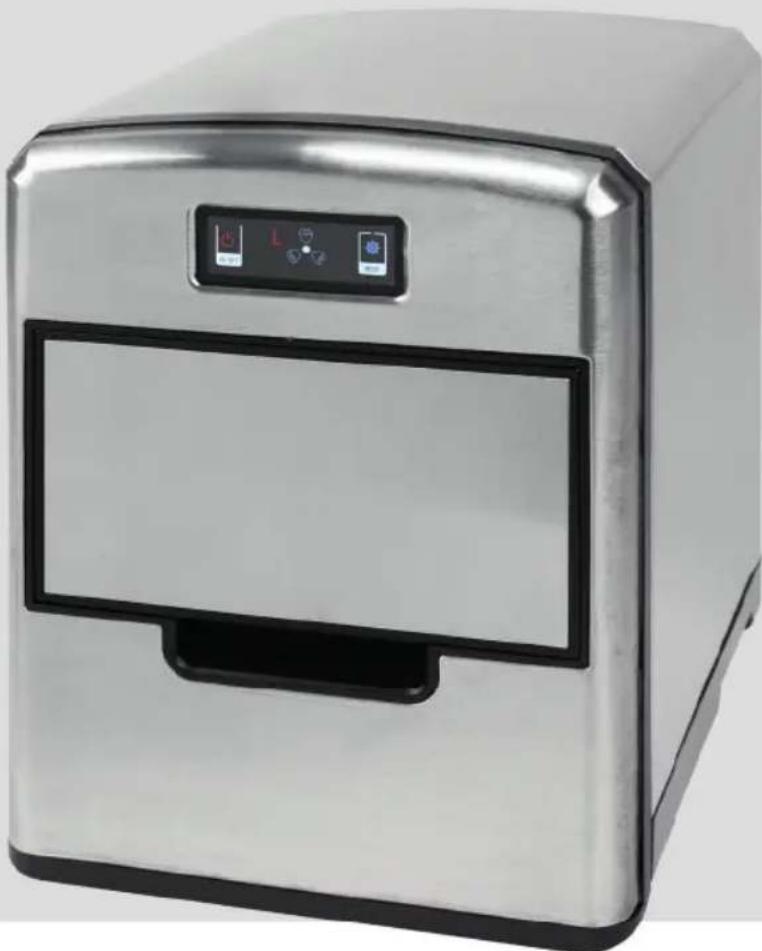
Overview of the Components
Figure A
1 Housing
2 Water tray (inside the appliance)
3 Ventilation openings
4 Mains connection
5 Transport recesses
6 Residual water - drainage opening
7 Water tank (inside the appliance)
8 Ice cube container
9 Display and touch screen ("Touchscreen" interface)
Figure B
| Shown on Display | Meaning |
| MODE Setting the size of the ice cubes | |
| ON/OFF | Start making ice cubes / Interrupt / finish making ice cubes |
| S Small | ice cube size |
| M Medium ice cube size | |
| L Large | ice cube size |
| Ice cube tray full | |
| Water refill | |
| Rotating display: Ice cube being made Flashing display: Fault | |
Notes for Use

CAUTION:
Please observe a waiting period of 2 hours before initial operation and after moving the appliance for the refrigerant to settle; otherwise the compressor can be damaged.
Location
- Place the appliance on a flat, water-resistant surface.
- Make sure that the placement allows sufficient air circulation for the appliance.
Electrical Connection
- Insert the appliance plug of the power supply cord into the socket on the back of the appliance.
- Be sure the voltage of the appliance (rating plate) corresponds with the mains voltage before connecting to mains power supply.
- Connect the appliance to a properly installed wall outlet. A signal tone will sound. The appliance is in standby mode.
Standby (Standby Mode)
- The buttons ON/OFF and MODE are illuminated in the display.
- The ice cube size that was last set is flashing.
Using the "Touchescreen"
The appliance is operated through the touchscreen. Touch the displayed buttons ON/OFF and MODE gently with your finger to execute the functions.
Ice Cube Size
You may choose between 3 sizes:
- small (S)
- medium (M)
- large (L)
Eco Save (Power Saving Mode)
Once the ice cube container is full the appliance switches into standby mode.
You benefit from better safety and lower energy consumption.
Operation
Making Ice Cubes
NOTE:
- For hygienic reasons do not use the ice cubes from the first cycle.
- The first few ice cubes will be small depending on the water temperature and ambient temperature. The ice cubes will only grow larger in the following cycle.
- For best results, aim for a water temperature of between 7^ and 20^ as well as an ambient temperature of between 16^ and 25^ .
-
Due to fast freezing the ice cubes can look "milky". This is the air trapped in the water and does not influence the quality of the ice cubes.
If you want clear ice cubes, use chilled drinking water which has firstly been boiled. -
Refer to figure A on page 3. Pull the ice cube tray about half way.
- Using the supplied measuring beaker as a guide, pour at least 0.8 drinking water, to a maximum of 1.7, into the water tank through the ice cube tray.

NOTE:
- You can also pull out the ice cube tray completely. By doing so you pour the drinking water directly into the water tank.
-
The FULL mark can be found on the water tank.
-
Close the ice cube tray.
- tart ice cube production by touching ON/OFF on the display. The indicator lamp rotates. The ice cube size that was last set is flashing
- Touching MODE on the display allows you to select the desired ice cube size. An ice cube making cycle lasts between 8 and 12 minutes. Keep the ice cube tray closed during ice cube making.
Stop Ice Cube Production
Touch ON/OFF on the display to stop ice cube production.

NOTE:
If operation is manually interrupted, water which is no longer needed is fed back to the water tank. Only then will the appliance stop. Half-finished ice cubes remain suspended on the cooling rods. As soon as it is sufficiently thawed, it will fall off and drop into the ice cube tray.
Indicator Lamp (Ice Cube Tray Full)
The temperature sensor stops the ice cube production as soon as the ice cube container is full.
The indicator lamp then lights up and you hear several signal tones. The appliance switches into standby mode.

NOTE:
When removing the ice cube tray, some water will drip through the holes onto the floor.
- Remove the ice cubes with the supplied ice cube scoop.
- The indicator lamp turns off and a few moments later ice cube production starts again.
Indicator Lamp (Water Refill)
The indicator lamp turns on if the water tank is nearly empty and a beep tone sounds. Ice cube production is automatically halted.
Empty the ice cube tray.
- Refill with potable water as described in chapter "Make ice cubes". Since there may still be water in the appliance, check the FULL mark in the water tank.
- Close the ice cube tray.
- Touch ON/OFF two times on the display to resume the ice cube production. The indicator lamp turns off.
Cleaning and Maintenance

WARNING:
- Switch off the appliance before cleaning and disconnect the mains plug.
- Never immerse the appliance in water to clean it. Doing so may lead to electric shock or fire.

CAUTION:
- Do not use wire brushes or other abrasive implements.
- Do not use harsh or abrasive cleaning agents.
- Do not use chemicals, acids, petrol or oil products.
NOTE:
- For hygienic reasons exchange the water in the tank after 24 hours.
- Remove the ice cube tray after use. If the water tank remains open no mould or bacteria can form.
Ice Cube Container
Remove the ice cube container and clean it with a mild detergent under running warm water.
Casing and Interior
- Clean casing and interior with a damp cloth.
- Use a diluted solution of vinegar and water.
Drain Residual Water
Drain the residual water if the appliance is not in use for a longer period of time. Rest the appliance on a table edge.
Take a bowl and hold it under the drainage opening for the residual water.
- Remove the dividing wall and pull the closure out of the bottom.
After the residual water has been drained, put the closure back into the opening and replace the dividing wall.
Storage
- We recommend that you keep the appliance in the original packaging if you do not intend using it for long periods.
- Always keep the appliance out of the reach of children in a dry, well-ventilated place.
Troubleshooting
| Problem Possible Cause | Solution | |
| No function. No power supply. Test the socket with another电器 appliance. | ||
| Plug in the mains plug correctly. | ||
| Check the main circuit breaker. | ||
| The appliance is faulty. Contact our service centre or a specialist. | ||
| Compressor noisy. | Mains power supply too low. | Turn the appliance off and check the mains power supply. |
| Indicator lamp ① ② ③ ④ flashes. | Water refill. Refill water | →“Making Ice Cubes”. |
| The ice cubes are too small. | Surrounding temperature is too high. | Place the appliance in a cooler location. Make sure there is adequate air circulation around the appliance. |
| The water temperature is too high. | Stop the ice production. Drain some water and refill cold water (max. 20 °C). | |
| Ice cube size has been wrongly selected. | Use the MODE button to select one of the larger ice cube sizes M or L. | |
| Smaller ice cubes are normal during the first production cycles. | ||
| Ice cubes are too large and stick together. | Water temperature or ambient temperature too low. | Stop ice cube production. Drain off some water and refill with lukewarm water (max. 35 °C). |
| The icon lights up. | The water tray is blocked by oversized ice cubes. | Wait until the ice cubes are loosened. Switch the appliance on again. Use ON/OFF to restart. |
Technical Data
Model: PC-EWB 1187
Voltage supply: 220-240 V~, 50 Hz
Power input: 0.68A
Ice cube production: 10-15 kg/24 hours
Water tank volume: approx. 1.7 litres
Refrigerant: R600a/23g
Protection class: I
Climate class: T
Net weight: approx. 9.20kg
The right to make technical and design modifications in the course of continuous product development remains reserved.
This appliance has been tested according to all relevant current CE guidelines, such as electromagnetic compatibility and low voltage directives, and has been constructed in accordance with the latest safety regulations.
Disposal
Meaning of the "Dustbin" Symbol
Protect our environment: do not dispose of electrical equipment in the domestic waste.
Please return any electrical equipment that you will no longer use to the collection points provided for their disposal.
This helps avoid the potential effects of incorrect disposal on the environment and human health.
This will contribute to the recycling and other forms of re-utilisation of electrical and electronic equipment.
Information concerning where the equipment can be disposed of can be obtained from your local authority.
Instrukcja obslugi
CTC Clatronic Sp. z 0.0
Ul. Brzeska 1
45-960 Opole
Usuwanie
Cnmbonbl npmeHemble B daHHOM pyKOBOCTBe noJIb3OBaTeIa
BaxhIbe pekomehdaun nOObecneueHnBaWei 6e3- onachoctn o6o3haueHbIOOCo6eHHOMy.Oba3aTeNbHO cNeuTte 3TNM pekomehdaunm,UTo6blpeDToBpaNTb HechacThb cnUaynnnoNOnMKy 3dennr:

PENEYIPPEXDEHNE:
PpeDynpexKaet o6 onaChocTn dIra 3IopOBbI N BO3MOK-HOM PNCKe IOnyueHn TpaBMbl.

BHIMAHNE:
Yka3bIbaeHa BO3MOxHyO ONaCHOCTb IIN3dJIIMN IN dpynx OKpyxaIOxN ppeDMTOB.

ПИМЕЧАнЯ:
Jaet COBtI INHOpMaIIO.
CoepkaHne
O63op detae np6opa. 3
O67a HOpMaun 56
Oc6bIe yka3aHnI NO texHnke
6e3onachoctn dnn 3Toro yctpoCTBa. 57
IpeHa3NaueHne 58
PacnaKOBka yctpoiCTBa. 59
KoMJIeKT nOCTaBKn 59
O63op detae np6opa. 59
Pucyok A. 59
Pucyok B. 59
PpmeuHnno nncnoB3OBAHn.. 59
PacnoJoxeHne 59
IoiKluoyehne K 3JIeKtpoceTn. 59
Standby (Dexyphbippekm) 59
IcnoIb3OBAHHe《CecOpHOro 3KpaHa》.59
Pa3mep Ky6nKOB Ibda 59
3KohomnHbpekm(Pekm3heproscbepekene)....59
Pa6ota. 60
PnirroTOBHeHne Ky6IKOB Ibda 60
OcTaHOBka npriroTOBneHn Ky6NkOB Nda... 60
Jamna-nHnDnKaTOp
I P E D U N P E X K D E H N E:
- История Толбко письевую Body 6e3 Добавок! Добавки OCTаЮТСВ В В ВODЯНOM KOНType И Загаянот рибор.
3aPpeaetc3aKpbBaTb INI IN repMeTu3nPOBaTb BeHTINJauHnHbIE OTBepCTn B Kopnyce.
3anpeaetcnaHapuatab kOHTyp oxJaXdEHHa.
B cnyuae npepbIBaHnra pa6oTbI: 3aPpeuaeTcra nCpOJIb3OBaTb MeTaNlueckne yCTpoiCTBa nIIN dpyrHe cpeiCTBa dIy uCKopeHnra pOuceca pa3MopaxnBaHnra.
He xpaHnte BHyTpni yCTpoiCTBa KaKne-JIbO B3pbIOoNacHbie npedMeTbI, TaKne KaK a3pO30JbHbIe 6aJIIOHcNk, CoedePxaUne JIeKOBocPiamaHЯIoUncEa BeIecTBA.
BHIMAHHE:
Ipeed neBbIM nCNoIb3OBAHnem npnbopa, a TaKxe nocJe TpaHCnOpTnPoBKN IOJoxdnte He MeHee 2-x YacOB, yTO6bl OxJaXdaIOUaJg XnIKoCTb OTcToJnAcB. B IpOTnBHom cIyuae KOMnpEccop MoKet CnOMaTbcra.
- Bcerda nepebo3nte i xpaHnte np6op B BeptnkaJbHOM noJooXeHn.
3anpeaetcyaTahabnBaTb np6Op Ha orOHB nIIN pIOM C NCTOCHKAMN HArpeBa, TaKIMN KaK PINTbl, paDnaTOpbI IN T.D. - UctaHaBJIbBaIte npi6Op Ha poBHyIO, yCTOuHByIO, rOpN3oHTaJIb-HyIO IOBepxHOcTB. OTeHbI N dpyrIX ppeMToB OCTaBJaIte pacCTOJHHe 15 cm.
He OtpeMoHTnPoBaTb yCTpoiCTBO camOCToTeJbHo. 6paTneCb K aBTOpN3OBaHHOMy npopeccnoHaIy. EcIn ceTeBoi shHyp
Iprn6opa 6ydet NOBpeXdeH B IpoceCCE 3KcNpyaTauu, ero Heo6xOIMO 3aMeHNTb CneuaJIbHbIM UHypOM, NOCTaBJIeEMbIM N3rTOBHTeIeM IIN peMOHTHOcLyX60J.
MoxKHO BbIbpaTb OINH 33 pa3MepoB:
- He60JIbIe (S)
- cpeHne (M)
- KpyNHbIe (L)
3KOHOMUHbIpeXIM(Pexm3HePrc6epeXeHnA)
Iocne HanoHHeHnKoHTeHepa Ky6NkoB Ibda, np6Op nepeKIOuHaTcBa DexKypHb peKIM.
BbI n3BNeueTe noJIb3y n3 ycIIeHHo6eOaHocTn n IOHNKeHHOrO 3HeprONTope6JIeHn.
Pa60ta
PnroTOBHeHne K6nKOB Jbda

ПРИМЕЧАнЯ:
- Pto coobpaekhenm rnnneHb He nCnoJb3ynte Ky6nKn Ibda n3 nepBvHORO uKnPa npiroTOBHeHn Ky6nKOB.
- IepBbIe HeckoBko Ky6nOB Nbda 6yDyT He6oJbWoRa3Mepa; 3TO 3aBNCIT OT TempepaTypbI BODbl N TempepaTypbI OkpykaHoue CpeDbI. Ky6nKn Nbda 6yDyT 6onbWe TOnbKO BO BpEMr CneDuOJIero UNKla.
-ПЯ NOЛУЕнHA JYUHINX pe3yIbTaTOb, CTapaITecb, YTO6bI TEMpePaTypa BOdI bIa MExdy 7°C n 20°C, a TeMnepaTypa OkpyxAnOeJ cpeBIMexdy 16°C n 25°C.
BcneCTBnE 6bICTPOI 3AMOP0KIN Ky6NKMOYr NMeT 《MONOHbI》UBeT,KOTOpBI OByCNOBEn COePka- UIMCBA BOe BO3dyXOM.3TO He BInraTe Ha KaueCTBO K6NKOB Nbda. -
EcnHn HyxHo nOyHb Ky6Kn NcTOro Ibda, nCnObl3yIte OxnaJdeHHyIO nITbeByIO BDOy, KOtOpyo npedBapntelbHO npoknpiTNI.
-
Cm. pnc. A ha ctp. 3. BbITaHHTe NOTOK dIg Ky6IKOB JbDa npIMepHO HanoIOBHy.
2.Испьзу IMeHоуСВа B KOMПЕКTe MeH3ypKBy Ka-ueCTBe Меры, HaneITE B pe3epByap, Yepe3 NotOKДЯ КБИкOBлбДa,ΚΑМИнИМуM,0,8ЛПNTbeBOI BoDbI,Ho He 6oNbIe 1,7 n.

ПРIMЕЧАнЯ:
IOTOKKy6IKOBNbdaMOXHO TaKKe BbITaHyTb NOHOCbIO.CdEnab3TO,MOXHO NITbNITBeByIO BOy HENOCpeDCTBeHHO Bpe3epByap DnBbbl.
OTMeTkyFULLMOxHnHaHTnHape3epByapeIINBAObl.
- 3akpoTe nToK dIy Ibda.
- HauHnTE npoecc reHeepnpOBaHnIbJa, HaxKaB KOnkky ON/OFF Ha nCnIeE. HndkaTOp 6yJeT BpaTaBcR. Mraet noCleHn yCTaHOBJIeHHbI pa3Mep Ky6NKOB nbda.
5.Пикховене K MODE HaДиспee NO3BOIT Bbl-6paTb HxHbI pa3mep Ky6KOB nbda.ОднцКл поИЗВОДСТВа nbda ДПNTcR O 8do 12 MmHT.Bo Времпpoцecca reHepuPObAHЯ nbda loTOK dIЯ Ky6KOB nbda DoJXeH 6blt 3akpbIt.
OctaHOBka npiroTOBJIeHn Ky6NKOB JbDa
KoCHNTecb KONKN ON/OFF Ha DnCnnee, YTObI OCTaHOBtB rHeepnpOBaHne Ibda.
ПРIMECHАнг:
Ecni npouec6bInpepBaH BpyHyIO, IINHnRA BOa 6ydet OTBeDeHa O6paTHo B pe3epByap. TOnbKO nOcne 3Toro yCTpOCTBO OCTaHOBNTc. HAnOIOBHy cDeNaHHbIe KybIK Nbda OCTaOTcN IOBWeHHeHIM Na OxnaJdIo- uix cTepxkHex. KaK ToJIbKO OHN DOCTaTOH0 OTaHT, OHN cNaADY C HNX IN NonaUT B JNOTOK dNRA Ky6IKOB Nbda.
Jamna-nHnkaTop
KoHTeHepdny Ky6nKOB Nbda
CHIMITE KOHTeHep IJIy KByKOB JbDa N OcNCTte erO C NOMOuI MOrKOro MOUcero CpeDCTBa NOd PpOTouHOI TENIOI BOIo.
Kopnyc n BHyTpeneHne NOBepxHOCTn
OuHauTe KOpNc HByTpEHHne NOBepxHOCTn C NOMObIyOBNaXHeHHoT KaHn.
- IcnoIb3yIte pa36abneHbI pactBOp yKcya n BoDbI.
CnB BoDbl
Ecnn yctpoCTBO He nCnOJIb3ayTc B TeueHne DInTeJb-Horo nepnoDa BpeMeHN, CneIte OCTaBwUIOCA BOy.
IocTaBbTe ycTpoiCtBO Ha KpaI cTOna.Bo3bMInTe KyBUnH n DePKeNte ero noD dpeHaxHbIM OTBepCTnEM ocTaBWeJcR BObl.
CHMMTE pa3dienTeIbHyIO CTeHky N BbITAHNTe KOxyxC HxKHeY qACTN.
- Pocne cInBa ocTabWeiC BODI NOCTaBtKe KoxyX o6paTHo B OTBepCTme N BepHnTe Ha MeCTO pa3dJIuTEnbHyIO CTeHky.
XpaHeHne
- PekomeHnyetc xpaHnTb yCTpoICTBO B erO opmHaHbHOyynakOBke,ecnBb He nHaHpyTe NcNoJb30BaTbeeroBTeHeMeDnITeJIbHOrBpemeHN.
Bcerda xpaHnTe yctpoNCTBO B cyXOM, xopoO npoBeTpnaeMOM MecTe, HeIOCTyHOM DJIa DeTei.
YcTpaHHe HEnCnpaBHOCTe
He donyckaIte HnnpaBnIbHO yTINI3aIMN OTO HAHOCT BpeD OKpykaIOUe CpeE N OKa3bIBaET HeRaTINBHOE BO3DeIcTBNe Ha 3IDOpOBBe IIOJe.
Oka3bIaBaiTe codeeCTBne nporpaMMe yTuIN3aUNn dpyrIM fopmam nepepa60TKn 3NeKtpoHHoN n3NeKtpuYeckoTexHKn.
HOpMaIuO O NyHKTx yTIN3aUN 6bITOBoT EHXNMOXHO NOJyUHTB B MECTbIX OPraHAX BnactN.
a
PC-EWB 1187
50.240-220
0,68 1
aLw 24/05 15-10
1.7 1
R600a/23
I.
T.
9,20 j 1
jglzll 3a aagai g i jg jg jg jg jg jg jg jg jg jg jg jg jg jg jg jg jg
L
jg jie CE jglj
gj 1 g j 1 g j 1 g j 1 g j 1 g j 1 g j 1 g j 1 g j 1 g j 1 g j 1 g j 1 g j 1 g j 1 g j 1 g j 1 g j 1
.
jglsl jolal
"aaalgjoo"
3a1y8nll 1026b jnojolll pue yu:luo
a. jbjb Cjbjd A
aalalalalalalalalalalalalalal
a a b 10b1
jglal g. algb sxlal jgal pluai w ay 15! auiub olub iay p
aolbl wg axaii daiw laiagc gao
Jj j 05dall wgl jolll jj
Juaolw aaxial 0d 0do 0aal w do ofo
J
#
aolwuyguyu 151 ydyaguo jglqy hao eloai
. 4. ab = i
4g 1jLg jIabJglg Jg 10
S APQ = S AQP + S_ PQR
ab = 30

aclw24ggo
[goa oal]jz jai 1. glll coo So JjJ .
S OBC = S AOB + S_ BOC
L
aillolbl cai aiao lalig laibig tlluao aggo
jUWgJUWJU
bi. allw wai zai
.
Lgolglb
| الله | الله |
| . . . . . . . . . . . . . . . . . . . . . . . . . . . . . . . . . . . . . . . . . . . . . . . . . . . . . . . . . . . . . . . . . . . . . . . . . . . . . . . . . . . . . . . . . . . . . . . . . . . . . . . . . . . . . . . . . . . . . . . . . . . . . . . . . . . . . . . . . . . . . . . . . . . . . . . . . . . . . . . . . . . . . . . . . . . . . . . . . . . . . . . . . . . . . . . . . . . . . . . . .. . . . . . . . . . . . . . . . . . . . . . . . . . . . . . . . . . . . . . . . . . . . . . . . . . . . . . . . . . . . . . . . . . . . . . . . . . . . . . . . . . . . . . . . . . . . . . . . . . . . . . . . . . . . . . . . . . . . . . . . . . . . . . . . . . . . . . . . . . . . . . . . . . . . . . . . . . . . . . . . . . . . . . . . . . . . . . . . . . . . . . . . . . . . . . . . . . . . . . . . . . . . . . . . . . . . . . . . . . . . . . . . . . . . . . . . . . . . . . . . . . . . . . . . . . . . . . . . . . . . . . . . . . . . . . . . . . . . . . . . . . . . . . . . . . . . . . . . . . . . . . 1 . 1 . 1 . 1 . 1 . 1 . 1 . 1 . 1 . 1 . 1 . 1 . 1 . 1 . 1 . 1 . 1 . 1 . 1 . 1 . 1 . 1 . 1 . 1 . 1 . 1 |
aIg
:dll lolu wU 2000 jglq
.4Lub1 4
JU JU
gall Ugoo
j_4 = 1
jLJIJIbI Ie
. 1
pduwyl
:Joo aolol l yloosyI g Jlbl pduowu
J 1 J 1
dolly jslal no lae g yg. dlaal yjll pl
1y 1
puii iie puiu
.
3
- 64
- 63
- j4aJ 10
63.
aole 1
g 100000000000000000000000000000000000000000000000000000000000
山
jglpluulwuyu wui j Jolu. uua 1d
pLsWyI yLjg
j( 4,0)
GARANTIEKARTE
warranty card · garantiekaart · carte de garantie · scheda di garanzia · tarjeta de garantia · cartao de garantia · garantikort · karta gwarancyjna · zaru.cnli list · kartica jamstva · carte de garantie · fapaunnoHa Kapta · zaru.cnly list · garancijski list · garanciajegy · rapaHTiHmΦOpMynap · fapaHTnHbTanoH
PC-EWB 1187
24 Monate Garantie gemäß Garantieerklarung - 24 months warranty according to warranty declaration - 24 maanden garantie volgens garantieverklaring - 24 mois de garantie selon la déclaration de garantie - 24 messi de garanzia seconde la dichiarazione di garanzia - 24 meses de garantia de acuero con la déclaracion de garantia - 24 mezes de garantia, de accordo a sua déclaration de garantia - 24 manedes garanti i henhold til garantibeteingenslese - 24 misiace gwarancjna podastawie owiadczcnia gwarancjnego - zaruka 24 mesiocu podle prohlasenf o zaruce - 24 mesecno jamstvo u skladu s jarnstvenom deklaracionjcm - 24 luni garantie conform declaratie de garanjie - 24 meeca rapanuca a cbotertcne c rapaunohnana dekpanaqna - 24-measa nza zaruka podfa vhylasenia o zaruke - 24-mesecna garancija, skladno z garancjsko izavo - 24 honap garancia a garanciafeftetelekben leirtak szerint - rapahtra na 24 mioud iinobidno hao npo rapahtio - rapaHTN - 24 meca cornaccho zanneneHHBM rapaHTHBM npaBnAM -
Kaufdatum, Handlsterpmel, Unterschied - date of purchase, dealer stamp, signature - aankoepdatum, dealerpmel, handbeking - date d'achat, tampon du concessionaire, signature - data di acquisto, timbre di rienditore, forn - fecha de compra, sellio del distribuiator, forn - data de compria, carimbo di distribuiator, assinatura - kipsgsdato, forhandlisterpmel, signature - data zakupi, pieczec spradleyce, podis - datum zakupeni, rulite prodede, podis - datum koupivne, zig troveca, podis - data ochichyde, stampla furnizatori, semmata - Data ha nojiknaya, neuva na Pogodava, Pogod - datum nikukpa, pecliatka obchodnika/ predajcu, podis - datum nikukpa, zig troveca, podis - visilaris datuma, kereskedé belyegroje, alárikas - data ngobanha, nevika nogodana, nigoc - Data npovopetemir, ilamrnpogodana, ngoc -
PROFI COOK.
www.proficook-germany.de