PCHGA 1196 - Water dispenser PROFICOOK - Free user manual and instructions
Find the device manual for free PCHGA 1196 PROFICOOK in PDF.

| Product type | Hot beverage dispenser |
| Brand | ProfiCook |
| Model | PCHGA 1196 |
| Maximum capacity | 7 liters |
| Electrical power | 1500 W |
| Voltage / Frequency | 220-240 V ~ 50/60 Hz |
| Protection class | I |
| Net weight | 1.8 kg |
| Adjustable temperature range | 30 °C to 100 °C |
| Functions | Heating and keep warm |
| Control type | On/Off switch I/O and temperature adjustment knob |
| Light indicators | Red heating indicator light, green keep-warm indicator light |
| Safety | Lid locking; lid with handle; self-closing tap |
| Tank material | Metal (not exactly specified) |
| Cleaning | Exterior: damp cloth; interior: soapy water; descaling with citric acid |
| Tap | Removable for cleaning (silicone cone) |
| Level indicator | Removable transparent tube with silicone seals |
| Delivery contents | Tank, lid with lock, level indicator, tap, power cable |
| Intended use | Heating and boiling beverages only (not perishable foods) |
| Safety warnings | Risk of burns from hot surfaces; do not immerse; do not use outdoors |
Frequently Asked Questions - PCHGA 1196 PROFICOOK
User questions about PCHGA 1196 PROFICOOK
0 question about this device. Answer the ones you know or ask your own.
Ask a new question about this device
Download the instructions for your Water dispenser in PDF format for free! Find your manual PCHGA 1196 - PROFICOOK and take your electronic device back in hand. On this page are published all the documents necessary for the use of your device. PCHGA 1196 by PROFICOOK.
USER MANUAL PCHGA 1196 PROFICOOK
natural_image
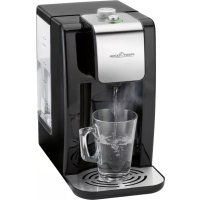
Exterior view of a stainless steel coffee water heater with control knobs and a digital display (no visible text or symbols)Bedienungsanleitung
Thank you for choosing our product. We hope you will enjoy using the appliance.
Symbols in this Instruction Manual
Important information for your safety is specially marked. It is essential to comply with these instructions in order to avoid accidents and prevent damage to the appliance:

WARNING:
This warns you of dangers to your health and indicates possible injury risks.

CAUTION:
This refers to possible hazards to the appliance or other objects.

NOTE:
This highlights tips and information.
Contents
Overview of the Components ....3
General Notes ......35
Special Safety Instructions for the Appliance ....35
Unpacking the Appliance 37
Overview of the Components / Scope of Delivery .....37
Notes for Use 37
Switching the Appliance On / Off 38
Operation 38
Cleaning 38
Decalcification 39
Storage 39
Troubleshooting 39
Technical Data....40
Disposal....40
General Notes
Read the operating instructions carefully before putting the appliance into operation and keep the instructions including the warranty, the receipt and, if possible, the box with the internal packing. If you give this appliance to other people, please also pass on the operating instructions.
- Only use the appliance for the intended purpose.
- Do not use it outdoors. Keep it away from sources of heat, direct sunlight, humidity (never dip it into any liquid) and sharp edges. Do not use the appliance with wet hands. If the appliance is humid or wet, unplug it immediately.
- When cleaning or putting it away, switch off the appliance and always pull out the plug from the socket (pull the plug itself, not the lead) if the appliance is not being used and remove the attached accessories.
- Do not operate the appliance without supervision. If you leave the room you should always turn the appliance off. Remove the plug from the socket.
- The appliance and the mains lead have to be checked regularly for signs of damage. If damage is found the appliance must not be used.
- Use only original spare parts.
- In order to ensure your children's safety, please keep all packaging (plastic bags, boxes, polystyrene etc.) out of their reach.

WARNING:
Do not allow small children to play with the foil. There is a danger of suffocation!
Special Safety Instructions for the Appliance

WARNING: Risk of burns!
During operation and afterwards, the temperature of the accessible surfaces will be very high.
• Always hold the lid by the handle.
• Take caution when opening the lid, extremely hot steam can emerge from the tank.

WARNING:
- The liquid level must be between the MIN and MAX mark.

WARNING:
- Always make sure that the lid is securely closed and the lock mechanism of the lid is locked.
-
Do not open the lid during operation.
-
The appliance is not suitable for outdoor use.
- In order to ensure secure and proper functioning of the appliance, only use it at ambient temperatures between 0 °C and 40 °C.
- The appliance must not be placed on a surface where it is in danger of being hit by a jet of water.
- Only use the appliance in a dry, indoor area. Do not place the appliance near a hot gas or electric burner or near hot surfaces.
- Use the appliance only on a level surface. The appliance must be horizontally levelled and stand securely. Take into consideration the great weight of the appliance when it is completely filled.
- Do not move the appliance and do not touch it when it is working.
- The appliance must only be installed in places where it can be supervised by trained staff.
- This appliance is intended for heating and boiling beverages. Do not use this appliance for heating perishable food (such as milk or beverages containing eggs).
- Do not repair the appliance yourself, but always contact an authorized technician. If the supply cord is damaged, it must be replaced by the manufacturer, its service agent, or similarly qualified persons in order to avoid a hazard.
- This appliance can be used by children aged from 8 years and above and persons with reduced physical, sensory or mental capabilities or lack of experience and knowledge if they have been given supervision or instruction concerning use of the appliance in a safe way and understand the hazards involved.
• Children may not play with the appliance.
- Keep the appliance and its cord out of the reach of children younger than 8 years.
- Cleaning and user maintenance may only be performed by trained staff.

CAUTION:
- Do not immerse the appliance into water for cleaning.
- The appliance must not be cleansed using a jet of water.
- Clean the appliance after each use.
- Follow the instructions given in the chapter "Cleaning".
Unpacking the Appliance
- Remove the appliance from its packaging.
- Remove all packaging material such as plastic films, filler material, cable ties and cardboard packaging.
- Check the content for any missing parts.
- In the event that the packaging content should be incomplete or if damages are noticeable, do not operate the appliance. Return it to the dealer immediately.

NOTE:
There may be dust and production residue on the appliance. We recommend cleaning the appliance as described under "Cleaning".
Overview of the Components / Scope of Delivery
1 Tank
2 Lid
3 Lock mechanism of the lid
4 Lid handle
5 Tank handles (left and right)
6 Water level indicator
7 Mains cable with plug
8 On/off switch I/O with power indicator light
9 Green indicator light "keeping warm"
10 Red indicator light "heating"
11 Tap
12 Temperature control
Notes for Use
Preparation
- For hygienic reasons, the appliance should be filled with approx. 5 litres of water before using it for the first time. Boil this water for approx. 5 minutes at the highest temperature. Then drain the water from the tank.
• After that, rinse with fresh water and again drain this water. - Clean the lid thoroughly with warm water and a mild detergent. Rinse the lid with fresh water and dry thoroughly with a soft cloth.
Electrical Connection
Check if the mains voltage to be used matches the voltage of the appliance. The details can be found on the information plate (under the appliance) and in the chapter "Technical Data".
Connected Wattage
The total power consumption of this appliance can be up to 1500 W. With this connected load a separate supply line protected by a 16 A household circuit breaker is recommended.

CAUTION: Overload!
- If you use extension leads, these should have a cable cross-section of at least 1.5 ~mm^2 .
- Do not use any multiple sockets, as this appliance is too powerful.
Switching the Appliance On/Off
Power On
- Switch the on/off switch I/O to position I. The control light in the on/off switch I/O lights up red.
- Turn the temperature control clockwise to the desired temperature.
i NOTE:
Depending on the ambient temperature and the content that is being heated in the tank, differences between the set and the actual temperature can occur.
To Turn Off
- Turn the temperature control counterclockwise as far as it will go to the position ^ C.
- Switch the on/off switch I/O to position O. The control light in the on/off switch I/O turns off.
Operation
Heating and Keeping Warm
- Fill the potable liquid into the appliance. Note the MIN and MAX mark.
- Insert the mains plug into the socket.
- Place the lid in such a way on the appliance that the steam vent is located in the back half of the lid. Before use, turn the lid and lock it with the lock mechanism of the lid. Slide the lock mechanism towards 🔒
- Set the On / Off switch to the I position.
- Turn the temperature control clockwise to the desired temperature. The temperature control can variably adjust the temperature between approx. 30 °C - 100 °C .
i NOTE:
- The red heating control light will be lit during the heating period.
-
When the set temperature is reached, the heating control light switches off and the green "keeping warm" control light turns on; the appliance remains in "keeping warm" state and holds the set temperature until it is switched off.
-
In order to drain liquid, pull the tap up or push it down and hold it in this position, until the cup or tank is filled. Release the tap after the tapping process, it shuts off automatically. For a steady flow, push the tap up or down until it locks, after overcoming a slight resistance; the tap remains open.
- Due to the system, a residue of approx. 0.8 litres of liquid remains in the tank. This amount can be reduced by cautiously tipping the tank forward while draining the liquid.
Pause Operation/End Operation
- Turn the temperature control (10) counterclockwise as far as it will go to the position °C.
- Switch the on/off switch I/O to position O to end the heating or boiling process.
3. ⚠️ WARNING:
Danger of scalding due to escaping steam!
Be particularly careful when removing the lid.
To open the lid, slide the lock mechanism towards and turn the lid.
- Remove the plug from the socket.
WARNING: Risk of burns!
The housing will be hot during use, do not touch and let the appliance cool down before storing it.
Cleaning
WARNING:
- Always turn the appliance off before cleaning and disconnect the power plug. Wait until the appliance has cooled.
- Never immerse the appliance into water or other liquids.
- The appliance is not suitable for cleaning with a jet of water. Therefore, do not clean this appliance with a pressure water jet!
- Never use flammable detergents (e.g. spirit) because they cause a higher risk of fire or explosion when the appliance is next used.

CAUTION:
- Do not use any wire brush or other abrasive objects.
- Do not use any acidic or abrasive detergents.
- Clean the appliance regularly.
- Clean the outside with a damp cloth. A mild detergent can be used for heavy dirt. Do not use aggressive cleaning agents or sprays.
- Thoroughly wash the inside of the tank and rinse with fresh water.
- Only use a soft cloth and never use any kind of abrasive cleaners, which might cause scratches.
- Do not use steel wool for cleaning. Small pieces might come off the steel wool, get stuck in the tap, and cause damage to the sealing surface.
- Use a soft, dry cloth to dry and polish the surface after cleaning.
- Make sure the appliance was cleaned properly before storing it in a dry place.
Tap
When used daily, the whole tapping mechanism must be cleaned once a week, when used more rarely, it does not have to be cleaned that often.
- Unscrew the tap's upper part for cleaning, detach the silicon cone, and clean all parts in warm water with a mild detergent. Rinse with clean water.
- Clean the inside of the tap and the connection to the tank with a small bottle brush.

CAUTION:
Never push the brush into the assembled tap because it would damage the silicon cone.
-
Wipe the interior of the tap's bottom part dry.
-
Firmly push the silicone cone onto the tap's upper part until it clicks into place.
-
Screw the tap's upper part back on.
Water Level Indicator
- Unscrew the knurled nut from the water level indicator.
- Pull the transparent tube out of the sleeve. If needed, you may also unscrew the sleeve.

NOTE:
Make sure that the two silicone seals are not getting lost.
- Clean the individual parts in warm water to which mild detergent has been added. Rinse with clean water.
- Screw the sleeve back onto the drain tap. The lower thread must no longer be visible.
- Insert the tube together with a silicone seal at the bottom into the sleeve.
- Before screwing the knurled nut back on insert the second silicone seal into the upper part of the tube.
Decalcification
- The frequency of the decalcifying operation depends on the hardness of the water and on how often the appliance is used.
- Calcareous water causes a layer of lime to settle in the tank, especially at the bottom of the tank, which can influence the heating capacity of the appliance.
- Please do not use vinegar but a commercially available decalcification agent on the basis of citric acid. Only use the quantities stated in the instructions.

NOTE:
After decalcifying the appliance boil fresh water in it several times in order to remove any residues. Do not use this water for consumption.
Storage
- Clean the appliance as described and allow it to dry.
- We recommend that you keep the appliance in the original packaging if it will not be used for long periods.
- Always store the appliance out of the reach of children in a dry, well ventilated place.
Troubleshooting
| Problem Possible Cause Remedy | ||
| It is not possible to switch the appliance on. | The appliance has no power supply. | Check the socket with another appli-ance. |
| Plug in the mains plug correctly. | ||
| Check the main circuit breaker. | ||
| The appliance is faulty. Contact our service centre or a specialist. | ||
| After the appliance has been used without or with too little liquid, the appliance has not cooled down sufficiently. | Fill with more liquid and let the appli-ance cool down a bit. | |
| Problem Possible Cause Remedy | ||
| The appliance switches into keeping warm mode before reaching the boiling point. | The inside of the appliance is stained with excessive limestone or the circuit of the wall socket is overloaded. | Descale the appliance as instructed. |
| Check the mains connection. | ||
| The appliance does not switch into keeping warm mode. | The lid is not closed properly. Close the lid and lock it with the lock mechanism of the lid. | |
Technical Data
Model: PC-HGA 1196
Power supply: 220 - 240 V\~, 50 / 60 Hz
Power consumption: 1500 W
Protection class:....I
Capacity: max. 7 litre
Net weight: .... approx. 1.8 kg
The right to make technical and design modifications in the course of continuous product development remains reserved.
This appliance has been tested according to all relevant current CE guidelines, such as electromagnetic compatibility and low voltage directives, and has been constructed in accordance with the latest safety regulations.
Disposal
Meaning of the "Dustbin" Symbol

Protect our environment: do not dispose of electrical equipment in the domestic waste.
Please return any electrical equipment that you will no longer use to the collection points provided for their disposal.
This helps avoid the potential effects of incorrect disposal on the environment and human health.
This will contribute to the recycling and other forms of re-utilisation of electrical and electronic equipment.
Information concerning where the equipment can be disposed of can be obtained from your local authority.
Instrukcja obsługi
CTC Clatronic Sp. z o.o
Ul. Brzeska 1
45-960 Opole