GAR 960 T - Lawn mower Güde - Free user manual and instructions
Find the device manual for free GAR 960 T Güde in PDF.

User questions about GAR 960 T Güde
0 question about this device. Answer the ones you know or ask your own.
Ask a new question about this device
Download the instructions for your Lawn mower in PDF format for free! Find your manual GAR 960 T - Güde and take your electronic device back in hand. On this page are published all the documents necessary for the use of your device. GAR 960 T by Güde.
USER MANUAL GAR 960 T Güde
natural_image
Two red and black lawn grassing machines, one with a 'GDP' logo, displayed against a plain background (no text or symbols on the vehicles themselves)GAR 960 T
95449
GAR 680 T
95459

ENGLISH Please read the instructions carefully before starting the machine.
text_image
Scanned document page with placeholder text and a blue circular button labeled 'OK' in the bottom right corner.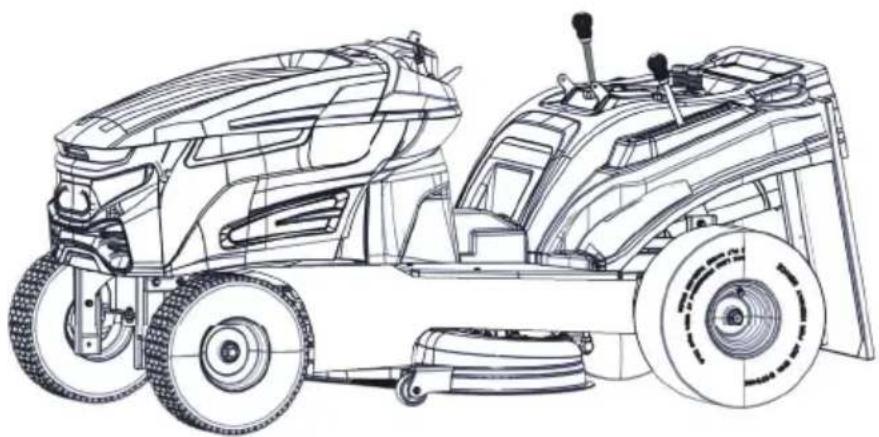
natural_image
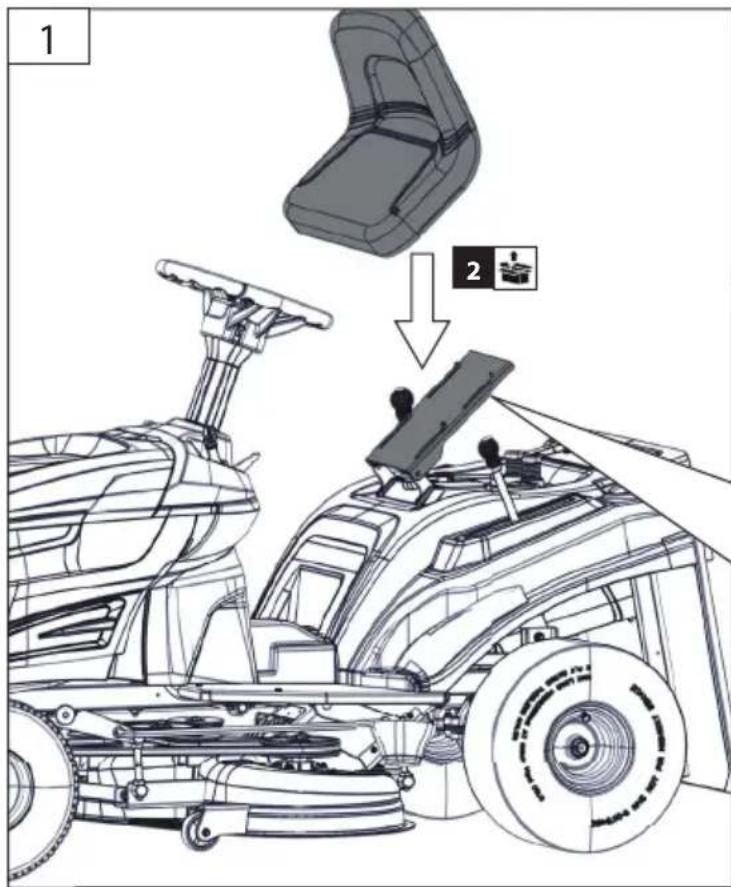
Technical line drawing of a tractor with visible wheels and suspension components (no text or symbols)1
2
19
3
19
4
5
6
natural_image
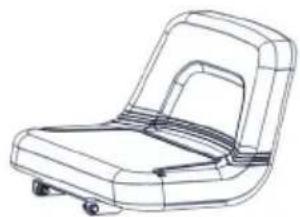
Line drawing of a car seat with wheels and handle (no text or symbols)
9
21

10

1
15
text_image
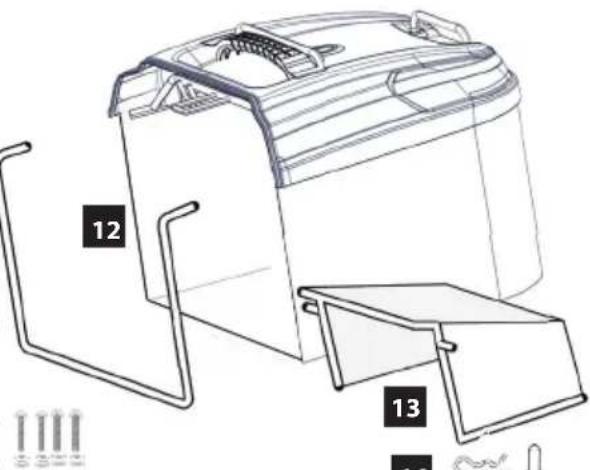
Technical diagram of a portable air purifier with labeled parts and component annotations20


22
18


15
4x
19
5x
natural_image
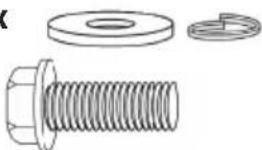
Technical illustration of a bolt and nut assembly (no text or symbols)21
4x
1x
8
14
1x

Gerätebeschreibung
EN Device description FR Description du dispositif IT Dotazione ES Descripción del dispositivo NL Beschrijving van het apparaat CZ Popis zařízení SK Opis zariadenia PL Opis urządzenia HU Eszközleírás

text_image
Technical diagram of a grassy tractor with numbered parts and exploded views, showing engine, fan, and wheel assembly.(1) Lenkrad
EN Steering wheel FR Volant IT Volante ES Volante NL Stuurwiel CZ Volant SK Volant PL Kierownica HU Kormánykerék
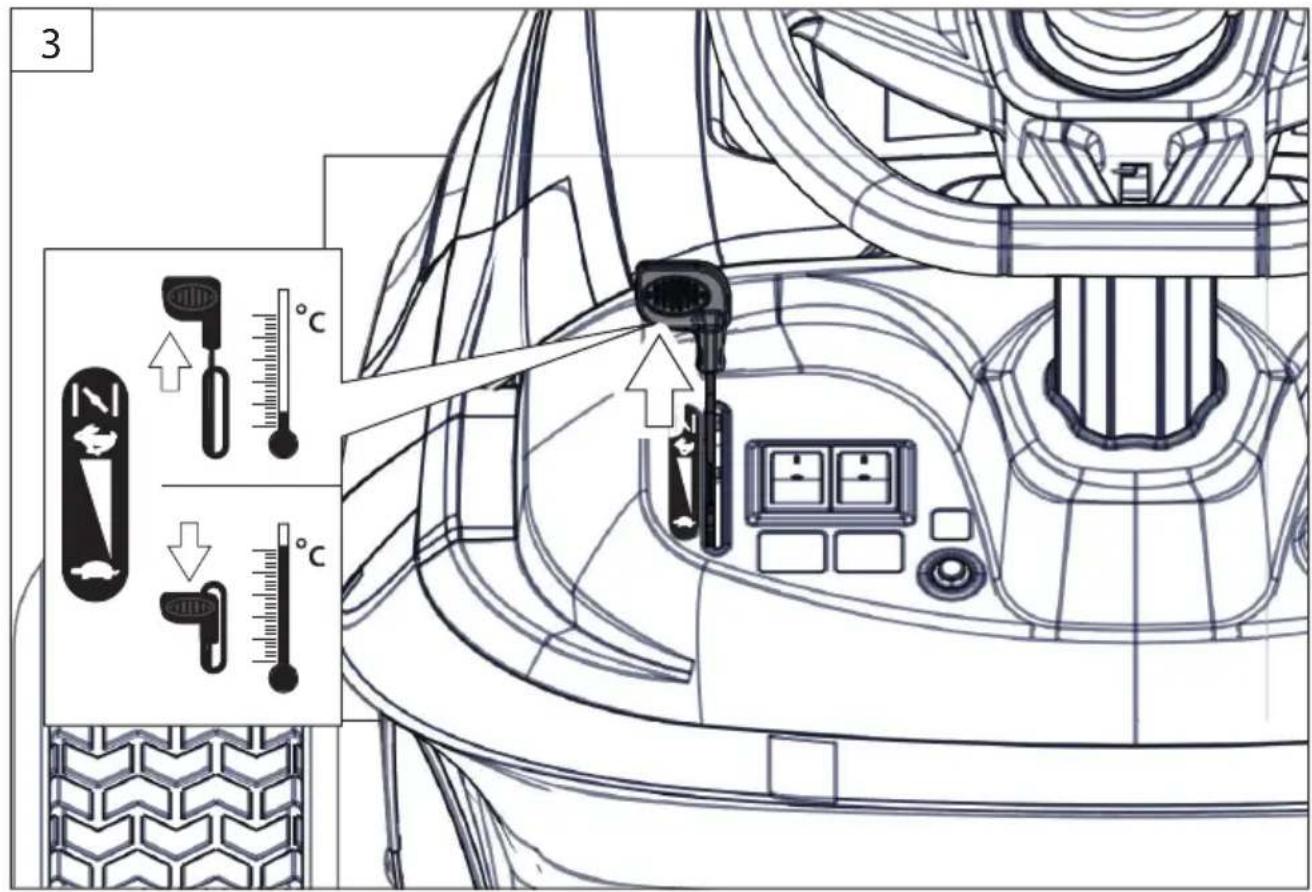
EN starting-up the device FR Mise en service IT Messa in funzione
ES Puesta en marcha NL Toestel in gebruik nemen cz Uvedení do provozu
natural_image
Three black-and-white icons: warning triangle, keyhole, and circuit symbol (no text or labels)
text_image
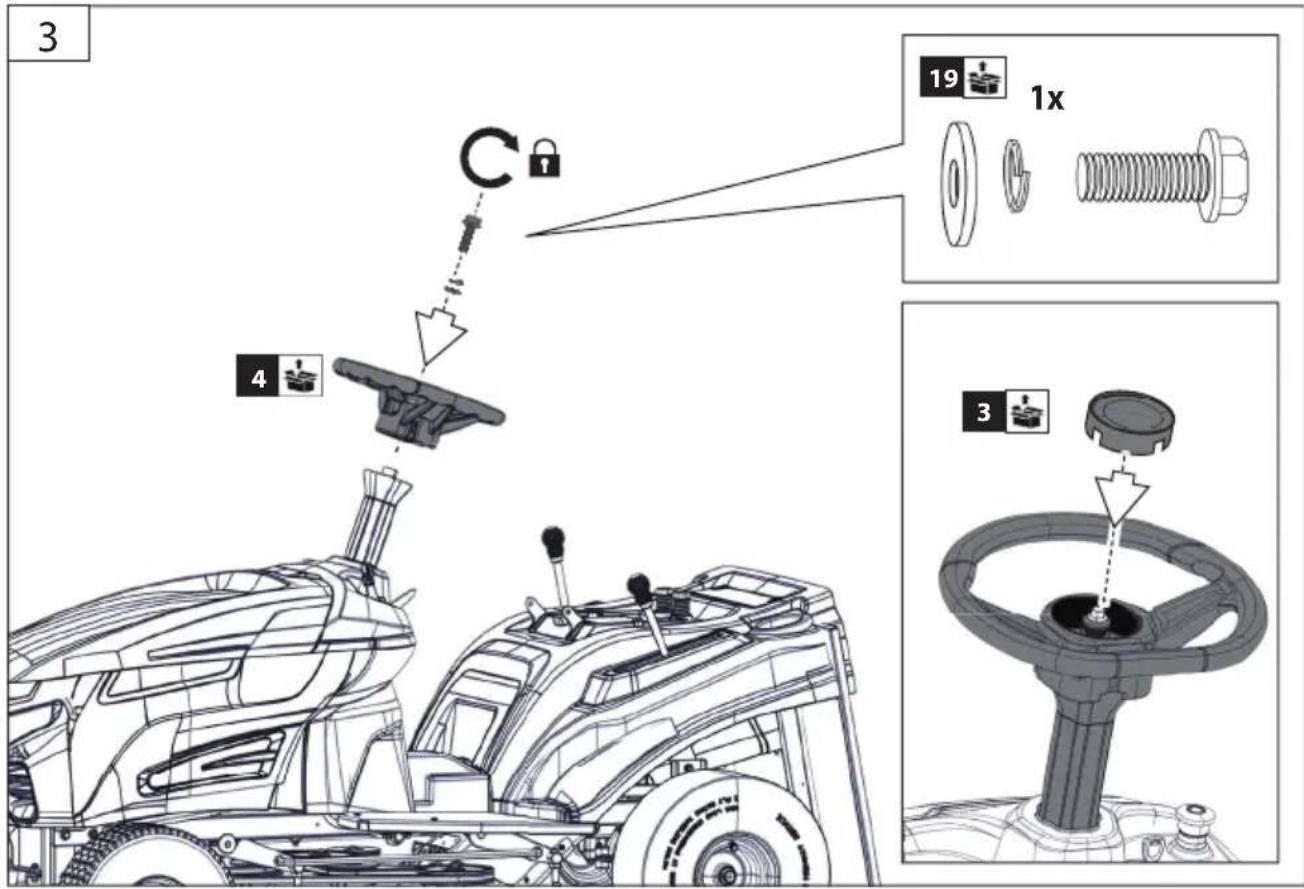
3 19 1x 4 3
natural_image
Line drawing of a tractor with visible suspension and wheel assembly (no text or symbols)


text_image
1 2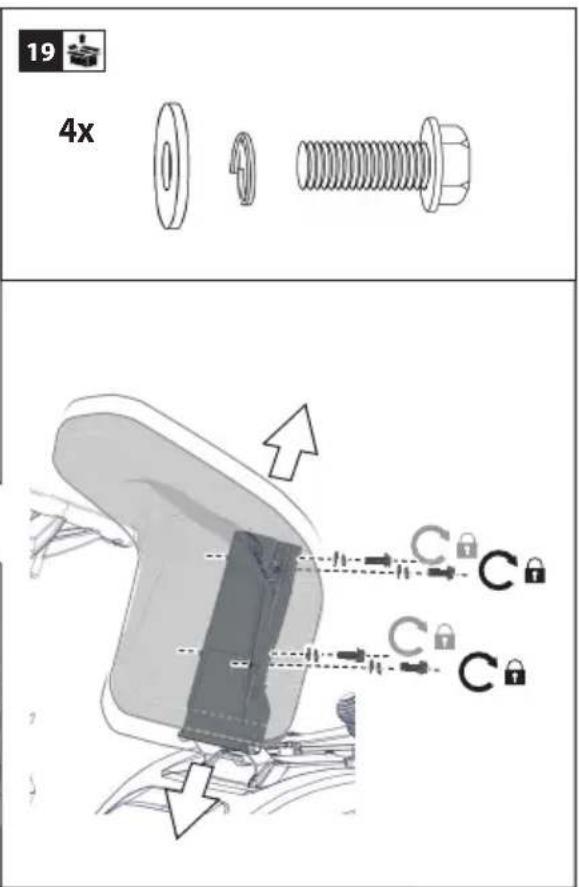
text_image
19 4x C C C C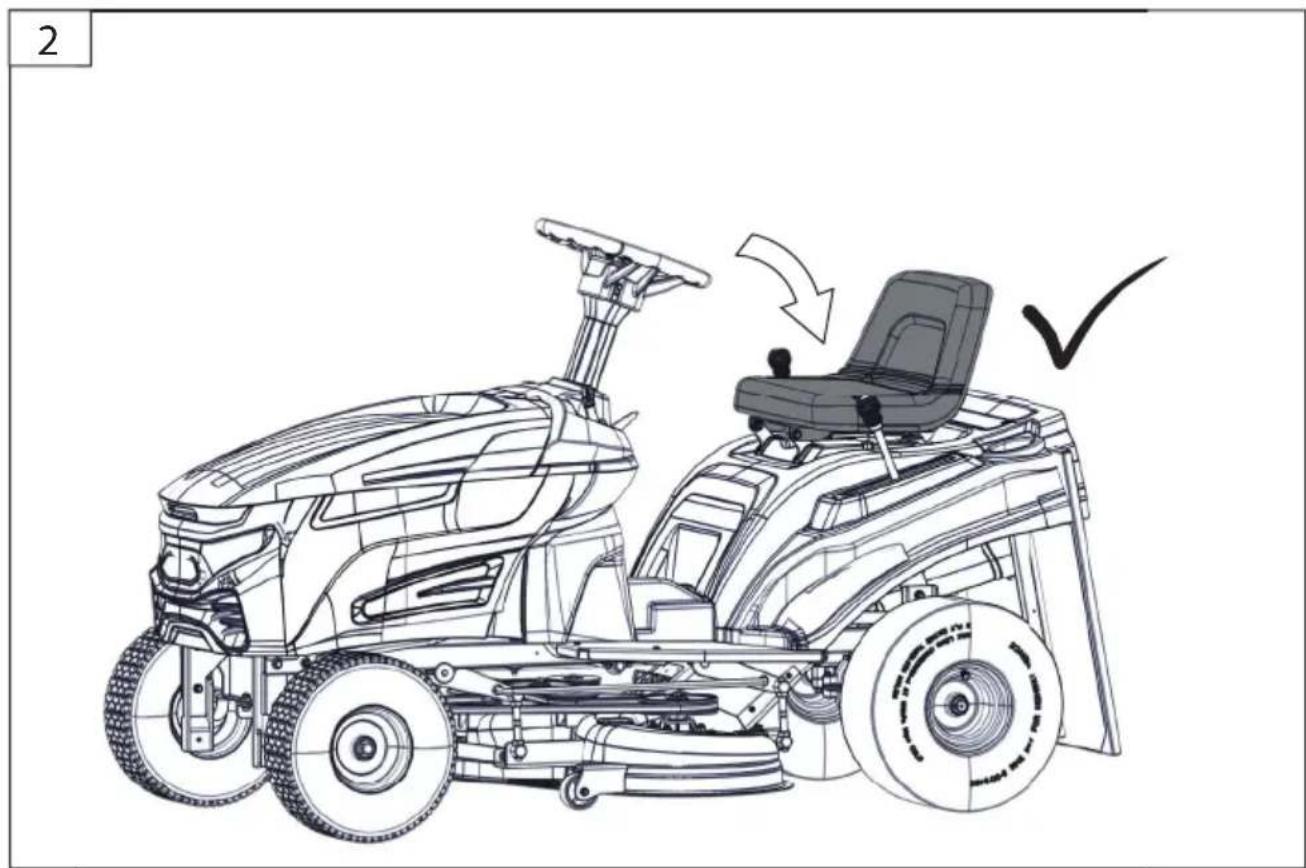
natural_image
Line drawing of a robotic cleaning vehicle with a seat and steering wheel (no text or symbols)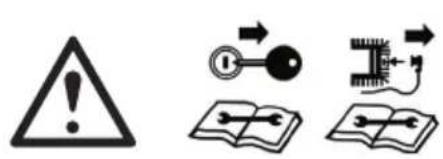
natural_image
Three black-and-white icons: warning triangle, keyhole, and circuit symbol (no text or labels)

text_image
1 11 10 12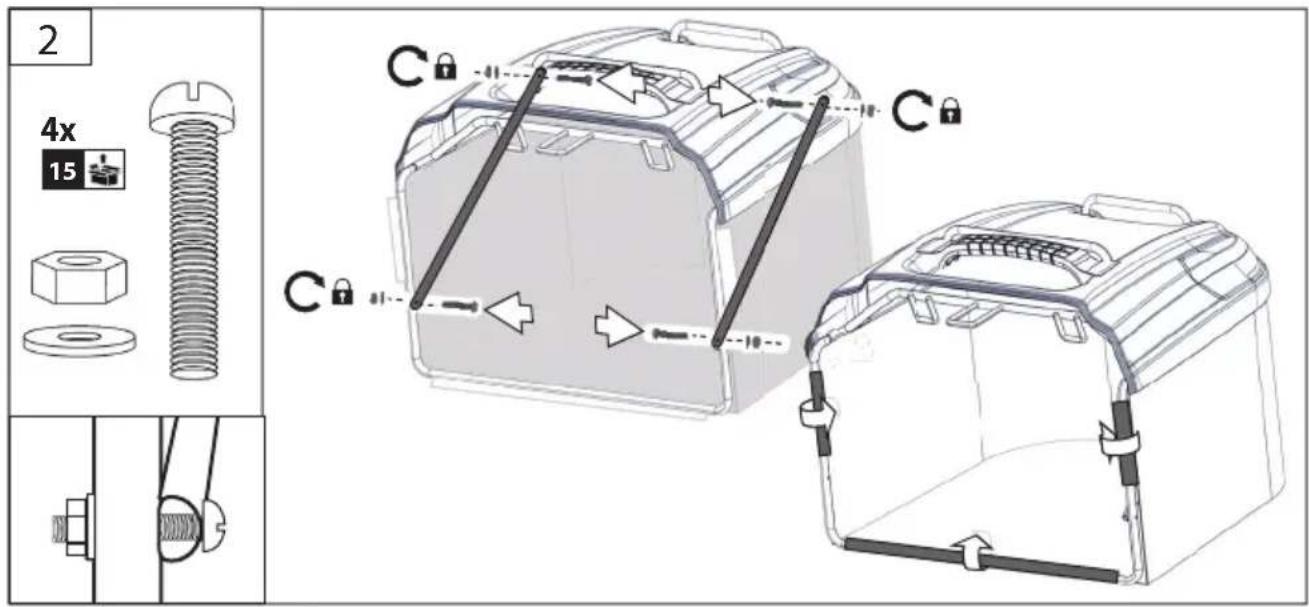
text_image
2 4x 15 C C C C C C 10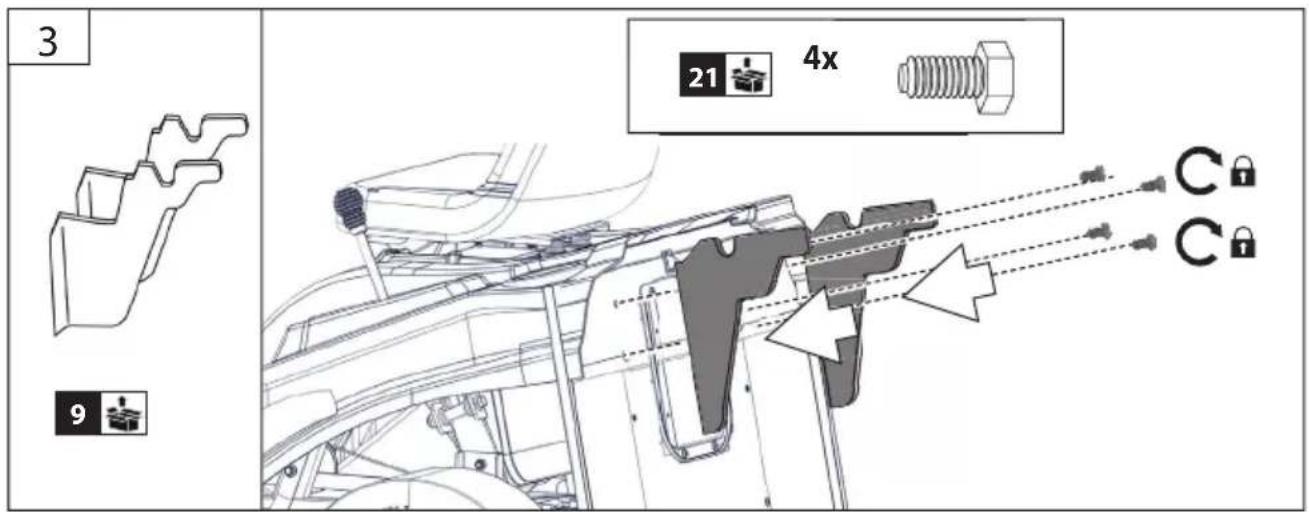
text_image
3 21 4x 9


10W-40
natural_image
Technical line drawing of a mechanical device with a crane and wheel, showing a gear or cam mechanism (no text or symbols)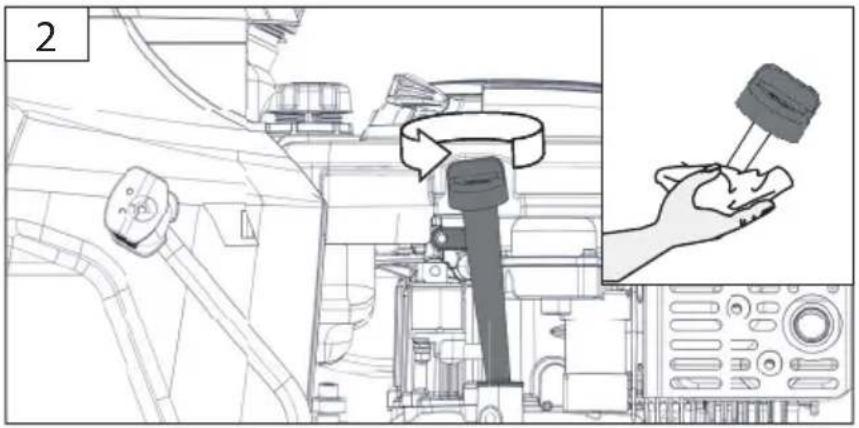
text_image
2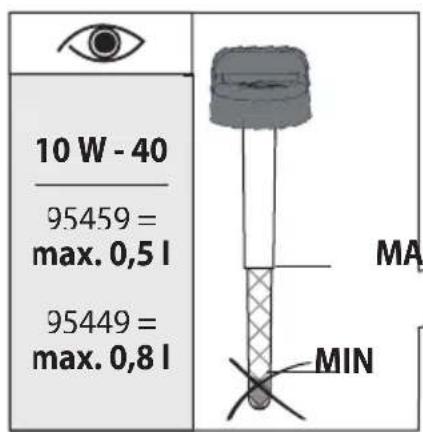
text_image
10 W - 40 95459 = max. 0,5 l 95449 = max. 0,8 l MA MIN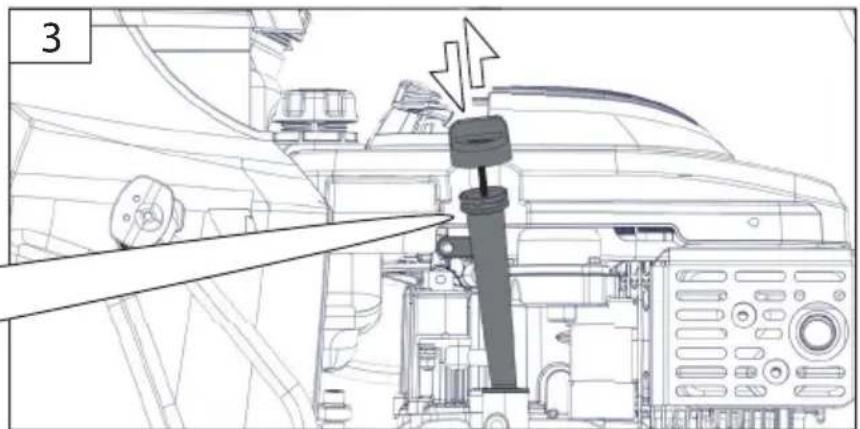
text_image
3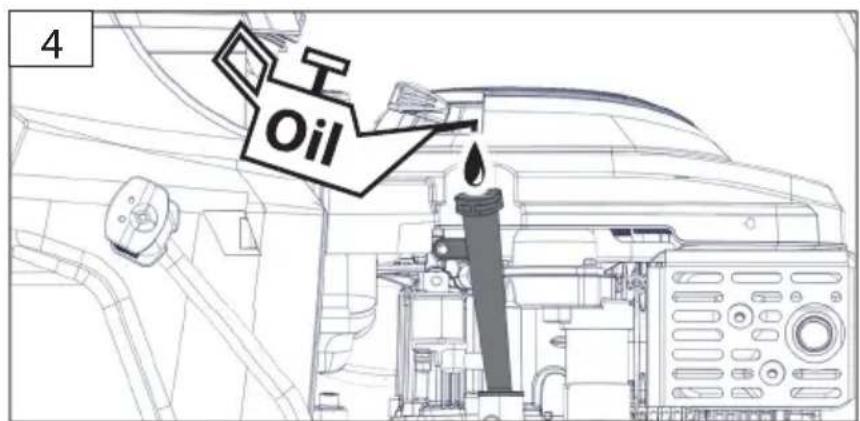
text_image
4 Oil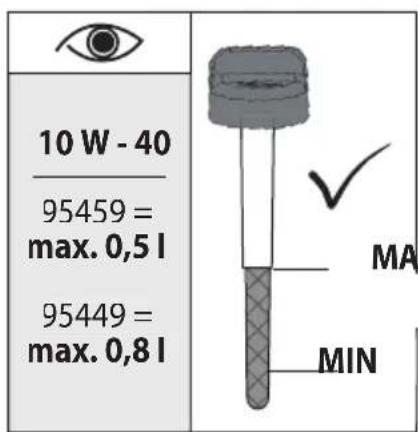
text_image
10 W - 40 95459 = max. 0,5 l 95449 = max. 0,8 l MA MIN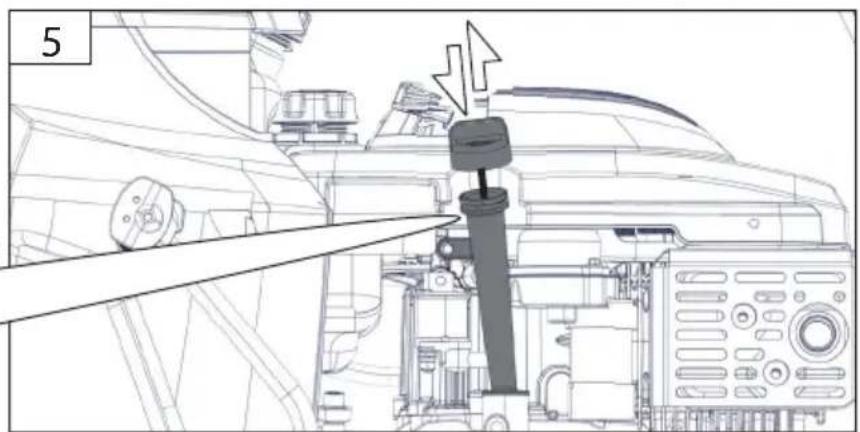
natural_image
Technical line drawing of a mechanical assembly with a tool inserted, showing no text or symbols


natural_image
Diagram of a robotic crane lifting a large cylindrical object, with an arrow indicating motion (no text or symbols present)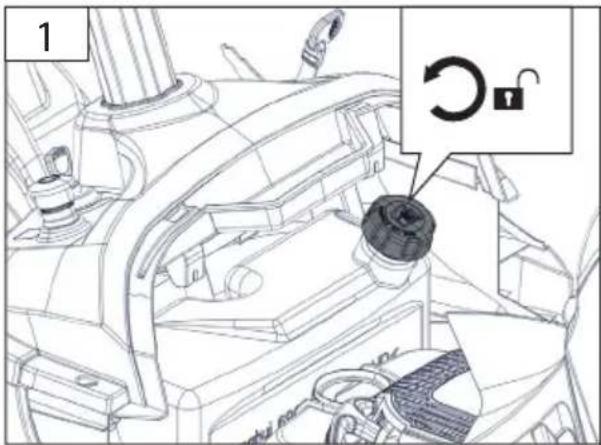
text_image
1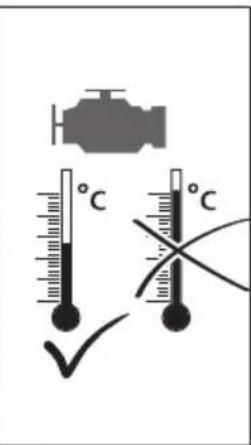
text_image
°C °C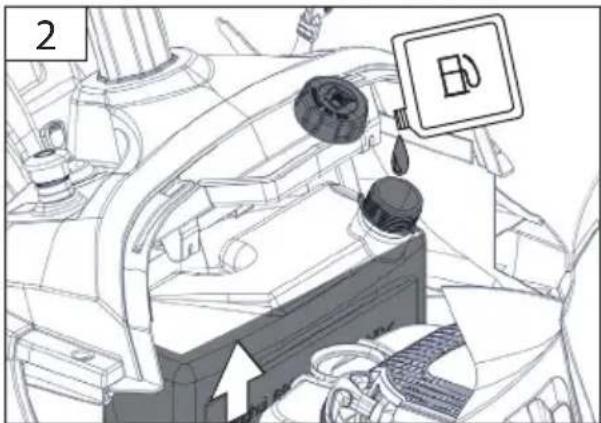
text_image
2 E
text_image
SUPER SUPER PLUS SUPER E10 NORMAL NORMAL E10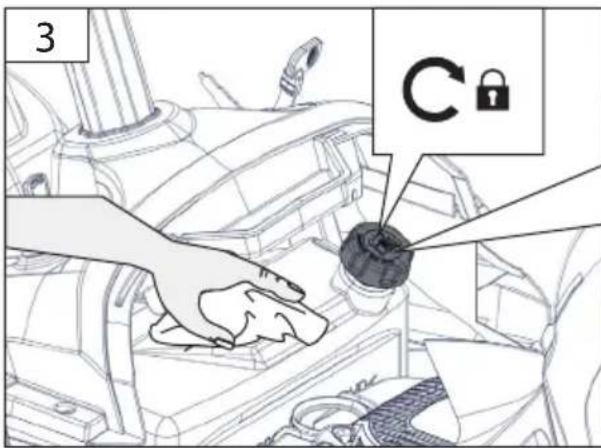
text_image
3 C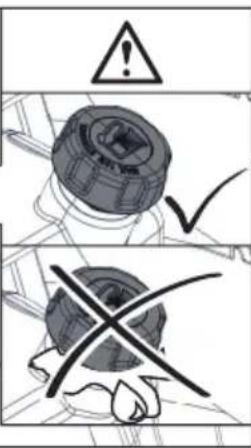
text_image
Safety warning illustration showing incorrect and correct safety symbols with checkmark and crossed-out gesture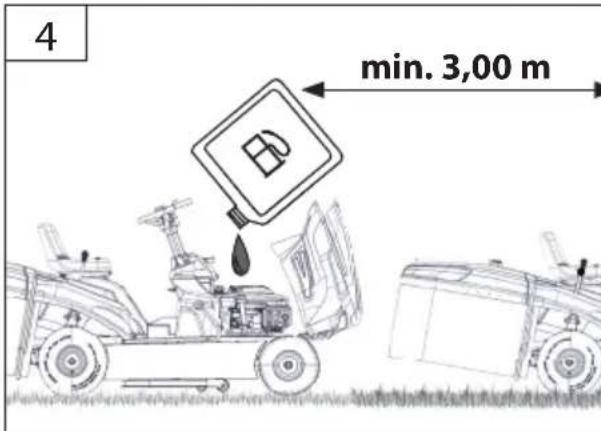
text_image
4 min. 3,00 m
text_image
START


natural_image
Mechanical assembly diagram showing a device with a curved cover and directional arrow (no text or symbols)
text_image
Technical diagram showing mechanical assembly with labeled components and directional arrows indicating motion or assembly.
natural_image
Technical line drawing of a mechanical assembly with no visible text or symbols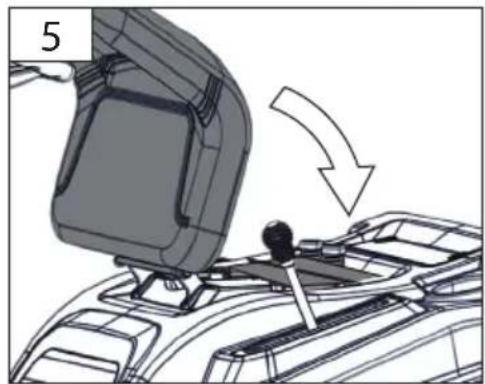
natural_image
Diagram of a vehicle interior with a device and directional arrow indicating motion (no text or symbols)
text_image
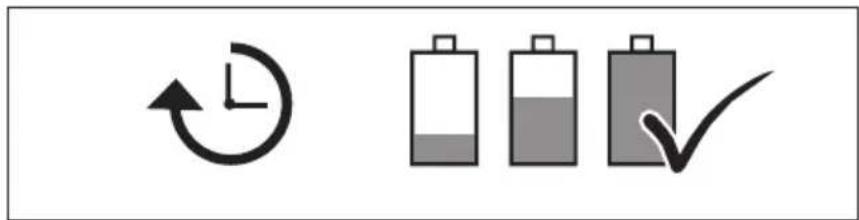
Diagram showing battery recycling icons: one with a clock and refresh, two with battery symbols and one with a checkmark.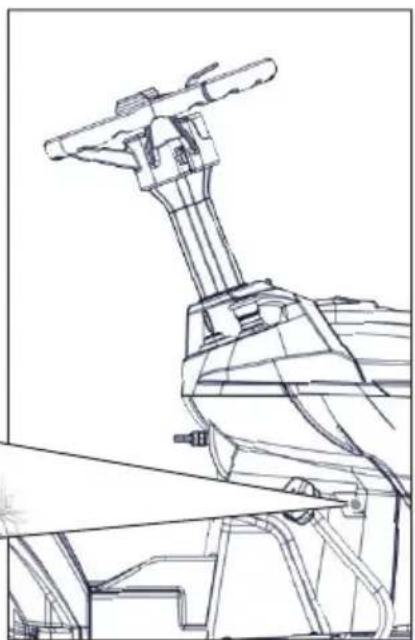
natural_image
Technical line drawing of a mechanical assembly (no text or symbols)
text_image
17


text_image
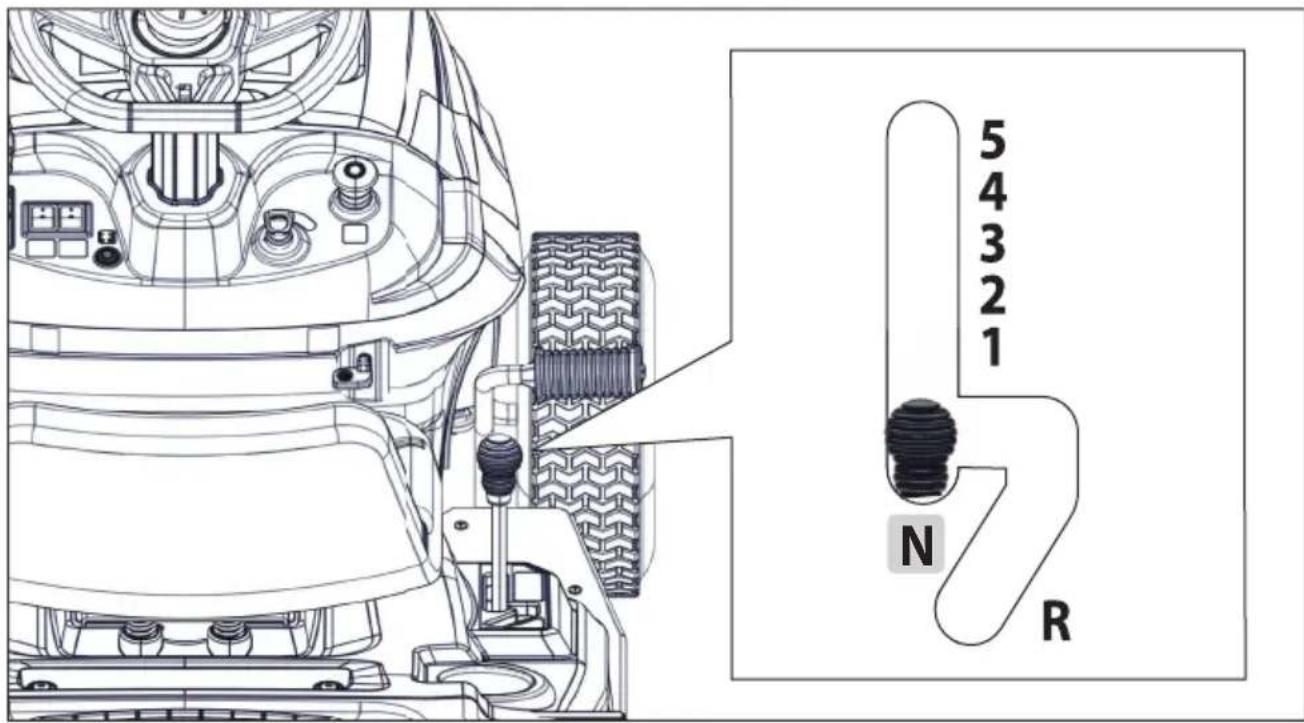
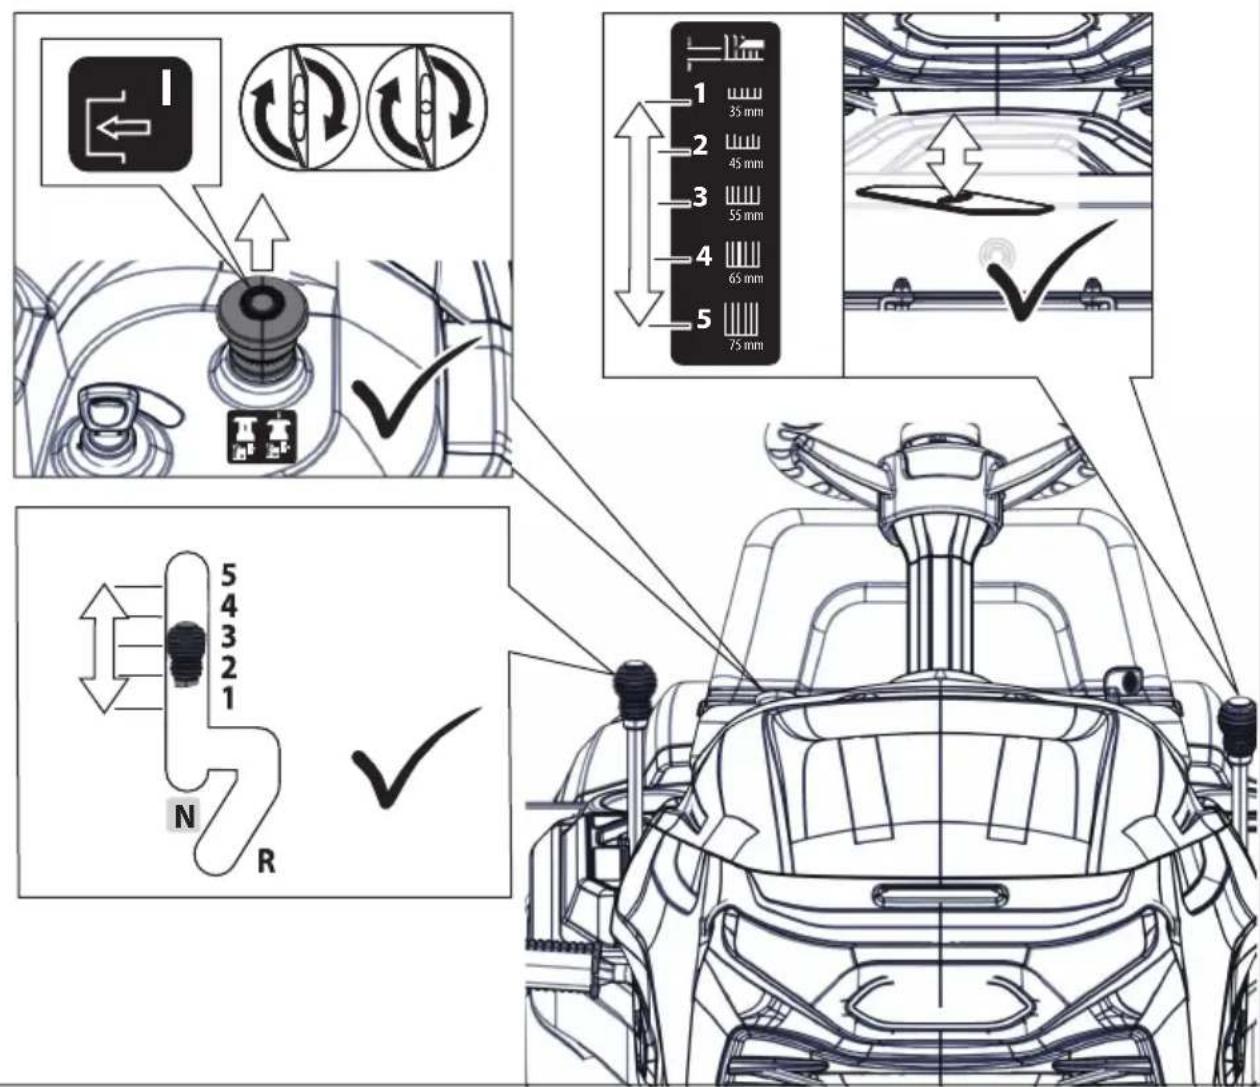
5 4 3 2 1 N R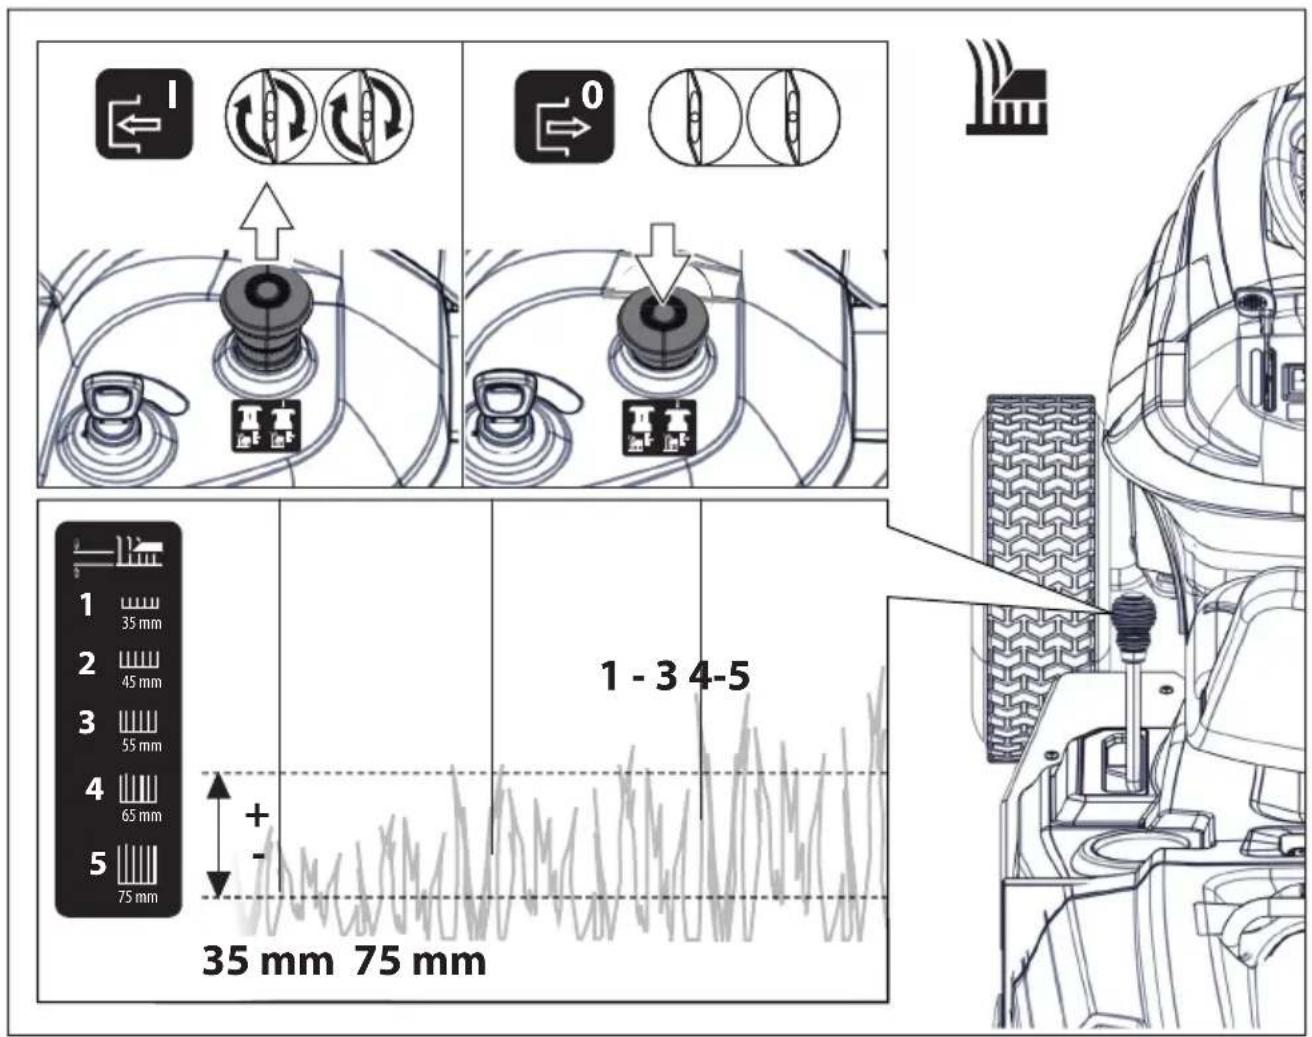
text_image
1 - 3 4-5 35 mm 75 mm1
START
N
2
2
1


text_image
3 °C °C
text_image
4 16


5
text_image
Technical diagram illustrating vehicle seatbelting and adjustment mechanism with numbered parts and directional arrows6
text_image
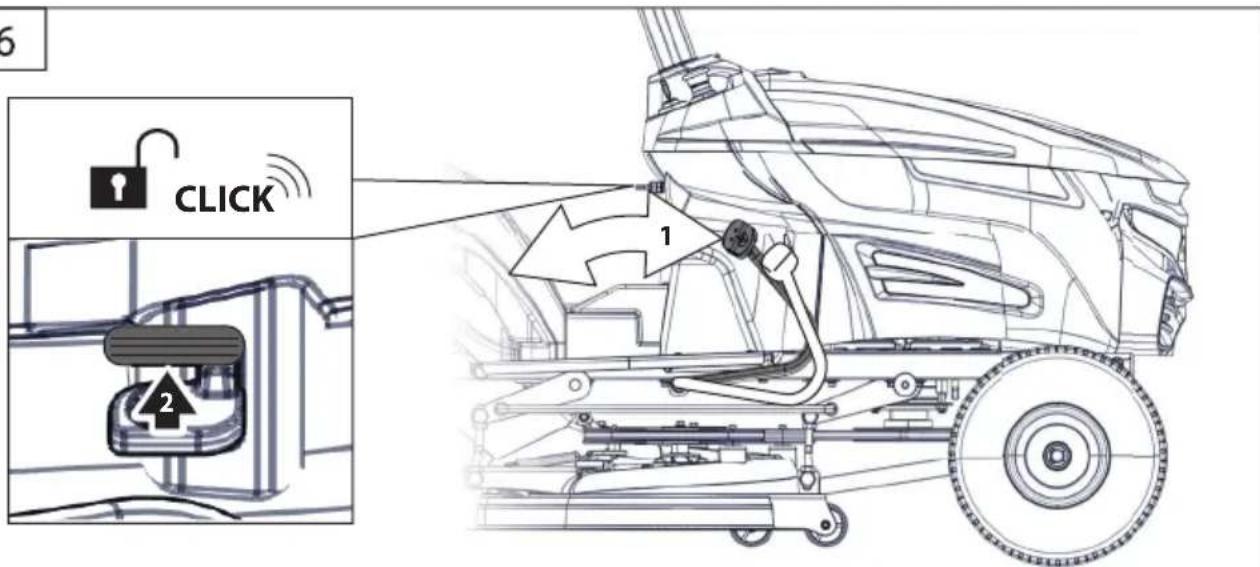
5 CLICK 1 27
text_image
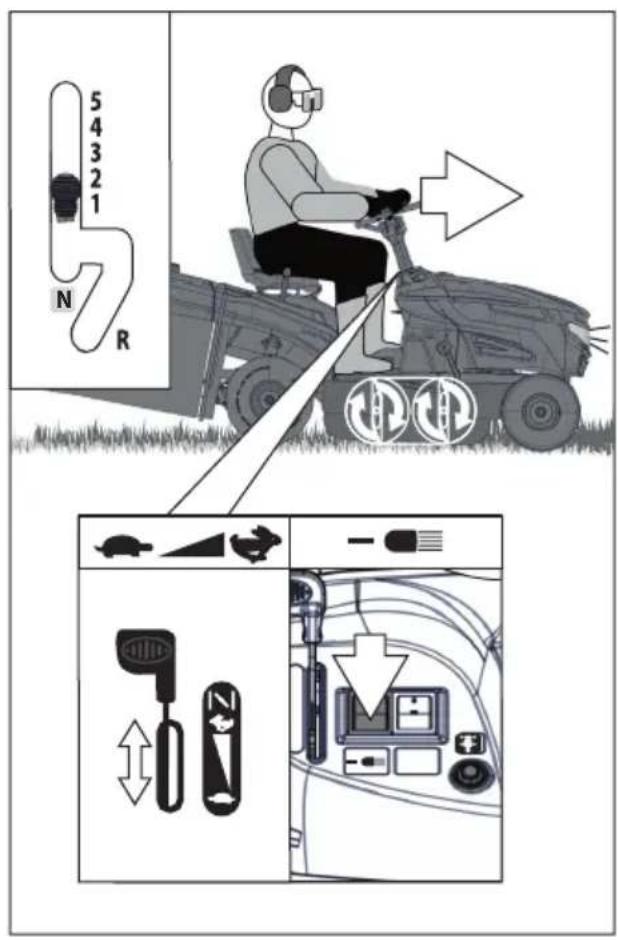
5 4 3 2 1 N R
text_image
5 4 3 2 1 N R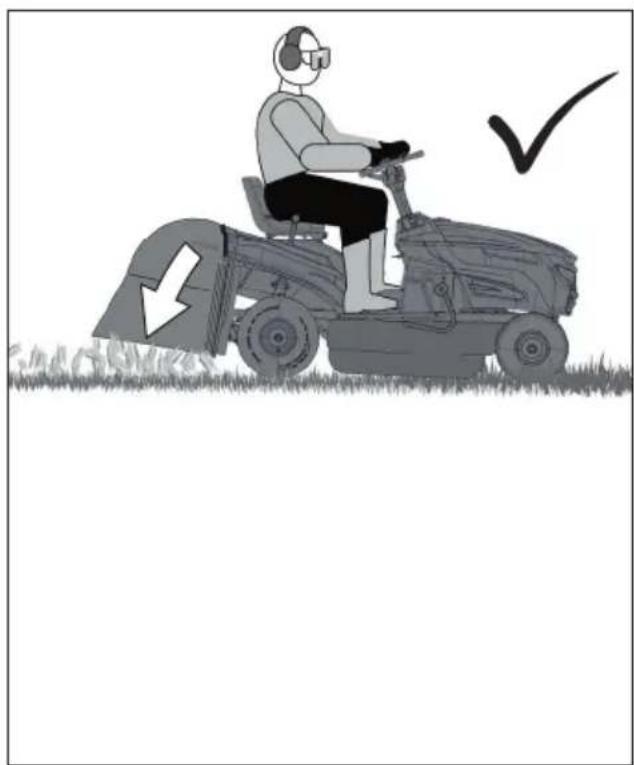
natural_image
Illustration of a person operating a grassy tractor with a checkmark indicating completion (no text or symbols present)
text_image
Illustration showing a grassy tractor with a hand operating a cart, accompanied by a checkmark and number 8 instruction.8
9
STOP
text_image
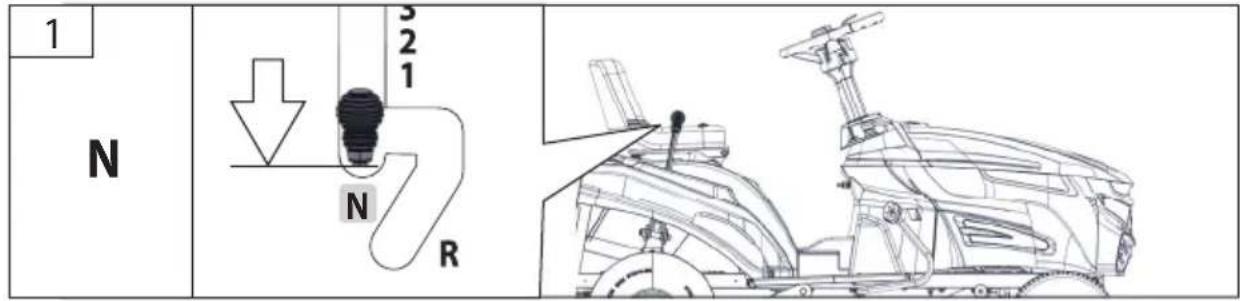
1 N 321 N R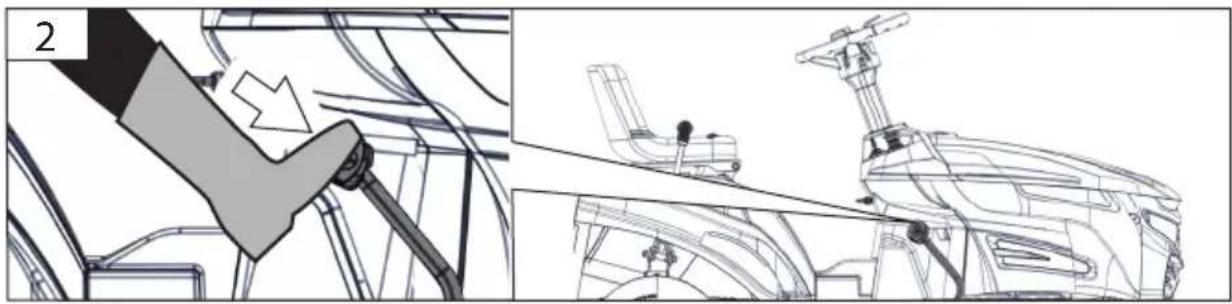
natural_image
Technical line drawing of a mechanical assembly with no visible text or symbols
text_image
3 Lock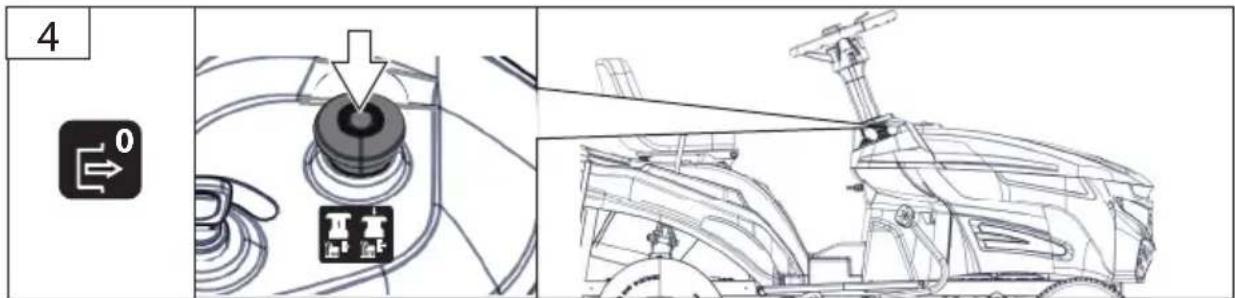
text_image
4 0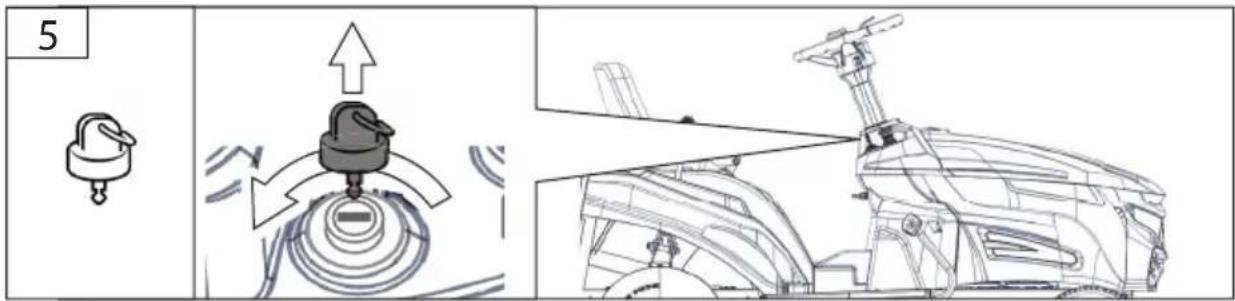
text_image
5 ↑ ↓


text_image
Illustration of a person using a grassy tractor with safety symbols and a checkmark indicating compliance or verification.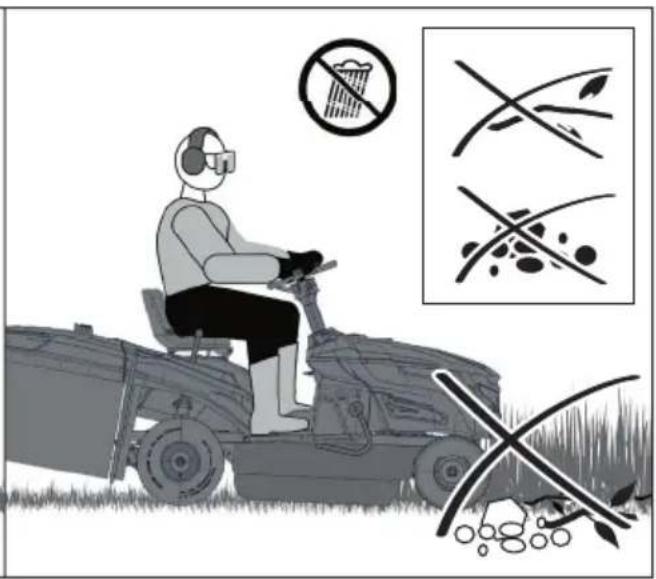
text_image
Illustration showing a person operating a tractor with no litter, accompanied by three symbolic diagrams: a crossed-out pile, a crossed-out leaf, and a crossed-out grain.
text_image
max. 10° max. 10°
natural_image
Illustration of a person operating a combine harvester with a cross symbol, no text or symbols present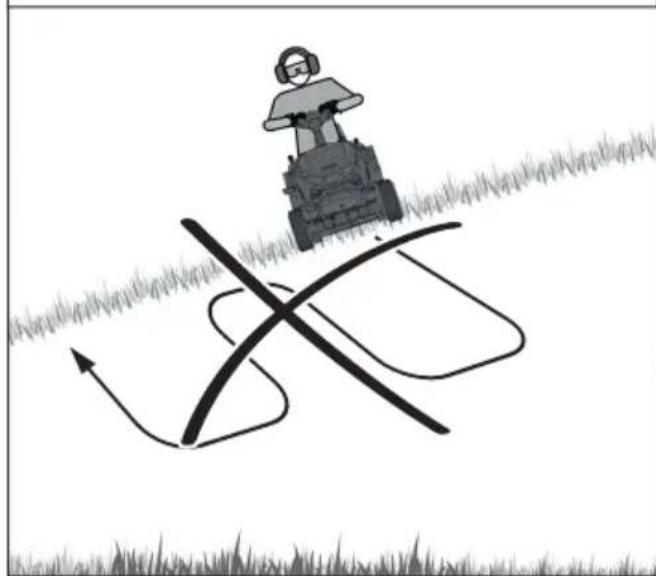
natural_image
Illustration of a person operating a tractor with motion lines and grass at the base (no text or symbols)
natural_image
Illustration of a person on a grassy tractor with a checkmark and arrow, no text or symbols present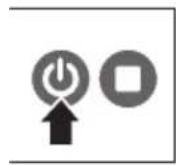


PRIVAT NOT PRIVATE
natural_image
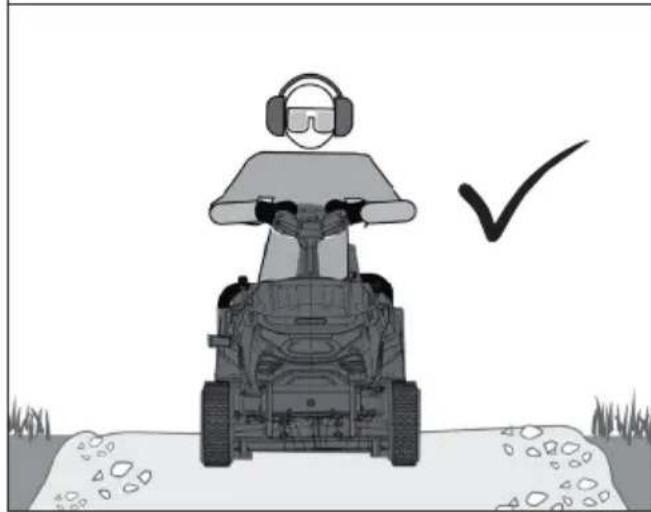
Illustration of a person in a covered vehicle with a headset, standing on a dirt path with grass at the base (no text or symbols)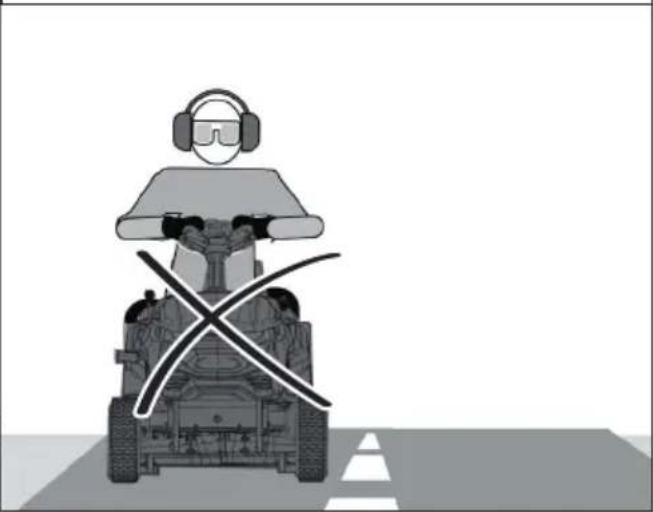
natural_image
Illustration of a person in a helmet and headset standing on a road with a cross symbol (no text or symbols present)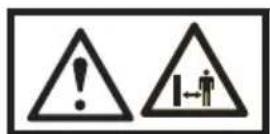

natural_image
Illustration of a person operating a large forklift on a grassy terrain (no text or symbols)min. 10 m


natural_image
Two-panel illustration showing a cart rolling down grass and a person standing on the ground with a tool, both without any text or symbols.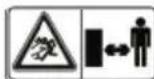
natural_image
Illustration of a person using a tricycle to drive a motor, with a cross symbol and motion lines (no text or symbols present)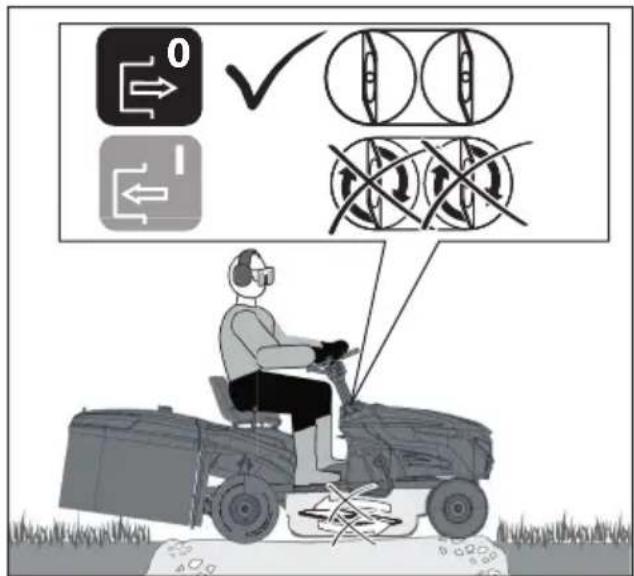
text_image
Diagram illustrating a person using a tractor to interact with three icons: directional arrows, circular diagrams, and cross symbols, with checkmark and crossed-out arrows indicating decision or verification.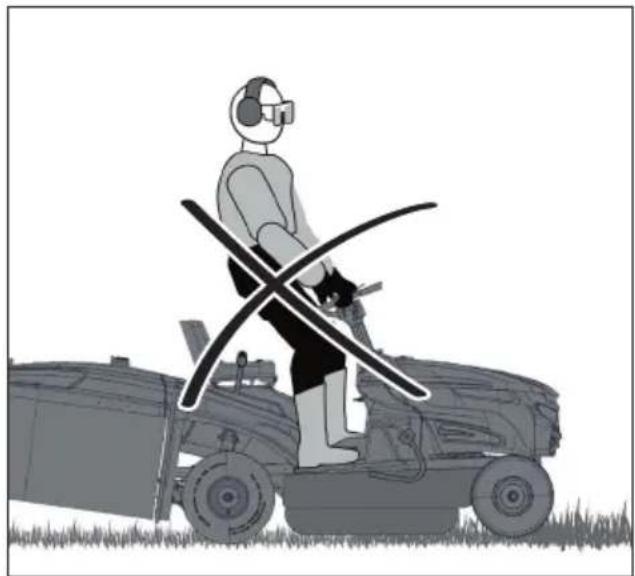
natural_image
Illustration of a person standing on a grassy field next to a tractor, holding a curved blade (no text or symbols)


natural_image
Illustration of a mechanical device and a truck with an arrow indicating rotation or movement (no text or symbols present)
text_image
1 °C °C
natural_image
Technical line drawing of a mechanical assembly with no visible text or symbols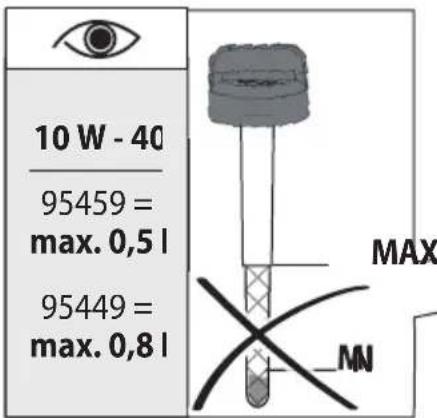
text_image
10 W - 40 95459 = max. 0,5 l 95449 = max. 0,8 l MAX MN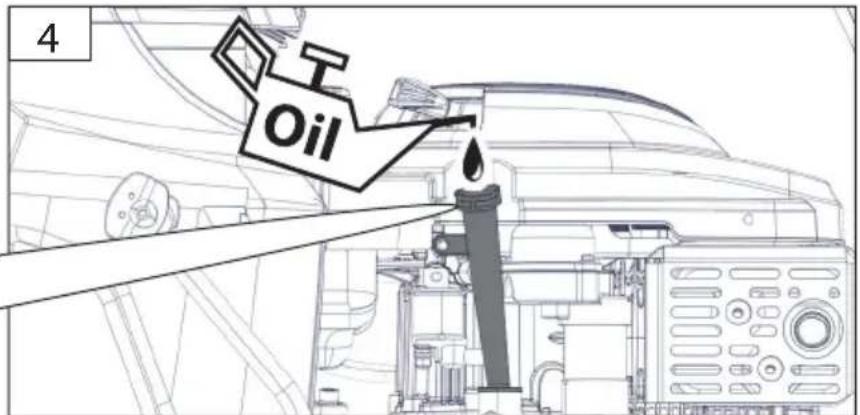
text_image
4 Oil
text_image
10 W - 40 95459 = max. 0,5 l 95449 = max. 0,8 l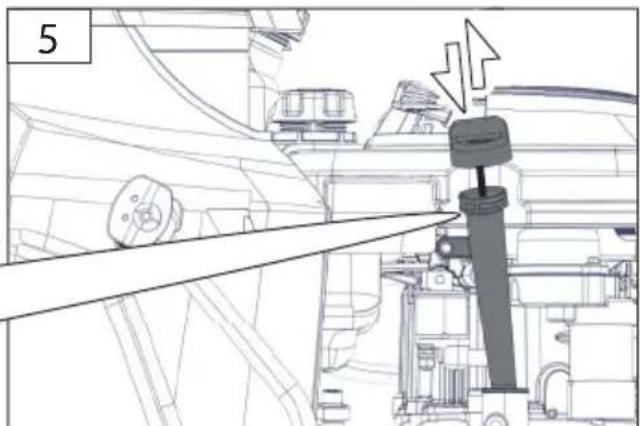
text_image
5
natural_image
Mechanical assembly diagram showing a rotating shaft and housing components (no text or labels)


natural_image
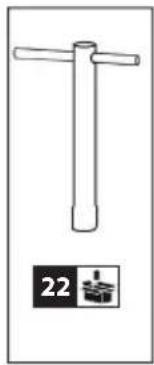
Simple line drawing of a T-shaped tool or stand with a label '22' below it (no text or symbols on the diagram itself)
natural_image
Diagram showing a vehicle with a wheel and arrow indicating motion, no text or symbols present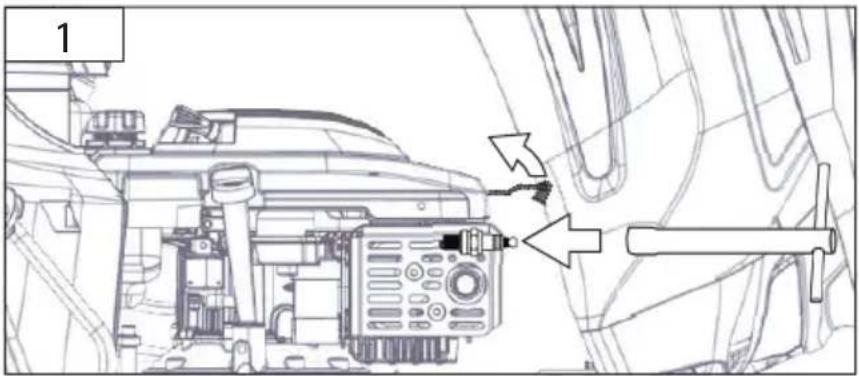
text_image
1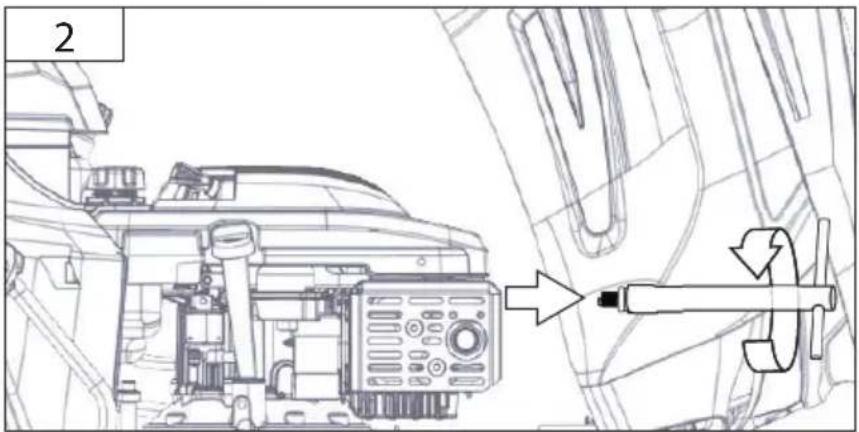
text_image
2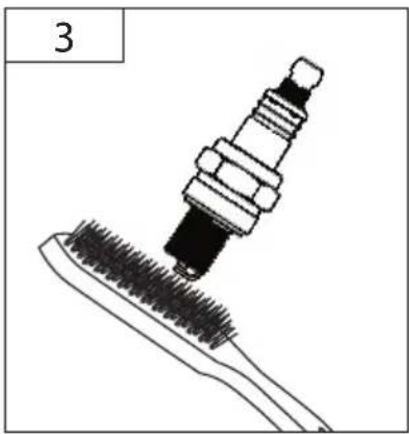
natural_image
Line drawing of a spark plug inserted into a toothbrush, no text or symbols present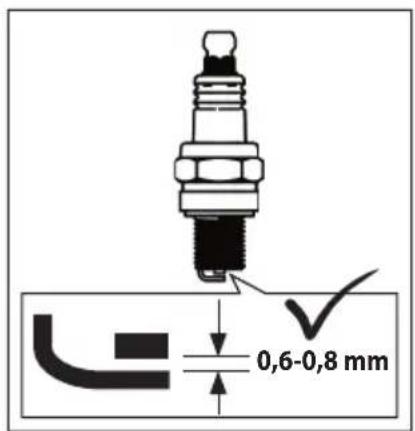
text_image
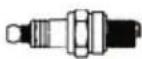
0,6-0,8 mm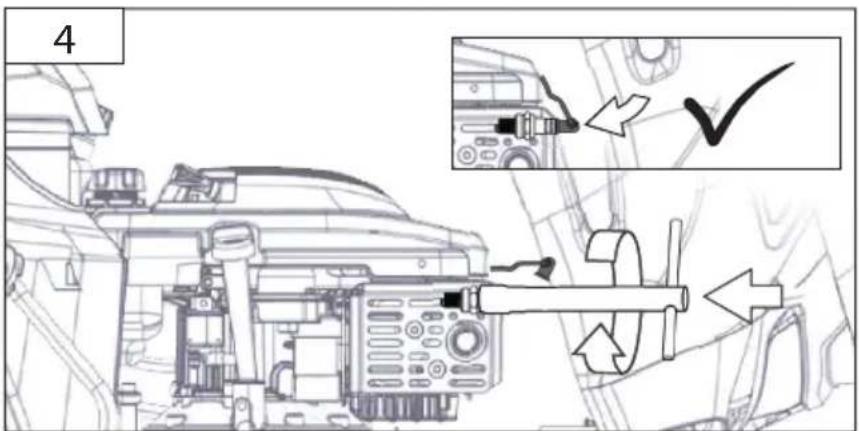
text_image
4


text_image
1
text_image
2
text_image
3 H₂O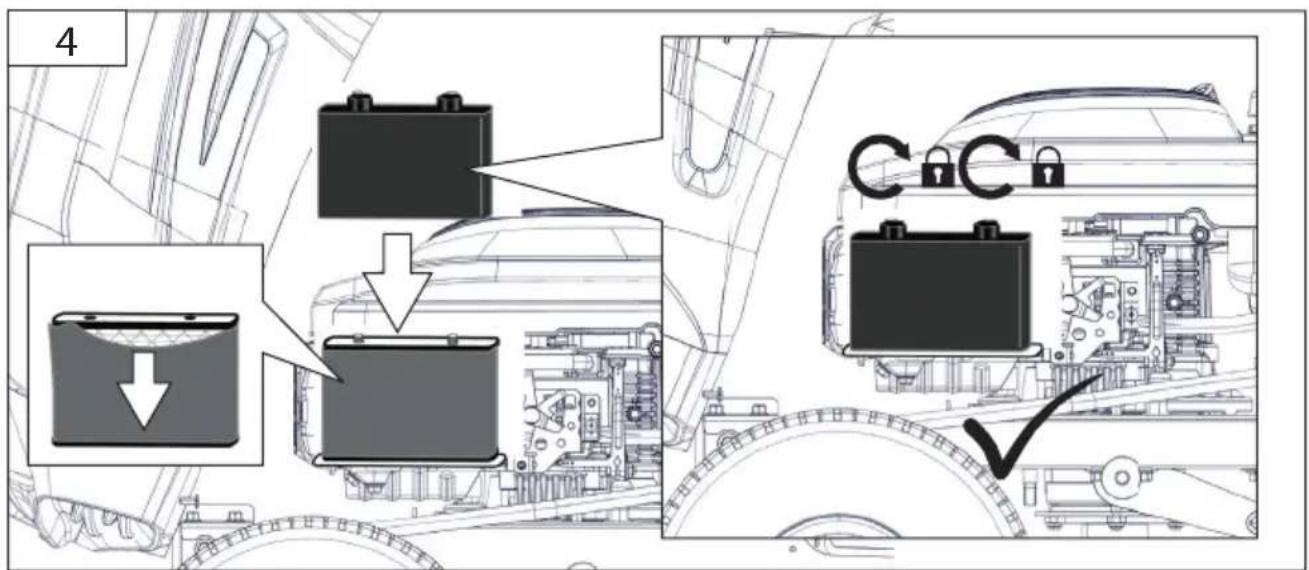
text_image
4 C C C


text_image
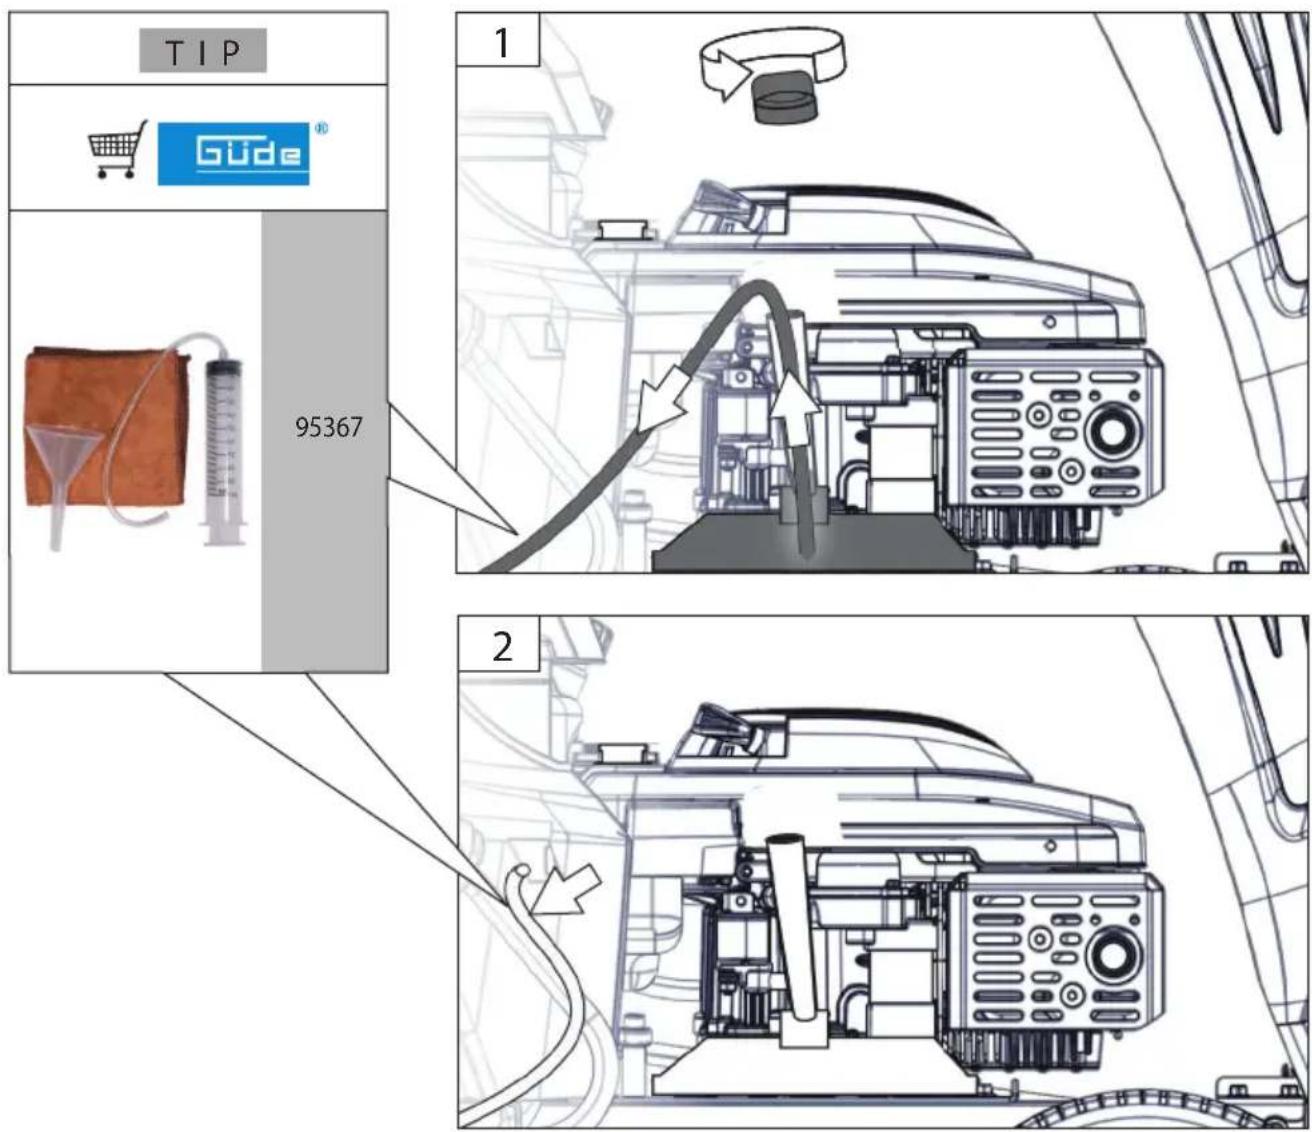
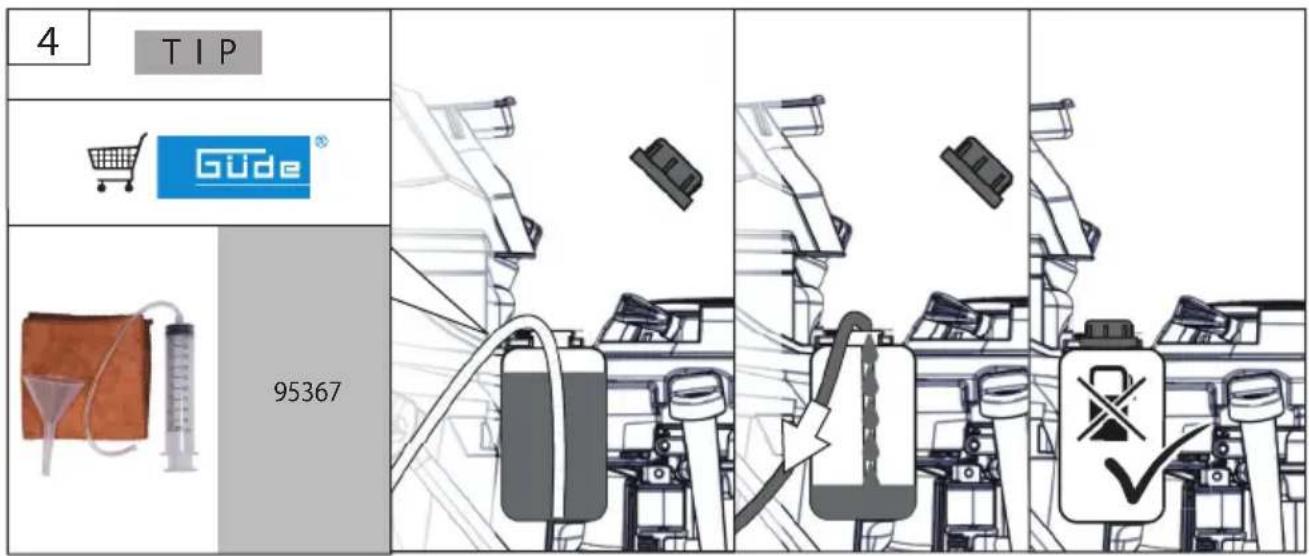
TIP Güde® 95367 1 2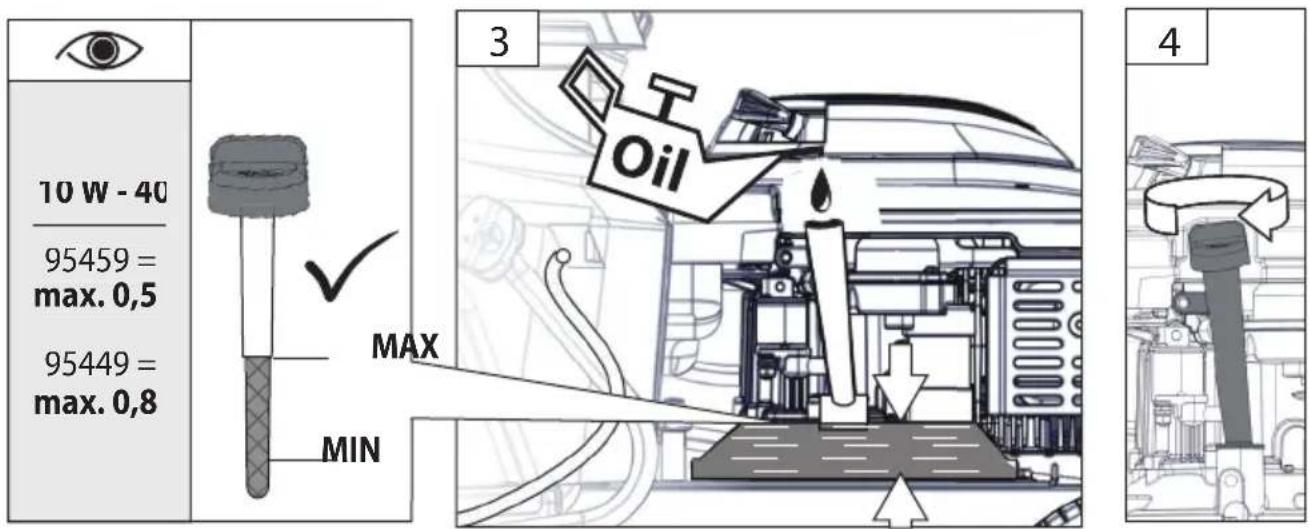
text_image
10 W - 40 95459 = max. 0,5 95449 = max. 0,8 3 Oil MAX MIN 4


natural_image
Technical line drawing of a mechanical assembly with no visible text or symbols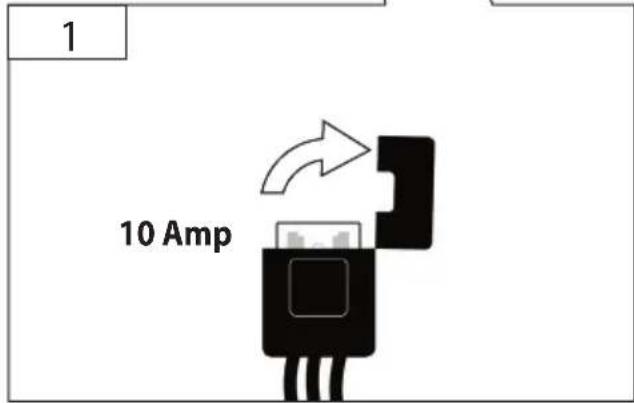
text_image
1 10 Amp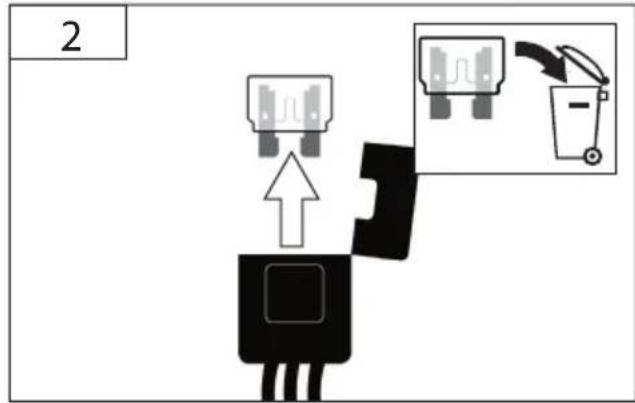
text_image
2
text_image
3 CLICK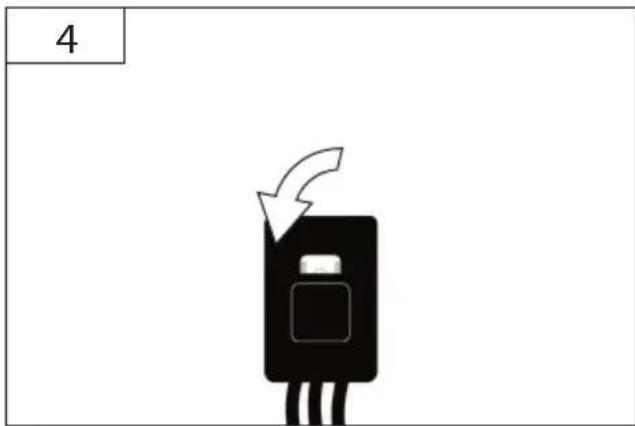
text_image
4


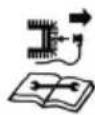


1
natural_image
Technical line drawing of a vehicle chassis and its internal components, showing external assembly and motor assembly (no text or symbols)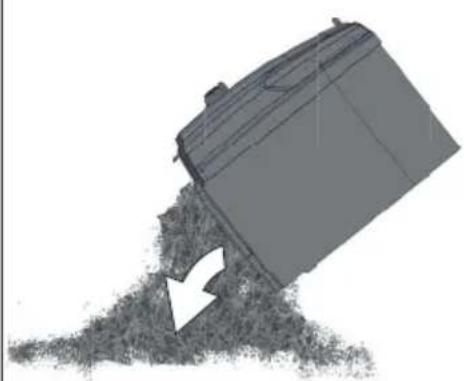
natural_image
3D rendered object resembling a bucket with a downward arrow emerging from its surface, no text or symbols present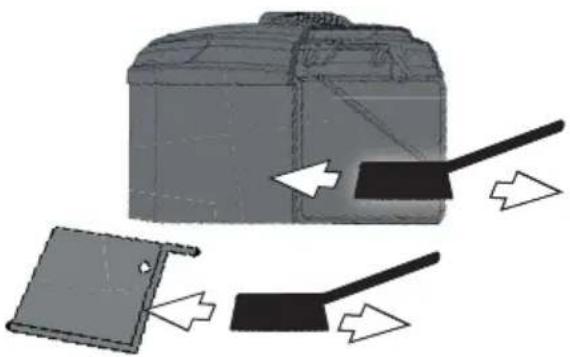
natural_image
Diagram showing a mechanical component with arrows indicating motion or force, no text or symbols present2
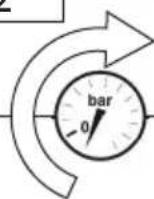
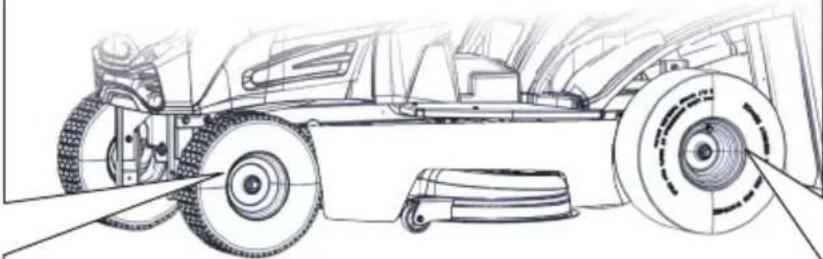
GAR 680 T
2.0 bar / 30 PSI
GAR 960 T
2,0 bar / 30 PSI
natural_image
Technical line drawing of a vehicle's front wheel assembly (no text or symbols)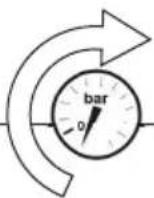
GAR 680 T
2.0 bar / 30 PSI
GAR 960 T
1,5 bar / 22 PSI


3
text_image
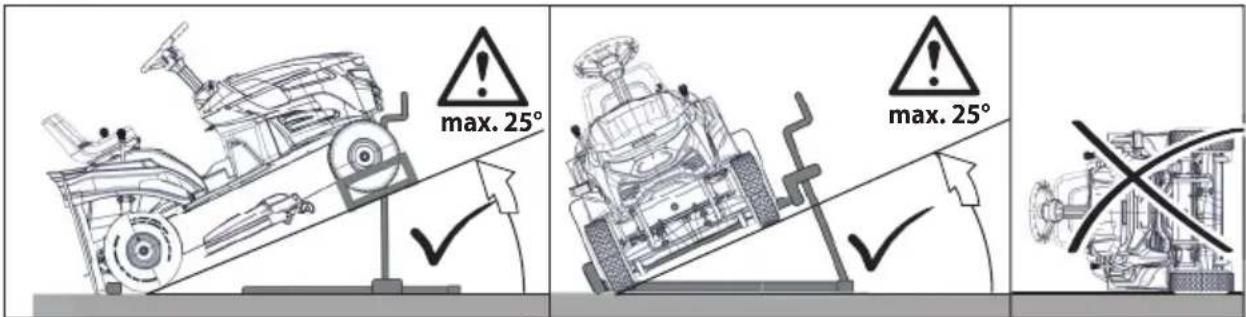
max. 25° max. 25°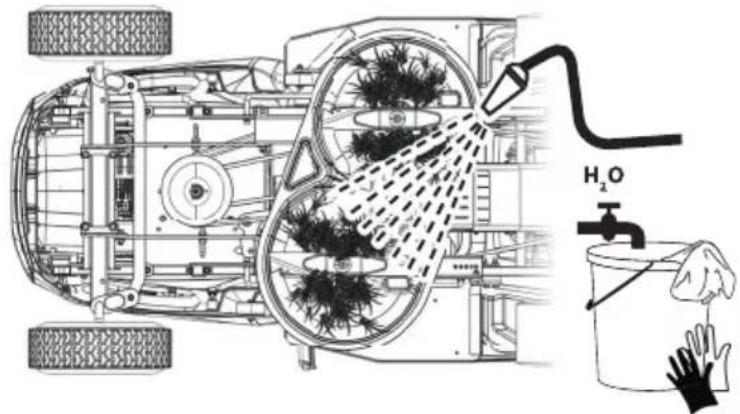
text_image
Technical diagram showing a vehicle interior with water spray and a hand bucket labeled H₂O, illustrating environmental impact.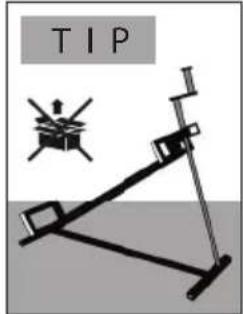
text_image
TIP
text_image
Technical diagram of a water treatment machine with hand and checkmark indicating water absorption, plus a labeled 'H₂O' symbol.4

natural_image
Line drawing of a mechanical device with a bracket and lid (no text or symbols)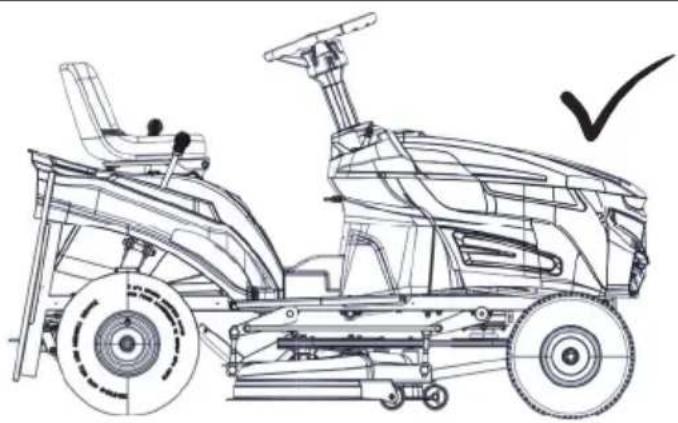
natural_image
Technical line drawing of a tractor with visible suspension components and a checkmark indicating inspection (no text or symbols present)


natural_image
Illustration of a person forklifting a tractor with a circular diagram showing environmental symbols (no text or labels)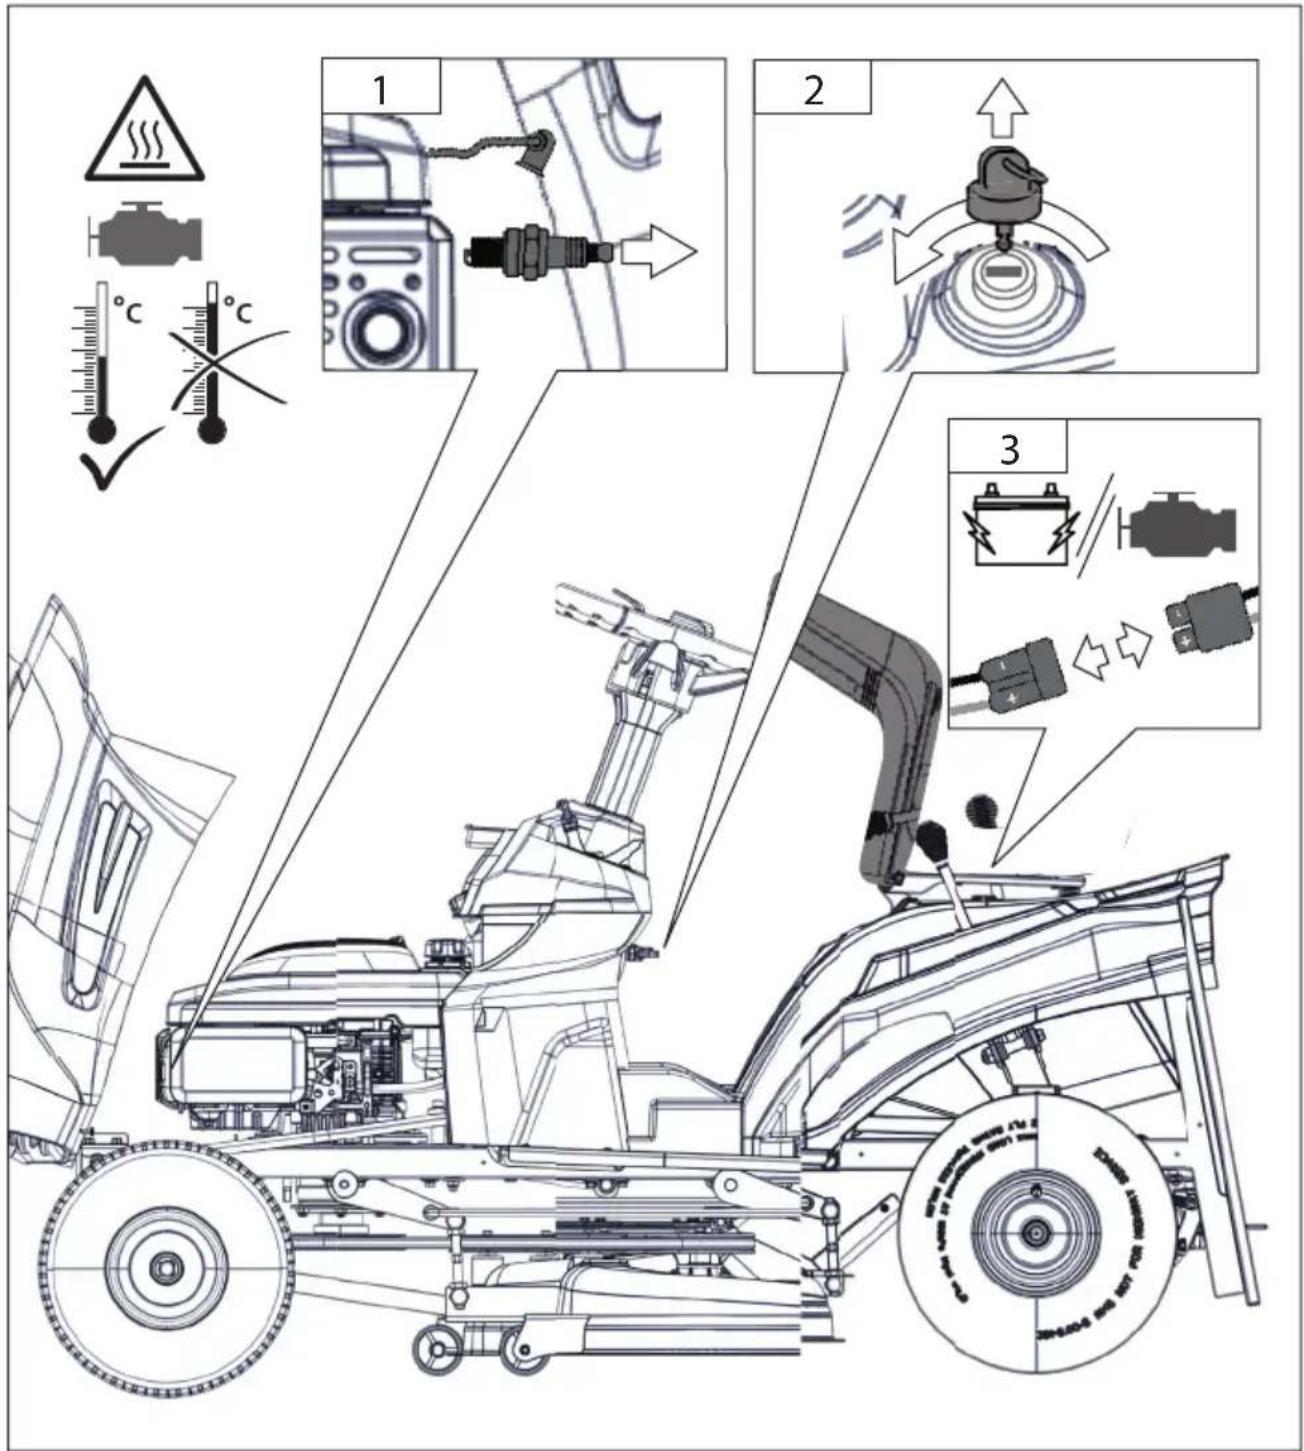
text_image
Technical diagram of a mechanical assembly with labeled parts and thermal warning symbols


text_image
4 TIP Gude® 95367
text_image
5 H₂O H₂O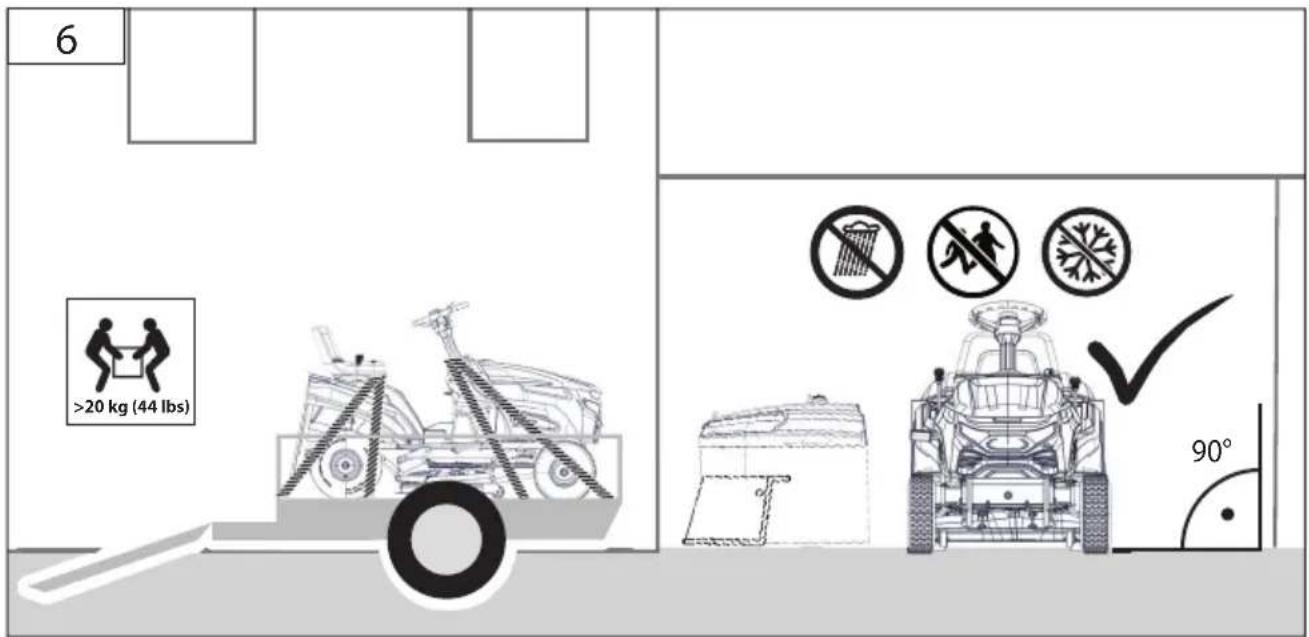
text_image
6 >20 kg (44 lbs) 90°Technische Daten
Warning: The vibration emission level will vary because of the ways in which a power tool can be used and may increase above the level given in this information sheet. It may be used for a preliminary assessment of exposure. Identify additional safety measures to protect the operator from the effects of vibration such as: maintain the tool and the accessories, keep the hands warm, organisation of work patterns.


Read and understand the operating instructions before using the appliance. Familiarise with the control
elements and how to use the appliance properly. Abide by all the safety measures stated in the service manual. Act responsibly toward third parties.
In case of any doubts about connection and operation refer please to our customer center
Specifi ed Conditions of Use
The mower is intended for the cutting of lawns and grassy areas with a maximum terrain inclination of 10^ in private household and hobby gardens. Do not use this product in any other way as stated for normal use. Not observing general regulations in force and instructions from this manual does not make the manufacturer liable for damages.

Use the appliance only outside, never use it in fi ned and bad ventilated areas.

The device is not approved for road traffic!
Residual Risk
Rotating blades may lead to serious injuries by cutting or amputating parts of the body.
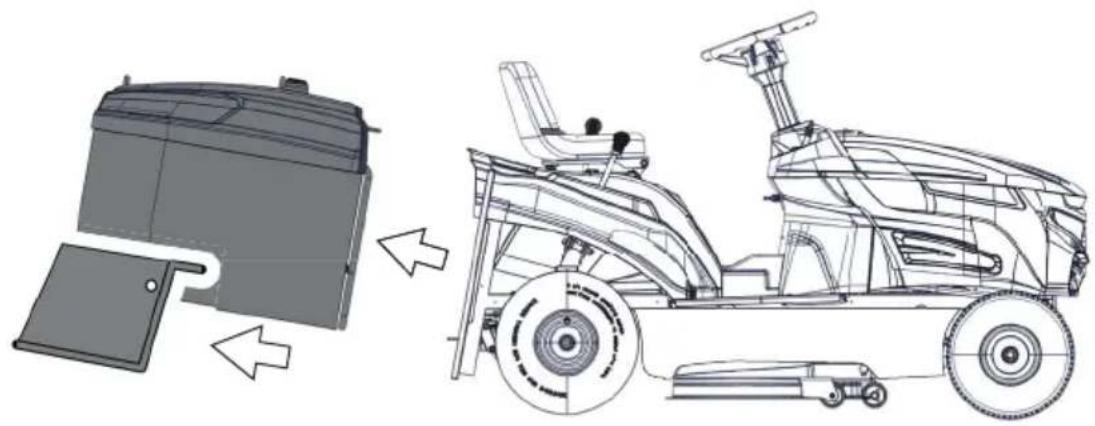
Never touch under the housing body when the engine is running. Wear protective shoes. Never remove the collection bag when the machine is being operated.
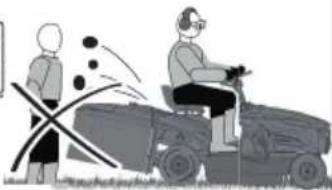
Thrown-off stones or soil may lead to injuries. Before mowing, check the area to be mowed for any undesirable objects. Make sure that the catcher bag is properly hooked in. Wear safety goggles when working.
Poor lighting/light conditions represent a high safety risk. Provide adequate lighting or good lighting conditions when working with the machine.
Requirements for operating staff
The operating staff must carefully read the Operating Instructions before using the appliance.
This appliance is not intended for use by persons (including children) with limited physical, sensory or mental capabilities or insufficient experience and/or knowledge unless they are supervised by a person who is responsible for their safety or have been instructed by them in the safe use of the appliance.
Qualifi cation: Apart from the detailed instructions by a professional, no special qualifi cation is necessary for appliance using.
Minimum age: Persons over 16 years of age can only work on the appliance. An exception includes youngsters trained in order to reach knowledge under supervision of the trainer during occupational education. Local regulations may stipulate the minimum age of the user.
Training: Using the appliance only requires corresponding training by a professional or the Operating Instructions. No special training is necessary.
Do not use the appliance if you are tired, ill, under influence of drugs, alcohol drinks or medicaments.
The operator is responsible for accidents or risks to third parties.
Emergency procedure

Risk of injury
Never put your hands and feet near the rotating parts. Always keep your distance from the ejection opening.

Danger of burns!
Some parts of the appliance get too hot when the appliance is operated. Do not touch any hot parts, e.g. engine and muffler.
Conduct a fi rst-aid procedure adequate to the injury and summon qualified medical attendance as quickly as possible. Protect the injured person from further harm and calm them down. For the sake of eventual accident, in accordance with DIN 13164, a workplace has to be fitted with a fi rst-aid kit. It is essential to replace any used material in the fi rst-aid kit immediately after it has been used.
If you seek help, state the following pieces of information
- Accident site
- Accident type
- Number of injured persons
- Injury type(s)
Symbols

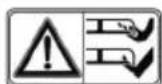
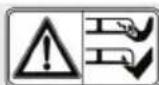
Caution! Warning! Danger!


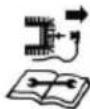
Read and understand the operating instructions before using the appliance.
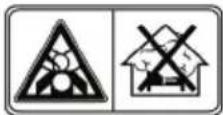
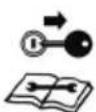
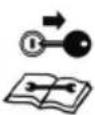
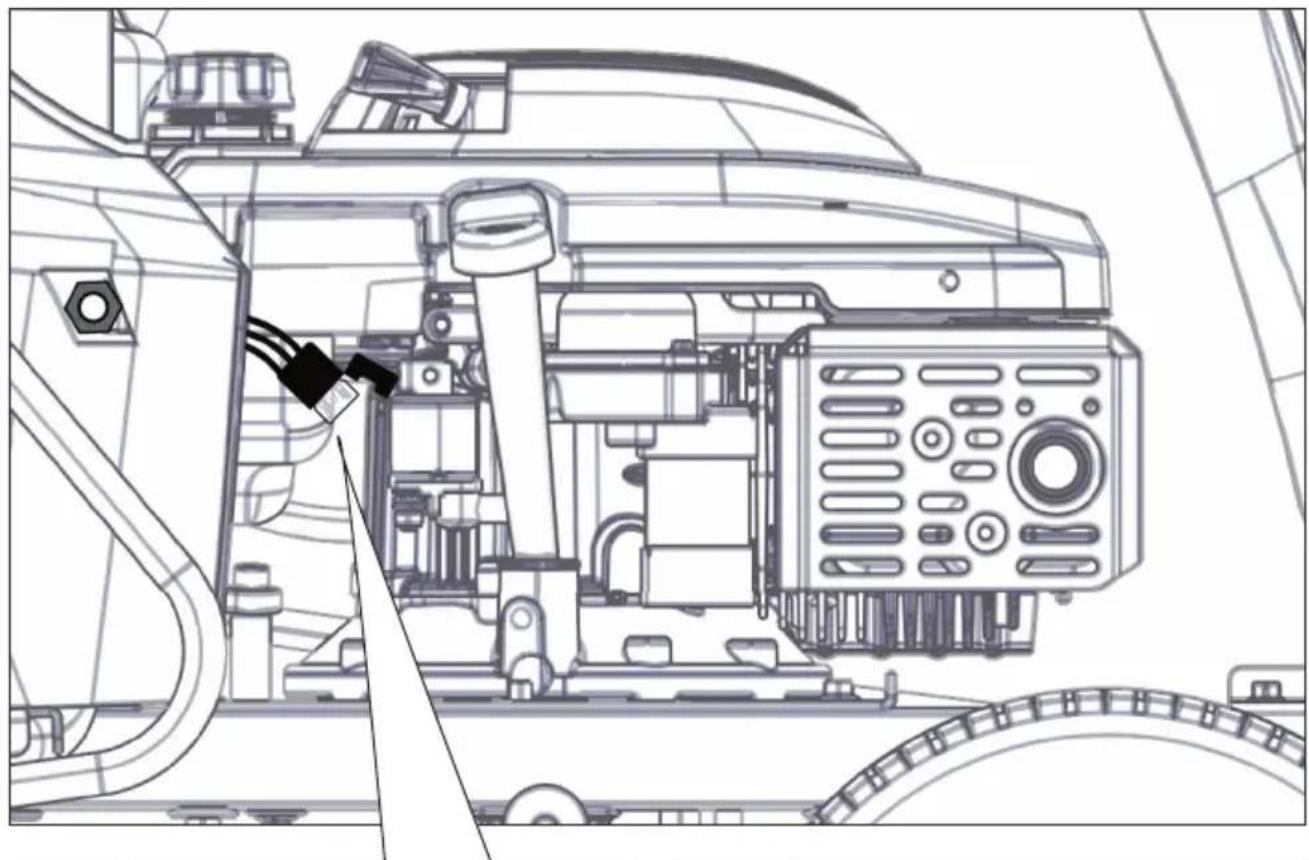
Stop the engine and disconnect the spark plug wire.
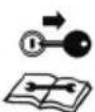
Remove the key.

Stop the device.

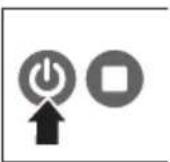
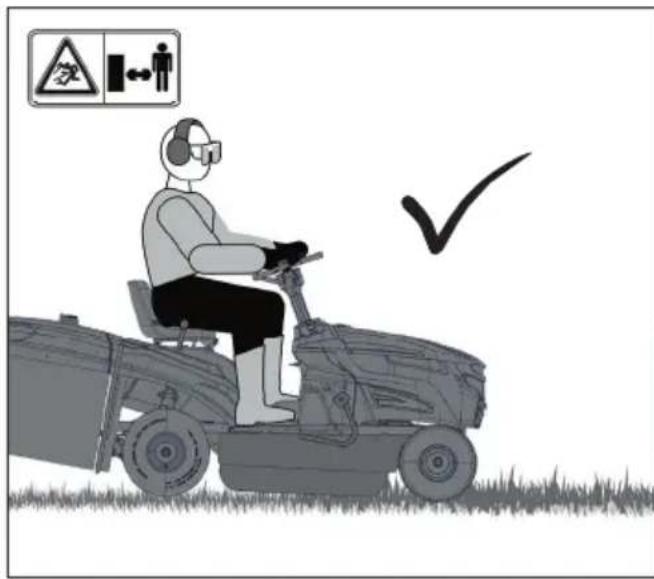
Wear ear protectors. Wear goggles.

Wear protective gloves.

Wear solid shoes and long trousers.

Warning against hot surfaces! Danger of burns!


Prohibited smoking and open fire using.
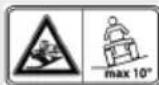
Danger of tipping over! Use only on slopes up to 10 %

Keep a distance from the ejection opening at all times. The open ejector flings parts.
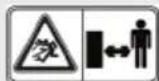
Keep bystanders in safe distance from the appliance (at least 10 m)
Keep children and other persons including animals in a safe distance when using the appliance.
Keep sufficient distance from the mower blade during operation.
Warning against cutting injuries

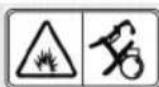
Risk of explosion
Refuel the engine only when switched off.

Risk of poisoning!
Use the appliance only outside, never use it in confined and bad ventilated areas.
- Check the oil level, fill it up if required.

② Fill up with petrol.

Reverse mowing

Mower

Cutting height adjustment

Light

Ignition lock

Choke
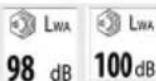
Sound power level

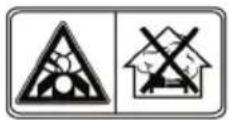
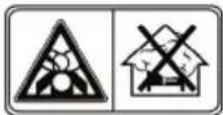
Keep dry at all times.

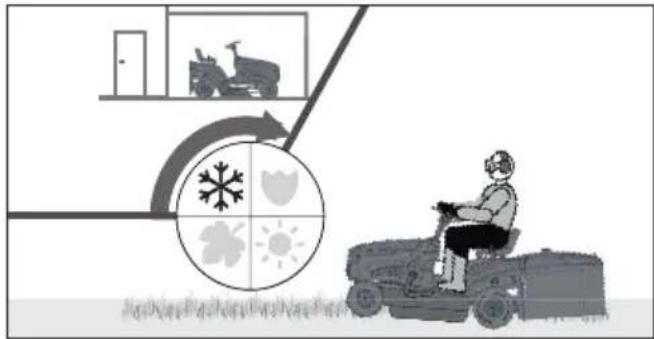
Protect against cold

Keep the machine out of reach of children.

Two persons are required for implementation.
Any damaged or disposed devices must be delivered to appropriate collection centres. Batteries, oil, and similar substances must not enter the environment.
Safety Warnings

Warning
Read all safety warnings and all instructions. Failure to follow the warnings and instructions may result in electric shock, fi re and/or serious injury.
Save all warnings and instructions for future reference.
Keep children and other persons including animals in a safe distance when using the appliance. Minimum safe distance is 10 m.
Wear personal protective equipment. Wear suitable protective clothing such as sturdy shoes with non-slip sole, robust long trousers, gloves, safety glasses and hearing protection! Wear protective gloves if necessary.
Use the appliance in broad daylight or in a well-lit environment. Poor lighting/light conditions represent a high safety risk.
Check carefully the terrain where the appliance is being used and remove any items that could get caught and be thrown away.
Do not use the appliance in bad weather, especially when there is a risk of storm.

Fuel is highly flammable.
Keep the fuel in suitable containers only.
The appliance may only be refuelled outdoors and not near open fire or burning cigarettes.
Emergency procedure
Make sure the fuel does not overflow. If the fuel overflows, the engine must not be started. Remove any dirt from the appliance and prevent any attempt at ignition until fuel fumes have evaporated.
In the tank pressure may develop. Loosen the tank cap slowly to allow this pressure to gradually decrease.
To reduce fire risks, periodically clean the cylinder flaps with compressed air and clear the silencer area to get rid of sawdust, branches, leaves or other debris.
Regularly remove all lawn and weed residues to prevent the shaft tube from overheating. Lawn/grass/weed residues become caught underneath the protective shield, thereby preventing sufficient cooling of the shaft tube. Carefully remove the remains with a sweeping broom or similar.
The engine must be filled with engine oil before the initial commissioning.
Check the oil level every time before commissioning. Fill with engine oil if required.
Always inspect the machine before use to ensure that the rollers and screws are not blunt, worn or damaged. Replace worn or damaged rollers and screws to ensure that the machine remains balanced.
Maintenance

Switch the engine off and remove the socket plug before any work on the engine. Wait until all rotating parts have stopped the appliance has cooled down.
Always keep the machine clean, especially the tank and engine area. Clean the grass ejector and housing regularly.
Apply environment-friendly oil to all moving parts.
Check the collection bag at regular intervals for any wear and aging.
Repairs and works specified in these Instructions may only be performed by qualified authorised staff.
Use only original accessories and original spare parts.
Only a regularly maintained and treated appliance can serve as a satisfactory aid. Insufficient maintenance and care can lead to unforeseen accidents and injuries.
Disposal
If your device should become useless somewhere in the future or you do not need it any longer, do not dispose of the device together with your domestic refuse, but dispose of it in an environmentally friendly manner. Thoroughly empty the oil/lubricant and fuel tanks and dispose of the remainders at a special collecting point or dump.
Please dispose of the device itself at an according collecting/recycling point. By doing so, plastic and metal parts can be separated and recycled. Information concerning the disposal of materials and devices are available from your local administration.
Guarantee
Warranty period of 12 months applies to commercial use and 24 months applies to private use and commences on the day of purchase of the device.
The guarantee solely covers inadequacies caused by material defect or manufacturing defect. Original payment voucher with the sales date needs to be submitted for any claim in the guarantee period.
The guarantee does not cover any unauthorised use such as appliance overloading, use of violence, damage as a result of any unauthorised interference or caused by foreign items. Failing to follow the operating and assembly instructions and common wear are also not included in the guarantee.
Service
Do you have any technical questions? Any claim? Do you need any spare parts or operating instructions? We will quickly help you and without needles bureaucracy at our web pages at www.guede.com in the Servicing part. Please help us be able to help you. In order to identify your device in case of claim we need the serial No., product No. and year of production. All this data can be found on the type label.
Serial No.:
Art. No:
Year of production:
Tel.: +49 (0) 79 04 / 700-360
Fax: +49 (0) 79 04 / 700-51999
E-Mail: support@ts.guede.com
Inspection and maintenance plan
Non-compliance with the maintenance plan may result in damage to the motor!
| Regular servicing period Before | any start-up | After 1 month | After 3 months | After 6 months | After 12 months | Nach 24 Monaten | |
| 5 Hours of operation | 25 Hours of operation | 50 Hours of operation | 100 Hours of operation | 250 Betriebs-stunden | |||
| Engine oil (10W-40) | Inspection | √ | |||||
| Change | √ | √ | |||||
| Air filter Inspection | √ | ||||||
| √ | |||||||
| Spark plug Inspection Clean | √ | ||||||
| √ | |||||||
Carry out the appropriate maintenance in the month specified or after being operated for the number of operating hours specified, depending on which occurs first.
Defects searching
| Failures Causes Removal | ||
| Engine does not start or starts, but does not run further. | Wrong starting process. Refer to the instructions in these operating instructions. | |
| Empty fuel tank/Lack of fuell Add some fuel | ||
| Wrong fuel, storing without petrol tank being drained | Drain the fuel tank and carburettor.Add fresh petrol. | |
| Wrong setting of the carburettor. Have the carburettor settings adjusted by an authorised customer service organisation. | ||
| Sooted spark plug (carbon residues on electrodes), electrodes distance too big. | Clean the spark plug, check the plug thermal value, possibly change the plug | |
| The spark plug is wet from petrol (oversaturated engine). | Dry the spark plug out and refit it. | |
| Dirty air filter Clean or replace the air filter | ||
| Flat battery Charge the battery | ||
| Fuse defective Change the fuse (10 A) | ||
| Engine starts, but does not run at full power. | Dirty air filter Clean or replace the air filter | |
| Wrong setting of the carburettor. Have the carburettor settings adjusted by an authorised customer service organisation. | ||
| Engine splutters. Dirty air filter Clean or replace the air filter | ||
| The motor does not develop maximum power | ||
| Engine does not run smoothly. | Wrong setting of the carburettor. Have the carburettor settings adjusted by an authorised customer service organisation. | |
| Excessive exhaust gases (smoke). | ||
| Unsteady running, strong vibrations | blades defective Replace the blade | |
| Blade is loose Check and tighten the blade clamping | ||
| Poor mowing/catching performance | Blade is blunt Have the blade sharpened or replaced | |
| Collection bag is blocked Empty the collection bag | ||
| Mowing height adjustment not regulated Adjust the mowing height | ||
| Grass is not collected | Blocked channel | Clean the ejection channel |
| Full collection bag | Empty the collection bag | |
| Too wet grass | Cut in dry weather | |
Translation of the EC-Declaration of Conformity
We, hereby declare the conception and construction of the below mentioned appliances correspond - at the type of construction being launched - to appropriate basic safety and hygienic requirements of EC Directives.
In case of any change to the appliance not discussed with us the Declaration expires.