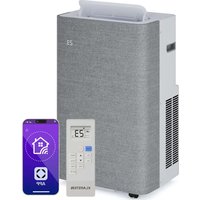
IceWind Plus Smart - Air Conditioning Klarstein - Free user manual and instructions
Find the device manual for free IceWind Plus Smart Klarstein in PDF.
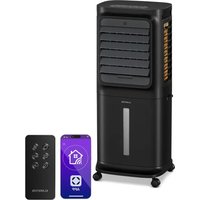
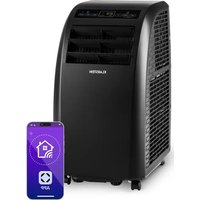
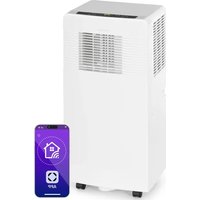
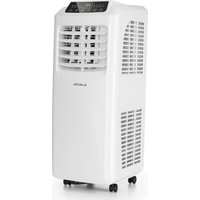
| Product type | Air cooler |
| Brand | Klarstein |
| Model | IceWind Plus Smart |
| Power supply | 220-240 V ~ 50 Hz |
| Power | 65 W |
| Wi-Fi | Yes (IEEE 802.11b/g/n, 2.4 GHz) |
| Control | Touch panel, remote control, smartphone app |
| Ventilation modes | Normal, Natural, Sleep |
| Ventilation speeds | High, Medium, Low, Silent |
| Timer | 1 h, 2 h, 4 h, 8 h |
| Oscillation | Yes |
| Humidification | By evaporation |
| Filter | Dust filter and water filter |
| Cleaning | Every 2 months minimum |
| Safety | Dry run protection, automatic shut-off |
| Remote control | Yes (CR2032 battery included) |
| Remote battery | CR2032 |
| Memory function | Yes |
| Dry wind function | Yes |
| Smartphone app | Klarstein (iOS and Android) |
| Article numbers | 10040209, 10040210, 10040211, 10040212 |
| Use | Indoor only |
Frequently Asked Questions - IceWind Plus Smart Klarstein
User questions about IceWind Plus Smart Klarstein
0 question about this device. Answer the ones you know or ask your own.
Ask a new question about this device
Download the instructions for your Air Conditioning in PDF format for free! Find your manual IceWind Plus Smart - Klarstein and take your electronic device back in hand. On this page are published all the documents necessary for the use of your device. IceWind Plus Smart by Klarstein.
USER MANUAL IceWind Plus Smart Klarstein
text_image
QR code image containing encoded data, no visible human-readable textINHALTSVERZEICHNIS
natural_image
Technical line drawing of a portable air conditioner unit with internal compartments and housing (no text or symbols)natural_image
Symbol of a trash bin crossed with a diagonal line, no text or numbers presentUnit 6 Riverside Business Centre
Brighton Road
Shoreham-by-Sea
BN43 6RE
United Kingdom
Congratulations on purchasing this device. Please read the following instructions carefully and follow them to prevent possible damages. We assume no liability for damage caused by disregard of the instructions and improper use. Scan the QR code to get access to the latest user manual and more product information.

text_image
QR code image containing encoded data, no visible human-readable textCONTENTS
Safety Instructions 18
Device Overview 20
Control Panel and Button Functions 21
Installation and Operation 22
Other Functions 23
Device Control by Smartphone 25
Cleaning and Care 27
Disposal Considerations 29
Declaration of Conformity 29
TECHNICAL DATA
| Item number 10040209, 10040210, 100402011, 10040212 | |
| Power supply 220-240 V ~ 50 Hz | |
| Power consumption 65 W | |
| WiFi standard IEEE 802.11b/g/n (channel 1-14) | |
| WiFi frequency 2.400 - 2.4835 GHz | |
| WiFi transmission power (max.) 11b: 17 dBm, 11g: 15 dBm, 11n: 13 dBm | |
SAFETY INSTRUCTIONS
- Before use, check the voltage indicated on the nameplate. Ensure that you only connect the appliance to sockets with the appropriate voltage.
- Keep the cable away from hot surfaces and sharp objects.
- Do not lay the cable under a carpet or cover it with other objects or fabrics. Lay the cable so that no one falls over it or gets caught on it.
- Do not use the device if the plug or the power cord is damaged.
- If the power cord is damaged, it must be replaced by the manufacturer, an authorised specialist company or a similarly qualified person.
- Use the unit indoors only.
- Do not cover the device.
- Place the appliance on a level, stable surface.
- Make sure that the unit is switched o before inserting the plug into the socket.
- Do not operate the appliance with wet hands and do not handle the plug and the cable with wet hands.
- Do not leave the device unattended during operation. Switch the device o and unplug it when you are not using it.
- Before llling, cleaning and maintaining the device, pull the power plug out of the socket.
- Do not pull the plug out of the socket by the cable. Instead, hold it securely with your hand while unplugging it.
- Children from the age of 8, mentally and physically impaired persons may only use the device if they have been familiarised in detail with the functions and safety precautions by a supervisor responsible for them beforehand. Make sure that children do not play with the appliance. Children over the age of 8 may only clean the appliance under supervision. Make sure that children do not play with the appliance. Children may only clean and care for the appliance under supervision.
- Use the device only as described in these operating instructions.
- Do not put your ngers or objects into the ventilation openings.
- Do not place the appliance near curtains, drapes, tablecloths or similar textiles. These could be drawn into the fan and could damage it.
- Do not use the unit in damp rooms such as bathrooms.
- Do not use the unit before the wheels are mounted or when it is lying on its side.
- Unwind the cable completely before use.
• Make sure that the device is upright.
- During operation, the unit humidifies the ambient air. However, avoid too high humidity. We recommend a humidity of between 40 - 50% . Excessive humidity can lead to mould or health problems.
- Only place the unit on surfaces that are insensitive to moisture and high humidity. It can always happen that a few drops fall out when installing or removing the water tank. If this is the case, wipe away the water drops immediately.
- Change the water in the tank after 3 days at the latest.
- Never swallow batteries as there is a risk of chemical burns.
- A button cell battery is included with this unit. If the button cell battery is swallowed, it can cause severe internal burns and death within 2 hours.
- Keep both new and used batteries out of the reach of children.
- If the battery compartment does not close securely, stop using the appliance and make sure it is out of the reach of children.
- If you think batteries have been swallowed or are in any other orifices, seek medical attention or emergency room care immediately.
- The batteries contain environmentally hazardous substances. They must be removed from the appliance before disposal and disposed of safely in accordance with environmental regulations.
- Note that high humidity can favour the growth of biological organisms in the environment.
- Make sure that the area around the air cooler does not get damp or wet. If there is moisture around the unit, reduce the power of the unit. If the output power of the unit cannot be reduced, use the air cooler with interruptions. Make sure that absorbent materials such as carpets, curtains, curtains or tablecloths do not get wet.
- Never leave water in the holder when the appliance is not in use.
- Empty and clean the air cooler before storage. Clean the air cooler before the next use.
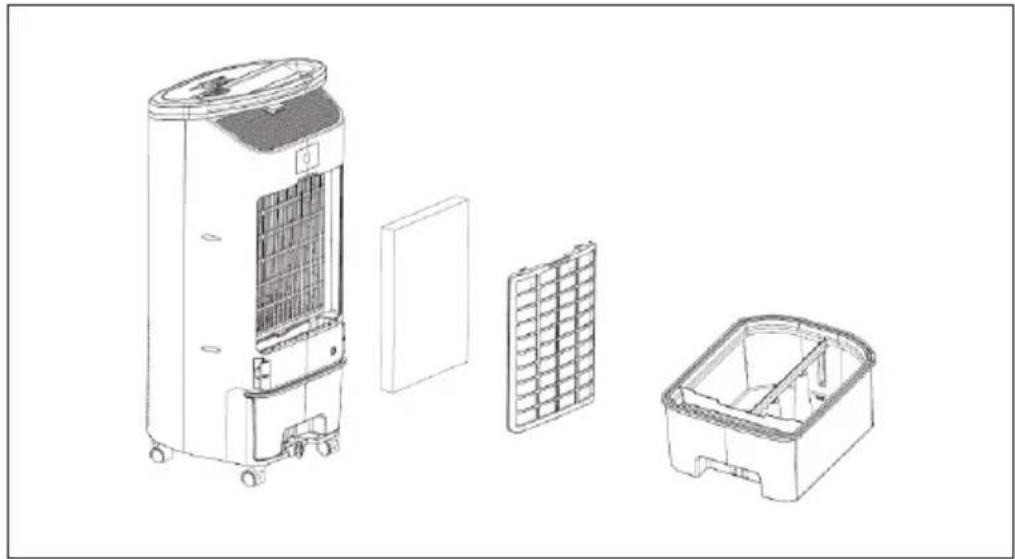
DEVICE OVERVIEW
| 1 Top cover 8 Remote control | ||
| 2 Control panel 9 Back side | ||
| 3 Remote control sensor 10 Filter | ||
| 4 Decorative ring 11 Filter frame | ||
| 5 Air outlet 12 Water tank | ||
| 6 Front shell 13 Power cable | ||
| 7 Rollers |
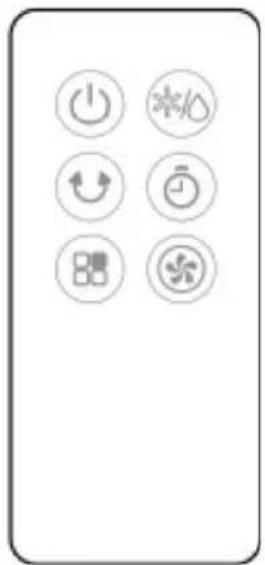
CONTROL PANEL AND BUTTON FUNCTIONS
| On/Off | |
| Setting the timer: 1, 2, 4, 8 h | |
| Humidification or evaporative cooling | |
| Swing | |
| Mode: Normal > Natural ( ) Sleep mode ( ) | |
| Wind speed: high > medium > low > quiet |
natural_image
Pure electrical control icons without any text or labelsINSTALLATION AND OPERATION
Before first use
Remove all packing material and read the instructions completely. The unit is ready for use immediately.
Switching on the appliance
As soon as the unit is switched on, all displays come on briefly. A double signal sounds, the air outlet moves back from the current angle to 0^ and the unit switches to standby mode. If you do not take any action for more than 1 minute, the display darkens to 33 % of the original brightness. Press any button to switch the display back on.
Operation via the buttons on the control panel
- On/Off: Press the button to start the unit in normal wind mode. The air outlet opens automatically. Press the button again to return to standby mode. The fan stops and the outlet closes automatically. To switch off the device completely, pull the power plug out of the socket.
- Wind speed: After the unit has been switched on, the unit is in normal wind mode. Press the button several times to set one of the following wind speeds: high > medium > low > quiet. If you select "low", the fan first runs at medium speed and then changes to low speed.
- Wind mode: Press the button several times to select one of the following modes: Normal > Natural ( ) > Sleep Mode ( ). The corresponding indicator on the display lights up. In natural mode, the wind speed changes regularly and the cool air is distributed throughout the room. In natural mode, the speed is automatically controlled and not manually adjustable. In sleep mode, the air is distributed to ensure a comfortable sleep. In sleep mode, all speeds are manually adjustable.
Note: In natural wind mode, the "quiet" wind speed cannot be used. In natural mode, only the wind speeds "high", "medium" and "low" can be used.
- Timer: Press the button several times to select one of the following settings: 1 hour > 2 hours > 4 hours > 8 hours. If the corresponding LED is not lit, the timer is not active. After you have selected the desired time, the corresponding indicator lights up on the display. As soon as the time has elapsed, the unit switches off and the display goes out.
- Humidification or evaporative cooling: In operating mode, press the button to switch the water pump in the unit on/off
- Swing: Press the button to swing the unit to the right and left. Press the button again to stop the swing function.
OTHER FUNCTIONS
Memory function
- When the unit is switched on again after an interruption of the power supply or a power failure, a beep sounds 10 times (once per second), with no screen display and no action performed. After 30 seconds, the unit returns to the function that was set before it was switched off (all functions, except sleep mode, are restored when it is switched on again, including the new function for protection against unintentional long-term operation).
- If you press the On/Off button within the recovery time, the last set function is restored immediately.
- The countdown of the timer function is also saved. The maximum deviation after a power failure is 5 minutes (the time during which the unit was switched off by the power failure is not included).
- If the unit has been switched off normally and you switch it on again after the power supply has been interrupted, the memory function is not activated and the unit is in normal operating mode.
Water shortage protection function
- When the cooling function of the unit is activated, it starts with a 45-second delay because the unit first checks whether there is enough water in the water tank and it takes another 5 seconds to determine the operating status of the cooling.
- When the cooling function has been activated, the water pump pumps water. Regardless of whether there is water in the water tank, the magnetic switch connected to the MCU connection is not detected for the first 50 seconds after the water pump is switched on. The state of the magnetic switch is determined between the 45th and 50th second. Depending on the state of the magnetic switch, it is determined whether the water pump continues operation or stops operation.
- After 45 seconds, if the water level in the water tank is found to be too low for 5 consecutive seconds, the water pump stops operating. The unit beeps for 10 seconds and the humidification indicator light goes off.
WiFi function
- In operating mode, press and hold the wind mode button 📁 for 5 seconds. After a beep sounds, the WiFi indicator light flashes rapidly for approx.
5 seconds and app networking can be configured in standard mode. If no connection is established within 3 minutes, the WiFi indicator goes off. To reconnect, press and hold the wind mode button for 5 seconds. After a beep sounds, the WiFi module is reset, the WiFi indicator light flashes quickly for about 5 seconds and the app networking can be configured in standard mode. When the WiFi indicator light is flashing rapidly, press and hold the wind mode button again for 5 seconds. After a beep sounds, the WiFi indicator flashes slowly and the app networking can be adjusted in compatibility mode.
Notes on the WiFi function
- If the unit is switched off again within 10 seconds of being switched on, the WiFi indicator light returns to the state before it was switched off. If the unit is switched off after 10 seconds, the WiFi indicator light goes off and the unit goes into standby mode. Press and hold the setting button for 5 seconds to restart the function.
- If no connection to a WiFi network is established within 3 minutes during the pairing process, the WiFi indicator light goes off. Press and hold the setting button for 5 seconds to restart the function.
- If the router is switched off after the connection to the device has been successfully established, the WiFi indicator light also goes out. When the router is switched on again, the connection to the device is also automatically restored.
- To use the WiFi function, the WiFi indicator on the unit must flash quickly and the WiFi router must be able to connect to a mobile end device (smartphone).
Dry wind function
- After the cooling and humidification function has been activated, the paper of the filter's wet curtain must be completely dried. Therefore, always before storing the unit after using the cooling and humidification function, press and hold the wind speed button for 3 seconds to activate the dry wind function. Then stop the dry wind function.
- After the dry wind function has been activated, the next higher wind speed is selected first. The appliance then runs for 20 minutes at the highest speed setting. The indicator light of the highest speed level lights up.
- After activating the dry wind function, the indicator of the highest speed level flashes and is switched on and off alternately at a frequency of 0.5 seconds. The function is automatically terminated after 20 minutes.
- When the dry wind function is activated, all other functions are deactivated.
- After this function is activated, all buttons except the on/off button are deactivated.
- If you press the On/Off button before the 20 minutes have elapsed, the appliance is switched off and the remaining time of the dry wind function is not saved.
- If the dry wind function has been activated and the unit has been switched off prematurely, the unit is reset to the previous operating mode when it is switched on again (except for the timer and sleep mode functions). The dry wind function is not saved.
- If you switch off the unit after using the cooling and humidification function without using the dry wind function, you must restart the unit and activate the dry wind function to dry the paper of the filter wet curtain.
DEVICE CONTROL BY SMARTPHONE
If you integrate the device into your home WiFi, you can conveniently operate it via the associated Klarstein app. The app not only allows you to remotely control the device via your smartphone, but also gives you access to recipes and additional information.
Follow these steps to connect your smartphone to your Klarstein device:
- Download the Klarstein app first by scanning the QR code with your smartphone (see below), or download it directly from App Store or Google Play.
- Make sure your smartphone is connected to the same WiFi network that your Klarstein device is to be connected to.
- Open the Klarstein app.
- Sign in to your account. If you do not have an account, sign up in the Klarstein app.
- Follow the instructions from the app.
App Download
Use the scan function of your smartphone to scan the QR code and save the app on your smartphone.
Note: The app provides further information on how to use the app and help on how to connect to your device as soon as you open it for the first time.
| iOS Android | |
Troubleshooting connection problems
If your Klarstein device cannot be found in the WLAN, check the following:
- The device is not plugged in. Make sure that your device is plugged into an electric socket.
- The device is not in pairing mode. Make sure that the WiFi indicator (LED) on the smart device control panel is blinking as described in the 'Reset WiFi settings' instruction of your smart device (instructions are usually available on device connection process).
- The WiFi access point does not operate on 2.4 GHz. Make sure that your access point operates on 2.4 GHz band and you have a separate SSID on 2.4 GHz band. If you are not sure about the operating band of your access point, please contact your internet provider company.
Important: please note that if your WiFi router is dual band - operating on both 2.4 GHz and 5 GHz band - you need to separate the SSIDs for each band and use the 2.4 GHz SSID for connection.
-
Firewall settings of your WiFi network; the firewall setting of your WiFi network may not allow the Klarstein app to configure the WiFi settings on your smart device. Please make sure that you are not using a public WiFi network, e.g. airports, dormitories, companies, etc.
-
Different credentials used in smartphone and the app. Make sure that the WiFi credentials entered in the Klarstein app are the same as the ones that your smartphone is connected to.
Following the above mentioned points, if your smart device still fails to connect to the app, please contact us via email for support: appsupport@go-bbg.com
CLEANING AND CARE
Note: Switch the device off and unplug it before cleaning, repairing or maintenance.
Cleaning
- If too much foreign matter or dust settles on the grille cover and the air inlet rotors at the back of the unit, the wind effect will be impaired. It is therefore recommended to clean them at least every two months.
natural_image
Exploded view diagram of a portable air conditioner unit showing internal components and housing (no text or labels)- Switch off the device and unplug the power cord. Always disconnect the mains plug before cleaning to avoid electric shocks or mechanical damage.
- Use a commercially available cleaning agent and a soft brush for cleaning. Do not use chemical cleaners for cleaning.
Cleaning the outer surface of the device
- Wipe the surface with a damp cloth. Do not use water, as it could enter the unit and damage the electronics.
- Do not use caustic cleaning agents or solvents.
Cleaning the filters
- Press down the snaps of the dust filter and remove it.
- Remove the water filter.
- Vacuum the dust filter.
- Place the water filter in a warm soap solution for a short time. Then rinse the water filter thoroughly with clear water. Replace the filters in reverse order.
- The filter in the water tank can be rinsed with warm water if necessary.
Storage
- If the device will not be used for a long time, unplug it from the mains and pack it away to prevent dust from getting into the housing.
• After packing, store it in a dry, ventilated place.
Changing the battery of the remote control
- To change the battery, open the battery compartment by pressing down the snap lock and pulling out the battery compartment. To do this, observe the markings on the back of the remote control.
- Insert a new battery (CR2032). Make sure that the positive pole (+) is facing upwards towards you. Note the polarity markings on the back of the remote control and in the battery compartment so that you insert the battery the right way round.
• After inserting the battery, push the battery compartment back into the remote control.
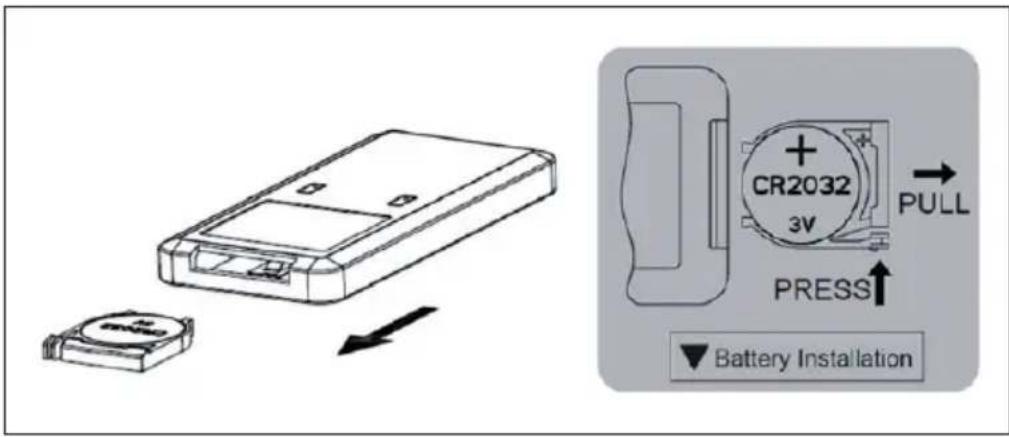
text_image
Diagram showing a battery module being transferred to a battery via a pull button, with labeled components and directional arrows.DISPOSAL CONSIDERATIONS
natural_image
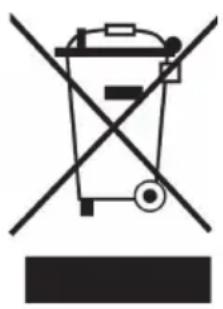
Symbol of a trash bin crossed with a diagonal line, no text or numbers presentIf there is a legal regulation for the disposal of electrical and electronic devices in your country, this symbol on the product or on the packaging indicates that this product must not be disposed of with household waste. Instead, it must be taken to a collection point for the recycling of electrical and electronic equipment. By disposing of it in accordance with the rules, you are protecting the environment and the health of your fellow human beings from negative consequences. For information about the recycling and disposal of this product, please contact your local authority or your household waste disposal service.
This product contains batteries. If there is a legal regulation for the disposal of batteries in your country, the batteries must not be disposed of with household waste. Find out about local regulations for disposing of batteries. By disposing of them in accordance with the rules, you are protecting the environment and the health of your fellow human beings from negative consequences.
DECLARATION OF CONFORMITY

text_image
CE UK CAManufacturer:
Chal-Tec GmbH, Wallstrasse 16, 10179 Berlin, Germany.
Importer for Great Britain:
Chal-Tec UK limited
Unit 6 Riverside Business Centre
Brighton Road
Shoreham-by-Sea
BN43 6RE
United Kingdom
The complete declaration of conformity of the manufacturer can be found at the following link: use.berlin/10040209
Cher client, chère cliente,
text_image
QR code image containing encoded data, no visible human-readable textSOMMAIRE
text_image
Mobile phone control panel with six function icons: power, refresh, alarm, timer, grid, and fanINSTALLATION ET UTILISATION
natural_image
Technical line drawing of a portable air conditioner unit with internal compartments and housing (no text or symbols)natural_image
Symbol of a trash bin crossed with a diagonal line, no text or numbers presentDÉCLARATION DE CONFORMITÉ

text_image
CE UK CAFabricant :
Chal-Tec GmbH, Wallstraße 16, 10179 Berlin, Allemagne.
Unit 6 Riverside Business Centre
Brighton Road
Shoreham-by-Sea
BN43 6RE
Royaume Uni
text_image
QR code image containing encoded data, no visible human-readable textÍNDICE
text_image
Technical diagram of a portable air conditioner unit with numbered components for identification.natural_image
Technical line drawing of a portable air conditioner unit with internal compartments and housing (no text or symbols)natural_image
Symbol of a trash bin crossed with a diagonal line, no text or numbers presentChal-Tec UK limited.
Unit 6 Riverside Business Centre
Brighton Road
Shoreham-by-Sea
BN43 6RE
Reino Unido
text_image
QR code image containing encoded data, no visible human-readable textINDICE
text_image
Technical diagram of a portable air conditioner unit with numbered components for identification.natural_image
Technical line drawing of a portable air conditioner unit with internal compartments and housing (no text or symbols)natural_image
Symbol of a trash bin crossed with a diagonal line, no text or numbers presentUnit 6 Riverside Business Centre
Brighton Road
Shoreham-by-Sea
BN43 6RE
Regno Unito