
GXP2130 - Phone GRANDSTREAM - Free user manual and instructions
Find the device manual for free GXP2130 GRANDSTREAM in PDF.
| Product type | IP Phone (SIP) for businesses |
| Brand | Grandstream |
| Model | GXP2130 |
| Phone lines | 3 |
| Screen | 2.8 inch color graphic LCD |
| Programmable keys | 4 XML context-sensitive keys, 8 BLF keys |
| Network connectivity | 2 Gigabit Ethernet ports (LAN and PC) |
| Power supply | 12V DC power adapter (included) |
| PoE | Support (Power over Ethernet) |
| Bluetooth | Built-in (version V2) |
| Audio quality | HD (handset and speakerphone) |
| Conference | Up to 4 participants |
| Phone functions | Call transfer, hold, conference, mute, speakerphone, headset |
| Installation | Wall mount or desktop stand |
| Configuration | Via web browser or phone menu |
| Firmware update | Via network; do not restart during update |
| Security | Privacy protection, administrator and user passwords |
| Package contents | Phone, handset, adapter, Ethernet cable, phone cable, stand, guide, wall mount, BLF labels |
| Emergency service | Does not support emergency calls; requires configured SIP subscription |
| Maintenance | Clean with a soft, dry cloth |
Frequently Asked Questions - GXP2130 GRANDSTREAM
User questions about GXP2130 GRANDSTREAM
0 question about this device. Answer the ones you know or ask your own.
Ask a new question about this device
Download the instructions for your Phone in PDF format for free! Find your manual GXP2130 - GRANDSTREAM and take your electronic device back in hand. On this page are published all the documents necessary for the use of your device. GXP2130 by GRANDSTREAM.
USER MANUAL GXP2130 GRANDSTREAM
Grandstream Networks, Inc.
126 Brookline Ave, 3rd Floor
Boston, MA 02215
Voice: (617) 566-9300
Fax: (617) 249-1987
www.grandstream.com

For Warranty and RMA information, please visit www.grandstream.com
EU Agent:
Picus Advisors Ltd
Taivalmaki 9F1-02200 Espoo, FINLAND https://www.picus.fi
Note: For European Union only
natural_image
Two black OPD phones with digital displays and cord connectors (no visible text or symbols)GXP2130 Enterprise IP Phone Quick Installation Guide
Content
English....1
简体中文....7
Español....13
Français....19
Deutsch....25
Italiano....31
Русский....37
Português.... 43
Polski....49
The GXP2130 is not pre-configured to support or carry emergency calls to any type of hospital, law enforcement agency, medical care unit (“Emergency Service(s)”) or any other kind of Emergency Service. You must make additional arrangements to access Emergency Services. It is Your responsibility to purchase SIP-compliant Internet telephone service, properly configure the GXP2130 to use that service, and periodically test your configuration to confirm that it works as You expect. If You do not do so, it is Your responsibility to purchase traditional wireless or landline telephone services to access Emergency Services.
GRANDSTREAM DOES NOT PROVIDE CONNECTIONS TO EMERGENCY SERVICES VIA THE GXP2130. NEITHER GRANDSTREAM NOR ITS OFFICERS, EMPLOYEES OR AFFILIATES MAY BE HELD LIABLE FOR ANY CLAIM, DAMAGE, OR LOSS, AND YOU HEREBY WAIVE ANY AND ALL SUCH CLAIMS OR CAUSES OF ACTION ARISING FROM OR RELATING TO YOUR INABILITY TO USE THE GXP2130 TO CONTACT EMERGENCY SERVICES, AND YOUR FAILURE TO MAKE ADDITIONAL ARRANGEMENTS TO ACCESS EMERGENCY SERVICES IN ACCORDANCE WITH THE IMMEDIATELY PRECEDING PARAGRAPH
PRECAUTIONS:
WARNING: Please DO NOT power cycle the GXP2130 during system boot up or firmware upgrade. You may corrupt firmware images and cause the unit to malfunction.
WARNING: Use only the power adapter included in the GXP2130 package. Using an alternative non-qualified power adapter may possibly damage the unit.
OVERVIEW:
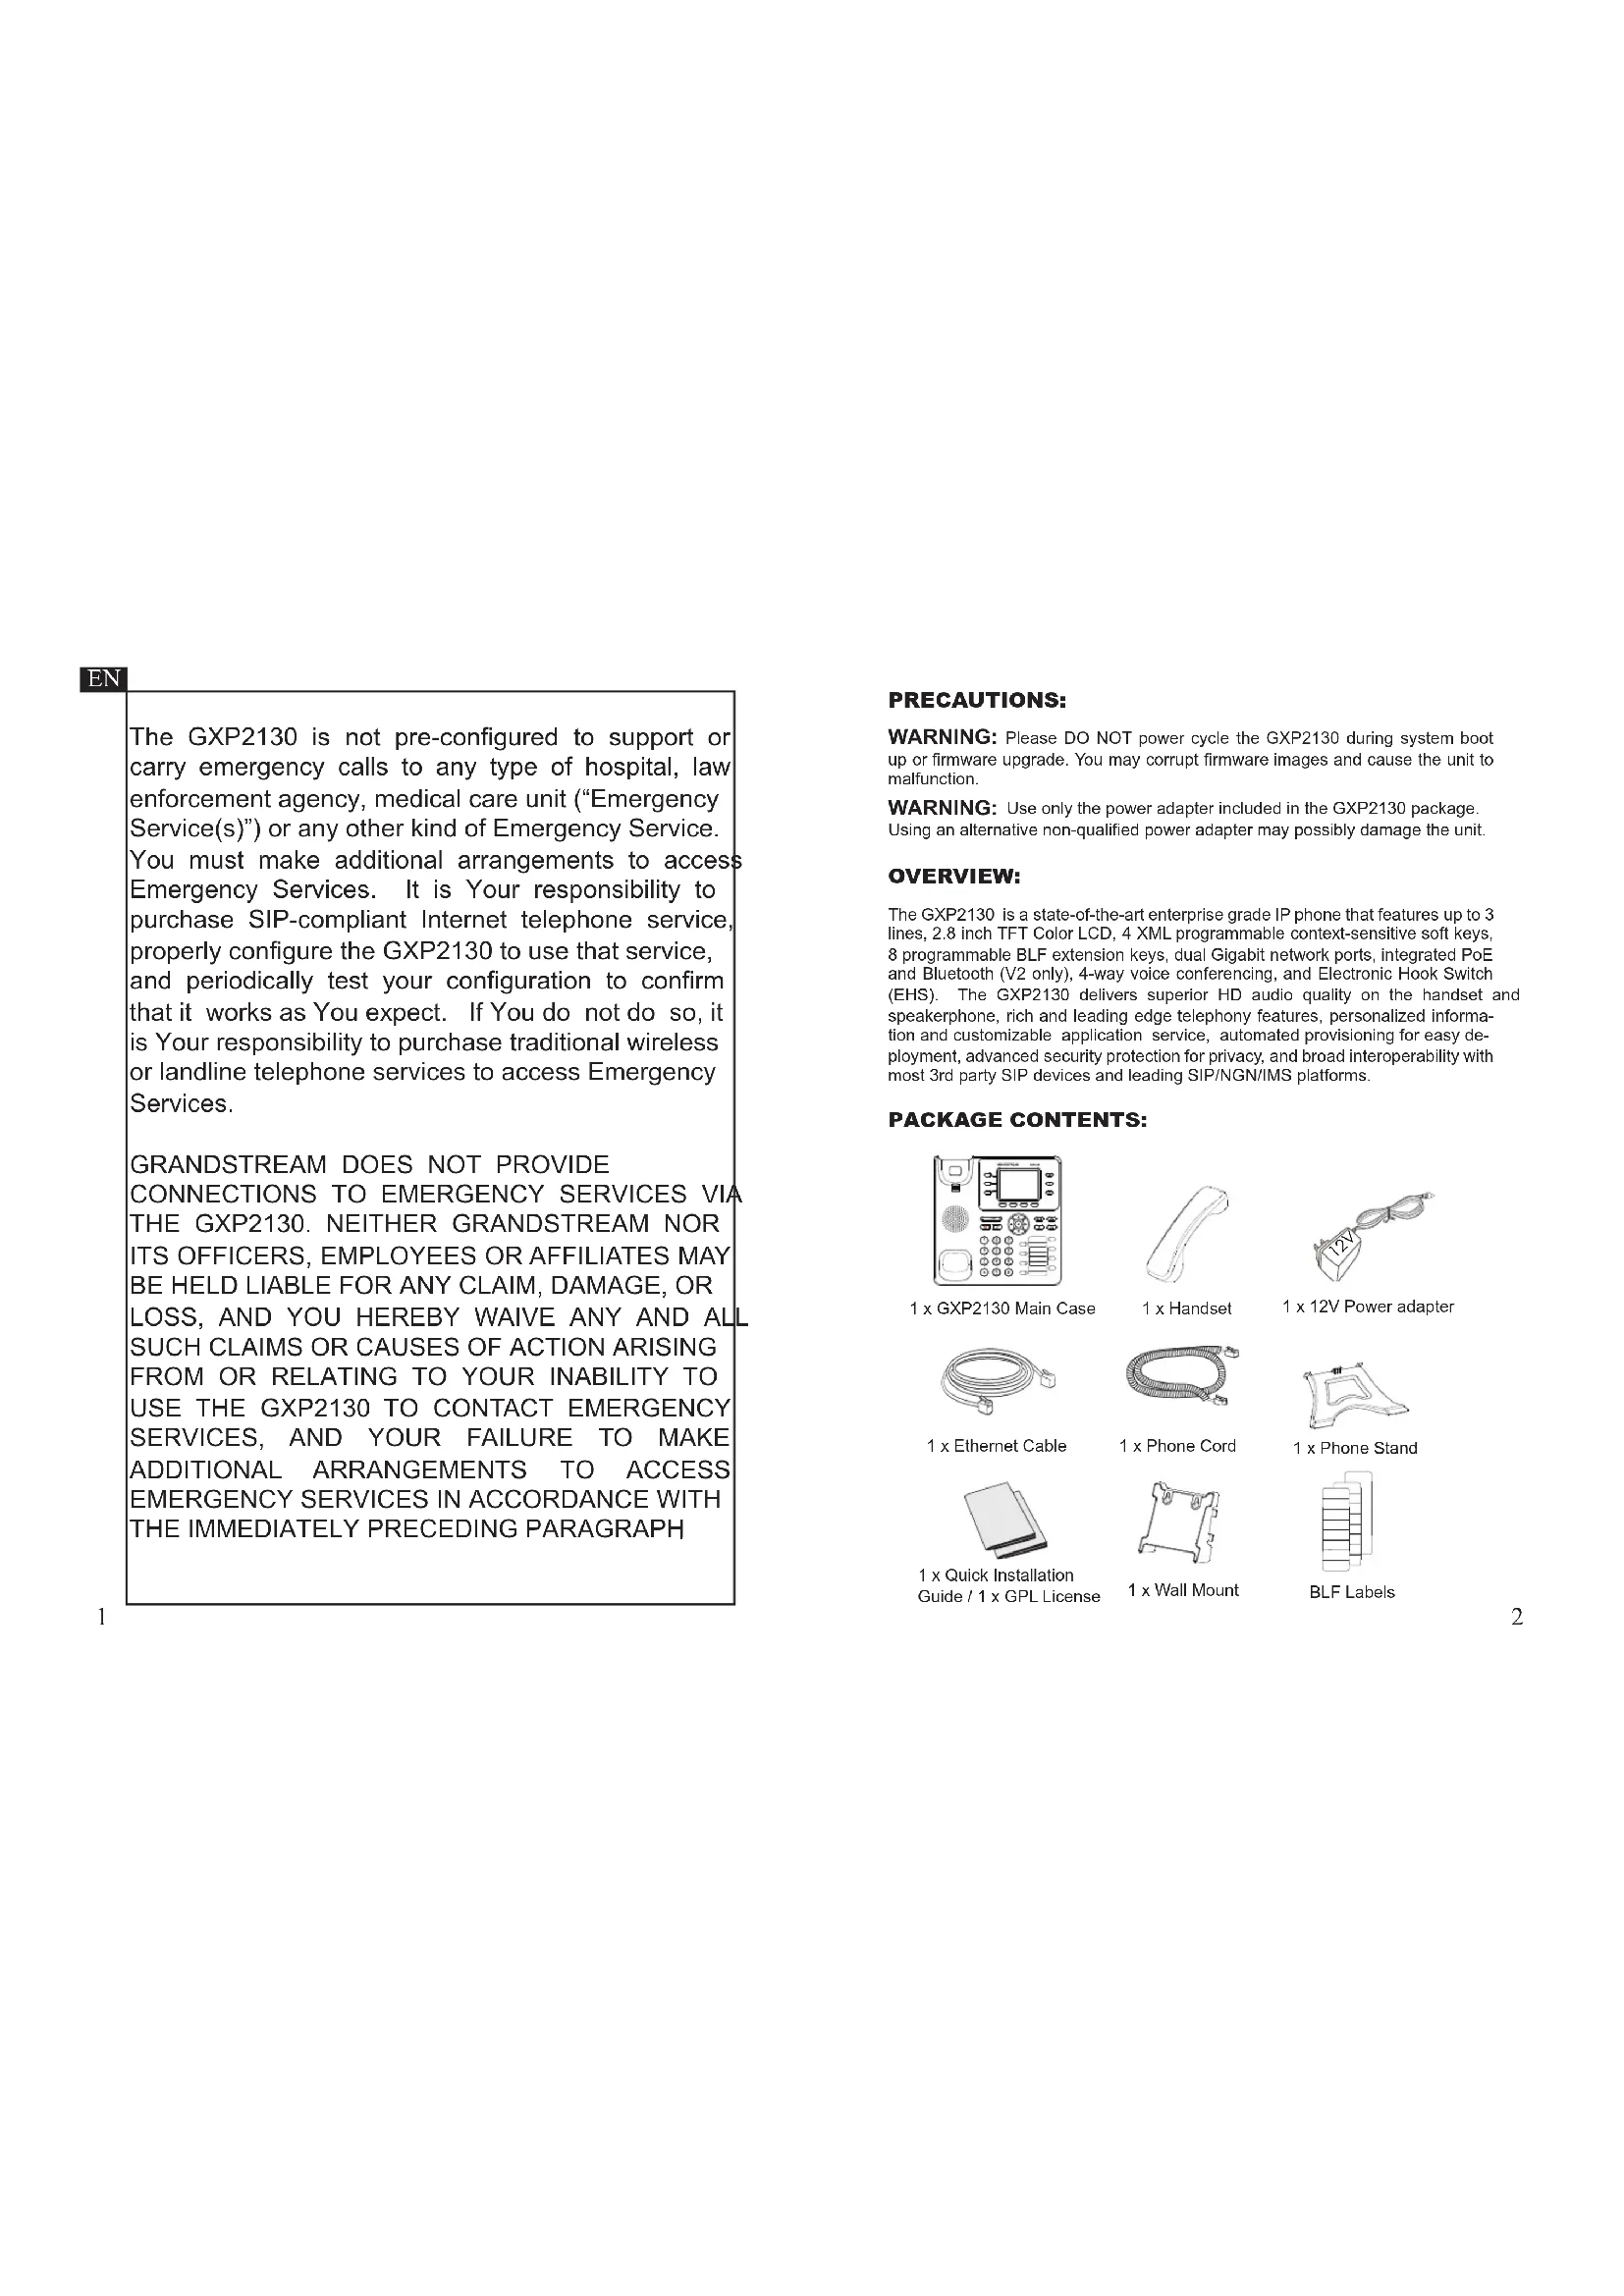
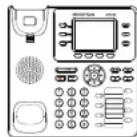
The GXP2130 is a state-of-the-art enterprise grade IP phone that features up to 3 lines, 2.8 inch TFT Color LCD, 4 XML programmable context-sensitive soft keys, 8 programmable BLF extension keys, dual Gigabit network ports, integrated PoE and Bluetooth (V2 only), 4-way voice conferencing, and Electronic Hook Switch (EHS). The GXP2130 delivers superior HD audio quality on the handset and speakerphone, rich and leading edge telephony features, personalized information and customizable application service, automated provisioning for easy deployment, advanced security protection for privacy, and broad interoperability with most 3rd party SIP devices and leading SIP/NGN/IMS platforms.
PACKAGE CONTENTS:
1 x GXP2130 Main Case

1 x Handset

1 x 12V Power adapter

1 x Ethernet Cable

1 x Phone Cord

1 x Phone Stand

1 x Quick Installation
Guide / 1 x GPL License

1 x Wall Mount

BLF Labels
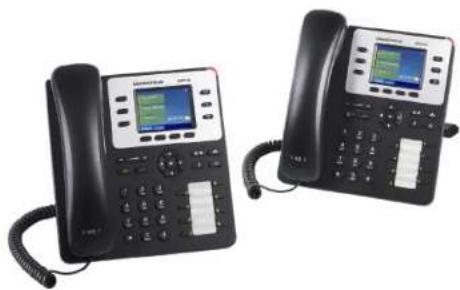
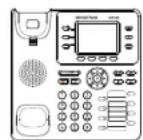
PHONE SETUP:

text_image
Slots for the wall mount and phone stand TC / 400001-500Installing the Phone (Wall Mount):
- Attach the wall mount to the slot on the back of the phone.
- Attach the phone to the wall via the wall mount hole.
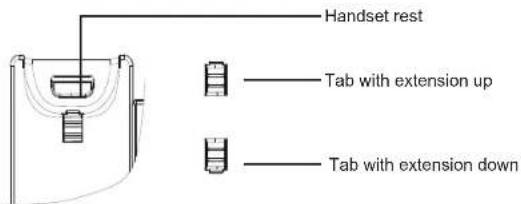
- Pull out the tab from the handset cradle (See figure below).
- Rotate the tab and plug it back into the slot with the extension up to hold the handset while the phone is mounted on the wall (See figure below).
text_image
Handset rest — Tab with extension up — Tab with extension downInstalling the Phone (Phone Stand):
For installing the phone on the table with the phone stand, attach the phone stand to the bottom of the phone where there is a slot for the phone stand (upper part, bottom part).
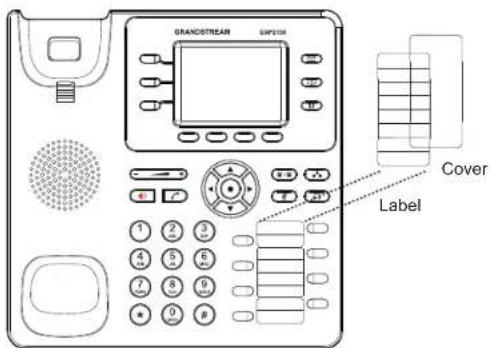
Installing BLF Paper Label:
- Install the paper label under the plastic notches on the phone and gently lay the paper down on the phone surface.
- Install the plastic cover over the paper label by inserting the cover under the plastic notches on the phone.
text_image
BRANDSTREAM CAPYUM 1 2 3 4 5 6 7 8 9 0 1 Label CoverCONNECTING THE PHONE
natural_image
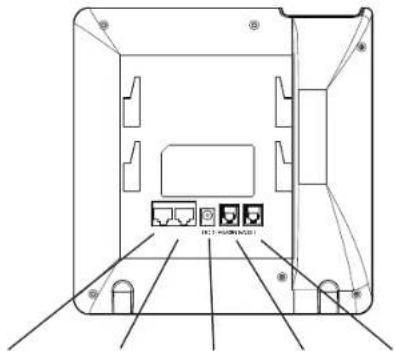
Technical line drawing of a device rear panel with labeled ports and mounting holes (no text or symbols)PC Port LAN Port Power Headset Port Handset Port
To setup the GXP2130, follow the steps below:
- Connect the handset and main phone case with the phone cord.
- Connect the LAN port of the phone to the RJ-45 socket of a hub/switch or a router (LAN side of the router) using the Ethernet cable.
- Connect the 12V DC output plug to the power jack on the phone; plug the power adapter into an electrical outlet.
- The LCD will display provisioning or firmware upgrade information. Before continuing, please wait for the date/time display to show up.
- Using the phone embedded web server or keypad configuration menu, you can further configure the phone using either a static IP or DHCP.
Tips For Using the Keypad:
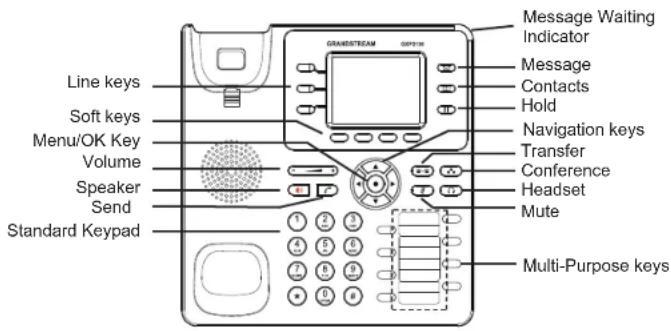
text_image
Line keys Soft keys Menu/OK Key Volume Speaker Send Standard Keypad GRANESTREAM GPT-76 Message Waiting Indicator Message Contacts Hold Navigation keys Transfer Conference Headset Mute Multi-Purpose keys- To access the MENU, press the round MENU button.
- Navigate the menu by using the UP/DOWN and LEFT/RIGHT buttons.
- Press the round MENU button to confirm a menu selection.
- The phone automatically exits MENU mode with an incoming call, the phone goes off-hook or the MENU mode is left idle for 60 seconds.
PHONE CONFIGURATION:
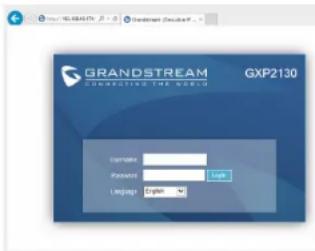
Configure the GXP2130 using Web Browser:
- Ensure your phone is powered up and connected to the Internet.
- Press the UP button to see the IP address.
- Type the phone's IP address in your PC browser.
- The default administrator username and password are "admin"; the default end-user username is "user" and the password is "123".
text_image
GRANDSTREAM GXP2130 Camelus Password Language: EnglishConfigure the GXP2130 using the Keypad:
- Make sure the phone is idle.
- Press the MENU button to access the keypad MENU to configure the phone.
- Select MENU-> Phone-> SIP-> Account to configure settings for SIP Proxy, Outbound Proxy, SIP User ID, SIP Auth ID and SIP Password.
- Follow MENU options to configure the basic features of the phone. For example: the IP address if using a static IP. For details, please check GXP2130 User Manual.
- Please contact your ITSP (Internet Telephony Service Provider) for additional settings that may be necessary to configure the phone.
Note: For the detailed user manual, please download from: http://www.grandstream.com/support
This product is covered by one or more of the U.S. patents (and any foreign patent counterparts thereto) identified at www.cmspatents.com.
ZH
http://www.grandstream.com/support
1 x GXP2130 Base Principal

1 x Handset