
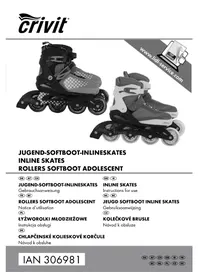
HG05680 - Skate CRIVIT - Free user manual and instructions
Find the device manual for free HG05680 CRIVIT in PDF.

| Product type | Children's roller skates |
| Brand | Crivit |
| Model | HG05680 |
| Category | Skate |
| Use | Private use, not suitable for other sports |
| Available sizes | 29/30 and 31/32 |
| Wheel size | 58 × 32 mm |
| Wheel hardness | 90 A |
| Bearings | Chrome ABEC 5 |
| Standard | EN 13899, class B, 20-60 kg |
| Maximum user weight | 60 kg |
| Delivery contents | 1 pair of skates, instruction manual |
| Closure | Laces and hook-and-loop fastener |
| Brake | Front brake |
| Direction adjustment | Adjustment nuts (2) |
| Materials | Plastic, metal, rubber (brake) |
| Care and cleaning | Clean with a dry cloth, lubricate bearings with suitable grease |
| Spare parts available | Wheels, front brake, screws, nuts, washers |
| Warranty | 3 years |
| After-sales service France | 0800904879, owim@lidl.fr |
| After-sales service Belgium | 080071011, owim@lidl.be |
Frequently Asked Questions - HG05680 CRIVIT
User questions about HG05680 CRIVIT
0 question about this device. Answer the ones you know or ask your own.
Ask a new question about this device
Download the instructions for your Skate in PDF format for free! Find your manual HG05680 - CRIVIT and take your electronic device back in hand. On this page are published all the documents necessary for the use of your device. HG05680 by CRIVIT.
USER MANUAL HG05680 CRIVIT
DETSKÉ KOLIESKOÈV KORČULE
Pokyny pre oblsuhu a bezpećnostné pokyny
DK
RULLESKØJTER TIL BØRN
Operation and safety notes
NL BE
KINDER-ROLSCHAATSEN
GB/IEOperation and safety notesPage 11
Intended use Page 12
Scope of delivery/Part description. Page 12
Technical data.. Page 12
Safety notices
Roller skating tips
First attempts.. Page 13
Setting the steering characteristic.. Page 13
Attaching and removing
Putting the roller skates on. Page 14
Removing the roller skates. Page 14
Maintenance... Page 14
Care and storage
Troubleshooting
Disposal
Warranty
Warranty claim procedure.. Page 15
Service Page 16
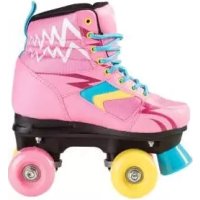
Kids' roller skates
Introduction
We congratulate you on the purchase of your new product. You have chosen a high quality product. Familiarise yourself with the product before using it for the first time. In addition, please carefully refer to the operating instructions and the safety advice below. Only use the product as instructed and only for the indicated field of application. Keep these instructions in a safe place. If you pass the product on to anyone else, please ensure that you also pass on all the documentation with it.
Intended use
These roller skates are intended for private use and not for other sports.
- Scope of delivery / Part description (Figure A)
1 Pair Kids' roller skates
1 Instructions for use
1 Velcron strap
2 Laces
3 Screw, small
4 Front stopper
5 Phillips screw
6 Wheels
7 Bolt, large
8 Nut for adjusting the steering characteristic
9 Bolt, small
10 Washer
Technical data
Sizes: 29/30 and 31/32
Wheels size: 58 × 32 ~mm , Wheels hardness: 90 A
Ball bearings: ABEC 5 chrome bearings
EN 13899, Class B, 20-60 kg
Date of manufacture (month/year): 12 / 2021

Safety notices
KEEP ALL SAFETY NOTICES AND INSTRUCTIONS FOR FUTURE REFERENCE. KEEP INSTRUCTIONS IN A SAFE PLACE. SUBMIT ALL DOCUMENTS TO A THIRD PARTY IF DISTRIBUTING THE PRODUCT.
Always warn others when you are passing them. Do not skate on a road with intense traffic. Yield the road pedestrians and cyclists.
Choose the correct surface for roller skating. Surfaces should be smooth, clean and dry.
Make sure that the screws and bolts are secure before roller skating.
Ensure that screws and bolts retain their selflocking properties.
Do not modify the roller skates in such a way that poses a risk to your safety.
Remove objects with sharp edges, such as small stones, that you may skate into.
Always wear full protective equipment (helmet, protectors for palms, wrists, elbows, and knees).
A WArNIng with heavy traffic.
Remain vigilant at all times and be careful.
Avoid excessive speeds. As a rule of thumb: never skate faster than you can run.
Exchange the Front stoppers and rollers regularly if they are worn.
Always wear reflective clothing so that you are more visible to others.
CAUTION! Do not use this product barefoot.
Always pay attention to other road users and follow the road traffic regulation.
The user needs to understand the Road Traffic Act of the using country.
Avoid property damage!
Look after your roller skates.
Avoid water, oil, potholes, and very rough surfaces.
Roller skating tips
Note: We recommend skating in roller skate parks and taking a skating course with an instructor.
- First attempts
Initial position:
Keep your feet shoulder-width apart and bend your knees slightly to avoid falling backwards.
Accelerating:
As a beginner, start by taking small steps forwards with your toes pointing outwards at an angle.
Rolling:
If you take a few steps in succession you will then have enough momentum to place your roller skates next to one another and roll. Bend your knees slightly while doing this.
How to fall:
Important! Practise falling initially onto a soft surface using protective equipment without your roller skates. Always try to fall forwards, and never backwards! Fall onto your protective knee pads. Then catch yourself using the elbow and wrist protectors. Spread your fingers in order to avoid injury.
Mastering curves:
At low speeds:
Shift your weight as if riding a bicycle. Move your weight onto your left foot for a left curve and onto your right foot for a right curve.
At high speeds:
Use "Cross over technique" as in ice-skating (Figure B).
Braking techniques:
Note: Practise various braking techniques on a smooth surface without traffic or pedestrians. Avoid slopes until you are confident about braking.
Braking with your front stopper (Figure C):
If your roller skates are fitted with front stoppers, remember to use them. Lift the heel of your roller skate slightly and press the front stopper into the ground. Shift your weight forwards slightly and bend your knees. The braking effect can be intensified if you bend your knees more and shift your weight further forwards, while increasing at the same time the pressure on the roller skate you are braking with.
V-stopping (Figure D):
If you have removed the front stopper from your roller skates, you should use the 'V-stop' technique. To do this, make a sharp "V" shape with your toes and roll so that your feet meet.
- Setting the steering characteristic
The steering characteristic of the product depends on the weight of the user and the adjustment of the steering. The steering can be adjusted by both nuts 8.For harder steering, tighten the nuts. In order to achieve softer steering, loosen the nuts slightly.
ATTENTION! The thread must protrude at lease 3mm (approx. 2 threads) beyond the self-locking nut as the steering will be set too softly otherwise the wheels may hit the shoe and block if the incline is steep (Figure H).
Note: Test and check the steering properties of the product before each use.
Testing the steering characteristic:
- Put on the roller skates and stand up.
- Lean with your full body weight alternately to the left and to the right.
- The underside of the roller skate must not rest on the wheels (Figure H).
- If necessary, adjust the steering characteristic.
- Attaching and removing
- Putting the roller skates on
Preparation from unpacking to putting the roller skates on
Important!
Ensure that your roller skates fit properly. Check all settings before each skating session, as they can alter over time and as a result of frequent use.
Put your roller skate on like a normal shoe. To do this, use the laces 2 to find a secure fit.
- Thread the laces 2 in a cross fashion into the corresponding eyelets (Figure E). Tie the laces 2 at the end with a bow and close the velcro strap.
- Removing the roller skates
- Release the velcro strap and laces 2 on the roller skates and take the roller skates off.
- Maintenance
Changing the front stopper (Figure F)
Note: Worn front stoppers do not function properly.
Use appropriate tools to replace the front stopper on the tip of the shoe.
When changing the toe stoppers, ensure that they cannot rotate, and use new screws for the new stoppers.
Turn the roller skate upside down with the rollers facing upwards and loosen the screw in a counter-clockwise direction. Remove the stopper (Figure F). During replacement, take care the position of the stopper and shoe (Figure J).
Put the screw in the new front stopper and tighten it with the screw and bolt on the bottom of the roller skate.
Changing the wheels (Figure G)
Important!
Please refer to the section on technical data: Wheels with a different diameter could change the handling characteristics and could mean a
risk to the user in some circumstances. Do not use the roller skates if the wheels cannot be fitted perfectly. Never install larger wheels than those originally used on the roller skates.
The wear of the wheels depends on many factors such as skating style, surfaces, the size and weight of the user, weather conditions, the wheel material and its degree of hardness. It is therefore necessary to exchange them if it is worn.
Unscrew the bolts 7 on the centre of the rollers with a suitable spanner.
Remove the wheel 6 from the roller skate and attach a new wheel to the mount.
Screw the bōt securely back onto the screw thread. The wheel 6 should not be able to move laterally.
Regular maintenance of the roller skates is required. Ensure that the product is working properly to ensure safety.
After use, clean the shoes with a dry cloth.
ATTENTION! When removing the wheels, handle washer and nut carefully. Place washer and nut in a secure place and do not lose them (Figure G).
Care and storage
Roller skates are pieces of technical sports and leisure equipment and they therefore become worn depending on the skill and style of each roller skater. We recommend that you clean and dry the roller skates thoroughly after use.
Remove any small stones and other objects that may have become trapped in your roller skates.
Remove any sharp edges that may have formed during skating.
Always keep the roller skates in a dry place.
Clean the roller skates and ball bearings with a dry cloth after skating. Wet or damp ball bearings must be dried using a clean cloth. Lubricate the bearings from the outside with a suitable bearing grease to prevent the formation of external rust.
Bearings are usually closed and cannot be lubricated inside. Worn ball bearings must be replaced.
- Troubleshooting
Wheels or ball bearings are noisy
Dismantle the wheels from the roller skates, remove it, and clean the ball bearings with a clean cloth.
Wheels wear out quickly
Smooth surfaces extend the life of the wheels. Try harder wheels for harder surfaces and for use in difficult conditions.
Roller skates pull to the left or right
This can depend on the user. Exchange the wheels that show signs of one-sided wear.
The brake is not working properly
Change the front stopper if the angle between the front stopper and the ground is greater than 40 degrees (Figure I).
Brake problems
Always leave sufficient distance to front stopper. The faster you skate the longer your braking distance. Ensure that you understand the braking techniques and practise them on a level ground.
Ankles get turned frequently
Make sure that the laces are tight enough.
Problems with the footbed
You may not be accustomed to this kind of movement. Check the areas that are causing your problems and re-adjust the roller skates. Try wearing thick socks.
Disposal
The packaging is made entirely of recyclable materials, which you may dispose of at local recycling facilities.
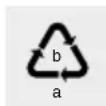
Observe the marking of the packaging materials for waste separation, which are marked with abbreviations (a) and numbers (b) with following meaning: 1-7: plastics / 20-22: paper and fibreboard / 80-98: composite materials.
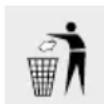
Contact your local refuse disposal authority for more details of how to dispose of your worn-out product.
Warranty
The product has been manufactured to strict quality guidelines and meticulously examined before delivery. In the event of product defects you have legal rights against the retailer of this product. Your legal rights are not limited in any way by our warranty detailed below.
The warranty for this product is 3 years from the date of purchase. The warranty period begins on the date of purchase. Please keep the original sales receipt in a safe location. This document is required as your proof of purchase.
Should this product show any fault in materials or manufacture within 3 years from the date of purchase, we will repair or replace it - at our choice - free of charge to you. This warranty becomes void if the product has been damaged, or used or maintained improperly.
The warranty applies to defects in material or manufacture. This warranty does not cover product parts subject to normal wear, thus possibly considered consumables (e.g. batteries) or for damage to fragile parts, e.g. switches, rechargeable batteries or glass parts.
Warranty claim procedure
To ensure quick processing of your case, please observe the following instructions:
Please have the till receipt and the item number (IAN 375147_2104) available as proof of purchase. You will find the item number on the rating plate, an engraving on the front page of the instructions for use (bottom left), or as a sticker on the rear or bottom of the product.
If functional or other defects occur, please contact the service department listed either by telephone or by e-mail.
You can return a defective product to us free of charge to the service address that will be provided to you. Ensure that you enclose the proof of purchase (till receipt) and information about what the defect is and when it occurred.
Service
GB Service Great Britain
Tel.: 08000569216
E-Mail: owim@lidl.co.uk
IE Service Ireland
Tel.:1800200736
E-Mail: owim@lidl.ie
Introduction
Brzdenie s prednou brzdou (obr. C):


- DETSKÉ KOLIESKOÈV KORČULE
- RULLESKØJTER TIL BØRN
- KINDER-ROLSCHAATSEN
- Safety notices
- Roller skating tips
- Attaching and removing
- Maintenance... Page 14
- Care and storage
- Troubleshooting
- Disposal
- Warranty
- Kids' roller skates
- Introduction
- Intended use
- - Scope of delivery / Part description (Figure A)
- Technical data
- Avoid property damage!
- - First attempts
- Initial position:
- Accelerating:
- Rolling:
- How to fall:
- Mastering curves:
- Braking techniques:
- Braking with your front stopper (Figure C):
- V-stopping (Figure D):
- - Setting the steering characteristic
- Testing the steering characteristic:
- - Attaching and removing
- - Putting the roller skates on
- Preparation from unpacking to putting the roller skates on
- Important!
- - Removing the roller skates
- - Maintenance
- Changing the front stopper (Figure F)
- Changing the wheels (Figure G)
- - Troubleshooting
- Wheels or ball bearings are noisy
- Wheels wear out quickly
- Roller skates pull to the left or right
- The brake is not working properly
- Brake problems
- Ankles get turned frequently
- Problems with the footbed
- Warranty claim procedure
- Service
- GB Service Great Britain
- IE Service Ireland
- Brzdenie s prednou brzdou (obr. C):
Brand : CRIVIT
Model : HG05680
Category : Skate