
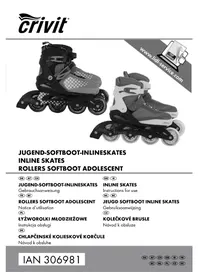
IAN 75394 - Skate CRIVIT - Free user manual and instructions
Find the device manual for free IAN 75394 CRIVIT in PDF.

| Product type | Children's ice skates |
| Brand | Crivit |
| Model | IAN 75394 |
| Size | 28–32 (children's shoe size) |
| Maximum load | 100 kg |
| Safety standard | DIN EN 15638:2009 |
| Textile technology | HeiQ® PURE dynamic (thermoregulation, freshness) |
| Intended use | Private use, recreational skating (not for competition) |
| Size adjustment | Sliding button with click-in lock |
| Width adjustment | Hexagonal screw under the boot |
| Closure | Laces + Velcro strap + click buckle |
| Blade sharpening | By a professional (radius ≥ 5 mm, hollow grind + radius) |
| Blade maintenance | Oiling or greasing after use, sandpaper for rust |
| General maintenance | Cleaning and drying after each use |
| Included accessories | Allen key for hexagon socket screws |
| Warranty | 3 years (material and manufacturing defects) |
Frequently Asked Questions - IAN 75394 CRIVIT
User questions about IAN 75394 CRIVIT
0 question about this device. Answer the ones you know or ask your own.
Ask a new question about this device
Download the instructions for your Skate in PDF format for free! Find your manual IAN 75394 - CRIVIT and take your electronic device back in hand. On this page are published all the documents necessary for the use of your device. IAN 75394 by CRIVIT.
USER MANUAL IAN 75394 CRIVIT
Instructions for use
FR CH
GB Instructions for use
Parts Description 4-5
Contents 18
Technical data 18
HeiQPURE dynamic 18
Intended Use 18
Safety Information 18
Tips for Ice Skating 18-19
Adjusting the size 19
Adjusting the width 19
Putting On and Taking Off 19
Maintenance 20
Care, Storage 20
Disposal Information 20
3 Years Warranty 20
(1) Clasp
(2) Hook and loop fastener
(3) Bootlaces
(4) Adjustment mechanism
(5) Adjustment button
(6) Size symbols
(7) Arrester button (PUSH button)
FR Description des pieces
With your purchase you have decided on a high-quality product. Get to know the product before you start to use it. Carefully read the following operating instructions. Use the product only as described and only for the given areas of application. Keep these instructions safe. When passing the product on to a third party, always make sure that the documentation is included.
Contents
1 x Instructions for use
1 x Kids' Ice Skates
1 x Allen key
Technical data
Size: 28-32
Max. weight: 100kg
DIN EN 15638:2009
HeiQ® PURE dynamiq
PURE textile freshness
Experience the feeling of lasting freshness through the power of silver, keeping you odour-free all day long.
ADAPTIVE heat regulation
Feel good all around. The textile will cool you down when you're hot, and keeps you dry longer in the cold. Cools and reduces perspiration.
Intended Use
This product has been manufactured as a recreational ice skate for private use and is not suitable for competitive ice hockey or figure skating.
#
Safety Information
WARNING!
There is a risk of drowning when skating on open bodies of water. Make sure that the ice is thick enough to support you!
Risk of injury!
- Before each use, make sure that all screws and nuts are secure and tight. The product may only be used in flawless condition.
- Do not alter the product in such a way that your safety might be put at risk.
- For your own safety, always wear suitable personal protective equipment (helmet, protectors for the hands, wrists, elbows and knees).
Always wear reflective clothing in order to be seen more easily. - Risk of cuts! When handling the ice skates, always remember that the blades are sharp!
- Do not use this article in bare feet.
Tips for Ice Skating
ATTENTION!
Always check the thickness of the ice before skating on open bodies of water.
Please note that the ice can be rather thin, particularly around bank vegetation and areas where liquid is discharged, as well as on flowing bodies of water! Inform your children about the possible risks. You are responsible for supervising them.
Practising for the first time!
- Choose a suitable skating area. We recommend skating at ice rinks or on specially designated and approved areas.
- First practice several important skating skills on the ground before attempting to skate on the ice. Allow someone to help you.
- Practice on a relatively smooth skating rink with support from an experienced person or hold onto the edge of the rink until you feel secure on the ice.
- Adjust your speed according to your skating ability. First learn to glide, turn curves and brake before attempting to skate faster.
Starting position:
Place feet shoulder-width apart and slightly bend your knees to keep from falling backwards. Do not look down at your feet, but keep your eyes in the direction in which you are skating.
Speeding up:
As a beginner, start with small steps with your toes pointed out and at an angle.
Gliding:
Once you have taken a couple of consecutive steps, you will then have enough momentum to place both skates next to each other and glide. When doing so, bend your knees slightly.
Mastering curves
At a slow speed:
Shift your weight like when riding a bike. For a left curve, place your weight on your left foot and on your right foot for a right curve.
At a fast speed:
Use crossovers (Fig. A)
Falling techniques
First practise falling onto the protective equipment without ice skates on a soft mat or surface. Always try to fall forwards, never backwards! Allow yourself to fall onto your kneepads. Then break your fall using your elbow and wrist protectors. At the same time, spread out your fingers to prevent injuries.
Stopping techniques
T-stop (Fig. B)
When using the "T-stop technique" you will shift your entire weight onto one foot. Now move the other foot behind the first one, so that they form a right angle. Then shift your weight from the front to the inside edge of the blade of your rear skate and stop by increasing pressure.
Plough stop (Fig. C)
Push your toes together and form a V-shape with your blades (heels pointing outwards), put pressure on the balls of your feet and stop using both legs.
Adjusting the size
Press down on the adjustment button and push the skate until it is the desired size. It must snap into place with an audible Click. The arrow on the skate shows the corresponding size on the frame (Fig. E).
Adjusting the width
Loosen the screws on the underside of the article with the enclosed long Allen key by turning in the direction in which the arrow is pointing. Slide shoe to adjust to the desired width. When you have selected your individual width, re-tighten the screws (Fig. F).
Putting on and Taking off
Putting on:
IMPORTANT!
Make sure that your skates fit comfortably. The outer boot should not crease when the buckles are closed. Do not force the buckles. If the outer boot does crease up, it is a sign that either the tension is incorrect, or that you have purchased the wrong size.
NOTE:
By pressing down on the adjustment mechanism, you can move the clasp back and forth until you have found the right tension for your foot.
- Tie the bootlaces.
- Close the hook and loop fastener.
- Then close the clasp ("CLICK").
Taking off:
- Press the arrester button (PUSH button) in the direction of the arrow and open the buckle. Then open the hook and loop fastener and undo the laces.
Maintenance
Sharpening the blades ATTENTION!
For your own safety, only have the blades sharpened by a professional (at a sports store or an ice skating rink)! No changes may be made to the blade mounts!
Please note that after sharpening there must be a radius of at least 5mm at the end of the blade. Make sure that the blades are not only sharpened using hollow grinding, but that the radius is also sharpened.
Fig.1: Hollow grinding
Fig. J: Blade radius
Due to production reasons, the blades have only been sharpened for the first use.
We recommend that the blades are sharpened from time to time when they become blunt, in order that the skates glide more effectively.
Care, Storage
This article should always be carried using the blade covers. Remove the blade covers before initial use. The skates are not suitable for walking on hard ground. If you must walk on them outside of the skating area, replace the blade covers. Clean and dry this article after every use. Regularly treat the skates with standard care products (leather shoes) and check the plastic casing and liners for damage. To avoid corrosion, lightly oil or grease the blades, especially before storing for a long period of time. Possible rust build-up on the blades can be removed using fine sandpaper. Store the product in a temperature-controlled and dry area.
Disposal Information
Please dispose of the product and packaging in an environmentally friendly manner, separating different materials for recycling as required! Dis- pose of this item through an authorised disposal company or through your local waste disposal facilities - ask your local authority for information if further guidance is required. Ensure that you comply with all regulations currently in force.
3 Years Warranty
The product was produced with great care and under constant supervision. You receive a three-year warranty for this product from the date of purchase. Please retain your receipt.
The warranty applies only to material and workmanship and does not apply to misuse or improper handling. Your statutory rights, especially the warranty rights, are not affected by this warranty.
With regard to complaints, please contact the following service hotline or contact us by e-mail.
Our service employees will advise as to the subsequent procedure as quickly as possible.
We will be personally available to discuss the situation with you.
Any repairs under the warranty, statutory guarantees or through goodwill do not extend the warranty period. This also applies to replaced and repaired parts.
Repairs after the warranty are subject to a charge.
In the event of complaints, please specify: Delta-Sport-Nr.: KI-1431
IAN: 75394 (Size 28 - 32)
GB Service Great Britain
Tel.: 0871 5000 720 (£ 0.10/Min.)
E-Mail: deltasport@lidl.co.uk

DELTA-SPORT HANDELSKONTOR GMBH
Wragekamp 6
D-22397 Hamburg
Version: 10/2012


- GB Instructions for use
- FR Description des pieces
- Contents
- Technical data
- HeiQ® PURE dynamiq
- PURE textile freshness
- ADAPTIVE heat regulation
- Intended Use
- #
- Safety Information
- WARNING!
- Risk of injury!
- Tips for Ice Skating
- ATTENTION!
- Practising for the first time!
- Starting position:
- Speeding up:
- Gliding:
- Mastering curves
- At a slow speed:
- At a fast speed:
- Falling techniques
- Stopping techniques
- T-stop (Fig. B)
- Plough stop (Fig. C)
- Adjusting the size
- Adjusting the width
- Putting on and Taking off
- Putting on:
- IMPORTANT!
- NOTE:
- Taking off:
- Maintenance
- Sharpening the blades ATTENTION!
- Care, Storage
- Disposal Information
- Years Warranty
- In the event of complaints, please specify: Delta-Sport-Nr.: KI-1431
Brand : CRIVIT
Model : IAN 75394
Category : Skate