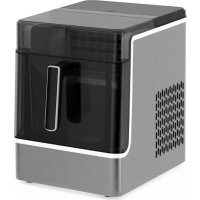
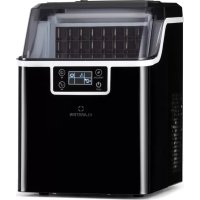
Ice Lux - Ice machine Klarstein - Free user manual and instructions
Find the device manual for free Ice Lux Klarstein in PDF.


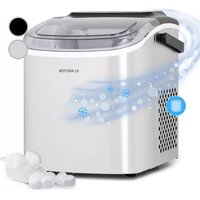
| Brand | Klarstein |
| Model | Ice Lux |
| Product type | Ice machine |
| Ice production capacity | 23 kg/24 h |
| Water tank capacity | 2 liters |
| Ice storage capacity | 1.8 kg |
| Number of ice cubes per cycle | 32 pieces |
| Ice cube size | 22 x 22 x 22 mm (2 adjustable sizes) |
| Product dimensions (W x D x H) | 264 x 341 x 370 mm |
| Net weight | 12 kg |
| Power supply | 220-240 V ~ 50 Hz |
| Total power | 250 W |
| Refrigerant | R290 (propane, 27 g) |
| Insulation | Cyclopentane |
| Climate type | SN / N |
| Functions | Large/small ice cubes, delayed stop, automatic cleaning, forced drain |
| Indicator lights | On/Off, ice bin full, water shortage, preset, cleaning |
| Cleaning | 3-minute automatic cycle, pump drain |
| Safety | Lid lock, water level detection, 3-minute compressor protection |
| Maintenance | Regular cleaning of evaporator, water tank, float, temperature sensor |
| Repairability | Replaceable fuse, access to internal components, manufacturer technical support |
| Included accessories | Ice bin, user manual |
| General information | Domestic use, freestanding, flat surface |
Frequently Asked Questions - Ice Lux Klarstein
User questions about Ice Lux Klarstein
0 question about this device. Answer the ones you know or ask your own.
Ask a new question about this device
Download the instructions for your Ice machine in PDF format for free! Find your manual Ice Lux - Klarstein and take your electronic device back in hand. On this page are published all the documents necessary for the use of your device. Ice Lux by Klarstein.
USER MANUAL Ice Lux Klarstein
Berlin Brands Group UK Limited PO Box 42 272 Kensington High Street London, W8 6ND United Kingdom
Dear Customer,
Congratulations on purchasing this equipment. Please read this manual carefully and take care of the following hints on installation and use to avoid technical damages. Any failure caused by ignoring the items and cautions mentioned in the operation and installation instructions are not covered by our warranty and any liability. Scan the QR code to get access to the latest user manual and more product information.
CONTENTS
Technical Data 19
Safety Instructions 20
Product Overview 23
Function keys and indicator lights 24
Instructions for use 26
Cleaning and Maintenance 28
Troubleshooting and error codes 30
Disposal Considerations 32
Manufacturer & Importer (UK) 32
TECHNICAL DATA
| Article number 10046888, 10046889 |
| Climate Type SN/ N |
| Power supply 220-240 V ~ 50 Hz |
| Total power 250 W |
| Ice storage capacity 1,8 kg |
| Water tank capacity 2 liter |
| Refrigerant R290/ 27 g |
| Vesicant Cyclopentane |
| Weight 12 kg |
| Product size 264x341x370 mm |
| Ice making capacity 23 kg/ 24 h |
| Type of ice Cubes |
| Output ice per cycle 32 pieces |
| Size of ice cubes 22x22x22 mm |
SAFETY INSTRUCTIONS
- In order to avoid harm caused by misuse, please read the instruction manual carefully before using this product and use this product strictly in accordance with the purpose stated in the instruction manual.
- Place the device on a level surface.
- Use the device indoors only.
- Unplug the device from the power outlet when not in use.
- Never immerse the power cord and plug in water or other liquids.
- Only use accessories that are expressly recommended by the manufacturer for this device.
- Do not place the device directly under an electrical outlet.
- Do not let the power cord hang from the work surface so that children cannot pull on it.
- Do not overfill the unit, otherwise short circuits and electric shocks may occur.
- Make sure that the lid is always closed during operation.
- Do not pull the plug out of the outlet by the cord, but hold it by hand when unplugging.
- Use this device only for its intended purpose. We accept no liability for damage caused by disregarding the instructions and improper use. Only use the device in the household.
- Do not connect the device to a timer or remote-controlled socket.
- Do not immerse the device in water.
- The use of an extension cord is not recommended, as it may overheat and become a risk of fire.
- If the power cord or plug is damaged, it must be replaced by the manufacturer, an authorized service centre, or a similarly qualified person.
- Follow local regulations for disposal of equipment containing flammable gas.
- Do not store highly flammable or explosive substances in the device.
- Never touch the evaporator surface by hand when the ice maker is working. It may cause frostbite to your skin.
- Do not overturn the Ice Maker. If the machine is overturned, leave it to stand for 2 hours before switching it on.
- If the Ice Maker is brought in from outside in winter, allow it to warm up to room temperature for a few hours before switching it on.
- Dispose of the appliance only at an authorised waste disposal facility. Do not expose to flame.
- This appliance is not intended for use by persons (including children) with reduced physical, sensory or mental capabilities, or lack of experience and knowledge, unless they have been given supervision or instruction concerning use of the appliance by a person being responsible for their safety.
- Children shall not play with the appliance. Cleaning and user maintenance shall not be made by children without supervision.
-
Children between the ages of 3 and 8 are not allowed to load and unload refrigeration equipment.
-
This appliance is intended to be used in household and similar applications such as
-
staff kitchen areas in shops, offices and other working environments;
- farm houses and by clients in hotels, motels and other residential type environments;
- bed and breakfast type environments;
- catering and similar non-retail applications.
This appliance contains the refrigerant propane (R290), a natural gas which is environmentally friendly. Although it is flammable, it does not damage the ozone layer and does not increase the greenhouse effect. The use of this coolant has, however, led to a slight increase in the noise level of the appliance. In addition to the noise of the compressor, you might be able to hear the coolant flowing around the system. This is unavoidable and does not have any adverse effect on the performance of the appliance. Care must be taken during the transportation and setting up of the appliance that no parts of the cooling system are damaged. Leaking coolant can damage the eyes.
WARNING
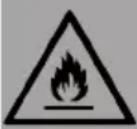
Fire hazard due to improper disposal! Please observe the local regulations for the disposal of appliances containing flammable refrigerants and gases.
- Keep ventilation openings in the unit housing free of obstacles.
- Do not damage the refrigerant circuit.
- The refrigeration system contains a high-pressure refrigerant. Do not damage the refrigeration system.
- The maintenance of the refrigeration system shall be done by professionals.
- Do not use any mechanical devices or other means to accelerate the defrosting process or the ice recovery process.
- Do not use electrical appliances inside the food storage compartments of the appliance, unless they are of the type recommended by the manufacturer.
- Unplug the ice maker before cleaning or making any repairs or servicing.
- Do not clean the ice maker with flammable liquids, as this could cause a fire or explosion.
- Refrigerant and insulation blowing gas are flammable.
Special Notes
- When positioning the unit, make sure that the power cord is not pinched or damaged.
- Make sure that there are no multiple sockets or power supplies on the back of the unit.
To avoid contamination of food, please follow the instructions below:
- Regularly clean surfaces that may come into contact with food. Clean the water drain regularly.
- Fill the device with potable water only.
- If the appliance contains a water tank, clean it if it has not been used for 48 hours. Rinse the tank if no water has been removed for 5 days.

WARNING
When using, servicing and disposing of the unit, pay attention to the left symbol on the rear of the unit or on the compressor. This symbol warns of possible fires. There are flammable substances in the refrigerant lines and in the compressor. Keep the appliance away from sources of fire during use, maintenance and disposal.
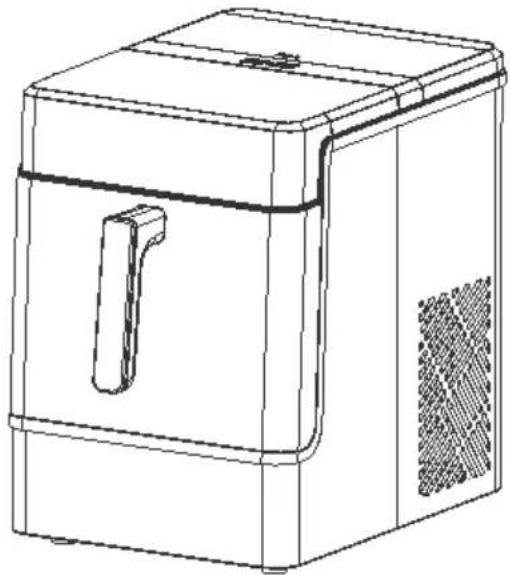
Appliance
Control panel

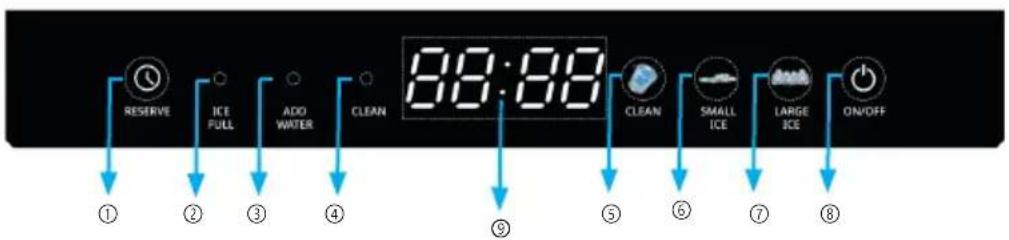
| ① | Preset to power on button | ⑥ | Small ice button |
| ② | Ice full indicator light | ⑦ | Power button |
| ③ | Clean indicator light | ⑧ | Large ice button |
| ④ | Water shortage indicator light | ⑨ | Display |
| ⑤ | Clean button |
FUNCTION KEYS AND INDICATOR LIGHTS
Function buttons
Standby mode
- Plug in the power, display the full screen for 1 second when switched on, buzzer sounds once and only the power indicator flashes at long intervals (standby).
- During the ice making process, lightly touch the On/Off button in the middle to switch to Standby mode after discharging.
Power button
Gently touch the On/Off button, the buzzer will sound once, the On/Off indicator light will remain lit and other indicators will flash at long intervals, the system will enter the function selection mode.
Large ice button
Gently touch the Large Ice button, the buzzer will sound, the Large Ice light and the Power light will be steady and other lights will turn off to enter the ice making mode.
Small ice button
Gently touch the small ice button, the buzzer will sound, the small ice light and power light will illuminate and other lights will extinguish to enter the ice making mode.
Cleaning button
- Touch the cleaning button, the buzzer will sound, the cleaning light will flash at long intervals, the LED display will start to show the countdown, the water pump will continue to work for 3 minutes (if the water is insufficient, the water low indicator will appear), at the end of 3 minutes or touching the power button will put the machine into standby mode;
- After pressing and holding the cleaning button for 5 seconds, the buzzer will sound, the cleaning light will come on, the LED display will start counting down to 3 minutes and 30 seconds of drain valve operation, the end of the time or touching the on/off button will put the machine into standby mode. (The purpose of this function is to facilitate the draining of water from the upper tank).
Forced discharge
In standby mode, press and hold the power button for 5 seconds to enter the forced discharge mode (this function prevents a power failure in the middle of the ice cube making process from interrupting the discharge process).
Forced discharge failure: When the compressor stops due to power failure, overload and other circumstances and enters the three-minute protection, pressing and holding the power button for 5 seconds in standby mode is invalid and it is necessary to wait for three minutes before operating again.
Function selection
- In the function selection interface, if the function selection is not made within 1 minute, the unit will return to the standby state.
- Lightly touch the preset button, the buzzer will ring once, the preset indicator light will flash + the power light will stay on, it will enter the preset state and the LED display will show 00:00 (the longest preset time is 24 hours), the time is increased by pressing the large ice button and decreased by pressing the small ice button; press the preset button repeatedly to change the digits; press and hold the preset button for 5 seconds to confirm.
- When the large and small ice selections are complete, the machine enters the countdown; press the large or small ice button to select the ice (direct confirmation). After 1 minute of inactivity, small ice is automatically selected.
- During the countdown, press the On/Off button to exit the preset mode and enter standby mode.
Each time the above operation is completed, a buzzer sounds and the countdown to start making ice cubes ends.
Indicator lights
Power indicator light
Flashing to indicate standby and steady light to indicate operation.
Large ice indicator light
The light is solid, indicating that the machine is in large ice mode.
Small ice indicator light
The light is solid, indicating that the machine is in small ice mode.
Low water indicator light
The indicator light is steady to indicate low water.
Ice full indicator light
The indicator light is steady to indicate the ice is full.
Preset indicator light
The indicator light is steady to indicate that the machine is in Preset mode.
Cleaning indicator
Flashing to indicate cleaning status, solid to indicate emptying.
INSTRUCTIONS FOR USE
Step 1: Gently press the Push position on the top of the machine and the lid will automatically lift a small distance. Open the lid by hand and add water to the Max line.
Step 2: Plug the machine in, the display will light up and the machine will go into standby mode.
Step 3: Press the On/Off button, select the Ice Maker button (Large Ice Maker or Small Ice Maker), then press the On/Off button again to start making ice.
Step 4: The ambient temperature of the machine is recommended to be 12^-35^ and the water temperature is recommended to be 15^-20^ ;
During the ice making process, it is necessary to make sure that the ice collecting tray is placed inside the ice maker.
Please make sure that the water used in the ice maker is edible and clean water, other water may cause scale, which may cause the machine to not work properly.
Correct procedure for removing the Ice Tray
Before removing the Ice Tray, you must manually turn over the transparent cover and then hold the handle of the Ice Tray to lift it up.
Correct procedure for installing the ice collection tray
Before installing the ice collection tray, you must manually turn over the transparent cover and then hold the ice collection tray handle at the edge of the machine to fit from top to bottom.
Low water alarm light indicates the situation
- Simply turn on the machine, the upper water tank drain valve works for 2 minutes, the lower water tank float does not rise (water shortage);
- The sound of the water pump suddenly increases (there is not enough water in the lower tank, the pump is empty or half pumping).
- The water pump is damaged or the surface of the lower reservoir is covered with ice sand and cannot work normally.
- When the ice collecting tray is close to the state of full ice, the last plate of ice may be blocked by the ice in front of the top, resulting in the ice above the evaporator can not be normal off, the machine ice full light may not be lit, but also may enter a long period of discharging program, so enter standby, manually remove the ice, and then press the power button again to return to normal ice making.
During the ice making process, it is necessary to make sure that the ice collecting tray is placed inside the ice maker.
Please ensure that the water used in the Ice Maker is potable and clean, as other water may cause scale to form, which may cause the machine to malfunction.
Correct procedure for removing the Ice Tray
Before removing the Ice Tray, you need to manually flip over the transparent cover and then hold the handle of the Ice Tray to lift it up.
Correct procedure for placing the ice collection tray
Before placing the ice collection tray, turn the transparent cover by hand and then hold the handle of the ice collection tray against the edge of the machine so that it fits from top to bottom.
Low water alarm light indicates the situation:
- Just turn on the machine, the upper water tank drain valve works for 2 minutes, the lower water tank float does not rise (water shortage);
- The sound of the water pump suddenly increases (there is not enough water in the lower reservoir, the pump is empty or half pumping).
- The water pump is damaged or the surface of the lower water reservoir is covered with ice sand and cannot work normally.
- When the ice collecting tray is close to the state of full ice, the last plate of ice may be blocked by the ice in front of the top, resulting in the ice above
the evaporator can not be normal off, the machine ice full light may not be lit, but also may enter a long period of discharging program, so enter standby, manually remove the ice, and then press the power button again to return to normal ice making.
Note: When the ice collecting tray is close to the state of full ice, the last plate of ice may be blocked by the ice in front of the top, resulting in the ice above the evaporator can not be normal off, the machine ice full light may not light up, but also may enter a long period of discharging programme, so enter standby, manually remove the ice, and then press the power button again to return to normal ice making.
CLEANING AND MAINTENANCE
- Clean the inner liner, ice tray, water tank, evaporator, float switch and temperature probe frequently.
- When cleaning, unplug the machine and remove the ice cubes. Use clean water to clean the inside and outside of the Ice Maker. Do not spray the Ice Maker with chemicals or diluted agents such as acids, petrol or oil. Rinse thoroughly before use.
- From Standby mode, press the Clean button to enter the cleaning mode. After 3 minutes, cleaning is complete. Please drain the water from the machine tank, refill with drinking water and make ice cubes.
- If the water spout is dirty or the small hole is blocked, it can be disassembled for cleaning.
- Keep the ventilation openings in the machine body or in the built-in structure free of obstructions. Do not use mechanical devices or other means to speed up the defrosting process other than those recommended by the manufacturer.
- To keep the ice clean, change the water in the water tank at least once a day. If you do not use the machine for a long period of time, please drain and clean the water.
- If the compressor stops working due to lack of water, ice too full, power failure, etc., when the machine is restarted, the compressor will delay for 3 minutes.
- Please use drinking water before starting to make ice, during initial installation or when reusing after a long period of non-use.
- Do not add more water than the maximum level.
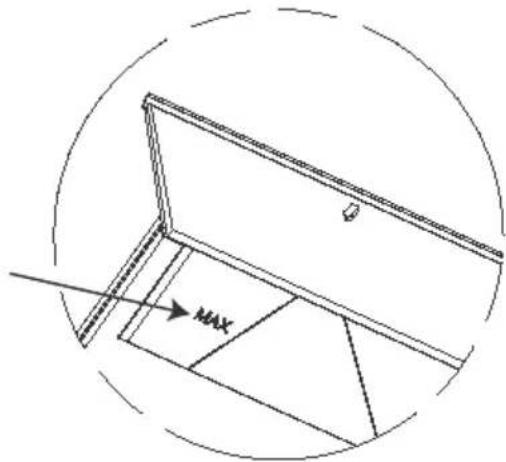
Max. water level mark
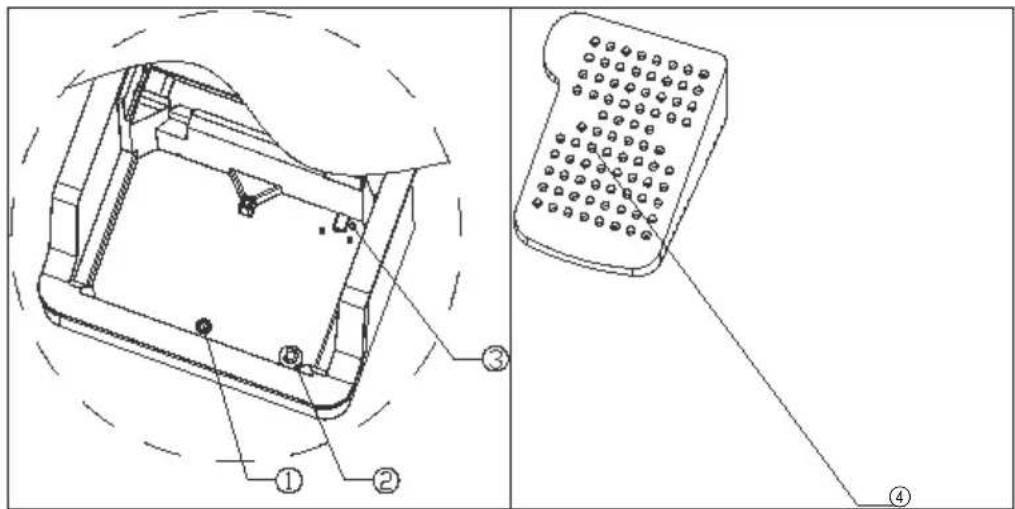
Bottom parts of the water tank
① Water plug: before using the machine or changing the season, the surface of the machine must be scrubbed clean by pulling the plug down to drain the dirty water.
② Float switches: important signalling elements of the computer board controlling the discharge of water from the upper tank to the lower tank, surface dirt must be cleaned regularly.
③ Temperature sensor: monitors the temperature of the water in the lower tank, the dirt on the surface must be cleaned regularly.
④ Filter cover: filters particles, surface dirt must be cleaned regularly.
TROUBLESHOOTING AND ERROR CODES
Note: During the ice making, if a power failure occurs due to disconnecting the power cord or turning off the power button, it may result in the formed ice remaining on the ice grid. If this situation occurs, press the Clean button to start the cleaning program, wait for the ice cubes to fall, and then restart the ice making machine.
| Error code Possible Cause |
| E1 Communication failure |
| E2 Sensor 1 failure |
| E3 Sensor 2 failure |
| E4 Water pump failure |
| Problem Possible Cause Solution | ||
| Display shows “----” The fall is lling is cubes are not normal | Restart the ica making process | |
| “- - - - ” is displayed No ice fall detected for 1 hour | Restart the appliance | |
| Buzzer sounds twice Invalid touch Press the correct button | ||
| The compressor works abnormally with a buzzing noise | The voltage is lower than recommended | Stop the ice maker and do not restart until the voltage is normal |
| Water shortage indicator light is on | The water in the upper and lower water tanks is insufficient. | Add some water until it reaches MAX position. Press the power button briefly to cancel the water shortage indicator light, press the power button again to start the machine, select the large ice or small ice mode, the machine will return to the normal ice making state. |
| The display is not on No power Check if the power cord is connected properly and connect the power | ||
| Blown fuse Replace fuse | ||
| The ice made is too large | Wrong ice size selected Select small size | |
| Ice of previous cycles left in the water tray | The nexice making cycle will be normal | |
| The ice making process was correct, but no ice came out | The compressor has no refrigerant | Contact the customer service |
| Compressor damaged Cont | tact the customer service | |
| Fan motor damaged Cont | tact the customer service | |
| The machine has been working, but the water has been warming | Solenoid valve broke down | Replace the solenoid valve |
| When the ice is full, the machine does not display the ice full Icon | Ice full sensor damaged The | the infrared detection component terminals are loose, please plug them back in |
| Solar light interference Cont | tact the customer service | |
DISPOSAL CONSIDERATIONS
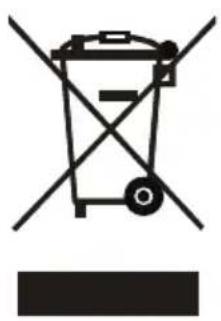
If there is a legal regulation for the disposal of electrical and electronic devices in your country, this symbol on the product or on the packaging indicates that this product must not be disposed of with household waste. Instead, it must be taken to a collection point for the recycling of electrical and electronic equipment. By disposing of it in accordance with the rules, you are protecting the environment and the health of your fellow human beings from negative consequences. For information about the recycling and disposal of this product, please contact your local authority or your household waste disposal service.
MANUFACTURER & IMPORTER (UK)
Manufacturer:
Chal-Tec GmbH, Wallstrasse 16, 10179 Berlin, Germany.
info@electronic-star.de
Importer for Great Britain:
Berlin Brands Group UK Limited
PO Box 42
272 Kensington High Street
London, W8 6ND
United Kingdom
Estimado cliente:
Berlin Brands Group UK Limited
PO Box 42
272 Kensington High Street
London, W8 6ND
United Kingdom
Chere cliente, cher client,
Berlin Brands Group UK Limited
PO Box 42
272 Kensington High Street
London, W8 6ND
United Kingdom
Gentile clientele,
Berlin Brands Group UK Limited
PO Box 42
272 Kensington High Street
London, W8 6ND
United Kingdom


KLARSTEIN
- Dear Customer,
- CONTENTS
- TECHNICAL DATA
- SAFETY INSTRUCTIONS
- WARNING
- Special Notes
- To avoid contamination of food, please follow the instructions below:
- FUNCTION KEYS AND INDICATOR LIGHTS
- Function buttons
- Standby mode
- Power button
- Large ice button
- Small ice button
- Cleaning button
- Forced discharge
- Function selection
- Indicator lights
- Power indicator light
- Large ice indicator light
- Small ice indicator light
- Low water indicator light
- Ice full indicator light
- Preset indicator light
- Cleaning indicator
- INSTRUCTIONS FOR USE
- Correct procedure for removing the Ice Tray
- Correct procedure for installing the ice collection tray
- Low water alarm light indicates the situation
- Correct procedure for placing the ice collection tray
- Low water alarm light indicates the situation:
- CLEANING AND MAINTENANCE
- Bottom parts of the water tank
- TROUBLESHOOTING AND ERROR CODES
- DISPOSAL CONSIDERATIONS
- MANUFACTURER & IMPORTER (UK)
- Manufacturer:
- Importer for Great Britain:
- Estimado cliente:
- Chere cliente, cher client,
- Gentile clientele,
Brand : Klarstein
Model : Ice Lux
Category : Ice machine