
GAC2500 - Phone GRANDSTREAM - Free user manual and instructions
Find the device manual for free GAC2500 GRANDSTREAM in PDF.
User questions about GAC2500 GRANDSTREAM
0 question about this device. Answer the ones you know or ask your own.
Ask a new question about this device
Download the instructions for your Phone in PDF format for free! Find your manual GAC2500 - GRANDSTREAM and take your electronic device back in hand. On this page are published all the documents necessary for the use of your device. GAC2500 by GRANDSTREAM.
USER MANUAL GAC2500 GRANDSTREAM
Grandstream Networks, Inc.
126 Brookline Ave, 3rd Floor
Boston, MA 02215. USA
Tel: +1 (617) 566 - 9300
*Android is a Registered Trademark of Google, Inc.

EU Agent:
Picus Advisors Ltd
Taivalmaki 9F1-02200 Espoo, FINLAND
https://www.picus.fi
Note: For European Union only

natural_image
Black circular electronic device with a digital display showing colorful UI elements (no visible text or symbols)GAC2500EnterpriseConferencePhone
Quick Installation Guide
For Warranty and RMA information, please visit www.grandstream.com
Content
English....1
简体中文....7
Español....13
Français....19
Deutsch....25
Italiano....31
Русский....37
Português....43
Polski....49
The GAC2500 is not pre-configured to support or carry emergency calls to any type of hospital, law enforcement agency, medical care unit ("Emergency Service(s)") or any other kind of Emergency Service. You must make additional arrangements to access Emergency Services. It is your responsibility to purchase SIP-compliant Internet telephone service, properly configure the GAC2500 to use that service, and periodically test your configuration to confirm that it works as you expect. If you do not do so, it is your responsibility to purchase traditional wireless or landline telephone services to access Emergency Services.
GRANDSTREAM DOES NOT PROVIDE CONNECTIONS TO EMERGENCY SERVICES VIA THE GAC2500. NEITHER GRANDSTREAM NOR ITS OFFICERS, EMPLOYEES OR AFFILIATES MAY BE HELD LIABLE FOR ANY CLAIM, DAMAGE, OR LOSS. YOU HEREBY WAIVE ANY AND ALL SUCH CLAIMS OR CAUSES OF ACTION ARISING FROM OR RELATING TO YOUR INABILITY TO USE THE GAC2500 TO CONTACT EMERGENCY SERVICES, AND YOUR FAILURE TO MAKE ADDITIONAL ARRANGEMENTS TO ACCESS EMERGENCY SERVICES IN ACCORDANCE WITH THE IMMEDIATELY PRECEDING PARAGRAPH.
PRECAUTIONS:
WARNING: Please DO NOT power cycle the GAC2500 during phone boots up or firmware upgrades. You may corrupt firmware images and cause the unit to malfunction.
WARNING: Use the only power adapter included in the GAC2500 package. Using an alternative non-qualified power adapter may possibly damage the unit.
OVERVIEW:
GAC2500 represents the future in enterprise conference phone featuring a 4.3" capacitive screen, a Gigabit network port, 3 microphones, a Micro-USB port, a 3.5mm audio port and an RJ48 cascade port, PoE, Wi-Fi and Bluetooth. The GAC2500 supports 6 lines/6 SIP accounts, 7-way HD audio conferencing. The GAC2500 delivers superior HD audio, leading edge telephony features, advanced security and privacy protection, and provisioning. The GAC2500 is compatible with plenty of third party SIP devices and major SIP/NGN/IMS platforms.
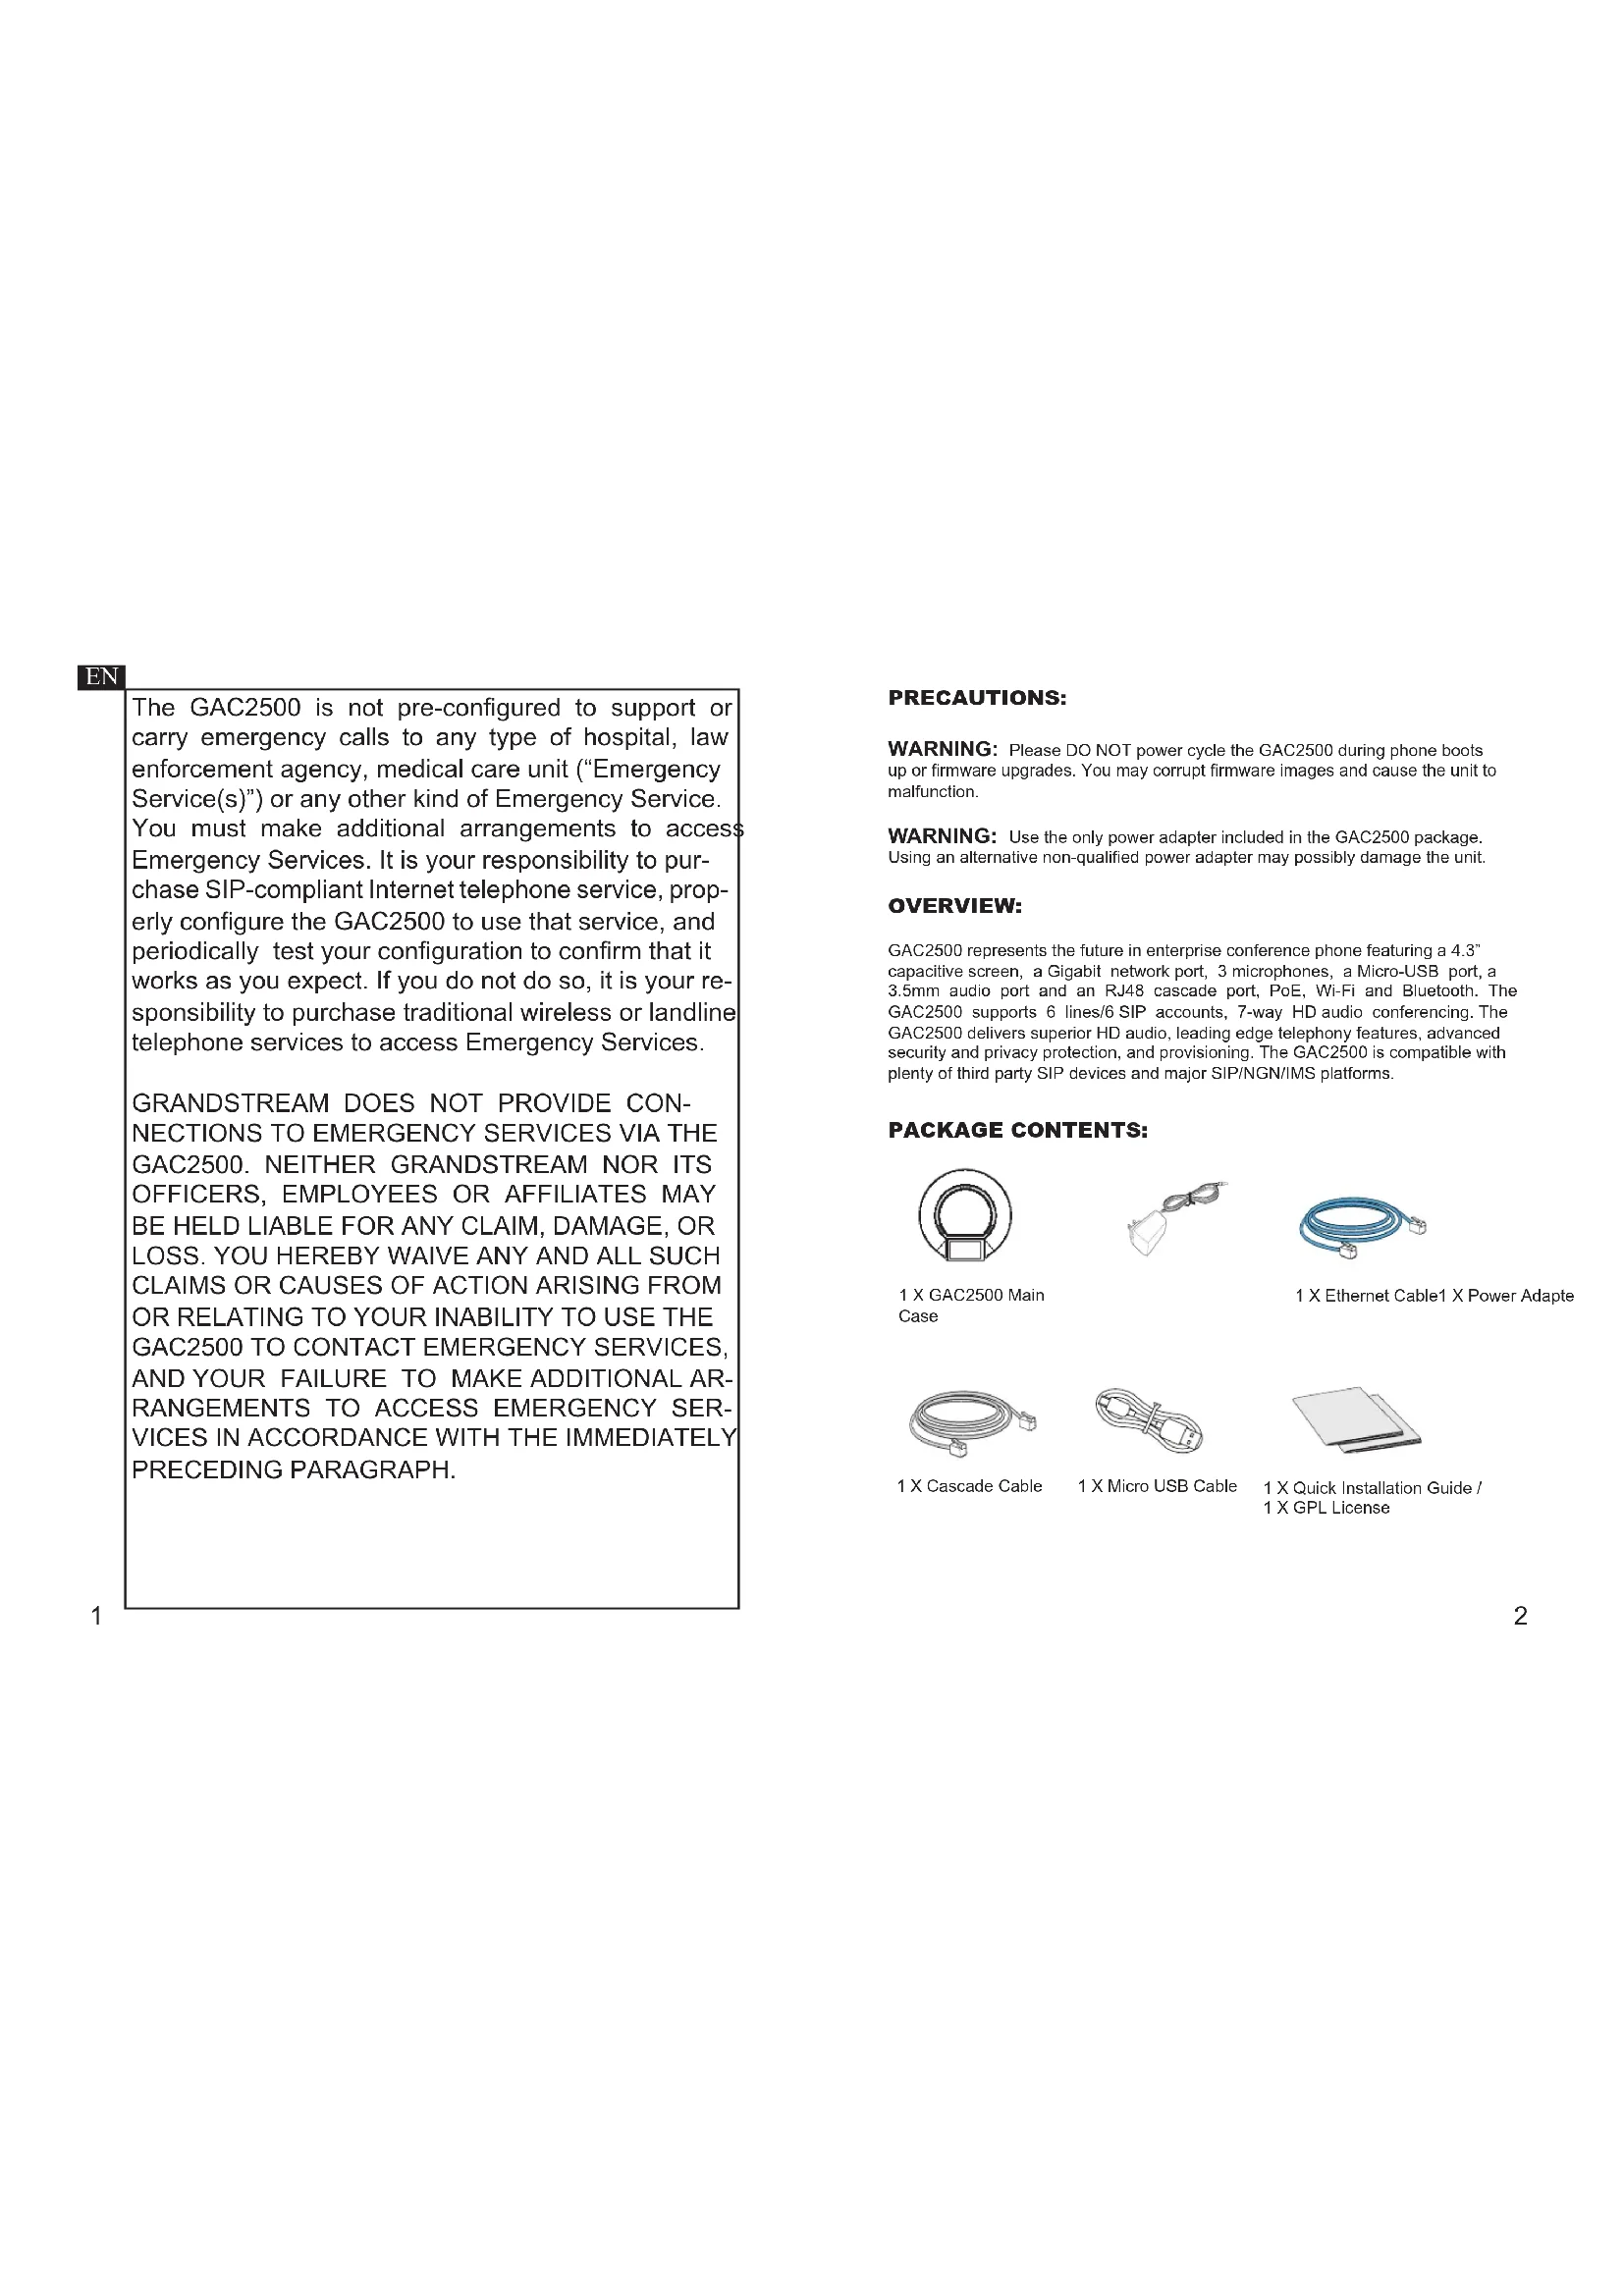
PACKAGE CONTENTS:

1 X GAC2500 Main Case


1 X Ethernet Cable1 X Power Adapte

1 X Cascade Cable

1 X Micro USB Cable

1 X Quick Installation Guide /
1 X GPL License
CONNECTING THE GAC2500:
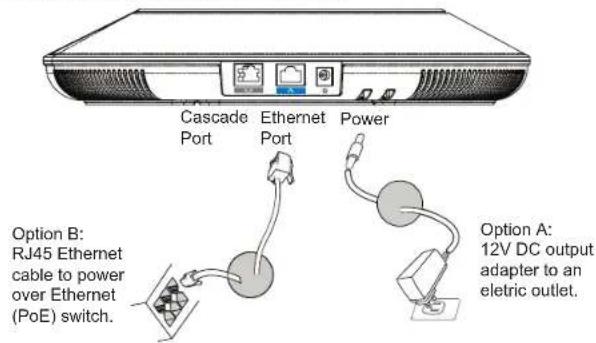
text_image
Cascade Port Ethernet Port Power Option B: RJ45 Ethernet cable to power over Ethernet (PoE) switch. Option A: 12V DC output adapter to an electric outlet.Caution: Please only use either Option A or Option B for power supply.
CONNECTION CONFIGURATION:
GAC2500 provides 2 connection configurations:
-
Standard connection (extendable cascade connection and mobile device connection).
-
Integrated connection (slave mode connection).
Caution: The 2 connections cannot be configured at the same time. If the micro-USB port is connected to GVC32xx products or PC, GAC2500 will use integrated connection for microphone audio capture and the speaker.
STANDARD CONNECTION:
- Connect the LAN port of the phone to the RJ-45 socket of a hub/switch or a router.
- Connect the 12V DC output plug to the power jack on the phone; plug the power adapter into an electrical outlet. If PoE switch is used in step 1, this step could be skipped.
- The LCD will display booting up or firmware upgrading information. Before continuing, please wait for the main screen display to show up.
- On the web configuration interface or from the menu of the touch screen, you can further configure network connection using static IP, DHCP and etc.
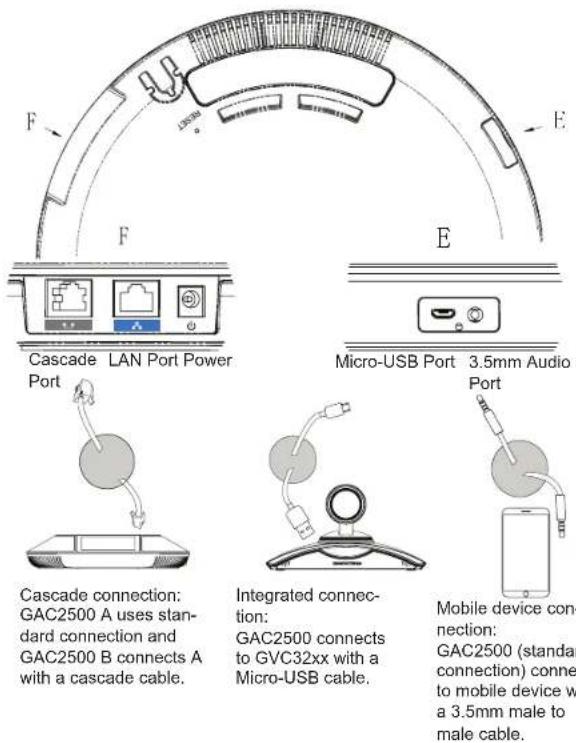
text_image
F E F Cascade LAN Port Power Port Micro-USB Port 3.5mm Audio Port Cascade connection: GAC2500 A uses stan- dard connection and GAC2500 B connects A with a cascade cable. Integrated connec- tion: GAC2500 connects to GVC32xx with a Micro-USB cable. Mobile device con- nection: GAC2500 (standard connection) conne to mobile device w a 3.5mm male to male cable.INTEGRATED CONNECTION:
- Connect the 12V DC to the power jack on the phone; plug the power adapter into an electrical outlet.
-
After the device boots up, connect the Micro-USB port to the USB port of GVC32xx or PC, as shown above.
-
The LCD will display the cascade connection interface, as shown below.

text_image
GVC3200 connected- Adjust the conference settings by tapping the icons on the interface.
DEVICE CONFIGURATION:
Configuring the GAC2500 Using Web Browser:
- Ensure the device is properly powered up and connected to the Internet using standard connection.
- The IP address of the phone will be shown up on the LCD.
- Type the phone's IP address in your PC's browser (under the same LAN).
- In the login page shown below, the default username and password for administrator are "admin" and "admin". The default username and password for user are "user" and "123".

text_image
GAC2500 Enterprise Conference Phone Login Email English Add- In the web GUI, select "Account" to configure Account name, SIP Server, SIP User ID, Authenticate ID and Authenticate Password to register the account on the device.
- For configuring the network, select "Maintenance" --> "Network". Please contact your ITSP (Internet Telephony Service Provider) for additional settings that may be necessary to configure the phone.
Configuring the GAC2500 Using Touch Screen:
- Make sure the device is properly powered up using standard connection and in idle screen.
- Select Settings -> Advanced Settings -> Account. Tap on one of the Accounts to configure Account name, SIP Server, SIP User ID, SIP Auth ID, SIP Auth Password to register account on the GAC2500.
- Once successfully registered, the main screen will be shown as below.
- Please refer to the user manual for more configuration such as configuring the static IP address.
- Please contact your ITSP (Internet Telephony Service Provider) for additional settings that may be necessary to configure the phone.
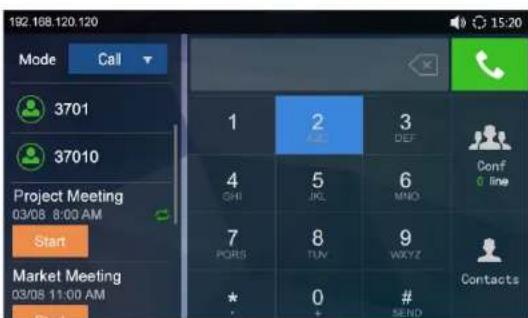
text_image
192.188.120.120 Mode Call 3701 37010 Project Meeting 03/08 8:00 AM Start Market Meeting 03/08 11:00 AM Start 1 2 3 SHI JKL MNO Conf 7 PGRS TUV WXYZ Contacts * 0 # SENDNote: For the detailed user manual, please download from: http://www.grandstream.com/support
This product is covered by one or more of the U.S. patents (and any foreign patent counterparts thereto) identified at www.cmspatents.com.

1 X GAC2500 Base Principal
text_image
GVC3200 connectedtext_image
GAC2500 Enterprise Conference Phone Command: Remove: English: Helptext_image
F E F E Port LAN Alimentation Port Micro-USB Port Audio
text_image
Cascadetext_image
GVC3200 connectedtext_image
GAC2500 Enterprise Conference Phone Input: Importing: Options: Lighttext_image
GVC3200 connected
1 X GAC2500
Apparecchi prin-
cipale
text_image
GVC3200 connectedtext_image
GAC2500 Enterprise Conference Phone Logintext_image
GVC3200 connectedCaution: The 2 connections cannot be configured at the same time. If the micro-USB port is connected to GVC32xx products or PC, GAC2500 will use integrated connection for microphone audio capture and the speaker.