
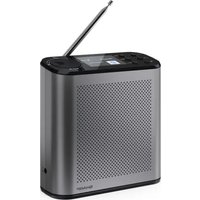
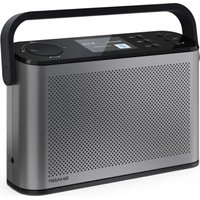
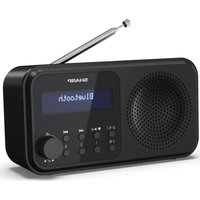
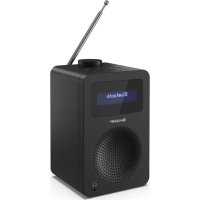
DRP420 - Radio SHARP - Free user manual and instructions
Find the device manual for free DRP420 SHARP in PDF.
| Product Type | Portable DAB+/FM/Bluetooth Digital Radio |
| Brand | Sharp |
| Model | DRP420 |
| Power Supply | 5V DC via micro USB port or 4 AA (LR6) batteries (not included) |
| Dimensions (W x H x D) | 174 x 90 x 53 mm |
| Weight | Approx. 0.39 kg |
| Audio Output Power | 2 Watts RMS |
| Power Consumption | Active < 2 W, Standby < 2 mW |
| DAB Frequency Range | Band III, 174 to 240 MHz |
| FM Frequency Range | 87.5 to 108 MHz |
| Bluetooth | Version 2.4 - 2.480 GHz, 10 m range |
| Bluetooth Name | SHARP DR-P420 |
| Antenna | Telescopic, fully extend for best reception |
| Display | Backlit with station info and battery indicator |
| Preset Memory | 20 DAB + 20 FM stations |
| Main Functions | Alarm, sleep, snooze, auto power off, auto scan |
| Maintenance | Unplug before cleaning, use a soft clean cloth without chemicals |
| Safety | Do not expose to water, do not block ventilation openings, keep out of children's reach |
| Batteries | Observe polarity, do not mix old and new, remove if not used for a long time |
| Repairability | No user serviceable parts, contact authorized service center |
Frequently Asked Questions - DRP420 SHARP
User questions about DRP420 SHARP
0 question about this device. Answer the ones you know or ask your own.
Ask a new question about this device
Download the instructions for your Radio in PDF format for free! Find your manual DRP420 - SHARP and take your electronic device back in hand. On this page are published all the documents necessary for the use of your device. DRP420 by SHARP.
USER MANUAL DRP420 SHARP
Product images are for illustration purposes only. Actual product may vary.
EN DE ESFR
IT NL PLRU

Important safety instructions
Please follow all safety instructions and heed all warnings. Keep this manual for future reference.

This symbol instructs the user to consult the user manual for further safety, operation, and maintenance related
information.

DC voltage
Precautions
Child safety
- Always follow basic safety precautions when using this product, especially when children are present. Children should be supervised to ensure that they do not play with the product.
Location
- The product should be installed in a stable location and ensure the product and its parts are not overhanging.
Ventilation
- Slots and openings in the cabinet are provided for ventilation to ensure reliable operation of the product and to protect it from overheating; these openings must not be blocked or covered. Ensure a minimum distance of 5cm around the product for sufficient ventilation. Never let anyone push anything into holes, slots or any other openings in the product's casing as this could result in an electric shock.
Heat and operating temperature
- Do not install near any heat sources such as radiators, heat registers, stoves, or other apparatus (including amplifiers) that produce heat. Avoid exposure to direct sunlight.
Naked flames
- To prevent the risk of fire, keep candles or open flames away from this product.
Water, moisture, and liquid entry
- To prevent the risk of fire or electric shock, do not expose this product to rain, water, or moisture. Do not place objects filled with liquids on or near this product.
Storms and lightning
- Storms are dangerous for all electric products. If the mains or aerial wiring is struck by lightning the product might get damaged, even if it is turned off. You should disconnect all cables and connectors from the product before a storm.
USB cable
- Do not damage the USB charging cable, stretch, bend or place heavy objects on it.
Damage
- Please inspect the unit for damage after unpacking. If it is damaged in any way do not operate the unit and consult your dealer.
Maintenance
- Unplug the power cable from the power source before cleaning the product. Use a soft and
clean cloth to clean the outside of the unit. Never clean it with chemicals or detergent.
Service and repair
- This product does not contain any parts that are serviceable by the user. Exposing the internal parts inside the device may endanger your life. In case of a fault, contact the manufacturer or authorised service department. The manufacturers guarantee does not extend to faults caused by repairs carried out by unauthorised third parties.
Batteries
Installation
- Do not use any batteries other than those specified. Observe the correct polarity when inserting the batteries. Never use different types of batteries together or mix new and old ones.
Use and maintenance
- Do not expose batteries to high temperatures, e.g. near fire or in direct sunshine. When the
product is not to be used for a long time (more than a month), remove the batteries from the product to prevent them from leaking. If the batteries leak, wipe away the leakage inside the battery compartment and replace the batteries with new ones.
Children safety
- Always ensure battery compartment is closed and secured.
- Batteries are easily swallowed by young children and can cause severe internal burns and lead to death. Keep batteries away from children. Seek immediate medical advice if you believe a battery has been swallowed.
Environmental condition
- Keep batteries away from low air pressure or high temperatures as this may result in an explosion or the leakage of a flammable liquid or gas.
Disposal
- Please dispose of batteries correctly by following the guidance in this manual (see section
"Disposal of this equipment and batteries"). Do not throw them into fire, do not disassemble them and do not try to recharge non-rechargeable batteries. They could leak or explode.
Disposal of this equipment and batteries
Information for users on collection and disposal of old equipment and used batteries.
This symbol means that the product contains batteries covered by European Directive 2013/56/EU which cannot be
disposed of with normal household waste. Cd, Hg and Pb underneath the wheelie bin symbol shows whether the battery contains, cadmium (Cd), mercury (Hg) or lead (Pb).

This symbol on a product means that the product is covered by European Directive 2012/19/EU and must not be disposed of or dumped with your other household waste.

This symbol means that the product is designed and manufactured so that it can be recycled and reused.
- These symbols on the products, packaging, and/or accompanying documents mean that used electrical and electronic products and batteries should not be mixed with general household waste. Household users should contact either the retailer where they purchased this product, or their local government office, for details of where and how they can take these items for environmentally safe recycling.
CE and UKCA statement:
- Hereby, Sharp Consumer Electronics Poland sp. z o.o. declares that this audio device is in compliance with the essential requirements and other relevant provisions of RED Directive 2014/53/EU and UK Radio Equipment Regulations 2017.
- The full CE text and UKCA declaration of conformity are available at sharpconsumer.eu and then entering download section of your model and choosing "CE Statements".
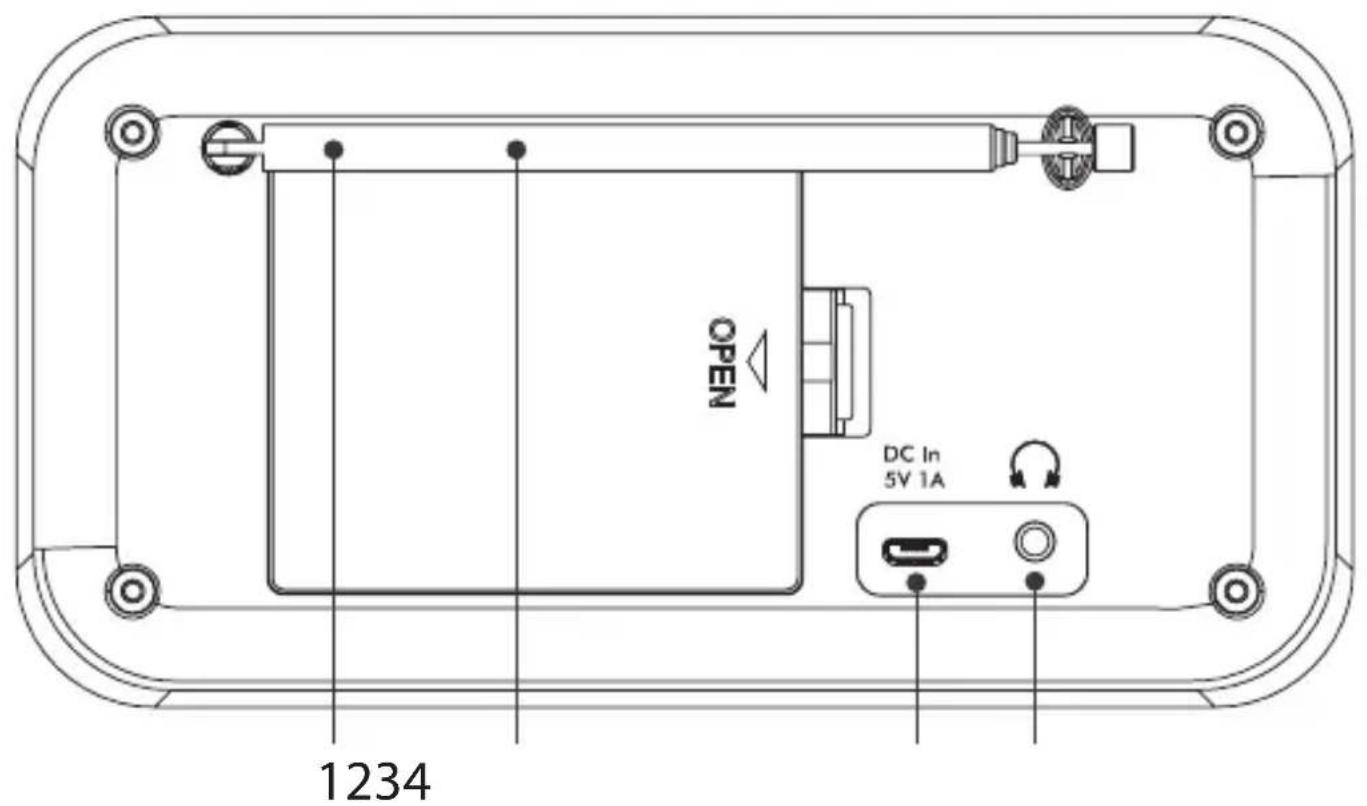
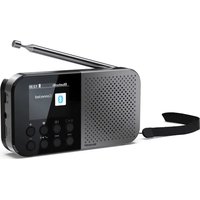
Controls
- Telescopic aerial
- Battery compartment
- Micro USB port
- Headphone jack
-
Backlit display
-
Power/Mode
-
When switched off, short press: power on
- When switched on, short press: change mode
- When powered via USB, long press: standby
-
When powered via battery, long press: power off
-
Pre-set/Play/Pause (20 DAB/20 FM)
-
Short press: Preset recall
- Long press: Preset store
-
In Bluetooth mode:
-
Short press to Play/Pause
- Long press to disconnect current device and scan for new devices
8.
In DAB mode:
- Short press to move up the DAB Station list
In FM mode:
- Short press: Move down the frequency band by 0.05MHz.
- Long press: Scan down the frequency band.
- In Bluetooth mode: Previous track
- In Menu: Move through the menu options
9.
In DAB mode:
- Short press to move down the DAB Station list
In FM mode:
- Short press: Move up the frequency band by 0.05MHz.
- Long press: Scan up the frequency band,
- In Bluetooth mode: Next track
- In the Menu: Move through the menu options
-
iIfo/Menu
-
Short press: Station information
- Long press: Enter the menu options
-
When in standby mode: short press to enter the Alarm 1 and 2 On/Off settings
-
Memory presets 1, 2 and 3
-
Short press: Recall preset 1 (2 or 3)
-
Long press: Store preset 1 (2 or 3)
-
Volume control:
-
Rotate: adjust the volume
- Rotate in Menu or Presets: Scroll through the available menu options or preset locations
- Short press: Select a displayed radio station/ frequency, menu or preset option
- When in standby mode, short press: activates a 10-minute snooze.
Box contents
1 x DR-P420 Tokyo Portable Digital Radio
1 x USB to Micro USB power cable
User documentation
Using your portable DAB+/ FM radio
Telescopic aerial
Fully extend the telescopic aerial (preferably vertically) before you attempt to tune to a DAB / FM station. This will ensure that the maximum signal strength is available when the radio begins to scan. Extending the aerial also ensures the best possible sound quality.
Connection
Connect the USB cable supplied into the Micro USB port on the back of the radio. Plug the USB-A (standard) end of the cable into a USB device or adapter to power the radio. The radio will power on and display < SHARP sharpconsumer.eu> . It will then go into standby mode.
Inserting batteries (optional)
Before installing the batteries (not included),
please ensure the radio is switched off using and has been unplugged from the USB cable. At the back of the radio, press in the tab on the battery compartment cover to remove it. Insert 4 × 1.5V AA-size (also known as LR-6) batteries, making sure to note the +^ and ^ -^ markings and position the batteries correctly. Replace the battery cover, making sure that it clicks' securely shut.
Initial set-up
Short press switch on the radio. It will begin an automatic scan for DAB stations. A progress bar will show the progress of the scan and the number of stations found. When the scan is complete, your radio will select the first available station and begin to play. By default, stations are listed numerically and then alphabetically.
Note: The DAB radio station list is stored in the memory; the next time the radio is switched on, the station search does not take place.
Short press or scroll through the available stations. To select the station displayed, short press. There will be a short delay whilst your radio tunes to your selected station.
Adjusting the volume
Turn clockwise to increase the volume, and anti-clockwise to decrease the volume.
Time and date
Time and date will be synchronised automatically to that broadcast by the DAB service in 24-hour format. To set the time and date manually, turn on the radio. Long press i to enter the menu options. Use to select System> /
Use to change the clock/date format and auto update settings. Short press to exit the menu.
Change the mode
Short press to change between DAB, FM, and Bluetooth modes. The display screen will confirm the mode.
DAB radio mode
Select DAB radio mode
Short press until the screen displays DAB + . The first time you use the radio or if the station list is empty, your radio will automatically begin to scan for DAB radio stations. A progress bar will show the progress of the scan and the number of stations found during the scan will also be displayed. If you were listening to a DAB station when you switched the radio off, this station will automatically be selected when you switch the radio back on.
Change DAB stations
Use to roll through the available stations. Press to select when the station you want to listen to is displayed. There will be a short delay whilst your radio tunes to your selected station.
Scanning for DAB stations
With DAB radio, additional stations and services regularly become available. Carry out a manual scan periodically to make sure that you have the most up-to-date station listing stored within the memory of your radio. If you have moved your radio to a new location, for e.g., if you go abroad on holiday, then it's also a good idea to carry out a manual scan.
In DAB mode:
Long press i. Use o scroll and select
Prune DAB stations
You can remove the DAB stations in the station list that cannot be received in your area. These are listed with a < prefix.
In DAB mode:
Long press i. Use to scroll and select
Storing a DAB station preset
Your radio can store up to 20 DAB radio stations as a preset for instant access to your favourite stations.
Note: Storing DAB radio station presets do not overwrite FM station presets.
Tune the radio to the DAB radio station that you wish to preset. Long press 心 until Preset Store < 1 :Empty>> is displayed.Use to move to the preset location that you would like to store the radio station to (1-20).Press to select.
The display will confirm <Preset X stored> , where 'X' is the number of the preset (1-20)
Note: If there is already an existing DAB station stored under a preset, it will be overwritten when you store the new station.
Tune to a DAB preset station
In DAB mode:
To quickly access the radio stations stored under preset locations 1, 2, or 3, short press 1, 2, or 3 as appropriate, on the front of your radio. Alternatively, short press II. <Preset Recall < 1: > is displayed together with the name or frequency of the station stored there, or (Empty)> if no previous station has been stored. Use to move to and select the preset station that you would like to listen to (1-20).
DAB display information
When listening to a DAB station, you can change the information that will appear on the display. There are several different types of information
that are sent by the broadcaster. Repeatedly short press i to cycle through the different information options:
- Dynamic label segment (DLS) - This is scrolling text information as supplied by the broadcaster. This could include artist names, song titles, contact details for the radio station, etc.
- Signal strength - An empty will appear on the display to indicate the minimum signal strength for acceptable listening. The row of solid rectangles indicates the actual signal strength that you are receiving.
- Program type (PTY) - e.g., 'Rock', 'Pop', 'Talk' or 'News'
- Multiplex name - Displays the broadcasting area and collection of radio stations on this frequency e.g., BBC National DAB, Digital 1 Network
- Channel and frequency - e.g. 12B 225.648 MHz (Channel=12B, Frequency=225.648 MHz)
-
Signal error - This is displayed as a number between 0-99. To satisfactorily listen to a radio station, the signal error must be below
-
Adjust the aerial or relocate your radio to improve reception.
-
Signal information - The data rate at which the signal is being transmitted.
- Power indicator - displays
when powered by USB; displays where XX is the battery charge available.
Time - Date
Dynamic range control (DRC)
DRC data is not transmitted by all broadcasters. DRC is used for controlling difference between the loudest and quietest sounds. e.g., in a noisy environment, setting the DRC to maximum makes quiet sounds comparatively louder, and loud sounds quieter.
There are 3 levels of compression:
- DRC off - no compression. This is the default setting.
- DRC low - medium compression
- DRC high - maximum compression
In DAB mode, long press i. to scroll and select <DRC> and then select your preference.
Note: The current DRC setting will have an asterisk (*) in the display.
FM radio mode
To change to FM mode, short press until the radio displays <FM> . If you were listening to an FM station when you switched the radio off, this station will automatically be selected when you power the radio back on.
Tune to an FM station
Long press button to scan up or down the frequency band. The radio will search for and stop at the next available station. Short press or fine-tune each frequency in 0.05MHz steps.
Note: If the reception is poor, adjust the aerial or move the radio to another location.
Change the scan setting
In FM mode: Long press i,
- The scan will only stop when a strong signal strength is received, resulting in better audio quality. It is possible that the station you are scanning for may be missed using this option.
The scan will stop at every station it receives, even if the signal strength is poor.
Use to choose and select from the options available.
Note: The current scan setting will have an asterisk (*) in the display.
Storing an FM station preset
Your radio can store up to 20 FM stations in its preset memories for instant access to your favourite stations.
Note: Storing FM radio station presets do not overwrite your DAB station presets.
Tune the radio to the FM radio station that you wish to preset. Long press❤▶ until <Preset
Store < 1 : (Empty)>> is displayed. Use to move to and select the preset location that you would like to store the radio station to (1-20). The display will confirm P reset X stored>, where 'X' is the number of the preset (1-20).
Note: If there is already an existing FM station stored under a preset, it will be overwritten when you store the new station.
Auto memory store (AMS)
Alternatively, you can use the Auto Memory Store (AMS) feature to store your FM radio station presets. In FM mode, long press i. Use to scroll to and select MS> . Your radio will now scan the FM frequency band and the stations found will be automatically stored to the preset locations.
Note: You can manually overwrite your AMS stored presets by following the steps in 'Storing an FM station preset' above.
Tune to an FM preset station
In FM mode:
To quickly access the radio stations stored under preset locations 1, 2 or 3, short press 1, 2 or 3, as appropriate. Alternatively, short press . <Preset Recall < 1: > is displayed together with the name or frequency of the station stored there, or < (Empty)> if no previous station has been stored.Use to move to and select the preset station that you would like to listen to (1-20).
FM display information
When listening to an FM station you can change the information that appears on the second line of the display. Repeatedly short press i to cycle through the different information options:
- Radiotext (RT) - This is scrolling text information as supplied by the broadcaster. This could
include artist names, song titles, contact details for the radio station, etc.
- Program Type (PTY) - e.g., 'Rock', 'Pop', 'Talk', or 'News'
- Station name or frequency - e.g., BBC R4, 93.30MHz
- Power indicator - displays
when powered by USB; displays where XX is the battery charge available.
Time - Date
Bluetooth mode
Ensure your radio is in Bluetooth mode by short pressing until the radio displays
Note: If necessary, refer to the instructions for your device to add or set up Bluetooth. When found, your radio will be displayed as
'SHARP DR-P420' on your device. Select this to begin pairing. Once done,
Paired devices will connect to the radio when they are within range (within 10 metres in line of sight). Your device will remain paired with the radio unless you decide to disconnect it.
To disconnect from Bluetooth, long press II for 3 seconds to unpair your current device and search for new devices.
Wirelessly stream music via Bluetooth
In Bluetooth mode, you can wirelessly stream audio through the product's speaker. Use the controls on your paired Bluetooth device as well as those on your radio. Controls available:
- Play/ Pause: Short press
Previous track: Short press
Next track: Short press
Volume can also be adjusted - either using your radio and/or your connected device.
Note: If the radio is inactive for 20 minutes, or no audio signal is being received, the radio will automatically go into standby (or power off if the radio is running on batteries).
Alarm functionality
Note: The alarm function will only function when the radio is powered through via USB; it won't function when powered through batteries (to preserve the battery life).
Set an alarm
Note: Check that the radio is displaying the correct time and date before you set an alarm.


Alarm 1 or 2 settings
| Time | Hour |
| Min | |
| Duration 1, 5, 15, 30, or 60 minutes | |
| Source Buzzer, DAB, or FM | |
| Frequency Daily, once, weekdays or weekends | |
| Volume level 25%-100% | |
| Alarm On or Off |
Note: If the time is not set or has failed to update from the radio signal,
If you try to set alarm when the unit is powered by batteries,
Stop, snooze, or switching the alarm off
To stop the alarm, short press < Alarm off> will be displayed. The alarm symbol will remain in the display and will sound again at the same time the next day unless it was set for Once>.
To snooze the alarm, press.
To switch off the alarm, follow the steps for 'Set an alarm' and select
Sleep timer
You can set your radio to switch to standby mode automatically using the sleep timer. You can choose from <Sleep off> , <15> , <30> , <45> , <60> and <90> minutes. To do this, long press i Use to scroll and select System> /
Display backlight timeout
To adjust the display backlight timeout, long press i. Use to select
for the backlight brightness for the
Display language
To change the display language, long press i. Use to scroll and select System> / Language>.Use to scroll and select your preferred language.There are 7 options available:English,French,German,Italian, Spanish,Polish,and Netherlands.An asterisk (^*) will be displayed next to the current language setting.
Other information
Software version
To check the software version of your radio, long press i. Use o roll and select
Factory reset
You can reset your radio to restore it to the original factory settings.
Note: If you reset your radio, your stored presets will be deleted and any connected Bluetooth device will be unpaired.
Long press i. Use to scroll and select
Troubleshooting
If there is no sound or power:
- Adjust the volume.
- Check that the USB cable is connected and that the radio is not in standby mode.
- If the product is powered using batteries, check
if they need to be replaced. Please use good quality AA batteries.
If the radio reception is poor:
- Make sure that you have fully extended the telescopic aerial (preferably vertically).
- Rescan for radio stations, see sections 'Scanning for DAB stations' and/or 'Tune to an FM station' as appropriate.
- Try moving your radio to another location to see if the reception improves.
- Check that you do not have other electrical equipment close to your radio. This may cause interference.
If you are unable to pair with a Bluetooth device:
- Check that you are in Bluetooth mode.
- Ensure that you are within 10 metres of the radio for Bluetooth functionality.
- Move the radio and Bluetooth device away from other Bluetooth devices/electrical equipment.
- If possible, turn off other nearby Bluetooth devices or disable their Bluetooth functionality.
If the function buttons do not respond:
- Check that the USB cable is connected to the back of your radio. Short press 0 . If you are using batteries, they may need to be replaced.
Factory reset the device.
Note: All your settings, including the radio station list, connected Bluetooth devices and any preset will be deleted when a factory reset is carried out.
Technical specifications
| Input DC 5V | |
| Batteries 4 x 1.5V AA size (LR-6) (Optional, not supp ied) | |
| Audio output 2 Watts RMS | |
| Power Consumption Active: < 2 W Standby: < 2 mW | |
| DAB frequency range Band III, 174 MHz to 240 MHz | |
| FM frequency range 87.5 MHz to 108 MHz | |
| Bluetooth 2.4 GHz ~ 2.480 GHz | |
| Pairing name SHARP DR-P420 | |
| Dimensions (W) x (H) x (D) mm 174 x 90 x 53 | |
| Weight approx. 0,39 kg |
Dynamic Range Control (DRC)
Alternatively, you can use the following method to connect to a radio.
Changer de station DAB
prochaine station disnpleble.
Specifications techniques
Dynamic Range Control (DRC)
IcToHnKu TeNna n pa6oOaY TeMpepaTpya
- Hy yctaHaBnBaIte n3dJIne pIdom c nCTOuHnKaMn TeIIa, HApPImep paIaNtOpamn, o6OrpeBaTeJIaMn, neyAmn IIN dpyrIMn yCTpOiCTBaMn (BkIIOUaY ycNlnteI), BbIpa6aTbIBaIOUcIMn TeIINo. He donyckaIte nonaHaHna Ha n3dJIne npIbIX coNHeuHbIX nyuei.
OTkpbln orohb
-Bo n36eXaHne pUcKa BO3rOpaHn,He cTaBbTe pAOM C n3dEJIeM CBeu INIIN HbIe NCTOCHNOK OTKpbITOrO ORH.
Boda, BlaRa n nonaHaHne XnKoCTn
-Bo n36eXaHne pncKa Bo3rOpAHnI nn IopaxKeHHa 3JIeKTPnueCKm TOKOM, He DonyckaIte nonaHa Ha n3JeNHe Kaenb OcaKOB, BOnblnn Bnarn. Ha cTaNbTe Ha n3DeHne nn PAnOM C Hm PpeMeTbI, HApONHeHHbIe XnDkoCTaMn.
Tpo3bIMOJIHN
- rpo3bl npedctabnIOT onacHOCTb dIy BCEX 3JIeKTPoPnp6OpOB. Ydap MOHnB CeTeBOI nIaHTeHHbI Ka6elb MoKeT npNBecTI K NOBpeJdeHIO u3JeNIA, daJce ecNI OHO BbIKIQUHeO. IpeD rpo3oI cIeDyET OTKIIUoyATb OT u3DeHnBce Ka6eNl pa3bEmbl.
Ka6eIb USB
He onyckaTe noBpeXdHn3apdHoro shhpya USB, He pactaRnBaTe n He nepern6aTe erO, He cTaBbTe Ha Hero TjXeIbe IpeDMeTbl.
PobpeckdneHc
PacnaKOBaB yCToPiCTBO,OCMOTpuTe erO, UTO6bI y6eINtbcB B OTCyTCTBnIO NBpeXdEHN. Ecnn OHO nMeet KaKne-JIn6o NobpeXdEHN, He npictuNaTe K 3KcNpyataunn N3dEJIra, a o6paTntecb K npOdaBuY.
TexHnueckoe o6cnykUbaHne
- Праздуем пиctупаь к очntke n3deлney, OTKIIOUHTe UHyp пNTAHNЯ OT NCTOCHNka энергИ. ДяочNTКВ BHeшней NOBepxHOCTN yCTpoIcTBA UNCNoIb3yIte MЯrkyIu ИчСТуI0
caJefky. HnKOrda He OunuaiTe eue c NOMOJIbIO XmMueCKNX IIN MOUxN CpeDCTB. 06cIyXnBaHne n peMOHT
-Данhoeи3делп He coeepKNT KOMnoHENTOB, texHnueckoe 6cnyxuBaHne KOToPbIX NOIb3OBaTeJIb MOKeT OcyuieCTBnIb camOCToRteJbHO. KoHTaKT c HeKOTOpbIMu qactMn BHyTpN yCtpoiCTBa MoKeT npedctabJIrTb ONaCHOCTb dIy JxN3H.N.B Clyuae BO3HnKHOBeHnA HeNCnPpABHOCTeI CJeDyET CBra3aTbcra C npOn3BOOnTeIem IINnpedCTaBnteIem aBTopn3OBAHHORO cepBnCHOrO ueHTpa. TapaHTnA npOn3BOOnTeJIr He paCnpocSTpaHReTcHa HeNCnPpABHOCTn, BO3HnKUHe BCJeDCTBVe nPoBeDeHnpeMOHTa He yNoJHOMOeHHbIMn TpeTbIMn JInCaMn.
Батуарейки
YCTaHOBka
- IcnoIb3yIe ToIbKO yka3aHHbIe 6aTapeKn. BCTabJIa 6aTapeKn O6paJauTe BHMMaHHe Ha
nojropoctb. IcnoJb3OBaTb OndHOBpeMeHHO 6atapeKn pa3HbIX TINOB INI IN CTapBIE IN HOBbie 6atapeKn KaterOpueeCKn 3anpeueHo.
3Kcnpnyatauia TeXnueckoe 06cIyXnBaHne
He noDBeprAte 6aTapeKn BO3dEICTBIO BbICOKHX TEMNepaTyp, HApnpMep B o6JIaCTn BO3dEICTBIA NpRmBIX COJHcHbIX Lyuei. EcNI I3dJIne He 6yDet NCNoIb3ObaTbcra B TeueHne IINTEJBHOrO nepoDA (CBblse OJHOro Meca), BO I36ExKaHne npoteKaHHa 6aTapeek BblbTe INx I3dJIeNA. EcNI 6aTapeKKn npoteKNI, BBITpuTe BHyTpEHHIOU qactb 6aTapeHoro OTCEKa I 3aMeHNTe 6aTapeKN HObIMN.
Be30nacHOCTbTeTei
BaTapeHbI OTCeK DOJXKeH 6bITb BcERda 3aKpbIT, aero KpbIuKa DOJXHa 6bITb 3aΦNkCupObaHa.
BaTapeKIMoKeT IerKO npOrnOtNb pe6eHOK; 3TO MoKeT npINBeCTN K BO3HNKHOBEHIO TJKeJIbIX BHyTpEHHNX OXoROB N CMEPTN. DePKeNTe 6aTapeKIN B HeOCTynHom dIЯ DeTei MeCTe. EcNI nMeIoTcA OCHOBaHn npednoLaTaB, yTo npOrnOueHa 6aTapeKa,
HemeiHNO 6paTntecb 3a MeiHnHcKoI NOMOIO.
YcnoBnO Okpykaiouei cpebl
He donyckaIte nonaHaHna 6aTaapeek B MeCTa C Hn3KIM DaBLeHneM BO3dyxa IIN BBICOKOJ Tempeatypo: 3TO MOKeT pNBecTN K B3pyBy IIN yTeUKe BOCnlaMeHReMoN XnIDKOCTN IIN r3a.
Ytunn3aun
MoxHo BbIbpaTb OINH N3 DByx BapNaHTOB:
— NOUCK
Проблема на в�ье ся Толбко пи
обаружени устончвого сигнала, пи
КOTOPOM обесенье ся улоченhoe
Каецьо 3ычаня. пи Исплбозовни зТORO
Варна за сухесльные BOЗМожноctь поруска
Нж�� радимостацни.
Haxmaj KONky ,HaJNTe N BbIbepntoOINN3 npednaeraembIX BapnAHTOB.
Прмочи.Текшанстpoикпonska nOMEaETcHaДИСПЛe "3BezdOчК" (^*)
CoxpaheHne B namrTn HOBo FMCTaHcN
BnamrnpaHnnpemHnka MoKeT xpaHntbcra do 20 FM-CTaHcui,HTo N03BOJareT 6bICTpo nepeKJIIOUaTb eO Ha IIO6bMbIe CTAHcui.
PpmeHne. Pn coXpaHeHn B namrTn FM-CTaHn He npocxOanT nepe3aIncB cTaHn DAB.
HactpoTe paDnOpnpemHK ha FM-CTaHcIIO, KOtOpyO Bbl XOTnte COxpaHNTb B nAmrTn.
Haxmnte n npndepknte KhoNky 11 noka Ha dincnee He noBNTc coo6eHne <Preset
Store < 1 :Empty) . Haxmam KHONky
,HaIdnte N Bb6epnte Homep (1-20),noKOTOpbIM XOTnTe COxpaHnTb TeKyuIyO cTaHcNIO.
Ha nucnnee noBntc noTBePkaiooee
coo6ueHHe:
PpmeHne. Ecnn noB BbI6paHHbIM Homepom yke coxpaneHa kakaJ-Im6o FM-CTaHcNia, pn coXpaHeHN HOBOI CTaHcN n CTapbIe daHHbIe CTnpaIOTcR.
Ecnn 3Byk OTCyTCTByeT nn Cna6bI:
- OTPerynupyIte rpoMkoCTb.
- Y6eIITecb B TOM, yTo USB-Ka6eIb nOdkIouyeH, a paAnOpnpnEmHnK He HaxoIITcB peKIme OxNJaHnA.
- Ecni nHTaHne u3dJIINr oCyUeCTBnIeTcR OT 6aTaapeek, npOBepbTe, He HyKDaIOTcR IIN OHN B 3aMeHe. NcNoIb3yIte B paDIOnpnEmHnke BBICOKOKaueCTBeHHbIe 6aTaapeKn TnPa AA.
Pn cna6om paDnOcnrHane:
- Y6eIITecb B TOM,чTO TeNECKONUYeCKa aHTeHHa NOnHOCTbIO BbITa (KeJaTeJbHO B BePTnKaJIbHOe NIOJOxKeHne).
- Повторе поск радиocтанци соглachо
yka3aHnM B pa3dene "POnsck cTaHcN DAB" n (nIn) "HaCToPOKa npneMHNka Ha FM-cTaHcNIO", B 3aBNCIMOCTN OT peKIma.
- Pocmotpnte, He yuuchTcJn npem, ecn nephectn padnoonpneMHK B dpyroe MeCTO.
- Поберьт, He paclnoLOXeHbI IIN pRdOM c paDNOpnemHNKOM kaQoe-l6o eUe 3JIeKTPoPnp6Opbl. OHI MOryT coZdaBaTb NOMEXI.
Ecnn He ydaetcyaCTaHOBtB CB3b C yctpoiCTbOM Bluetooth:
- Поберп, установлен Ли на пиемнке рекимBluetooth.
- Y6eIITecb B TOM, UTO yCTPOINCTBO HAXOINTcB INpeIax paInuCa DeIcTBnI INTEpEeNcBA Bluetooth - 10 MeTPOB.
- Перемechидаюпсимнк устpoичBo Bluetooth на достаточе пастоане ot дугх устpoичBluetoothи рочи Зл ektronрпборов.
- Ecnn BO3MOXHNO, BbIKIOUHTe paCnOLOXKeHHbIe pAOM yCTpoiCTBa Bluetooth nIN OTKIOUHTe B
Hnx yHKunu Bluetooth.
Ecn npaonnpemHK he pearnyet Ha yHKnOHaJIbHbIe KHONK:
- Y6eIITecb B TOM,чTO Ka6eJIb USB BCTaBNeH BrHe3do Ha 3aDHei NaHei paAnOpnpemMnka. KpaTKOBpeMeHHo HaxmTe KHOJky
. Ecnn nntaHne paDnOnpnemHnka OcyuecTBnAeTcra OT 6aTaapeek, BO3MOxHO, OHN HJXdaIOTcB 3aMeHe.
BocctaHObnte nepBOHaayalbHbIe 3aBOdCKne HaCTpoiKn paAnOpnpnEMnKa.
PpimmeaHne. PnBocCTaHOBHeHn 3aBOcknx HacTpoek paHIOnpMnHa N3 NaMaTn ydaJIeTcN cncOK paHIOCTaHcN, COxpaHeHHbIe cTaHcN IN NOdkJIoueHHbIe K Hemy yCTpoiCTBa Bluetooth.
TexHnueckne xapakTepncTNKn
The Bluetooth® word mark and logos are registered trademarks owned by Bluetooth SIG., Inc.


SAU/MAN/0174
CE UK CA
Sharp Consumer Electronics Poland sp. z o.o.
Ostaszewo 57B, 87-148 Lysomice, Poland
Made in China
www.sharpcounter.eu
SHARP
- Important safety instructions
- Please follow all safety instructions and heed all warnings. Keep this manual for future reference.
- Precautions
- Child safety
- Location
- Ventilation
- Heat and operating temperature
- Naked flames
- Batteries
- Installation
- Children safety
- Environmental condition
- Disposal
- Disposal of this equipment and batteries
- CE and UKCA statement:
- Controls
- 8.
- 9.
- Box contents
- Using your portable DAB+/ FM radio
- Telescopic aerial
- Connection
- Inserting batteries (optional)
- Initial set-up
- Adjusting the volume
- Time and date
- Change the mode
- DAB radio mode
- Select DAB radio mode
- Change DAB stations
- Scanning for DAB stations
- In DAB mode:
- Prune DAB stations
- Storing a DAB station preset
- Tune to a DAB preset station
- DAB display information
- Dynamic range control (DRC)
- There are 3 levels of compression:
- FM radio mode
- Tune to an FM station
- Change the scan setting
- Storing an FM station preset
- Auto memory store (AMS)
- Tune to an FM preset station
- In FM mode:
- FM display information
- Bluetooth mode
- Wirelessly stream music via Bluetooth
- Alarm functionality
- Set an alarm
- Stop, snooze, or switching the alarm off
- Sleep timer
- Display backlight timeout
- Display language
- Other information
- Software version
- Factory reset
- Troubleshooting
- If there is no sound or power:
- If the radio reception is poor:
- If you are unable to pair with a Bluetooth device:
- If the function buttons do not respond:
- Changer de station DAB
- Specifications techniques
- Батуарейки
- YCTaHOBka
- CoxpaheHne B namrTn HOBo FMCTaHcN
- Ecnn 3Byk OTCyTCTByeT nn Cna6bI:
- Pn cna6om paDnOcnrHane:
- Ecnn He ydaetcyaCTaHOBtB CB3b C yctpoiCTbOM Bluetooth:
- Ecn npaonnpemHK he pearnyet Ha yHKnOHaJIbHbIe KHONK:
- TexHnueckne xapakTepncTNKn
Brand : SHARP
Model : DRP420
Category : Radio