SHLS 1800 A1 - Electric heater SILVERCREST - Free user manual and instructions
Find the device manual for free SHLS 1800 A1 SILVERCREST in PDF.

| Product Type | Wi-Fi Ceramic Fan Heater |
| Brand | SilverCrest |
| Model | SHLS 1800 A1 |
| Maximum Heat Output | 1800 W |
| Minimum Heat Output | 1200 W |
| Supply Voltage | 220-240 V ~, 50/60 Hz |
| Standby Consumption | 0,00019 kW |
| Dimensions (L x H x D) | approx. 21 x 50 x 21 cm |
| Weight | approx. 2.7 kg |
| Heat Levels | 2 (high: 1800 W, low: 1200 W) |
| Fan Only Mode | Yes (without heating) |
| Timer | 2 h, 4 h, 8 h |
| Oscillation | Horizontal and vertical |
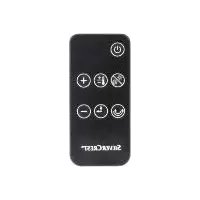
| Remote Control | Yes (with CR2032 battery included) |
| Mobile App | Compatible with LIDL HOME (Wi-Fi 2.4 GHz) |
| Filter | Washable with warm water (max 30°C) |
| Overheat Protection | Yes (automatic shut-off of heating element) |
| Tip-over Protection | Yes (safety switch on the base) |
| Safety Class | II |
| Warranty | 3 years |
Frequently Asked Questions - SHLS 1800 A1 SILVERCREST
User questions about SHLS 1800 A1 SILVERCREST
0 question about this device. Answer the ones you know or ask your own.
Ask a new question about this device
Download the instructions for your Electric heater in PDF format for free! Find your manual SHLS 1800 A1 - SILVERCREST and take your electronic device back in hand. On this page are published all the documents necessary for the use of your device. SHLS 1800 A1 by SILVERCREST.
USER MANUAL SHLS 1800 A1 SILVERCREST
This product is only suitable for well insulated rooms or for occasional use.
FR DE
Operating instructions and safety instructions
NL BE
ERAMISCHE VENTILATORKACHEL
MET WIFI
KERAMICKY TOPNY VENTILATOR
S PRIPOJENÍM NA SÍT WLAN

natural_image
Symbol of a trash bin crossed with no text or numbers, representing waste sorting or disposal (no text present)https://www.targa.gmbh/downloads/conformity/346979_2001.pdf
https://www.targa.gmbh/downloads/datasecurity/
346979_2001_SHLS_1800_A1.pdf
- Trademarks 24
- Intended use.... 24
- Package contents ...... 25
- Overview of controls 25
- Technical specifications 26
5.1 Information required on electric local space heaters....27
- Safety instructions 28
- Copyright 34
- Before you start.... 34
8.1 Remote control / inserting the battery 34
- Getting started 34
9.1 Switching the fan heater on and off 35
9.2 Setting the heat level....35
9.3 Setting the heating/ventilation time 36
9.4 Swivel function (horizontal / vertical) 36
9.5 Controlling the fan heater using the app.... 36
9.6 Overheating protection 37
9.7 Tilt protection....37
- Troubleshooting 38
- Maintenance/cleaning 38
11.1 Maintenance....38
11.2 Cleaning....38
- Storage when not in use 39
-
Environmental regulations and disposal information.... 39
-
Conformity notes 40
- Privacy protection / Internet security 40
- Warranty and service information....40
Congratulations!
By purchasing the SilverCrest SHLS 1800 A1 ceramic fan heater, hereinafter referred to as the fan heater, you have opted for a quality product.
Before first using it, familiarise yourself with the way the fan heater works and read these operating instructions through carefully. Be careful to follow the safety instructions and only use the fan heater as described in the operating instructions and for the applications given.
Keep these operating instructions in a safe place. If you pass the fan heater on to someone else, make sure to give them all the relevant documents with it.
1. Trademarks
Apple ^® is a registered trademark, App Store is a service mark of Apple Inc., registered in the USA and other countries.
Google ^® and Android ^® are registered trademarks of Google Inc.
Other names and products may be the trademarks or registered trademarks of their respective owners.
2. Intended use
The fan heater is designed exclusively for heating and ventilating inside spaces. This fan heater may not be used outdoors or in tropical climates. The fan heater may also not be used in spaces where there are specific conditions such as an explosive atmosphere (e.g. because of gas, dust or steam). This fan heater has not been designed for corporate or commercial use. Use the fan heater in domestic environments for private applications only. Any other use does not correspond to the intended use. This fan heater fulfils all standards and directives listed in the Declaration of Conformity. In the event of any modification to the fan heater that was not approved by the manufacturer, compliance with these standards is no longer guaranteed. The manufacturer shall not be liable for any damage or malfunctions resulting from such modifications.
Observe the regulations and laws in the country of use.
3. Package contents
Remove the fan heater and all the accessories from the packaging. Remove the packaging material and check that all components are complete and undamaged. If you find anything missing or damaged, please contact the manufacturer.
• SHLS 1800 A1 fan heater
- Remote control (inside remote control compartment)
• CR2032 coin-shape battery (inside remote control)
• These operating instructions
4. Overview of controls
These operating instructions have a fold-out cover. On the inside of the cover is a diagram of the fan heater with the components numbered. The meanings of the numbers are as follows:
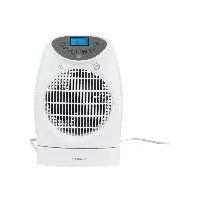
| 1 | Handle |
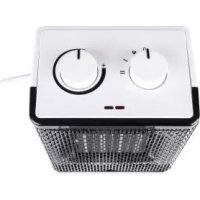
| 2 | Control panel |
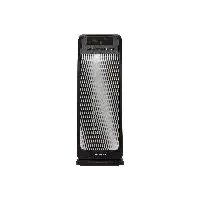
| 3 | Air outlet grille |
| 4 | Stand |
| 5 | Safety switch (on the bottom) |
| 6 | Indicator light |
| 7 | Filter compartment |
| 8 | Remote control compartment |
| 9 | Power cable |
| 10 | On/off switch |
| 11 | Filter |
| 12 | Air inlet grille |
| 13 | Timer button/swivel function (vertical) |
| 14 | Timer LEDs (2h, 4h and 8h) |
| 15 | Mode button/swivel function (horizontal) |
| 16 | On/Standby Switch |
| 17 | Infrared transmitter |
| 18 | On/Standby Switch |
| 19 | Swivel button (vertical) |
| 20 | Operating mode button |
| 21 | Timer buttons (2h, 4h and 8h) |
| 22 | Swivel button (horizontal) |
- Technical specifications
| Model SHLS 1800 A1 | |
| Input voltage 220 V - 240 V | ~, 50/60 Hz |
| Transmission power < 20 dBm | |
| Frequency band 2400 MHz - 2483.5 | MHz |
| Safety class | II / ☐ |
| Heating power | 1800 W |
| Power consumption: | |
| Heat setting I | approx. 1200 W |
| Heat setting II | approx. 1800 W |
| Fan running | approx. 15 W |
| Remote control power supply CR2032 | / 3V |
| Minimum app requirements Android 5.0, iOS 9.0 | |
| Environmental conditions 0 °C to +40 °C, max. 85 % relative humidity | |
| Dimensions (W x H x D) approx. 21 x 50 x 21 cm | |
| Weight approx. 2,7 kg |
The technical data and design may be changed without prior notice.
5.1 Information required on electric local space heaters
| Model code(s): SilverCrest SHLS 1800 A1, IAN 346979_2001 | |||||
| Designation | Symbol | Value | Unit | Designation | Unit |
| Heat output For electrical storage local space | heaters only: Type of heat charge control | ||||
| Nominal heat output | Pnom | 1.8 | kW Manual | heat charge control with integrated thermostat | No |
| Minimum heat output (benchmark) | Pmin | 1.2 | kW manual | heat charge control with room and/or outdoor temperature feedback | No |
| Maximum continuous heat output | Pmax,c | 1.8 | kW electronic | heat charge control with room and/or outdoor temperature feedback | No |
| Auxiliary electricity consumption | Fan assisted heat output Yes | ||||
| At nominal heat output | elmax | 1.8 | kW | Type of heat output/room temperature control | |
| At minimum heat output | elmax | 1.2 | kW single | stage heat output and no room temperature control | No |
| In standby mode | eISB | 0.00019 | kW Two | or more manual stages, no room temperature control | No |
| with mechanic | thermostat | room | temperature control | Yes | |
| with electronic | room temperature | control | No | ||
| electronic room temperature control | plus day timer | No | |||
| electronic room temperature control | plus week timer | No | |||
| Other control options | |||||
| room temperature control | with | presence detection | No | ||
| room temperature control | with open | window detection | No | ||
| with distance control option | No | ||||
| with adaptive start control | No | ||||
| with working time limitation | No | ||||
| with black bulb sensor | No | ||||
| Contact details | Name and address of the manufacturer or its authorised representative TARGA GmbH Coesterweg 45 59494 Soest GERMANY | ||||
This table is available for download from this link: www.targa.gmbh/downloads/erp/346979_2001.pdf
6. Safety instructions
Before you use the fan heater for the first time, please read the following notes and heed all warnings, even if you are familiar with handling electronic devices. Keep these operating instructions in a safe place for future reference. If you sell the fan heater or pass it on, it is essential that you also hand over this manual, as it is part of the product.
Explanation of the symbols used
DANGER! This signal word indicates a danger with a high risk, which could lead to death or major injuries if not avoided.
WARNING! This signal word indicates a danger with a moderate risk, which can lead to death or major injuries if not avoided.
DANGER! This symbol denotes danger for human health and risk of death and/or risk of damage to property due to electric shock.
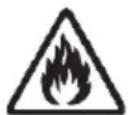
DANGER! This symbol denotes danger for human health and risk of death and/or risk of damage to equipment due to fire.
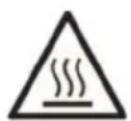
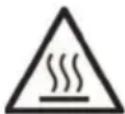
DANGER! Warning, hot surfaces! This symbol denotes the risk of injuries or burns from hot surfaces.
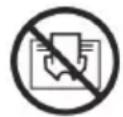
WARNING! This symbol denotes that the fan heater must not be covered to prevent overheating.
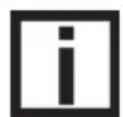
This symbol denotes further information on the topic.
General safety instructions
- Keep children under 3 away from the fan heater unless they are under constant supervision.
- This fan heater may be used by children of 8 years or over or by persons with physical, sensory or mental impairments or those with no knowledge or experience providing they are supervised or they have been given instructions on the proper use of the fan heater and they understand the associated risks. Children must not play with the fan heater. The product must not be cleaned or maintained by unsupervised children.
- Children of between 3 and 8 may only switch the fan heater on and off if they are supervised or have been instructed in the safe use of the fan heater and understood the resulting risks, providing the fan heater is placed or installed in its normal place of use.
- Small parts can represent choking hazards. Keep the packaging out of the reach of these people. There is a risk of suffocation.
- Children of between 3 and 8 may not insert the plug into the mains socket, adjust the fan heater, clean the fan heater or carry out user maintenance.
- Attention! Some parts of the fan heater can get very hot and cause burns. Be particularly careful if children or persons requiring extra protection are present.
- The fan heater must not be operated in the immediate vicinity of a basin, a bathtub, a shower or a swimming pool as water splashes could get into the device.
- If it is damaged or malfunctions, the fan heater must not be used, in order to prevent damage. Get customer services or a qualified person to check the fan heater and repair it if necessary.
- Only use the fan heater indoors, not for heating up a car or tent, for example.
- Never cover the fan heater with washing or other objects to dry them. Essentially, to prevent overheating, the fan heater should never be covered.

DANGER: Risk of electric shock!
- Only plug the mains plug into an easily accessible mains socket. The fan heater should never be placed immediately below a wall mains socket. Operate the fan heater only at the voltage indicated on the rating plate!
- The fan heater, the power cable (9) and the mains plug must not be immersed in water or other liquids.
- Never touch the power cable (9) or the fan heater with wet hands.
-
Protect the fan heater from drips and splashes. If liquid penetrates into the fan heater, unplug the mains plug immediately and get the fan heater checked or repaired if necessary by customer service or similarly qualified personnel.
-
If the fan heater falls into water, unplug the mains plug immediately and only then remove the fan heater from the water.
- To disconnect properly from the mains, the mains plug must be pulled out of the socket. Never pull on the power cable (9) to remove the mains plug from the mains socket. Always pull on the mains plug itself.
- Unplug the mains plug from the mains socket if the fan heater is not working properly, not in use, during thunderstorms and before cleaning.
- Make sure that the power cable (9) cannot be damaged by sharp edges or hot spots.
- Make sure that the power cable (9) cannot become crushed or squashed.
- Do not modify the fan heater in any way.
- If the power cable (9) is damaged, it must be replaced by the manufacturer, its customer service or a similarly qualified person, in order to avoid any possible danger. Never use adapter plugs or extension cables and do not tamper with the power cable (9)!
Risk of fire!
- Always place the fan heater on an even, heat-resistant surface away from heat sources and combustible materials, liquids or gases. Leave clearance of at least 1 m on all sides.
- The fan heater is not designed to be operated with an external timer or a separate remote control system.
• Always unwind all the power cable (9).
- The fan heater must not be covered and no objects must be inserted into the air inlet grille (12) or the air outlet grille (3) to avoid overheating.
- In order to avoid a build-up of heat, the air needs to be able to go in and out freely.
- When the device is in use, burnable objects such as curtains or paper should be kept away from the fan heater.
- Make sure that no fire hazards (e.g. burning candles) are placed on or near the fan heater.
Risk of getting burnt!
- The surfaces of the fan heater can get very hot when in use. Only hold the device by the handle (1).
- The fan heater can still be very hot even after it has been switched off.
• Always allow the fan heater to cool before cleaning. - Only transport the fan heater when it has cooled down. Always carry it by the handle (1).
Risk of injury
- If you notice any smoke, unusual noises or strange smells, unplug the mains plug from the mains socket immediately. If this occurs, the fan heater should not be used before it has been inspected by authorised service personnel.
- Lay the power cable (9) so it does not present a trip hazard.
- Always keep enough clearance from the fan heater to ensure that hair or clothing cannot be sucked into the fan heater by the fan.
HAZARD from batteries
- Always pay attention to the correct polarity when inserting the battery. When it is empty, replace it with a battery of the same type. Risk of explosion!
- Batteries can represent choking hazards. Therefore, always keep batteries out of reach of children. If a battery is swallowed, seek medical help immediately.
- Batteries must not be recharged, dismantled, discarded of in fire or short-circuited.
- Remove empty batteries immediately to prevent leaks.
- If battery acid has leaked out, avoid contact with eyes, skin and mucus membranes. In the event of contact with acid, rinse the affected parts immediately with plenty of clean water and seek medical attention.
WARNING about property damage
- Do not attempt to swivel the unit by hand. This could damage the motor.
- Do not use any abrasive or astringent detergents.
7. Copyright
All the contents of this user manual are protected by copyright and provided to the reader for information only. Copying data and information without the prior explicit written consent of the author is strictly forbidden. This also applies to any commercial use of the contents and information. All texts and diagrams are up-to-date as of the date of printing.
8. Before you start
Please unpack the fan heater and remove all packaging material. Inspect the fan heater for any damage. If the fan heater is damaged, do not use it.
8.1 Remote control / inserting the battery
The remote control supplied can be stored in the remote control compartment (8) of the fan heater when not in use. You can operate the fan heater in the same way from the control panel (2) of the fan heater or using the remote control.

The battery has already been fitted into the remote control. Remove the plastic strip sticking out of the battery compartment in order to activate the battery.
If the battery in the remote control is empty, replace it with a new type CR2032 3 Volt battery. The procedure is as follows:
- Press the closure flap on the battery holder of the remote control towards the centre (Diagram A). Pull the battery holder out.
- Remove the empty battery and insert a new battery. Make sure the polarity is correct (+/-).
- Push the battery holder back into the remote control until the closure flap clicks into place.
9. Getting started

DANGER! When switched on, the temperature of exposed surfaces may be very high. There is a risk of getting burnt!

DANGER! Always unwind all the power cable (9). There is a risk of fire.

DANGER! Keep a clearance of at least one metre to walls, furniture and other devices. There is a risk of fire.

When you use it for the first time, smells or slight smoke may develop. This is normal and perfectly safe. However, do make sure there is sufficient ventilation.
- Switch the On/Off switch (10) off.
- Plug the mains plug into an easily accessible mains socket.
You can operate the fan heater in the same way from the control panel (2) of the fan heater or using the remote control.
9.1 Switching the fan heater on and off
- Switch the On/Off switch (10) on. A beep sounds and the fan heater is in standby mode. The fan heater can now be operated from the control panel (2) or the remote control.
- To use the fan heater, press the ⏻ button (16 or 18). The status indicator (6) lights up.
- To switch the fan heater back to standby mode, press the ⏻ button (16 or 18) again. The status indicator (6) goes out.

Please note that the fan heater has an auto power-off function. The fan continues running for approx. 20 seconds until it completely switches off.

Please note that the fan heater swivels back to the centre position (horizontal/vertical) when you switch it off.

Please note that the fan heater consumes minimal electricity when in standby mode.
- In order to switch the fan heater off completely, it needs to be switched off from the On/Off switch (10).

Even when the On/Off switch (10) is off, the full mains voltage is live in the device. Only unplugging the mains plug disconnects the fan heater completely.
9.2 Setting the heat level
Every time you switch it on using the 📊 button (16 or 18), the fan heater starts up using the last settings.
To select a different mode, proceed as follows:
Press the Ⓧ/∅ button (15) or the Ⓧ button (20) as many times as necessary until the operating mode you want has been selected. The status indicator (6) shows the operating mode selected.
| Indicator light (6) Mode | |
| Dark red | High power: The fan heater works at 1800 W. |
| Light red | Low power: The fan heater works at 1200 W. |
| Blue | Fan function: In fan mode, the fan heater works without heating. |
9.3 Setting the heating/ventilation time
The fan heater has a timer which allows you to set the running time for the fan heater. The running time can be set to 2, 4 or 8 hours.
Setting on the device:
- Press the Ⓐ/↑ button (13) to toggle through the hours. The set time is indicated by the Timer LEDs (14).
Setting using the remote control:
- On the Ⓛ section (21) of the remote control, press the button with the desired time (2h, 4h or 8h) to set the timer directly. The set time is indicated by the Timer LEDs (14).
At the end of the set running time, the fan heater switches off.
9.4 Swivel function (horizontal / vertical)
The built in swivel function allows the fan heater to distribute the air flow evenly around the room.
Setting on the device:
- Press and hold the Ⓥ/Ω button (15) for at least 2 seconds to switch the horizontal swivel function on or off.
- Press and hold the ⏻/↑ button (13) for at least 2 seconds to switch the vertical swivel function on or off.
Setting using the remote control:
- Press the 😊 button (22) on the remote control to switch the horizontal swivel function on or off.
- Press the ⏻ button (19) on the remote control to switch the vertical swivel function on or off.
9.5 Controlling the fan heater using the app
You can also use an app to conveniently control the fan heater.
The app controls are similar to those on the remote control or on the device.
Control and settings for this product are done from the LIDL HOME app.
Here you can download the app suitable for your mobile device:

Start the app and add your fan heater.
In order to add the fan heater in the app, you must enable the fan heater WiFi function as follows:
- Press and hold the ⏻ button (16) for about 5 seconds until a beep sounds.
- Wait about 2 seconds, the Timer LEDs (14) (2h, 4h and 8h) flash quickly.
- Press and hold the ⏻ button (16) again for about 5 seconds until a beep sounds.
- Wait about 2 seconds, the Timer LEDs (14) (2h, 4h and 8h) now flash slowly for about 3 minutes.
- Within these 3 minutes, the app can search for the fan heater and add it.
Now you can control the fan heater either using the app, the remote control or directly on the device.
9.6 Overheating protection
The fan heater is fitted with overheating protection which automatically switches off the heating element in the event of internal overheating. The fan continues running to accelerate the cooling of the fan heater. As soon as the fan heater has cooled down again, the heating element switches back on automatically.

FIRE HAZARD!
The overheating protection does not normally trigger for no reason. Check the following:

- Can the fan heater emit heat without impairment?
- Is the fan heater too close to a wall or another object?
• Is the fan heater covered?
• Are the air inlet grille (12) and the air outlet grille (3) on the fan heater free? - Is the filter (11) dirty and needs to be cleaned?
• Is the fan blocked by a foreign body?
Confirm any obvious problems immediately or consult the manufacturer. If the overheating protection triggers again without an obvious reason, there could be a technical fault. In this case, stop using the fan heater and consult the manufacturer.
9.7 Tilt protection
The fan heater is fitted with a safety switch (5). This is on the base of the device. If the fan heater is not straight or falls over, the safety switch (5) triggers automatically.
- Place the fan heater in an upright, safe position where the safety switch (5) is pressed.
- The fan heater does not switch back on automatically. Please select the function you want again.

FIRE HAZARD! The safety switch (5) must not be tampered with or blocked in order to operate the fan heater in a non-upright position.
10. Troubleshooting
The fan heater is not working
- Check that the mains plug is correctly inserted into the mains socket.
- Check whether the mains socket is live. If necessary, check the house fusebox.
- Check if the On/Off switch (10) is switched on.
The fan heater is not heating
- Check whether the fan heater is upright and the safety switch (5) is activated.
- Check whether the fan heater is in fan mode.
- The internal overheating protection has been triggered. Allow the fan heater to cool and check that the air inlet grille (12) and the air outlet grill (3) are free.
• The heating element is faulty. Contact customer service.
Cannot control the unit using the remote control
- Point the remote control infrared transmitter (17) directly at the fan heater. Make sure there are no obstacles between the remote control and the fan heater.
- The distance between the fan heater and the remote control could be too great. Reduce the distance.
- The remote control battery is empty. Insert a new CR2032 3V battery.
11. Maintenance/cleaning
11.1 Maintenance

Servicing is required if the fan heater has been damaged in any way, for example, if liquid has entered the product, if the fan heater has been exposed to rain or moisture, if the fan heater is not working normally or if the product has been dropped. If you notice any smoke, unusual noises or strange smells, switch off the fan heater immediately and remove the mains plug from the mains socket. If this occurs, the fan heater should not be used before it has been inspected by authorised service personnel. All repairs must be carried out by qualified service personnel. Never open the housing on the fan heater.
11.2 Cleaning

DANGER! Unplug the mains plug from the mains socket before you start to clean, there is the risk of electric shock!

DANGER! Wait until the fan heater has cooled down. Otherwise there is risk of burn injury!
Clean the fan heater at regular intervals. To clean the fan heater, use a slightly damp cloth. Never use any solvents or cleaners that may damage the plastic.
If the air inlet grille (12) or the air outlet grille (3) of the fan heater get dirty, you can also clean them with a vacuum cleaner.
The filter (11) can be removed for cleaning. To do so, remote the air inlet grille (12) from the filter compartment (7). Clean the filter with max. 30°C warm water. Wait for the filter to dry out completely before installing it again.
12. Storage when not in use

DANGER! Wait until the fan heater has cooled down. Otherwise there is risk of burns or fire!
When the fan heater is to be left unused for a long period of time, unplug the power cord from the mains socket. Keep the fan heater in a clean, dry place away from direct sunlight.
13. Environmental regulations and disposal information


Devices marked with this symbol are subject to the European Directive 2012/19/EU. All electrical and electronic devices must be disposed of separately from household waste at official disposal centres. Proper disposal of old devices prevents damage to the environment or your health. For further information about proper disposal, contact your local council, recycling centre or the shop where you bought the device.
Dispose of all packaging in an environmentally friendly manner. Cardboard packaging can be taken to paper recycling centres or public collection points for recycling. Any film or plastic contained in the packaging should be taken to your public collection points for disposal.
Please note the markings on the packaging material when disposing of it, it is labelled with abbreviations (a) and numbers (b), the meanings of which are as follows:
1-7: plastic / 20-22: paper and cardboard / 80-98: composite materials.
The product can be recycled, is subject to an extended producer responsibility and is collected separately.
Disposal of batteries
Respect the environment. Old batteries must not be disposed of with domestic waste. They must be handed in at a collection point for waste batteries. Please note that batteries must be disposed of fully discharged at appropriate collection points for old batteries. To prevent any short circuits cover the battery poles of not fully discharged batteries with insulating tape.
14. Conformity notes

This device complies with the basic and other relevant requirements of the RE Directive 2014/53/EU, the ErP Directive 2009/125/EC and the RoHS Directive 2011/65/EU.
The complete EU Declaration of Conformity is available for download from this link: https://www.targa.gmbh/downloads/conformity/346979_2001.pdf
15. Privacy protection / Internet security
If you have any questions regarding Privacy Protection/Internet security, or to report any security issues, please contact:
service@targa-online.com
You can download the complete Privacy Protection policy at the following link:
https://www.targa.gmbh/downloads/datasecurity/
346979_2001_SHLS_1800_A1.pdf
16. Warranty and service information
Warranty of TARGA GmbH
Dear Customer,
This device is sold with three years warranty from the date of purchase. In the event of product defects, you have legal rights towards the seller. These statutory rights are not restricted by our warranty as described below.
Warranty conditions
The warranty period commences upon the date of purchase. Please keep the original receipt in a safe place as it is required as proof of purchase. If any material or manufacturing faults occur within three years of purchase of this product, we will repair or replace the product free of charge as we deem appropriate.
Warranty period and legal warranty rights
The warranty period is not extended in the event of a warranty claim. This also applies to replaced and repaired parts. Any damage or defects discovered upon purchase must be reported immediately when the product has been unpacked. Any repairs required after the warranty period will be subject to charge.
Scope of warranty
The device was carefully manufactured in compliance with stringent quality guidelines and subjected to thorough testing before it left the works. The warranty applies to material and manufacturing faults. This warranty does not cover product components which are subject to normal wear and which can therefore be regarded as wearing parts, or damage to fragile components such as switches, rechargeable batteries or components made of glass. This warranty is void if the product is damaged, incorrectly used or serviced. To ensure correct use of the product, always comply fully with all instructions contained in the user manual. The warnings and recommendations in the user manual regarding correct and incorrect use and handling of the product must always be
observed and complied with. The product is solely designed for private use and is not suitable for commercial applications. The warranty is rendered void in the event of incorrect handling and misuse, if it is subjected to force, and also if any person other than our authorised service technicians interfere with the device. No new warranty period commences if the product is repaired or replaced.
Submitting warranty claims
To ensure speedy handling of your complaint, please note the following:
Before using your product for the first time, please read the enclosed documentation carefully. Should any problems arise which cannot be solved in this way, please call our hotline.
- Always have your receipt, the product article number as well as the serial number (if available) to hand as proof of purchase.
- If it is not possible to solve the problem on the phone, our hotline support staff will initiate further servicing procedures depending on the fault.

Service
Phone: 0800 404 7657
E-Mail: targa@lidl.co.uk

Phone: 1890 930 034
E-Mail: targa@lidl.ie

Phone: 800 62230
E-Mail: targa@lidl.com.mt
Phone: 8009 4409
E-Mail: targa@lidl.com.cy
IAN: 346979_2001

Manufacturer
Please note that the following address is not a service address. First contact the service point stated above.
TARGA GmbH
Coesterweg 45
59494 Soest
GERMANY
Table des matières
natural_image
Symbol of a trash bin crossed with no text or numbers, representing waste sorting or disposal (no text present)https://www.targa.gmbh/downloads/conformity/346979_2001.pdf
https://www.targa.gmbh/downloads/datasecurity/
346979_2001_SHLS_1800_A1.pdf
Cher client, chère cliente,
Cher client, chère cliente,
U bedient en stelt dit product in via de LIDL HOME-app.

natural_image
Symbol of a trash bin crossed with no text or numbers, representing waste sorting or disposal (no text present)https://www.targa.gmbh/downloads/conformity/346979_2001.pdf
15. Privacybescherming/internetbeveiliging
service@targa-online.com.
https://www.targa.gmbh/downloads/datasecurity/
346979_2001_SHLS_1800_A1.pdf
16. Garantie- en servicegegevens

natural_image
Symbol of a trash bin crossed with no text or labels, representing waste sorting or disposal (no text present)https://www.targa.gmbh/downloads/conformity/346979_2001.pdf
https://www.targa.gmbh/downloads/datasecurity/
346979_2001_SHLS_1800_A1.pdf
natural_image
Symbol of a trash bin crossed with no text or numbers, representing waste sorting or disposal (no text present)https://www.targa.gmbh/downloads/conformity/346979_2001.pdf
https://www.targa.gmbh/downloads/datasecurity/
346979_2001_SHLS_1800_A1.pdf
Spustite aplikáciu a pridajte svoj ventilátorový ohrievač.
Ak chcete pridat ventilátorový ohrievač v aplikácii, musíte zapnút funkciu Wi-Fi ohrievača nasledovne:
natural_image
Symbol of a trash bin crossed with no text or labels, accompanied by a black rectangular block below (no readable text or symbols)https://www.targa.gmbh/downloads/conformity/346979_2001.pdf