
VTW33 - Fan Eurom - Free user manual and instructions
Find the device manual for free VTW33 Eurom in PDF.
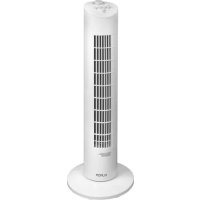
| Product Type | Tower fan |
| Brand | Eurom |
| Model | VTW33 |
| Supply Voltage | 220-240 V ~ 50 Hz |
| Power Consumption | 50 W |
| Total Height | 84 cm |
| Grille Diameter | 42 cm (17 inches) |
| Net Weight | 2.5 kg |
| Number of Speeds | 3 (Low, Medium, High) |
| Oscillation Function | Yes, approx. 90° |
| Mechanical Timer | Yes, up to 120 minutes |
| Automatic Shut-off | Yes, via timer |
| Recommended Use | Indoor only |
| Assembly Required | Yes, assembling the base and routing the cable |
| Cleaning the Grilles | Soft, slightly damp cloth (unplugged) |
| Motor Housing Cleaning | Vacuum cleaner or small brush (unplugged) |
| Safety Instructions | Do not use in damp rooms, keep away from children, do not insert objects |
| Repairability | Repair by a qualified professional only |
Frequently Asked Questions - VTW33 Eurom
User questions about VTW33 Eurom
0 question about this device. Answer the ones you know or ask your own.
Ask a new question about this device
Download the instructions for your Fan in PDF format for free! Find your manual VTW33 - Eurom and take your electronic device back in hand. On this page are published all the documents necessary for the use of your device. VTW33 by Eurom.
USER MANUAL VTW33 Eurom
EN - Instruction leaflet
Thank you very much for choosing for an EUROM device. You have made a good choice! We hope you will be satisfied about its functioning.
To get maximum profit from your device, it is important to read this manual attentive and totally before use, and to understand what is written. Read especially the safety instructions: they are there to protect you and your environment.
Keep the manual in a safe place for future reference. Store also the package: that is the best protection for your device in times of no-use. And if you at any time pass the appliance on, pass on the manual and package too.
GENERAL SAFETY GUIDELINES
- This device is only to be used indoors.
- This device should only be used for the purposes (ventilating a domestic space) and in the way as set out in the booklet. Any other usage may be dangerous (could cause fire, injury, damage, electric shock etc), will invalidate the guarantee
- Check fan, plug and cable for damage before use Do not turn on the appliance if you have discovered damage to the appliance, cord or plug, if the appliance is malfunctioning, if it has been dropped or if there are signs of any other defect. Return the complete product to the vendor or to a certified electrician for inspection and/or repair. Always ask for original parts. The appliance (incl. cord and plug) may only be opened and/or repaired by properly authorised and qualified persons.
- Before every use, check that the voltage on the socket to be used matches the voltage indicated on the device's specification plate: 220/240V / 50Hz.
- Avoid the use of extension cables. If unavoidable, use an approved cable with sufficient power. Completely unroll the cable.
- The electrical cable may never come into contact with sharp, hot or moving objects, must not be wound around the fan and must not be bent or rolled up too tightly.
- Always ensure that the floor is sturdy, flat and horizontal.
- Do not leave a fan operating unsupervised in a room.
- This device in not suitable for use in wet or damp spaces such as bathrooms and laundry rooms. Do not place the device in the vicinity of taps, bathtub, shower, pool, fountains or other sources of moisture. Make sure it cannot fall into water and prevent water from getting into the device itself. If, at any time, the device does fall into water, unplug it immediately! Do not use a device that has a damp interior but have it repaired. Never immerse the device, cord or plug in water and never touch it with wet hands or feet. Do not place the appliance in an open window to avoid rain or on wet surfaces and avoid that no moisture spillage.
- Never hang things over the device. Ensure that curtains, clothing etc do not come into the vicinity of the fan.
- Keep the suction and extraction grill clean and free from dust and make sure that a minimum of 10cm of free space is left around the fan.
- Never insert a finger, pen or any other object through the protective grille when the fan is in use!
- Never spray any products (anti-insect, cleaning agent etc) on or in the fan.
- Do not store or use the fan:
- in locations where it could become wet or fall into water;
- near flammable, explosive or gaseous substances;
- near acids, alkalis, oil or other corrosive substances.
- Never connect the fan to a timer or dimmer.
-
First turn off the fan and then remove the plug from the socket before moving, cleaning or carrying out maintenance. Do that when the fan is not in use as well. Pull on the plug to remove from the socket, never pull on the cord!
-
Always remove the plug from the socket after use.
- This device is not suitable to be used by children or persons with a physical, sensual or mental disability or those who lack experience and knowledge, irrespective of whether they are being supervised or there is a responsible person present. Keep these persons and household pets out of the vicinity of the fan.
TECHNICAL SPECIFICATIONS
| Model | VTW33 |
| Connected power | 220-240V / 50Hz |
| Capacity | 50W |
| Altitude fan | 17" (42 cm) |
| Weight (kg) | 2,5 kg |
| Dimensions (cm) | 13(26) x 15(26) x 84 cm |
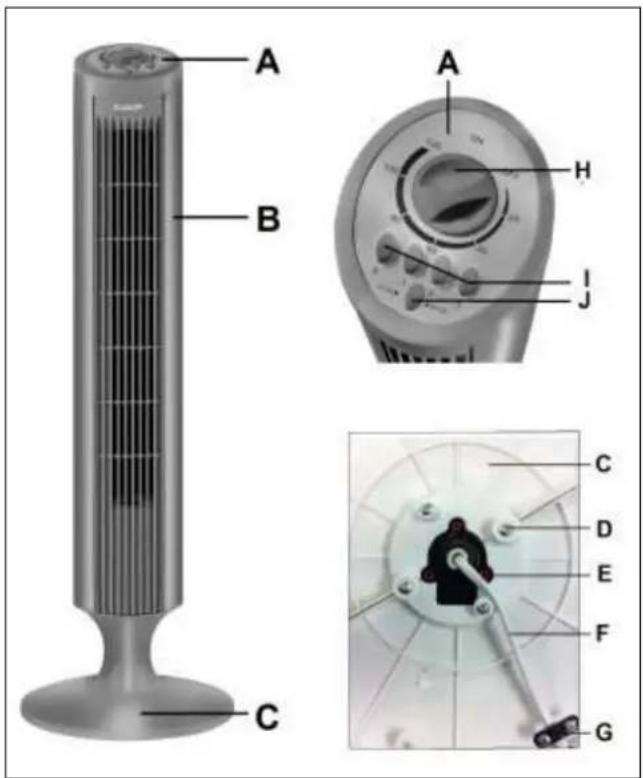
COMPONENTS DIAGRAM
A. Control panel
B. Ventilator housing
C. Foot
D. Screw (4x)
E. Cylinder (3x)
F. Electrical cable
G. Lead-through electric cable with clamp
H. On/Off-button and timer
I. Control buttons
J. Oscillating button
ASSEMBLY
- Remove all of the packaging.
- Remove the 4 screws from the underside of the ventilator housing.
- Slide the two sections of the foot together and fasten them with the 2 screws.
- Lead the electrical cable through the hole in the foot.
- Place the foot on the ventilator housing in such a way that the 3 cylinders of the ventilator housing are visible and do not fall under the foot.
- Insert the 4 screws in the holes of the foot and screw the foot and ventilator housing together firmly (see diagram).
- Lead the electrical cable to the lead-through and fasten it with the appropriate clamp.
OPERATION
Ensure that all of the safety regulations have been obeyed and that the device is upright and stable. Insert the plug into the socket.
Make sure that the on/off button (H) is OFF.
- Connect the plug to the wall socket.
- Turn the on/off button to ON.
- Use the control buttons (I) to select a speed: 1, 2, 3 = low, medium or high power fan speed. The device will now start operating.
- By pressing the oscillating button (J) the device will start oscillating ± 90^ . Press the button again to turn off this function.
- Press 0 to turn off the device completely.
- Finally, turn the on/off button to OFF and remove the plug from the wall socket.
The timer (H) enables you to set how long you want the fan, and possibly also the oscillate function, to work. The fan will continue to operate when the timer is set to ON. If you want to set a specific operating time, first turn the knob clockwise to OFF and then to the required number of minutes (max. 120). The fan and oscillation function will switch off when the knob reaches OFF. You can then turn the knob from OFF to ON again (continuous operation) or select the desired operating time.
Please note: you can turn the knob anti-clockwise to reduce the required number of minutes and from OFF to ON, but never turn the knob anti-clockwise from ON to 120 minutes! The knob is not intended to turn from ON to 120 minutes and forcing it will invalidate the warranty on the timer.
CLEANING AND MAINTENANCE
Always turn the fan off and take plug out of socket before cleaning or carrying out maintenance work!
Open the safety grille by undoing the small screw and the clamps.
Clean the grille and fan blades with a (slightly humid) soft cloth. Do not use a corrosive or abrasive cleaning agent! Dry everything properly.
Keep the engine housing and the opening free from dust and dirt with a vacuum and/or brush. Do not use any water here!
Further maintenance is not required. Please consult your supplier or an electrician if you have any problems.
Close the safety grille again (including screw) before using the fan.
Store the fan at the end of the season in a safe, dry place that is not subject to extremes of temperature, preferably in its original packaging which is the best protection against dirt and moisture.
REMOVAL
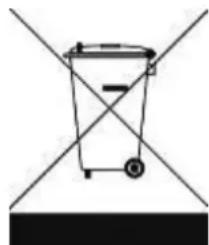
In the EU this symbol indicates that this product may be disposed of as ordinary household waste. Old equipment contains valuable materials, suitable for recycling. These materials should be made suitable for reuse in order to prevent any adverse effects to health and the environment caused by unregulated waste collection. Therefore, please make sure that you bring old equipment to a designated collection point. Alternatively, contact the original supplier, who can make sure that as many of the components as possible can be recycled.
DE
DANK
Brand : Eurom
Model : VTW33
Category : Fan