
Vento 3D Silent Comfort - Fan Eurom - Free user manual and instructions
Find the device manual for free Vento 3D Silent Comfort Eurom in PDF.

| Product type | Pedestal fan |
| Brand | Eurom |
| Model | Vento 3D Silent Comfort |
| Dimensions (W x D x H) | 26 x 27 x 36 cm |
| Weight | 2.7 kg |
| Power supply | 220-240 V ~ 50/60 Hz |
| Power | 50 W |
| Protection rating | IPX0 |
| Protection class | Class II |
| Number of speeds | 8 |
| Airflow modes | Normal, Nature, Sleep |
| Oscillation | Horizontal, vertical and 3D |
| Timer | 1 to 7 hours |
| Remote control | Yes, with included CR2032 battery |
| Control panel | Integrated touch |
| Maintenance | Clean the exterior with a soft cloth; do not immerse |
| Safety | Protective grille, automatic shut-off in case of tipping (not specified but recommended) |
| Spare parts | Contact the manufacturer or an authorized center |
| Warranty | Compliant with applicable legislation |
Frequently Asked Questions - Vento 3D Silent Comfort Eurom
User questions about Vento 3D Silent Comfort Eurom
0 question about this device. Answer the ones you know or ask your own.
Ask a new question about this device
Download the instructions for your Fan in PDF format for free! Find your manual Vento 3D Silent Comfort - Eurom and take your electronic device back in hand. On this page are published all the documents necessary for the use of your device. Vento 3D Silent Comfort by Eurom.
USER MANUAL Vento 3D Silent Comfort Eurom
Vento 3D Silent Comfort
User manual
NL 3
EN 12
DE 21
FR 30
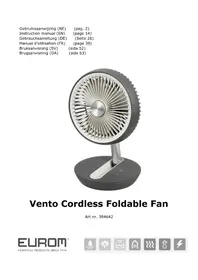
natural_image
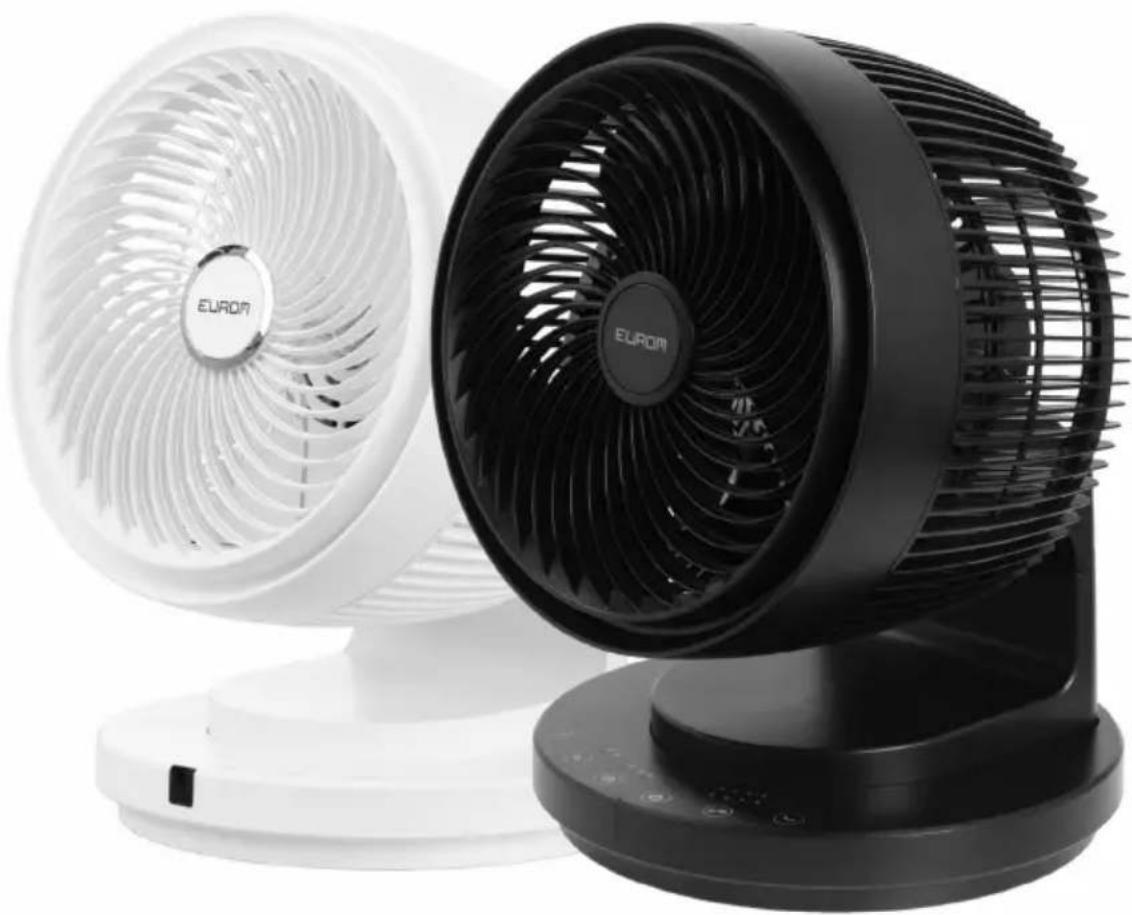
Exterior view of a white and black EUROM electric fan with visible blades and base (no text or symbols on the fan body)Model: Product code:
Vento 3D Silent Comfort Black 384918
Vento 3D Silent Comfort White 384901
Figuur 3.
Figuur 6.
Werking

WAARSCHUWING
Please read and understand these safety instructions. Incorrect use can cause injury and will void EUROM's warranty.
- Children of less than 3 years should be kept away unless continuously supervised.
- This appliance can be used by children aged from 8 years and above and persons with reduced physical, sensory or mental capabilities or lack of experience and knowledge if they have been given supervision or instruction concerning use of the appliance in a safe way and understand the hazards involved.
•Children shall not play with the appliance. - Cleaning and maintenance shall not be made by children without supervision.
- If the supply cord is damaged, it must be replaced by manufacturer, its service agent or similarly qualified persons in order to avoid a hazard.
General safety instructions
- Before using the device, assemble it completely. Always keep the plug out of the socket when assembling/disassembling. Never use the device when the guard is removed or damaged.
- Check device, plug and cable for damage before use. Do not turn on the device if you have discovered damage to the device, cord or plug, if the device is malfunctioning, if it has been dropped or if there are signs of any other defect. Return the complete product to the vendor or to a certified electrician for inspection and/or repair. Always ask for original parts. The device (incl. cord and plug) may only be opened and/or repaired by properly authorised and qualified persons.
- Never use the device with a programmer, timer, separate remote-control system, or any other device that switches the device on automatically.
- Never connect the device to a dimmer.
- Avoid the use of extension cables. If unavoidable, use an approved cable with sufficient power. Completely unroll the cable.
- Before every use, check that the voltage on the socket to be used matches the input voltage indicated on the identification plate.
- Never mount the device on walls or ceilings.
- Always remove all the packaging before installing or using the device.
- Never let children play with the packaging material. Keep the packaging material out of the reach of children.
•Always keep batteries, both full and empty, out of reach of children to avoid the chance of swallowing. Dispose used batteries immediately and safely. Seek immediate medical attention when you suspect that a battery has been swallowed. - Always avoid eye or skin contact with the battery acid in event of a leaking battery. In case of contact with the battery acid, consult a doctor immediately.
- Never expose batteries to heat, fire, or direct sunlight.
- Always remove the batteries from the device when the device is not used for a longer period of time.
•Always use the recommended battery type(s). - Always place and use the device on a dry, stable, and horizontal surface.
•Always use the device in an upright position.
- This device is not suitable for use in wet or damp spaces such as bathrooms and laundry rooms. Do not place the device in the vicinity of taps, bathtub, shower, pool, fountains or other sources of moisture. Make sure it cannot fall into water and prevent water from getting into the device itself. If, at any time, the device does fall into water, unplug it immediately! Do not use a device that has a damp interior but have it repaired.
•This device is only to be used indoors.
- Do not use the device near gas appliances, fireplaces.
- Keep device away from fire and do not expose them to direct sunlight.
- Do not use the device at temperatures above 40^ , not in the vicinity of heating appliances and not in dusty areas.
- Never use the device near flammable or explosive substances or fuels. Flammable or explosive substances or fuels may cause an explosion. Only use the device in a clean and well-ventilated area.
- Never let the power cord hang over the edge of a table or counter. Someone could trip over the cord or accidentally pull the cord.
- The electrical cable may never come into contact with sharp, hot or moving objects, must not be wound around the device and must not be bent or rolled up too tightly.
- Do not place the device in an open window to avoid rain or on wet surfaces and avoid that no moisture spillage.
- Never hang things over the device. Ensure that curtains, clothing and other materials do not come into the vicinity of the device.
- Keep the suction and extraction grill clean and free from dust and make sure that a minimum of 50~cm of free space is left around the device.
- Ensure that there are no objects in the vicinity of the device that can prevent oscillation.
- Do not let any liquid or flammable detergent enter the device, to avoid electric shock and/or a fire hazard.
- Never insert a finger, pen or any other object through the protective grille when the device is in use!
- Never use any paint, cleaning sprays, anti-insect sprays, or similar near the device when the device is switched on.
- This device should only be used for the purposes (ventilating a domestic space) and in the way as set out in the booklet. Any other usage may be dangerous (could cause fire, injury, damage, electric shock etc.), will invalidate the guarantee.
- Keep long hair away from working device, to avoid hair get tangled in device.
- Never immerse the device, cord or plug in water or other liquids and never touch the device, cord or plug with wet hands or feet.
- Never pull the power cord to disconnect it from the socket. Always grasp the plug and pull.
- Remove the plug from the wall socket and immediately switch off the device when you hear strange noises, smell or see smoke.
- Do not leave a device operating unsupervised in a room.
•Always unplug the device after use.
- Prevent the device from constantly blowing on small children, patients or people who have difficulty moving.
- Never let the product or power cord become dusty. Regularly clean the device and power cord from dust.
- First turn off the device and then remove the plug from the socket before moving, cleaning or carrying out maintenance. Do that when the device is not in use as well. Pull on the plug to remove from the socket, never pull on the cord!
- Be sure that the plug has been disconnected from the power outlet before removing the protective grill from the device for cleaning and maintenance work.
- Never use cleaning solvents or abrasives to clean the device. Using the wrong cleaning products may damage the housing of the device. Always use the correct cleaning method specified in this user manual.
- Do not store or use the device:
•in locations where it could become wet or fall into water;
•near flammable, explosive or gaseous substances;
•near acids, alkalis, oil or other corrosive substances.
Introduction
Thank you for choosing this EUROM device. You have purchased a quality device that you will enjoy for many years. Using this device with respect and care will reduce the risk of personal injury or material damage.

CAUTION
It is important to read and understand this instruction manual before assembling, installing and using the device.
This manual describes the correct and safe use of this device. Keep this manual for future reference. The manual is an essential part of the device and must be given to the new owner upon resale or exchange. This manual has been compiled with the utmost care. Nevertheless, we reserve the right to improve and adjust this manual at any time. The images used may differ.
The following symbols and terms are used in this manual to alert the reader to safety issues and important information:

WARNING
Indicates a hazardous situation which, if the safety instructions are not followed, can lead to injuries to the operator or bystanders, light and/or moderate damage to the product or to the environment.

CAUTION
Indicates a hazardous situation which, if the safety instructions are not followed, can lead to light and/or moderate damage to the product or to the environment.
Identification

Figure 7.
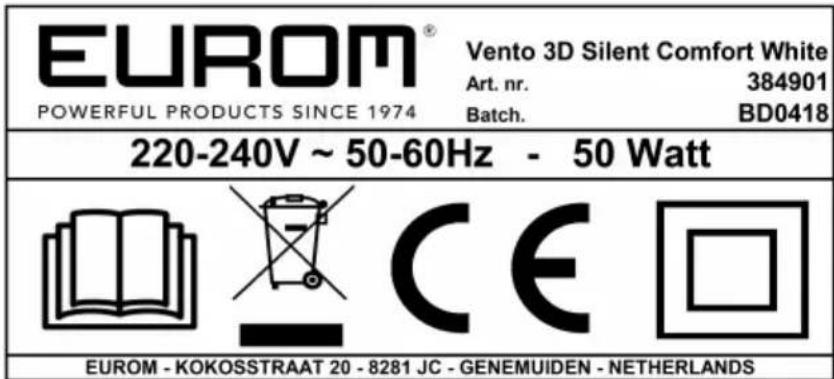
Figure 8.
Specifications
| Type Vento 3D Silent Comfort | |
| Product size: 26 x 27 x 36cm | |
| Weight: 2.7kg | |
| Voltage: 220-240V~ 50/60Hz | |
| Power: 50W | |
| Protection rating: IPX0 | |
| Protective class: Class II |
Description
The Vento 3D Silent Comfort is an efficient standing fan with a unique oscillating pattern. Thanks to the horizontal and vertical oscillation the device moves the air through the room very effectively. In the nature mode the speed varies to mimic natural wind. The device also has a sleep mode in which the fan is extra quiet and also varies the speed.
Unboxing
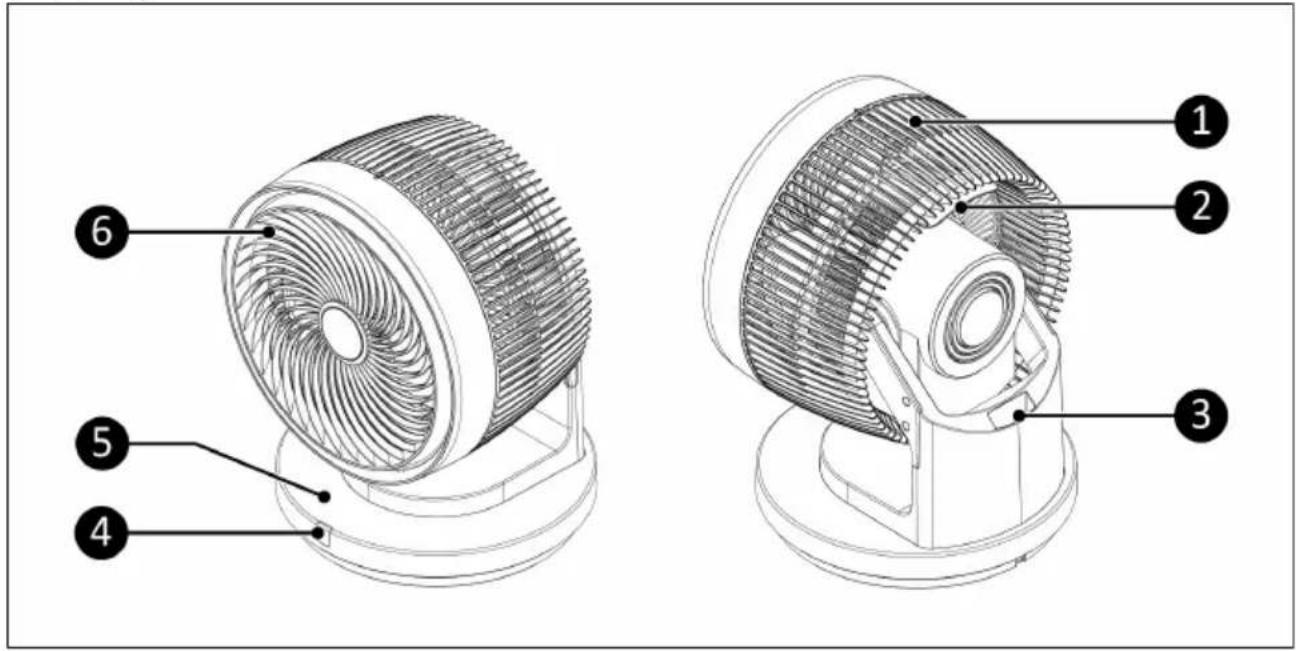
Figure 9.
| No. | Description No. Description | ||
| 1 Rear protective grid 4 Remote control receiver | |||
| 2 Handle 5 Control panel | |||
| 3 Storage compartment for remote control 6 Front protective grid | |||
Control panel
- Up/down oscillation button
- Mode button with Nature mode/Sleep mode indicator
- Timer button with indicator
- On/Off button
- Speed button with indicator
- Left/right oscillation button
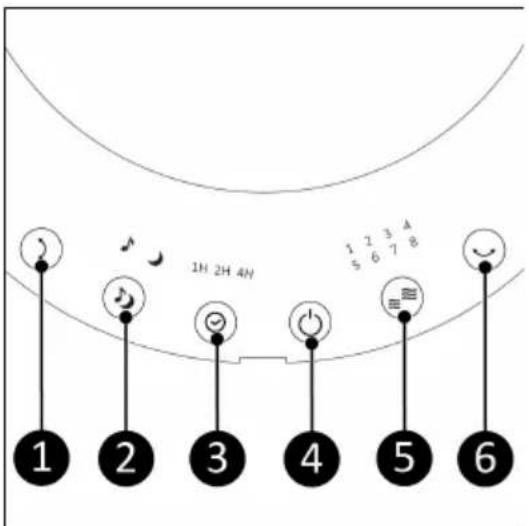
Figure 10.
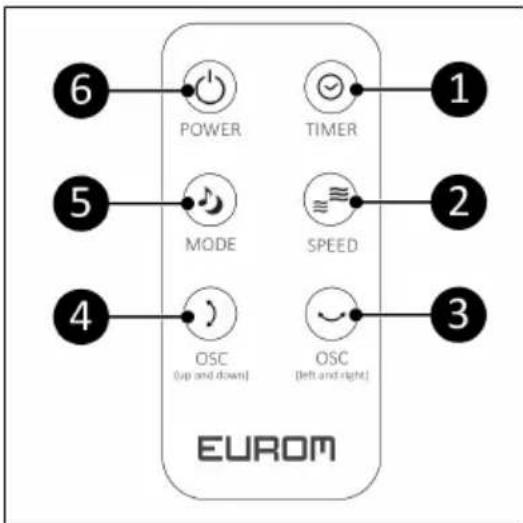
Remote control
- Timer button
- Speed button
- Left/right oscillation button
- Up/down oscillation button
- Mode button
- On/Off button
flowchart
graph TD
    A["6 POWER"] --> B["1 TIMER"]
    C["5 MODE"] --> D["2 SPEED"]
    E["4 OSC (up and down)"] --> F["3 OSC (left and right)"]
    G["EUROM"] --> H["3"]
Figure 11.
Installation

WARNING
Do not put the power plug into the wall socket before the device is mounted or placed correctly.

CAUTION
Make sure that the main voltage is the same as indicated on the identification label of the device. All electrical connections must stay dry under all circumstances.
Remote control
The remote control is delivered with the battery already installed. Simply pull the tab on the remote to activate the battery.
To install a new battery, follow the steps below:
- Push the tab (Figure 12, pos. 2) on the battery tray (Figure 12, pos. 1) and pull the battery tray out from the remote control.
- Remove the old battery (Figure 12, pos. 3) from the battery tray.
- Place a new CR2032 button cell battery into the battery tray.
- Push the battery tray back into the remote control.
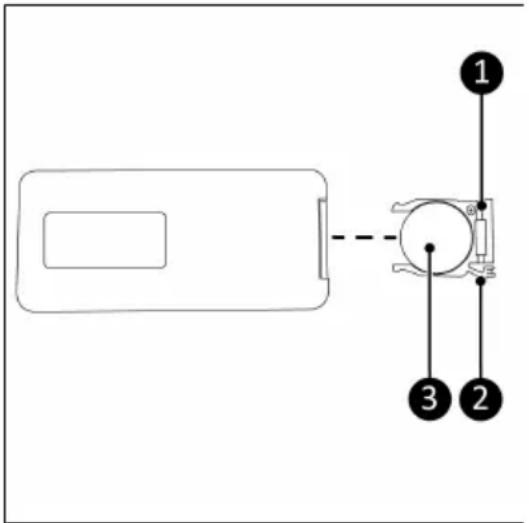
Figure 12.
Operation

WARNING
Before every use, make sure that:
•the device is not damaged;
• the device is not covered or blocked.

CAUTION
Make sure the device is placed on a flat, dry surface.

CAUTION
Do not manually adjust the blowing direction of the fan.
The device can be operated with the control panel and the remote control. Operation on the control panel and with the remote control are the same.
Turning on/off
- Plug the power cable into the outlet.
- Press the On/Off button to turn the device on.
- Press the On/Off button again to turn the device off.
Speed setting
- Press the Plus or Minus button to adjust the speed setting (1-8). The speed indicator lights show the currently selected speed.
Timer setting
The device has a timer setting to automatically turn off after the set amount of time.
- Press the Timer button to set the timer from 1-7 hours. The Timer indicator will light up according to the setting.
There are 3 Timer indicator LEDs: 1H, 2H and 4H. The LEDs can light up to indicate the number of hours. If only 1H lights up, the timer is set to 1 hour. If all three LEDs light up, the timer is set to 7 hours (1+2+4=7). If 1H and 2H light up, the timer is set to 3 hours (1+2=3), and so on.
Oscillation setting
- Press the Left/right oscillation button to turn on the left-right oscillation function.
- Press the Up/down oscillation button to turn on the up-down oscillation function.
- Press both buttons to turn on the 3D oscillation function.
- Press either button again to turn off its respective oscillation function.
Blowing mode
The device has 3 blowing modes: Normal mode, Nature mode and Sleep mode.
Normal mode
In Normal mode, the speed can be set from 1-8. The Normal mode is active by default.
- If any other mode is active, press the Mode button until the Mode indicator is off.
- Choose the desired speed with the Speed button (see Speed setting).
Nature mode
In Nature mode, the fan automatically alternates between 3 different speeds to imitate a natural wind. The fan blows at one speed between 2.5s and 15s before moving on to the next speed.
- Press the Mode button until the Nature mode indicator lights up.
- Choose the desired intensity level with the Speed button (see Speed setting). In Nature mode, there are 3 intensity levels:
- Speed 1-3: Lowest intensity level
- Speed 4-6: Middle intensity level
- Speed 7-8: Highest intensity level
Sleep mode
In Sleep mode, the fan automatically alternates between 3 different speeds to imitate a wind that is more suitable for sleeping. In Sleep mode, the average fan speed is lower than in Nature mode. The fan blows at one speed between 2.5s and 15s before moving on to the next speed.
- Press the Mode button until the Sleep mode indicator lights up.
- Choose the desired intensity level with the Speed button (see Speed setting). In Sleep mode, there are 3 intensity levels:
°Speed 1-3: Lowest intensity level - Speed 4-6: Middle intensity level
°Speed 7-8: Highest intensity level
Cleaning and maintenance

CAUTION
- Always unplug the device before you clean it or service it.
- Never immerse the device in water or any other liquid.
- Never use abrasive, aggressive, or flammable cleaning agents such as bleach or alcohol to clean any part of the device.
- Regularly clean the outside of the fan to prevent dust from collecting.
Disposal

This marking indicates that this product should not be disposed of with other household waste throughout the EU. To prevent possible harm to the environment or human health from uncontrolled waste disposal, recycle it responsibly to promote the sustainable reuse of material resources. To return your used device, please use the return and collection systems or contact the retailer where the product was purchased. They can take this product for environmentally safe recycling.
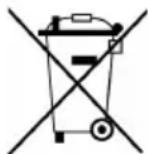
Before disposal, remove the battery and dispose of it in shops and supermarkets in the designated collection bins in accordance with local laws and regulations.
Abbildung 15.
Abbildung 18.
Betrieb

WARNUNG
Figure 21.
Figure 24.
Utilisation

AVERTISSEMENT
- Vento 3D Silent Comfort
- Werking
- WAARSCHUWING
- General safety instructions
- Introduction
- CAUTION
- WARNING
- Identification
- Specifications
- Description
- Control panel
- Remote control
- Installation
- Operation
- Turning on/off
- Speed setting
- Timer setting
- Oscillation setting
- Blowing mode
- Normal mode
- Nature mode
- Sleep mode
- Cleaning and maintenance
- Disposal
- Betrieb
- WARNUNG
- Utilisation
- AVERTISSEMENT
Brand : Eurom
Model : Vento 3D Silent Comfort
Category : Fan