Vigor Air - Deep fryer Klarstein - Free user manual and instructions
Find the device manual for free Vigor Air Klarstein in PDF.
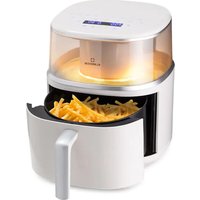
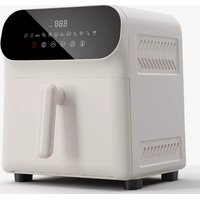
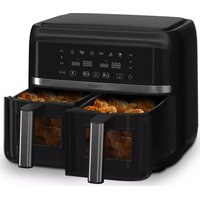
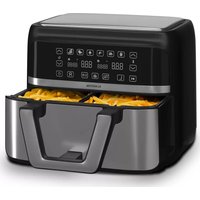
| Product type | Air Fryer |
| Brand | Klarstein |
| Model | Vigor Air |
| Power supply | 220-240 V ~ 50/60 Hz |
| Power | 1800 W |
| Capacity | 30 L |
| Temperature range | 30-230 °C |
| Cooking programs | 17 preset programs: Air Fry, Chips, Wings, Pizza, Steak, Cookies, Snacks, Veggies, Toast, Bake, Bagel, Broil, Roast, Dehydrate, Proof, Defrost, Reheat, Keep Warm |
| Dual Cook | Automatic sequencing of two programs |
| Rotisserie | Integrated with accessories |
| Interior light | Yes, dedicated switch |
| Door sensor | Interrupts cooking when opened |
| Included accessories | Baking grid, frying basket, baking tray, crumb tray, spit fork, rotisserie handle |
| Cleaning | Manual; accessories washable with soapy water; do not use abrasive sponges; do not put in dishwasher |
| Safety | Automatic stop when door open, hot surfaces, usage precautions |
| Bulb | Halogen 25W, replaceable |
| Glass door | Removable for cleaning |
Frequently Asked Questions - Vigor Air Klarstein
User questions about Vigor Air Klarstein
0 question about this device. Answer the ones you know or ask your own.
Ask a new question about this device
Download the instructions for your Deep fryer in PDF format for free! Find your manual Vigor Air - Klarstein and take your electronic device back in hand. On this page are published all the documents necessary for the use of your device. Vigor Air by Klarstein.
USER MANUAL Vigor Air Klarstein
text_image
QR code image containing encoded data, no visible human-readable textINHALTSVERZEICHNIS
natural_image
Simple line drawing of a box with an upward arrow, no text or symbols presentnatural_image
Illustration of a rectangular electronic device with a circular lens and a label pointing downward (no text or symbols present)natural_image
Simple line drawing of a plug and socket (no text or symbols)natural_image
Line drawing of a microwave oven with a 110mm height label (no other text or symbols)natural_image
Line drawing of a kitchen oven with a hand holding a tool, showing the interior panel and lid (no text or symbols)natural_image
Diagram of a mechanical or electrical component with rotational arrows indicating motion (no text or symbols)natural_image
Technical line drawing of a mechanical assembly with a tool and base plate (no text or symbols)natural_image
Illustration of a hand pressing down on a rectangular electronic device with a curved arrow indicating motion (no text or symbols)Member of Berlin Brands Group
Handwerkerstr. 11
15366 Dahlwitz-Hoppegarten
Deutschland
natural_image
Symbol of a trash bin crossed with a diagonal line, no text or numbers presentBerlin Brands Group UK Limited
PO Box 42
272 Kensington High Street
London, W8 6ND
United Kingdom
Dear Customer,
Congratulations on purchasing this device. Please read the following instructions carefully and follow them to prevent possible damages. We assume no liability for damage caused by disregard of the instructions and improper use. Scan the QR code to get access to the latest user manual and more product information.

text_image
QR code image containing encoded data, no visible human-readable textCONTENTS
Safety Instructions 30
Device Overview 32
Accessories 33
Getting Started 34
LED Control Panel 35
Key Functions 35
Cooking Programmes 38
Operation 39
Dual Cooking 42
Cooking Tables 44
Replacing the Light Bulb 46
Disassembling the Glass Door 47
Cleaning, Care and Storage 48
Troubleshooting 50
Disposal Considerations 52
Manufacturer & Importer (UK) 52
TECHNICAL DATA
| Item number 10039940, 10039941 | |
| Power supply 220-240 V ~ 50/60 Hz | |
| Power 1800 W | |
| Capacity 30 L | |
| Adjustable temperature 30-230 °C |
SAFETY INSTRUCTIONS
- Before using for the first time, check that the voltage of your socket corresponds to the voltage specified.
- To avoid electric shock, do not immerse the power cord or the device itself in water or other liquids.
- Keep children and pets away from the device while it is in operation.
- Switch off the device after use and pull the power plug out of the socket.
- The device should be operated on a power circuit separate from other devices. If the electrical circuit is overloaded with other devices, this device may not function properly.
- Use extreme caution when moving a container that contains hot food.
- Do not let the power cord hang over the edge of tables or work surfaces, and make sure that the power cord does not come into contact with the hot surfaces of the device.
• Always place the device securely in the centre of the table or work surface. - Never touch hot device surfaces. Use the handles to move or lift.
- The device may not be used by children.
- The use of accessories that are not expressly recommended by the manufacturer can lead to injuries.
- Do not place or use the device on heat-sensitive glass surfaces, wooden surfaces or tablecloths. With these surfaces, it is essential to place a heat-insensitive plate with thermal protection under the device.
- Do not use the device if the power cord is damaged, the device is malfunctioning, or has been damaged in any other way.
- Before cleaning and when not using the device, switch it off and pull the power plug out of the socket. Let the device cool down first before removing or adding device parts.
- Do not place the device in the immediate vicinity of hot gas or electric ovens or in a heated oven.
- If the plug does not fit properly, be sure to consult a qualified electrician to reduce the risk of electric shock. Never attempt to tamper with the power plug in any way.
- Do not clean the device with metallic scouring pads. Small metal parts could break off and short out electrical components in the device, which could result in an electric shock and damage the device.
-
To minimise the risk of electric shock, prepare food only in the coated, non-stick container provided.
-
The device is designed for domestic use only.
- Only use the device for its intended purpose.
- Keep these operating instructions for future reference.
- Children over 8 years as well as mentally, sensory and physically impaired persons may only use the device if they have been informed in detail about the functions and safety precautions by a supervisor responsible for them beforehand and understand the associated risks.

CAUTION
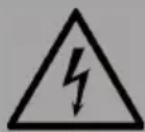
Risk of burns! When hot air frying, hot steam is released through the air outlets. Keep your hands and face a safe distance from steam and air vents. Also watch out for hot steam and air when removing parts of the device from the device.
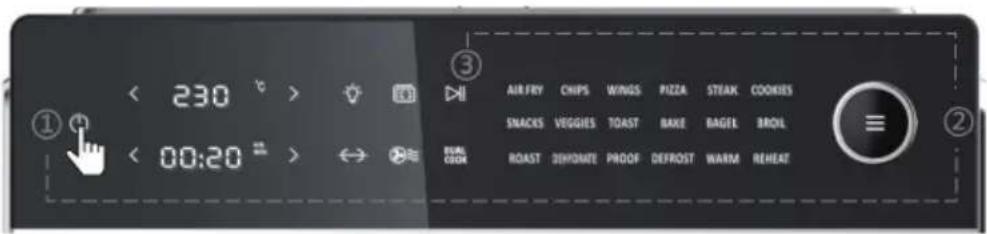
DEVICE OVERVIEW
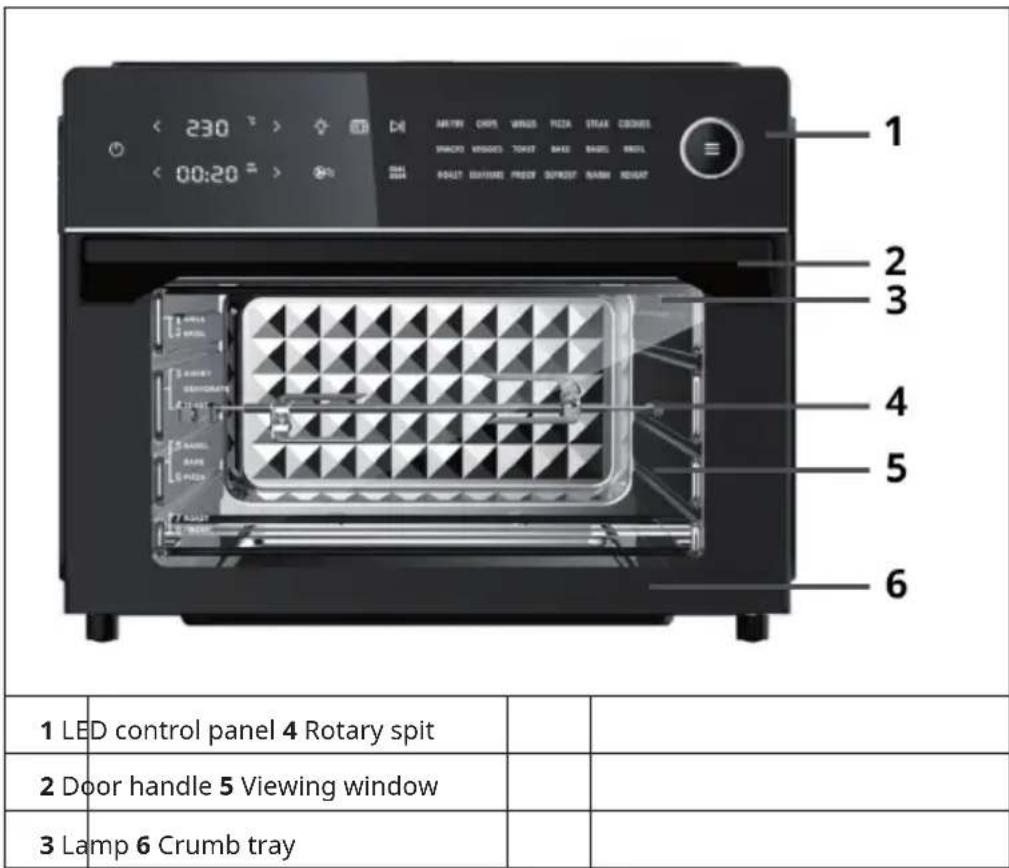
text_image
< 230 >> < 00:20 >> 1 2 3 4 5 6 1 LED control panel 4 Rotary spit 2 Door handle 5 Viewing window 3 Lamp 6 Crumb trayDevice properties
The appliance works with 360 °C hot air technology.
Door sensor
If the door is opened during cooking, the cooking process will pause and the light will come on.
The display appears on the control panel:

As soon as the door is closed, the light will go out and the cooking process will continue. Make sure that the door of the appliance remains closed during cooking.
ACCESSORIES
Baking rack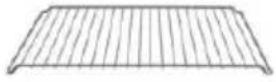 | Can be used for the preparation of meat, bread, pizza etc. |
Frying basket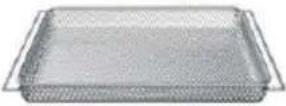 | Use the frying basket in combination with the hot air function to optimise your cooking results. Can be used for the preparation of chips, chicken wings, onions etc. or as a drying basket. |
Baking tray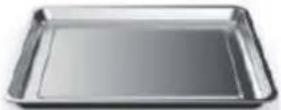 | Can be used for the preparation of biscuits, cakes, turkey etc. You can also use it to collect leftovers or oil when deep-frying. |
| Crumb tray Can be used to collect food waste. | |
Pivot spit fork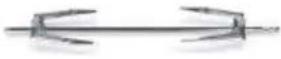 | Can be used to evenly roast food (e.g. a whole chicken). |
Rotisserie handle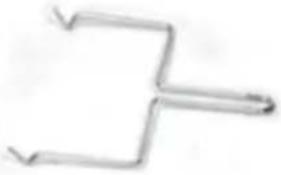 | Use the handle to remove the rotisserie from the appliance after cooking. |
GETTING STARTED
Before use
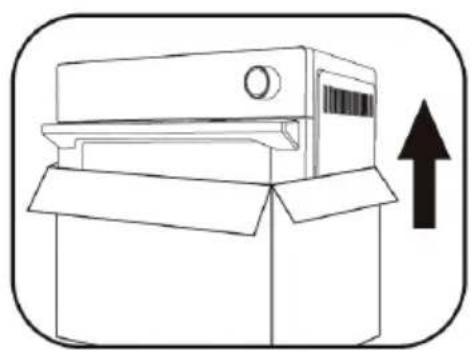
- Remove all packing material around the unit and inside the unit.
natural_image
Simple line drawing of a box with an upward arrow, no text or symbols present- Remove the protective film from the control panel. (This film is used to protect the control panel, you can remove it or leave it on the unit.)

natural_image
Illustration of a car air conditioner unit with a black arrow pointing to its side panel (no text or symbols)- Before plugging in the mains plug, make sure that the voltage indicated on the rating plate of the appliance matches the voltage of the socket.
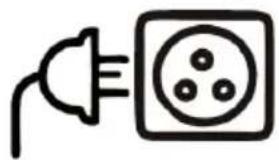
natural_image
Simple line drawing of an electric plug connected to a socket (no text or symbols)- Place the appliance on a stable, flat, heat-resistant surface, at a safe distance from objects that could be damaged by heat. Keep a minimum distance of 110 mm between the mains connection and the wall, furniture, etc.

natural_image
Line drawing of a microwave oven with a 110mm height label (no other text or symbols)- Clean all accessories and clean the interior of the appliance. Dry the accessories completely before putting them back into the unit.
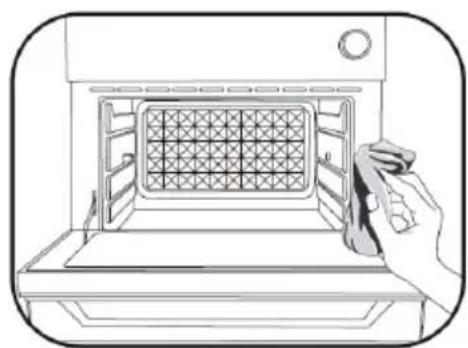
natural_image
Line drawing of a hand cleaning a microwave oven with a grating (no text or symbols)- When using the appliance for the first time, run it at the highest setting (230 °C) for at least 18 minutes to sterilise it and eliminate manufacturing odours. The unit may emit odours or smoke from the protective film.
LED CONTROL PANEL
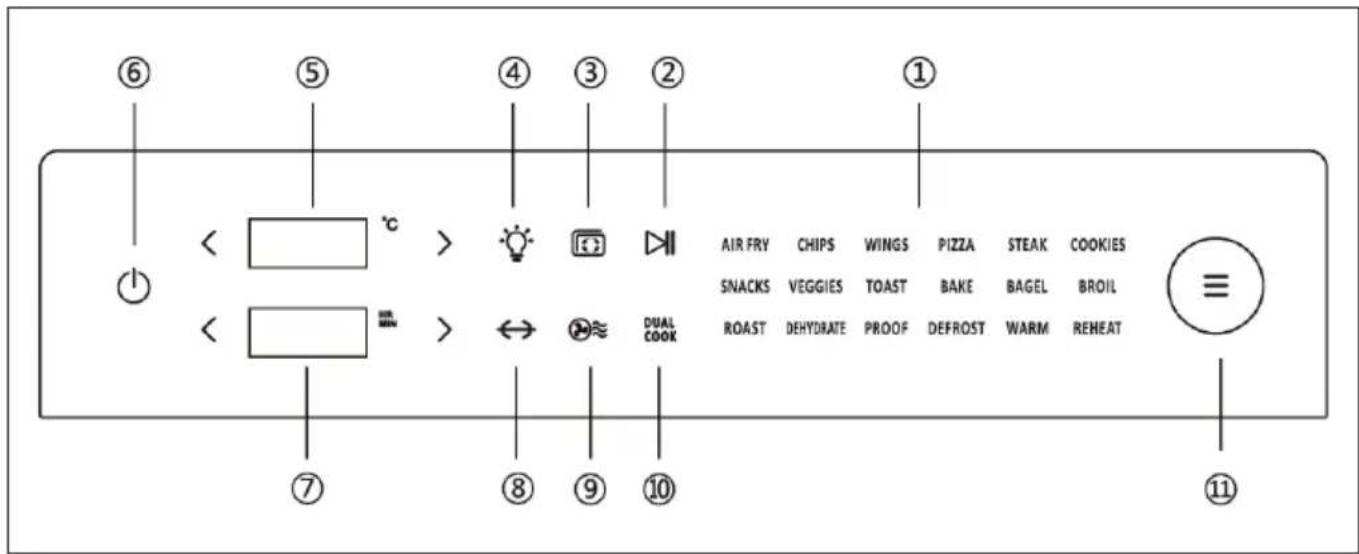
text_image
< °C > ④ ③ ② ① < °C > AIR FRY CHIPS WINGS PIZZA STEAK COOKIES SNACKS VEGGIES TOAST BAKE BAGEL BROIL ROAST DEHYDRATE PROOF DEFROST WARM REHEAT ⑦ ⑧ ⑨ ⑩ ⑪KEY FUNCTIONS
| No. | Key symbol Key function | Operation | |
| 1 | Programme overview | You will find the list of programmes in the 'Cooking Programmes' section. | |
| 2 |  | Start/Pause | Touch the START/PAUSE icon to start or pause a programme. |
| 3 |  | Preheat | After selecting a programme and setting the temperature, touch the symbol to preheat the appliance. (Touching the START/PAUSE icon (2) is not required to start the preheating programme. Once the preheating process is finished, the appliance beeps 5 times and 'Add Food' is displayed on the screen) |
| 4 |  | Light switch | Touch the light symbol to switch the lamp on or off. (The light is automatically switched off after 5 minutes). |
| 5 |  °C °C | Temperature setting | To lower the temperature, touch the < button. To raise the temperature, touch the > button. To make the settings more quickly, press and hold the respective button. |
| 6 |  | ON / OFF | Touch this button to turn the appliance on and off. |
| 7 |  | Time setting | To reduce the time, touch the < button. To increase the time, touch the > button. To make the settings more quickly, press and hold the respective button. |
| 8 |  | Rotary spit | Touch this button if you want to use the rotisserie. |
| 9 |  | Hot air | This symbol is an indicator light. As soon as a programme using hot air is set, the symbol flashes during operation. |
| 10 | DUAL COOK | Dual Cooking | This advanced technology allows you to start the appliance with one programme and then automatically switch to another programme for perfect cooking. For example, if you want to prepare a pot roast with breadcrumbs, set the programmes 'BAKE' and 'BROIL'. The pot roast is cooked through and has a golden, crispy breading at the end. All you have to do is set the programmes - the appliance does the rest all by itself. Enjoy your favourite food without any extra effort. |
| 11 | ≡ | Menu | The desired programme can be selected by turning the control dial. Select the next programme by turning the control dial clockwise. Select the previous programme by turning the control dial counter-clockwise. After selecting the programme, press the MENU button to start the cooking process. |
COOKING PROGRAMMES
| Programme Preset | Temperature | Preset time Temperature setting range | Time setting range |
| AIR FRY (Hot air frying) | 200 °C 10 min | 90-230 °C up to 2 hours | |
| CHIPS (frozen chips) | 230 °C 18 min | 90-230 °C up to 2 hours | |
| WINGS (chicken wings) | 230 °C 18 min | 90-230 °C up to 2 hours | |
| PIZZA 230 °C 11 min | 90-230 °C up to 2 hours | ||
| STEAK 230 °C 7 min | 90-230 °C up to 2 hours | ||
| COOKIES (biscuits) | 180 °C 15 min | 90-230 °C up to 2 hours | |
| SNACKS 200 °C 18 min | 90-230 °C up to 2 hours | ||
| VEGGIES (vegetables) | 230 °C 15 min | 90-230 °C up to 2 hours | |
| TOAST -- Level 1-7 | 1-7 min | ||
| BAKE (baking) | 175 °C 25 min | 90-230 °C up to 2 hours | |
| BAGEL | 230 °C 13 min | 90-230 °C up to 2 hours | |
| BROIL (grilling) | 230 °C 13 min | 90-230 °C up to 2 hours | |
| ROAST (roasting) | 200 °C 30 min | 90-230 °C up to 2 hours | |
| DEHYDRATE (drying) | 60 °C | 5 hours | 30-80 °C |
| PROOF | 34 °C 45 min | 30-40 °C up to 8 hours | |
| DEFROST (thawing) | 50 °C 20 min | 30-80 °C up to 2 hours | |
| REHEAT (warming up) | 95 °C | 5 min 90-230 °C up to 2 hours | |
| WARM (keeping warm) | 50 °C | 4 hours | 30-120 °C up to 8 hours |
Note: The information in the table is for reference only. Temperature and time settings can be adjusted by the user as required.
OPERATION
text_image
< 230 ° > < 00:20 ° > AIR FRY CHIPS WINGS PIZZA STEAK COOKIES SNACKS VEGGIES TOAST BAKE BAGEL BROIL ROAST DEHYDANCE PROOF DEFROST WARM REHEAT
flowchart
graph LR
    A["POWER ON"] --> B["MENU"]
    B --> C["Preheat"]
    C --> D["Accessories position"]
    D --> E["START"]
| 1 | Insert the mains plug into the socket and touch the ON/OFF button (6) to switch on. The screen lights up and the HOT AIR symbol (9) flashes. | |
| 2 |  | Turn the MENU knob (11) and select the desired programme. The respective preset temperature and time are displayed on the screen. You can adjust the temperature < 230 ° > and the time < by 0:20 ° touching the < and > buttons. Press the MENU button to start the cooking process. |
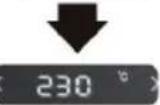 | ||
 | Note: The temperature of the 'TOAST' function cannot be adjusted. Touch the time setting < 00:20 ° for levels 1-7 of the 'TOAST' function. | |
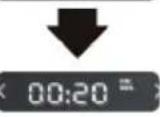
| 3 |  | Touch the PREHEAT icon (3) to preheat the appliance. As soon as the cooking chamber reaches a temperature of 150 °C, 'Add Food' is displayed on the screen. (After preheating, place the food in the appliance and close the door, the cooking process will start automatically.) |
 | Note: No preheating is required for the TOAST, DEHYDRATE, PROOF, DEFROST, REHEAT and WARM programmes. |
| Position accessories | |||
| Position 1: DEHYDRATE |  | Position 2: TOAST DEHYDRATE |  |
| Position 3: TOAST DEHYDRATE BAKE VEGGIES PIZZA |  | Position 2: CHIPS WINGS |  |
| Position 4: ROAST |  | Position 5: Rotary spit |  |
| Accessories |  Baking rack Frying basket Baking tray Rotary spit Baking rack Frying basket Baking tray Rotary spit | ||
| Note: If you prepare greasy food with the baking rack, deep-frying basket or rotisserie (for example chicken), you should also place the baking tray one step lower to catch dripping fat. | |||
| 4 | Position accessories | Slide the accessories with the food into the desired slot in the appliance and close the door. There are four slide-in units. Position the accessories in the appropriate slot according to the 'Position accessories' table above.Note:If you want to use the rotisserie, fix the food on it and then place the rotisserie in the appliance. |
| 5 |  Start/Pause Start/Pause | If you skip the preheating function in step 3, touch the START/PAUSE icon (2) to start cooking. The screen shows the timer counting down. As soon as the cooking process is finished, the device beeps 5 times and 'END' is displayed on the screen. All menu icons light up.Note:To use the rotisserie, touch the rotisserie icon (8) after touching the START/ PAUSE icon. |
 | Note:The screen will display 'END' until the MENU button (11) is pressed. As soon as the cooking process is finished, the fan continues to run for 4 minutes to cool down the appliance. | |
DUAL COOKING
text_image
< 230 ° > < 00:20 = AIR FRY CHIPS WINGS PUZZA STEAK COOKIES SNACKS VEIGGIES TOAST BAKE BAGEL BROIL ROAST DHYDRATE PROOF DEFROST WARM REHEAT
flowchart
graph LR
    A["POWER ON"] --> B["Dual Cook"]
    B --> C["Preheat"]
    C --> D["Accessories position"]
    D --> E["START"]
| 1 |  | Insert the mains plug into the socket and touch the ON/OFF button (6) to switch on the device. The screen lights up and the HOT AIR symbol (9) flashes on the screen. |
| 2 | DUAL COOK | Example:Step 1: Step 2: Step 2: Touch the DUAL COOK symbol (10). The five programmes AIR FRY / BAKE/ BROIL / ROAST / WARM light up for a long time. Turn the MENU knob (11) and select the first programme, for example AIR FRY. 'AIR FRY' flashes on the screen (the other 4 programmes remain lit). Then touch the temperature displayand set the desired temperature. Touch the time displayto set the desired time. Finally, press the MENU button (11) to confirm the first programme set. The remaining four programmes continue to light up on the screen. Repeat the above steps to set the second programme. Touch the DUAL COOK symbol (10). The five programmes AIR FRY / BAKE/ BROIL / ROAST / WARM light up for a long time. Turn the MENU knob (11) and select the first programme, for example AIR FRY. 'AIR FRY' flashes on the screen (the other 4 programmes remain lit). Then touch the temperature displayand set the desired temperature. Touch the time displayto set the desired time. Finally, press the MENU button (11) to confirm the first programme set. The remaining four programmes continue to light up on the screen. Repeat the above steps to set the second programme. |
| Note: Touch the START/PAUSE icon (2) and then the DUAL COOK icon (10) to return to the main menu and cancel the dual cooking function. | ||
| 3 | 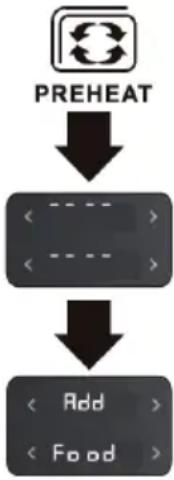 | Touch the PREHEAT icon (3) to preheat the appliance. As soon as the cooking chamber of the device reaches a temperature of 150 °C, 'Add Food' is displayed on the screen. (After preheating, place the food in the appliance and close the door, the cooking process will start automatically) |
| 4 | Position accessories | Slide the accessories with the food into the desired slot in the appliance and close the door. There are four slide-in units. Position the accessories in the appropriate slot according to the 'Position accessories' table above. |
| 5 |  | If you skip the preheating function in step 3, touch the START/PAUSE icon (2) to start cooking. The set time is counted down on the screen. The first selected programme lights up for a long time. The second selected programme is only displayed on the screen when the first programme has finished. As soon as the cooking process is finished, the device beeps 5 times and 'END' is displayed on the screen. All menu icons light up.Note: If you want to use the rotisserie, touch the ROTISSERIE symbol (8) after touching the START / PAUSE symbol (2). |
 | Note: The screen will display 'END' until the MENU button (11) is pressed. After the cooking process is finished, the fan continues to run for 4 minutes to cool down the appliance. | |
COOKING TABLES
| COOKING PROGRAMMES | ||||
| Function Preheat | Recommended | food quantity | Recommended accessories | Recommended position |
| AIR FRY (hot air frying) | yes | depending on the selected foods | Frying basket 2 | |
| CHIPS (frozen chips) | yes 550 g | Frying basket 2 | ||
| WINGS (chicken wings) | yes | 1038 g (28 pieces) | Frying basket 2 | |
| PIZZA yes 33 cm | Baking tray or baking rack | 3 | ||
| STEAK yes 190 g | Baking tray or baking rack | 2 | ||
| COOKIES (biscuits) | yes | depending on the selected foods | Baking tray 2 | |
| SNACKS yes | depending on the selected foods | Baking tray or baking rack | 3 | |
| VEGGIES (vegetables) | yes | depending on the selected foods | Baking tray or frying basket | 3 |
| TOAST no 6 pieces | Baking rack 2 / 3 | |||
| BAKE (baking) | yes | depending on the selected foods | Baking tray or baking rack | 3 |
| BAGEL | yes | depending on the selected foods | Baking tray or frying basket | 2 |
| BROIL (grilling) | yes | depending on the selected foods | Baking tray or baking rack | 2 |
| ROAST (roasting) | yes | depending on the selected foods | Baking tray or rotary spit | 4 or rotary spit position |
| DEHYDRATE (drying) | no | depending on the selected foods | Frying basket | 1 / 2 / 3 |
| PROOF | no | depending on the selected foods | Baking tray 3 | |
| DEFROST (thawing) | no | depending on the selected foods | Baking tray 2 | |
| REHEAT (warming up) | no | depending on the selected foods | Baking rack | 3 |
| WARM (keeping warm) | no | depending on the selected foods | Baking tray 2 | |
| DUAL COOKING | |||||
| Function 1 Function 2 Preheat Recommendation | recommended | food quantity | Recommended accessories | Recommended position | |
| AIR FRY (hot air frying) | WARM (keeping warm) | yes | depending on the the selected food | Frying basket 2 | |
| BAKE (baking) | BROIL (grilling) | Baking tray or baking rack | 3 | ||
| AIR FRY (hot air frying) | WARM (keeping warm) | Baking tray or rotary spit | 4 or rotary spit position | ||
| ROAST (roasting) | AIR FRY (hot air frying) | Baking tray or rotary spit | 4 or rotary spit position | ||
| AIR FRY (hot air frying) | BROIL (grilling) | Frying basket or baking rack | 2 / 3 | ||
| Note: It is normal that some moisture may settle on the door of the appliance during cooking. It is recommended to preheat the appliance before cooking. | |||||
REPLACING THE LIGHT BULB
CAUTION
Risk of electric shock! Make sure that the mains plug of the appliance has been disconnected from the socket and allow the appliance to cool down completely before replacing the light bulb.
Bulb required: 25 W halogen lamp

text_image
1Turn the lamp cover counter-clockwise to take it out.
text_image
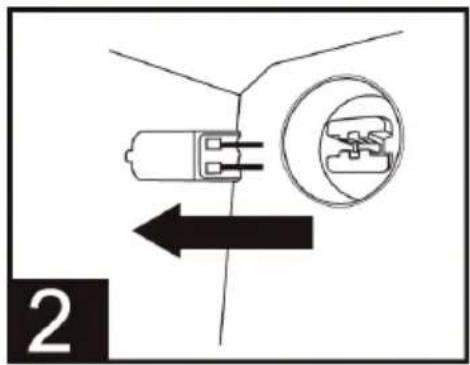
2Remove the defective bulb by pulling it out directly.
text_image
3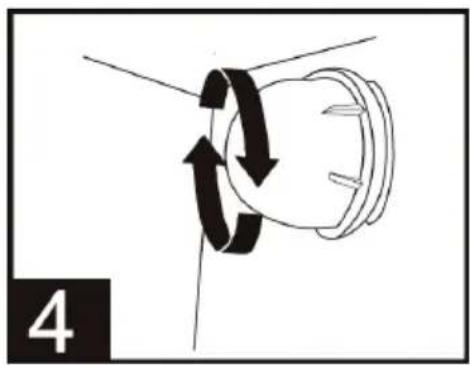
natural_image
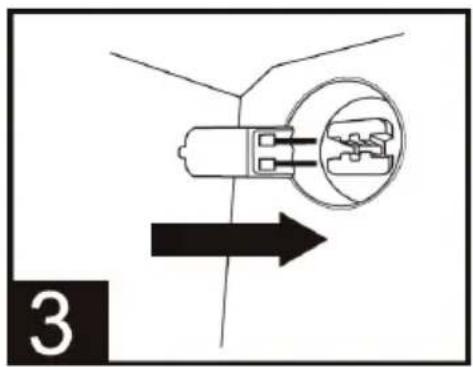
Diagram of a mechanical or electrical component with rotational arrows indicating motion (no text or symbols)Insert the new light bulb. Turn the lamp cover clockwise
to tighten it.
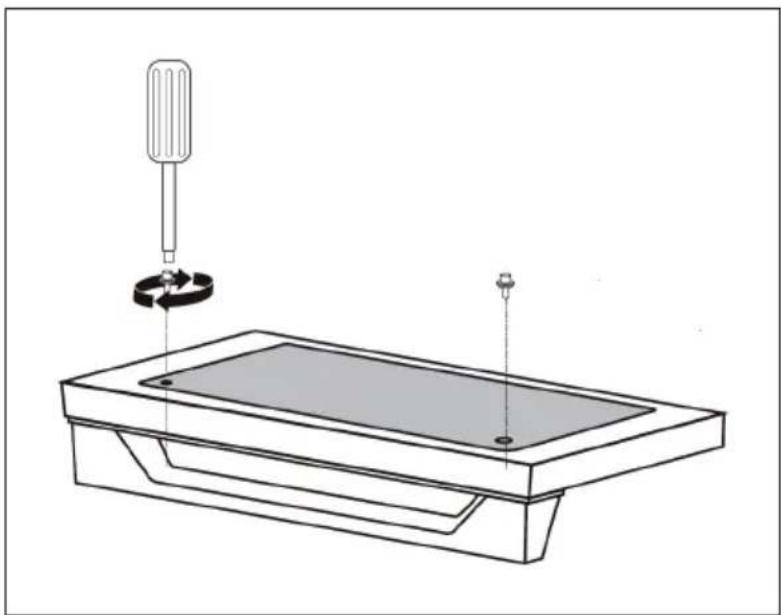
DISASSEMBLING THE GLASS DOOR
CAUTION
Risk of burns! Make sure that the glass door has cooled down completely before disassembling it.
- Loosen the screws by turning them counter-clockwise with a screwdriver.
natural_image
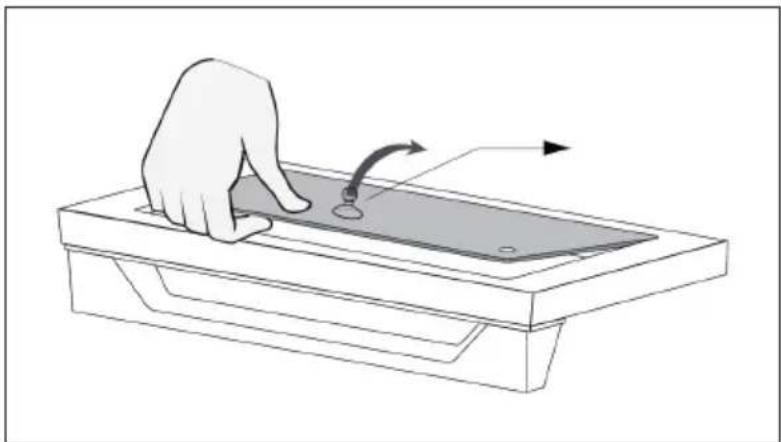
Technical line drawing of a mechanical assembly with a tool and base plate (no text or symbols)- The glass can be sucked in with a silicone suction cup and then removed with the hands.
natural_image
Illustration of a hand pressing down on a rectangular electronic device with a curved arrow indicating motion (no text or symbols)- Replace the glass after cleaning and drying and tighten the screws clockwise.
CLEANING, CARE AND STORAGE
Note: Disconnect the power plug from the socket before cleaning. Let the appliance and accessories cool down completely before disassembling and cleaning.
Cleaning the housing, the door and the LED screen
- Wipe the housing with a soft, damp sponge. A mild liquid cleaner or spray can be used to prevent staining. Apply the cleaner to the sponge before cleaning and not directly to the housing.
- Clean the glass door with a glass cleaner or mild detergent and a soft, damp sponge or soft plastic scouring pad. Do not use abrasive cleaners or metal scouring pads as these may scratch the housing.
- Wipe the LED screen with a soft, damp cloth. Apply the cleaning agent to the cloth and never directly to the LED screen. Cleaning the screen with a dry cloth or abrasive cleaner may damage the screen.
WARNING
Risk of electrical shock! Never immerse the device or the power cord in water or other liquids.
Cleaning the cooking chamber
- Wipe the walls of the cooking chamber with a soft, damp sponge to remove food residues. To avoid staining, you can use a non-abrasive liquid detergent or a mild cleaning spray. Apply the cleaning agent to the cloth before cleaning and not directly to the surfaces in the cooking chamber.

WARNING
risk of fi re and electrical shock! Be extremely careful when cleaning the heating elements. Before cleaning, let the appliance cool down completely and wipe the heating elements lengthwise with a damp, soft cloth. Do not use any cleaning agents or cleaning sprays for this purpose. Allow all surfaces to dry completely before plugging the mains plug back into the socket and switching the appliance on.
Cleaning the crumb tray
- Pull out the crumb tray after each use of the appliance and dispose of the crumbs. Wipe the crumb tray out with a soft, damp sponge. To avoid staining, you can use a non-abrasive liquid detergent or a mild cleaning spray. Before cleaning, apply the detergent to the sponge and not directly in the crumb tray. Then allow the crumb tray to dry completely.
- To loosen burnt-on grease, soak the crumb tray in a warm soap solution and then clean it with a soft sponge or soft plastic scouring pad. Then rinse the crumb tray and dry it completely.
- After cleaning, push the crumb tray back into the device. Only plug the mains plug back into the mains socket after inserting the crumb tray and only switch on the appliance when the crumb tray is inside.
Cleaning the accessories (baking rack, baking tray, frying basket)
- Clean all accessories in a warm soap solution with a soft, damp sponge or soft plastic scouring pad. Rinse and dry them thoroughly. Do not use abrasive cleaners or metal scouring pads, as these can damage the accessories.
- It is not recommended to clean the accessories in the dishwasher as this may shorten the life of the accessories.
Storage
- Make sure that the unit and all accessories are completely clean and dry.
• Make sure the door is closed. - Store the unit in an upright position on its feet. Do not store the appliance while it is wet or still warm. Do not store the unit in a humid or warm environment.
TROUBLESHOOTING
| Problem Potential cause | Solution | |
| The device does not work | The device is not connected to the mains. | Make sure that the plug of the device is inserted in the socket. |
| The unit has not been switched on. | Touch the ON/OFF button ⏻ to switch on the unit. | |
| The device door has not been closed properly. | Make sure the door is properly closed. | |
| Steam escapes from the front of the appliance door. | Foods with a high moisture content are being cooked. | This is normal. The door has ventilation openings so that steam produced, for example, when defrosting frozen bread, can escape. |
| White smoke is coming out of the unit. | The unit is being used for the first time. | This is normal the first time you use the device. It is recommended to run the appliance for 18-20 minutes at the highest temperature setting. |
| Fatty foods are being cooked. | This is normal when cooking fatty foods. This does not affect the cooking process. | |
| The baking tray, crumb tray or heating elements still contain grease or oil residues from previous use. | Make sure that all components are thoroughly cleaned after each use. | |
| Black smoke is coming out of the unit. | The food is burning. Switch | off the appliance immediately and remove the food. |
| The food is not cooking. The | there is too much food in the appliance. | Reduce the amount of food being cooked at one time. |
| The set cooking temperature is too low or the cooking time is set too short. | Set a higher temperature or a longer time. | |
| The wrong programme has been selected. | Make sure you have selected the correct cooking programme. | |
| The food is not cooked evenly. | The food was stacked or stuck together. | Make sure that the food is evenly distributed. |
| The baking tray, the frying basket or the baking rack are not positioned correctly. | Place the accessories in the correct position. Be careful when doing this as the accessories may be hot. | |
| After frying, the food is not crispy. | The food has a high moisture content. | Spraying or brushing food evenly with a small amount of oil can increase crispness. |
| Error code 'E1' Short circuit in the temperature monitor. | Disconnect the power plug from the mains. Please contact customer service. | |
| Error code 'E2' The temperature monitor or the heating elements do not work. | Unplug the mains plug from the socket, wait briefly and plug the mains plug back into the socket. Contact customer service if this does not solve the problem. | |
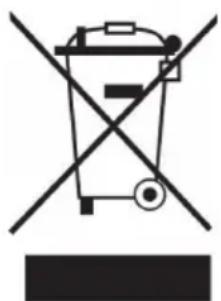
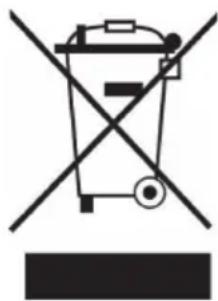
DISPOSAL CONSIDERATIONS
natural_image
Symbol of a trash bin crossed with a diagonal line, no text or labels presentIf there is a legal regulation for the disposal of electrical and electronic devices in your country, this symbol on the product or on the packaging indicates that this product must not be disposed of with household waste. Instead, it must be taken to a collection point for the recycling of electrical and electronic equipment. By disposing of it in accordance with the rules, you are protecting the environment and the health of your fellow human beings from negative consequences. For information about the recycling and disposal of this product, please contact your local authority or your household waste disposal service.
MANUFACTURER & IMPORTER (UK)
Manufacturer:
Chal-Tec GmbH, Wallstrasse 16, 10179 Berlin, Germany.
Importer for Great Britain:
Berlin Brands Group UK Limited
PO Box 42
272 Kensington High Street
London, W8 6ND
United Kingdom
Cher client, chère cliente,
text_image
QR code image containing encoded data, no visible human-readable textSOMMAIRE
natural_image
Line drawing of a cardboard box with an upward arrow indicating growth (no text or symbols)natural_image
Illustration of a car air conditioner unit with a black arrow pointing to its side panel (no text or symbols)natural_image
Simple line drawing of an electric plug connected to a socket (no text or symbols)natural_image
Line drawing of a microwave oven with a 110mm height label (no other text or symbols)natural_image
Line drawing of a hand cleaning a microwave oven with a grating (no text or symbols)natural_image
Diagram of a mechanical or electrical component with rotational arrows indicating motion (no text or symbols)natural_image
Technical line drawing of a mechanical assembly with a tool and base plate (no text or symbols)natural_image
Illustration of a hand pressing down on a rectangular electronic device with a curved arrow indicating motion (no text or symbols)natural_image
Symbol of a trash bin crossed with a diagonal line, no text or numbers presentBerlin Brands Group UK Limited
PO Box 42
272 Kensington High Street
London, W8 6ND
United Kingdom
Estimado cliente:
text_image
QR code image containing encoded data, no visible human-readable textÍNDICE
natural_image
Simple line drawing of a cardboard box with an upward arrow, no text or symbols presentnatural_image
Illustration of a car air conditioner unit with a black arrow pointing to its side panel (no text or symbols present)natural_image
Simple line drawing of an electrical plug connected to a socket (no text or symbols)natural_image
Line drawing of a microwave oven with a 110mm height label (no other text or symbols)natural_image
Line drawing of a kitchen oven with a hand holding a tool, showing the interior and exterior view (no text or symbols)natural_image
Diagram of a mechanical or electrical component with rotational arrows indicating motion (no text or symbols)natural_image
Technical line drawing of a mechanical assembly with a tool and base plate (no text or symbols)natural_image
Illustration of a hand pressing down on a rectangular electronic device with a curved arrow indicating motion (no text or symbols)natural_image
Symbol of a trash bin crossed with a diagonal line, no text or numbers presentBerlin Brands Group UK Limited
PO Box 42
272 Kensington High Street
London, W8 6ND
United Kingdom
Gentile cliente,
natural_image
Simple line drawing of a box with an upward arrow, no text or symbols presentnatural_image
Illustration of a rectangular air conditioner unit with a black arrow pointing to its side (no text or symbols)natural_image
Simple line icon of a plug and a socket (no text or symbols)natural_image
Line drawing of a microwave oven with a 110mm height label (no other text or symbols)natural_image
Line drawing of a kitchen oven with a hand holding a tool, showing a grid-patterned chamber (no text or symbols)natural_image
Diagram showing a mechanical or electrical component with rotational arrows indicating motion (no text or symbols)natural_image
Technical line drawing of a mechanical assembly with a tool and base plate (no text or symbols)natural_image
Illustration of a hand pressing a button on a rectangular electronic device with directional arrows indicating motion (no text or symbols)natural_image
Symbol of a trash bin crossed with a diagonal line, no text or numbers presentPRODUTTORE E IMPORTATORE (UK)
Produttore:
Chal-Tec GmbH, Wallstraße 16, 10179 Berlino, Germania.
Berlin Brands Group UK Limited
PO Box 42
272 Kensington High Street
London, W8 6ND
United Kingdom
Geachte klant,
text_image
QR code image containing encoded data, no visible human-readable textINHOUDSOPGAVE
natural_image
Line drawing of a box with an upward arrow, no text or symbols presentnatural_image
Illustration of a rectangular electronic device with a circular lens and a label pointing downward (no text or symbols present)natural_image
Simple line drawing of a plug and socket (no text or symbols)natural_image
Line drawing of a microwave oven with a 110mm height label (no other text or symbols)natural_image
Line drawing of a hand cleaning a microwave oven with a grating (no text or symbols)natural_image
Diagram of a mechanical or electrical component with rotational arrows indicating motion (no text or symbols)natural_image
Technical line drawing of a mechanical assembly with a tool and base plate (no text or symbols)natural_image
Illustration of a hand pressing down on a rectangular electronic device with a curved arrow indicating motion (no text or symbols)INSTRUCTIES VOOR AFVOER
natural_image
Symbol of a trash bin crossed with a diagonal line, no text or numbers presentBerlin Brands Group UK Limited
PO Box 42
272 Kensington High Street
London, W8 6ND
United Kingdom

area
| Category | Value | |---|---| | 1 | 100 | | 2 | 100 | | 3 | 100 | | 4 | 100 | | 5 | 100 | | 6 | 100 | | 7 | 100 | | 8 | 100 | | 9 | 100 | | 10 | 100 | | 11 | 100 | | 12 | 100 | | 13 | 100 | | 14 | 100 | | 15 | 100 | | 16 | 100 | | 17 | 100 | | 18 | 100 | | 19 | 100 | | 20 | 100 | | 21 | 100 | | 22 | 100 | | 23 | 100 | | 24 | 100 | | 25 | 100 | | 26 | 100 | | 27 | 100 | | 28 | 100 | | 29 | 100 | | 30 | 100 | | 31 | 100 | | 32 | 100 | | 33 | 100 | | 34 | 100 | | 35 | 100 | | 36 | 100 | | 37 | 100 | | 38 | 100 | | 39 | 100 | | 40 | 100 | | 41 | 100 | | 42 | 100 | | 43 | 100 | | 44 | 100 | | 45 | 100 | | 46 | 100 | | 47 | 100 | | 48 | 100 | | 49 | 100 | | 50 | 100 | | 51 | 100 | | 52 | 100 | | 53 | 100 | | 54 | 100 | | 55 | 100 | | 56 | 100 | | 57 | 100 | | 58 | 100 | | 59 | 100 | | 60 | 100 | | 61 | 100 | | 62 | 100 | | 63 | 100 | | 64 | 100 | | 65 | 100 | | 66 | 100 | | 67 | 100 | | 68 | 100 | | 69 | 100 | | 70 | 100 | | 71 | 100 | | 72 | 100 | | 73 | 100 | | 74 | 100 | | 75 | 100 | | 76 | 100 | | 77 | 100 | | 78 | 100 | | 79 | 100 | | 80 | 100 | | 81 | 100 | | 82 | 100 | | 83 | 100 | | 84 | 100 | | 85 | 100 | | 86 | 100 | | 87 | 100 | | 88 | 100 | | 89 | 100 | | 90 | 100 | | 91 | 100 | | 92 | 100 | | 93 | 100 | | 94 | 100 | | 95 | 100 | | 96 | 100 | | 97 | 100 | | 98 | 100 | | 99 | 100 | | Note: The actual values in the 'Value' column are not provided in the code. I have used the label 'The Region' to represent the 'Region'. The values are estimated based on the provided code.