
AeroVital Fry - Deep fryer Klarstein - Free user manual and instructions
Find the device manual for free AeroVital Fry Klarstein in PDF.


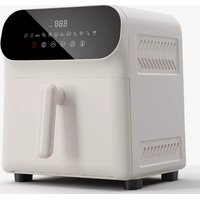
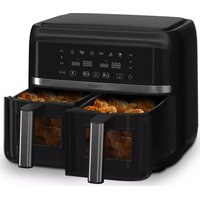
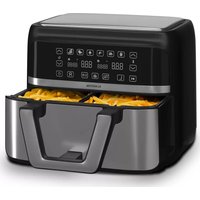
| Product Type | Hot Air Fryer (oil-free) |
| Brand | Klarstein |
| Model | AeroVital Fry |
| Dimensions (L x W x H) | 37.5 x 30 x 35 cm |
| Weight | 5.2 kg |
| Capacity | 5.5 L |
| Power Supply | 220-240 V, 50/60 Hz |
| Power | 1700 W |
| Temperature Range | 80 °C to 200 °C |
| Timer | 0 to 60 minutes with automatic shut-off |
| Display | Digital Touchscreen |
| Preset Programs | 8 programs: fries, chicken, steak, fish, vegetables, etc. |
| Preheat Function | Yes |
| Keep Warm Function | Yes |
| Basket Material | Stainless steel and non-stick coating |
| Cool-touch Handle | Yes |
| Cleaning | Basket and pot dishwasher safe |
| Overheat Protection | Yes |
| Automatic shut-off when basket is removed | Yes |
| Available Spare Parts | Cooking basket, pot, odor filter |
| Repairability | Repairability score: 7.4/10 |
| Color | Black |
Frequently Asked Questions - AeroVital Fry Klarstein
User questions about AeroVital Fry Klarstein
0 question about this device. Answer the ones you know or ask your own.
Ask a new question about this device
Download the instructions for your Deep fryer in PDF format for free! Find your manual AeroVital Fry - Klarstein and take your electronic device back in hand. On this page are published all the documents necessary for the use of your device. AeroVital Fry by Klarstein.
USER MANUAL AeroVital Fry Klarstein
INHALTSVERZEICHNIS
Technische Daten 3
natural_image
Line drawing of a rectangular kitchen appliance with a side handle and lid (no text or symbols)natural_image
Technical line drawing of a two-cylinder mechanical assembly with attached spring-loaded components (no text or symbols)natural_image
Line drawing of a mechanical tool or plunger with two upright arms and a central handle (no text or symbols)natural_image
Technical line drawing of a cylindrical mechanical component with mesh texture and central mounting bracket (no text or symbols)EINSCHÜBE EINSETZEN
natural_image
Line drawing of a cylindrical device with mesh pattern and handle, no text or symbols presentBEDIENUNG
natural_image
Line drawing of a food delivery machine with open lid and control panel (no text or symbols)natural_image
Symbol of a trash bin crossed with a diagonal line, no text or numbers presentUnit 6 Riverside Business Centre
Brighton Road
Shoreham-by-Sea
BN43 6RE
United Kingdom
Dear Customer,
Congratulations on purchasing this device. Please read the following instructions carefully and follow them to prevent possible damages. We assume no liability for damage caused by disregard of the instructions and improper use. Scan the QR code to get access to the latest user manual and more product information.

CONTENT
Technical Data 19
Safety Instructions 20
Device Overview 22
Control Panel 23
Programs 24
Inserts 24
Inserting the Inserts 25
Operation 26
Function Programs 27
Cleaning and Care 28
Troubleshooting 28
Recipes 30
Hints on Disposal 33
Manufacturer & Importer (UK) 33
TECHNICAL DATA
| Item number 10034575 | |
| Power supply 220-240 V ~ 50/60 Hz |
FURTHER ACCESSORIES
Note: Further accessories are available for this item under the following item numbers:
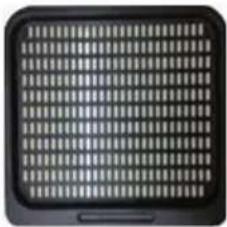
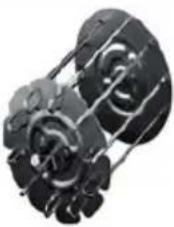
| Item number | 10034576 10034577 | |
| Accessory Mesh | Rack Kebab Set | |
 |  | |
SAFETY INSTRUCTIONS
- Before using for the first time, check that the voltage of your power outlet matches the specified voltage.
- To avoid electric shock, do not immerse the power cord or the device itself in water or other liquids.
- Keep children and pets away from the device during operation.
• After use, switch off the appliance and disconnect the mains plug from the socket. - The unit should be operated separately from other units on a separate circuit. If the circuit is overloaded by other devices, this device may not work properly.
• Take extreme care when moving a container containing hot food. - Do not let the power cord hang over the edge of tables or work surfaces, and be careful not to allow the power cord to come into contact with the hot surfaces of the equipment.
• Always place the unit securely in the center of the table or worktop. - Do not touch hot device surfaces. Use the handles to move or lift.
• The device must not be used by children. - Use of accessories not expressly recommended by the manufacturer may result in injury.
- Do not place or use the unit on heat-sensitive glass surfaces, wooden surfaces or tablecloths. Be sure to place a heat-resistant plate with thermal protection under the unit on these surfaces.
- Never use the device if the power cord is damaged, if the device malfunctions or has been damaged in any other way.
- Before cleaning or when not in use, switch off the device and disconnect the power plug from the socket. Allow the device to cool down before removing or adding any parts.
-
Do not place the device in the immediate vicinity of hot gas or electric ovens or in a heated oven.
-
If the power plug does not fit properly, always contact a qualified electrician to minimize the potential for electrical shock. Never try to manipulate the power plug in any way.
- Do not clean the device with metallic scouring pads. Small metal parts could break off and short out the electrical components of the device, which could result in electric shock or damage the device.
- To minimize the risk of electric shock, only prepare food in the supplied, coated, non-stick container.
• This device is designed for indoor use only. - Use the device only for its intended purpose.
- Keep this manual for future reference.
- This device may be only used by children 8 years old or older and persons with limited physical, sensory and mental capabilities and / or lack of experience and knowledge, provided that they have been instructed in use of the device by a responsible person who understands the associated risks.

CAUTION
Risk of burns! During hot air frying, hot steam is released through the air outlets. Keep your hands and face at a safe distance from the steam and from the air outlets. Also be careful of hot steam and air when you remove appliance parts from the appliance.
DEVICE OVERVIEW
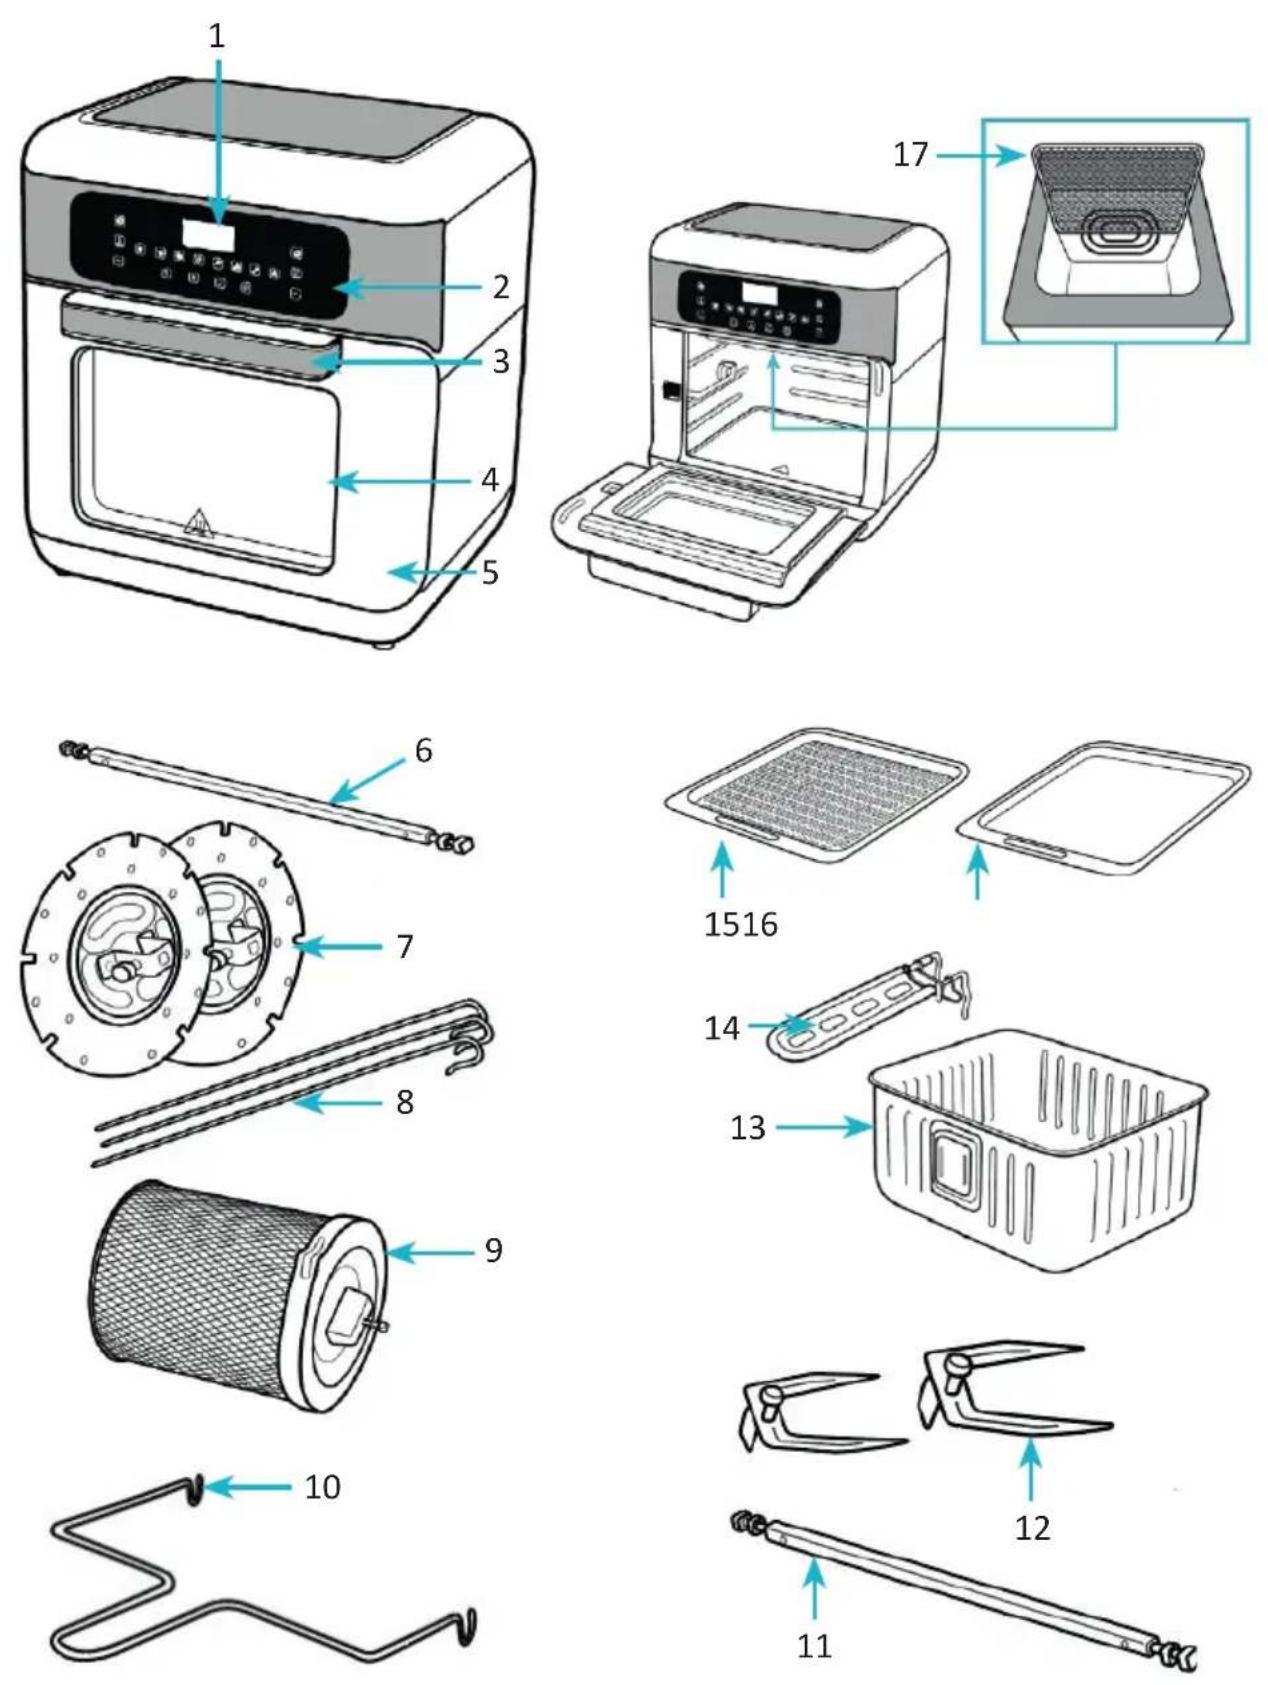
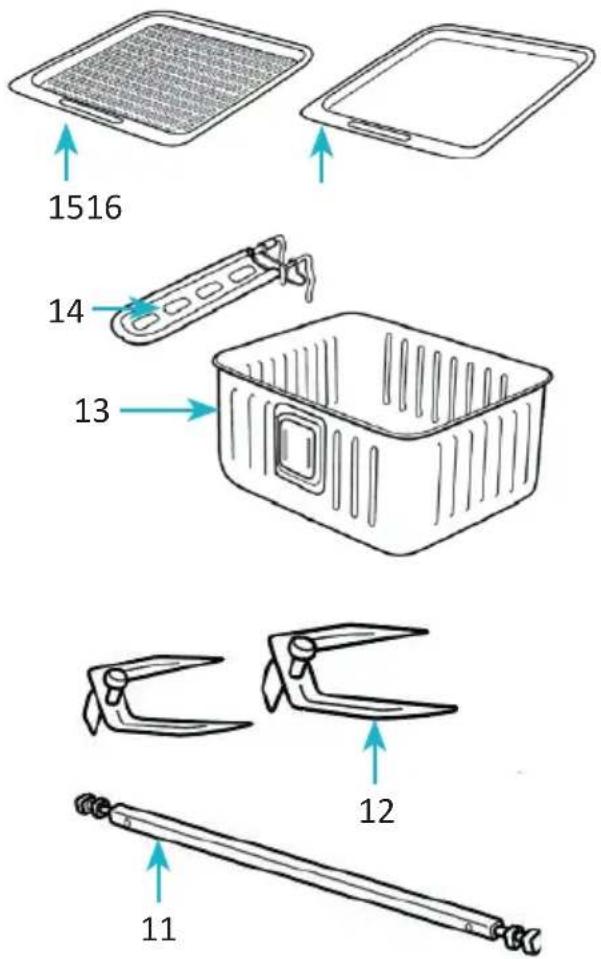
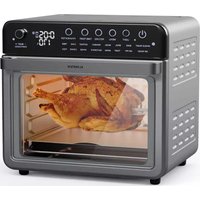
| 1 | Display | 10 | Drum basket hook |
| 2 | Operating element (touch-sensitive sensor buttons) | 11 | Roast / poultry rotisserie |
| 3 | Handle (door) | 12 | Rotisserie forks |
| 4 | Viewing window (door) | 13 | Deep-frying container |
| 5 | Door | 14 | Deep frying container (handle) |
| 6 | Rotisserie / kebab skewer (optional) | 15 | Sheet for dried goods and for multi-level cooking (optional) |
| 7 | Kebab accessories (outer plates) (optional) | 16 | Drip tray |
| 8 | Skewers (optional) | 17 | Protective grid for the heating element |
| 9 | Drum basket |
CONTROL PANEL
| + - + - | Temperature and time setting |
| Light button (on / off) | |
| Reheat button | |
| Rotate button (on / off) | |
| ON / OFF button (device) | |
PROGRAMS
 | French fries Fish |  |  | ||
 | Pizza |  | Drying and Dehydrating |  | Whole Chicken |
 | Chicken Steak Bal |  |  |
INSERTS
Frying Container
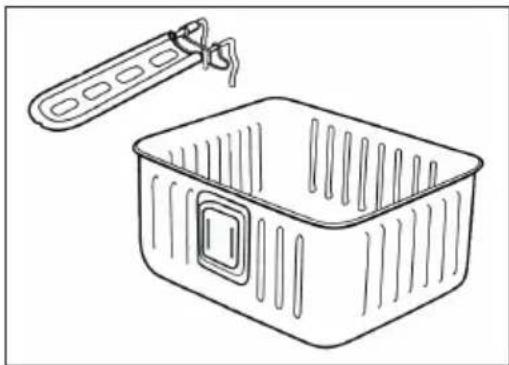
To attach the handle to the basket, open the handle latch, squeeze the removable frying container handle, and secure it to the basket handle insert. Once the handle is connected to the basket, close the handle lock to secure the basket handle. To release the handle from the basket, open the handle latch, squeeze the handle and pull it upwards.
natural_image
Line drawing of a bicycle basket with a handle and lid, no text or symbols presentKebab Set (optional, e.g. for doner meat or shashlik)
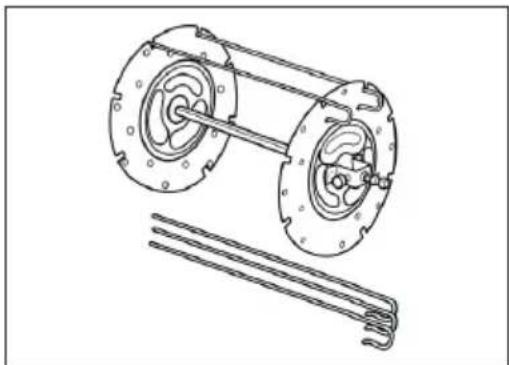
First, put the two outer plates onto the bar and tighten the screws. Then place the skewers in the outer notches and guide the bent ends into the holes (see picture).
natural_image
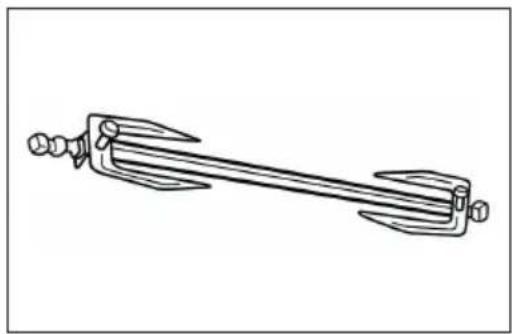
Technical line drawing of a mechanical assembly with two wheels and a spring-like component (no text or symbols)Roast / Poultry Rotisserie
Insert the bar longitudinally through the center of the poultry or roast. Push the rotisserie forks through the rotisserie skewer and into the poultry or roast and lock the forks with the screws. Make sure the size of the poultry or roast leaves enough space in the hot air fryer to allow the skewer to spin.
natural_image
Line drawing of a mechanical tool or clamp with two protruding pins (no text or symbols)Drum Basket (for example for chicken thighs or french fries)
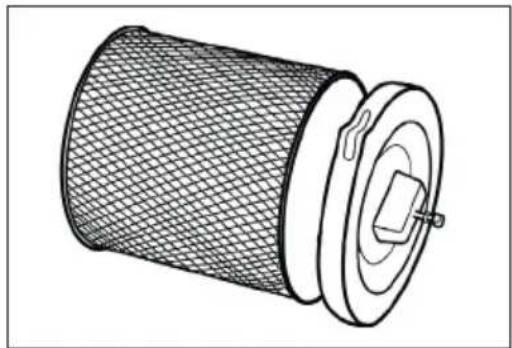
Place the drum basket cover onto the drum basket. Then rotate the cover to lock it.
natural_image
Technical line drawing of a cylindrical mechanical component with mesh texture and central slot (no text or symbols)INSERTING THE INSERTS
Inserting Roast / Poultry Rotisserie (11) or Drum Basket (9)
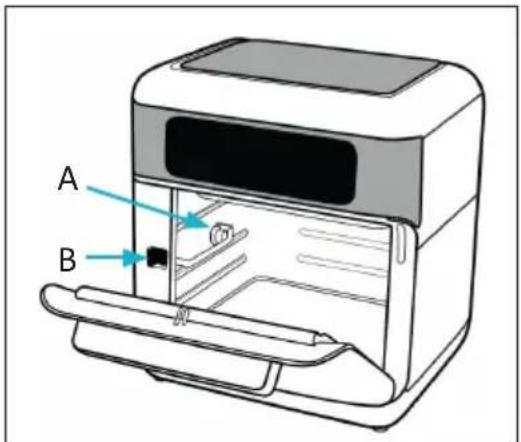
- Put the appropriate insert into the hot air fryer. Make sure the right side of the bar slides into the right side groove of the hot air fryer. Press and hold the red release button (B) as you slide the insert into the hot air fryer. On the left side inside the hot air fryer, unlock the lock (A). Once the insert is in position, release the release button. Make sure that the insert has been inserted correctly.
- Close the door.
- Press the "rotate" button to turn on the rotation.
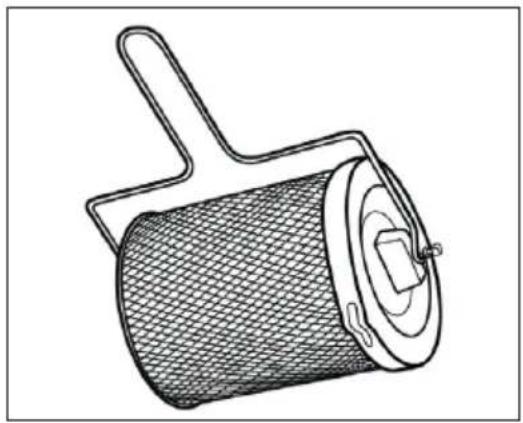
- To remove the inserts after cooking, take the drum basket hook (10) and hook it into the insert from below. Press the release button and slowly pull out the insert.
natural_image
Line drawing of a cylindrical device with mesh pattern and handle, no text or symbols presentOPERATION
- Place the unit on a horizontal, heat-resistant and even surface.
- Place the drip tray on the floor inside the unit.
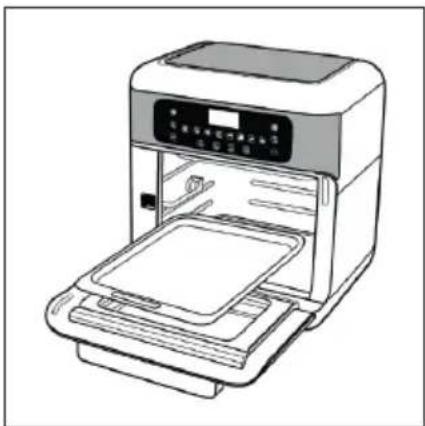
- Prepare the desired insert (kebab accessory, drum basket, roast / poultry rotisserie, frying container or dehydrator tray) with the food you have selected and then place it in the hot air fryer and close the door.
- Connect the power cord to a properly fitted power outlet.
natural_image
Line drawing of a food delivery machine with open lid and control panel (no text or symbols)-
Press the ON / OFF button to the control panel to turn on the device.
-
Next select the desired program. You can choose between the following programs: french fries, pizza, whole chicken, steak, fish, drying and dehydrating, chicken and cake. When you press the corresponding program icon, the time and temperature will be shown in the display.
-
To manually set or change the temperature or time, you can adjust the preset temperature and time using the "+" and "-" buttons in the temperature and time settings.
-
Press the ON / OFF button start cooking directly, or wait a few seconds for the device to start automatically.
-
When the set cooking time has expired, a beep will sound. Open the door and remove the appropriate insert (kebab accessory, drum basket, roast / poultry rotisserie, frying container or dehydrator tray) and place on a heat-resistant surface. Be careful as the inside of the hot air fryer and the accessories used in it may still be hot.
-
If you need any additional cooking time, set the time and temperature individually and start the process again.
-
To reheat the food, press the reheat button. The timer automatically adjusts to 6 minutes and 140 °C.
-
To stop the current cooking process, briefly press the ON/OFF button to
cancel the operation, press and hold the ON / OFF button
- To switch the device off completely, disconnect the plug from the socket.
FUNCTION PROGRAMS
| Food | French fries Pizza Whole Chicken Steak | ||||
 |  |  | [STTK] | ||
| Duration 20 minutes 12 minutes 30 minutes 15 minutes | |||||
| Temperature 200 °C 180 °C 180 °C 180 °C | |||||
| Food | Fish Shrimp | Drying & Dehydrating | Chicken | ||
 |  |  |  | ||
| Duration 15 minutes | minutes | 12 minutes | 2-24 hours | 30 minutes | |
| Temperature | 160 °C | 160 °C | 40-80 °C | 180 °C | |
| Food | Cake |
 | |
| Duration 30 minutes | |
| Temperature | 160 °C |
Note: The information in the table above is only an example and can be adjusted as desired. If you wish to bake cake or pizza in the hot air fryer, use the corresponding tray for each.
CLEANING AND CARE
Note: The following items are suitable for dishwashers: kebab accessories (7 + 8), drum basket (9), roast / poultry rotisserie (11 + 12), frying container (13) and trays (15 + 16).
- Pull the power plug out of the socket and make sure that the device is not powered. Clean the containers in warm rinse water. Do not use strong or aggressive detergents or abrasives.
- Next rinse all parts thoroughly and let them dry sufficiently. Wipe the outer case with a clean, damp cloth and then dry thoroughly.
- You can remove the protective grid of the heating element (18) at any time to clean it. Pull it out of the rail towards the door and wipe it off with a slightly damp cloth. Remember to replace the grid before using the unit again.
TROUBLESHOOTING
| Problem Possible Cause Solution | ||
| The device is not working properly. | The power plug is not plugged into the socket. | Insert the power plug of the device into a properly fitted socket. |
| The ON / OFF button was not pressed after a program was selected. | Press the ON / OFF button after you have set the desired program, time and temperature in order to start the device. | |
| The food is still raw after the time has elapsed. | The insert is too full. Fry in several passes instead of overfilling the insert. | |
| The temperature is set too low. | Set the correct temperature and fry again. | |
| The cooking time is set too low. | Set the correct cooking time and fry again. | |
| The food is not evenly fried. | Some foods need to be shaken once in the middle of the cooking time. | Remove the insert in the middle of the cooking time and shake the contents once so that they are mixed. |
| The insert is difficult to push into the hot air fryer. | The insert is too full. The contents of the insert must never exceed the maximum mark. | |
| The insert has not been inserted correctly. | Make sure that the insert is properly inserted into the hot air fryer. | |
| Steam is rising from the appliance. | You are frying oily food. It is not uncommon for food steam to arise in this case. | |
| There is too much oil in the fryer. | Clean the inserts after use. | |
RECIPES
Main courses:
- Crispy salmon cubes
• Braised peppers with quinoa and mushrooms
Side dishes:
• Homemade fries and potato wedges
Dessert:
- Hazelnut brownies
1. Crunchy salmon cubes
Servings: 2
Preparation time: 20-30 minutes
Ingredients: • 200 g salmon cubes (without skin and bones)
- 100 g cornflakes
• 1-2 egg (s) - 75 g of flour
- Lemon juice
- Salt and pepper
- 1-2 tablespoons of either sunflower oil / rapeseed oil / olive oil
First, cut the salmon fillet into bite-sized pieces about 3 x 3 cm in size and season with a little lemon juice, salt and pepper. Sprinkle the flour on a deep plate.
Next, beat the eggs in a plate. Then, prepare another plate with the crumbled cornflakes. Turn the fillets first in the flour, cover with egg and then completely with the cornflakes. Finally bake the breaded salmon pieces in the AeroVital Fry hot air fryer with a teaspoon of oil at 190 °C for about 6-8 minutes until crispy and serve on a plate.
2. Braised peppers with quinoa
Servings: 2
Preparation time: 20-30 Minuten
Ingredients: • 100 g quinoa
• 4 peppers (red)
• 300 ml vegetable broth
• 120 g mushrooms
• 100 g of grated Parmesan
- Curry powder
• 1 teaspoon of fennel (ground)
- 1 shallot
• 1 clove of garlic
- 1-2 tablespoons of either sunflower oil / rapeseed oil / olive oil
First, wash the quinoa thoroughly under cold water to rinse off any possible bitter substances. Then heat 300 ml of vegetable stock with the fennel and let the quinoa cook for 10 minutes. Next remove the quinoa from the heat and let it swell for another 10 minutes. In the meantime, cut the peppers in a round under the stalk and carefully remove the top together with the stalk. Core the peppers completely. Peel and chop the shallot and garlic. Then chop the mushrooms and sauté briefly with the curry powder, shallots and garlic in a pan. Finally mix the quinoa with the mushrooms and add the Parmesan cheese and fill the peppers. Put the pepper in the AeroVital Fry hot air fryer with a little oil for about 12-15 minutes at about 160 °C.
3. Homemade fries / potato wedges
Servings: 2
Preparation time: 10-15 minutes
Ingredients: • 6 potatoes (or sweet potatoes)
• 6 potatoes (or sweet potatoes)
- Salt
- 1-2 tablespoons of either sunflower oil / rapeseed oil / olive oil
First, peel the potatoes or rinse thoroughly for wedges. Then cut strips or pieces about 1 cm thick and place in cold water for 10 minutes to release the starch from the potatoes. Next turn the strips in the oil and season with paprika and salt. Finally, fry the fries or wedges in the AeroVital Fry hot air fryer at 200 °C for about 10 minutes until crispy.
4. Hazelnut brownies
Servings: 10
Preparation time: 40-60 minutes
Ingredients: • 70 g chocolate (at least 70 % cocoa content)
- 50 g of sugar
• 45 g of flour
• 30 g of chopped hazelnuts - 70 g of butter
• 1-2 egg (s)
• 1 packet of vanilla sugar
• 1 packet of baking soda
First, heat the chocolate together with the butter in a steel pan with constant stirring to avoid burning the chocolate. Then let it cool down for a short time.
For the next step, beat the cream, sugar, vanilla sugar in a bowl along with a pinch of salt. Then add the chocolate mixture with the flour, nuts and a pinch of baking powder and mix together.
Then lay out the pizza tray insert with baking paper and add the batter mixture and spread smoothly. Slide the insert into the AeroVital Fry hot air fryer and bake the dough at 180 °C for 18-20 minutes. To make sure the inside of the batter is creamy, stick a toothpick into it. As soon as the outside of the batter is crispy, some batter should stick to the stick.
Remove the cooked batter from the AeroVital Fry hot air fryer and allow it to cool briefly. Now you can cut the mass into bite-sized brownies.
DISPOSAL CONSIDERATIONS
natural_image
Symbol of a trash bin crossed with a diagonal line, no text or numbers presentIf there is a legal regulation for the disposal of electrical and electronic devices in your country, this symbol on the product or on the packaging indicates that this product must not be disposed of with household waste. Instead, it must be taken to a collection point for the recycling of electrical and electronic equipment. By disposing of it in accordance with the rules, you are protecting the environment and the health of your fellow human beings from negative consequences. For information about the recycling and disposal of this product, please contact your local authority or your household waste disposal service.
MANUFACTURER & IMPORTER (UK)
Manufacturer:
Chal-Tec GmbH, Wallstrasse 16, 10179 Berlin, Germany.
Importer for Great Britain:
Chal-Tec UK limited
Unit 6 Riverside Business Centre
Brighton Road
Shoreham-by-Sea
BN43 6RE
United Kingdom
Chère cliente, cher client,
SOMMAIRE
Fiche technique 37
natural_image
Line drawing of a rectangular box with a side tab and a hanging tool (no text or symbols)natural_image
Technical line drawing of a mechanical assembly with two wheels and a spring-like component (no text or symbols)natural_image
Line drawing of a mechanical tool or clamp with two arms and a central handle (no text or symbols)natural_image
Technical line drawing of a cylindrical mechanical component with mesh texture and central slot (no text or symbols)INSTALLATION DES ACCESSOIRES
natural_image
Line drawing of a cylindrical device with mesh pattern and handle (no text or symbols)UTILISATION
natural_image
Line drawing of a food delivery machine with open lid and control panel (no text or symbols)natural_image
Symbol of a trash bin crossed with a diagonal line, no text or numbers presentUnit 6 Riverside Business Centre
Brighton Road
Shoreham-by-Sea
BN43 6RE
United Kingdom
Estimado cliente:
ÍNDICE
Datos técnicos 53
natural_image
Line drawing of a rectangular box with a side tab and a hanging tool (no text or symbols)natural_image
Technical line drawing of a two-cylinder mechanical assembly with attached spring-loaded components (no text or symbols)Espetón para asar
natural_image
Line drawing of a mechanical tool or clamp with two arms and a central handle (no text or symbols)natural_image
Technical line drawing of a cylindrical mechanical component with mesh texture and central slot (no text or symbols)INTRODUCIR LOS ACCESORIOS
natural_image
Line drawing of a cylindrical device with mesh pattern and handle (no text or symbols)FUNCIONAMIENTO
natural_image
Line drawing of a food delivery machine with open lid and control panel (no text or symbols)natural_image
Symbol of a trash bin crossed with a diagonal line, no text or numbers presentUnit 6 Riverside Business Centre
Brighton Road
Shoreham-by-Sea
BN43 6RE
United Kingdom
Gentile Cliente,
INDICE
Dati tecnici 69
natural_image
Line drawing of a rectangular box with a side tab and a hanging tool (no text or symbols)natural_image
Technical line drawing of a two-c� mechanical assembly with attached spring-loaded components (no text or symbols)natural_image
Line drawing of a mechanical tool or clamp with two arms and a central handle (no text or symbols)natural_image
Technical line drawing of a cylindrical mechanical component with mesh texture and central slot (no text or symbols)natural_image
Line drawing of a cylindrical device with mesh pattern and handle (no text or symbols)UTILIZZO
natural_image
Line drawing of a food delivery machine with open lid and control panel (no text or symbols)natural_image
Symbol of a trash bin crossed with a diagonal line, no text or numbers presentPRODUTTORE E IMPORTATORE (UK)
Produttore:
Chal-Tec GmbH, Wallstraße 16, 10179 Berlino, Germania.
Unit 6 Riverside Business Centre
Brighton Road
Shoreham-by-Sea
BN43 6RE
United Kingdom

area
| Category | Value | |---|---| | 1 | 100 | | 2 | 100 | | 3 | 100 | | 4 | 100 | | 5 | 100 | | 6 | 100 | | 7 | 100 | | 8 | 100 | | 9 | 100 | | 10 | 100 | | 11 | 100 | | 12 | 100 | | 13 | 100 | | 14 | 100 | | 15 | 100 | | 16 | 100 | | 17 | 100 | | 18 | 100 | | 19 | 100 | | 20 | 100 | | 21 | 100 | | 22 | 100 | | 23 | 100 | | 24 | 100 | | 25 | 100 | | 26 | 100 | | 27 | 100 | | 28 | 100 | | 29 | 100 | | 30 | 100 | | 31 | 100 | | 32 | 100 | | 33 | 100 | | 34 | 100 | | 35 | 100 | | 36 | 100 | | 37 | 100 | | 38 | 100 | | 39 | 100 | | 40 | 100 | | 41 | 100 | | 42 | 100 | | 43 | 100 | | 44 | 100 | | 45 | 100 | | 46 | 100 | | 47 | 100 | | 48 | 100 | | 49 | 100 | | 50 | 100 | | 51 | 100 | | 52 | 100 | | 53 | 100 | | 54 | 100 | | 55 | 100 | | 56 | 100 | | 57 | 100 | | 58 | 100 | | 59 | 100 | | 60 | 100 | | 61 | 100 | | 62 | 100 | | 63 | 100 | | 64 | 100 | | 65 | 100 | | 66 | 100 | | 67 | 100 | | 68 | 100 | | 69 | 100 | | 70 | 100 | | 71 | 100 | | 72 | 100 | | 73 | 100 | | 74 | 100 | | 75 | 100 | | 76 | 100 | | 77 | 100 | | 78 | 100 | | 79 | 100 | | 80 | 100 | | 81 | 100 | | 82 | 100 | | 83 | 100 | | 84 | 100 | | 85 | 100 | | 86 | 100 | | 87 | 100 | | 88 | 100 | | 89 | 100 | | 90 | 100 | | 91 | 100 | | 92 | 100 | | 93 | 100 | | 94 | 100 | | 95 | 100 | | 96 | 100 | | 97 | 100 | | 98 | 100 | | 99 | 100 | | Note: The actual values in the 'Value' column are not provided in the code. I have used the label 'The Region' to represent the 'Region'. The values are estimated based on the provided code.
KLARSTEIN
- INHALTSVERZEICHNIS
- EINSCHÜBE EINSETZEN
- BEDIENUNG
- Dear Customer,
- CONTENT
- TECHNICAL DATA
- FURTHER ACCESSORIES
- SAFETY INSTRUCTIONS
- CAUTION
- DEVICE OVERVIEW
- CONTROL PANEL
- PROGRAMS
- INSERTS
- Frying Container
- Kebab Set (optional, e.g. for doner meat or shashlik)
- Roast / Poultry Rotisserie
- Drum Basket (for example for chicken thighs or french fries)
- INSERTING THE INSERTS
- Inserting Roast / Poultry Rotisserie (11) or Drum Basket (9)
- OPERATION
- FUNCTION PROGRAMS
- CLEANING AND CARE
- TROUBLESHOOTING
- RECIPES
- Main courses:
- Side dishes:
- Dessert:
- Crunchy salmon cubes
- Braised peppers with quinoa
- Homemade fries / potato wedges
- Hazelnut brownies
- DISPOSAL CONSIDERATIONS
- MANUFACTURER & IMPORTER (UK)
- Manufacturer:
- Importer for Great Britain:
- Chère cliente, cher client,
- SOMMAIRE
- INSTALLATION DES ACCESSOIRES
- UTILISATION
- Estimado cliente:
- ÍNDICE
- Espetón para asar
- INTRODUCIR LOS ACCESORIOS
- FUNCIONAMIENTO
- Gentile Cliente,
- INDICE
- UTILIZZO
- PRODUTTORE E IMPORTATORE (UK)
- Produttore:
- KLARSTEIN
Brand : Klarstein
Model : AeroVital Fry
Category : Deep fryer