
AeroCrisp Digital - Deep fryer Klarstein - Free user manual and instructions
Find the device manual for free AeroCrisp Digital Klarstein in PDF.

| Product type | Air fryer |
| Brand | Klarstein |
| Model | AeroCrisp Digital |
| Article numbers | 10045482, 10045483 (5.8 L); 10045486, 10045487 (8.3 L) |
| Power supply | 220-240 V ~ 50/60 Hz |
| Power | 1500-1700 W (5.8 L); 1700-2000 W (8.3 L) |
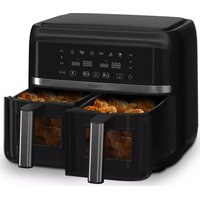
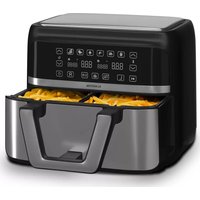
| Basket capacity | 5.8 L or 8.3 L depending on model |
| Temperature range | 60-200 °C |
| Timer | 1 to 90 minutes |
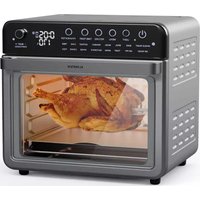
| Preset programs | Fries, chicken thighs, chicken wings, fish, beef, shrimp, pie, pizza, mushrooms, skewers, toast, biscuit |
| Display | Digital, temperature and time |
| Functions | On/off, start/stop, temperature adjustment, timer, program memory, automatic cooling |
| Supplied parts | Grill, frying basket, silicone pads |
| Care and cleaning | Clean with a soft cloth and mild detergent; do not immerse in water; let cool for 30 min before cleaning |
| Safety | Automatic shutdown when basket is removed; hot surfaces; do not use oil; keep children away |
| Repairability | Spare parts available on request; do not repair yourself if cord is damaged |
| Weight | Approx. 4.5 kg (5.8 L); approx. 5.5 kg (8.3 L) |
| Dimensions (L x W x H) | Approx. 30 x 30 x 35 cm (5.8 L); 35 x 35 x 40 cm (8.3 L) |
| Warranty | 2 years (depending on seller) |
Frequently Asked Questions - AeroCrisp Digital Klarstein
User questions about AeroCrisp Digital Klarstein
0 question about this device. Answer the ones you know or ask your own.
Ask a new question about this device
Download the instructions for your Deep fryer in PDF format for free! Find your manual AeroCrisp Digital - Klarstein and take your electronic device back in hand. On this page are published all the documents necessary for the use of your device. AeroCrisp Digital by Klarstein.
USER MANUAL AeroCrisp Digital Klarstein
KLARSTEIN
www.klarstein.com

area
| Category | Value | | -------- | ----- | | 1 | 100 | | 2 | 100 | | 3 | 100 | | 4 | 100 | | 5 | 100 | | 6 | 100 | | 7 | 100 | | 8 | 100 | | 9 | 100 | | 10 | 100 | | 11 | 100 | | 12 | 100 | | 13 | 100 | | 14 | 100 | | 15 | 100 | | 16 | 100 | | 17 | 100 | | 18 | 100 | | 19 | 100 | | 20 | 100 | | 21 | 100 | | 22 | 100 | | 23 | 100 | | 24 | 100 | | 25 | 100 | | 26 | 100 | | 27 | 100 | | 28 | 100 | | 29 | 100 | | 30 | 100 | | 31 | 100 | | 32 | 100 | | 33 | 100 | | 34 | 100 | | 35 | 100 | | 36 | 100 | | 37 | 100 | | 38 | 100 | | 39 | 100 | | 40 | 100 | | 41 | 100 | | 42 | 100 | | 43 | 100 | | 44 | 100 | | 45 | 100 | | 46 | 100 | | 47 | 100 | | 48 | 100 | | 49 | 100 | | 50 | 100 | | 51 | 100 | | 52 | 100 | | 53 | 100 | | 54 | 100 | | 55 | 100 | | 56 | 100 | | 57 | 100 | | 58 | 100 | | 59 | 100 | | 60 | 100 | | 61 | 100 | | 62 | 100 | | 63 | 100 | | 64 | 100 | | 65 | 100 | | 66 | 100 | | 67 | 100 | | 68 | 100 | | 69 | 100 | | 70 | 100 | | 71 | 100 | | 72 | 100 | | 73 | 100 | | 74 | 100 | | 75 | 100 | | 76 | 100 | | 77 | 100 | | 78 | 100 | | 79 | 100 | | 80 | 100 | | Note: The actual values are not provided in the code. The code generates random data for the first three categories (categories) and is not included in the output. |INHALTSVERZEICHNIS
natural_image
Symbol of a trash bin crossed with a diagonal line, no text or numbers presentBerlin Brands Group UK Limited
PO Box 42
272 Kensington High Street
London, W8 6ND
United Kingdom
Dear customer,
Congratulations on your purchase. Please read the following instructions carefully and follow them to prevent potential damage. We accept no liability for damage caused by disregarding the instructions and improper use. Please scan the QR code to access the latest operating instructions and further information about the product.

CONTENTS
Safety instructions 16
Instructions for safe use 17
Device Overview 18
Control panel 18
Setup and operation 22
Cleaning and care 22
Troubleshooting 23
Disposal considerations 24
Manufacturer & importer (UK) 24
TECHNICAL DATA
| Article number 10045482, 10045483 10045486, 10045487 | |
| Power supply 220-240 V ~ 50/60 Hz 220-240 V ~ 50/60 Hz | |
| Power 1500-1700 W 1700-2000 W | |
| Volume of the baskets 5.8 L 8.3 L |
SAFETY INSTRUCTIONS
- Before using for the first time, check that the voltage of your socket corresponds to the voltage specified.
- To avoid electric shock, do not immerse the power cord or the device itself in water or other liquids.
- Keep children and pets away from the device while it is in operation.
- Switch off the device after use and pull the power plug out of the socket.
- The device should be operated on a power circuit separate from other devices. If the electrical circuit is overloaded with other devices, this device may not function properly.
- Use extreme caution when moving a container containing hot food.
- Do not let the power cord hang over the edge of tables or work surfaces, and make sure that the power cord does not come into contact with the hot surfaces of the device.
• Always place the device securely in the centre of the table or work surface. - Never touch hot device surfaces. Use the handles to move or lift.
- The device may not be used by children.
- The use of accessories that are not expressly recommended by the manufacturer can lead to injuries.
- Do not place or use the device on heat-sensitive glass surfaces, wooden surfaces or tablecloths. With these surfaces, it is essential to place a heat-insensitive plate with thermal protection under the device.
- Do not use the device if the power cord is damaged, the device is malfunctioning, or has been damaged in any other way.
- Before cleaning and when not using the device, switch it off and pull the power plug out of the socket. Let the device cool down first before removing or adding device parts.
- Do not place the device in the immediate vicinity of hot gas or electric ovens or in a heated oven.
- If the power plug does not fit properly, be sure to consult a qualified electrician to reduce the potential risk of electric shock. Never attempt to tamper with the power plug in any way.
- Do not clean the device with metallic scouring pads. Small metal parts could break off and short out electrical components in the device, which could result in an electric shock and damage the device.
- To reduce the risk of electric shock, only prepare food in the coated, non-stick container provided.
INSTRUCTIONS FOR SAFE USE
• Always place the ingredients to be fried in the basket so that they do not come into contact with the heating elements.
- Do not cover air inlet and outlet openings while the device is in operation.
- Do not fill the basket with oil as this may pose a fire hazard
• while it is in operation.

CAUTION
Burn risk! The temperature of the accessible surfaces is high when the device is in operation. Never touch the inside of the device.
- Do not place the device against a wall or other devices. Leave at least 10 cm of free space on the back and sides and 10 cm on top of the device.
- Do not place any objects on the appliance.
- Do not leave the device unattended while it is running.

CAUTION
Risk of burns! Hot air frying releases hot steam through the air outlet openings. Keep your hands and face a safe distance from the steam and air vents. Also, be careful of hot steam and air when removing the pan from the device.
- Unplug the power cord immediately if you see dark smoke coming from the unit. Wait until the smoke stops before removing the plug from the device.
- Make sure that the device is on a horizontal, level and stable surface.
- This appliance is intended for use in households and similar areas such as: in staff kitchens in shops, in offices and other work areas, in farms, by customers in hotels, motels and other residential areas and in bed and breakfast establishments.
• Always pull out the mains plug when you are not using the device. - The device must cool down for 30 minutes after use before it can be handled or cleaned safely.
- Keep the device and its cord out of the reach of children under 8 years old.
- The device must not be operated with an external timer or a separate remote control system.
DEVICE OVERVIEW
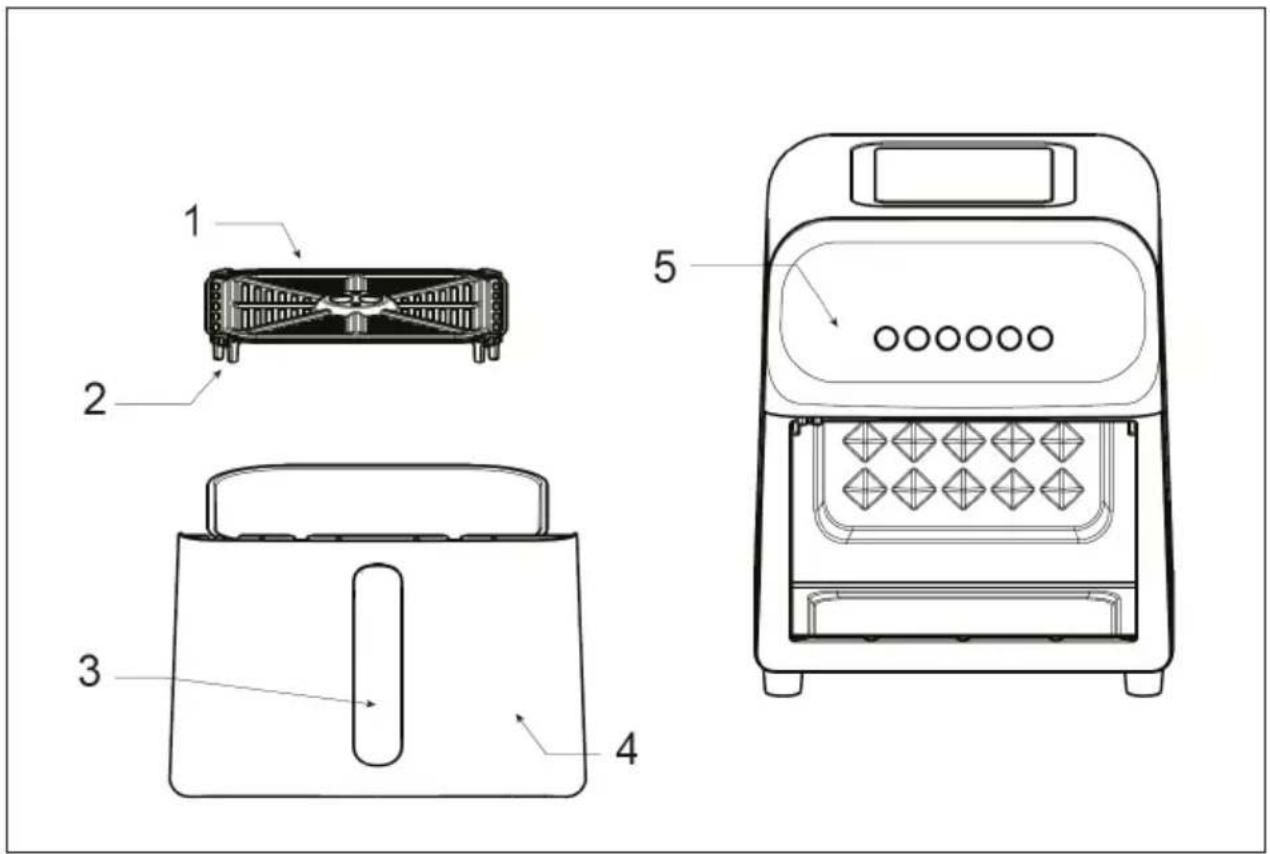
| 1 Grill 4 Frying basket | ||
| 2 Silicone pads 5 Control panel | ||
| 3 Handle 6 Display (see below) |
CONTROL PANEL

Button functions
The display (6) shows the time in minutes and the temperature in °C.
| On / Off | As soon as you insert the plug, the device will beep and the button will flash, signalling that the device is on. The device switches to standby mode. | |
 | Start/Stop | After selecting the function you want, press this button to start. While the device is working, press this button to stop the device. After you have selected a program, you cannot switch directly to another program. You must long press the power button to switch the device to standby mode and then press the power button again to select the other program. |
 | Preset programs | Press this button to cycle through the cooking modes of the different programs. All programs have a preset time and temperature, but you can adjust the time and temperature depending on the amount and size of the food. |
 | Temperature | Before you start the fryer, press the temperature button to set the working temperature. Then press ☑ to ☑ increase or decrease the temperature between 60-200 °C. Press the button while the device is in operation to subsequently adjust the temperature. Then press ☑ to ☑ increase or decrease the temperature in steps of 5 °C. |
 | Timer | Before you start the fryer, press the timer button to set the working time. Then press ☑ to ☑ the time between 1-90 minutes. Press the button while the device is in operation to subsequently adjust the time. Then press ☑ to increase or decrease the time.From 1-30 minutes, the time will increase/decrease in 1-minute increments.From 30-60 minutes, the time will increase/decrease in 5-minute increments.From 60-90 minutes, the time will increase/decrease in 10-minute increments. |
 | Plus | Press this button to increase the time and temperature. Press and hold the button to quickly increase the time/temperature. |
 | Minus | Press this button to decrease the time and temperature. Press and hold the button to quickly decrease the time/temperature. |
Preset programs
Note that these settings are guidelines. Because ingredients vary by origin, size, and brand, we cannot guarantee that the setting shown will always be appropriate for your ingredients. However, you can adjust the cooking times and temperatures.
| Function Preset | Time | Preset Temperature | Adjustable Time | Adjustable Temperature | Please note: | |
| [A320] | Chips 17 min 200 °C | 10 - 25 min 160 - 200 °C | Shake the food every 6-7 minutes. | |||
| [YDSY] | Chicken thighs 25 min 200 °C 10 - 25 min 160 - 200 °C | Turn the food after 10 minutes. | ||||
| [XSDY] | Chicken wings 20 min 200 °C 10 - 25 min 100 - 200 °C | Turn the food after 10 minutes. | ||||
| [6VTE] | Fish 18 min 180 °C 10 - 20 min 160 - 200 °C | Turn the food after 10 minutes. | ||||
 | Beef 10 min 200 °C 10 - 25 min 100 - 200 °C | Turn the food after 10 minutes. | ||||
| [3BD8] | Shrimp 9 min 200 °C 5 - 20 min 160 - 200 °C | Turn the food after 5 minutes. | ||||
| [5BBS] | Cake 10 min 160 °C 10 - 60 min 100 - 200 °C | |||||
 | Pizza 17 min 160 °C 10 - 30 min 100 - 200 °C | |||||
 | Mushrooms 10 min 180 °C 5 - 20 min 100 - 200 °C | |||||
 | Skewers 15 min 200 °C 10 - 25 min 100 - 200 °C | |||||
 | Toast 6 min 160 °C 5 - 20 min 100 - 200 °C | |||||
| [WATY] | Biscuits | 10 min 180 °C 10 - 25 min 100 - 200 °C |
Other functions
| Switching on the device | Once the plug is set, the buzzer will sound once and all lights will illuminate for 1 second. The power button will keep flashing and the device will go into standby mode. |
| Program memory • If you | pull out the frying basket during operation, the deep fryer switches off, but the set time and temperature are saved. After you put the frying basket into the device, the device will continue to work.If it fails during operation, the fryer will stop.Once power is restored, the unfinished program will continue.If you press the power button to turn off the device, all saved data will be erased. |
| Fryer cooling • Press the | power button to turn off the fryer during operation. The fan will continue to run for 10 seconds to cool down the fryer.When the fryer has completed a program, the fan will continue to run for 10 seconds to cool the frying basket. |
| Program end When the p | program is finished, the buzzer will sound3 times and the display will show [END]. The fryer will switch to standby mode. |
SETUP AND OPERATION
When using the device for the first time, preheat it in any program for 15 minutes to eliminate unpleasant odours caused by production residues.
| 1 | When the device is in standby mode, press The first program is displayed and flashes. Press the button again to select another program. |
| 2 | Press The program will start and the food will be cooked. The display alternately shows the temperature and the remaining time. When the program ends, the device will beep and the display will show [END]. |
| 3 | Hold the handle of the frying basket and pull it out. |
| 4 | Place the cooked food in a heat-resistant container. |
| 5 | Pull the plug out of the socket. |
| 6 | Allow the grill and frying basket to cool. |
| 7 | Clean the frying basket and the grill as described in the CLEANING AND CARE chapter. |
CLEANING AND CARE
- Before cleaning the deep fryer, unplug the power cord and wait for the deep fryer to cool down completely.
- If there is greasy dirt in the fryer, wipe it off with a soft, damp cloth.
- Use a neutral detergent to clean all accessories including the fryer and basket. Do not use steel wool to clean the Teflon coating of the grill and frying basket.
- After cleaning, store the device in a cool and dry place.
Note: To avoid electric shock or malfunction, never immerse the fryer in water or any other liquid to clean.
TROUBLESHOOTING
| Problem Possible cause Solution | ||
| Hot air fryer does not work. | The power plug is not plugged in. | Plug the power plug into the mains socket. |
| After setting or selecting the function, the start button was not pressed. | After setting the time and temperature or selecting a program, press the start button to start the cooking process. | |
| The frying basket has not been inserted correctly. | Remove and reinsert the frying basket until it beeps. | |
| The food is not cooked through. | There is too much food in the frying basket. | Fry the food in multiple batches. |
| The cooking time is not sufficient. | Increase the cooking time. | |
| The food is not roasted evenly. | Food was not shaken or turned during roasting. | During the cooking process, remove the frying basket and shake the food. |
| The surface of the food is not crispy. | The temperature is too low. | Set the temperature higher. |
DISPOSAL CONSIDERATIONS
natural_image
Symbol of a trash bin crossed with a diagonal line, no text or numbers presentIf there is a legal regulation in your country regarding the disposal of electrical and electronic equipment, this symbol on the product or on the packaging indicates that this product must not be disposed of with household waste. Instead, it must be taken to a collection point for the recycling of electrical and electronic equipment. By disposing of this product in accordance with the regulations, you protect the environment and the health of those around you from negative consequences. For information on recycling and disposal of this product, contact your local government or household waste disposal service.
MANUFACTURER & IMPORTER (UK)
Manufacturer:
Chal-Tec GmbH, Wallstrasse 16, 10179 Berlin, Germany.
Importer for Great Britain:
Berlin Brands Group UK Limited
PO Box 42
272 Kensington High Street
London, W8 6ND
United Kingdom
Estimado cliente:
ÍNDICE
natural_image
Symbol of a trash bin crossed with a diagonal line, no text or labels presentBerlin Brands Group UK Limited
PO Box 42
272 Kensington High Street
London, W8 6ND
Reino Unido
Cher client, chère cliente,
SOMMAIRE
natural_image
Symbol of a trash bin crossed with a diagonal line, no text or numbers presentBerlin Brands Group UK Ltd
PO Box 42
272 Kensington High Street
London, W8 6ND
United Kingdom
Gentile cliente,
INDICE
natural_image
Symbol of a trash bin crossed with a diagonal line, no text or labels presentPRODUTTORE E IMPORTATORE (UK)
Produttore:
Chal-Tec GmbH, Wallstraße 16, 10179 Berlino, Germania.
Berlin Brands Group UK Limited
PO Box 42
272 Kensington High Street
London, W8 6ND
United Kingdom

area
| Category | Value | | -------- | ----- | | 1 | 100 | | 2 | 100 | | 3 | 100 | | 4 | 100 | | 5 | 100 | | 6 | 100 | | 7 | 100 | | 8 | 100 | | 9 | 100 | | 10 | 100 | | 11 | 100 | | 12 | 100 | | 13 | 100 | | 14 | 100 | | 15 | 100 | | 16 | 100 | | 17 | 100 | | 18 | 100 | | 19 | 100 | | 20 | 100 | | 21 | 100 | | 22 | 100 | | 23 | 100 | | 24 | 100 | | 25 | 100 | | 26 | 100 | | 27 | 100 | | 28 | 100 | | 29 | 100 | | 30 | 100 | | 31 | 100 | | 32 | 100 | | 33 | 100 | | 34 | 100 | | 35 | 100 | | 36 | 100 | | 37 | 100 | | 38 | 100 | | 39 | 100 | | 40 | 100 | | 41 | 100 | | 42 | 100 | | 43 | 100 | | 44 | 100 | | 45 | 100 | | 46 | 100 | | 47 | 100 | | 48 | 100 | | 49 | 100 | | 50 | 100 | | 51 | 100 | | 52 | 100 | | 53 | 100 | | 54 | 100 | | 55 | 100 | | 56 | 100 | | 57 | 100 | | 58 | 100 | | 59 | 100 | | 60 | 100 | | 61 | 100 | | 62 | 100 | | 63 | 100 | | 64 | 100 | | 65 | 100 | | 66 | 100 | | 67 | 100 | | 68 | 100 | | 69 | 100 | | 70 | 100 | | 71 | 100 | | 72 | 100 | | 73 | 100 | | 74 | 100 | | 75 | 100 | | 76 | 100 | | 77 | 100 | | 78 | 100 | | 79 | 100 | | 80 | 100 | | Note: The actual values are not provided in the code. The code generates random data for the first three categories (categories) and is not included in the output. |
KLARSTEIN

- INHALTSVERZEICHNIS
- Dear customer,
- CONTENTS
- SAFETY INSTRUCTIONS
- INSTRUCTIONS FOR SAFE USE
- CAUTION
- DEVICE OVERVIEW
- CONTROL PANEL
- Button functions
- Preset programs
- Other functions
- SETUP AND OPERATION
- CLEANING AND CARE
- TROUBLESHOOTING
- DISPOSAL CONSIDERATIONS
- MANUFACTURER & IMPORTER (UK)
- Manufacturer:
- Importer for Great Britain:
- Estimado cliente:
- ÍNDICE
- SOMMAIRE
- Gentile cliente,
- INDICE
- PRODUTTORE E IMPORTATORE (UK)
- Produttore:
- KLARSTEIN
Brand : Klarstein
Model : AeroCrisp Digital
Category : Deep fryer