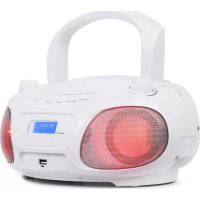
Harper - Mp3 player Auna - Free user manual and instructions
Find the device manual for free Harper Auna in PDF.


| Product type | Portable audio system (Boombox) |
| Brand | Auna |
| Model | Harper |
| Mains power | 100-240 V ~50/60 Hz, mains adapter included |
| Battery power | 6 C size batteries (UM-2) (not included) |
| Power consumption | 11 W |
| RMS power | 2 x 1.5 W |
| FM radio | 88-108 MHz, telescopic antenna |
| Bluetooth | Version not specified, typical range 10 m, frequency 2.402-2.480 GHz |
| USB playback | USB port for USB flash drive, MP3 files only |
| CD player | Standard audio CD (no MP3-CD) |
| Cassette player | Yes, with play, stop, fast forward/rewind, pause functions |
| AUX input | 3.5 mm jack for external source |
| Dimensions (estimated) | Approximately 400 x 200 x 250 mm (W x H x D) |
| Weight (estimated) | Approximately 3 kg |
| Care and cleaning | Clean with a soft dry cloth; do not use solvents |
| Safety | Do not expose to water or heat; do not open the housing |
| Spare parts and repairability | Contact Auna after-sales service for any repairs |
| Recycling | Do not dispose of with household waste; take to a collection point |
| Package contents | Device, mains adapter, user manual |
Frequently Asked Questions - Harper Auna
User questions about Harper Auna
0 question about this device. Answer the ones you know or ask your own.
Ask a new question about this device
Download the instructions for your Mp3 player in PDF format for free! Find your manual Harper - Auna and take your electronic device back in hand. On this page are published all the documents necessary for the use of your device. Harper by Auna.
USER MANUAL Harper Auna
INHALTSVERZEICHNIS
The lighting flash and arrow head within the triangle is warning sign alerting you of dangerous voltage inside the product
CAUTION
RISK OF ELECTRIC SHOCK DO NOT OPEN
CAUTION: TO REDUCE THE RISK OF ELECTRIC SHOCK DO NOT REMOVE COVER (OR BACK). NO USER SERVICIABLE PARTS INSIDE. REFER SERVICING TO QUALIFIED SERVICE PERSONNEL.

The exclamation point within the triangle is a warning sign alerting you of important instructions accompanying the product
natural_image
Symbol of a trash bin crossed with a diagonal line, no text or numbers presentUnit 6 Riverside Business Centre
Brighton Road
Shoreham-by-Sea
BN43 6RE
United Kingdom
Congratulations on purchasing this device. Please read the following instructions carefully and follow them to prevent possible damages. We assume no liability for damage caused by disregard of the instructions and improper use. Scan the QR code to get access to the latest user manual and more product information.

CONTENTS
Safety Instruction 19
Device Overview and Function Buttons 21
Installation 22
Getting Started and Operation 23
Disposal Considerations 28
Declaration of Conformity 28
TECHNICAL DATA
| Item number 10035462, 10035463 | |
| Power supply 100-240 V ~50/60 Hz | |
| Power consumption 11 W | |
| RMS power 2 x 1.5 W | |
| Radio frequencies FM: 88-108 MHz | |
| BT frequency 2.402-2.480 GHz | |
| BT radio-frequency power (max.) 4 dBm |
WARNINGS

The lighting flash and arrow head within the triangle is warning sign alerting you of dangerous voltage inside the product
CAUTION
RISK OF ELECTRIC SHOCK DO NOT OPEN
CAUTION: TO REDUCE THE RISK OF ELECTRIC SHOCK DO NOT REMOVE COVER (OR BACK). NO USER SERVICIABLE PARTS INSIDE. REFER SERVICING TO QUALIFIED SERVICE PERSONNEL.
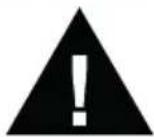
The exclamation point within the triangle is a warning sign alerting you of important instructions accompanying the product
CAUTION: TO REDUCE THE RISK OF ELECTRIC SHOCK AND SERIOUS PERSONAL INJURY, DO NOT REMOVE ANY COVER. NO USER-SERVICABLE PARTS INSIDE. REFER SERVICING TO QUALIFIED SERVICE PERSONNEL ONLY. WARNING. TO REDUCE THE RISK OF FIRE OR ELECTRICAL SHOCK, DO NOT EXPOSE THIS PRODUCT TO WATER, RAIN OR MOISTURE.
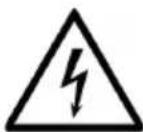

Triangle with lightning plus explanation as follows:
DANGEROUS VOLTAGE: The lightning flash with arrowhead symbol within the equilateral triangle is intended to alert the user to the presence of uninsulated dangerous voltage within the product's enclosure that may be of sufficient magnitude to constitute a risk of electric shock to persons.
Triangle with exclamation point plus explanation as follows:
ATTENTION: The exclamation point within the equilateral triangle is intended to alert the user to the presence of important operating and maintenance (servicing) instructions in the literature accompanying this product.
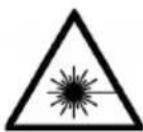
CAUTION: Danger of personal injury
Never touch or look into the optical lens within the CD compartment. This is a CLASS-1 laser product.

CAUTION: Danger of hearing damage
To avoid possible hearing damage, do not listen to this Boombox at high volume levels for long periods of time. Always keep the volume within reasonable limits.
SAFETY INSTRUCTION
Please read these instructions fully before installing or operating and keep it for future reference.
General Safety Information
- Keep the product and all its parts out of reach of small children.
- This product is not intended for use by persons (including children) with reduced physical, sensory or mental capabilities, or lack of experience and knowledge, unless they have been given supervision or instruction concerning the use of the appliance by a person responsible for their safety.
- Do NOT place foreign objects into the CD compartment. Use of controls or adjustments other than those specified herein, may result in hazardous laser light beam exposure. Do NOT open the cover and do NOT attempt to repair it yourself. Refer servicing to qualified personnel. This product does not contain any user serviceable parts. Unauthorised handling of the device may damage it and will void your warranty.
Power Source
- Only use the power supply that came with the product. Using an unauthorised power supply will invalidate your guarantee and may irrecoverably damage the product.
- Disconnect your Boombox from the mains power supply during thunderstorms.
- Always check that you have completely switched off your Boombox, before you change or disconnect the power supply.
- Where the mains power plug or an appliance coupler is used as the disconnect device, the disconnect device shall remain readily operable.
- The power socket must be within easy reach
- In order to avoid electric shock, do not bend, stretch or pull the power supply cable.
- Switch the Boombox off at the mains power socket and unplug it if you are leaving it unattended for a long period of time (holidays etc).
- Do not attempt to open the product. This product does not contain any user serviceable parts.
- Unauthorised handling of the product may damage it and will void your warranty.
Moisture and Water
• To reduce the risk of fire or electric shock:
- Do not use this product near water or moisture.
- Do not use this product near a bath or sink, near a swimming pool or anywhere else that water or moisture is present.
- Do not place objects filled with water, such as a vase, on or near the product.
- Keep it dry. Avoid exposure to precipitation, humidity and liquids which could all affect the product circuitry.
Heat Sources and Flames
- Do not leave this product in high temperatures as electronic devices and plastic parts may warp in heat.
- Keep it away from bright sunlight or heat sources, such as a radiator.
- Never place any type of candle or naked flame on top of, or near the product.
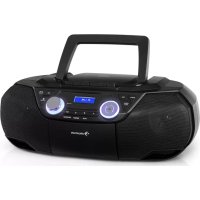
DEVICE OVERVIEW AND FUNCTION BUTTONS
Front View
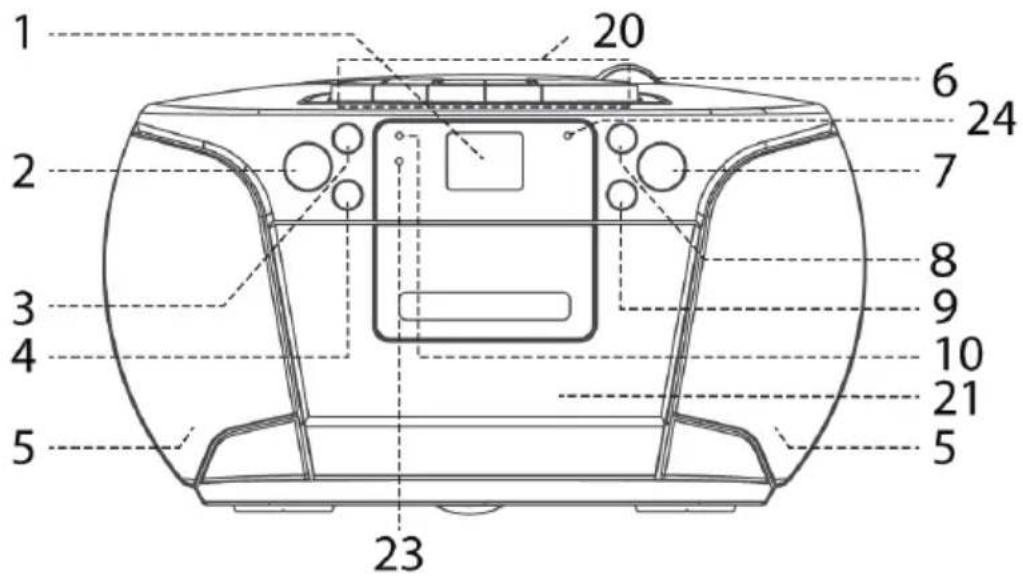
1 LED display
2 -■top button
3 -Skip down button (title/channel)
4 Repeat button
5 Speaker
6 CD component
7 ON/OFF, Play/Pause button
8 →Skip up button (title/channel)
9 Program button
10 BT/USB playback LED indicator
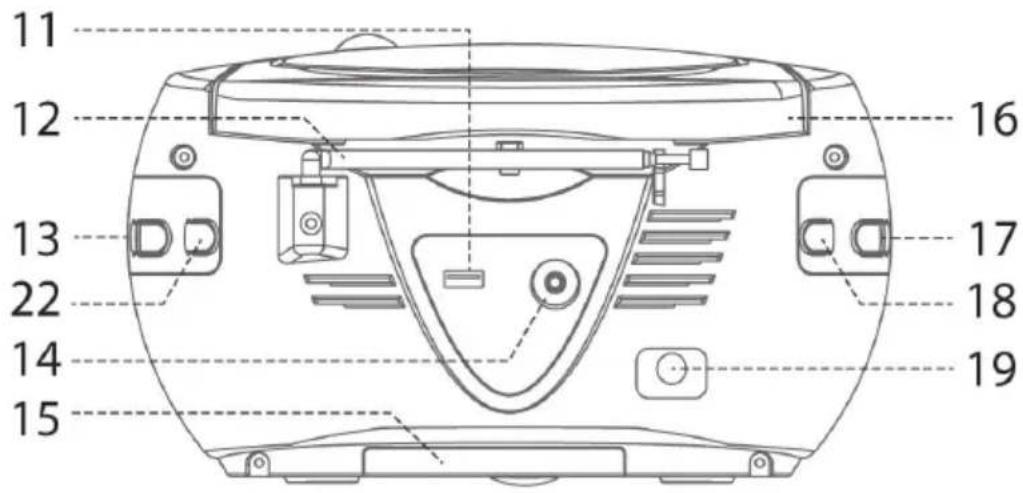
11 USB socket
12 Rod antenna
13 Turning knob
14 AUX IN jack
15 Battery compartment
16 Handle
17 Volume knob
18 Function selector
19 DC jack
20 Cassette buttons:
- PLAYBACK button
- REWIND button
- FAST FORWARD button
- ▶OP/EJECT button
- RAUSE button
21 Cassette door
22 BT/FM selector
23 PROG indicator
24 Power indicator
Rear View
INSTALLATION
- Unpack all parts and remove protective material.
- Do not connect the unit to the mains before checking the main voltage and before all other connections have been made.
- Do not cover any vents and make sure that there is a space of several centimeters at the back of the unit for ventilation.
Operation with Mains Cable (AC)
- Connect the one end of the mains cable to the DC socket (19) and the other end to the socket.
- Turn on the unit by pressing and holding the ON/O /Play button (7) for 3-5 seconds until the Power LED lights up.
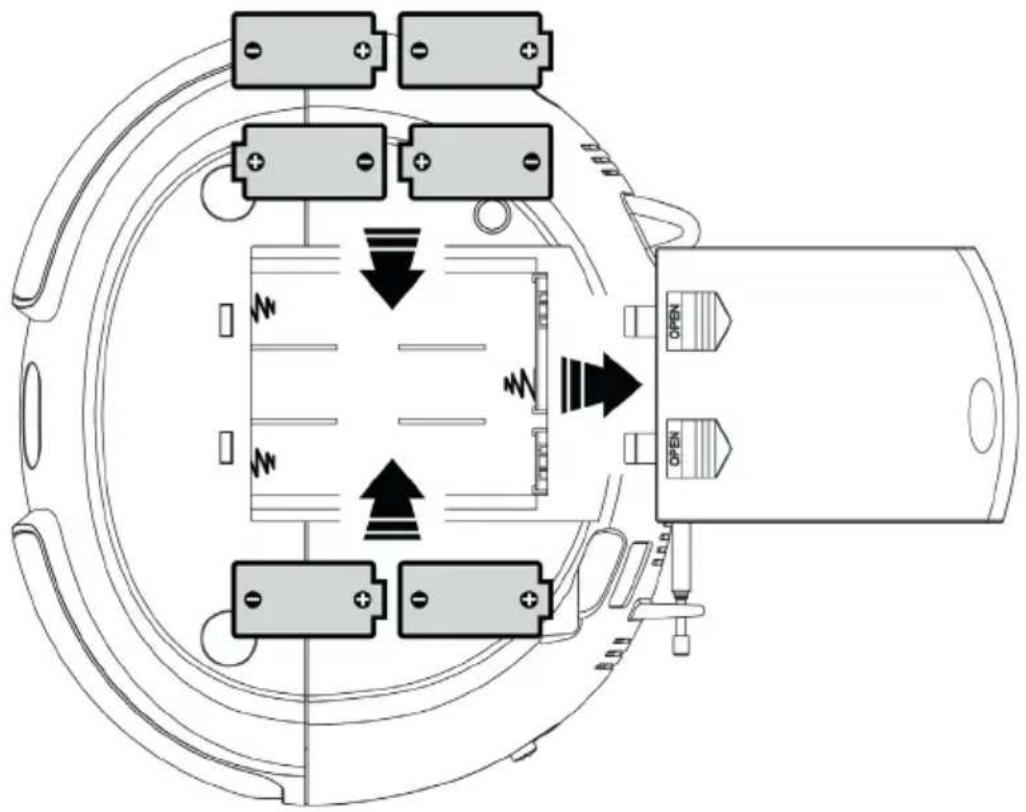
Operation with Batteries (DC)
For DC operation, please insert 6 pcs size C (UM-2) battery at batter compartment (15) as below direction and please unplug the DC socket (19) during operate with battery.
GETTING STARTED AND OPERATION
Note: If you notice that your device regularly switches itself off, this is not a malfunction but an energy saving function. The device connected to the mains automatically switches to standby mode if no media has been played for more than 15 minutes.
Radio
- Press and hold the ON/OFF/Play button (7) to turn on the unit and slide function selector (18) to select "Tuner/BT" position and keep the BT/FM selector (22) in "FM" position.
- Turn the tuning knob (13) to set the station frequency as desired.
- Adjust volume know (17) to the desired volume level.
NOTE: The receiver has a rod antenna (12) hanging at the rear cabinet. This antenna should be totally extended for best reception.
CD Playback
- Slide function selector (18) to select "CD/AUX" mode.
- Open the CD door (6).
- Place a CD with the printed side facing up inside the tray and then close the CD door.
- Focus search is performing, the LED display (1) will show the total number of tracks and total playing time.
Play/Pause mode ▶II
- Press the play/pause button (7) to start playback. The first track will start playback.
- To interrupt, press the play/pause button (7) once, and the playing time will be frozen on the LCD display (1). Press again to resume normal playback.
Stop Mode ■
If the stop button (2) is pressed during play or pause mode, system will go to stop mode.
Skip Mode (Skip up ▶Skip down )
- During play or pause mode, if the skip up button (8) is pressed. It will go to next track and display the track no. and then remain the play or pause mode.
- During play or pause mode, if the skip down button (3) is pressed, the current track will be played back from the beginning again, the original track no. is displayed and the play or pause mode remains.
- After step 2, press the skip-down button (3) again to skip to the previous track and keep the playback or pause mode.
Repeat Mode
Press the repeat button (4) during playback to select repeat function. The single or all tracks can be played as follows:

flowchart
graph LR
    A["(1) repeat 1 track"] --> B["(2) repeat all tracks"]
    B --> C["(3) off mode"]
| Play mode Indicator on LCD display | |
| Repeat 1 track LED is flashing. | |
| Repeat all tracks LED lights up. | |
| Off mode – | |
NOTES:
• The device supports normal compact discs, but NOT discs in CD-MP3 format.
• Due to AUX and CD were designed at the same position of this system. When AUX IN jack (14) plugged by 3.5 mm stereo plug. The channel will changeto AUX IN automatically and CD will stop to play. Please ensure the AUX IN jack (14) without plugged by anything before playing CD.
CD Programming
Up to 20 tacks can be programmed for disc play in any order. Before use, be sure to press the stop button (2).
- Set the CD mode and stop the CD playback.
- Press the program button (9), "P" will appear and is flashing.
- Select a desired track by pressing the skip up button ▶▶1 (8) or the skip down button ◀(2).
-
Press the Program button (9) to store the track into memory.
-
Repeat steps 3 and 4 to enter additional tracks into the memory if necessary.
- When all the desired tracks have been programmed, press the play/pause button ▶(7) to play the song in assigned order.
- Press the stop button ■ to terminate program play.
Display and Delete CD Playlist
- After programming is completed, press program button (9) to review the tracks being programmed.
- Press the stop button (2) at CD stop mode to cancel all programmed memory until the "PROG" indicator disappears on LCD display (1).
MP3 Playback via USB
The system is able to decode and playback all MP3 file which stored in the memory media via USB host.
NOTE: LED does not display anything during USB playback due to products design.
- Set the system at standby mode first or other function except USB mode.
- Plug-in the USB pen-drive with the face up and make sure it is going into completely.
Note: Connecting the USB upside down or backwards could damage the audio system or the storage media (USB thumb driver). Check to be sure the direction is correct before connection.
-
Slide the functions selector (18) to USB mode. The USB/BT indicator (10) will light up.
-
The system will start reading and playback the storage media automatically after connecting, the USB/BT indicator will change to flash mode during playback.
-
Press skip up button ▶▶(8) or skip down button ◀(2) to skip the track. Press play/pause button ▶(7) to change to stop mode.
NOTES:
- The system can detect and read the file under MP3 format only at USB mode but not other music file format.
• If you connect the system to MP3 player via the USB socket, due to variances in MP3 encoding format, some MP3 players may not be able to play via the USB socket. This is not a malfunction of the system.
- USBportdoesnotsupportconnectionwithUSBextensioncableandit is not designed for communication with computer directly.
Removing of USB
To remove the USB, turn off the power then unplug it by pulling out the USB socket directly.
AUX IN Connection
Connect the unit to any auxiliary device (i.e. MP3 player, or iPod® (not included) by connecting the AUX IN jack (14) at the rear cabinet with one end of 3.5 mm stereo cable (not provided) and the other end connect to the auxiliary device to perform the music.
- Slide function selector (18) to select "CD/AUX" mode.
- Once the plug of the 3.5 mm stereo cable is inserted into the AUX IN jack, the unit automatically switches to AUX mode.
- Adjust the volume knob (17) to the desire volume level. If the distortion is too high, reduce the volume level of your auxiliary device. Start to playback your device.
NOTE: When connected to the AUX IN jack, the CD function will be disabled. Unplug the AUX IN jack to resume CD playback function.
BT Connection and Playback
- Set the function selector (18) to "Radio/BT" position and keep the BT/FM selector (22) in "BT" position
- The BT/USB LED indicator (10) will flash, which means the BT is not yet connected and under searching mode.
- Switch on the BT feature of your BT device (such as mobile phone) and select "Harper" from the device list to connect.
- Once the BT connection has been successfully established, the BT LED (10) will light up.
- You can start playback on your external BT device and let the music play through the Boombox.
Tape Playback
General Operation
▶ Play button Press this button to start playing the tape.
▶ Fast forward button Press to start rapid tape winding in either
◀ Fast rewind button forward or reverse direction. Press the stop/eject button when the cassette spools stop turning.
■▲ Stop/eject button Press to stop all deck operation. Press again to open the cassette door.
Pause button Press to stop tape operation temporarily. Press again to resume play.
Playback
- Select tape mode by the function button (18).
- Put in the cassette tape.
- Press the play button ▶ to active playback.
- Adjust the volume up/down control (17) to the desired level.
- Use the pause button if you want to stop playback temporarily.
- Press the stop/eject button ■ when finished.
DISPOSAL CONSIDERATIONS
natural_image
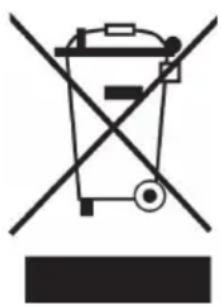
Symbol of a trash bin crossed with a diagonal line, representing no waste or discharge (no text or labels)If there is a legal regulation for the disposal of electrical and electronic devices in your country, this symbol on the product or on the packaging indicates that this product must not be disposed of with household waste. Instead, it must be taken to a collection point for the recycling of electrical and electronic equipment. By disposing of it in accordance with the rules, you are protecting the environment and the health of your fellow human beings from negative consequences. For information about the recycling and disposal of this product, please contact your local authority or your household waste disposal service.
This product contains batteries. If there is a legal regulation for the disposal of batteries in your country, the batteries must not be disposed of with household waste. Find out about local regulations for disposing of batteries. By disposing of them in accordance with the rules, you are protecting the environment and the health of your fellow human beings from negative consequences.
DECLARATION OF CONFORMITY

Manufacturer:
Chal-Tec GmbH, Wallstrasse 16, 10179 Berlin, Germany.
Importer for Great Britain:
Chal-Tec UK limited
Unit 6 Riverside Business Centre
Brighton Road
Shoreham-by-Sea
BN43 6RE
United Kingdom
The complete declaration of conformity of the manufacturer can be found at the following link: use.berlin/10035462
Chère cliente, cher client,
SOMMAIRE
The lighting flash and arrow head within the triangle is warning sign alerting you of dangerous voltage inside the product
CAUTION
RISK OF ELECTRIC SHOCK DO NOT OPEN
CAUTION: TO REDUCE THE RISK OF ELECTRIC SHOCK DO NOT REMOVE COVER (OR BACK). NO USER SERVICIABLE PARTS INSIDE. REFER SERVICING TO QUALIFIED SERVICE PERSONNEL.

The exclamation point within the triangle is a warning sign alerting you of important instructions accompanying the product
ATTENTION : POUR RÉDUIRE LES RISQUES DE CHOCS ÉLECTRIQUES, NE DÉMONTEZ AUCUN CACHE. L'APPAREIL NE CONTIENT AUCUNE PIÈCE À ENTRETENIR. ADRESSEZ-VOUS UNIQUEMENT À DES PERSONNELS QUALIFIÉS POUR LA MAINTENANCE. MISE EN GARDE : POUR RÉDUIRE LE RISQUE D'INCENDIE ET DE CHOC ÉLECTRIQUE, NE PLONGEZ PAS L'APPAREIL DANS L'EAU ET NE L'EXPOSEZ PAS À LA PLUIE OU À L'HUMIDITÉ.

natural_image
Symbol of a trash bin crossed with a diagonal line, no text or numbers presentDÉCLARATION DE CONFORMITÉ

Fabricant : Chal-Tec GmbH, Wallstraße 16, 10179 Berlin, Allemagne.
Unit 6 Riverside Business Centre
Brighton Road
Shoreham-by-Sea
BN43 6RE
United Kingdom
ÍNDICE
The lighting flash and arrow head within the triangle is warning sign alerting you of dangerous voltage inside the product
CAUTION
RISK OF ELECTRIC SHOCK DO NOT OPEN
CAUTION: TO REDUCE THE RISK OF ELECTRIC SHOCK DO NOT REMOVE COVER (OR BACK). NO USER SERVICIABLE PARTS INSIDE. REFER SERVICING TO QUALIFIED SERVICE PERSONNEL.

The exclamation point within the triangle is a warning sign alerting you of important instructions accompanying the product
natural_image
Symbol of a trash bin crossed with a diagonal line, no text or numbers presentUnit 6 Riverside Business Centre
Brighton Road
Shoreham-by-Sea
BN43 6RE
United Kingdom
INDICE
The lighting flash and arrow head within the triangle is warning sign alerting you of dangerous voltage inside the product
CAUTION
RISK OF ELECTRIC SHOCK DO NOT OPEN
CAUTION: TO REDUCE THE RISK OF ELECTRIC SHOCK DO NOT REMOVE COVER (OR BACK). NO USER SERVICIABLE PARTS INSIDE. REFER SERVICING TO QUALIFIED SERVICE PERSONNEL.

The exclamation point within the triangle is a warning sign alerting you of important instructions accompanying the product
ATTENZIONE: NON APRIRE LA CUSTODIA PER EVITARE SCOSSE ELETTRICHE E GRAVI LESIONI. ALL'INTERNO NON CI SONO COMPONENTI CHE POSSONO ESSERE RIPARATI DAL CLIENTE. RIVOLGERSI ESCLUSIVAMENTE A UN TECNICO DELL'ASSISTENZA QUALIFICATO.
ATTENZIONE: PER RIDURRE IL RISCHIO DI INCENDIO O DI SCOSSA ELETTRICA, NON ESPORRE QUESTO APPARECCHIO ALL'ACQUA, ALLA PIOGGIA O ALL'UMIDITÀ.

MESSA IN FUNZIONE E UTILIZZO
natural_image
Symbol of a trash bin crossed with a diagonal line, no text or numbers presentUnit 6 Riverside Business Centre
Brighton Road
Shoreham-by-Sea
BN43 6RE
United Kingdom
natural_image
Abstract white logo design on dark background, resembling stylized letter 'S' or wave form (no text or symbols)
- INHALTSVERZEICHNIS
- CAUTION
- RISK OF ELECTRIC SHOCK DO NOT OPEN
- CONTENTS
- WARNINGS
- CAUTION: Danger of personal injury
- CAUTION: Danger of hearing damage
- SAFETY INSTRUCTION
- General Safety Information
- Power Source
- Moisture and Water
- Heat Sources and Flames
- DEVICE OVERVIEW AND FUNCTION BUTTONS
- INSTALLATION
- Operation with Mains Cable (AC)
- Operation with Batteries (DC)
- GETTING STARTED AND OPERATION
- Radio
- CD Playback
- Play/Pause mode ▶II
- Stop Mode ■
- Skip Mode (Skip up ▶Skip down )
- Repeat Mode
- NOTES:
- CD Programming
- Display and Delete CD Playlist
- MP3 Playback via USB
- Removing of USB
- AUX IN Connection
- BT Connection and Playback
- Tape Playback
- General Operation
- Playback
- DISPOSAL CONSIDERATIONS
- DECLARATION OF CONFORMITY
- Manufacturer:
- Importer for Great Britain:
- Chère cliente, cher client,
- SOMMAIRE
- DÉCLARATION DE CONFORMITÉ
- ÍNDICE
- INDICE
- MESSA IN FUNZIONE E UTILIZZO
Brand : Auna
Model : Harper
Category : Mp3 player