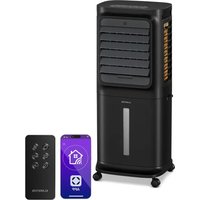
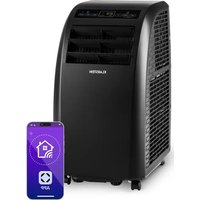
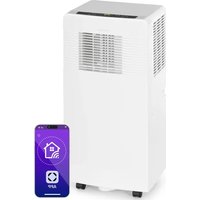
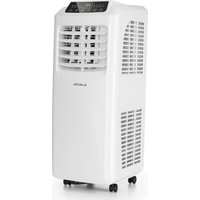
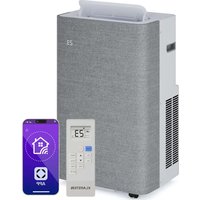
Skyscraper Frost - Air Conditioning Klarstein - Free user manual and instructions
Find the device manual for free Skyscraper Frost Klarstein in PDF.
User questions about Skyscraper Frost Klarstein
0 question about this device. Answer the ones you know or ask your own.
Ask a new question about this device
Download the instructions for your Air Conditioning in PDF format for free! Find your manual Skyscraper Frost - Klarstein and take your electronic device back in hand. On this page are published all the documents necessary for the use of your device. Skyscraper Frost by Klarstein.
USER MANUAL Skyscraper Frost Klarstein
ONNNNNNNNNNNNNNNNNNNNNNNNNNNNNNNNNNNNNNNNNNNNNNNNNNNNNNNNNNNNNNNNNNNNNNNNNNNNNNNNNNNNNNNNNNNNNNNNNNNNNNNNNNNNNNNNNNNNNNNNNNNN
KLARSTEIN
www.klarstein.com


Member of Berlin Brands Group
Handwerkerstr. 11
15366 Dahlwitz-Hoppegarten
Deutschland
Berlin Brands Group UK Limited PO Box 42
272 Kensington High Street
London, W8 6ND
United Kingdom
Dear Customer,
Congratulations on purchasing this equipment. Please read this manual carefully and take care of the following hints to avoid damages. Any failure caused by ignoring the items and cautions mentioned in the instruction manual are not covered by our warranty and any liability. Scan the QR code to get access to the latest user manual and other information about the product.

CONTENTS
Safety Instructions 18
Product Description 20
Installation and Operation 23
Use of Ice Box 26
Cleaning and Storage 27
Disposal Considerations 28
Manufacturer & Importer (UK) 28
TECHNICAL DATA
| Item number 10035819, 10035820 | |
| Power supply 220-240 V~ AC | 50-60 Hz |
| Power rating 45 W | |
| Noise (strong mode) ≤55 dB | |
| Rated wind output 100 m | 3/h |
| Rated evaporation 300 mL/h | |
| Energy efficiency ratio 3 W/W | |
| Dimensions 254 mm × 254 m | m × 820 mm |
| Weight 5 kg | |
SAFETY INSTRUCTIONS
- The appliance is only for household and indoor use.
- Check the voltage indicated on the rating plate.
- This appliance is not intended for use by persons (including children) with reduced physical, sensory or mental capabilities, or lack of experience and knowledge, unless they have been given supervision or instruction concerning use of the appliance by a person responsible for their safety. Children should be supervised to ensure that they do not play with the appliance.
- This appliance can be used by children aged from 8 years and above and persons with reduced physical, sensory or mental capabilities or lack of experience and knowledge if they have been given supervision or instruction concerning use of the appliance in a safe way and understand the hazards involved. Children shall not play with the appliance. Cleaning and user maintenance shall not be made by children without supervision.
- If the supply cord is damaged, it must be replaced by the manufacturer, its service agent or similarly qualified persons in order to avoid a hazard.
- Unplug the power plug before cleaning or repairing the product.
- Do not touch the power cord with wet hands to avoid the risk of electric shock.
- Do not pull the cord when unplug the power plug.
- Do not bend the power cord or place heavy objects on it.
- Never insert wood sticks, metal sticks and other objects into the air inlet and outlet, it may lead to current leakage, short circuit and product damage.
- Do not spray insecticides or flammable sprays around the product, it may cause damage to the product.
- Avoid direct blowing to children for long time, it may lead to child sickness or affect the health.
- Make sure that no foreign matter is adhered to the power plug and insert the plug completely.
- Exception handling: If there is any peculiar smell or abnormal sound when using the product, stop it immediately and disconnect the power.
- Do not tilt or impact the device when placing or moving it after filling water, in order to prevent water spilling. If the product has ever inclined and there is water inside, immediately pull out the plug, and dry 24 hours before starting again.
- The water level of the tank must not exceed the maximum level. When the cooling or humidification function is turned on, the water level shouldn't be lower than the minimum level.
- When the tank is filled with water, do not lift the product by holding the handle, or else the water in the tank will overflow. Please push the handle. If there is no water or little water in the tank, you can hold the handle to lift the device.
- During humidification, do not remove the air filter and wet curtain bracket. It may cause water droplets ejection from air outlet.
-
Do not turn the blades with hands, or else it will damage the synchronous motor.
-
If you go out or the device will not be used for a long time, turn it off and unplug the power cord from the outlet.
- In case of fault, please deliver it to the maintenance station or notify after-sales service centre. Don't dismantle or replace parts arbitrarily, as it may cause safety problems.
- Do not ingest battery, Chemical Burn Hazard.
- This product contains a coin / button cell battery. If the coin / button cell battery is swallowed, it can cause severe internal burns in just 2 hours and can lead to death.
- Keep new and used batteries away from children.
- If the battery compartment does not close securely, stop using the product and keep it away from children.
- If you think batteries might have been swallowed or placed inside any part of the body, seek immediate medical attention.
- The batteries contain materials, which are hazardous to the environment. they must be removed from the appliance before it is scrapped and that they are disposed of safely.
- Be aware that high humidity levels may encourage the growth of biological organisms in the environment.
- Do not permit the area around the humidifier to become damp or wet. If dampness occurs, turn the output of the humidifier down. If the humidifier output volume cannot be turned down, use the humidifier intermittently. Do not allow absorbent materials, such as carpeting, curtains, drapes, or tablecloths, to become damp.
- Never leave water in the reservoir when the appliance is not in use.
- Empty and clean the humidifier before storage. Clean the humidifier before next use.
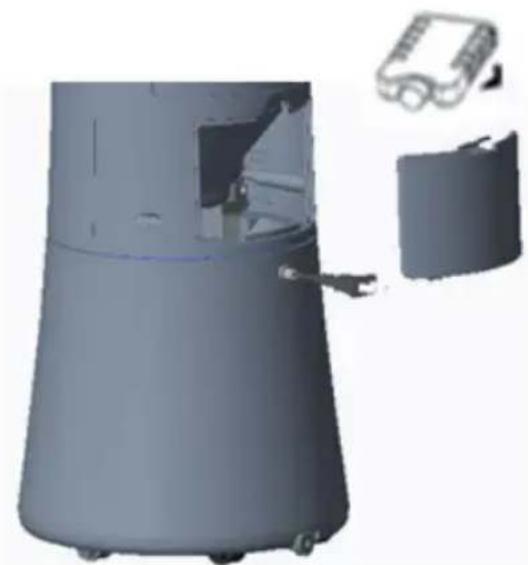
PRODUCT DESCRIPTION
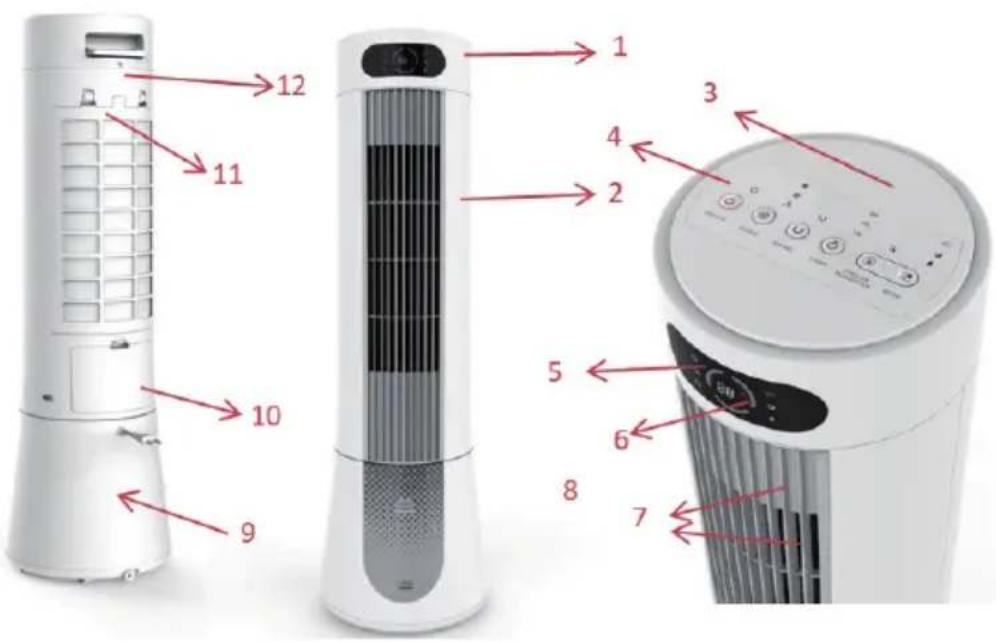
- Top shell
- Front shell
- Top cover
- Control panel
- Display window
-
Display PVC
-
Outlet grid and area
- Water gauge
- Water tank shell
- Water-filling valve
- Rear grille cover
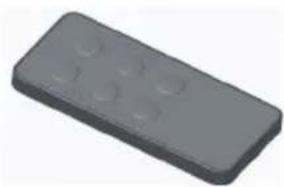
Ice box Remote control
Button panel
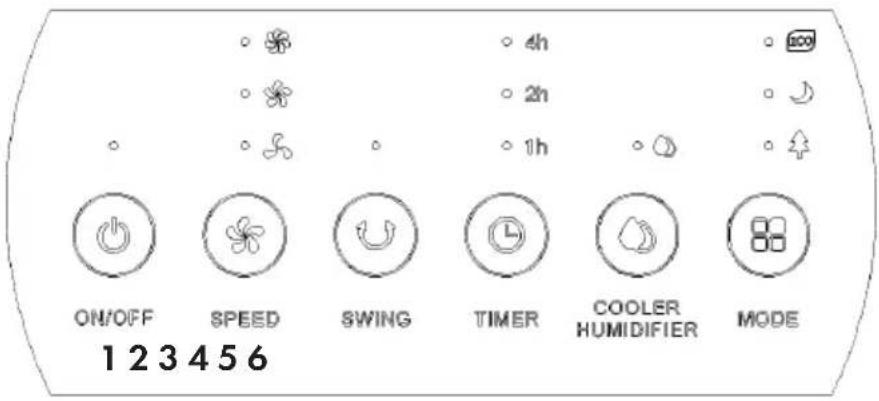
1 ON/OFF button
2 SPEED button
3 SWING button
4 TIMER button
5 COOLER/HUMIDIFIER button
6 MODE button

Display panel
1 Remote control receiver
2 ON/OFF
3 Timing/temperature display
4 Temperature
5 Timing
6 Sleep wind mode
7 Natural wind mode
8 ECO mode
9 One light ON (low level)
10 Two-light ON (medium level)
11 Three-light ON (high level)
12 Swing
13 Humidification/cooling
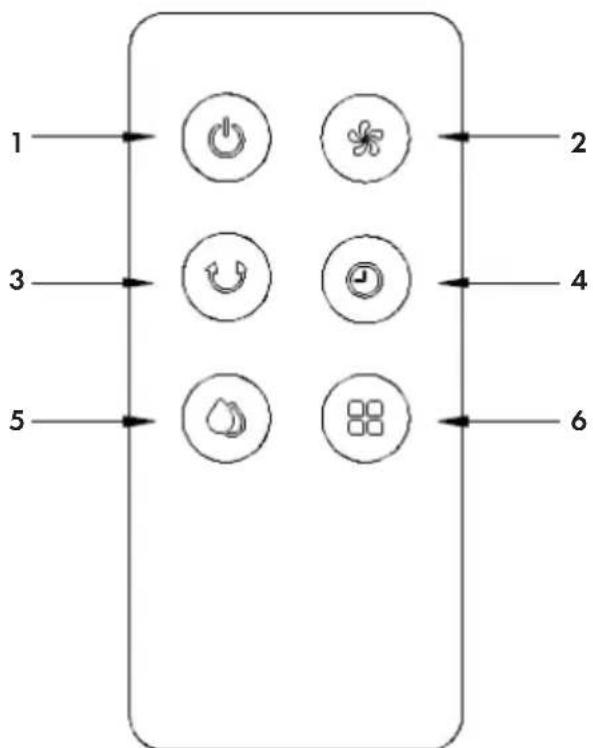
Display panel of remote control
1 ON/OFF button
4 Timing button
2 Wind speed button
5 Humidification/cooling button
3 Swing button
6 Mode button
-
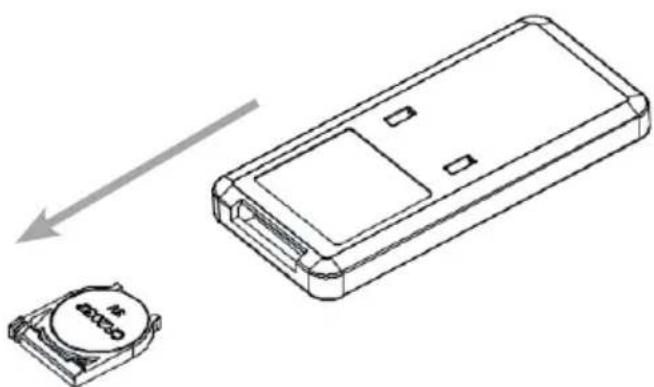
To install a new battery: open the battery compartment on the back of the remote control and insert a 3V CR2032 battery. Press down the latch, then pull the battery holder out in the direction of the arrow. Pay attention to the polarity when inserting the battery. Then slide the battery compartment back in.
-
Using the remote control: When using the remote control, hold it in the direction of the IR receiver.
INSTALLATION AND OPERATION
Operation method of function buttons
As light-touch buttons, lightly touch buttons on operation panel to trigger corresponding functions.
- The buzzer gives Bi Bi during first power-on to enter standby mode and all function indicator lights are OFF. Except ON/OFF button, other buttons are invalid.
- ON/OFF button: in standby mode, press this button to enable complete machine and light power indicator light and temperature indicator light, and show current temperature on nixie tube. During first power-on, the wind is natural and at low speed. If restarted after power-off, memorize the mode before power-off, rather than timing function. If it's sleep wind before power-off, turn to natural wind without memorizing sleep wind mode.
In power-on mode, the brightness of all LED lights reduces to 30% without operation of buttons (including remote control) for 1 min, and resumes by repressing the button, and corresponding operations are made.
In power-on mode, press this button to shutdown and the buzzer gives a sound of "Bi-". Upon shutdown, the system returns to standby mode and has no output or display.
- Wind speed button: in power-on mode, press this button to adjust the wind speed to circulate among low-gear wind medium-gear wind high-gear wind low-gear wind.... Wind speed indicator light on the top panel is lighted according to current wind speed. For wind speed indicator light on the front panel, two LEDs are lighted for each gear, and accumulated. If high-gear is enabled, all wind speed indicator lights are on.
- Swing button: in power-on mode, press this button to switch horizontal swing function, and display operation conditions by LED indicator lights on top panel and front panel.
- Timing button: in power-on mode, press this button to set timing in 1-7H with progressive increase of 1h by each pressing. If re-press timing button upon 7h, return to non-timing mode, in the same way. Nixie tube and LED give corresponding changes. After timing, nixie tube displays timing time and current temperature alternatively at an interval of 10s. If restarted after power-off, there is no memory and internal vibration used by IC has a timing accuracy of ± 3% .
-
Humidification/cooling button: in power-on mode, press this button to turn on and off humidification function and display operation conditions by LED indicator lights on top panel and front panel. If place frozen curling in the water tank to cool the water (or add cold water to water tank), it has cooling effect during humidification.
-
Mode button: after power-on, press this button to circulate among natural wind sleep wind ECO natural wind... and select a specific wind mode and display operation conditions by LED indicator lights on top panel and front panel. If natural wind, no display on LED.
Operation law at natural wind speed
Operate constantly at selected wind speed without changes.
The operation pattern at natural wind speed is as follows:
In natural wind mode, mode indicator LED is ON to display the mode. Wind speed change indicator only display initial wind speed mode, rather than wind speed with changes (i.e. natural wind mode is enabled in high-gear mode, which is only displayed by gear indicator light without switching).
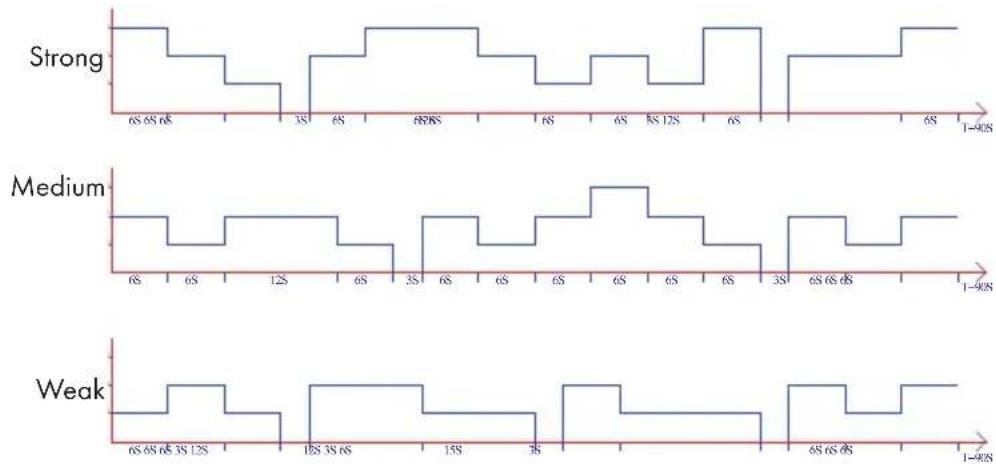
Operation rule of sleep wind: regardless of wind speed before, sleep wind mode always starts from current wind speed, which is decreased progressively in a cycle of 30min. Wind speed indicator LED also show changed wind speed in a cycle of 30min, until end of the timing and shutdown. If no timing, low-gear natural wind is operated all the time.
Operation rule of sleep wind is as follows:
-
If sleep wind mode is operated from high-gear wind speed, after operation of fan for 30min at high-gear natural wind, wind speed of the machine is changed to medium-gear wind speed and corresponding medium-gear wind speed indicator LED is ON and it operates for 30min at medium-gear natural wind; after 30min, it returns to low-gear wind speed and corresponding low-gear wind speed indicator light is ON and it operates for 30min at low-gear natural wind; then, it still operates at low-gear natural wind, until end of preset time or shutdown.
-
If sleep wind mode is enabled from medium-gear wind, after the fan is operated for 30min at medium-gear natural wind, wind speed is changed to low-gear wind speed and corresponding low-gear wind speed light is ON; after 30min of operation of low-gear natural wind, low-gear natural wind is operated all the time, until the end of preset time or shutdown.
- If sleep wind is enabled from low gear wind, the fan always operates low-gear natural wind according to change rule of low-gear natural wind and low-gear wind speed indicator LED is ON, until the end of preset time or shutdown. In sleep wind mode, gear indicator light changes wind speed indicator light with cyclic change of 30min , rather than change rule of natural wind.
ECO mode
In ECO mode, the wind speed button cannot be adjusted and wind speed indicator light is unchanged. If it exits ECO mode, wind speed is operated at previous gear.
Operating conditions of ECO mode
| Ambient temperature | Wind speed |
| < 25 °C low | |
| 25–29 °C mediuim | |
| > 29 °C high |
USE OF ICE BOX
With specific cold storage and insulation features, ice box can slowly absorbs the heat in the water to keep temperature in the water tank lower than ambient temperature for hours all the time, thus producing more nice and cool wind by the air conditioner fan.
- Place ice box in the freezing chamber of the refrigerator, until complete freezing of ice box.
- Place freezing ice box in the water tank of air conditioner fan from water-filling valve, and resume water-filling valve to keep water temperature in the water tank lower than ambient temperature after 10min.
- With two ice boxes to ensure continuous use.
Note: It is prohibited to open the cover of the ice box and swallow the content.
CLEANING AND STORAGE

Cleaning of water tank
-
Unplug the power and remove water-filling valve.
-
Wipe the scale in the water tank by using a towel with little detergent, clean it with clean water, and drain the sewage from the outlet.
Cleaning of body surface
-
Clean the body surface with a wet cloth, and prohibit directly flushing it.
-
Do not use corrosive detergent or solvent for cleaning.
-
When cleaning the body, please be sure to turn off the power switch and unplug the power cord to avoid electric shock.
Installation and use after cleaning
-
Install water curtain gloth and rear grille properly in the sequence.
-
Connect the power supply and ensure normal operation of the machine.
-
If not operated properly, please confirm whether rear grille is installed properly.
Storage
-
When not using for a long time, unplug the power cord and pack the product to avoid dust.
-
Make sure that water curtain cloth and filter screen are dry and there is no water in the water tank before packaging.
-
Store in a dry and ventilated place after packaging.
DISPOSAL CONSIDERATIONS
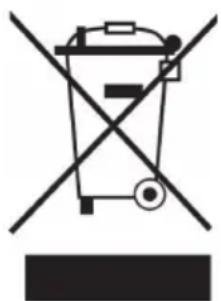
If there is a legal regulation for the disposal of electrical and electronic devices in your country, this symbol on the product or on the packaging indicates that this product must not be disposed of with household waste. Instead, it must be taken to a collection point for the recycling of electrical and electronic equipment. By disposing of it in accordance with the rules, you are protecting the environment and the health of your fellow human beings from negative consequences. For information about the recycling and disposal of this product, please contact your local authority or your household waste disposal service.
This product contains batteries. If there is a legal regulation for the disposal of batteries in your country, the batteries must not be disposed of with household waste. Find out about local regulations for disposing of batteries. By disposing of them in accordance with the rules, you are protecting the environment and the health of your fellow human beings from negative consequences.
MANUFACTURER & IMPORTER (UK)
Manufacturer:
Chal-Tec GmbH, Wallstrasse 16, 10179 Berlin, Germany.
Importer for Great Britain:
Berlin Brands Group UK Limited
PO Box 42
272 Kensington High Street
London, W8 6ND
United Kingdom
Chere cliente, cher client,
Berlin Brands Group UK Limited
PO Box 42
272 Kensington High Street
London, W8 6ND
United Kingdom
Estimado cliente:
Berlin Brands Group UK Limited
PO Box 42
272 Kensington High Street
London, W8 6ND
United Kingdom
Gentile Cliente,
PRODUTTORE IMPORTATORE (UK)
Produtlore:
Chal-Tec GmbH, Wallstraße 16, 10179 Berlin, Germania.
Berlin Brands Group UK Limited
PO Box 42
272 Kensington High Street
London, W8 6ND
United Kingdom


KLARSTEIN