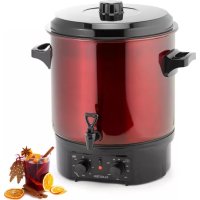
Biggie - Water dispenser Klarstein - Free user manual and instructions
Find the device manual for free Biggie Klarstein in PDF.


| Product type | Multi-purpose water dispenser / sterilizer |
| Brand | Klarstein |
| Model | Biggie |
| Power supply | 220-240 V ~ 50/60 Hz |
| Power | 1800 W |
| Tank capacity | 25 L |
| Dimensions (W × D × H) | 45 × 41.7 × 48.5 cm |
| Weight | 4.5 kg |
| Temperature range | 38 °C to 100 °C |
| Timer | 1 to 120 minutes + continuous ON mode |
| Functions | Hot water dispensing, sterilization, gentle cooking, keep warm |
| Display | Heating and keep warm indicator lights |
| Faucet | Yes, removable for cleaning |
| Removable grid | Yes |
| Safety | Overheat protection and automatic shut-off in case of no water |
| Maintenance | Clean with damp cloth, descale with citric acid or vinegar |
| Body material | Enameled steel |
| Included accessories | Removable grid, lid |
| Usage | Domestic and similar (offices, hotels) |
| Article number | 10048312 |
Frequently Asked Questions - Biggie Klarstein
User questions about Biggie Klarstein
0 question about this device. Answer the ones you know or ask your own.
Ask a new question about this device
Download the instructions for your Water dispenser in PDF format for free! Find your manual Biggie - Klarstein and take your electronic device back in hand. On this page are published all the documents necessary for the use of your device. Biggie by Klarstein.
USER MANUAL Biggie Klarstein
KLARSTEIN
www.klarstein.eu

area
| Category | Value | | -------- | ----- | | A | 100 | | B | 100 | | C | 100 | | D | 100 | | E | 100 | | F | 100 | | G | 100 | | H | 100 | | I | 100 | | J | 100 | | K | 100 | | L | 100 | | M | 100 | | N | 100 | | O | 100 | | P | 100 | | Q | 100 | | R | 100 | | S | 100 | | T | 100 | | U | 100 | | V | 100 | | W | 100 | | X | 100 | | Y | 100 | | Z | 100 |INHALT
natural_image
Symbol of a trash bin with crossed lines indicating no waste or discharge, and a solid black rectangle below (no text or labels)Congratulations on purchasing this device. Please read the following instructions carefully and follow them to prevent possible damages. We assume no liability for damage caused by disregard of the instructions and improper use. Scan the QR code to get access to the latest user manual and more product information.

CONTENT
Safety Instructions 20
Product Overview 23
Before first use 24
Operation
25
Preservation of food 26
Cooking Tables 29
Cleaning and Care 30
Disposal Considerations 31
Manufacturer & Importer (UK) 31
TECHNICAL DATA
| Item number 10048312 | |
| Power supply 220-240 V ~ 50/60 Hz | |
| Weight 4.5 kg | |
| Size (LxWxH) 45x41.7x48.5 cm | |
| Power consumption 1800 W | |
| Water tank capacity 25 L |
SAFETY INSTRUCTIONS

CAUTION
Risk of burns! The unit becomes hot during use. Only touch the controls and handles so that you do not burn yourself.
- Treat the instructions for use as part of the appliance itself, and pass them on to anyone else who uses it.
- Please check that the voltage on the product label matches that of your plug socket.
- This product can be used by children aged 8 and over, provided they are supervised, have been instructed in the safe use of the appliance and understand the possible risks.
• Children must not play with the appliance. - Cleaning and maintenance must not be performed by children under the age of 8 unless supervised.
- Children under 8 years old must be kept away from the appliance and its power cord.
- The device may be used by persons with reduced physical or mental abilities, or lack of experience and knowledge, provided they are under supervision or have been instructed in the safe use of the appliance and understand the potential dangers.
- If the appliance's power cord is damaged, it must be replaced by the manufacturer, a service technician, or a similarly qualified person to prevent dangerous situations.
- Do not operate the appliance if the cord or plug is damaged, or if the appliance malfunctions, is dropped or damaged in any way.

CAUTION
Risk of electric shock! Turn the appliance off and unplug the power cord before cleaning, servicing or repairing the appliance.
- Return the appliance to the manufacturer or the nearest authorised service agent for examination, repair, or electrical or mechanical adjustment.
- Before replacing any accessories or parts that move during operation, or before assembly, disassembly, cleaning or maintenance, turn off the appliance and disconnect it from the mains by pulling the power cord out of the socket.
- Always unplug the appliance from the power supply when leaving it unattended, and before assembly, disassembly or cleaning.
• Take care when handling the appliance to avoid injury (e.g. burns or scalding). - The metal housing of the appliance may become hot during operation.
- Do not plug or unplug the socket with wet hands, and do not pull the plug by the power cord!
- This product is intended for use in the home and similar environments, such as shops, offices, hotels, motels and other residential facilities that provide
breakfast. It is not intended for commercial use!
- When the appliance is in operation, ensure that pets, plants and insects do not come into contact with it.
- Do not use the appliance with a timer or any other external device that turns the appliance on automatically, as there is a risk of fire.
- Do not immerse the appliance in water, either fully or partially! Do not wash it under running water.
- Only use the appliance in the working position in areas where there is no risk of it being knocked over, and at a sufficient distance from heat sources (e.g. heaters, stoves, cookers, ovens and grills), flammable objects (e.g. curtains and drapes) and wet surfaces (e.g. sinks and washbasins).
- Do not turn the appliance on when it is empty or without water. Do not fill the container with more liquid than is indicated by the MAX markings.
- Do not use the appliance near explosive materials or in areas where there is a risk of explosion (e.g. petrol stations).
- Use the appliance in areas with sufficient air circulation.
- Do not use the appliance in places with extreme temperatures, excessive humidity or dust, or in the proximity of magnetic fields (e.g. near credit cards).
- Protect it from direct sunlight.
- This appliance is not designed for continuous operation!
- Do not touch the outer surfaces while the kettle is in operation as they will be hot and there is a risk of burning.
- Do not move the appliance when it is hot, as it may tip over and cause a burning injury.
- Do not modify the surface of the appliance in any way (e.g. by using self-adhesive wallpaper or foils).
- Do not leave any objects (e.g. protective gloves or kitchen towels) on the lid while the appliance is in use, as these could cover the steam escape openings.
- Do not allow water or food containing water to freeze in the pot. This could crack the pot.
- Do not place the appliance on unstable, fragile or flammable surfaces (e.g. glass, paper, plastic, varnished wood and various fabrics/tablecloths). Use plastic or wooden kitchen utensils to stir and scoop food, as metal utensils could damage the inner pot's surface.
- Only use the appliance in the working position in places where there is no risk of it being knocked over, and keep it at a sufficient distance from sources of heat (e.g. heaters, electric or gas stoves/cookers) and wet surfaces (e.g. kitchen sinks/wash basins).
- Do not use the appliance in an environment saturated with explosive or flammable vapours.
- Be careful when lifting the lid and always remove it away from yourself.
- Use the handles to carry the appliance!
- This appliance conforms to fire safety requirements according to EN 60335-2-6. According to this standard, it is a device that can be used on a table or similar surface, provided that:
- There is a safe distance of at least 500 mm from surfaces of flammable materials in the direction of the main heat radiation and 100 mm in other directions.
- The appliance is equipped with a heat safety lock that disconnects the power supply if water boils away or if the device is turned on when empty. If this happens, unplug the appliance and allow it to cool down. Do not fill the appliance with cold water to cool it down more quickly as this could reduce the life of the heating element.
- Check the condition of the appliance's power cord regularly.
- The power cord must not come into contact with sharp or hot objects, open flames or water, or be bent over sharp edges.
- Never place it on hot surfaces or allow it to hang over the edge of a table.
- Hitting, stumbling or pulling the power cord, for example by children, could cause the appliance to tip over or fall and result in serious injury!
- If you need to use an extension cord, make sure that it is undamaged and complies with the relevant standards.
- Never use the appliance for any purpose other than that described in these instructions!
- Only use genuine accessories from the manufacturer with the appliance.
- The manufacturer is not responsible for any damage caused by improper use of the appliance (e.g. burning, scalding or fire) if the above safety warnings are not followed.
Note: To enjoy boiled meat and vegetables safely, always boil these foods twice: The second heating after at least 24 hours. You can find more information about this at: https://www.bzfe.de/inhalt/einkochen-1348.html (Federal Centre for Nutrition).
PRODUCT OVERVIEW
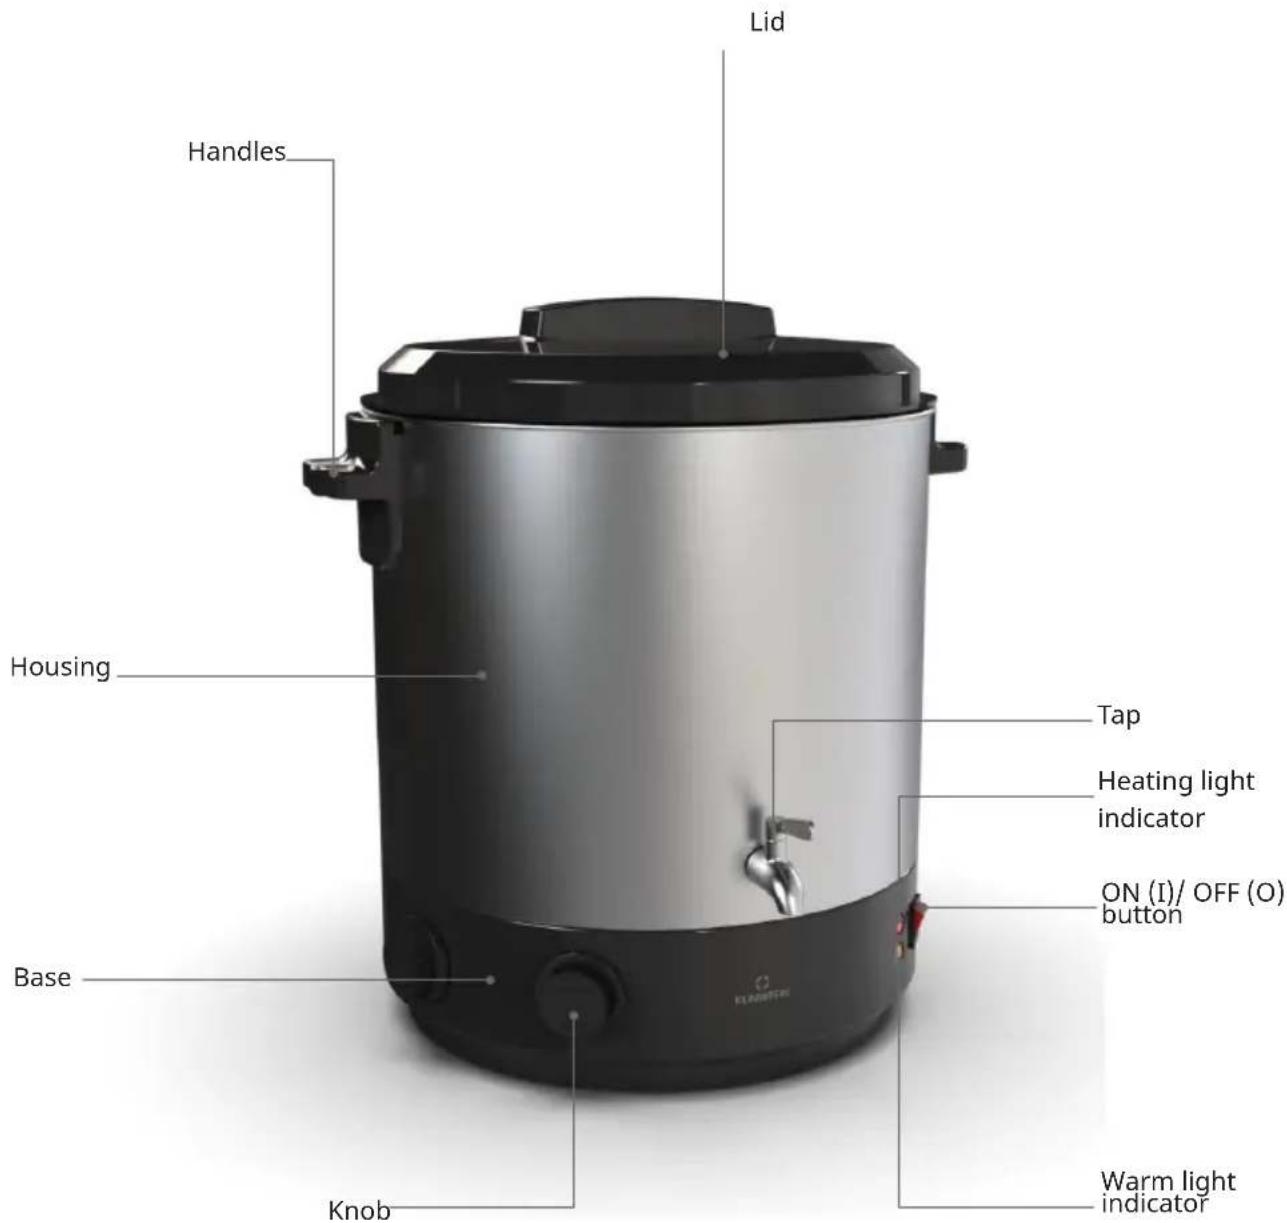
BEFORE FIRST USE
- Remove all packaging materials and take out the appliance and its accessories.
- Remove all adhesive foils, stickers or paper from the appliance.
- Wash all parts that will come into contact with food in hot soapy water, rinse thoroughly and either wipe dry or leave to dry before first use.
- Ensure that the power supply cord is undamaged and is not positioned underneath the appliance or over any sharp or hot surfaces.
- The socket must be easily accessible so that the appliance can be quickly disconnected from the mains in case of danger.
- Pour clean drinking water into the appliance up to a maximum of 6 litres.
- Connect the power cord to the electrical socket. Press the ON/OFF switch to the 'I' position (the keep warm light will come on to indicate a connection to the mains).
- Set the temperature regulator to the “100” position and the timer regulator to the “ON” position (the operating light indicator will turn on). Wait until the water reaches boiling point (the operating light indicator will turn off and the keep warm indicator light will turn on), then leave it to boil for at least 10 minutes.
- Leave the appliance to cool down, then pour out the water. Any potential short-lived smoke or smell is not a fault and does not constitute a reason for returning the appliance. Place the appliance on a solid, flat, dry surface (e.g. a kitchen table) out of the reach of children.
- If you are going to use the appliance for preserving food in jars, insert the removable grid and fill the container with the appropriate amount of water for the type and quantity of food you are preparing.
- Plug the power supply into an electrical socket. The preserving pot is now ready for use.
- Operating the preserving pot is easy and consists of two main control features.
- The temperature regulator and the timer regulator. To finish or discontinue the heating process, turn both regulators counter-clockwise to the "OFF/oC" position.
- Then turn the ON/OFF switch to the "O" position (all indicator lights will turn off) and disconnect the power cord from the wall socket.
OPERATION
The appliance can be used both for boiling food and for heating water and other liquids.
General
- This appliance has multiple uses: preserving, cooking, warming up food in water, preparing hot drinks, blanching vegetables, and more. Always warm viscous foods slowly and stir constantly to prevent burning.
- If the appliance continues to cook when empty, an additional safety feature prevents overheating and drying out.
- Allow the appliance to cool down thoroughly before refilling it with water to avoid burns from hot steam and to protect the enamel surface from damage.
- When using the appliance for the first time, an odour may be produced, but this will disappear quickly.
Over-heating protection
- The preserving pot is equipped with a safety heat switch that disconnects the heating element if there is insufficient or no water.
- If no water is added, the preserving pot will automatically switch off and must be allowed to cool.
Note: If the appliance does not work after being connected to the electrical outlet, press the button located at the bottom of the appliance.
Temperature settings
The appliance is equipped with a built-in thermostat that enables you to set the temperature from approximately 38 °C to 100 °C (the boiling point) with an accuracy of ±8% . Once the set temperature has been reached, it is automatically maintained depending on the timer setting.
Setting the timer
The timer regulator can be used in two modes:
Automatic mode "1-120"
The timer allows you to set a time between 1 and 120 minutes. To increase the desired time, turn the regulator clockwise. To decrease it, turn it anticlockwise. When the set time runs out, the appliance will turn off and emit one beep.
Continuous operation mode "ON"
In this mode, the heating is not limited by time. It is suitable for heating food that needs to be kept at a certain temperature for more than 120 minutes. To activate this mode, turn the regulator counter-clockwise until it clicks into the 'ON' position. Never turn the appliance on without water. Never leave the appliance running unattended — keep an eye on it throughout the entire food preparation process!
Note: In the "OFF"-mode, the timer is off.
The appliance is equipped with a temperature indicator switch. When you turn it on (position "I"), the appliance will beep loudly to indicate that the set temperature has been reached. This is useful when you need to time the heating process from the moment the pot reaches the set temperature. This allows you to avoid the time difference caused by the time it takes the pot to reach the set temperature (this time varies depending on the volume of water, ambient temperature, etc.).
PRESERVATION OF FOOD
Preservation is a traditional and proven method of keeping food. The preserving pot can also be used for cooking, heating and preparing hot drinks, such as mulled wine or punch, as well as blanching vegetables. Follow the general rules for cooking and preserving. You will find a few of these below:
- It is important that the food is clean.
- Fruit and vegetables should be of good quality and ripe, and thoroughly cleaned. Rinse and dry the food thoroughly.
- Green beans and peas will last longer if you blanch them first.
- Rinse jars, bottles and their lids in hot soapy water.
- Rinse with clean water and leave to dry.
- Leave the lids in clean water until you use them.
- Do not use sealing lids, jars or bottles that are worn or damaged.
- Fill the containers up to 2 cm from the top. When preserving soft foods such as purées, leave 3–4 cm of space at the top.
- When making smoked goods, only fill the jars up to three-quarters of their volume.
- Close and seal the jars using screw-on lids, spring fasteners or clips.
- Close the jars (or bottles, etc.) immediately after conservation.
- Always place the jars on the removable grid to ensure good circulation of boiling water around them, resulting in faster heating.
- You can use jars or containers of various sizes in this pot.
- The jars must be immersed in water up to 3/4 of their height. Immerse the largest jar up to 3/4.
- Jars that are fully immersed are sealed, which is why no water gets to them.
-
The temperature of the water you pour into the container should be approximately the same as the temperature inside the jars.
-
Look up the preservation times and temperatures in your recipes and in other books about preserving food.
- Preservation only starts when the set temperature is reached.
- Remove the jars once the required preservation time has elapsed.
- Store the preserved food in a cool, dark place.
- It is advisable to write the preservation date and contents on the jars.
Additional information on preservation
- Preserving involves preserving food without using any chemical additives. The heat generated kills any germs in the food being preserved. At the same time, the jar will be sealed in a germ-free, airtight manner due to the vacuum produced.
- Use sterilisation or pasteurisation depending on the type and quantity of food to be preserved. To sterilise, heat the food to at least 100 °C. To pasteurise, heat to 80 °C. Pasteurisation is sufficient for household use. Use relevant bottling jars with screw or locking caps with rubber seal rings.
- To safely enjoy boiled meat and vegetables, always boil these foods twice, with the second boil taking place at least 24 hours after the first. More information can be found at https://www.bzfe.de/inhalt/einkochen-1348.html (Federal Centre for Nutrition).
Preservation steps
- Place the removable grid at the bottom of the container.
- Place the mason jars inside (see Tips).
- Fill the container with the required amount of water.
- Put the lid on.
- Plug the supply cord into an electrical outlet.
- Set the desired heating temperature by turning the temperature knob between 30 °C and 100 °C.
- Set the desired time.
Notes
- The operation indicator light turns on and off during the heating process. This indicates that the thermostat is switching on; it is not an error of the appliance.
- The liquid must be added into the appliance before turning it on. Make sure water does not come out of the container during long-lasting heating!
- The heating-up time is not included in the preservation time. When the selected temperature has been reached, the timer will start counting down as soon as you twist it, at which point the preservation time begins. The time it takes to reach the set temperature varies depending on factors such as the volume of water and the ambient temperature.
- Do not drain liquids containing solid particles, e.g. soups or goulash. Solid particles can clog the tap. The appliance is equipped with a release valve to make it easier to release liquids from the container.
• However, if you are preparing denser foods (e.g. goulash), you must add the liquid to the appliance before turning it on. Make sure that the water does not boil out of the container during long-lasting heating!
- Do not overfill the preserving pot container; leave at least 4 cm of free space at the top.
- The outer part of the appliance will warm up during heating. Take care not to touch the hot spots.
• Always use the container with a lid.
- Hot water may remain on the inside of the lid. Take care to avoid injury (scalding or burning).
Boiling
- Place the rack in the cooker.
- Fill the food into jars and close the jars.
- Stack the jars on the rack.
Note: For smaller glasses, more glasses will fit into the device.
- Fill the cooker with enough water to cover the highest glass of 3/4 with water. Do not exceed the maximum mark.
- Put on the lid and turn on the appliance. Please note that a timer must be set for the appliance to start heating. Depending on the fill level and target temperature, this can take up to 90 minutes. As soon as the set temperature is reached, the appliance automatically switches from heating mode to warm-keeping mode.
- Then set the temperature and time according to the cooking table. The time indicated there applies from the point at which the target temperature is reached. The timer does not take into account the lower temperature during the warm-up time due to the design.
- After the set time has elapsed, the cooker automatically switches off.
- Turn off the appliance before unplugging it.
- Place the appliance in the sink or tub and drain the water by pressing the tap down. Let the appliance cool down.
- After the appliance has cooled down, remove the glasses with oven gloves or pliers as they will be hot for a long time. Allow the glasses to cool completely.
COOKING TABLES
Note: The times shown in the table are only indicative. The time taken to reach the set temperature varies greatly and depends on multiple factors. The times in the table apply from the moment the set temperature is reached.
| Fruit °C Min Vegetables °C Min | |||||
| Currant 85 20 Cauliflower 100 90 | |||||
| Puree 90 30 Bean pods 100 120 | |||||
| Pears 90 30 Thick beans 100 90 | |||||
| Strawberries 75 25 Peas | 100 120 | ||||
| Blueberries | 85 25 Pickled vegetable | 90 30 | |||
| Raspberries 80 30 Carrot (small) | 100 90 | ||||
| Cherries | 80 30 Turnip | 100 90 | |||
| Mirabelle plums | 90 30 Pumpkins | 90 30 | |||
| Peaches | 90 30 Brussels sprouts | 100 120 | |||
| Apricots | 90 30 Asparagus | 100 120 | |||
| Rhubarb | 100 30 Kale | 100 120 | |||
| Gooseberries | 80 30 Tomatoes | 90 30 | |||
| Plums | 90 30 Cucumbers | 90 30 | |||
| Apples | 90 30 Meat | °C Min | |||
| Note: The preserving jars will be hot after boiling. Use oven gloves or pliers to remove them. Keep the preserves dry, cool and in the dark. | Roasted meat, pre-roasted | 100 75 | |||
| Goulash | 100 75 | ||||
| Poultry, Game, Roast | 100 75 | ||||
| Schnitzel, chops, roast | 100 75 | ||||
| Smoked meat products 100 120 | |||||
CLEANING AND CARE
- Allow the unit and the unit to cool down completely before cleaning.
- Never immerse the appliance in water. Always turn the appliance off by unplugging it from the outlet before carrying out any maintenance.
- Do not use coarse or abrasive cleaning agents, such as sharp objects, peelers, chemical solvents, thinners, oven cleaners or other solvents.
- Wipe the outer surface with a damp soapy cloth. Rinse the inside of the container and remove any lime scale deposits with a solution of citric acid or vinegar (then boil with clean water).
- You can take the release valve apart and clean it separately. Never dry plastic die-cast items over a heat source (e.g. a stove or gas/electric cooker).
- If the power cord becomes soiled, wipe it with a damp cloth. It is normal for the colour of the surface to change over time. However, this change does not affect the surface characteristics and cannot be the subject of a warranty complaint!
Grommet valve cleaning
- Grip the tap with one hand and hold the plastic nut inside the tank with the other. Turn the tap anticlockwise to unscrew it.
- You can then unscrew the knurled cap at the top of the tap to release the tap mechanism.
- Wash all the other parts in hot, soapy water, then rinse them thoroughly and leave to dry completely.
- Insert the grommet into the valve groove in the reverse sequence.
- Assemble the individual parts in the correct order and position, pulling the valve tight with the appropriate force.
Storage
The appliance must be stored safely. It should be stored in a clean, dry, dust-free place that is out of the reach of children and anyone who is unable to operate the appliance safely.
DISPOSAL CONSIDERATIONS
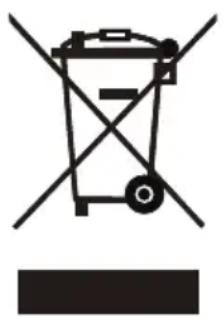
natural_image
Symbol of a trash bin with crossed lines indicating no waste or discharge, and a solid black rectangle below (no text or labels)If there is a legal regulation for the disposal of electrical and electronic devices in your country, this symbol on the product or on the packaging indicates that this product must not be disposed of with household waste. Instead, it must be taken to a collection point for the recycling of electrical and electronic equipment. By disposing of it in accordance with the rules, you are protecting the environment and the health of your fellow human beings from negative consequences. For information about the recycling and disposal of this product, please contact your local authority or your household waste disposal service.
MANUFACTURER & IMPORTER (UK)
Chal-Tec GmbH, Mühlenstraße 25, 10243 Berlin, Germany.
Contact: info@klarstein.com
Estimado cliente:
ÍNDICE
natural_image
Symbol of a trash bin with crossed lines indicating no waste or discharge, and a solid black rectangle below (no text or labels)SOMMAIRE
natural_image
Symbol of a trash bin with crossed lines and a horizontal bar below (no text or labels)INDICE
natural_image
Symbol of a trash bin with crossed lines indicating no waste or discharge, and a solid black rectangle below (no text or labels)area
| Category | Value | | -------- | ----- | | 1 | 100 | | 2 | 100 | | 3 | 100 | | 4 | 100 | | 5 | 100 | | 6 | 100 | | 7 | 100 | | 8 | 100 | | 9 | 100 | | 10 | 100 | | 11 | 100 | | 12 | 100 | | 13 | 100 | | 14 | 100 | | 15 | 100 | | 16 | 100 | | 17 | 100 | | 18 | 100 | | 19 | 100 | | 20 | 100 | | 21 | 100 | | 22 | 100 | | 23 | 100 | | 24 | 100 | | 25 | 100 | | 26 | 100 | | 27 | 100 | | 28 | 100 | | 29 | 100 | | 30 | 100 | | 31 | 100 | | 32 | 100 | | 33 | 100 | | 34 | 100 | | 35 | 100 | | 36 | 100 | | 37 | 100 | | 38 | 100 | | 39 | 100 | | 40 | 100 | | 41 | 100 | | 42 | 100 | | 43 | 100 | | 44 | 100 | | 45 | 100 | | 46 | 100 | | 47 | 100 | | 48 | 100 | | 49 | 100 | | 50 | 100 | | 51 | 100 | | 52 | 100 | | 53 | 100 | | 54 | 100 | | 55 | 100 | | 56 | 100 | | 57 | 100 | | 58 | 100 | | 59 | 100 | | 60 | 100 | | 61 | 100 | | 62 | 100 | | 63 | 100 | | 64 | 100 | | 65 | 100 | | 66 | 100 | | 67 | 100 | | 68 | 100 | | 69 | 100 | | 70 | 100 | | 71 | 100 | | 72 | 100 | | 73 | 100 | | 74 | 100 | | 75 | 100 | | 76 | 100 | | 77 | 100 | | 78 | 100 | | 79 | 100 | | 80 | 100 | | Note: The actual values are not provided in the code. I have used the label 'Value' as a placeholder for the value detection. You would need to run the code to get the actual values from the code list. Please note that the actual values would be the result of this example. You would need to run the code to get the actual values from the code list. You would need to run the code to get the actual values from the code list. You would need to run the code to get the actual values from the code list. You would need to run the code to get the actual values from the code list. You would need to run the code to get the actual values from the code list. You would need to run the code to get the actual values from the code list. You would need to run the code to get the actual values from you would need to run the code.
KLARSTEIN

- CONTENT
- SAFETY INSTRUCTIONS
- CAUTION
- PRODUCT OVERVIEW
- BEFORE FIRST USE
- OPERATION
- General
- Over-heating protection
- Temperature settings
- Setting the timer
- Automatic mode "1-120"
- Continuous operation mode "ON"
- PRESERVATION OF FOOD
- Additional information on preservation
- Preservation steps
- Notes
- Boiling
- COOKING TABLES
- CLEANING AND CARE
- Grommet valve cleaning
- Storage
- DISPOSAL CONSIDERATIONS
- MANUFACTURER & IMPORTER (UK)
- Estimado cliente:
- ÍNDICE
- SOMMAIRE
- INDICE
- KLARSTEIN
Brand : Klarstein
Model : Biggie
Category : Water dispenser