
Abbey - Water dispenser Klarstein - Free user manual and instructions
Find the device manual for free Abbey Klarstein in PDF.

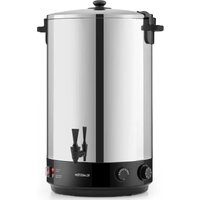
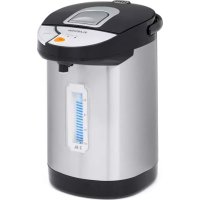
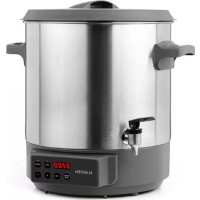
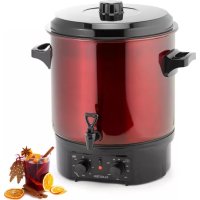
| Product type | Water dispenser / Multifunction electric kettle |
| Brand | Klarstein |
| Model | Abbey |
| Tank capacity | 25 L / 40 L / 60 L depending on version |
| Power supply | 220-240 V ~ 50-60 Hz |
| Adjustable temperature range | 30 °C to 100 °C |
| Adjustable heating duration | 0 to 180 minutes |
| Display | Digital screen with target and current temperature, duration |
| Main functions | Canning, heating liquids, keep warm |
| Service taps | 1 tap for liquid dispensing |
| Tank material | Stainless steel (estimated) |
| Lid | With removable lid |
| Interior grid | Removable grid for jars |
| Safety | Automatic shut-off, audible beep at end of cycle, overheating protection |
| Maintenance and cleaning | Clean the tank with a soft brush, wipe the housing with a damp cloth |
| Approximate dimensions (25 L) | Approximately 40 x 35 x 40 cm (estimated) |
| Approximate weight (25 L) | Approximately 6 kg (estimated) |
| Included accessories | Grid, lid, tap |
| Repairability | Repairs by a qualified specialist only |
| Warranty | Standard manufacturer's warranty (usually 2 years) |
Frequently Asked Questions - Abbey Klarstein
User questions about Abbey Klarstein
0 question about this device. Answer the ones you know or ask your own.
Ask a new question about this device
Download the instructions for your Water dispenser in PDF format for free! Find your manual Abbey - Klarstein and take your electronic device back in hand. On this page are published all the documents necessary for the use of your device. Abbey by Klarstein.
USER MANUAL Abbey Klarstein
INHALTSVERZEICHNIS
Member of Berlin Brands Group
Handwerkerstr. 11
15366 Dahlwitz-Hoppegarten
Deutschland
natural_image
Symbol of a trash bin crossed with a diagonal line, no text or numbers presentBerlin Brands Group UK Ltd
PO Box 1145
Oxford, OX1 9UW
United Kingdom
Dear Customer,
Congratulations on purchasing this device. Please read the following instructions carefully and follow them to prevent possible damages. We assume no liability for damage caused by disregard of the instructions and improper use. Scan the QR code to get access to the latest user manual and more product information.

CONTENTS
Safety Instructions 16
Before First Use 16
Device Overview 17
Operation 18
Preserving 20
Preservation Table 21
Heating Liquids 22
Cleaning and Care 22
Disposal Considerations 23
Manufacturer & Importer (UK) 23
TECHNICAL DATA
| Item number 10041838 1 | 0041839 10041840 | ||
| Gross volume 25 L 40 L 60 L | |||
| Power supply 220-240 V ~ 50-60 Hz | |||
| Adjustable temperature 30-100 °C | |||
| Adjustable time 0-180 minutes | |||
SAFETY INSTRUCTIONS
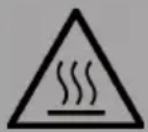
CAUTION
Risk of burns! The device becomes very hot during use. To avoid burning yourself, only touch the controls and the handles.
- Check the device and the power cord regularly for any damage. Do not use the device if the power cord or the device is damaged.
- When you are no longer using the device, switch it off and pull the plug out of the socket. Let the device cool down completely before cleaning or storing it.
- Place the appliance on a stable, level and heat-resistant work surface. Leave at least 20 cm of space around the device from walls and other devices.
- Never immerse the unit completely in water or other liquids, otherwise the electrical parts could be damaged.
- Children from the age of 8 years and mentally, sensory and physically impaired persons may only use the device if they have been informed in detail about the functions and safety precautions by a supervisor responsible for them beforehand and understand the associated risks.
- Do not attempt to repair the device yourself. Repairs may only be carried out by qualified specialists.
- Do not move the device while it is in operation. Be very careful when moving equipment with hot liquids.
- Do not use any accessories other than those supplied.
Note: To safely enjoy cooked meat and vegetables, always cook these foods twice: The second heating after at least 24 hours. You can find more information at: https://www.bzfe.de/inhalt/einkochen-1348.html (Federal Centre for Nutrition)
BEFORE FIRST USE
- Before using the cooker for the first time, boil fresh water once to remove dust and production residues. To do this, fill with 6 litres of water and set the thermostat to MAX.
-
To start the cooker, set the TIMER to the desired time. After you have set the time, the display fl ashes 3 times to confi rm and the cooker starts. Alternatively, press the control on the right to confi rm and start the cooker. When the time is up, the appliance switches off automatically.
-
Let the device cool down and remove the water.
-
You can now use the cooker.
DEVICE OVERVIEW
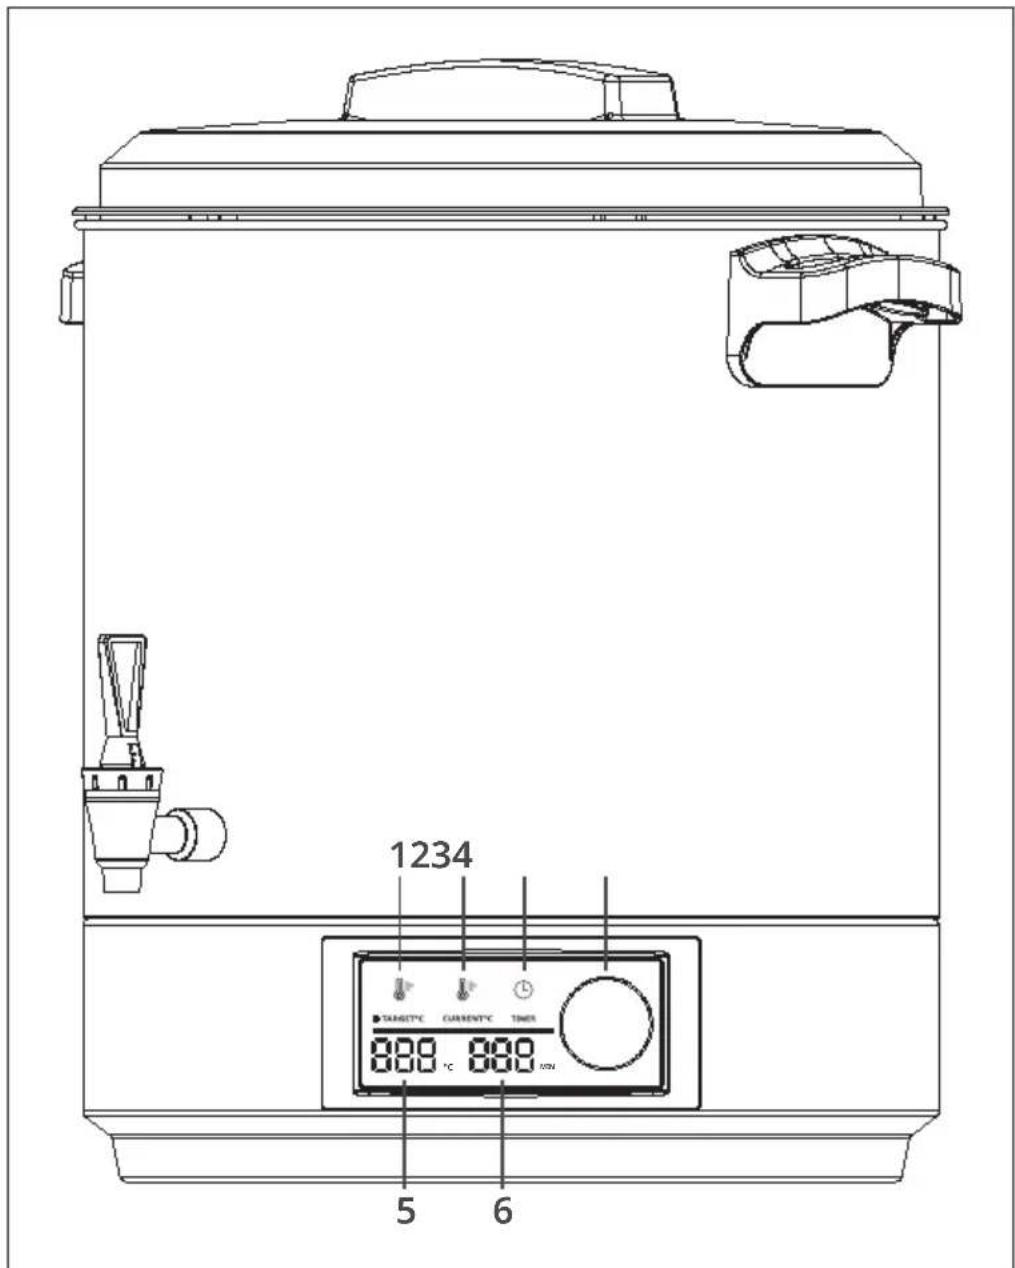
| 1 Target temperature 4 | Control knob(set time/temperature) | |
| 2 Current temperature 5 Temperature display | ||
| 3 Set time 6 Time display |
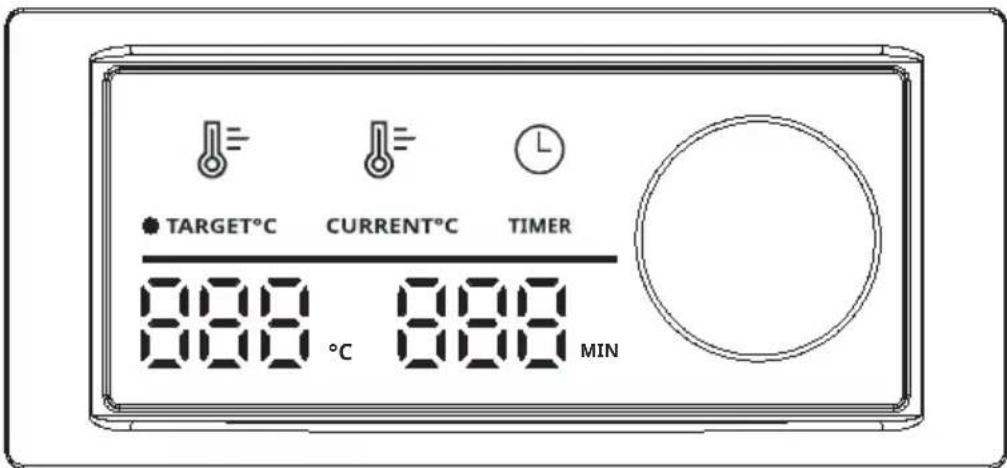
OPERATION
- When you insert the plug of the appliance into the socket, a beep sounds. The screen lights up and the temperature and time are displayed on the screen (for example: temperature display: 80 °C; time display: 30 MIN). If no button is pressed within 10 minutes, the screen will go dark again.
-
Press the temperature icon on the screen to adjust the temperature. The temperature symbol starts flashing. The temperature can now be adjusted by turning the dial. Turning the control dial clockwise increases the temperature by 1 °C at a time. If you turn the control dial anticlockwise, the temperature is lowered by 1 °C at a time (the lowest temperature that can be set is 30 °C; the highest temperature that can be set is 100 °C). Each time you turn it, a sound is heard and the screen lights up. If no buttons are pressed and the control dial is not turned, the temperature display flashes three times to confirm the set temperature. Optionally, it is also possible to set a start time for the unit.
-
Press the temperature icon on the screen to display the current set water temperature.
-
Turning the control dial clockwise increases the set time by one minute. Turning the control dial anticlockwise decreases the set time by one minute (minimum time setting: 1 minute; maximum time setting: 180 minutes). With each turn, the device will beep and the screen will light up. If no buttons are pressed and the dial is not turned, the time display will flash three times to confirm the time set. The unit starts operation automatically.
-
If you press the temperature icon on the screen after starting operation, the current temperature and time settings are displayed on the screen. The time is not increased or decreased. When the device has heated up to the set temperature, there are two reminder tones. The heating element stops operating and the countdown of the set time begins. When the temperature of the liquid drops by 2 °C, the device heats up again with the set time. The heat status will be displayed on the screen.
- If you turn the rotary control in operating status (no sound), the screen lights up. However, the temperature and time are neither increased nor decreased. If no button is pressed and the rotary control is not turned, the screen goes dark after 10 seconds. During operation, the temperature and time cannot be adjusted unless the programme is paused manually.
- During the heating process, press the temperature symbol (the screen lights up) and switch to the operating status (the screen displays the set temperature and time, e.g. if the set temperature is 75 °C , the screen first displays " 75 °C ", the same applies to the time). The temperature and time can be increased and decreased.
- If no time setting is made, the screen remains permanently lit. Once the time has elapsed, the unit beeps 15 times (once per second) and then returns to the operating status. The screen lights up. If no buttons are pressed or the rotary control is not turned within 10 seconds, the screen goes blank.
PRESERVING
The appliance can be used for preserving food as well as for heating water and other liquids.
Preserving
- Place the insert grate in the cooker.
- Fill the food into jars and close the jars.
- Stack the jars on the rack as shown in the picture.
Note: With smaller glasses, more glasses fit into the device accordingly.
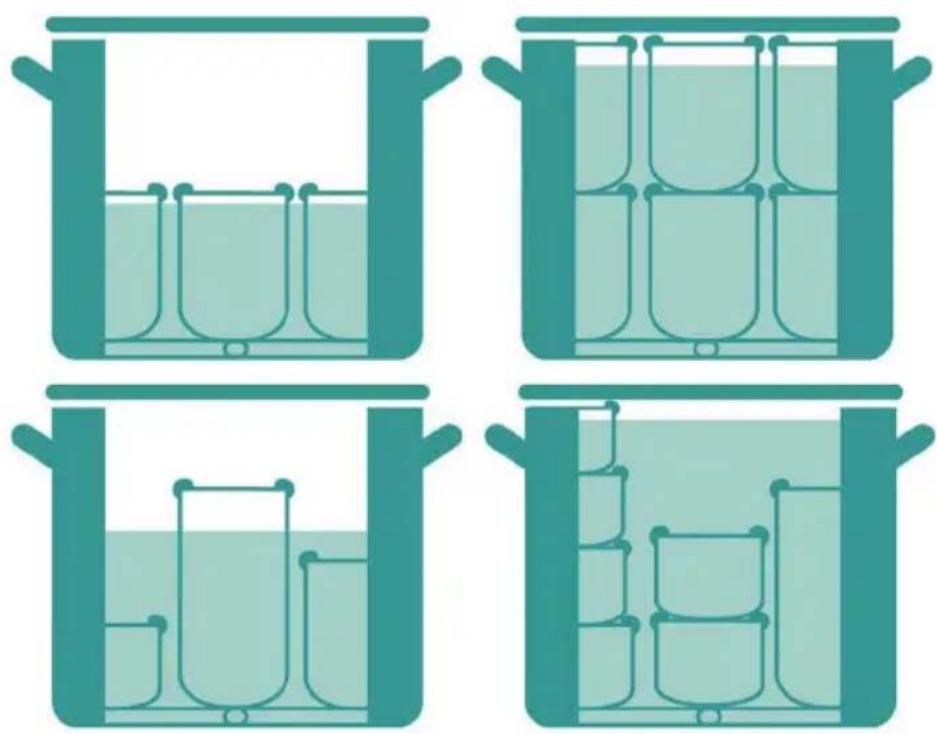
- Fill the cooker with enough water to cover 3/4 of the tallest glass with water. Do not exceed the maximum mark.
- Put the cover on and turn the main switch on. Set the timer and then the desired temperature. The device now starts to heat up, which can take up to 90 minutes. Once the set temperature is reached, the device automatically switches from heating mode to keep-warm mode.
- Set the temperature and time according to the preserving table. The time indicated there applies from the point at which the target temperature is reached.
-
After the set time has elapsed, the cooker switches off automatically and a signal tone sounds.
-
Turn the thermostat off and set the main switch to OFF before unplugging the device.
- Place the device in the washbasin or a tub and drain the water by pressing the tap down. Then let the device cool down.
- After the device has cooled down, remove the jars using oven gloves or tongs, as they will still be hot for a long time. Leave the glasses to cool completely.
PRESERVATION TABLE
Note: These specifications are recommendations.
| Fruit °C Min Vegetables °C | Min | ||||
| Apples soft / hard 90 30 Cauliflower | 100 90 | ||||
| Apple sauce 90 30 Asparagus | 100 120 | ||||
| Cherries | 80 30 Peas | 100 120 | |||
| Pears soft / hard | 90 30 Carrots | 100 90 | |||
| Strawberries / blackberries | 80 25 Gherkins | 90 30 | |||
| Rhubarb | 100 30 Pumpkin | 90 30 | |||
| Raspberries / gooseberries | 80 30 Kohlrabi | 100 90 | |||
| Currants / cranberries 90 25 | Brussels sprouts | / red cabbage | 100 120 | ||
| Apricots | 90 30 Celery | 100 120 | |||
| Mirabelles / greengages | 90 30 Mushrooms | 100 110 | |||
| Peaches | 90 30 Beans | 100 120 | |||
| Plums / damsons | 90 30 Tomatoes | / tomato paste | 90 30 | ||
| Quinces | 95 25 | ||||
| Blueberries | 85 25 Meat | °C Min | |||
| Note: The canning jars are hot after canning. Use tongs or oven gloves to remove the jars. Store preserves in a dry, cool and dark place. | Roast in one piece | 100 120 | |||
| Meat broth 100 60 | |||||
| Game, poultry cooked through | 100 75 | ||||
| Goulash cooked through | 100 75 | ||||
| Minced meat sausage mixture (raw) | 100 110 | ||||
HEATING LIQUIDS
Note: When heating liquids, the cooker must only be filled to the maximum mark. Otherwise, liquid could leak out when heated.
- Put the desired drink or water into the cooker.
- Put the lid on, switch on the appliance and set the desired temperature. Once the desired temperature is reached, the cooker automatically switches to keep-warm mode.
- Stir the drink regularly so that the heat is evenly distributed.
- When you want to pour a drink, hold a cup under the tap and press the tap down. When the cup is full, release the tap.
Note: Do not use the tap when heating liquids with pieces (fruit punch, soup). Otherwise it could become clogged.
CLEANING AND CARE
- Let the device cool down completely before cleaning.
• Always disconnect the power cord from the socket before cleaning. - Clean the bottom of the pot with a soft brush or a damp cloth. To avoid damaging the surface, never use pointed or hard objects.
- Wipe the housing with a soft, damp cloth. Then rub it with a dry cloth.
DISPOSAL CONSIDERATIONS
natural_image
Symbol of a trash bin crossed with a diagonal line, no text or numbers presentIf there is a legal regulation in your country regarding the disposal of electrical and electronic equipment, this symbol on the product or on the packaging indicates that this product must not be disposed of with household waste. Instead, it must be taken to a collection point for the recycling of electrical and electronic equipment. By disposing of this product in accordance with the regulations, you are protecting the environment and the health of those around you from negative consequences. For information on recycling and disposal of this product, contact your local government or household waste disposal service.
MANUFACTURER & IMPORTER (UK)
Manufacturer:
Chal-Tec GmbH, Wallstrasse 16, 10179 Berlin, Germany.
Importer for Great Britain:
Berlin Brands Group UK Ltd
PO Box 1145
Oxford, OX1 9UW
United Kingdom
Estimado cliente:
ÍNDICE
natural_image
Four identical illustrations of a laboratory or storage tank with beakers inside, arranged in a 2x2 grid (no text or symbols)natural_image
Symbol of a trash bin crossed with a diagonal line, no text or numbers presentBerlin Brands Group UK Ltd
PO Box 1145
Oxford, OX1 9UW
Reino Unido
Cher client, chère cliente,
SOMMAIRE
natural_image
Four identical illustrations of a laboratory or storage tank with beakers inside, arranged in a 2x2 grid (no text or symbols)natural_image
Symbol of a trash bin crossed with a diagonal line, no text or numbers presentBerlin Brands Group UK Ltd
PO Box 1145
Oxford, OX1 9UW
United Kingdom
Gentile cliente,
INDICE
natural_image
Symbol of a trash bin crossed with a diagonal line, no text or numbers presentPRODUTTORE E IMPORTATORE (UK)
Produttore:
Chal-Tec GmbH, Wallstraße 16, 10179 Berlino, Germania.
Berlin Brands Group UK Ltd
PO Box 1145
Oxford, OX1 9UW
United Kingdom

KLARSTEIN

- INHALTSVERZEICHNIS
- Member of Berlin Brands Group
- Dahlwitz-Hoppegarten
- Dear Customer,
- CONTENTS
- SAFETY INSTRUCTIONS
- CAUTION
- BEFORE FIRST USE
- DEVICE OVERVIEW
- OPERATION
- PRESERVING
- PRESERVATION TABLE
- HEATING LIQUIDS
- CLEANING AND CARE
- DISPOSAL CONSIDERATIONS
- MANUFACTURER & IMPORTER (UK)
- Manufacturer:
- Importer for Great Britain:
- Estimado cliente:
- ÍNDICE
- SOMMAIRE
- Gentile cliente,
- INDICE
- PRODUTTORE E IMPORTATORE (UK)
- Produttore:
- KLARSTEIN
Brand : Klarstein
Model : Abbey
Category : Water dispenser