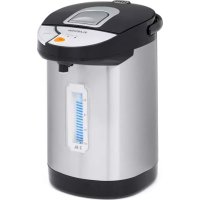
Hot Spring - Water dispenser Klarstein - Free user manual and instructions
Find the device manual for free Hot Spring Klarstein in PDF.


| Product type | Hot water dispenser |
| Brand | Klarstein |
| Model | Hot Spring |
| Article numbers | 10034558, 10034559 |
| Capacity | 4.2 L / 2.8 L depending on model |
| Power supply | 220-240 V ~ 50/60 Hz |
| Power | 750-900 W |
| Tank material | Stainless steel |
| Functions | Heating, keep warm, reboil, hot water dispensing |
| Indicator lights | Heating indicator, warming indicator, water level indicator |
| Safety | Automatic shut-off after boiling, overheat protection, lockable lid |
| Surface temperature | May exceed 60 °C during operation |
| Recommended safety distance | Greater than 50 cm from other appliances |
| Cleaning | Descaling with lemon water, cleaning with a damp cloth and mild detergent |
| Maintenance | Regular descaling to preserve the heating element |
| Usage | Domestic and indoor (office kitchens, guest rooms, etc.) |
| Compliance | CE (2014/30/EU, 2014/35/EU), RoHS (2011/65/EU) |
| Supplied accessories | Lid, service tap, stainless steel container |
| Precautions | Do not touch hot surfaces, do not immerse in water |
Frequently Asked Questions - Hot Spring Klarstein
User questions about Hot Spring Klarstein
0 question about this device. Answer the ones you know or ask your own.
Ask a new question about this device
Download the instructions for your Water dispenser in PDF format for free! Find your manual Hot Spring - Klarstein and take your electronic device back in hand. On this page are published all the documents necessary for the use of your device. Hot Spring by Klarstein.
USER MANUAL Hot Spring Klarstein
INHALTSVERZEICHNIS
natural_image
Symbol of a trash bin crossed with a diagonal line, no text or numbers presentCongratulations on purchasing this equipment. Please read this manual carefully and take care of the following hints to avoid damages. Any failure caused by ignoring the items and cautions mentioned in the instruction manual is not covered by our warranty and any liability. Scan the QR code to get access to the latest user manual and other information about the product.
CONTENT
Safety Instructions 10
Product Overview 11
Operation 12
Cleaning and Care 13
Hints on Disposal 14
Declaration of Conformity 14
TECHNICAL DATA
| Item number 10034558, 1 | 0034559 | |
| Capacity 4.2 L 2.8 L | ||
| Power supply 220-240 V ~ | 50/60 Hz | |
| Power 750-900 W | ||
SAFETY INSTRUCTIONS
- Before use, check the voltage on the device badge. Connect the device only to sockets which correspond to the voltage of the device.
- Since the surface temperature of the hot water dispenser may exceed 60 °C during operation, touch only the handle and knobs.
- The distance between the hot water dispenser and other equipment above it must be more than 50 cm to prevent other equipment from being damaged by steam. Do not place the hot water dispenser near other equipment that can easily be deformed by high temperatures.
- Children 8 years of age and older, mentally, sensory and physically impaired persons may only use the appliance if they have been thoroughly familiarised with its functions and safety precautions by a supervisor responsible for them and understand the associated risks.
- Do not leave the device unattended during operation, especially when children are present.
- Do not allow the power cord to hang over the worktop, as children may pull on it and scalds themselves.
- If the power cord or plug is damaged, it must be replaced by the manufacturer, an authorized service center, or a similarly qualified person.
- Place the hot water dispenser on a level, stable and heat-resistant surface.
- Do not plug the hot water dispenser into an outlet that is already connected to other kitchen appliances. Use a separate socket for the hot water dispenser.
- Do not use an extension cord.
- Never immerse the hot water dispenser in water or other liquids.
- When not in use, unplug the appliance from the wall outlet.
- Do not cover the ventilation openings.
- Do not use the hot water dispenser in wet places and do not touch it with wet hands.
- Allow the hot water dispenser to cool completely before cleaning.
• Store the unit in a dry, cool place. - The appliance is not intended for commercial use, but only for household and similar environments. This includes kitchens in offices, farms, hotels, motels and facilities offering Bed & Breakfasts.
- Do not place the appliance near heat sources or in direct sunlight.
- Repairs should only be performed by qualified personnel and are required if the equipment has been damaged, power cords or plugs are damaged, liquid has been spilled or objects have fallen on the equipment, the equipment has been exposed to moisture or moisture, has been dropped or is not operating normally.
PRODUCT OVERVIEW
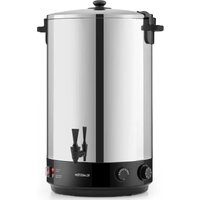
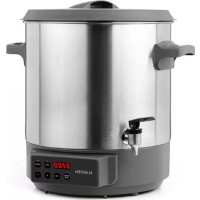
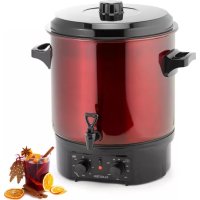
| A | Lid | I | Tap |
| B | Water dispenser button | J | Additional water dispenser button for one cup |
| C | Reboil button | K | Stainless steel containers |
| D | Keep warm indicator | L | Seal |
| E | Boiling-up display | M | Case |
| F | Steam outlet | N | Water level indicator |
| G | Grip | O | Cable connection |
| H | Lid lock | P | Plug |
OPERATION
-
Place the appliance on a uniformly dry, heat-resistant, non-slip surface as close as possible to the wall outlet.
-
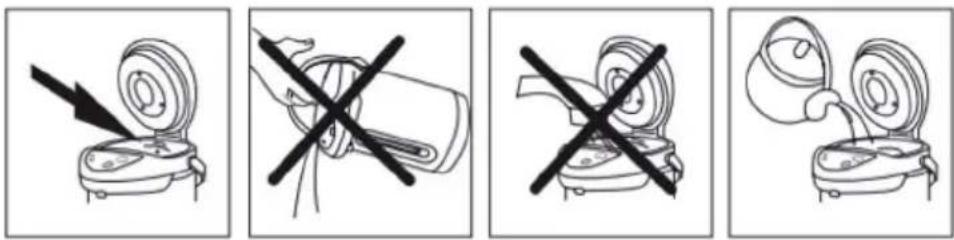
Open the lid and fill the hot water dispenser with water. The water level must not exceed the MAX mark on the container. Do not place the hot water dispenser directly under the tap for filling. Use a kettle or other vessel with a spout for filling.
-
Press the lid down until it clicks into place.
-
Connect the hot water dispenser to the power supply. The BOILING indicator will illuminate.
-
After the water has been boiled, the hot water dispenser switches off and the BOILING indicator goes out. The hot water dispenser now automatically monitors the water temperature.
-
As soon as the water temperature drops, the hot water dispenser automatically switches on again to keep the water warm. The corresponding KEEP WARM indicator will illuminate.
-
To pour water into a cup, press the water dispenser button (B). The machine is equipped with an additional water dispenser button (J) located behind the tap. Press the cup against this button to fill the cup with water.
-
If you want to boil the water again, press the REBOIL button (D).
-
When hot water is no longer needed, unplug the appliance from the wall socket.
Note: Do not empty the hot water dispenser completely. When the water level reaches the minimum mark on the scale, unplug the appliance from the wall outlet and wait for the appliance to cool down. Then top up with water. Never open the lid while the appliance is boiling or immediately afterwards.
Important notes
- Fill hot water dispenser only with water.
- Leave the lid closed for a while after cooking, otherwise you could get scalded by the escaping steam.
- Do not cover the steam outlets with anything, as this could cause boiling water to automatically escape from the appliance.
- Do not boil more water than you need. This reduces power consumption and increases the life of the hot water dispenser.
- Never heat the hot water dispenser on gas or electric stoves.
CLEANING AND CARE
- Disconnect the plug from the socket and allow the appliance to cool down. Then clean it with a damp cloth and a little detergent. Do not use abrasive detergents as they may damage a surface.
- The hot water dispenser must be cleaned regularly to remove limescale. Too much lime can damage the heater. To clean the appliance, run a full load of lemon water through it and then a full load of fresh water.
- Never immerse the hot water dispenser in water or other liquids.
HINTS ON DISPOSAL
natural_image
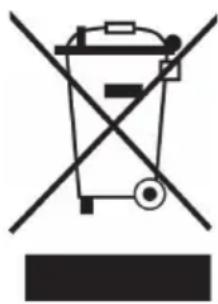
Symbol of a trash bin crossed with a diagonal line, no text or numbers presentAccording to the European waste regulation 2012/19/EU this symbol on the product or on its packaging indicates that this product may not be treated as household waste. Instead it should be taken to the appropriate collection point for the recycling of electrical and electronic equipment. By ensuring this product is disposed of correctly, you will help prevent potential negative consequences for the environment and human health, which could otherwise be caused by inappropriate waste handling of this product. For more detailed information about recycling of this product, please contact your local council or your household waste disposal service.
DECLARATION OF CONFORMITY

Producer:
Chal-Tec GmbH, Wallstraße 16, 10179 Berlin, Germany.
This product is conform to the following European Directives:
2014/30/EU (EMC)
2014/35/EU (LVD)
2011/65/EU (RoHS)
Estimado cliente,
ÍNDICE
natural_image
Symbol of a trash bin crossed with a diagonal line, no text or numbers presentSOMMAIRE
natural_image
Symbol of a trash bin crossed with a diagonal line, no text or numbers presentDÉCLARATION DE CONFORMITÉ

Fabricant :
Chal-Tec GmbH, Wallstraße 16, 10179 Berlin, Allemagne.
INDICE
natural_image
Symbol of a trash bin crossed with a diagonal line, no text or numbers present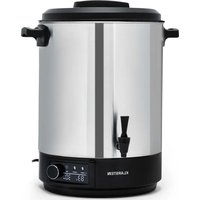

Brand : Klarstein
Model : Hot Spring
Category : Water dispenser