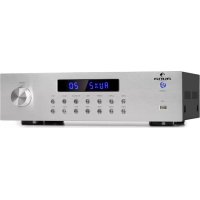
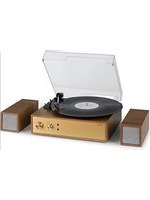
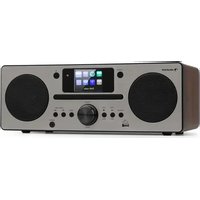
USER MANUAL AV2CD850BT Auna
INHALTSVERZEICHNIS
Technische Daten 4
Lautsprecherauswahl
natural_image
Illustration of a bundle of cables with three connectors (no text or symbols)
Member of Berlin Brands Group
Handwerkerstr. 11
15366 Dahlwitz-Hoppegarten
Deutschland
natural_image
Symbol of a trash bin crossed with a diagonal line, representing no waste or discharge (no text or labels)
Congratulations on the purchase of your device. Please read the following instructions carefully and follow them to prevent potential damage. We accept no liability for damage caused by disregarding the instructions or improper use. Please scan the QR code to access the latest operating instructions and for further information about the product.
CONTENTS
Technical Data 18
Safety Instructions 18
Device overview and function keys 20
Setup and operation 23
Operation 26
Troubleshooting 27
Disposal Considerations 28
Declaration of Conformity 28
TECHNICAL DATA
| Product code 10031404, 10032 | 758 |
| Power supply 220-240 V ~ 50 | /60 Hz |
| Output power 8 x 50 W RMS | |
| Connections | 3 x stereo RCA AUX input1 x REC audio output1 x USB port1 x RF antenna input4 x 2 speaker terminals |
| Playable formats MP3, WMA | |
| Speaker impedance 4 - 80 Ohm | |
| BT frequency 2402-2480 MHz | |
| BT transmission power (max.) | < 20 dBm |
SAFETY INSTRUCTIONS
- Children over 8 years as well as mentally, sensory and physically impaired persons may only use the device if they have been informed in detail about the functions and safety precautions by a supervisor responsible for them beforehand and understand the associated risks.
- Observe all the instructions given in the operating instructions.
- The unit must not be used near water or in a humid environment.
- Take care not to spill any liquid over the appliance and the appliance openings.
- Move the unit carefully so as not to damage it.
- Do not block the unit outputs.
- Do not place the unit near heat sources (e.g. heating). Do not expose the device to direct sunlight.
- Plug the power plug of the device into the mains socket.
- Insert the mains plug of the device into the socket in the intended way.
-
Under no circumstances should you attempt to service or repair the device yourself. In this case, the warranty becomes void.
-
The mains plug is used to disconnect the unit from the mains after it has been switched off. Make sure that the mains plug is always freely accessible.
- Do not expose the appliance to splashing water and do not place objects filled with liquids, such as vases, on the appliance.
- Do not expose the batteries to extreme heat such as sunlight or fire.
- Never obstruct the ventilation of the appliance by blocking the ventilation openings with objects such as newspapers, tablecloths, curtains etc.
- Make sure that a minimum distance of 5 mm is maintained to all sides of the unit.
- Do not place any sources of ignition with an open flame, such as lit candles, on the device.
- Only use the unit in a temperate climate, not in a tropical climate.
WARNING
Danger of injury! To reduce the risk of electric shock, do not open the unit cover or the back of the unit. The unit does not contain any parts that could be serviced by the customer. Please contact customer service or similarly qualified personnel for maintenance and repair.
DEVICE OVERVIEW AND FUNCTION KEYS
Front side
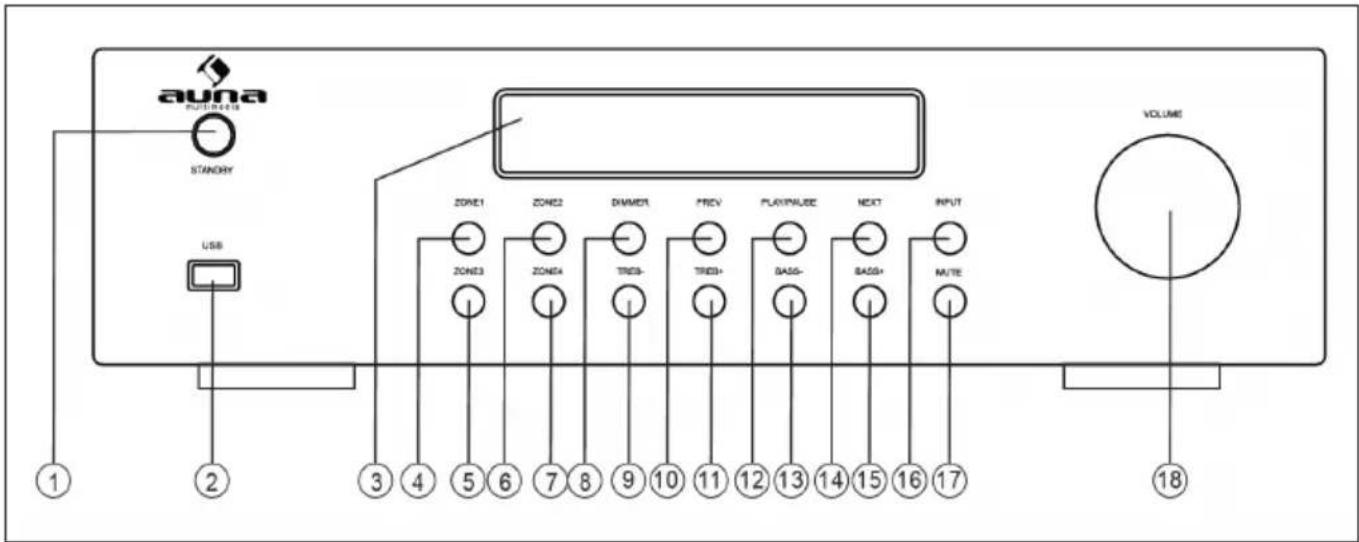
| 1 STANDBY | 10 | Track back - Press to go to the previous track in USB mode. If you are in BT mode, this also works for some apps. With other apps, however, it may be the case that a different playlist or music genre is displayed. |
| 2 USB input |
| 3 | LED - Indicates the modes for BT, USB and AUX. Point the remote control in this direction to make the settings. |
| 4 | ZONE 1 - Press here to adjust the volume of the speakers for zone 1. | 11 Treble + | |
| 5 | ZONE 3 - Press here to adjust the volume of the speakers for zone 3. | 12 | PLAY/PAUSE - Plays or pauses the USB or BT source. |
| 6 | ZONE 2 - Press here to adjust the volume of the speakers for zone 2. | 14 | Title forward - Press to move to the next USB title. |
| 7 | ZONE 4 - Press here to adjust the volume of the speakers for zone 4. | 15 BASS - | |
| 8 DIMMER 16 INPUT | | |
| 9 Treble - | 17 MUTE | |
| 18 Volume | |
Back side
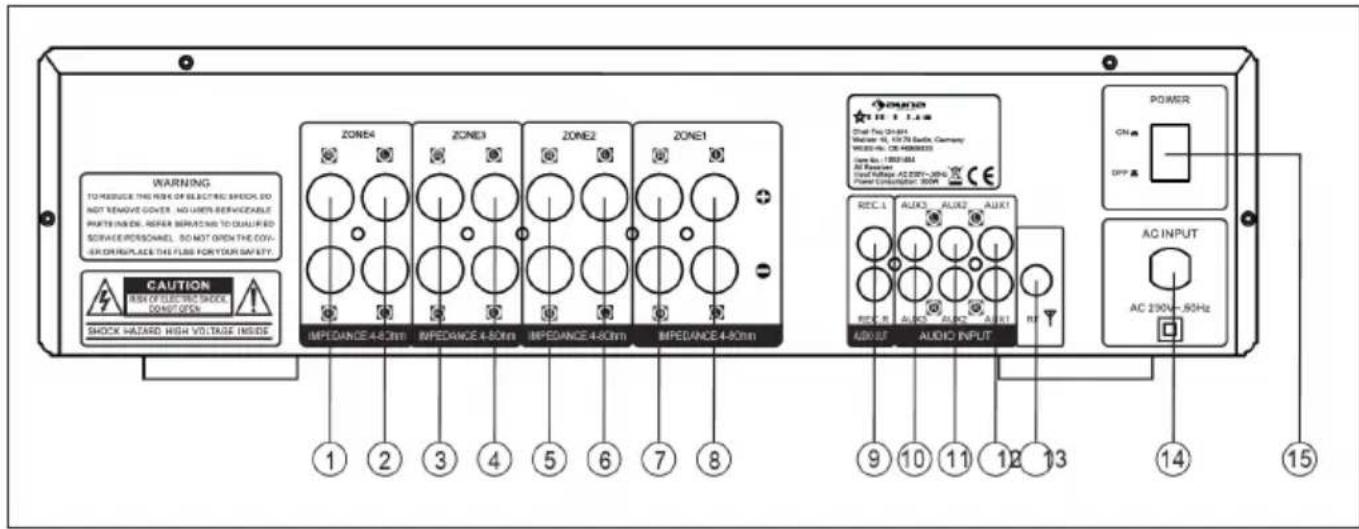
| 1. | ZONE 4 : Speaker terminal (RIGHT) | 9. REC AUDIO OUTPUT |
| 2. ZONE 4 : Speaker terminal (LEFT) 10. AUX3 AUDIO INPUT |
| 3. | ZONE 3 : Speaker terminal (RIGHT) | 11. AUX2 AUDIO INPUT |
| 4. ZONE 3 : Speaker terminal (LEFT) 12. AUX1 AUDIO INPUT |
| 5. | ZONE 2 : Speaker terminal (RIGHT) | 13. RF ANTENNA INPUT |
| 6. ZONE 2 : Speaker terminal (LEFT) 14. AC INPUT (230 V~,50 Hz) |
| 7. ZONE 1 : Speaker terminal (RIGHT) 15. ON/OFF switch |
| 8. ZONE 1 : Speaker terminal (LEFT) | |
Remote control
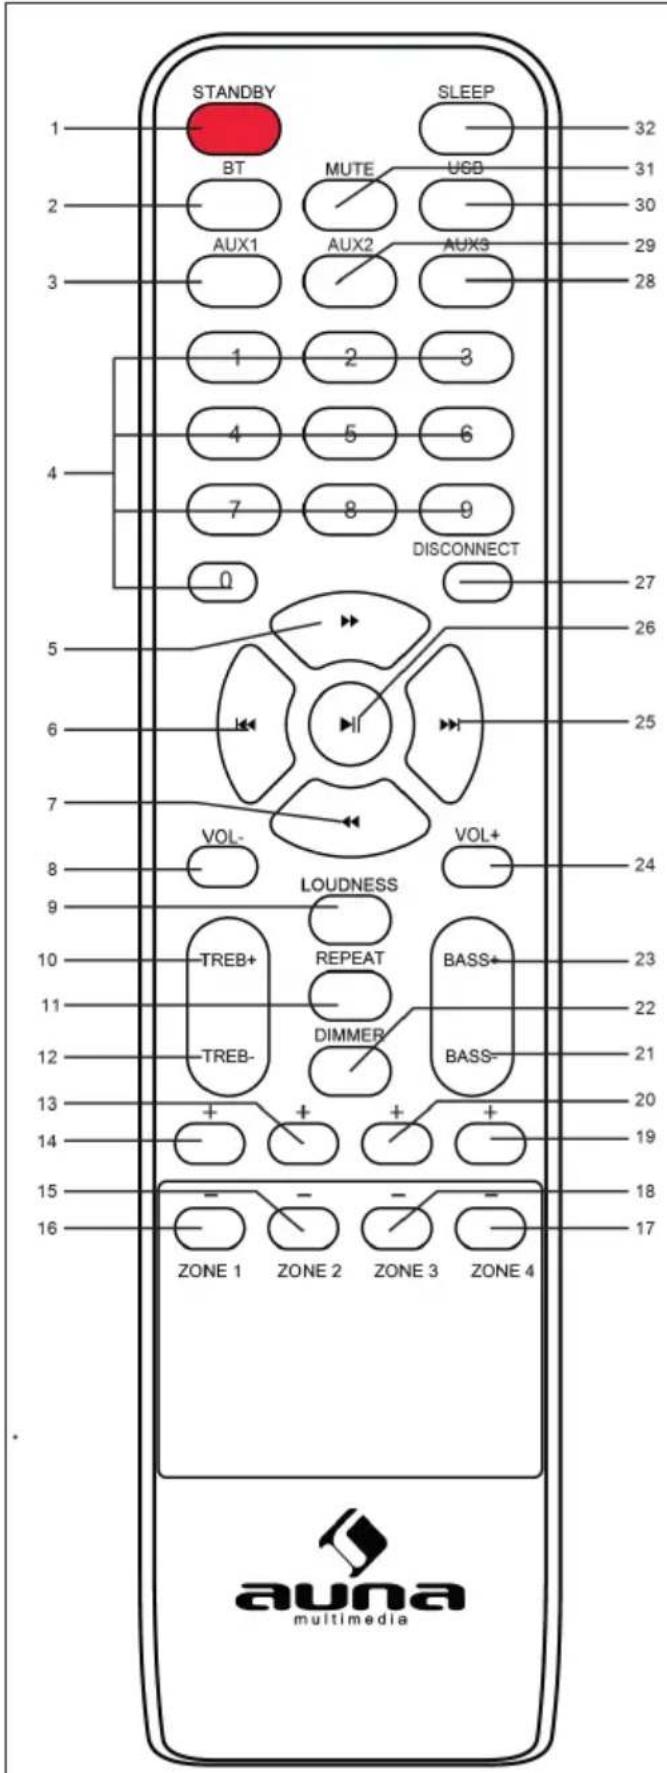
1 STANDBY
2 BT BT mode
3 AUX1 AUX1 select
4 Number key Title selection in USB title mode
5 Fast forward
6 Jump back title
7 Rewind
8 Decrease volume
9 Volume level
10 TREBLE +
11 Repeat (in the USB playback)
12 TREBLE -
13 Volume + for ZONE 1
14 Volume - for ZONE 1
15 Volume + for ZONE 2
16 Volume - for ZONE 2
17 Volume + for ZONE 3
18 Volume - for ZONE 3
19 Volume + for ZONE 4
20 Volume - for ZONE 4
21 BASS -
22 DIMMER Setting the display brightness
23 BASS +
24 Main volume +
25 Title jump forward
26 PLAY/PAUSE
27 DISCONNECT, press to disconnect from a BT source.
28 Select AUX3
29 Select AUX2
30 Switch on USB operation
31 Switch on mute
32 SLEEP Setting the time for standby mode
The RF remote control can control the unit from any angle and up to 25 m away.
SETUP AND OPERATION
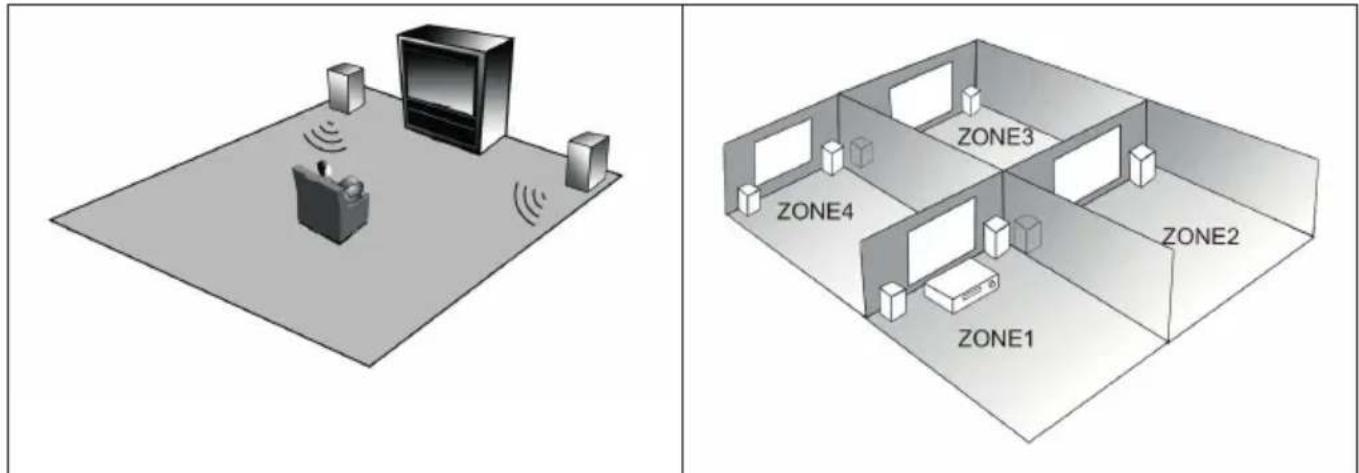
Speaker system
- A 5-speaker system gives you a good sound field effect. The rear speakers deliver a broadly dispersed sound while the middle speakers create the feeling of being the person being addressed during a dialogue.
- Should you use only the main speakers and the rear speakers, a live feel can be created through these four speakers.
- By using the centre speakers, dialogue and voice effects can be precisely localised.
- If you want to feel low frequencies and vibrations, a subwoofer is essential.
Speaker placement
The centre speaker in the central position should be positioned higher or lower than the TV speaker to avoid interference from the magnetic field. You can also use magnet-resistant speakers.
The subwoofer can be placed anywhere, as low frequencies are not very directional. The rear speakers should be placed behind your seating position about 2 metres above the floor.
Speaker selection
The speakers should be powerful enough. The impedance of the front speakers should be 4 Ω - 8 Ω. The impedance of the centre and rear speakers should also be 4 Ω - 8 Ω for all.
Establishing a connection
Switch the device off immediately and pull the power plug out of the socket. Do not switch the unit on again until the connection has been successfully established.
- Make sure that all plugs are properly inserted into the connectors, otherwise the speakers may produce noise.
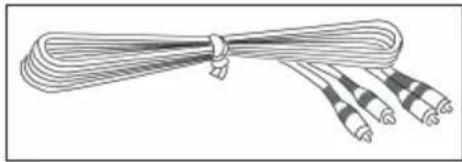
natural_image
Illustration of a bundle of cables with three connectors (no text or symbols)
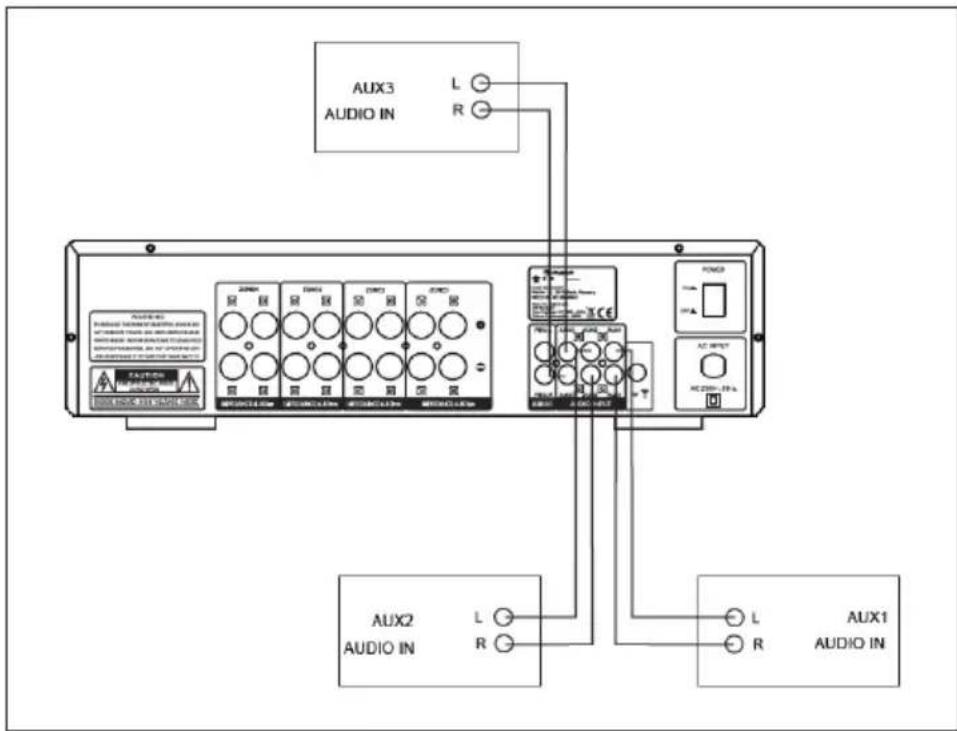
Connecting audio and video devices
- Connect the audio equipment with an RCA cable.
- The signal for the right speaker is connected to the input for the right speaker, the signal for the left speaker to the input for the left speaker.
flowchart
graph TD
    A["AUX1 AUDIO IN"] --> B["AUX2 AUDIO IN"]
    B --> C["POWER"]
    C --> D["AUX3 AUDIO IN"]
    D --> E["Power Supply"]
    style A fill:#f9f,stroke:#333
    style B fill:#ccf,stroke:#333
    style C fill:#cfc,stroke:#333
    style D fill:#fcc,stroke:#333
    style E fill:#ffc,stroke:#333
Connecting the speakers
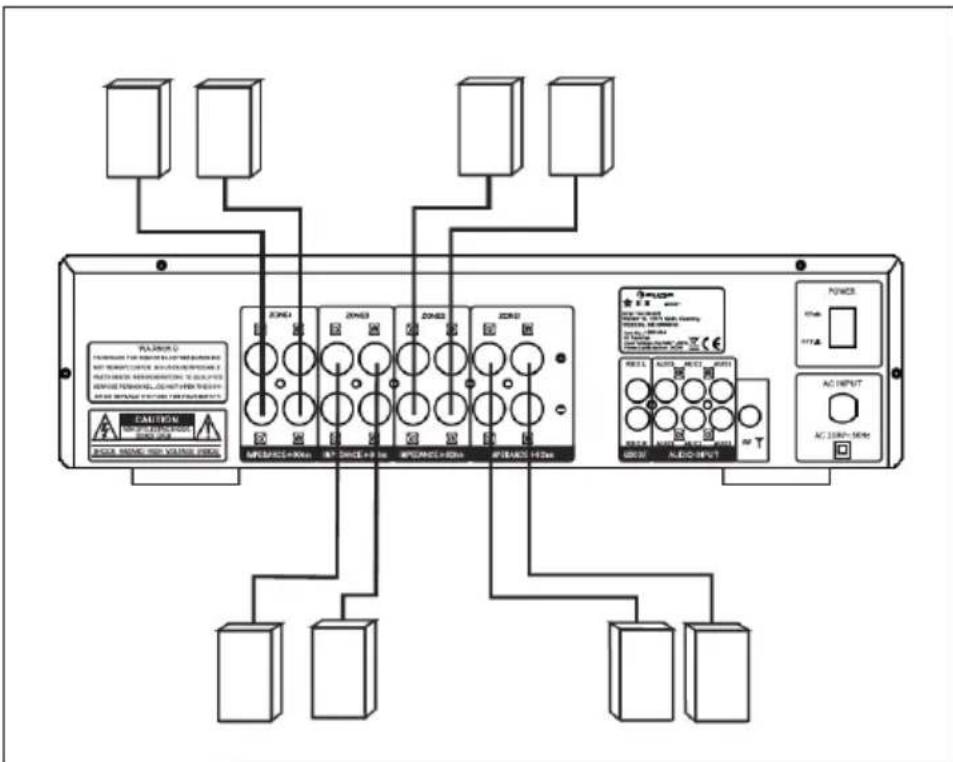
- The speakers must have the correct impedance (read "Choosing Speakers"), otherwise they may be damaged.
- Do not let the bare speaker wires touch each other or other metal parts, as this could damage the unit or the speakers.
- Make sure that the polarity of the speaker wires is correct, "+" to +-" and "--" to "--". If this wiring is not followed, the sound will be unnatural and hollow.
flowchart
graph TD
    A["Power Supply"] --> B["Control Panel"]
    B --> C["ZONE Module 1"]
    B --> D["ZONE Module 2"]
    B --> E["ZONE Module 3"]
    B --> F["AC Input/Output"]
    B --> G["AC Control Panel"]
    B --> H["AC Output/Control Panel"]
    style A fill:#f9f,stroke:#333
    style B fill:#ccf,stroke:#333
    style C fill:#cfc,stroke:#333
    style D fill:#cfc,stroke:#333
    style E fill:#cfc,stroke:#333
    style F fill:#cfc,stroke:#333
    style G fill:#cfc,stroke:#333
    style H fill:#cfc,stroke:#333
Connection to the speaker system
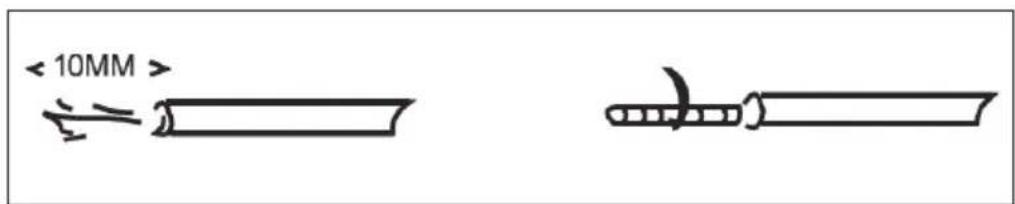
Connect the speaker terminals to wires of a suitable gauge. Clamp the insulation approx. 10 mm above the wire. If the bare wire is loose, clamp it tight.
OPERATION
The respective buttons can be found on the front of the amplifier and on the remote control.
- Select an audio source by pressing the INPUT button on the unit or on the remote control. USB, BT, AUX1, AUX2, AUX3 are set one after the other.
- Adjust the main volume on the volume control (VOLUME) (VOL +/-).
- Press the ZONE1, ZONE2, ZONE3 or ZONE4 buttons on the unit or on the remote control to adjust the volume for the respective zone.
- Press the BASS +/-, TREB +/- buttons to adjust the bass and treble.
- With MUTE on, you can mute the audio output.
Playback via USB
- Press the INPUT button until you switch to USB mode
- Use the □ and □ buttons to jump to a title. Press the □□ button to pause or resume playback.
Note: Supported file formats: MP3, WMA, WAV. Max USB data media size 32 GB
Pairing with BT
- Disconnect all BT devices that have been paired with the amplifier.
- Go to the BT settings of your mobile device and activate BT.
- Switch on the amplifier and set it to BT mode. The blue lettering "BT" flashes in the display to indicate that the amplifier is ready for pairing.
- Start the search for BT devices with your mobile device.
- Select the unit with the BT name "AUNA10031404" from the search results.
- Depending on the menu, select "OK" or "YES" to perform the pairing.
- If a password entry is required, enter "0000".
Note: To unpair, press the DISCONNECT button on the remote control.
TROUBLESHOOTING
| Problem Potential cause Possible solution | |
| The unit will not turn on or there is no sound. | The mains cable is damaged or the mains plug is not inserted in the socket. | Check the mains cable for damage or insert the mains plug into the socket. |
| The device can be switched on but no sound can be heard. | No speakers connected. Connect with the speaker cable. |
| The unit is muted or the volume is at the minimum setting | Press the MUTE button or adjust the volume. |
| The sound comes exclusively from one channel. | The connectors are not inserted correctly. | Insert the connector plugs correctly. |
| There is no sound from some zones. | The connectors are not inserted correctly. | Insert the connector plugs correctly. |
| In some zones, the volume setting is on Minimum. | Adjust the volume setting of those zones. |
| The instrumental sound is reversed in stereo playback. | Wrong speaker polarity or wrong input polarity. | Make sure that the + and - connections have been made correctly. |
| The unit does not work properly with the remote control. | The batteries are dead. Replace the batteries. |
| The batteries were inserted the wrong way round. | Make sure that the batteries are inserted correctly. |
| The remote control is too far away from the unit. | Move the remote control closer to the unit. |
| There is an obstacle between the unit and the remote control. | Remove the obstacle. |
| The wrong button was used. Use the correct button. |
DISPOSAL CONSIDERATIONS
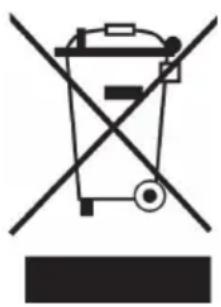
natural_image
Symbol of a trash bin crossed with a diagonal line, representing no waste or discharge (no text or labels)
If there is a legal regulation for the disposal of electrical and electronic devices in your country, this symbol on the product or on the packaging indicates that this product must not be disposed of with household waste. Instead, it must be taken to a collection point for the recycling of electrical and electronic equipment. By disposing of it in accordance with the rules, you are protecting the environment and the health of your fellow human beings from negative consequences. For information about the recycling and disposal of this product, please contact your local authority or your household waste disposal service.
This product contains batteries. If there is a legal regulation for the disposal of batteries in your country, the batteries must not be disposed of with household waste. Find out about local regulations for disposing of batteries. By disposing of them in accordance with the rules, you are protecting the environment and the health of your fellow human beings from negative consequences.

Manufacturer:
Chal-Tec GmbH, Wallstrasse 16, 10179 Berlin, Germany.
Importer for Great Britain:
Berlin Brands Group UK Ltd
PO Box 1145
Oxford, OX1 9UW
United Kingdom
Hereby, Chal-Tec GmbH declares that the radio equipment type AV2-CD850BT is in compliance with Directive 2014/53/EU. The full text of the EU declaration of conformity is available at the following internet address: use.berlin/10031404
For Great Britain: Hereby, Chal-Tec GmbH declares that the radio equipment type AV2-CD850BT is in compliance with the relevant statutory requirements. The full text of the declaration of conformity is available at the following internet address: use.berlin/10031404
Estimado cliente:
ÍNDICE
Datos técnicos 30
natural_image
Illustration of a bundle of cables with three connectors (no text or symbols)
natural_image
Symbol of a trash bin crossed out by a diagonal line, with no text or labels present.
Berlin Brands Group UK Ltd
PO Box 1145
Oxford, OX1 9UW
United Kingdom
Cher client, chère cliente,
SOMMAIRE
Fiche technique 42
24 Volume principal +
Choix des enceintes
natural_image
Illustration of a bundle of cables with three connectors (no text or symbols)
natural_image
Symbol of a trash bin crossed with a diagonal line, representing no waste or discharge (no text or labels)

Fabricant :
Chal-Tec GmbH, Wallstraße 16, 10179 Berlin, Allemagne.
Berlin Brands Group UK Ltd
PO Box 1145
Oxford, OX1 9UW
United Kingdom
INDICE
Dati tecnici 54
natural_image
Illustration of a bundle of cables with three connectors (no text or symbols)
natural_image
Symbol of a trash bin crossed out by a diagonal line, with no text or labels present.
Berlin Brands Group UK Ltd
PO Box 1145
Oxford, OX1 9UW
United Kingdom
natural_image
Abstract white logo design on dark background, resembling stylized letter 'S' or wave form (no text or symbols)