
SHZK 600 A2 - Vacuum Cleaner SILVERCREST - Free user manual and instructions
Find the device manual for free SHZK 600 A2 SILVERCREST in PDF.
| Brand | SilverCrest |
| Model | SHZK 600 A2 |
| Product type | 2-in-1 vacuum cleaner (stick + handheld) |
| Rated voltage | 220-240 V~, 50-60 Hz |
| Power consumption | 600 W |
| Protection class | II |
| Suction power | ≥15 kPa |
| Dust container capacity | 600 ml |
| Noise level | ≤80 dB(A) |
| Filter type | HEPA (dry washable, do not wash with water) |
| Floor types | Hard floors and carpets (integrated switch) |
| Included accessories | Telescopic tube, floor nozzle, 2-in-1 crevice tool |
| Mode of use | Stick vacuum or handheld vacuum |
| Thermal protection | Automatic shut-off in case of overheating |
| Filter cleaning | Tap the HEPA filter, rinse the filter housing with warm water, dry for 24 hours |
| Warranty | 3 years |
| IAN reference | 391617_2201 |
| Intended use | Domestic, dry indoor |
| Weight | Approx. 2.5 kg |
| Cord length | Approx. 5 m |
Frequently Asked Questions - SHZK 600 A2 SILVERCREST
User questions about SHZK 600 A2 SILVERCREST
0 question about this device. Answer the ones you know or ask your own.
Ask a new question about this device
Download the instructions for your Vacuum Cleaner in PDF format for free! Find your manual SHZK 600 A2 - SILVERCREST and take your electronic device back in hand. On this page are published all the documents necessary for the use of your device. SHZK 600 A2 by SILVERCREST.
USER MANUAL SHZK 600 A2 SILVERCREST
natural_image
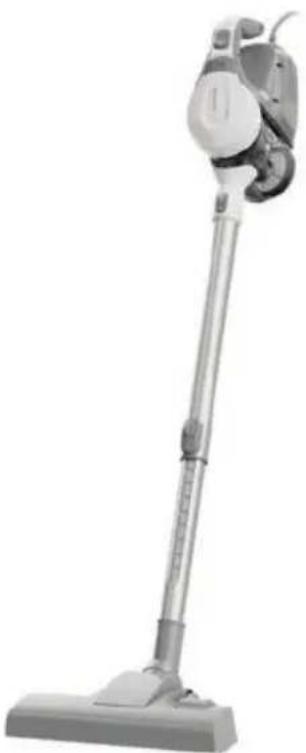
Exterior view of a white and gray vacuum cleaner (no text or symbols visible)2-IN-1-STAUBSAUGER / 2-IN-1 VACUUM CLEANER / ASPIRATEUR 2 EN 1 SHZK 600 A2
DE AT CH
2-IN-1-STAUBSAUGER
Operation and safety notes
FR BE
ASPIRATEUR 2 EN 1

natural_image
Technical line drawing of a mechanical device with no visible text or symbols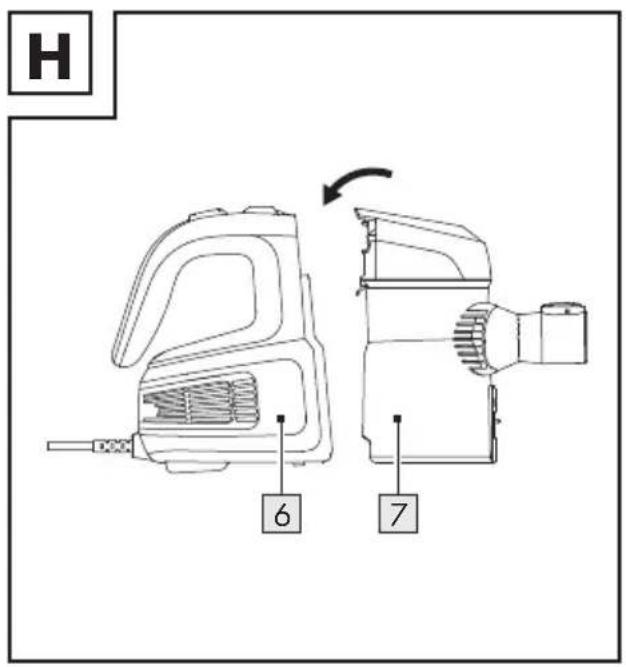
www.optimex-shop.com
Warnings and symbols used Page 18
Introduction Page 19
Intended use....Page 19
Scope of delivery....Page 19
Parts description....Page 19
Technical data Page 19
Safety instructions....Page 20
Before first use....Page 23
Operation....Page 24
Accessories Page 24
Attaching accessories ...... Page 24
Switching on/off Page 24
Emptying the dust container....Page 24
Cleaning and care Page 25
Troubleshooting Page 26
Storage Page 27
Disposal Page 27
Warranty Page 28
Warranty claim procedure....Page 28
Service Page 28
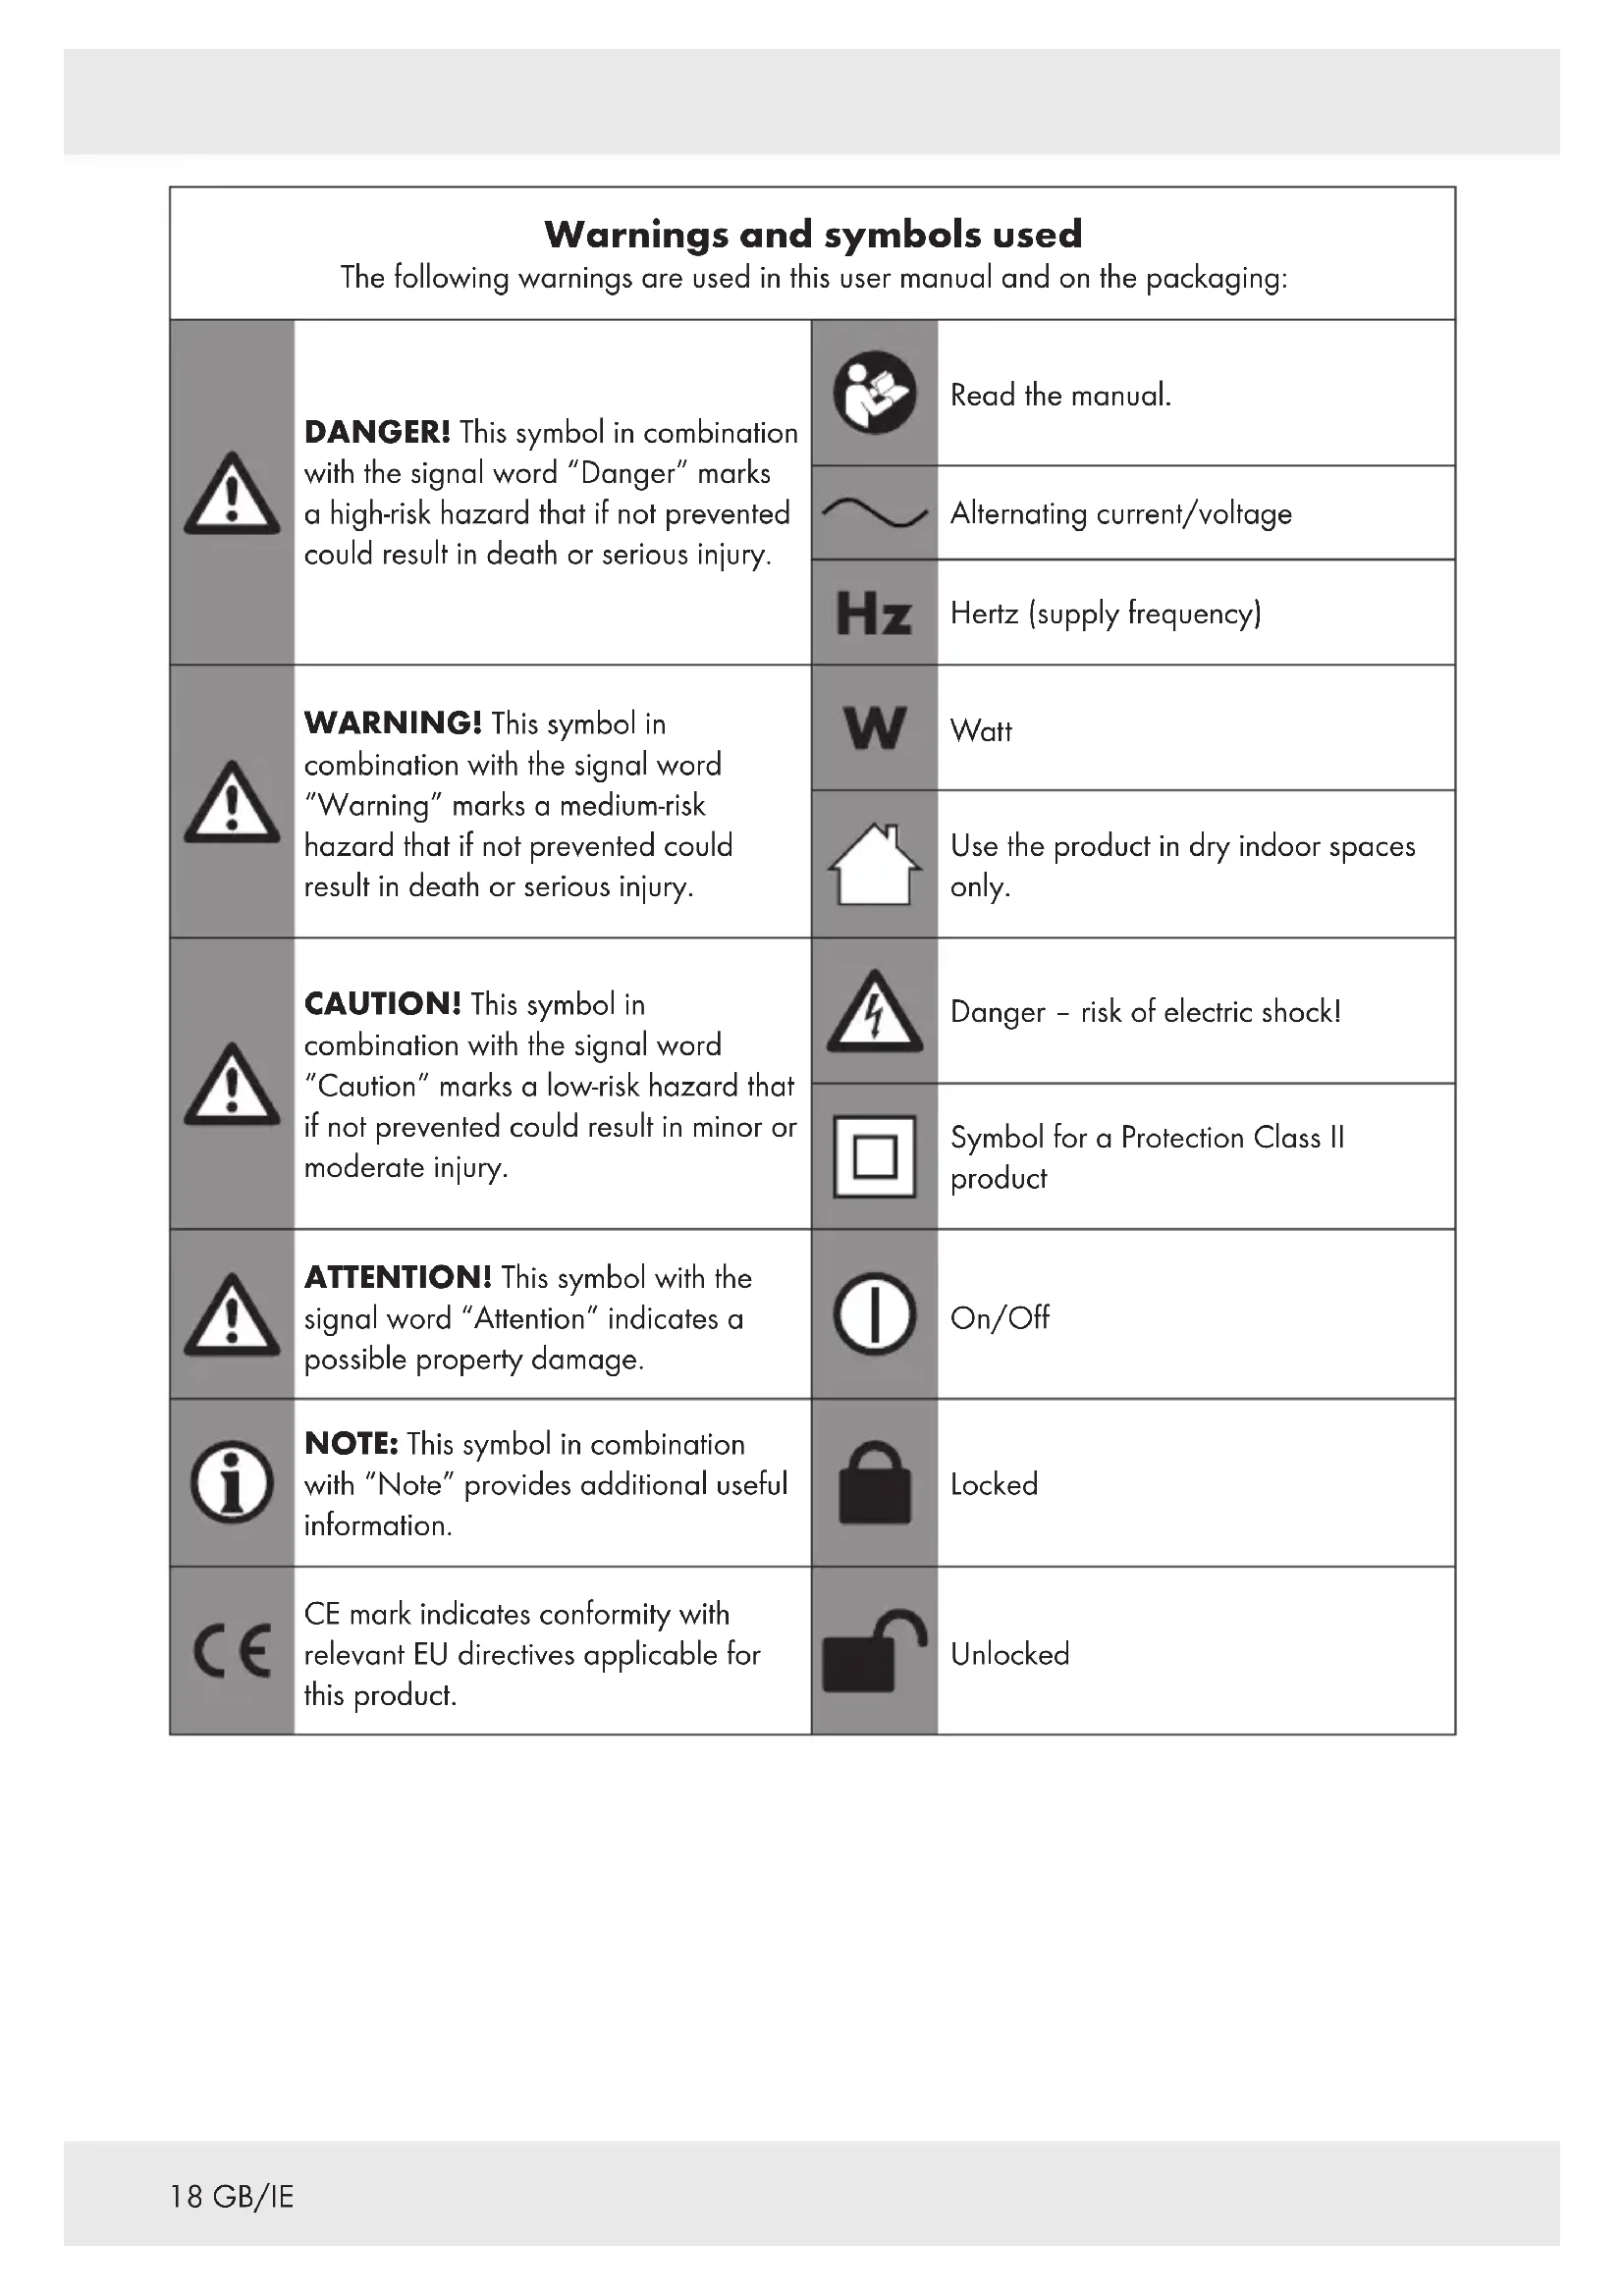
| Warnings and symbols usedThe following warnings are used in this user manual and on the packaging: | |||
 | DANGER! This symbol in combination with the signal word “Danger” marks a high-risk hazard that if not prevented could result in death or serious injury. |  | Read the manual. |
 | Alternating current/voltage | ||
 | Hertz (supply frequency) | ||
 | WARNING! This symbol in combination with the signal word “Warning” marks a medium-risk hazard that if not prevented could result in death or serious injury. |  | Watt |
 | Use the product in dry indoor spaces only. | ||
 | CAUTION! This symbol in combination with the signal word “Caution” marks a low-risk hazard that if not prevented could result in minor or moderate injury. |  | Danger - risk of electric shock! |
 | Symbol for a Protection Class II product | ||
 | ATTENTION! This symbol with the signal word “Attention” indicates a possible property damage. |  | On/Off |
 | NOTE: This symbol in combination with “Note” provides additional useful information. |  | Locked |
 | CE mark indicates conformity with relevant EU directives applicable for this product. |  | Unlocked |
2-IN-1 VACUUM CLEANER
Introduction
We congratulate you on the purchase of your new product. You have chosen a high quality product. The instructions for use are part of the product. They contain important information concerning safety, use and disposal. Before using the product, please familiarise yourself with all of the safety information and instructions for use. Only use the product as described and for the specified applications. If you pass the product on to anyone else, please ensure that you also pass on all the documentation with it.
Intended use
This product is designed for vacuuming dust. Do not use it for any other purpose.
The product is only intended for private household use, not for commercial or other purposes.
The manufacturer accepts no liability for damages caused by improper use.
- Scope of delivery
After unpacking the product, check if the delivery is complete and if all parts are in good condition. Remove all packing materials before use.
1 2-in-1 Vacuum Cleaner
1 Telescopic tube
1 Floorhead
1 2-in-1 crevice nozzle
1 Instruction manual
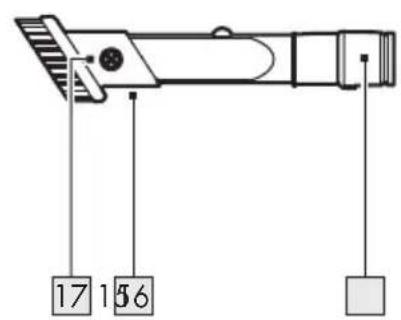
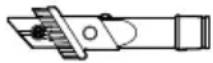
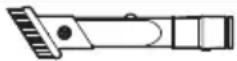
Parts description
(Fig. A)
1 Dust container lid
2 Release button
3 On/off switch ①
4 Handle
5 Power cord with power plug (not illustrated)
6 Motor unit
7 Dust container
8Lock
9 Intake
10Intake lock
11 Telescopic tube
12Telescopic tube lock
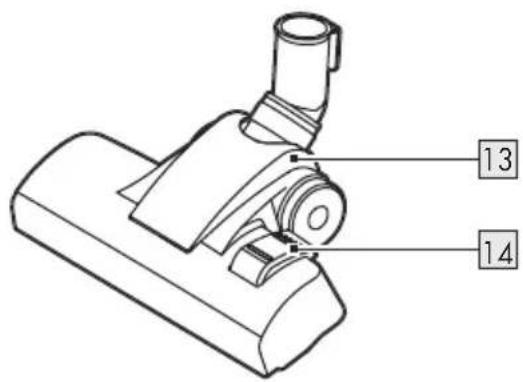
13 Floorhead
14Switch for
- Hard floor
- Carpet


152-in-1 crevice nozzle
16Brush head
17 Release button
18Filter case
19HEPA filter
20Clip for opening the dust container lid
- Technical data
Rated voltage: 220-240 V\~,
50-60 Hz
Power consumption: 600 W
Protection class: II
Suction power: ≥ 15 kPa
Dust container volume: 600 ml total
Noise emission: ≤ 80 dB(A)
Suction levels: 1
Filter: HEPA
The product complies with Ecodesign Directive 2009/125/EC & EU 666/2013 based on standards EN 60312-1, EN 60704-2-1 and EN 60335-2-2.

Safety instructions
BEFORE USING THE PRODUCT, PLEASE FAMILIARISE YOURSELF WITH ALL OF THE SAFETY INFORMATION AND INSTRUCTIONS FOR USE! WHEN PASSING THIS PRODUCT ON TO OTHERS, PLEASE ALSO INCLUDE ALL THE DOCUMENTS!
In the case of damage resulting from non-compliance with these operating instructions the warranty claim becomes invalid! No liability is accepted for consequential damage! In the case of material damage or personal injury caused by incorrect handling or non-compliance with the safety instructions, no liability is accepted!
Children and persons with limitations

⚠ WARNING! DANGER OF DEATH AND ACCIDENTS FOR TODDLERS AND CHILDREN!
Never leave children unsupervised with the packaging material. The packaging material represents a danger of suffocation. Children frequently underestimate the dangers.
This product can be used by children aged from 8 years and above and persons with reduced physical, sensory or mental capabilities or lack of experience and knowledge if they have been given supervision or instruction concerning use of the product in a safe way and understand the hazards involved.
■ Children shall not play with the product.
- Cleaning and user maintenance shall not be made by children unless they are older than 8 and supervised.
Intended use
⚠ WARNING! Risk of injury! Misuse may lead to injury. Use this product solely in accordance with these instructions. Do not attempt to modify the product in any way.
Electrical safety
⚠️DANGER! Risk of electric shock! Never attempt to repair the product yourself. In case of malfunction, repairs are to be conducted by qualified personnel only.
⚠ WARNING! Risk of electric shock! Do not immerse the product's electrical components in water or other liquids. Never hold the product under running water.
⚠ WARNING! Risk of electric shock! Never use a damaged product. Disconnect the product from the socket outlet and contact your retailer if it is damaged.
⚠ WARNING! Risk of electric shock! Do not operate the product with wet hands or while standing on a wet floor.
⚠ WARNING! Risk of injury! Turn off the product and disconnect it from the power supply before cleaning and when the product is not in use.
- Do not use the product anymore if it has been dropped.
Before connecting the power plug to the power supply: Check that the voltage and the current rating correspond with the power supply details shown on the product's rating label.
- Regularly check the power plug and the power cord for damages. If the power cord is damaged, it must be replaced by the manufacturer, its service agent or similarly qualified persons in order to avoid a hazard.
■ Protect the power cord against damages. Do not let it hang over sharp edges, do not squeeze or bend it. Keep the power cord away from hot surfaces and open flames.
Operation
■ Disconnect the power plug from the socket-outlet
- when a malfunction occurs,
– before attaching/changing accessories,
– before cleaning the product,
- if you will not use the product for a long time,
– during a thunderstorm and
-after each use.
■ Disconnect the product from the socket-outlet by pulling the power plug, but not by pulling on the power cord.
■ Defective components must always be replaced by original spare parts.
- Do not obstruct the ventilation slots during operation. Risk of overheating and damage to the product.
■ Never use the product to absorb water or other liquids, flammable substances or hot/burning objects.
The product is equipped with a thermal fuse that automatically cuts off the power supply if the product overheats. If this safety device has turned off the product, disconnect the power cord from the socket-outlet and let the product cool. Once the product has cooled down, you can connect the power plug back into the socket-outlet and use the product normally.
Cleaning and storage
⚠ WARNING! Risk of
injury! Disconnect the product from the power supply before cleaning work and when not in use.
■ Protect the product, its power cord and power plug against dust, direct sunlight, dripping and splashing water.
■ Store the product in a cool, dry place, protected from moisture and out of the reach of children.
■ Protect the product against heat. Do not place the product close to open flames or heat sources such as stoves or heating appliances.
Before first use
■ Remove all packaging material and lay out all separate components in front of you. After unpacking, check the product for visible damage.
Operation
Accessories
Part Application
 | 11 | FloorsHard-to-reach places |
 | 13 | CarpetsHard floorsStairs |
 | (887S) (774H) | Hard-to-reach places CornersSkirting edges LouvresChairsUpholstery |
 | (466I) | 15BlindsLouvresDelicate surfaces |
* Set the switch for hard floor/carpet according to the floor type: 14
Switch position Floor type
| Hard floor | |
| Carpet |
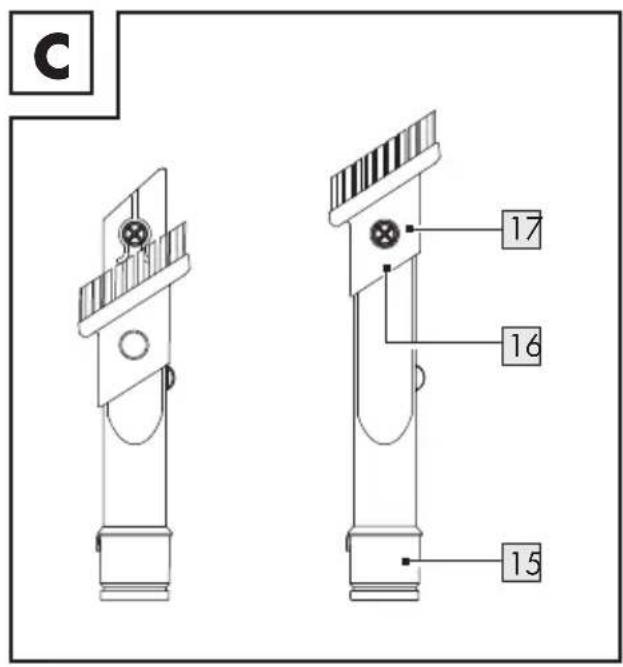
** Using the 2-in-1 crevice nozzle 15 with brush head 16: Slide the brush head forward. Let the brush head lock in place.
Using the 2-in-1 crevice nozzle 15 without brush head 16: Press the release button 17. Slide the brush head backward (Fig. C).
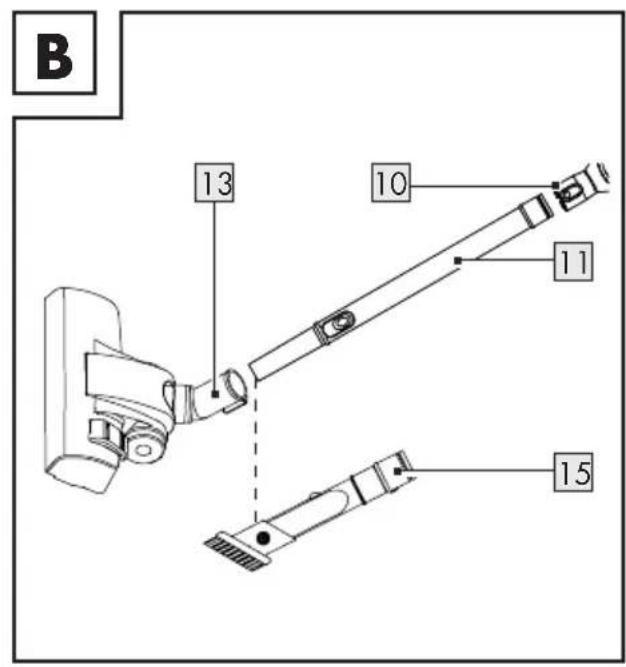
- Attaching accessories
(Fig. B)
Attach a nozzle 13 15 to the telescopic tube 11.
- Attach the telescopic tube 11 to the intake 9. The telescopic tube must audibly lock in place.
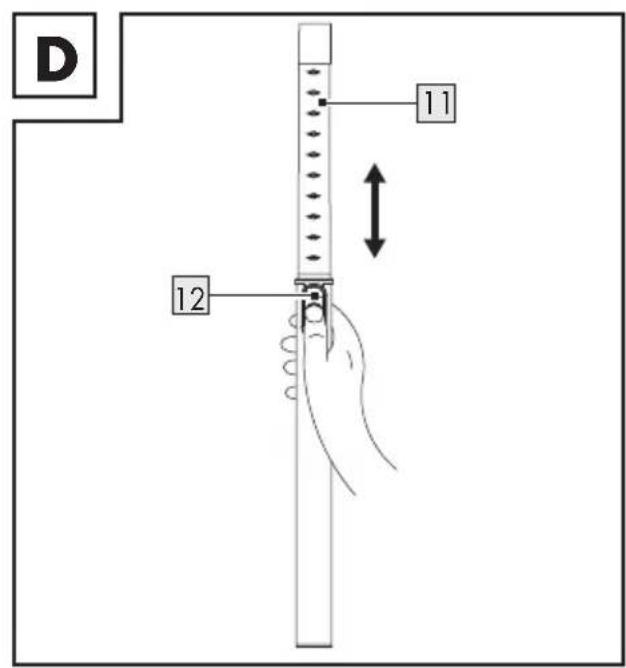
- Set the telescopic tube 11 to the desired length:
- Press the telescopic tube lock 12. Adjust the length of the telescopic tube 11 (fig. D).
- Release the telescopic tube lock 12.
- If necessary, slightly adjust the length until the telescopic tube lock 12 locks in place.
i NOTES:
The 2-in-1 crevice nozzle 15 can be directly attached to the intake 9.
■ Prior to usage: Securely fasten all accessories.
- Switching on/off
■ Connect the power plug 5 to a socket-outlet.
■ Switching on/off: Press the on/off switch ① 3 once.
■ Disconnect the power plug 5 from the socket-outlet if you do not use the product.
● Emptying the dust container
i NOTES:
■ Empty the dust container ^7 outdoors if possible, since emptying can lead to a cloud of dust.
■ Empty the dust container before the filling line marked with MAX is reached.
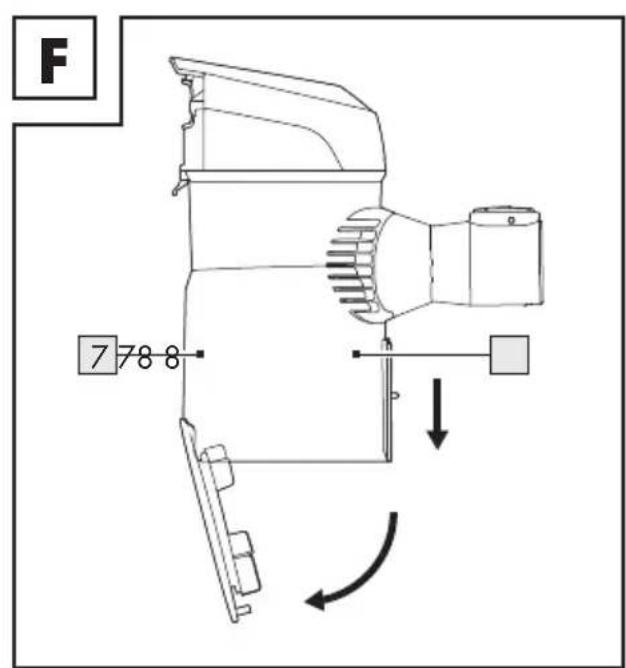
Press the release button 2 and lift the dust container 7 from the motor unit 6 (Fig. E).
- Hold the dust container 7 over a waste bin.
Press the lock 8 on the side of the dust container 7 down to open the bottom and thus discharge the dust (Fig. F).
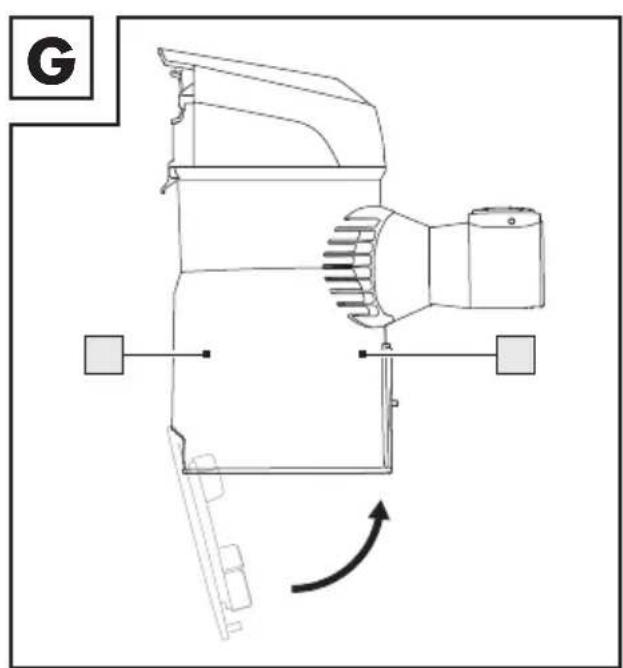
- Close the bottom. The lock 8 must audibly lock in place (Fig. G).
- Insert the dust container 7 into the motor unit 6. The release button 2 must audibly lock in place (Fig. H).
● Cleaning and care
⚠️ DANGER! Risk of electric shock!
Disconnect the power plug 5 from the socket-outlet before cleaning the product.
Never touch the power plug with moist or wet hands.
Always keep the power plug and power cord dry.
⚠ WARNING! Risk of electric shock!
Never immerse the electric parts of the product in water or other liquids. Never hold the product under running water.
- Switch off the product and disconnect the power plug 5 from the socket-outlet.
- Do not use any corrosive or abrasive cleaning agents.
■ Remove coarse dirt by hand. - Clean the product with a damp cloth. For stubborn dirt, use a damp cloth and a mild detergent and clean the product again.
Dust container and filter
NOTE: Check the HEPA filter 19 regularly for damage and deformation. A damaged or deformed HEPA filter cannot be cleaned and must be replaced. This is necessary in order to maintain the functionality of the product and to protect the product from damage.
Replacement HEPA filters 19 (article number IAN 391617_2201) can be reordered.
Order online
www.optimex-shop.com
■ Remove the dust container 7 (see "Emptying the dust container").
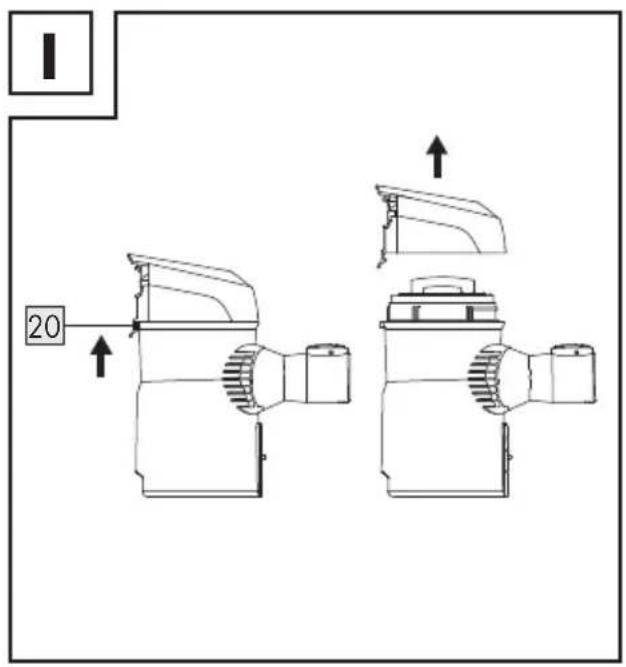
■ Remove the dust container lid 1 by pressing the clip for opening the dust container lid 20, which is located at the side, upwards (Fig. I).
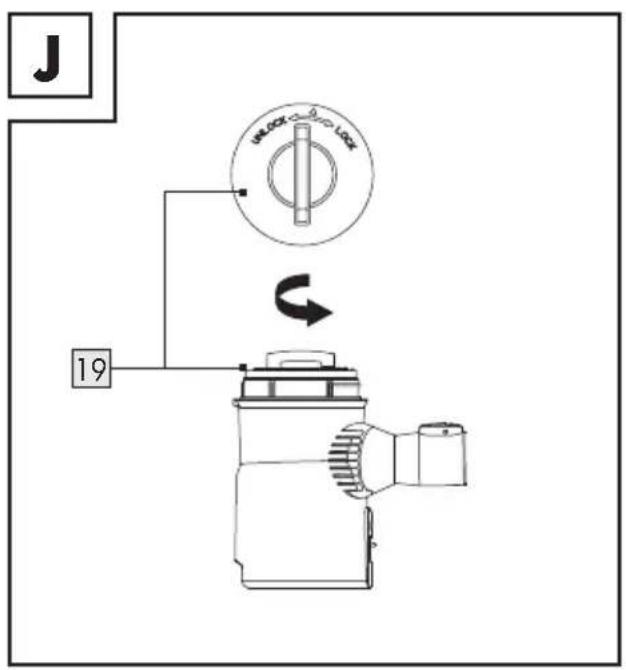
Turn the HEPA filter 19 counter-clockwise so that points to on the filter case 18 (Fig. J).
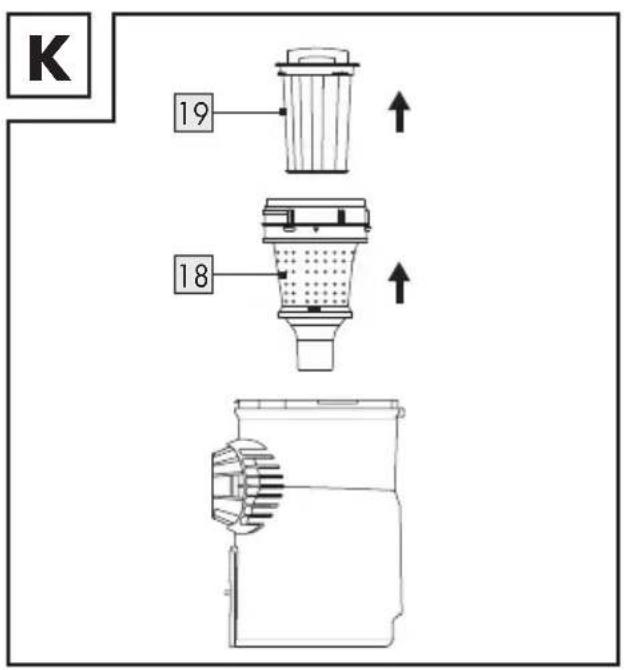
■ Remove the filter case 18 with HEPA filter 19 from the dust container 7 (Fig. K).
Pull the HEPA filter ^19 out of the filter case ^18 (Fig. K).
The HEPA filter ^19 can be emptied by tapping it. Never wash the HEPA filter with water.
- Rinse the filter case 18 with warm water and let it dry for 24 hours.
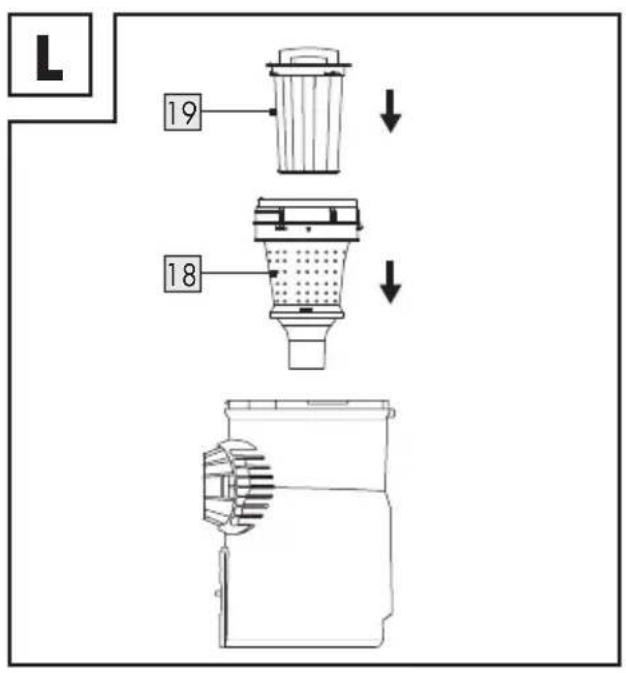
- Insert the HEPA filter ^19 into the filter case ^18 (Fig. L).
Insert the filter case 18 with the HEPA filter 19 into the dust container 7 (Fig. L).
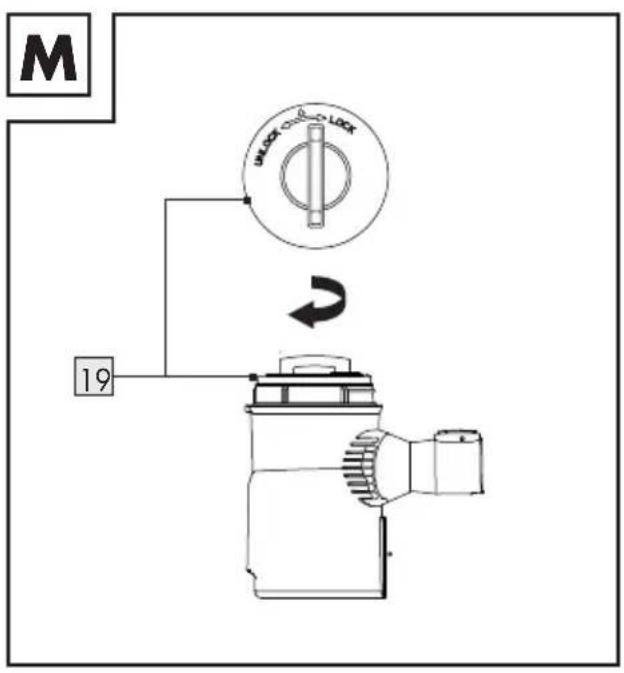
Turn the HEPA filter ^19 clockwise so that points to ● on the filter case ^18 (Fig. M).
Place the dust container lid 1 on the dust container 7. The clip for opening the dust container lid 20 must audibly lock in place.
Insert the dust container 7 into the motor unit 6. The release button 2 must audibly lock in place (Fig. H).
● Troubleshooting
Fault Possible cause Action
| The product does not work. | The power plug 5 is not connected to the socket-outlet. | Connect the power plug 5 to a socket-outlet. |
| The suction power is reduced and the product does not vacuum any dirt. | Dust container 7 full. | Empty the dust container 7 (see "Emptying the dust container"). |
| Suction path blocked. | Check the nozzle 13 15, the telescopic tube 11 and the dust container 7 for blockages and remove them. | |
| Filter case 18 or HEPA filter 19 clogged. | Clean the filter case 18 and the HEPA filter 19 (see "Cleaning and care"). | |
| The product overheats. | Filter case 18 or HEPA filter 19 clogged. | Clean the filter case 18 and the HEPA filter 19 (see "Cleaning and care"). |
| Dust escapes from the product. | The dust container 7 was not installed correctly. | Install the dust container 7 (see "Emptying the dust container"). |
| The air that escapes from the product smells unpleasant. | Deposits in the suction paths, the filter case 18 or HEPA filter 19. | Clean the product, the filter case 18 and the HEPA filter 19 (see "Cleaning and care"). |
Storage
■ Store the product in the original packaging when it is not in use.
■ Clean the product before storage.
■ Store the product at a dry location out of the reach of children.
- Disposal
The packaging is made entirely of recyclable materials, which you may dispose of at local recycling facilities.

The product and packaging materials are recyclable, subject to extended manufacturer responsibility. Dispose it separately, following the illustrated packaging symbols, for better waste treatment.
The Triman logo is valid in France only.
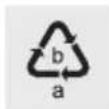
Observe the marking of the packaging materials for waste separation, which are marked with abbreviations (a) and numbers (b) with following meaning: 1–7: plastics / 20–22: paper and fibreboard / 80–98: composite materials.
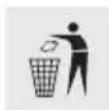
Contact your local refuse disposal authority for more details of how to dispose of your worn-out product.
To help protect the environment, please dispose of the product properly when it has reached the end of its useful life and not in the household waste. Information on collection points and their opening hours can be obtained from your local authority.
Warranty
The product has been manufactured to strict quality guidelines and meticulously examined before delivery. In the event of product defects you have legal rights against the retailer of this product. Your legal rights are not limited in any way by our warranty detailed below.
The warranty for this product is 3 years from the date of purchase. The warranty period begins on the date of purchase. Please keep the original sales receipt in a safe location. This document is required as your proof of purchase.
Should this product show any fault in materials or manufacture within 3 years from the date of purchase, we will repair or replace it – at our choice – free of charge to you. This warranty becomes void if the product has been damaged, or used or maintained improperly.
The warranty applies to defects in material or manufacture. This warranty does not cover product parts subject to normal wear, thus possibly considered consumables (e.g. batteries) or for damage to fragile parts, e.g. switches, rechargeable batteries or glass parts.
● Warranty claim procedure
To ensure quick processing of your case, please observe the following instructions:
Please have the till receipt and the item number (IAN 391617_2201) available as proof of purchase.
You will find the item number on the rating plate, an engraving, on the front page of the instructions for use (bottom left), or as a sticker on the rear or bottom of the product.
If functional or other defects occur, please contact the service department listed either by telephone or by e-mail.
You can return a defective product to us free of charge to the service address that will be provided to you. Ensure that you enclose the proof of purchase (till receipt) and information about what the defect is and when it occurred.
Service
GB Service Great Britain
Tel.: 08000569216
E-Mail: owim@lidl.co.uk
IE Service Ireland
Tel.: 1800 200736
E-Mail: owim@lidl.ie
CE
www.optimex-shop.com
⚠ WAARSCHUWING! Verwondingsgevaar!
⚠ WAARSCHUWING! Verwondingsgevaar!
www.optimex-shop.com
www.optimex-shop.com
Online objednávka www.optimex-shop.com
www.optimex-shop.com
www.optimex-shop.com
⚠️ADVARSEL! Fare for
⚠️ADVARSEL! Fare for
natural_image
Technical line drawing of a mechanical component with a cylindrical shaft and base (no text or symbols)
Tæpper
Hårde gulve
Trapper


www.optimex-shop.com
www.optimex-shop.com
www.optimex-shop.com
www.optimex-shop.com
Odstranite posodo za prah7 (glejte: »Praznjenje posode za prah«).
Odstranite pokrov posode za prah 1, tako da sponko za odpiranje pokrova posode za prah 20 na strani pritisnete navzgor (sl. I).
Filter HEPA19 zavrtite v levo, da znak kaže na znak na ohišju filtra 18 (slika J).
Ohišje filtra 18 s filtrom HEPA 19 odstranite iz posode za prah 7 (sl. K).
Filter HEPA19 izvlecite iz ohišja filtra 18 (sl. K).
Filter HEPA19 lahko izpraznete, tako da ga stepete. Filtra HEPA nikoli ne perite z vodo.
Ohišje filtra18 pomijte s toplo vodo in pustite, da se suši 24 ur.
■ Filter HEPA19 vstavite v ohišje filtra 18 (sl. L).
Ohišje filtra 18 s filtrom HEPA 19 vstavite v posodo za prah 7 (sl. L).
Filter HEPA19 zavrtite v desno, da znak kaže na znak na ohišju filtra 18 (sl. M).
Pokrov posode za prah 1 postavite na posodo za prah 7. Sponka za odpiranje pokrova posode za prah 20 se mora slišno zaskočiti.
Posodo za prah 7 vstavite v motorno enoto 6. Sprostitvena tipka 2 se mora slišno zaskočiti (sl. H).
Pooblaščeni serviser:
OWIM GmbH & Co. KG
Stiftsbergstraße 1
74167 Neckarsulm
NEMČIJA
