00176579 - Lighting HAMA - Free user manual and instructions
Find the device manual for free 00176579 HAMA in PDF.
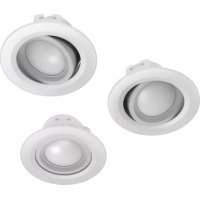
| Product type | WiFi recessed LED spot (set of 3) |
| Model | 00176579 |
| Brand | Hama |
| Power | 5 W per spot |
| Luminous flux | 350 lm per spot |
| Color temperature | 2700 K - 6500 K (warm white to cool white) |
| Power supply | 230 V ~ 50 Hz |
| Recessed diameter | 75 mm |
| Minimum recessed depth | 80 mm |
| Minimum distance to flammable materials | 50 cm |
| Protection class | II |
| Protection rating | IP20 |
| Connectivity | 2.4 GHz WiFi |
| Max. transmission power | < 100 mW |
| App | Hama Smart Home (Solution) |
| Dimmer | Not compatible with conventional dimmer |
| Light source | Not replaceable |
| Usage | Dry indoor only |
| Installation | By a qualified electrician |
| Package contents | 3 WiFi LED spots, 1 quick start guide |
| Cleaning | Slightly damp lint-free cloth, no harsh detergents |
Frequently Asked Questions - 00176579 HAMA
User questions about 00176579 HAMA
0 question about this device. Answer the ones you know or ask your own.
Ask a new question about this device
Download the instructions for your Lighting in PDF format for free! Find your manual 00176579 - HAMA and take your electronic device back in hand. On this page are published all the documents necessary for the use of your device. 00176579 by HAMA.
USER MANUAL 00176579 HAMA
Operating Instructions
Bedienungsanleitung
Moded'employi
Instruccionesdeuso
Gebruiksaanwijzing
Istruzioniperl'uso
Instrukcjaobslugi
Hasznalatiutmutató
Manualdeutilizare
Návodk p oužiti
Návodnapoužitie
Manualdeinstruções
Bruksanvisning
PykoBOOCTBOONKcnpnyatauH
Pa6oTHaHHcTpyKcIa
O8nyiecxpno
Kullanmakilavuzu
Käyttoohje
LinktoApp

de.hama.com/smarthome#smart-solution
GB
D
F
E
NL
1
PL
H
RO
CZ
SK
P
S
RUS
BG
GR
TR
FIN
Step1:cuttheholeonceiling
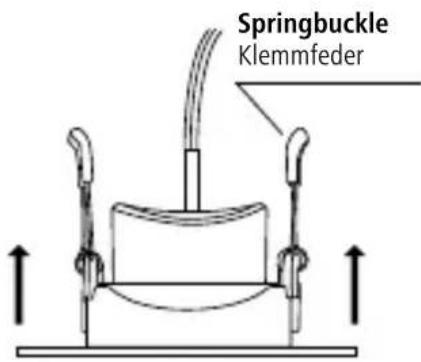
Step 3: Vertically put the spring buckle and then release on the hole of ceiling
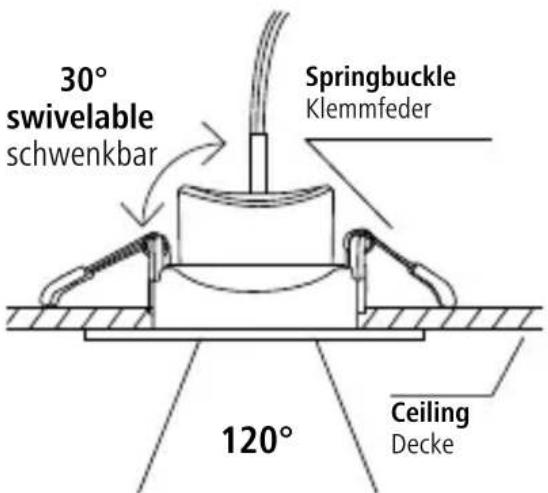
Step4:Finishinstallation
Schritt4:InstallationabschlieBen
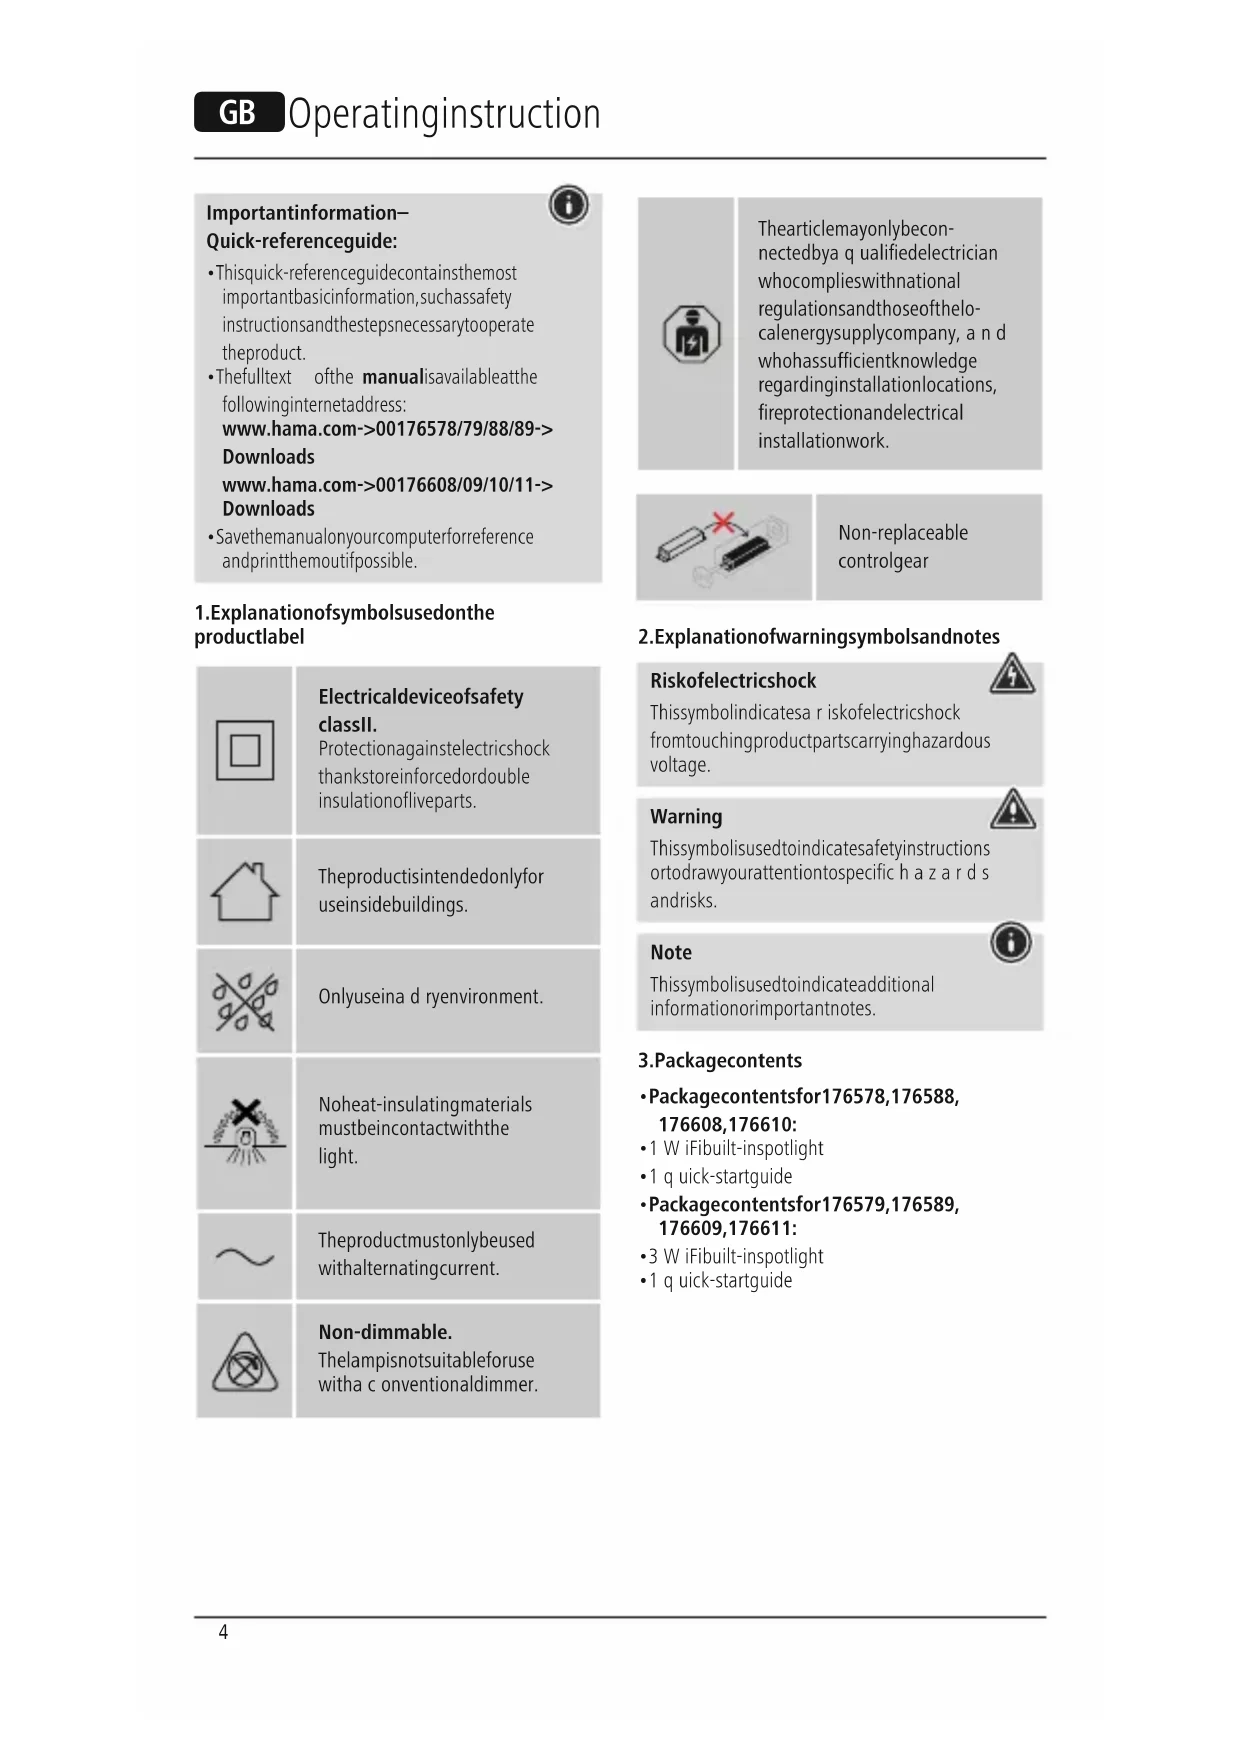
Important information- Quick-referenceguide:
Thisquick-referenceguidecontainsthemost importantbasicinformation,suchassafety instructionsandthestepsnecessarytooperatetheproduct.
Thefulltext ofthe manualisavailableatthe followinginternetaddress: www.hama.com->00176578/79/88/89-> Downloads www.hama.com->00176608/09/10/11-> Downloads
- Savethemanalonyourcomputerforeference andprintthemoutifpossible.
1.Explanationofsymbolsusedonthe productlabel
| Electricaldeviceofsafety classII. Protectionagainstelectricshock thankstoreinforcedordouble insulationofliveparts. | |
| Theproductisintendedonlyfor useinsidebuildings. | |
| Onlyuseina d ryenvironment. | |
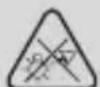
| Noheat-insulatingmaterials mustbeincontactwiththe light. | |
| Theproductmustonlybeused withalternatingcurrent. | |
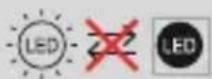
| Non-dimmable. Thelampisinitsuitableforuse witha c onventionaldimmer. |


Thearticlemayonlybeconnectedbyaqualifiedelectricianwhocomplieswithnationalregulationsandthoseofthelocalenergysupplycompany, andwhohassufficientknowledgeregardinginstallationlocations,fireprotectionandelectricalinstallationwork.
Non-replaceable controlgear
2.Explanationof warningsymbolsandnotes
Riskofelectricshock
Thissymbolindicatesa r iskofelectricshock fromtouchingproductpartscarryinghazardous voltage.
Warning
Thissymbolisusedtoindicatesafetyinstructions ortodrawyourattentiontospecific h a z a r d s andrisks.
Note
Thisssymbolisusedtoindicateadditional informationorimportantnotes.


3.Packagecontents
- Packagecontentsfor176578,176588, 176608,176610:
-1 W iFibuilt-inspotlight - 1 q quick-startguide
- Packagecontentsfor176579,176589, 176609,176611:
- 3 W iFibuilt-inspotlight
- 1 q quick-startguide
4.Safetyinstructions
Thisproductisintendedforprivate,non-commercialuseonly.
- Thisproductisintendedexclusivelyforinstallation insuspendedceilingsorsuitablebuilt-inrecesses orconcretebuilt-inhousings.
- Usetheproductonlyforthenthintendedpurpose.
- Donotdroptheproductanddonotexposeitto anymajorshocks.
- Donotoperatetheproductoutsidethepower limitsspecifiedinthetechnicaldata.
- Do not modify the product in any way. Doing so voidsthewarranty.
Childrenmustnotplaywiththedevic.Ecianning andusermaintencemustnotbcarriedoutby childrenwithoutsupervision.
- As with all electrical products, this device should bekeptoutofthereachofchildren.
- Disposefpackagingmaterialimmediately inaccordancewiththelocallyapplicable regulations.
Theproductshouldonlybeinstalledinself-containedrooms.Itisnotsuiteforinstallation inbathrooms.
Theproductmustonlybeoperatedona supply networkasdescribedonthetypepeplate.
- Before mounting, check that the ceiling you have chosen issuable fortheweighttobemounted. Also make sure that there are no electric, water, gasorotherlinesrunningthroughtheceilingat themountingsite.
Electricalcablesmustneverbecometrappedortwistedbetweentheproductandthesurface.
If the product is attached to a metal surface, it must be connected to anearthleadorthe installation'spotentialequalisingcable.
These built-in lights are not compatible with dimmerswitches,motionsensorsordimmers.
- Protect the product from dirt, moisture and overheating and use it in dryroomsonly.
Onlyusethearticleundermoderateclimatic conditions.
- Donotusetheproductinareasinwhich electronicproductsare n ot permitted.
- Donotusetheproductina d ampenvvironment andavoidsplashingwater.
- Donotbendorcrushthecable.
- Donattempttoserviceorrepairtheproduct yourself. L eaveanyandallserviceworkto qualifiedexperts.
- Donotcontinuetooperatethedevicifitis visiblydamaged
Warning

- Please notethatlights(evenLEDs)cangenerateheatandmaybecomehot. Alwayslet thelightcooldownforafewminutesbefore touchingit.
The device can only be operated on a 30 V/50Hz AC voltage network. Work on the 230V n etwork must be carried out by an electrician certified in your country. The applicable prevention regulations must be adhered to.
Toavoidanelectricshockfromthedevicere, pleasedisconnectthemainsvoltage(switchoff theautomaticcircuitbreaker).Failure to complete withtheinstallationinstructionscancausefires orotherhazards.
Riskofelectricshock

Donotopentheproductanddonotoperateitif itisdamaged,ifsmoke,a strangesmellorloud noisesare c omingfromit.Immediatelycontact yourdealerorourservicedepartment(seeitem "ServiceandSupport").
Note

Thelightsourceofthislightisnotreplaceable; whenthelightsourcehasreachedtheendofits life,youneedtoplacetheentire light.


Warning

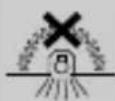
Neverlookstraighttothelightsourceanddonotaimitsbeamoflightstraighttotheeyesofotherpeopleoranimals.Thiscoulddamageyour/theireyes.

Exampleinstallationinwood/ d rywallceiling:
1.Before commencinganyinstallation, maintenanceorrepairwork,pleasedisconnect thepowercircuitbydisconnectingtheuse.
2. Secure the powercircuit against being switchedbackon.
3. Check that the minimum installation depth of 80mm (47 m light + 3 m c learance) is available. The clearance between the upper edge of the light and the ceiling must not be less than 33 mm to allow ventilation. The minimum distance between the lights and flammable materials must be no less than 50 cm. Donot cover the light with any heat-insulating material.
4. Markoutthepositionwhere t helightisto beinstalled.
5. Create an installation opening with a diameter of 75mm using a suitable holesaw. Take care not to distort any hidden installation or supply lines.
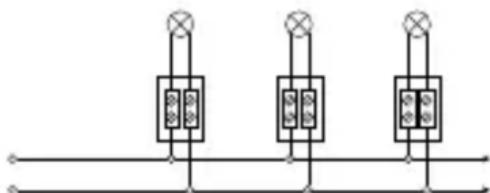
6. Theterminalpoints(e.gterminalstrip) betweenthedomesticinstallationandthe built-inspotlightconnectioncablemust be clampedinsuitablejunctionboxes.(Not included intheextentofdelivery).
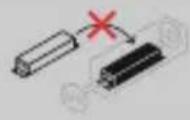
7.Continuingcablestothenextbuilt-inlight mustcorrespondintermsofstructure a nd insulationtotheoperatingmode.Theyellow / green (earth / PE conductor) cable is not connected.Otherlightsare c abledinparallel.
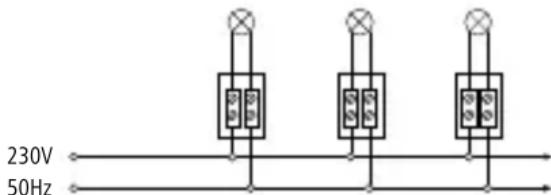
8.Closethejunctionboxandpushitintothe installationopening.Alsoensure t hatthecables are free of compressive and tensile forces. Protectallcablesandinsulationfromany potentialdamage.
9. Positionthebuilt-inlightatanangleandfirst inserta c lampintotheinstallationopening. Thespringsontheclampare v erypowerful andcauseinjuryifdueattentionis notpaid!
- Nowguidethecondclampintothe installationopening.Thebuilt-inlightis nowslowlyintroducedallthewaytothe installationopening.Theforceoftheclampsis sufficienttoholdthebuilt-inlightinposition.
- No further fixings are needed. For precise alignment, the built-in light can be easily repositioned and rotated. The internal part of the light can also beswivelled.
12.Onlyreinsertthefuseonceallbuilt-inlights havebeeninstalled.
Removal
1.Pullthebuilt-inlightoutoftheinstallation openingoneside.Takecare to e nsure t h a t theclampdoesn'taccidentallyslipoutof theopening.Otherisethere isadangerthat fingersmaybecometrapped.
2. Firstcarefullyremoveoneclamp,thenthe other, from the installation opening.
3.Thefurtherremovalprocessiscarriedoutin thereverseordertotheinstallationprocess.
5.Here'showeasyitis:
Downloadtheapp
- DownloadtheHamaSmartHome(Solution)
APPfromtheAppleAppStore or r G ooglePlay
Store. - OpentheHamaSmartHome(Solution)APP.
The firsttimeyouusetheapp,youneedto register and create a new account. If you already haveanaccount,loginwithyouraccessdetails. - Follow the instructions in the app.
Note

A d etaileddescriptionofthe
HamaSmartHome(Solution)App
anditsfullscopeoffunctionscanbefoundinour AppGuideat:
www.hama.com ArticleNumber Downloads AppOperatingInstructions
6.CareandMaintenance

Note
Disconnecttheproductfromthemainsbefore cleaningandduringprolongedperiodsof non-use.
- Only clean this product with a slightly damp, lint-freeclothhanddonotuseaggressivecleaning agents.
- Ensure that no water is able to enter the product.
7.WarrantyDisclaimer
Hama GmbH & Co KG assumes no liability and providesnowarrantyfordamageresultingfromimproper installation/mounting,improperuseoftheproduct orfromfailure to o bservetheoperatinginstructions and/orsafetynotes.
8.RecyclingInformation
Noteonenvironmentalprotection:
Aftertheimplementationofthe EuropeanDirective2012/19/EUand 2006/66/EUnthenationallegal system,thefollowingapplies: Electricandelectronicdevicesas
wellasbatteriesmustnotbedispersedofwith householdwaste.Consumersareobligebylaw toreturnelectrcaleandelectronicdevicesaswell asbatteriesattheendoftheirservicelivestothe publiccollectingpointsetupforthispurpose or point of sale.Details to this are defined by the nationallawoftherespectivecountry.T hissymbol ontheproduct,theinstructionmanualorthe package indicates that a product is subject to these regulations.Byrecycling,reusingthematerialsor otherformsofutilisingolddevices/Batteries,you are makinganimportantcontributiontoprotecting ourendvironment.
9.RFexposureinformation
ThisdevicecomplieswiththeUrequirements forlimitingtheexposure of t hegeneralpublicto electromagneticfieldsbymeansofhealthprotection. ThedevicecomplieswithRFspecificationsprovided itisused20cmawayfromthebody.
10.DeclarationofConformity
Hereby, Hama GmbH & Co KG declares that the radio equipmenttype[00176578,00176579,00176588, 00176589,00176608,00176609,00176610, 00176611]isincompliancewithDirective2014/53/EU. The fulltextoftheEU declaration of conformity is availableatthefollowinginternetaddress: www.hama.com->00176578,00176579, 00176588,00176589,00176608,00176609, 00176610,00176611->Downloads.
11. Technical data
| WiFiLEDBuilt-InSpotlight | 176578/79/88/89 |
| Luminousflux350lm | |
| Power5W | |
| Lightcolour | 2700%- 6 500% (warmwhitetocool white) |
| Lampcurrent45mA | |
| Frequencyband/ frequencybands | 2.4GHz |
| Maximumradio- frequencycypower transmitted | < 1 00mW |
| WiFiLEDBuilt-InSpotlight | 176608/09/10/11 |
| Luminousflux380lm | |
| Power5W | |
| Lightcolour | 2700%- 6 500% (warmwhitetocool white) |
| Lampcurrent45mA | |
| Frequencyband/ frequencybands | 2.4GHz |
| Maximumradio- frequencycypower transmitted | < 1 00mW |
IyckBooeycpoiCTBO HenoDJIeKJNTaMeHe.
1.PoRcHeHnK o 603HaueHnMa MapKnupOBKnN3deJIn

3auntbill.
3aunta ot 3neKtpoydapa 6naqopa
yCJIeHHoHnN I BOHOn3OJauuN
TOKOpOBoAunxDetaeN.

I3dennepaHa3HaeHo TOLbKOJIAICNOJIb3OBaHnB NOMeHnn.

IcnoB3oBaTbToJbKOB cyxOcnpeJe.
K lamneheoJxHbInpuieraTb TeIOn3OInpyUoumeMaTePnaJIbI.

NCTOCHK CBeta 30T JAMNBI He NOJNEXHT 3aMeHe.10oKOHuaHnCpOKacnyx6bInCTOuHnKa CBeta J aMnycJeNyet3aMeHtBnIOJIHOCTbIO.
PpeynpexKdHne

HNB K OeMCnyaehecMOtpnteHaNCTOCHK CBeta HHeHaPpABnIeTeero B Ia3a JIOJAMUNIKBOTHBM.ONaCHOCTb NOBpeXdEHnra3!
PnmuMepyctaHOBKnB IepeBaHHbI/ rNtCOKApTOHHbIINOTJIOK:
1.Передначаллимонтужа,тхичecкого
облухиваняллремоны о бстоьт
эльекtpocetb,OTКЛЮЧИВпрдoxpaHNTeIb.
2.3aunntTeJnKtpocTebOT HepeHaMepeHHOrO B KIOUeHnA.
3. Y6eHntecb H aJIuHn Heo6xOJIMoI rIy6HbIBCTpaINBaHnMaMHmym80MM(47 MMCBETnJIbHNKn33MMnpomExyTOHoe paCCToHnne).IpomexyTOHOepacCToHnne MEXdyBepxHMkpaEMCBetNJbHKaN IOTOLKOM DoJIxHO CoCTaBnTb He MeHee 33 MM,HTo6bIO6ecneHTbBEHTNIpOBaHnE. MnHImaJIbHOepacCToHnEmexMy CBETNJbHKaMn JERKOBOCJIaMeHNOUIMMC MaTePnaJAMnIOJXHOCCTaBnTbHe MeHee50cm.HeNOKpbIbTaCBETNJbHKn TeJIPOJ3OJIaONHHbIMMaTePnaJlOM.
4. OTMeTbTepeIpaIaEmaOpacnIOJoxHeNCBETINbHnka.
5.CdenaTaeOTBepCTneJIABCTpoKnO75 MMCOOTBECTByoUeIΦpe3oJIAKpyrIbIX OTBepTNI. CJeNTe 3a TeM, YTO He nonactb BCKpbTyO 3JIeKTPOnpOBOkny INHKeHePbIe KOMMYHnKaun.
6.CoeHHeHHeKJIeMMHbIX3aXIMOB (HaepmepJIIOCTPOBbI3axIM)MeJdy npOBoIKoB I DOME N COeINHTeJIbHbIM KaBeJIeMBCTPOeHHORO C BETNJbHnka DoJXHOBBINOJHrTbCAB N OxOJauxPacnpdeJeNTeJIbHbIX (paCnaayHbIX) Kopo6kax. (He BXoJrT B KOMJIeKT NocTabKn).
7. Ka6eIb, BeDyuN K CJIeDyUOSeMy BCTPOeHHOMYCBETINbHnky,I0JXKeHNO CTPOeHNIO N 30JIaUNCOOTBECTBOBaTb peKIMy pa6oTb.IPBoOD JeITo- 3eJeHbI (3eMn/npBoOD 3a3EmLeHn) HEnoDKJIIOUaETcI.DpyrueCBETINbHnKn COeINHIAOTc npaJIeNbHO.
230V 50Hz

8.3akpoIepacnpeIeIeIbHyIOKOpO6kyu BCTaBte ee B MOHTaxHoe OTBepCTne. DaJIee CNeIITe3aTeM,HTo6bIka6beIbHe6blIOIo IaBJIeHNm I HaTaeKeHNm. 3aUIIaIe Ka6eIb I N 30JIaIIOOTBO3MOXhblIXNOBpeKJeHn.
9.PacnoIoxnTeBCTpaNbaEmbIcBETnHKnNoD yIOMN B CTaBbTeChauJa3aKaTbI3aXIM B M OHTaxKHOeOTBepCTne.IpyxHbI3aXIMa OueHbCINbHbIe N C LyuaeHeBHMaTeJIbHOCTN MOrYTBblBaTbNOBpeXdEHNA!
10.TenepbBCTaBBTeBTOPO3axKaTbI3axNIMB MOHTaXHoeOTBepCTne.3aTeMCBETnIbHnik MeIJIeHHOJNOHOCbIOBCTaBJIeTCAB MOHTaXHoeOTBepCTne.CIbI3axNMOB IOCTaTOUHOJLYpeKJBaHnIBCTpoEHNO CBETnIbHnKa B eRO NOLOKeHN.
11.ДононтелбногОКрплесенЯ He Tpe6yeTc.ДяTOHOrO p a3MeueHHBCTpoEHbI CBETINbHNKMOxHOCJIeKanODBHyTb IIN NOBepHyTB CBOEM NIOJOxEHN.ДононтельНOBHyTppeHHOuAcTb CBETINbHNKaMOxHoeUeNOBOpaUBaTb.
12. BkIIOHTe npedoxpAHnteTb TOnbKO nocne NOJIHOCTbO3aBepseHHOro M OHTaXaBCex CBETnIbHNKOB.
ДемоNTаж
1.N3BNEKNTECBENbHnKcOdHOIcTOPOhIN3 MOHTaXHoT OTBepCTn. CJeIITe npn 3a TEM,HTo6b3axNMCJyauHHOHeBbICKOJIb3HyI N3OTBepCTn.IHaueEcTbONaCHOCTb3axNMa naJIbceB.
2.0ctopoxhON3BnKeKNTeN3MOHTaXHOrO OTBepCTIaCHaJIaOINH,3aTeMnpyroJ 3axm.
3.DaJIbHeiIeMOHTaXbIINJHReTcB O6paTHOMnopRKeIO CpaBHeHIO CMoHTaXOM.
5.3arpy3kapanpnoJoxeHn--
3TOnpoctO
-СачайтенихеHamaSmartHome (Solution)нЗAppleStoreиGooglePlay.
- OTkpoTepnIoJxHeneHamaSmartHome (Solution)
KaKHOBbIINoJIb3OBATeJIbBbIOJIXHbI 3apeNCTpnpOBaTbCn 3 aBeCTNUHOBYIOUYeTHyIO 3aInCb.Ecn yBa cYxe eCTb yYeTHa 3aInCb, BOINTEBC NCTEmy,NCNOJIb3yACBOUdAHHbIe DOCTyna.
CneyuTeyKa3aHnMmnpUIOxEHNIA.
Yka3aHne

Iopob6HoeonicaHemeMo6nblHoROnpnploKeHHa
HamaSmartHome(Solution)
nOJHbIepeueHbdyHKuIcoepxITcA
B H aWEMcnpaBOOHnke:
www.hama.com Homeaprtukyana
Downloads
PykoBODCTBOON3KnJyataunnpnloxhen
6.TexHnueckOoe6cnyKbHaHneu y xoJ

PpmeaHne
IpeepouchkOIN pndntelbHOM HeNcNoJIb3OBaHnIOKJIIOHTeYCTPOICTBO OTCETN.
YnCTnte n3dEInne TOnbKO C NOMOuBIO 6e3BOPcBOo, cIeRkABNaXHOuCaNΦETK, He NCNoJIb3yItearpeCCNBHbIeUcnTaeUncpeDCTBa.
Cneinte 3a tem, yto6bI B yctpoiCTBO He nonanaIaBoda.
7.0cbo6oxdHneoTOBtCTBeHHOCTn
HamaGmbH&Co.KGHe Hecet OTBeTCTBHeHOCTn 3a NOBpeXdEHH,BO3HNIKWHne B pe3yJIbTaTe HeHaJNExaUeYcTaHOBKN,MOHTaxaHn HeHaJNExaUeRO n CNOJb3OBAHNrN3DeJIHn IINHeCO6JIIODeHnATpe6OBAHnpyKOBOdCTBa N03KcIpyatauNN/IINyKa3aHnNOTexHnke 6e3OnacHOCTn.
8.NHCTpyKcunnooyTnln3aun
OxpaHaokpykaJoueicpeIbI:

CMOMeHTa nepexoHa naHOnHaJIbHoRo
3aKoHODaTeIbCTBaHaebPoneNckne HOpMaTnBbl2012/19/EUn2006/66/EU
IeINCTBnTEJIbHOCNeIyIOUe:
3JNeKTpuecknEn 3JneKTpOHHbIe
np6opbl, a TaKke 6atapen 3anpeaetc
ytunn3npoBaTb C obuHbIM Mycopom. Notpe6nteIb,
coIacho3aKOHy,083aHyTuIN3npoBAtb
3neKtpueckne n 3JeKtpoHHbIe np6opbl, a TaKke
6atapenn a KkyMnyTOpblIOncNxCNOb3OBaHnra
BC neuaJIbHOpeDHa3HaueHHbIXdJIa3TOROyHKta
cbopa, INo6 B nyKHTax npodaXn. DeTaIbHna
perlameHTaUa3NTxTpe6OBaHmOcyUeCTCBnEETc
COOTBECTBYUOUMMECTHBIM3aKOHOdaTeJIbCTBOM.
Heo6xoImocTbCo6JIODeHnJaHHbIXpEtnNCaHn
obO3NaayctC06ObIM3HauchKOMHa3DeHn,
HNCTpykUnIO3KcNlyaTaUmmNInyNAkOBKe.
Ppinepepa6OTke, NOBTOPHOMNcNOb3OBaHn
MaTeepnAnOBuINnpuPyrofOpMeYtUN3aUIN
6bIBwNxB y notpe6NeHnnp6OpOBBbInOMoraete
oxpahe OkpyxaOnse CpeDb. B COOTBeTCTBNi C
npedncaHnMn no ObpaSeHnO c 6batapeMn, B
FepMaHnBBiWeHa3BaHHbIeHOPMaTNBdeIeCTBYOT
DJIa YtUN3aUIN 6batae n AkKyMnyTopOB.
9.HΦopMaHRO B O3dEiCTBUNBBICOKOJ YACTOTbl
DAnHnoeUcpoCTBOCOOTBeTCTByeTTpe6oBaHnAmeEC NOOpaHnueHnIOBO3DeIeCTBn3JIeKTPomarHHTbIX NOJe Ha HaceJeHne C NOMOuBo NONoXeHn NOoxpae3dOpOBy. YcpoCTBOCOOTBeTCTBye TcneuΦnKaUm B OTHOJeuHn BBICOKO JaCTOTbl, ecNHOHcNOb3yeTcHapacctOHN20cm OTena.
10.Deklapaunipon3BovnteJia
HactoIzumKOMnHaHama
GmbH & Co KG 3aBnE, qTO
paanoo6opdyoBAnHeTnna
[00176578,00176579,00176588,
00176589,00176608,00176609,00176610,
00176611]oTBeueaETpe6oBaHmMdIupeKTeNBbl
2014/53/EC.C noJIHbIM TeKCTOM dKeJapauuN
O C OOTBETCTBUNITpe60BaHnAmeCMoxHo
03HaKOMNTbc3decb:ww.hama.com->00176578,
00176579,00176588,00176589,00176608,
00176609,00176610,00176611->Downloads.
11.TexnueckneaHHbIe
OnachoctOT Tokob yap
To3ncmb0j y ka3BaonacHocTnpDOnnnp C H en3oJlnpaHuaCTHaNpOdyKta,KoHTo eBeHTyalHOpOBexJaT O naCHOHaPExeHne, KOeTO e TOKOBA BNCOKO, Ye CbUeCTByBa ONaCHOCT OT TOKOB ydap.
PpeynpexkdeHne
I3non3Bace,3aDaa06o3Haayabayka3aHne3a 6e3oNaCHOCTnJIN3aJaHaCooVBHMaHHeTO KbM KOHKpeTHn ONaCHOCTn PnCKOBe.
Yka3aHne
H3no3BaCe,3aD0603HaayabaonbHnTeHn HOpMaunnBaxKnYa3aHn.
3.CbDpbXaHHeHaonakOBkata
CbIbpKaHne Ha onaKOBkata 3a 176578, 176588,176608,176610:
- 1WiFi cnot-namma 3a Brgpaxdahe
1KpaTko pboBOOCTBO3a yNtpe6a
CbIbpkaHneHa onaKOBkata 3a 176579, 176589,176609,176611:
- 3 W iFiCnota
1KpaTko pboKOIOCTBO 3a ynoTpe6a
4.Yka3aHn83a6e30naCHOCT
- PpOyKtBt e npEbnDcH 3a JnUHa, HecToNaHcKa 6nTOBaynotpe6a.
- Ppojktb e npedBnDHe enHCTBeHO ca MOHTax B OKaueHn TabaHn NIN B CbOTBeTHte MoJyN 3a BrpaxdaHe, pecn. Kopnyc n 3a BrpaxdaHe B6eToH.
- 3nnoB3BaIte npOyKta cmo 3a npEbnDHeHata ceI.
He no3B0JBaIte Ha npOdyKta da naJa n He ro n3laarTeHaCnJIHnBn6paun.
He n3noI3BaIte npOdykTa I3BbH HerOBInTe rpaHnCuHa MoUHOCTTa, NOCOeHN B TexHNueCKInTe daHHN.
He npabete npomEnb ypea. TaKa 3e 3aryBte npabo Ha BcKaKbn rapaHnOHH npTeHcnn. - Deuata He 6nBa Da InrpaT C ypea. NocntBaHeto IOTpe6nteJckata NoDpBxxKa He 6nBa Da ce H3BbPWBat OT Deua 6e3 Ha3Op.
- IIOIO6HO Ha BCNUKn eNEKtpuYeCKn npOyKTn,TO3n npOyKT He 6bNA da nonaDa B pbcTe Ha deca!
- I3XbPJIeTe OAnKOBbHnI MaTePnAJI BeDHaRa CbIaCHO DeIcTBaUHTe Ha MCTO pa3NOpE6n 3a I3XbPJIaHe Ha OTnAbu.
- IpoodykTB Tp86Ba Da ce IHCTaIinae EDINHCTBeHO B 3aTbOpEn NOMEueHn. ToH e IPOxOJaU 3a INHCTaJauuB 6 aHn.
IpoNYkTbM0KeJa pa6Otn Camo B 3axpaHbuaMpexka, KaKBaTo e yKa3aHa Ha fa6pnuHaTa Ta6eJa. - PpeiMoHTaKa 3aIbJNkITeHNO npOBepTe npriGOnHOCTTa Ha npEiBnIeHaTcTeHa 3a TerITo, KoEt Oe 6bJe MOHTnpaHo, n Ce yBepeTe, Ye Ha MCTOTO Ha MOHTaKa B TaBaHa HMa eNEKtpueckn Ka6eNi, BODo-, ra3OpPoBODi nn DpyrtnPb6oPBoOAn.
- EJIeKtpnuecknte npoBOnHnU He Tp8Ba HNKOra da ce npuunBbAT mN yCyKBat MExNy npOdykTa n NobbpXHOCTT.
Ako npOdykTbCe nOCTaBa Ha MeTaHa NoBbpxHocT, TAp6Ba Da e Cbbp3aHa CbC 3aUHTnHa PpOBoHNK IIN C pOBoHNKa 3a N3paBHBaHe Ha NtEHnAInTe HauHCTaJaLnaTt.
TeBrgpaeHn KpyuHKe He ca CbBMecTmN 3a ekCnIIOaTaUe C DmMpaUe IpeBKIOUyBaTeU, DeTeKTopn 3a DBXJKeHne UIN DImepn. - PanaTe npOdykTa OT 3aMbpcBaHe, BlaRa n nperepbaHe I rO nI3nOJI3BaIte cMoB cyxN NOMeUeHn.
- I3noI3BaIte npOyKta cMo npu yMepeHn KJIMMaTNUHn Y CIOBn.
He n3no13BaIte npOyKTa B 30Hn, B KOITo He ca pa3peWeHn eJekTpoHHn npOyKTu.
He n3noJ3BaIe npOdyKa BbB BlaXHa CpeJa n36yBaIe BOHN pBcKn.
He npuynbaute He npntncaTe Kaeba.
He ce onntbaite camn da o6cnykBaTe nI npemOHtnupate npOyKta. OctabeTc BcKaKaBa TexHnuecka noDpBxka Ha KOMnTeHTHnTe CneuaJIncn.
He npoIbIxabaiTe Ia n3IOnJI3BaTe npOyKTa, aKO ToI mAOyeBnIHINOBpeiN.
PpeynpexdneHn
- Имайтпенид, чу лamнite (ВКЛ. LED CBETПИНITE)MORATДAPа3ВЯТВИСОКI TEmператури ида се нагоршт. Виаги ИЗчakВа�тЕняКOLКOMINHYЛЯМАNTада ИЗCTИнHe, п徳и дя ДOKОСHTe.
- EKcIIOaTaunraHa ypeDa e DOnyctMa eINHCTBeHO Cmpexa C npomeHInBO HnpeXeHne 230 V 50 Hz. Pa6OTnte no 230-BoTTOBaMpeXaTpa6BaJaceN3BbPswBaT caMOOTceTpHnUpaHBbBBAwaTaJbPxAb aEnkTPOCNEuaJIncT.IpntOBaTPa6BaJa cecb6IIOdaBat B aIiHNtepdNcAHHra3a 3aUHTa O T N HcNDHTN.
3a npedotbpaTbaHe Ha TOKOB ynap Ha ypeDa, MOJI, n3KJIIOyETempexBOToHAnpexEHe (n3KIOUByBaHeHaABTomATuHnAmpKbCBaY). PInHeCna3BaHeHayka3aHnTa 3 a N HCTaNaMoraT Da Bb3HNKHat NoXapN IIN DpyrOnaCHOCTN.
OnachocT OT TOKOB ydap
HeoTbapnTe npOkyTa n HepnoDbJIkaBaIteJa ro n3noJI3BaTe npri noBpeNi,OTdJIaCe ot Heo dIM,06pa3yBaHeHaMnpucNlncNIIHmUMOBe. O6bpHeTeceHe3a6abHOKbMbAunrTbproBeu nn Haun cepBn3eH OTdJ (Bnx ToKa CepBn3 n c bnot).
Yka3aHne
KpyuKaTa Ha Ta3n JaMaNa He MoXe Da Ce CMeHra, 3aTOBa C n3TuHaHeTo Ha EKCnIooTaauOHHna N JxNtB0rTpa6Ba Da ce CMeHn UJnata JaMaNa.
PpeynpexdHne
Hnkora He norlejkaIte InpekTHO B n3TOUHKa HacBETJINHAn H e H aocuBaTecBETJINHHN JbU d npekTHOKbMOHTeHaDpyrNXopauJI XNBOTHN.CbueCTByBa ONaCHOCT3ayBpeKdaHeHaOHTe!
IpMep 3a MOtax B DbPBO/okayeh TaBaH:
1.Ппeнзаочbaнehapao6tunonHCTaInpahe,TexnueckoobcnyxBaHe npemOH n3KIOUyTeOTHaNPexEHHeTO TKOBnKpbTpe3N3KIOUhaHepaHnpa3nteJI.
2.06e3onaceTeToKOBnKpbTcpeuynOBTOpHO BKJIOUBAHe.
3. IpoBepTe dani e hainuHa Heo6xOImMaTa MNHmAlHaIbIbOuHaHaABrpaXdaHe ot MIn. 80 mm (47 mm lamna + 33 mm pa3cToHne). Pa3cToHneTO MeJy rOpHn p6 Ha lamnata n TabaHa Tpr6Ba Da e He no-MaIKo OT 33 mm, 3a da e Bb3MoXHa BeHTnlaUma. MNHmAlHOTopA3cToHne MExdYamnTeN 3 anaUMMMAtePnAni Tpr6Ba Da e He no-MaIKo ot 50 cm. He NOKpVBaiTeJamnatac T ONlON3OJaUaOnHe H MaTePnAn.
4.МаркпайтженинатаноциязаВгражданеоналмпata.
5.HanpaBeTeMoHTaJxHeHbOpc075m m CbCcBoTBeTHaTa6OpKopoHa.IpntoBa BHIMaBaIte3aINHCTaJIaUNOHHH 3axpaHbAaIInpOBODHnU,KOHTO He c e BNXDaT.
6. 3axBaAaHeTo Ha MeCTaTa 3a CbBp3BaHe (HAnp.LyCTep KInema) MExNy DomaHaTa HnCTaIaUIN PnCbEiHNHTeHHaKeIHa cNt-Jamnata3aBrpaxJaHETP8BaIace N3BbPsN B NOxOJaIpa3PpeJeITeHH KyTIN. (He Ce CbDbpXaT B O6XBaTa Ha DoCTaBkata.)
7.BoIeIeHaTaTbKkA6eIa3cIeBaIuTe IaMn3aBrgpaxJaHaeTp6BaIaCbOTBeTCTBaT NoctpykTypaI N 3OlaunnaHaHaUnHa Ha pa6ota. IpobOHNK Xbl/T/3eJeH-(3a3emnteH/3aunTeH npOBOnHK) He ce CBbp3Ba.CpeBaIuTeIaMnncceCBbp3Bat C npOBOnHnnpapaneJHo.
230V 50Hz
8.3aTbOpeTepa3npeJeIeJIteHHaTaKyTuJnЯ ПьБ3HeteВMOtaxHЯOTBOP.BHIMaBaYTe Ka6eJIteJaHeCaPnITuCHaTIINNo6TeHATN. 3aUHTeTBcNkKAb6eJIInN 30JaCmNtO eBeHTyJIHNOBpeJN.
- IocTaBeTe BrpaDeHaTlaMnnaIIOHaKKnOH nIbPBoPpeKaPaIteo6TerHaTatacko6ab MOHTaXHHraOTBop.PpyxHHTeHaCKo6aTaca MHOrO CUNHN I npH HeBHMAmHe MoRat da npuHrTHapaHbAHn!
10.PpekapaTeBTopaO6TeHatacko6ab MOHTaXnIy OTbOp.BrpaJeHATA lamna ce npekapBa 6abHO n3zJIO B MOHTaxnIy OTbOp. CnIata Ha cKo6nte e doCTaTbHu, 3a da ce 3aIbpxKnBprdaHeTaIamnaHaHno3uNITaCn . - He e heo6xOIMO dOnbHnHTeHNO fHKcnpaHe. 3aToHONOOPaBHBaHeBrgpaDeHaTaNAMna MOKe JIeKO Da ce npemecBa N 3aBbPta B no3uNtA ta cn. BbTpewHata qact Ha JAmnata MOKeDaCEBbPtNDONbHnHTeJIHO.
12.N3KlIOUeTepeIa3IteJIeBacNeIHaHbNHO3BbPseHMOHTaxKaBCuYKnJaAMn3aBpaxDaHe.
Демонох
- I3TeIeIaMnata 3a BrpaJdaHe oT eHaTaCTpaHa OT MOHTaxHnO TBOp.Ipn TOBaBHNMaBaIteCKo6aTaJaHeCeN3JIb3HeHEBOJHOOTOBopa.B npotuBeH cnyaIcBtByBaONaCHOCdApnpuUInneTpbcTITecn.
- ΠbPBO n3TeIe eHata, a cIeT TOBa dpyrataCKo6aBHnMaTeHooTMOHTaxHHNOrTbOp.
- OctaHaJaTa YaCT OT DeMOHTaxa Ce n3BbPbBa B 06paTHAnocneIOBaTeJIHOCTHaMOHTaxa.
5.TobactaBaTOLKOBaJIeCHO:
I3terJHHeHaHpUNoXeHneTo
-ИзтетлеспуножецToHamaSmartHome (Solution)OTMaRa3инITEЗарпуножецApple AppStorengnGooglePlayStore.
- OTBopTe npJIOxEHeHToHamaSmartHome (Solution)
Katonbpbunotpe6nTeJTP6BaJaace perntpapTeu a c b3daTeHOBaKayHT.Ako Beue pa3noJaTaTe c akayHT, Bne3e C BaunTe DaHHN3aNoCTbI.
CneBaaTe HNCTpyKunTe B npJIOXeHneTO.
Yka3aHne

Iopnp6hoonncnneHa
npnloxeneToHamaSmartHome(Solution)
Hn bIbnHno6xBaTHaФyHKuNTeUeHaMepeTBe H aWetOpbKOBOCTBOHApNIOJXeHneToHa aDpec:
www.hama.com HomepaapTkyj
→N3TeTJIHnI→PbKOBODCTBO3aekcnIooatauHa npJIOXeHneTO
6.TexHnueckoo6cnyXbaHei noDpBxKa

Yka3aHne
Pa3eHHeTe npOyKta OT mpeXata npEi nOuNCTBaHETO KOraTOHaMaJaCen3NoJ3Ba3a NO-DbIroBpeM.
IOnuHCTBaHTeTO3n npOdyKTcMoCJIeKo HABJAXHeHaKbPna6e3BlnHKnH He I3NoJ3BaHTearpeCnBHNOpNCtBaUInpnpapaTn.
BHHIMaBaIe Da He nonaDa BOnpaKta.
7.N3KJIIOUOBAHeHaOTROBOPHOCT
Hama GmbH & Co KG He noema OTROBOPHOCT
IINI rapaHnra 3a NOBpeDN, KOINTO ca pe3yNTAT OT
HEnpabINHaHnCTaLauN,MOHTAXu yNOtpeBaHa
IPOJyKTA IINI OT HecNa3BaHe Ha YbTBaHeTO 3a
06CInyXBaHe I/INI Ha Yka3AHHaT a 3a 6e3OnacHOCT.
8.Yka3aHnna3aN3XbBpIHa
Yka3aHne OTHOCHO 3aunTaHa OKoHnTa Cpea:
OTMOMeHTa H a npunaRaHeTo h aEBPoneNcKntEiNpeKTnBn2012/19/EU n 2006/66/EO B haunohJHOTOpnpaBOHaCbOtBeTHNTecTpAHnBaXNCeHOTO:EJeKtpnuecknte
eJekpoHHteyepein 6 aTeepnTehe6bHaace
3XbPnTc6bTOBnTe OTnAbu. NTope6nta
eIbXeH03aKOHdAAbbpeHeJIeKTPuecknTe
eJektpoHHte ypeiN 6aTeepnTe B kpa Ha
TxAHATAblrOtpaHocTHAn3rpaedHtE3aueNTa
ObUeCTBeHNyHKTOBe3acb6pnaHaeHaOTnAbu
HInHaTbProBCKnro6ekt.IOpPo6HocHTeNo
BbnpocaperrnAmEHpauHB 3 aKOHOdaTeNCTBOTo
Ha CbOTBeTHata cTpaHa.CmbONbT Bbpx npOdykTa,
yNbTBaHeto 3 aY nTope6aHnONakOBkataHacoBa
KbMTe3nPa3nope6n.Ype3peuKnipaHeto,
npepa60TKataHaMaTeepnAInTEuINpyrtnΦopMn
HaONl3OTBOPRAhEnactapnTepeNi/6aTeepn
BVEOnpNaHacTe3a3aUnItaHaHaHaataoKoJHa
CpeJa.
9.ИнфорmaцязависокочетOTHaTaeKcno3nur
To3nypei3nblHbAan3NCKBaHnraTaHaE C3a
OprahuvaBHeAeKcno3nuiyTaHaHaceneHneTO
HaeJeKtpomarHHTnHNoIeta 3a3aunTaHa
3dpaBeTo.YpeBcBtCbotBetCTBaHa BnCOkOyeCTOTnHte
CneuΦnKaun,aKo ce n 3nol3BaHapa3CTOHNHe
20cmotTJIoTO.
10.Deklapaun3acbOTBeTCTBnE
HactoJIoToHamaGmbH8 Co K G
IeKJIapnpa,YeTINbTp aAnocntema
[00176578,00176579,00176588,
00176589,00176608,00176609,00176610,
00176611]cBoTBetCTBaHaOCHOBHTeN3iCKBaHn
HaIInpeKTtBa2014/53/EO.IbJIHNrTTeKCT
HaECdKeLapauaTAta c BoTBetCTBneE H a
pa3noJoxHe He CJeDnHn INTePHT aDpec: WwW.
hama.com->00176578,00176579,00176588,
00176589,00176608,00176609,00176610,
00176611->Downloads.
11.TexHnuecknDaHHN
| WiFIBrpaDéHn CBeToDmOdHn CNOT C BeteLHn | 176578/79/88/89 |
| CBeTlIneHnnotok350lm | |
| MoUHocT5 W | |
| UByTHe CBeTlInHata | 2700K - 6 500K (ToJIIO6JaIaOCTyJeHc 6Яla) |
| Tok Ha I aMnata45mA | |
| YeCTOTHaJIeHtA/ YeCTOTHnJIeHTN | 2,4GHz |
| MaKcImaJIHa ИЗльчВATEЛнa MOUHOCT | < 1 00mW |
| WiFIBrpaDéHn CBeToDmOdHn CNOT C BeteLHn | 176608/09/10/11 |
| CBeTlIneHnnotok380lm | |
| MoUHocT5 W | |
| UByTHe CBeTlInHata | 2700K - 6 500K (ToJIIO6JaIaOCTyJeHc 6Яla) |
| Tok Ha I aMnata45mA | |
| YeCTOTHaJIeHtA/ YeCTOTHnJIeHTN. | 2,4GHz |
| MaKcImaJIHa ИЗльчВATEЛнa MOUHOCT | < 1 00mW |
"Google and Google Play are trademarks of Google LLC."
All listed brands are trademarks of the corresponding companies. Errors and omissions excepted, and subject to technical changes. Our general terms of delivery and payment are applied.