
SuperTres - Stroller Foppapedretti - Free user manual and instructions
Find the device manual for free SuperTres Foppapedretti in PDF.
| Product Type | Stroller |
| Brand | Foppapedretti |
| Model | SuperTres |
| Maximum child weight (stroller) | 15 kg |
| Maximum child weight (carrycot) | 9 kg |
| Maximum child weight (car seat) | 13 kg (size 40-85 cm) |
| Number of seats | 1 |
| Seat orientation | Reversible (forward-facing or parent-facing) |
| Backrest adjustment | Reclining via strap |
| Canopy | Extendable and adjustable, with sun visor |
| Footrest | Adjustable |
| Handlebar | Height adjustable |
| Brake | Foot parking brake |
| Front wheels | Swivel with lock |
| Rear wheels | Fixed |
| Restraint system | 5-point harness with crotch strap |
| Folding | Compact, requires seat forward-facing and upright backrest |
| Carrycot compatibility | Yes (via adapters, sold separately) |
| Car seat compatibility | Yes (via adapters, sold separately) |
| Maintenance | Hand wash fabrics at 30°C; clean plastic and metal parts with a damp cloth |
| Safety | Compliant with EN standards; do not use for jogging; always secure the child |
| Warranty | 12 months |
| Manufacturer | Foppa Pedretti S.p.A., Italy |
Frequently Asked Questions - SuperTres Foppapedretti
User questions about SuperTres Foppapedretti
0 question about this device. Answer the ones you know or ask your own.
Ask a new question about this device
Download the instructions for your Stroller in PDF format for free! Find your manual SuperTres - Foppapedretti and take your electronic device back in hand. On this page are published all the documents necessary for the use of your device. SuperTres by Foppapedretti.
USER MANUAL SuperTres Foppapedretti
Important note: the images and instructions contained in this handbook refer to one version of the stroller; some components and functions described herein may vary according to the version of the stroller you have purchased.
INSTALL FRONT WHEELS (fig.1, fig.2, fig.3, fig.4, fig.5)
Insert the end bushing into the front legs until it is completely locked. Ensure the correct assembly.
Insert the end bushing into the slot situated in the center of the wheel block
Press the button down front wheel blocked. Raise the lock lever to activate the swivel function.
Press the steel button front wheel released (fig.5).
INSTALL REAR WHEELS (fig.6, fig.7, fig.8, fig.9, fig.10)
Assemble the rear wheels along the arrow direction.
Insert the rear wheel group into the end of the tubes of the rear legs. The wheel supports are correctly assembled when the metal pins are locked in the corresponding holes on the tubes of the chassis (fig.9).
Press the button situated on the center of wheel and pull it to take the wheel apart from the axle (fig.10).
UNFOLD THE STROLLER (fig.11, fig.12, fig.13)
Press the folding lock button and then lift up the handlebar to open the folding lock.
Step on the lever, and then lift up the handlebar until the stroller is unfolded.
Make sure the pushchair has been opened correctly.
PARKING BRAKE (fig.14)
To apply the brake: Press the brake lever, push the pushchair forward gently to ensure the brake has been applied correctly.
To release the brake: Lift the brake lever as shown.
ADJUSTING THE HANDLEBAR (fig.15)
Press both buttons "A" side handle and rotate the handle to the desired position.
FITTING THE BUMPER BAR (fig.16, fig.17, fig.18, fig.19, fig.20)
Assembly: Align the bumper bar and insert it in its seat on both sides, a click will indicate the correct assembly.
Disassembly: Push the release button "A" on each side of the bumper bar and contemporary lift the bar upwards to hook it off (fig.18).
Unhook the bumper bar on only one side : Push the release button “A” on one side of the bumper bar and contemporary lift the bar upwards to open it as a gate.
Push the buttons "A" on both sides, to adjust the height of the bumper bar (fig.20).
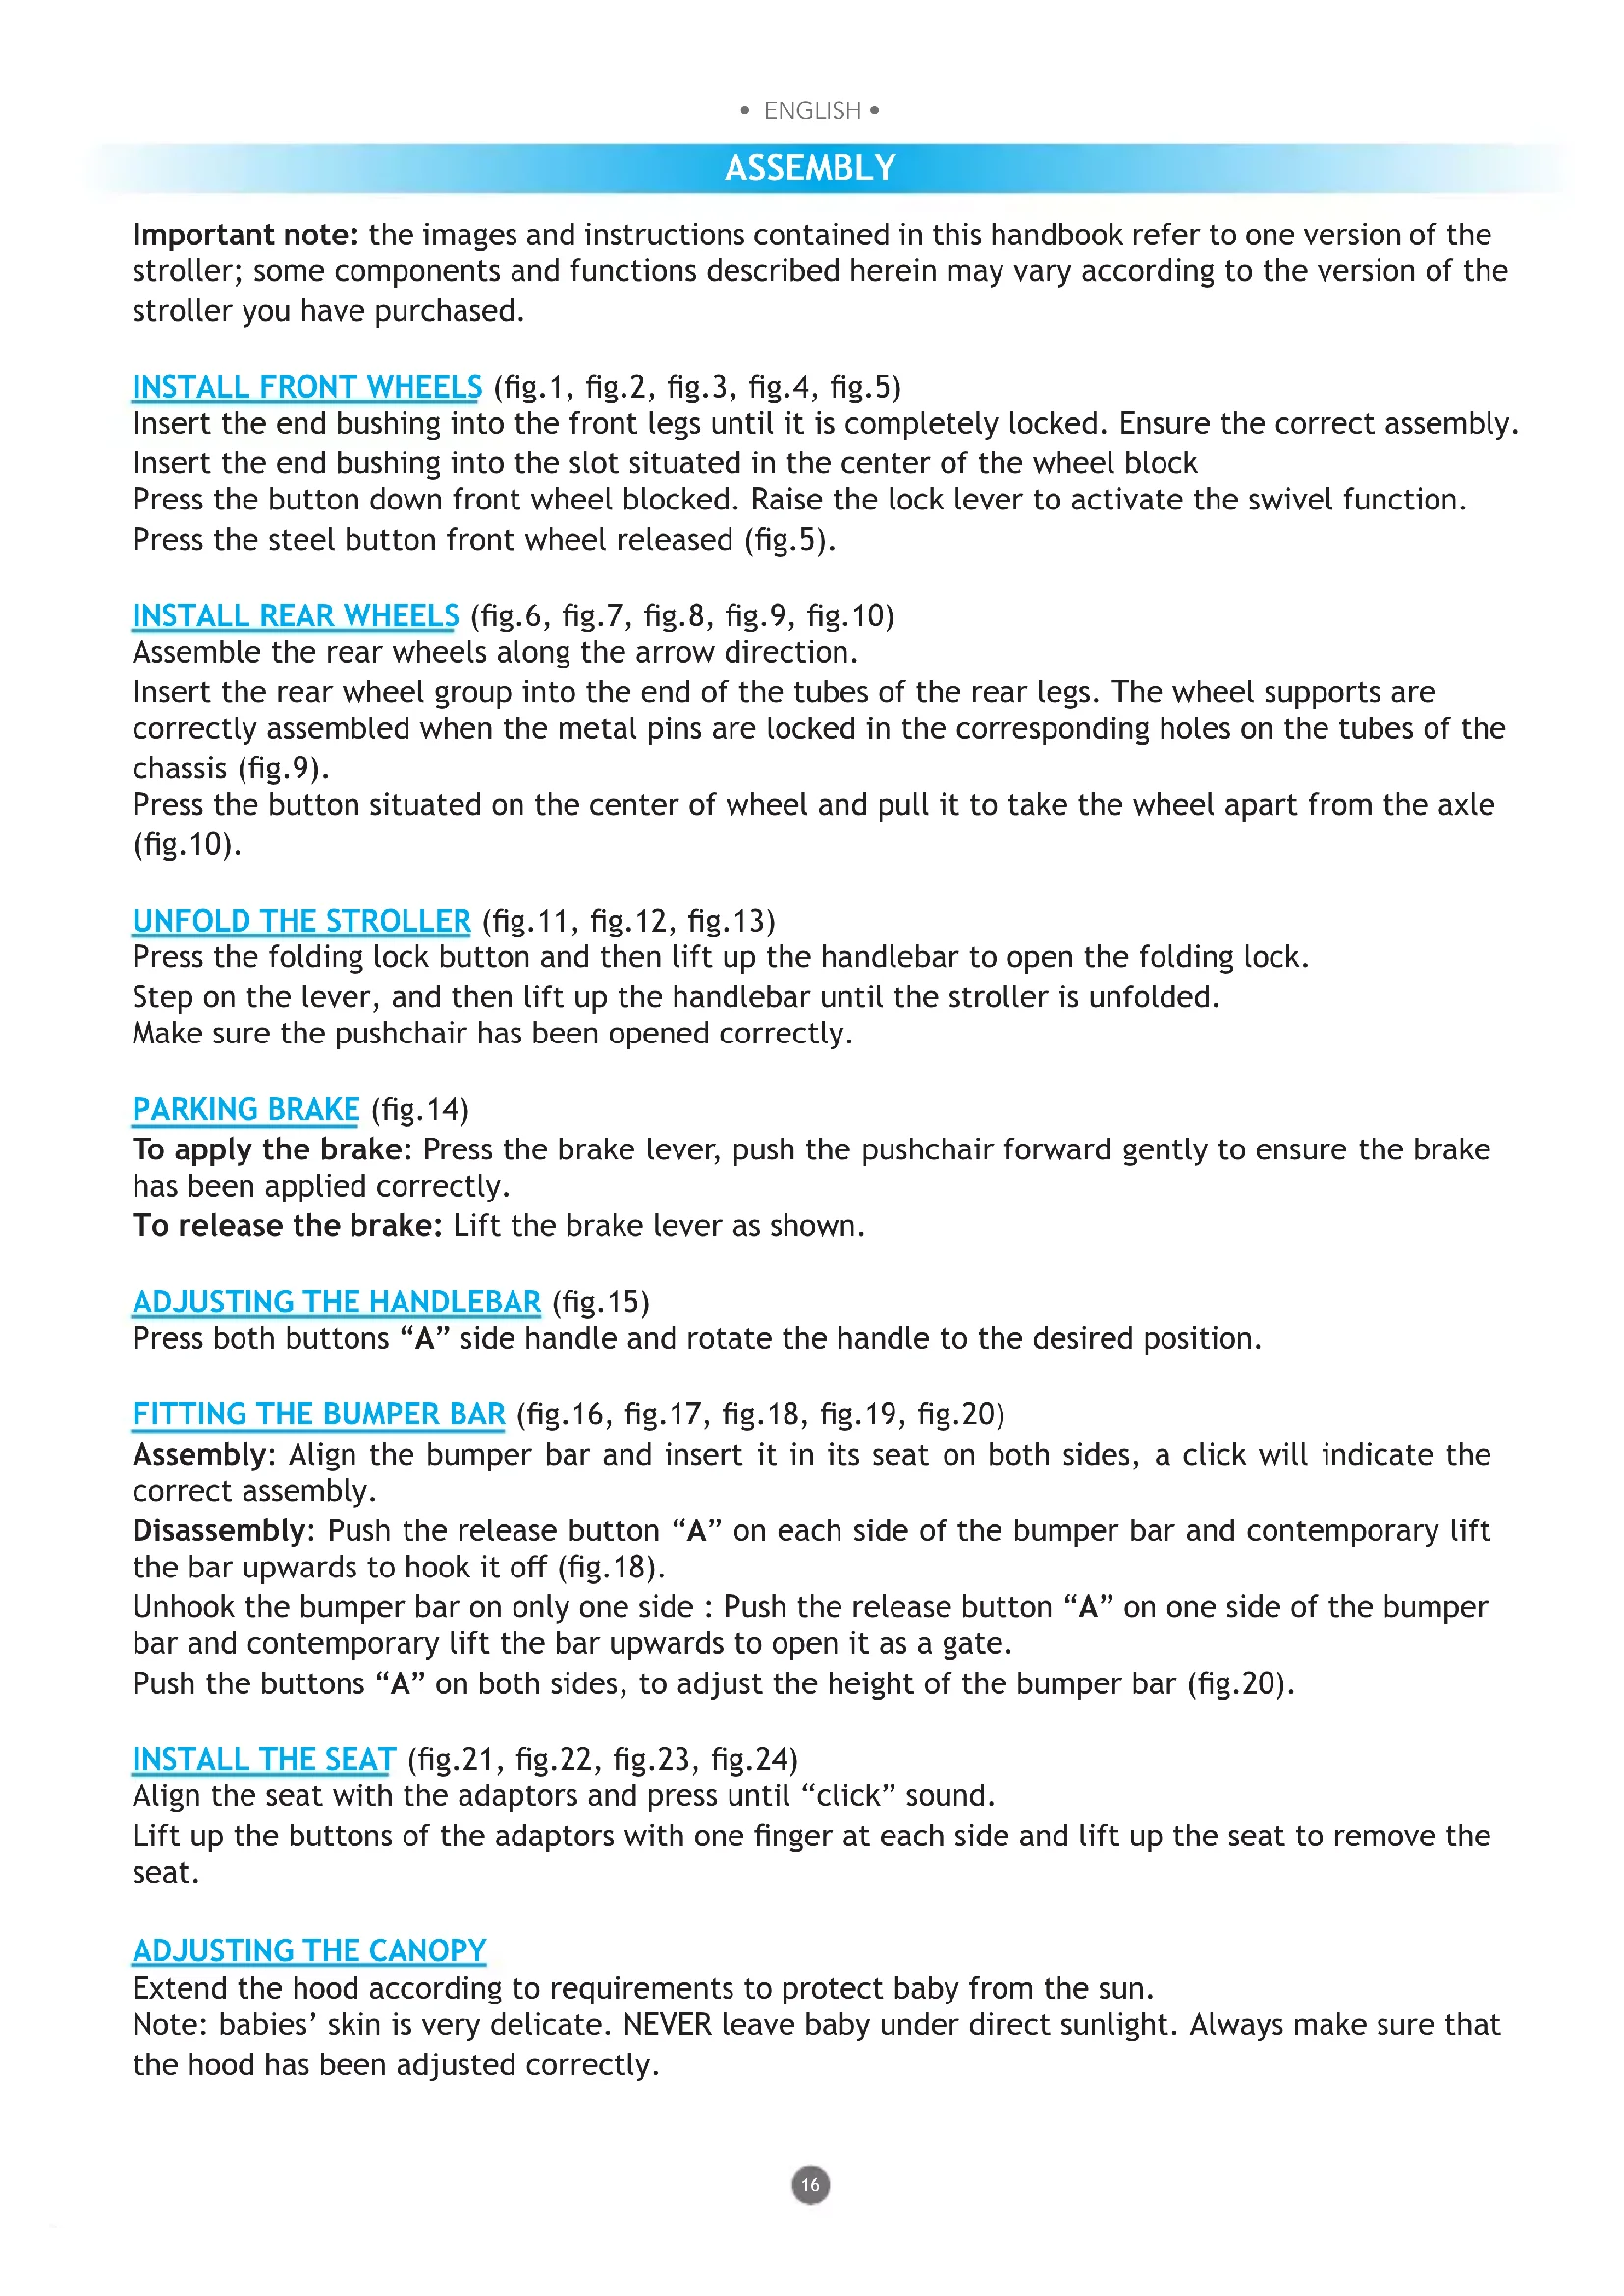
INSTALL THE SEAT (fig.21, fig.22, fig.23, fig.24)
Align the seat with the adaptors and press until "click" sound.
Lift up the buttons of the adaptors with one finger at each side and lift up the seat to remove the seat.
ADJUSTING THE CANOPY
Extend the hood according to requirements to protect baby from the sun.
Note: babies' skin is very delicate. NEVER leave baby under direct sunlight. Always make sure that the hood has been adjusted correctly.
ASSEMBLY
Remove the rear part of the hood to use it as a parasol (fig.32).
ASSEMBLY (fig.24, fig.25, fig.26)
OPEN THE CANOPY (fig.27, fig.28)
As picture, follow the arrowhead, pull the canopy pole and press down the agraffe, then the canopy can be opened.
FOLD THE CANOPY (fig.29, fig.30, fig.31)
Follow the arrowhead, put up the agraffe upward, then push the canopy, the canopy can be folded (fig.31).
Important: Never close the canopy without first undo the stretchers. The canopy could be damaged.
ADJUST THE FOOTREST (fig.33)
Press buttons "A" and adjust the footrest in the required position.
RECLINE THE BACKREST (fig.34)
To catch hold of the belt with one hand, and push up the Adjusting Holder "a" as shown in picture.
Press the button situated on the center of the Holder "b" with your thumb and pull the holder.
REVERSIBLE SEAT (fig.35, fig.36, fig.37)
Lift buttons "A" on both sides and remove the seat by lifting it.
Position the seat so that it is forward facing or parent-facing.
Replace the seat on the chassis of the pushchair, see the paragraph "INSTALL THE SEAT" for correct assembly.
SAFETY HARNESS (fig.38)
Apply the brake before placing your baby in the pushchair.
Release the buckle: press button "A" and remove the components
Fasten the buckle: by inserting part "a" in part "b", a click will indicate that it has been fastened correctly.
WARNING: The lap belt is provided with 2 side rings to be used for additional belts in compliance with the standard BS 6684.
FOLDING THE PUSHCHAIR (fig.39, fig.40, fig.41, fig.42)
Before folding the pushchair, make sure that:
The seat is forward facing
The backrest is adjusted in the upright position
The canopy is folded
Push the button "A", on the lower side of the right lever and keep pressed while sliding the levers, left and right, downwards. Fold the stroller. Ensure the locking device "B" is correctly engaged (fig.42).
Note: It is NOT possible to close the pushchair with the travel system accessories, the infant car seat and carrycot, fitted on the chassis.
UNFOLD THE STROLLER (fig.43, fig.44, fig.45)
Press the folding lock button and then lift up the handlebar to open the folding lock.
Step on the lever, and then lift up the handlebar until the stroller is unfolded.
Make sure the pushchair has been opened correctly.
ASSEMBLY
FITTING THE FOOTMUFF (fig.46)
Insert the lower part of the footmuff on the seat of the chassis.
Secure the footmuff to the chassis of the pushchair.
FITTING THE PUSHCHAIR RAINCOVER (fig.47)
Fit the raincover over the hood.
Fasten the front of the raincover to the chassis of the pushchair using the Velcro tabs.
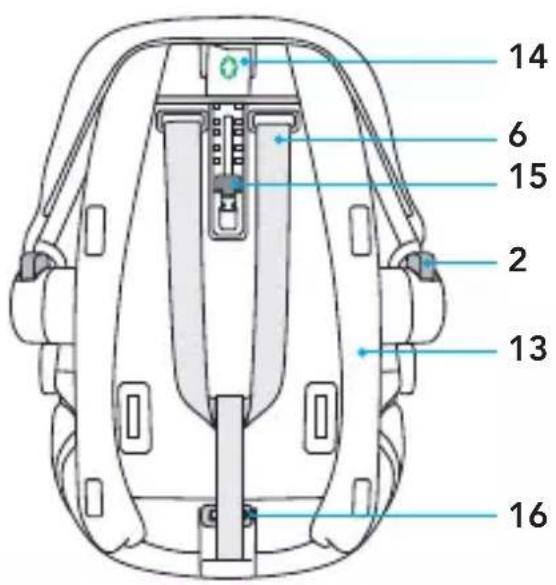
USING THE TRAVEL SYSTEM ACCESSORIES
WARNING: This vehicle has been designed for children of above 6 month age!
If you wish to use one of the accessories with which you can equip with your chassis car seat
SUPERTRES of the Group 0+ or carry cot SUPERTRES developed for when your baby is small, pls.
Operate it by following these instruction.
Remove the seat from the chassis (see the paragraph "INSTALL THE SEAT").
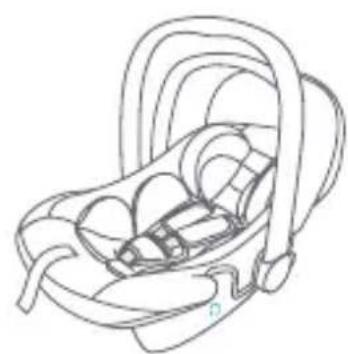
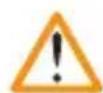
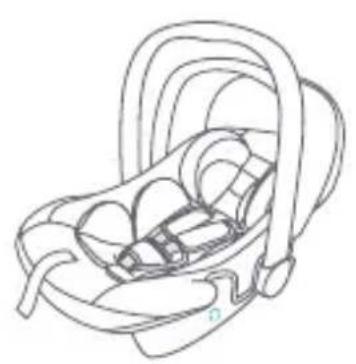
USING THE INFANT CAR SEAT AND CARRYCOT TRAVEL SYSTEM ACCESSORIES (fig.48, fig.49)
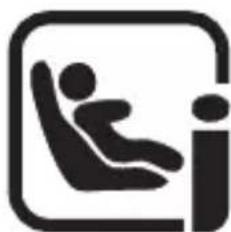
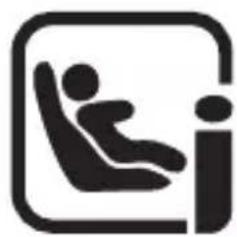
IMPORTANT: the travel system accessories must be secured to the chassis only in the parent facing position.8
CARRY COT (fig.50, fig.51)
Montage: Align the carry cot with the adaptors at both side, and press until "click" sound.
Remove: Lift up the buttons of the adaptors with one finger at each side and lift up the seat to remove the carry cot.
ADJUST CANOPY (fig.52, fig.53, fig.54)
Assembly (fig.52, 53)
Press the buttons at both side to adjust he handlebar of carry cot.
ADJUST THE BACKREST (fig.55)
Lift up the adjusting Holder to adjust the backrest up, press the button situated on the upper part of the Holder and push the Holder down to adjust the backrest down.
Hook the support bar to the frame to prevent swinging movement of the carrycot when using it on uneven terrains.( fig.56)
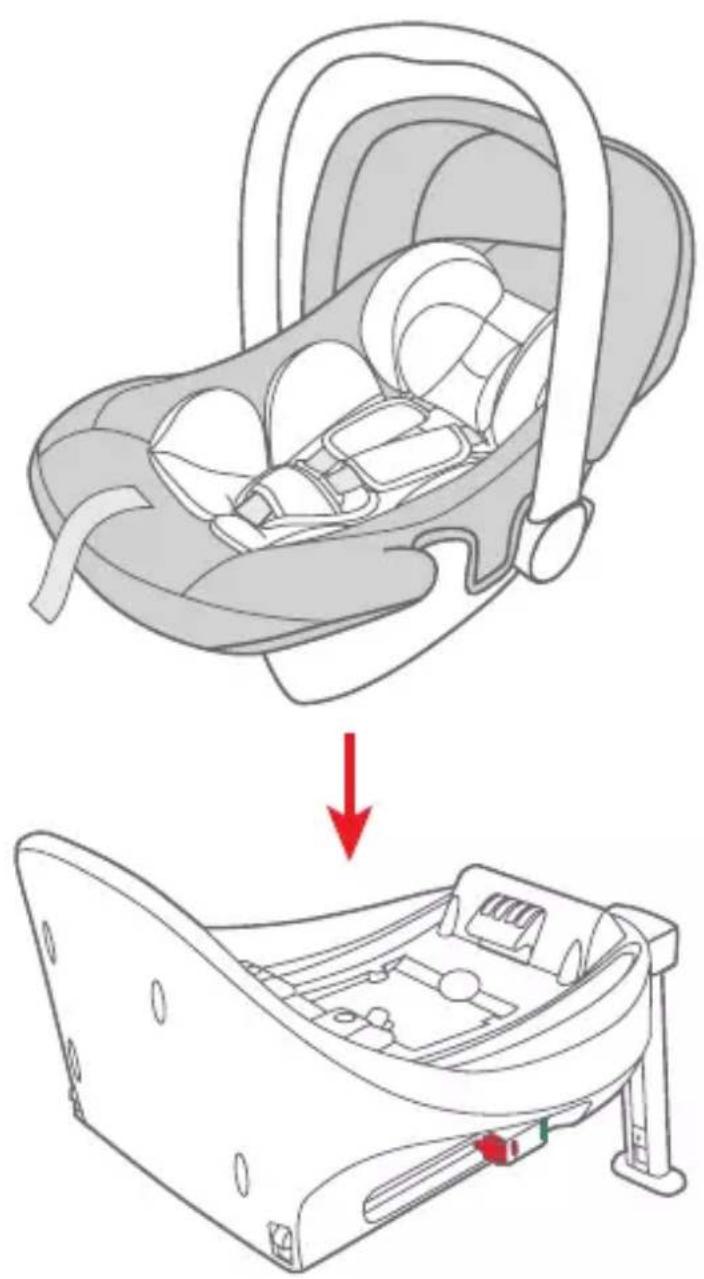
CAR SEAT (fig.57, fig.58)
Montage: Align the carry cot with the adaptors at both side, and press until "click" sound.
Remove: Lift up the buttons of the adaptors with one finger at each side and lift up the seat to remove the car seat.
WARNING
CARRYCOT
- This product is suitable for babies from birth up to 9kg .
WARNING: THIS PRODUCT IS ONLY SUITABLE FOR A CHILD WHO CANNOT SIT UP UNAIDED.
WARNING: ONLY USE ON A FIRM, HORIZONTAL LEVEL AND DRY SURFACE. - WARNING: DO NOT LET OTHER CHILDREN PLAY UNATTENDED NEAR THE CARRYCOT.
WARNING: DO NOT USE IF ANY PART OF THE CARRY COT IS BROKEN, TORN OR MISSING. - WARNING: Never leave child unattended. Always keep baby under supervision when he is in the carrycot.
- WARNING: This product is suitable only for a child who cannot sit up unaided, roll over and cannot push itself up on its hands and knees. Maximum weight of the child: 9Kg.
- WARNING: Suitable for children under 6 months of age.
- Before lifting or transporting the carrycot, check that the carrying handle is in a vertical position and correctly attached on both sides.
- The handles and the bottom of the crib must be inspected regularly to check for signs of wear and damage.
- When the child is in the carrycot, their head must never be lower than their body.
- Do not add mattresses other than the one supplied with the carrycot or approved by the manufacturer.
- RISK OF SUFFOCATION: the carrycot could tip over on soft surfaces and suffocate the child. NEVER place the carrycot on beds, sofas or other soft surfaces.
- Check regularly that the crib is intact, do not use if a part is damaged, worn or missing.
STROLLER
- WARNING: NEVER LEAVE THE CHILD UNATTENDED.
- WARNING: ENSURE THAT ALL THE LOCKING DEVICES ARE ENGAGED BEFORE USE.
- WARNING: TO AVOID INJURY, ENSURE THAT THE CHILD IS KEPT AWAY WHEN UNFOLDING AND FOLDING THIS PRODUCT.
- WARNING: DO NOT LET THE CHILD PLAY WITH THIS PRODUCT.
- WARNING: ALWAYS USE THE RESTRAINT SYSTEM.
- WARNING: CHECK THAT THE PRAM BODY OR SEAT UNIT OR CAR SEAT ATTACHMENT DEVICES ARE CORRECTLY ENGAGED BEFORE USE.
- WARNING: THIS PRODUCT IS NOT SUITABLE FOR RUNNING OR SKATING.
-
WARNING: THIS SEAT UNIT IS NOT SUITABLE FOR CHILDREN UNDER 6 MONTHS.
WARNING: THIS STROLLER IS SUITABLE FOR CHILDREN WITH A MAXIMUM WEIGHT OF 15 KG. -
WARNING! Ensure that all the locking devices are engaged before use.
- WARNING: Always keep child in view when in stroller.
WARNING: If the pushchair is used with the accessory, make sure it has been fastened correctly. - WARNING: Use seat belt, avoid serious injury from falling or sliding out Always.
WARNING: Only one child for one stroller. - WARNING: This product is not suitable for running or skating.
- WARNING: Check that the seat unit attachment devices are correctly engaged before use.
- WARNING: Do not place or hang parcels, bags or accessories on any part of the stroller including the handle. Failure to comply with this warning may cause, hazardous, unstable conditions to exist.
WARNING: Always make sure that the brake is engaged when positioning the child into the stroller seat or taking him/her out. - WARNING: Always use the parking brake, even when standing still for only a few moments.
WARNING
WARNING: When parking check if the brake is properly engaged by moving forward/rearward the stroller.
- WARNING: Never fold the stroller, not even partly, when your child is in it.
- A basket is provided for the carriage of 4kg of goods, evenly distributed.
The product must be assembled by an adult.
- Only the minder can operate the recline adjuster.
- Never use the stroller if any part of it is damaged or any component is missing.
- Do not allow children to play with or hang onto the stroller.
- This vehicle requires regular maintenance by the user.
- Do not use replacement parts or accessories other than those approved by the supplier as they may render the pushchair unsafe.
- Any load applied to the handle and/or the backrest and/or laterally to the product can compromise the stability of the product.
- Do not overload this pushchair with additional children, goods or accessories. Bags and other items must not be hung from the handle.
- Ensure all users are familiar with the products operation. It should always open and fold easy. If it does not, do not force the mechanism - stop and read the instructions.
- Do not use your pushchair in a manner for which it is not designed.
- Do not allow your child to climb unassisted into, play with or hang onto your pushchair.
- Hold on to your pushchair when close to moving road vehicles or trains. Even with the brake on the draught from the vehicle may move the pushchair.
Exercise caution when mounting or dismounting a kerb.
- Remove your children and fold the pushchair when ascending or descending stairs or escalators.
- Ensure the folded pushchair is stored away from children so that it does not fall and cause injury.
- Do not use replacement parts or accessories, e.g. child seats, bags, hooks, trays, rain covers etc. other than those approved by the supplier, they may render the pushchair unsafe.
- Never carry a second child on your pushchair.
- Do not use any platforms or attachments that allow transportation of the child.
- CARE: Your pushchair has been designed to meet safety standards and with correct use and maintenance will give many years of trouble free performance.
- The chassis is strong but will weaken should the back wheels be bumped down stairs or kerbs. continual impact will cause damage.
- If your child wears hard shoes these might damage the soft fabric.
- Storing a damp pushchair will encourage mildew to form.
- After exposure to damp conditions, dry off with a soft cloth, open fully and allow to dry thoroughly before storing.
- Store your pushchair in a dry, safe place.
- Do not leave the pushchair in sunlight for prolonged periods - some fabrics may fade.
- For car seats used in conjunction with a chassis, this vehicle does not replace a cot or a bed. Should your child need to sleep, then it should be placed in a suitable pram body, cot or bed. The infant car seat is not designed for long periods of sleep.
- Be aware of the risks related to open flames or other heat sources, such as radiators, fireplaces, electric and gas stoves, etc.: do not leave the product close to these heat sources.
CARRYCOT COMPONENT - PRODUCT MAINTENANCE
WARNING!
Check the carrycot regularly and make sure that there are no damaged or worn parts. Replace the carrycot if there are damaged parts.
Lining
- The fabric parts can be washed following the instructions on the washing label.
-
Clean the fabric with water, a mild soap and a sponge.
-
Never use abrasive or ammonia, bleach or white spirit-based cleaning products.
- Clean the fabric with a brush rather than washing it.
- Do not store the product if it is still wet and do not leave it in humid environments since mildew may form.
- Store the product in a dry place.
- Protect the product against weather agents, water, rain or snow; moreover, continuous and prolonged exposure to sunlight can cause changes in the colour of many materials.
- It is recommended to wash the lining separately from other items.
- Follow the lining washing instructions on the labels.
- Dry the textile lining completely before using or storing it.
- To prevent formation of mildew, it is advisable to air the carrycot periodically.
RAINCOVER
WARNING!
- Use under an adult surveillance.
- When in use make sure the rain cover does not come in contact with the face of the child as it may cause suffocation.
- Don't use the raincover on the product without a hood that can hold it.
- Never leave rain covers on indoors, in a hot atmosphere or near a heat source as the baby could overheat.
- Do not use on products other than those recommended by the Manufacturer.
- Hand wash at 30° C.
- This pushchair requires a minimum amount of regular maintenance.
- The lifetime of the pushchair will be increased if the moving parts are lubricated and it will also make the opening and folding operations easier.
- If any of the parts of the pushchair should become stiff or difficult to operate, apply a small quantity of spray lubricant, for example WD 40. Do not use oil or grease. The WD 40 should not be used to lubricate the removable wheels. If necessary, the wheels must be removed and cleaned with a soft, dry cloth.
- Check the locking mechanisms, the brakes, the wheels, the harnesses, the levers, the seat regulators, the joints and the securing devices regularly to make sure that they are fastened correctly and in good operating order.
- The wheels are subject to wear and should be replaced if necessary.
- Carry out a careful inspection to check the pushchair is in good operating condition after 18 months of use, after a long period of storage and before using it for another baby.
- Clean the fabric with water, neutral detergent and a sponge.
- Clean the fabric using warm water, a sponge and a neutral detergent.
- The plastic and metal parts can be cleaned with warm water, a sponge and a neutral detergent.
- Never use abrasive products for cleaning or ammonia based products, bleach or turpentine.
The contents of this document as stated below will come into effect as from 01.01.2005 and replace, on every account and in full, any previous message referring to the guarantee provided by Foppa Pedretti S.p.A.
FORMAL GUARANTEE
Foppa Pedretti S.p.A. the head office of which is located at n. 11 Via Volta, Grumello del Monte (Italy), guarantees directly to the Consumer that this brand new product is free of faults with regard to the materials, design and manufacture and that it complies with the characteristics as declared by the manufacturer.
This formal guarantee is valid in all Member Countries of the European Union and it neither excludes nor limits the Consumer's rights in accordance with mandatory measures provided for by the law with regard to the Retailer of the Product.
To take advantage of this formal guarantee, the Consumer must return the faulty product to the Retailer, presenting to the same the proof of purchase of the Product which must clearly show the Retailer's address, the date of purchase of the Product with the Retailer's stamp and signature and an indication of the Product itself or, alternatively, the receipt which must not have been altered and which must clearly show the same information as that referred to above. The formal guarantee is valid for twelve (12) months from the date of purchase of the Product. During this period, Foppa Pedretti S.p.A. will repair or replace the faulty product, at its own discretion. The formal guarantee is granted to the end buyer of the Product (Consumer) and it neither excludes nor limits the mandatory rights of the Consumer as provided for by the law and/or the rights that the Consumer may have with regard to the Dealer/Retailer of the Product.
EXCLUSIONS TO THE FORMAL GUARANTEE.
The formal guarantee is excluded in the case of damage caused to the Product for the following reasons: if the product is used in a way that does not comply with the information contained in the use and assembly instruction sheet, if the product is knocked or dropped, if the Product is exposed to humidity or extreme heat or environmental conditions, or to sudden changes in the same, corrosion, oxidization, unauthorized alterations or repairs to the Product, repairs using unauthorised spare parts, improper use, improper maintenance or failure to carry out the same, improper maintenance compared to the information given on the use and assembly instruction sheet, incorrect assembly, accidents, damage caused by food or drink, damage caused by chemical products, cases of force majeure.
In any case, Foppa Pedretti S.p.A. declines all responsibility for damage caused to persons or to property, other than the Product, when such damage is caused by a failure to comply with the instructions/advice/warnings contained in the manua I or, alternatively, in the use and assembly instruction sheet provided with each Product for the owner/user. (Purely as an example, in the case of a cot: "Check your baby constantly. Make sure that the sheets and blankets do not cover the baby's head...").
Furthermore, Foppa Pedretti S.p.A. declines all responsibility for damage to persons and to property when the breakage of its products is due to a deterioration in the components of the Product that are subject to wear. All the components of the Product made of plastic are considered to be components subject to wear.
MONTAGE
EXCLUSIONS DE LA GARANTIE CONVENTIONNELLE.
PYOMIeH THs KOYKO'YAA
Eoiawotc n koukoula Baoi twv avaykwv oac, ia va npootatéyete to wpo ano tic aktivec tou naiou.
Ppoooxn: to µ ω ρ exi nolu euaiothetao depma. MHN aqnvTe Tote to µ ω ρ aeoa kteeivvo otic nlaikc
aktivec, Bbaowtei navta otixepepuoioe ootkoula.
ApaipéoTe to niaw tmu nca tskoulaç, yia tn xpnon tou idou wc kaokaipivn tevta (oxma.32).
ΣYNAPMOΛ'OrHΞH (oxnμα.24, oxnμα.25, oxnμα.26)
ANOIRMA KOYKOYAA (oxnμa.27, oxnμa.28)
SYNTHPHsH TOY IPOIONTO
- Autó to kapótoi anaitéi taktkn ouvtnpnon ano tn nλεupa tou xphotn.
To npoiov anaiei liyn ouvtnpon. H iinavon twv kivoumuevwv eepov thauugnoi tn diapkeia tou kaopoiou kal a kataotnoe iio ukoae tic evepyiec avoiymatoc kal klaioipatoc tou idiou. - Av opioéva túnμata tou kapoioú yivouv ákaπtá n òókoλa σtn λειοργia, anλωσe μia μikpnootnta liavtkou oε mopfn σπpí, γia napáðεiμa WD 40. Mny xρηομοιeite λáδi n ypáso.
To npoiov WD 40 δ npenv va xnpoiopoieitai yia tn linavon twv anooiuevw tpoxv. Av iva anapaitnto, oipoxoi npenv va aepiethetaouv kai kaapiootouv eva maakof kal steyvo navaki. - Eλέγχετε τακτικά τους μηχανίσμούς ασραλίσης, τα φρένα, τους τροχός, τους Μαντες, τους μικρούς, τοχλούς, τους ρθμίσες, τους καθίσματος, τους συνδέσμους και τους μηχανίσμούς στερέωπς και
BéBaioeite navto otéxouv ouvoeoi ootá kai Bpikovtai e kañ katataon λειορyiaç.
Otpoxoi unokivtai o4oopa kai npenei va avikataotaouv, evxpeiaetai. - Ppaatoioite eva npoektikó éyxo, e n tnc ootncaeitoupyiac tou kapotoiou, ta ano 18 mvecs xponc, e ta afo eva eya lo xpovikó daotnma un xpnoq kal priv to xpnoiponoiote yia eva deutepo naidi.
KaapioTe upaouma e vepo, to nio anoppunavtiko kal eva oqouyapi.
Kaθapiετε to upaσμα με xλiapó vερό, ouδετερο παπoppunavtiko kai εva σφουγápl. - Ta πλαστικά και μεταλικά τμήματa μπορύν va καθαρίοτουν με xλιαρό vερό, ouδέτερo απορμιαντικό και ενα σφουγγάρι.
Mny xpnoiopoioieite note anoppunavtikauou xapaqouv n npoiovta e Baon tvn apuowia, xawpivn to vepti. aalccs ouokuec nou pnpei va npokaessouv npkayia.
To nepiexoevno unodekvuctn ouveia 0a ixue ano 01.01.2005 kai avtkaotae kae npintwnkai npw osioohnot npoyevotepo mnuva aavepeoEv otny eyyunon nou napextal ano tny Foppa Pedretti S.p.A.
ΣYMBATIKH EΓγHY∑H
H Foppa Pedretti S.p.A. µ δ ρa to Grumello del Monte (Italia) Via Volta 11, γ γ α τa i µ σa oTo Katavaawtn oTu auto to Ppoiov, vAc kataokeunc, eivai anaalayevo anto elattomega t oTa Ulika, oToV oxediaoKai otny kataokeu n Kai oumuopwveTai µ ta xapakntpiotiknou n ida onawvEi.
H napouoa ouBataikéyyunon 1oxuei oOa ta Kpatn µ λ η TcEupwnaiKnc Evwongkai δ Egaepieoute npiopici Ta dikaiomegaata tou Katavaawt, oupwov tic diataEci avaykaotikou dikaiou evavto Tou Iwantou Poiovtoc.
Tia va eIwIeIeI aIIO TnV napouoA OuBAtIKN Eyyunon o Katavaawntc 0a npenei va emiatpeei to eIattomegaIpoiov otov IwIant, napouoiacovtac tou tnv anodEiEg ayopac Tou Ipoiovtoc ano tnv onoi a npokuntouv euavaywotata n dieuuvon Tou IwIant, n uepounvia ayopac Tou Ipoiovtoc me tn oppayida kai unoypaipn Tou IwIant kai tnv evOeIgTou iDIOU Ipoiovtoc n evaalakrtka tn taueiak vOmu n anoE1E, mtnptonoinEvn, ano tnv onoia npokuntouv kaapaoi odic nInpopopieC.
H ouβatikn éyyunon loxéi yia Δδεka (12) μnveç ano tnv nμερounvia ayopac tou Πpoiovtoc. Kata tn diapkeia autnc tsπepiodou n Foppa Pedretti S.p.A. θα επιοκεuaoei n θa avtikataaotnoεi, kata tn kpion tnc, to ελattwpatiko Πpoiov.
H ouBataikéyyunon xopnyeitai oToV TEλiko ayopaTn Tou NpoiovTOc (Katavaawnt) kai δ ev eapieoute nepiopiiz ta unoxpewtka dkaiomegaTou Katavaawnt, ta onoia npoBAEneio vOpoc /kai ta dikaiomegaTou O Katavaawntc evexetai va exei evavti tou ω λ η τ /M a ω λ η τ η Tou NpoiovTOc.
EAEPEZEI THZ SYMBATIKH EFGYHHS
Ato tvn ouBaTikn Eyyunon Egaouvtai oI Znmuic nou pokAnThkav oTo Ppoiov ano tic akolouOeC aitiec: xpnon mOn OumoppwEvn e Tc odnyieC nou nepiexei To quAo oyniwv xpnoc kai eTv ouvapmoLoynon, Kpouoei Cai TTwoEic, EkEon Tou Poiovtoc OTnv Uypaia n oeakpaiec 0epuikec n peiBaalovtikec ouvNkeC n oe anotouec aalayec autow twv ouvthknw, diabpwon, oEiown, mEgouioobtnuevc tponoioanei n EIOKEUEc Tou Poiovtoc, EIOKEUEc Mxpanm np EyekpiEvw avtaalaktkov, akataaALnXpnon, kakouvtnpnon n EALeUnn ouvtnpnonc, akataaALnAn ouvtnpnon oE oukypion mOoa unodekivovtal oTo pfAlo obnyiw xpnonc kai ouvapmoLoynonc, eoPamvOn uovapmoLoynon, atuxmuata, EvpyeIEc TpOpwV n NotWv, EvpyeIEc XnMIkwv Poiovtwv, aiiec avwTepac Biaac.
MOHTAX IEPEDHIX KOJIEC (pnc.1, pnc.2, pnc.3, pnc.4, pnc.5)
Bctabte depkaTeIb KoIec B na3 Ha waccn do ero noJIHoro fHKcnpOBaHn.
Y6eIHTecB INpaBnIbHOCTMOHTaKa (pnc.2).
BCTaBbTe uTnΦKoIeCa BO BtynKy no ueHTpy depkataeKoIeCa.
HaKMTe BHN3 KONky, YTO6bl 3a6bLOKINPOBaTb NOBOPOTHe DBHXeHne KOJeca. BbHyTB KONKy,
NOTAHyB BBepx, YTO6bl CHOBA NOdkHouHTb NOBOPoTHoe DBNKHeHne KOleca.
YTo6bI CHaTb KOJcA, HaxMMTe Ha KHOKNy C BHyTppeHHe CToPOHbI (pnc.5).
MOHTAX 3AaHnX KOJIeC (pnc.6, pnc.7, pnc.8, pnc.9, pnc.10)
HacaNTb 3aHnne KoIeCa Ha KoIeChyIO OcB Ha WaccN C DePkaTeJMaN 3aHnX KOIeC, DeICTByA B HapBaJIeHn, yKa3aHHOM CTpeJIkoI.
BCTaBtB 6JOK 3aDnHx KOJec, 3aKpeINb Ha KOHcTpkyCUn Do noIhoro 3aueJIeHn. IpoBepntb, UTO DePkaTeIb KOJec HADEXHO 3aKpeJIeH C O6Enx CTOpOH uAccn. DePkaTeIb KOJec npaBnIbHO MOHTnpOBaH, KOrda MeTaNHeCKNe 3a6NkUPOBaHb I B OTBepCTnx, IMeIoUHXc Ha Tpy6uatom npoΦnHe HeCyUe KOHcTpkyCUn (pnc.9).
YTo6bI CHaTb KOleco C OCh, HaxaTb Ha KhoNky B ceHTpe KOleca N OndHOBpeMeHHo NotaHyTb Ha Ce6ra KOleco (pnc.10).
PACKJIADbIBAHNE IPOIyoHOn KOJIACKn (pnc.11, pnc.12, pnc.13)
HaKaTb Ha KhoNky pa36JoknpoBaHnry n, Depxacb 3a pyuKy, pa3JIOXHTb KOJScKy. Depxa KoJrCKy 3a pyuKy, HadaBnTb HoroH Ha 3aDnIO NOCTabKy, npOdoJXkay packPbIBaTb eE do noHoro packJaDbIbAHnry.
Y6eIHTbcB B TOM, YTO KOJIaCKa NOLHO p3IOXKeHa.
CTOHAUHbI TOPMO3 (pnc.14)
BkIoueHne TopMo3a: HaKaTb BnH3 Ha pbUar CToAHOuHOrO TopMo3a, CJIerKa NODTOJKNHyTb npOryLooHyIO KoJaCKy BnepEd, YTO6bl npOBepNTb HAdEeXHoCTb pa60TbI TopMo3a.
BbIKIIOUeHne TOPMo3a:ДЯ OTKJIIOUeHnA TOPMo3a HaxaTb Ha pbIyAxKOK "TOPMo3a", KaK nOKa3aHO Ha pncuHke.
PEYUNPOBKA PUKN (pnc.15)
HaKaTb Ha o6e KhoNkNo 6okam pyKn npOryIoUHoi KOJIaCKN “A” n NOBepHyTb IOD HuyXhbIM yIOM.
MOHTAX IPEDOXPAHNTIELBOHON PUYKN-BAMNEPA (pnc.16, pnc.17, pnc.18, pnc.19, pnc.20)
MONTAX: HaxaTb Ha KhoNk "A" c 06eNx CTOpOH, YTO6bl OTpeyIInpoBaTb pyuKy nO BBICOTE.
AeMoHTaK: HaXaTb Ha KHONKy "A" c 06eHX CTOPOH pyuKN I ODHOBpeMeHHO npnOAnrB eE BBepx, TTo6bl
BbIHyTb (pnc.18).
OTKpbIbAHne TOLbKO C OJHOH CTOpOHbI: HaxaTb Ha KHOHky “A” C OJHOH CTOpOHbI pyKn-6ampeHa npHNOdHrB BBePx, YTO6bl OTKpbITb, OTBeJa B CTOpOHy.
HaKaTaB Ha KhoNkN "A" c 06eHX CTOpOH, YTO6bI OTpeRyJInpOBaTb pyKy nO Bbcote (Pnc.20).
YCTAHOBKA CINDEHb8 (pnc.21, pnc.22, pnc.23, pnc.24)
PacnoJoxHtB KpenHeHn CndeHb HAnpoTHB COOTBeTCTByOuNX aDantTePOB,HaDaBHTb BHN3 D0
MOHTAX
UeIyka, yKa3bIBaIOoTe Ha npaBnJIbHO BbINOLHeHHe 3aueIeHne. Ipeed nCNoJIb3OBAHNem Bcerda npOBepaIte npaBnJIbHOcTB 3akpeIeHnC o6eHX cTOpOH. CndeHbe He dOJxHO OTKpeIaTbcS, eCInero npInODHaTbYTo6bI CHaTb CnDEHbe, npInODHaTb pbUarH aAdTepOB C 06eHX cTOpOH.
PERYUNPOBKA KANIIOWOHA
Pa3IOXHTe KaIIOHOH no Heo6xOaIMOCtN, YTO6bI ppeOxApaHtB pe6EHa oT coJIHeuHbIX Lyuei.
BHHMaHHe: Detcka Koxa Oeyb ChBteJIbHa, HkOrda HE octabJrTe pe6eHka nD Bo3dEChTBnEM npMbIX COJIHeHbIX Lyuei, Bcerda npOBepaBnIbHOCTb peryIINPOBKN KaIOoHa KOJIaCKN.
MOHTAX (pnc.24, pnc.25, pnc.26)
PACKPbITHE KANIHOHA (pnc.27, pnc.28)
Kak noka3aHo Ha pncyHke 5,packpbItb KaHooHn HkaTb Ha pbuaKKn "A".
CKIAdbAHNE KANIHOHA (pnc .29, pnc.30, pnc.31)
PpHnoHryb o6a pbIyIaXka “A”, nocJe yero, cIoxHTb KaIHOOH (pnc. 31).
Baxho: HNKorda He cKnaDbIbaiTe KaIOsoH, npeDbapnteIbHo He npINOndraB pbIaXKN “A”, 3TO
MOXET PnBecT N NOJOMKe KaIIOHOHa.
PERyIINPOBKA NOCTABKN IJRA HOG (pnc.33)
HaKaTaB Ha KhoNkN "A" n OtperyI npObaTb NocTaBky dny HOr B HyKHom NoJIOKeHn.
ONYCKAHNE CINHKN (pnc.34)
YTo6bl npHOnHb cNnKHy, Bo3bMntecb OndHou pyKo 3a perylnpoBOuHbI peMeHb, “a”dpyropyko nepeBedeHTe yCTpOcTBo perylnpOBKn B CTOPOHy cNnKN.
YTo6bl onyCTnTb CnHHky, HaxaTb KHONKy B ceHTpe ycTpoNCTBa peryIInpOBKn "b" n nepeBectn erO BHn3.
PEBEPCHBHOE CnDEHbE (pnc.35, pnc.36, pnc.37)
HaxaTb c 06eHX CTOpOH Ha KhoNkN "A" n CnTb cnDeHbe, npnnoDnB ero.
NoBepHyTb cndeHbe, no JeJaanHIO, B CTOpOHy DOpOHNn B CTOpOHy poDHTeJI pe6EHHka.
yCTaHOBnTb cHOba cnIeHbe Ha npOryNoUHyIO KOJIACKy, pyKOBoIDCTByAcb, B ueJx npaBnIbHOcTH MOHTaJa, naparpaΦom "yCTaHOBka cnIeHbJ".
CTPAXOBOUHbIE PEMHN (pnc.38)
IpeTeM, KaK Iomeuatab pe6eHka B KOJACKy, BKJIIOHTe CTOHOHbI TopMO3.
PacCTerHnTe npKkY-3aMOK: HaKMITE Ha KONky “A” IN 3BJIeKNTe BCE KOMIOHEHTbl
3acTeKKn. IomeCTIte pe6eHka B npOryIoUHyIO KOJIaCKy I OTpeRyIInpyIte cTpaXOBouHbIe peMHn Iop pa3Mepy pe6eHka.
3aCterHnTe npJxKy-3aMOK: BCTaBnB Yactb “a” B Yactb “a”. XapakTepHbI NcJIyOK yKaJcET Ha npaBnIbHOCTb COeINHeHn.
BHIMAHHE: PONCHNHyb peMeHb OChaJcH 2 6OKOBbIMN KOJIbUaM N JI INCNOJIb3OBAHnI DOnOHHTeNbHbIX pEmHe, OTBeuaHux Tpe6oBaHnI M CTAHApTa BS 6684.
CKIaDbIBAHNE IPOrUIOuHOKOLAckn (pnc.39, pnc.40, pnc.41, pnc.42)
IpeedcklaDbBaHHeM KOJIaCKN npOBepbTe, YTO:
CndeHbe paonoloxeHO nioM K dopore
CnHka noHaTa B BeptNkaJbHoe nOLOXeHne
MOHTAK
KanHouOH cIoxKeH
HaxaTb Ha KhoNky "A" Ha HnXHei cToPoHe npaBOro pbUra n, ydepxHBa eHaKaToi, nepeBecTH oBa pbUpara - IeBbI n npabbl - BBePx. Ctoxntb nporpylouHyIO KOJACKy.
Поберпь,чToMexaHn3M3akpbITnA“B”3aцeнlen(pnc.42)
IpnmeaHn: HElb3r cIoxNtB npOryLOnHyIO KOJAcKy, eCIn Ha uaccn yCTaHOBHeHbl dONoHNTeNbHbIe ycTpoiCTBa, TaKne KaK aBToKpeCIO N IIOlbKa-NepeHoCKa.
PACKJIADbIBAHNE IPOrIyIoUHOn KOJIaCKn (pnc.43, pnc.44, pnc.45)
HaKaTb Ha KhoNky pa36JoknpoBaHn y, DePxAcb 3a pyuKy, pa3JIOXHTb KOJScKy. DePxA KoJAcKy 3a pyuKy, HAdaBnTb HorOy Ha 3aAnIO IOndTaBky, npoDJIKxJa PaCKpbIBaTb eE Do nOJIHOr opacklaDbIbAHn.
y6eIHTbcB TOM, yTO KOJIaCKa IONHOCTbIO pa3IOXeHa.
MOHTAX YEXLA DIA HOG (pnc.46)
OeTb YexoI IJIa Hor Ha paMy cnIeHb, B HIXHeI erO qactn.
PnKpeNtB KONkAmu YexoI dIa Hor K CtpyKType npOryLoUHoi KOJIaCKN
MOHTAX KANOTA OT DOXDA (pnc.47)
HaTeb KAnOT OT DoJxHa KaIIOuOH.
3açeniMb Kpa C IeHToI-IlnUykoB B BepxHcN Yaactn KaNoTa OTo DoJd 3a CtpyKTypy npOryIoUHO KoJIaCKN.
NcNoJIb3OBAHNE C DOnOJIHHTeJIbHbIMN UCTPOICTBAMN
TAPAHNTHbIEOB3ATEJIbCTBA
HnkeykaaHHbIe noJoxeHnB BCTynaOT B DeiCTBHe c 01.01.2005 r. n noJIHoCTbIO 3aMeHnT IIO6yIO DpyryIO HnΦOpMaunIO, UTo Kacaetcra rapaHTn, npedocTabJeMoN KOmnaHne Foppa Pedretti S.p.A., ABJAcB
TAPAHINHbIE OBA3ATEJIbCTBA
KOMnHn Foppa Pedretti S.p.A.,oHnHaJIbHo 3apeHcTpnpOBAHHo no aDpecy: Grumello del Monte (Italia) Via Volta 11, KOTopar rapaHTnpuyet HenocpeDCTBeHHo NTo DaHHoe n3dJIne, TOnbKO yTO BbIyUeHHoe C fApRnK, He IMeET DeΦeKTOB HN MaTePnaJIOB, HN IpOeKTHpOBAHHa, HN PON3BOdCTBeHHbIX, IN COOTBeTCTByET 3aABLeHHbIM XapaKTepNCtIKam.
.Hactoaa rapaHTna DeiCTBnTeNbHa BO Bcex cTpaHax- yIeHax E3C n He NckIoUaet H He orpaHnUHbAe T npBa POnb3ObaTeJI, B COOTBeTcBm C 3aKoHOdaTeNbCTBOM, perlaMeHTnpuOuIM B3aHMOOTHoWeHnC POn3BOdnteJIem N3deJIIn.
YTO6bl BOCNoB3OBAbC8 DaHHoI rapaHTnei, Notpe6nteBdoJxHepnHeCTN deΦeKTHoe H3dJIe NpOaBuy, npEoCTaBvB DOkUMeHT, yOcTObepraIOuM O npNo6peTeHN N3dJIeN, c neaTbIO n NOINscBIO PpOaBua N yKa3aHHeM Ha3BaHn I3dJIeN NII, KaK aJIbTePHaTIBa, fNCKaJIbHbI KACCOBbI Yek, 6e3 KaKHX-JIb60 N3MeHEn, N3 KOToPOrO QETKO BnDHa BCy Ka3aHHa DO 3tOrO INΦOpMaun. TapaHTn IMeet CpOK DeIcTBn DBeHaIaTb (12) MecaueB C daTbI pNo6peTeHN N3dJIeN.
B TeueHne BbIeeyKa3aHHoro cpoKa KOMnAHn Foppa Pedretti S.p.A. 063yETc8 OTpeMOHTnpOBaTb Hn 3aMeHnTb, Ha CBOI Bbl6Op, DeΦeKTHoe N3dJIne. TapaHTn npdeOCTabJIaETCa KOHeuHOMy ToKynatelIO N3dJIIN (NoJb3OBaTeJIIO) n He NckJIHOaET n He orpaHnUHaET npab DaHHoro NoJb3OBaTeJI, npedYCMOTpeHbIX DeIcTBByUoMm 3aKOHoDaTeJIbCTBOM n/nnn npabaMn POnJb3OBaTeJI, Na npedJbAJIeHne CBOx npab B aDPEC DInepa/IpOdaBua N3dJIIN.
HE NOKPbIBAiotcraTAPAHTHEN.
.「rapaHTneH He NOKpbIBaEtCyaep6,CB83aHHbIc HcNoJIb3OBaHNem H3dEInn, BO3HKnUHnNO CLeDyUOuM npuHnAM: HnPaBnIbHOe HcNoJIb3OBaHHe, He COOTBeTCTByIOUeeyKa3AHm, CoDEpKauImCMr BO BkLaDbIe C HNCTpyKzmaHn PO MOHTaJy N 3KcPlyatauHn, yIapbl n PAnDeHn I3dEInn, H3dEInne POnDBepraIocb BO3dEhCTBnIO BLnXHOCTn HIN 3KCTpeMaJIbHbIM TEMpepatym Hn6laIopnpAHTbIM YcLOBnaM OKpykaIoJe Cpebl C NOCToRHHo CMeHO J3THXycLOBn, Kopp03Hn IOKscJIeHIO, a TaKxHe HecAHKUnOHPOBaHHOMy peMOHTy NlmoNΦHKaUHn, H3dEInne HcNoJIb3OBaIOcb He No Ha3HaueHnIO NLI HnPpaBnIbHO, 6e3 co6LIOdeHn Yka3aHn B INCTpyKzynx N0 MoHTaJy N 3KcPlyatauHn, pni NLOXOM yXoJe HnO TcyTCTBn TaKOBO, peMOHTe C HcNoJIb3OBaHNem HeOpnIHHaJIbHbIX 3anuaTeN, PO npuHHe HnPpaBnIbHO c6OpKn, abApHn, BO3dEhCTBn IIuN HAHTKOB, XHMNUeCKNX BeueCTB, a TaKxE BCJeDCTBne Upe3BbIuHaHBIX o6CToRteJIbCTB.
B LIO6OM Clyuae, KOMnAHn Foppa Pedretti S.p.A. He HecET HnKaKoN OTBeTCTBeHHocTH 3a uyep6, npHnHHeHHbI JIOdAM NIn npEdMeTaM, OTINyHbIM OT N3deJn, no npHnHe HecO6LIODeHn yka3aHN / npedncaHn / npedynpexKeHn, CoepXaUHXcB DaHHom pyKOBoDCTBe NIn, KaK aNbTePHaTnBa, B "INcTpYkCnN NO MONTaXy N3KcNpyatauN", COpBOxDaUoSe Kaxdoe N3deJIne H npEDHa3NaueHHe DnRA BlaJeBua/ NOlb3OBaTeJI. (HaNPmEp, YnCTO B KaueCTBe npimepa, B Cnyuae DeTCKoN KPOBaTKN: "HnkOrda He OCTabJnTe 6e3 npNCmotpa pe6eHka. KoHTpOJIpynte, UTO6bl rOJOBa pe6eHka He OKa3aJAcb NOKpbITOn pOcTBHeIO NIn ODeJIOM...").
KoMaHnFoppa Pedretti S.p.A., Kpome npOye, He HecET HnKaKoI OTBeTCTBHeHOctn 3a yUep6, nPnHHeHHbI IIOJAM NJIH mUeCTBy, ecN noLOMka eE npOdykCnCBra3aHa C pa3pyuSeHEm KOMNoHETOB N3dEIny, NOBepraembIX HopMaIbHOMy n3Hocy. KOMnoHENTamN, NOBepraUOnmncr HOpMaIbHOMy N3HOCy, cHTaIOTcR BCE nlaCTMacCOBBle KOMNoHEtBi N3deJIny.
SASTAVLJANJE
Vazna napomena: slike i upute u ovom prisucniku odnose se na Jednu verziju kolica; neke componente i funkcije opisane ovdje mogu se razlikovati ovisno o verziji kolica koju ste kupili.
POSTAVLJANJE PREDNJIH KOTAÇA (sl.1, sl.2, sl.3, sl.4, sl.5)
Umetnite krajnji lezaj u prednje noge dok se u potpunosti ne fiksira. Osigurajte ispravno sastavljanje. Umetnite krajni lezaj u utor na sredini blokade kotaca.
Pritisnite gumb za blokadu prednjih kotača. Podignite polugu za blokadu kako biste aktivirali okretnu spojku. Pritisnite Čelicni gumb za OTPustanje prednjih kotača (sl.5).
POSTAVLJANJE STRAZNJIH KOTACA (sl.6, sl.7, sl.8, sl.9, sl.10)
EN CAR SEAT - Assembly instructions
EN. IMPORTANT! READ THE INSTRUCTIONS CAREFULLY AND KEEP FOR FUTURE REFERENCE
FR. IMPORTANT! LIRE ATTENTIVEMENT ET CONSERVER SOIGNEUSEMENT A PORTEE DE MAIN POUR UNE UTILISATION ULTERIEURE
Car seat components PAG 26
Use - warning PAG 27
Checks before use PAG 31
Installation in the vehicle PAG 32
Placing your child in the car seat PAG 34
Using the buckle PAG 34
Adjusting the seat belt (harness) PAG 34
To adjust the headrest and straps PAG 34
Adjust the handle PAG 35
To protect your child PAG 35
Infant pad PAG 35
Fitting your car seat into the car PAG 36
Adjust canopy PAG 37
Maintenance - cleaning PAG 39
Formal guarantee PAG 40
CAR SEAT COMPONENTS

- Handle
- Handle release
- Shoulder pads
- Buckle crotch pad
- Buckle
- Harness
- Adjuster button
-
Adjuster strap
-
Lap belt guide
- Canopy
- Had support
- Infant pad
- Shell
- Shoulder belt guide
- "Adjusting headrest" lever
- Metal ring
CATEGORIES OF USE
| CAR SEAT "Car seat SuperTres i-Size" | CAR SEAT "Car seat SuperTres i-Size" with base "X i-Size" |
| The "Car seat SuperTres i-Size" car seat is fixed in the car with the 3-point seat belt. | The "Car seat SuperTres i-Size" car seat is attached to the "X i-Size" and fixed to the passenger seat with the ISOFIX connectors. Consult the "X i-Size" base instruction manual for correct installation in the car. |
Warning
- This is an "i-Size" child restraint device approved in accordance with regulation no. 129 to be used on the passenger seats of "i-Size-compatible" vehicles, as indicated by vehicle manufacturers in the vehicle user manual.
- If in doubt, contact the manufacturer of the child restraint device, or the retailer.
IMPORTANT: the "Car seat SuperTres i-Size" car seat, together with the "X i-Size" Base, is an i-Size restraint system approved according to the ECE R129 Regulation, for children between 40 and 85 cm in height with a maximum weight of 13 kg.
WARNING
IMPORTANT
Please read all instructions in this manual and in the vehicle owner's manual related to child safety seats carefully and understand them. Install and use the child safety seat as described in the instruction manual. Failure to do this could result in serious injury or death of your child. These operating instructions must be kept in the specific compartment in the car seat during the period of use for future reference.
IMPORTANT
- Because of potential medical issues inherent in low birth weight and premature infants, always have a trained professional doctor, or hospital staff member assess the suitability of the child restraint prior to leaving the hospital or using the child restraint.
- WARNING! Install the "Car seat SuperTres i-Size" car seat in the REAR-FACING POSITION ONLY.
- The "Car seat SuperTres i-Size" car seat can be installed on the "X i-Size" base in i-Size compatible passenger seats, as indicated by the manufacturer in the vehicle manual.
- If the vehicle used does not have an i-Size-compatible passenger seat, the installation is approved on ISOFIX passenger seats in the vehicles indicated in the attached Vehicle List, also available on the website www.foppapedretti.it.
- The "Car seat SuperTres i-Size" car seat alone can also be installed with the 3-point static or retractor seat belt alone, approved according to regulation UN/ ECE 16 or other equivalent standards.
- Before proceeding with the purchase, check that the car seat is compatible with your car. If in doubt, consult the manufacturer of the car seat or the dealer.
WARNING
- Use the child safety seat only on the vehicle seats that face forward. According to accident statistics, children are safer when properly restrained in the rear seating positions than in the front seating positions.
- After an accident, the car seat may no longer meet the safety requirements because of the damage sustained, even if this is not immediately visible. It is therefore recommended that you replace it. Only the manufacturer can ensure that it complies with the safety requirements, provided it is an original product.
- Make sure that luggage or other objects inside the vehicle are secured, to reduce the risk of injury in the event of an accident.
- The rigid and plastic components on the child restraint must be positioned and secured so as not to get trapped between the passenger seats or in a car door during daily use of the product.
- DO NOT remove any labels on the child safety seat. Important information is contained on the labels.
DO NOT use a child safety seat with damaged or missing parts.
DO NOT use damaged or frayed harness straps or vehicle belt. - DO NOT modify or attempt to modify the child safety seat in any way.
- DO NOT take apart or attempt to take apart this child safety seat except as instructed in this manual.
- DO NOT use a child safety seat that has been in a crash. A crash can cause damage to the child safety seat that you cannot see.
- DO NOT replace the child seat cover or harness with any other than the ones we recommend as these parts are integral to the child safety seat's performance.
- DO NOT use a second-hand child seat or child seat whose history you do not know.
- MAKE sure that the child safety seat does not become trapped by folding or moveable passenger seat or in the door of your car.
DO NOT USE in any configuration not shown in the instructions. - NEVER use this child safety seat with 2 point vehicle belts.
- DO NOT use belt routing methods not shown in these instructions.
DO NOT allow children to play with or adjust the child safety seat. - Always check the tightness of the restraint and the harness before each use.
- DO NOT use this child safety seat in a passenger seat with an active airbag unless the vehicle manufacturer confirms that it is safe.
- This child restraint should be securely belted in the vehicle even when not in use. In a crash or sudden stop, an unsecured child safety seat may injure other occupants.
WARNING
- Make sure to properly secure any loose objects, such as luggage or books, in your car as they may cause injuries in the event of an accident.
- NEVER leave your child unattended in a car even for a short time.
- NEVER take your child out of the child safety seat when the vehicle is moving.
- NEVER use this child safety seat without the car seat cover.
- HOT! Cover the child safety seat when left in direct sunlight. Parts of a child safety seat may become too hot for the child's skin. Always check surfaces before placing a child in the child seat.
- DO NOT use any load bearing contact points other than those described in the instructions and marked in the child restraint.
- The rigid items and plastic parts of a child restraint must be so located and installed that they are not liable, during everyday use of the vehicle to become trapped by a movable seat or in a door of the vehicle.
- We recommended that any straps holding the restraint to the vehicle should be tight, that any straps restraining the child should be adjusted to the child's body, and that straps should not be twisted.
- IMPORTANT! Please ensure that any lap strap is worn low down, so that the pelvis is firmly engaged.
- NEVER use this child restraint with any other base except ones that the manufacturer permits.
- ALWAYS make sure all vehicle belts and harness straps are not twisted before each use.
- NEVER leave the child in the child seat when the harness straps are loose or undone.
DO NOT leave your child in this child restraint for an extended period of time. - ALWAYS install the child safety seat in a rear-facing position.
- NEVER install the child safety seat forward-facing.
DO NOT use alternative routings not shown in these instructions. - MAKE SURE all folding passenger seats are property latched.
- ALL occupants of the vehicle should be correctly restrained. Unrestrained passengers may be thrown into other passengers and cause serious injury or death in a crash.
- ALWAYS MAKE SURE the handle is properly locked in the upright carrying position before carrying a child in the child seat.
- NEVER place the car seat or infant carrier near the edge of an elevated surface or on a soft such as a seat cushion or mattress. The car seat or infant carrier could fall off these surfaces and cause serious injury or death.
- NEVER use the child safety seat with a shopping cart.
CHECKS BEFORE USE
Inspect:
- child restraint free of damage.
Verify Child within Size Range:
weight between 0-13kg.
Install Child Restraint Rearward-facing in Safe Location in Vehicle:
- vehicle seats that face front of vehicle only;
- handle locked in specified position;
- child facing rear of vehicle;
- position with NO active AIRBAG;
- 3 point (shoulder/lap) belt used;
- seat belt not twisted;
belt path followed; - tight against vehicle seat.
Secure Child Properly in Child Restraint:
- correct shoulder strap height;
- harness not twisted;
- harness low across hips;
- harness secure and tight.
INSTALLATION IN THE VEHICLE
USE IN THE CAR
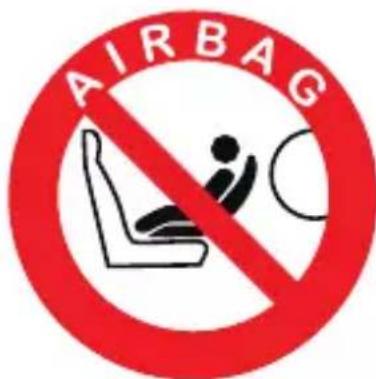
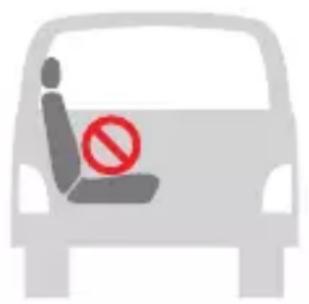
DO NOT USE THE CAR SEAT PLACED ON A PASSENGER SEAT Fitted WITH AN AIRBAG.
Danger! If the airbag explodes it may hit the seat, and cause serious injury to the child, if not death.
Follow the instructions in the vehicle owner's manual for the use of child seats.
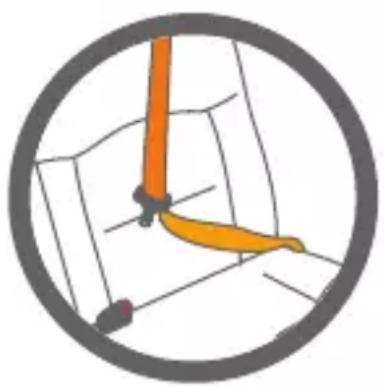
NEVER use a 2-point seat belt to fix the child's car seat to the passenger seat. Use only 3-point seat belts.

Comply with the regulations in force in your own country. NEVER use a 2-point seat belt to fix this child's car seat to the passenger seat.
Only suitable for use in vehicles equipped with 3-point static or retractor seat belts, approved according to regulation UN/ECE 16 or other equivalent standards.
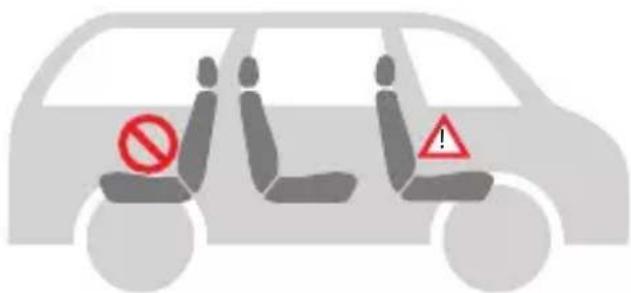
Never use this car seat on a front passenger seat fitted with an active front AIRBAG.
ICLE
WITH 3-POINT CAR SEAT BELT

You can install the car seat as follows:
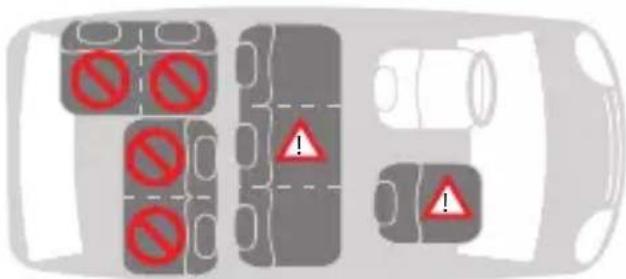
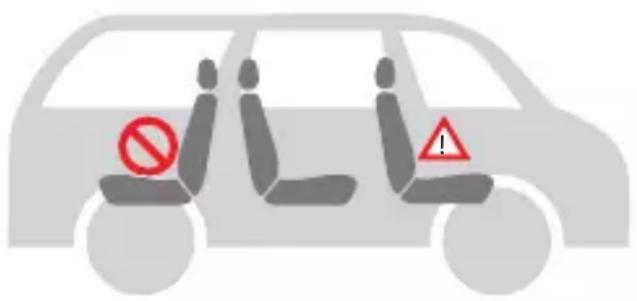
| in the direction of travel no | |
| in the opposite direction to the direction of travel | yes |
| with a 2-point belt | no 1) |
| with a 3-point belt | yes 2) |
| on the front passenger seat | yes 3) |
| on the side rear seat | yes |
| on the central rear seat | no 4) |
1) The use of a 2-point belt increases the risk of injury to the child in the
event of an accident.
2) The seat belt must be approved to ECE R 16 or to other equivalent standards.
3) Do not use on a front passenger seat fitted with an active front airbag.
4) It may be used if the central seat of the vehicle is equipped with a 3-point belt.
USING THE CAR SEAT
PLACING YOUR CHILD IN THE CAR SEAT
USING THE BUCKLE
To release the buckle (fig. 1): Press the red button on the buckle to release the shoulder straps and move them to the side.
To attach the buckle (fig. 2.1, fig. 2.2, fig. 2.3): Join together the two ends/ tabs of the straps to form a single connector.
Insert the connector into the central buckle until you hear a click.
Make sure that the straps are not twisted.
Adjust the chest protectors to the
centre of the child's shoulders.
ADJUSTING THE SEAT BELT (HARNESsS)
Loosening the straps (fig 3): Press the adjuster button on the front center of the seat, and pull on both shoulder straps to loosen the harness.
Tightening the harness (fig. 4): Pull the harness adjustment strap so as to tighten it properly against the body of the child. The harness is correctly tightened when the gap between the harness and the child is no greater than the thickness of your finger.
IMPORTANT! Pull the end of the adjuster strap outwards, not upwards or downwards. During transport (especially when not in the car), the adjuster strap must be placed in the belt compartment.
Ensuring that your child is properly secured with the harness.
To ensure the safety of your child, check that.....
- The straps are adjusted correctly at the height of the child's shoulders.
- The straps are not twisted.
- The tabs are properly engaged in the harness buckle.
- The straps are properly tightened, as the gap between the harness and the child must not be greater than the thickness of your finger.
TO ADJUST THE HEADREST AND STRAPS
Loosening the straps (fig 5): Press the adjuster button on the front center of the seat, and pull on both shoulder straps to loosen the harness.
To adjust the headrest and straps (fig.6. fig.7): Pull the harness adjustment lever upwards and at the same time slide the adjuster upwards or downwards until the chest straps are at the correct height.
Release the adjustment lever to lock the adjuster in the new position.
USING THE CAR SEAT
Make sure that the chest straps are properly locked and in the correct position. Make sure the shoulder straps are positioned just above the child's shoulders and that there is a 1 finger (1cm) gap. (fig. 8).
A properly-adjusted headrest ensures the optimal position for the child sitting in the car seat.
ADJUST THE HANDLE (fig. 9)
A. Fixed reclined cradle position
B. For use in the car and for transport
C. For placing the child in the seat
D. For use as a bouncer with rocking movement locked.
To adjust, squeeze handle release buttons on both sides, then rotate the handle. The handle will lock into position.
WARNING:
Always make sure the handle is securely locked in the upright carrying position before carrying.
You should hear a click when the handle button is engaged and handle is locked into the upright carrying position.
TO PROTECT YOUR CHILD (fig.10, fig. 11, fig. 12)
The reducer gives your child greater support during the first months.
The reducer is used to ensure greater comfort to young children.
The complete reducer must be used until the child reaches 60 cm .
- Always secure the child with the belt when placed in the car seat
- Never leave the child unattended in the child seat when placed on high-up surfaces (such as tables, etc.).
- Make sure that the end of the belt does not get caught in moving parts (such as automatic doors, escalators, etc.).
- WARNING! The plastic parts of the car seat can heat up in the sun, causing burns to the child. Protect the car seat from excessive heat, for example, by using a light covering.
- The car seat has only one installation position in the car, leaving the child always semi-reclined.
- Take regular breaks when travelling on long journeys. Your child can get tired very easily. Avoid leaving the child in the car seat for too long.
USING THE CAR SEAT
FITTING YOUR CAR SEAT INTO THE CAR
This car seat can only be fitted into the passenger seat of a car with a lap and diagonal seat belt and no AIR BAG.
Place child's bottom on the seat and the child's back flat against the back of the child restraint (fig.13).
This will increase the child's comfort and allow the harness to properly secure the child.
Slide shoulder straps over the child's shoulders.
Make sure that the straps are at the same height and positioned just above the child's shoulders.
Securing the child with the harness, to attach the buckle: (fig.14) see paragraph "Using the buckle".
Tightening the harness (fig. 15): see paragraph "Adjusting the seat belt (harness)".
To secure the car seat in the vehicle with the 3-point seat belt, proceed as follows:
Your child seat can only be installed rearward facing using a lap and diagonal seat belt in the front or rear passenger seat of the car (fig 16).
Pass the diagonal seat belt (the chest belt) of the car around the backrest of the car seat, passing through the diagonal belt guide (1) (fig. 17, fig 18).
Pass the horizontal seat belt (the lap belt) of the car through both belt guides (2) and fasten the buckle (3) (fig. 17, fig. 19).
If the vehicle's seat belt is too short, adjust its height to the lowest position.
If it is still too short, try another passenger seat.
Place the diagonal belt in the diagonal seat belt guide at the back of the seat (fig. 18).
Take out all the slack in the seat belt, ensuring that there are no twists or kinks in the seat belt (fig. 20).
USING THE CAR SEAT
WARNING:
- DO NOT route the vehicle belt using any other path when using the child seat. For assistant contact our Customer Service team.
- DO NOT use 2 point vehicle belt to install this child seat.
- ONLY install the child restraint rear-facing on forward-facing vehicle seats.
- Make sure the child is properly secured in the child restraint, and the child restraint is tightly installed in the vehicle.

Check that the car seat has been installed correctly in the vehicle
ADJUST CANOPY
The sun canopy is easily adjustable (fig. 21).
It enables your child to rest peacefully and gives protection from the sun's rays.
OPTIONAL
Optional "X i-Size" base, sold separately
MAINTENANCE - Cleaning
The upholstery and seat belts can be cleaned using a clean cloth, warm water and soap.
The plastic parts can be cleaned with mild soap and warm water.
Do not use harsh detergents such as solvents.

The car seat must not be used without the lining.
REMOVING THE CANOPY (fig. 22)
Removing the lining
Press the red release button and unhook the harness.
Remove the shoulder straps from the small seat, cover and chassis in plastic, by pulling each shoulder strap, including buckle, through its corresponding slot.
Do not remove the shoulder straps from the loop of the harness adjuster strap.
Remove the belt following the instructions in the "How to remove the harness buckle" paragraph and remove the buckle from the cover.
Pull out the cover from shell front.
To put the lining back on, follow the reverse procedure.
IMPORTANT! Make sure that it is correctly assembled, check that none of the belts are twisted.
How to remove the harness buckle
- Unclip the buckle (press the red release button).
- Loosen the belts on the harness.
- Locate the metal ring attached to the belt under the child restraint.
- Rotate the metal ring and remove it through the shell and the padding.
How to replace the harness buckle
- Insert the metal ring and the crotch strap through the padding and the shell.
- The metal ring, fastened to the belt, must come out from the shell.
- Pull the centre buckle to check that the crotch strap is correctly secured.
How to remove the harness
- Unclip the harness buckle (press the red button).
- Unclip the shoulder straps from the belt-tightening device, located on the rear of the backrest.
- Pull both belts through the shell and the lining and remove the chest protectors.
- Locate the metal ring attached to the belt under the child restraint.
- Rotate the metal ring and remove it through the shell and the padding.
The contents of this document as stated below will come into effect as from
01.01.2005 and replace, on every account and in full, any previous message referring to the guarantee provided by Foppa Pedretti S.p.A.
FORMAL GUARANTEE
Foppa Pedretti S.p.A. the head office of which is located at n. 11 Via Volta, Grumello del Monte (Italy), guarantees directly to the Consumer that this brand new product is free of faults with regard to the materials, design and manufacture and that it complies with the characteristics as declared by the manufacturer. This formal guarantee is valid in all Member Countries of the European Union and it neither excludes nor limits the Consumer's rights in accordance with mandatory measures provided for by the law with regard to the Retailer of the Product.
To take advantage of this formal guarantee, the Consumer must return the faulty product to the Retailer, presenting to the same the proof of purchase of the Product which must clearly show the Retailer's address, the date of purchase of the Product with the Retailer's stamp and signature and an indication of the Product itself or, alternatively, the receipt which must not have been altered and which must clearly show the same information as that referred to above.
The formal guarantee is valid for twelve (12) months from the date of purchase of the Product. During this period, Foppa Pedretti S.p.A. will repair or replace the faulty product, at its own discretion. The formal guarantee is granted to the end buyer of the Product (Consumer) and it neither excludes nor limits the mandatory rights of the Consumer as provided for by the law and/or the rights that the Consumer may have with regard to the Dealer/Retailer of the Product.
EXCLUSIONS TO THE FORMAL GUARANTEE.
The formal guarantee is excluded in the case of damage caused to the Product for the following reasons: if the product is used in a way that does not comply with the information contained in the use and assembly instruction sheet, if the product is knocked or dropped, if the Product is exposed to humidity or extreme heat or environmental conditions, or to sudden changes in the same, corrosion, oxidization, unauthorized alterations or repairs to the Product, repairs using unauthorised spare parts, improper use, improper maintenance or failure to carry out the same, improper maintenance compared to the information given on the use and assembly instruction sheet, incorrect assembly, accidents, damage caused by food or drink, damage caused by chemical products, cases of force majeure.
In any case, Foppa Pedretti S.p.A. declines all responsibility for damage caused to persons or to property, other than the Product, when such damage is caused by a failure to comply with the instructions/advice/warnings cont a ined in the manua I or, alternatively, in the use and assembly instruction sheet provided with each Product for the owner/user. (Purely as an example, in the case of a cot : "Check your baby constantly. Make sure that the sheets and blankets do not cover the baby's head...").
Furthermore, Foppa Pedretti S.p.A. declines all responsibility for damage to persons and to property when the breakage of its products is due to a deterioration in the components of the Product that are subject to wear. All the components of the Product made of plastic are considered to be components subject to wear.
EXCLUSIONS DE LA GARANTIE CONVENTIONNELLE.
X'H\S H T\(\Sigma\) N'OP\P(\)T\(\Sigma\)
Tia va ateAeuepwoTe Tnv TOptn (EK. 1): TatnoTe To KOKKIO KOUPTI OTNV KEVTPIKn aykpapa yia va aTOOUVoEoTe Tc pavTeC kAI TOTOEtntote Tc OTo TIAI Tou kaioaatoC.
Tia va aopaioTe Tnv nptn (EIK.2.1, EIK.2.2, EIK.2.3): EvwotE ta duo akpa/Tic
TpoeoxecTwv tipavtwv, oxmuizovtac eva movaikó onuio uvdoeonc.
EioayTe to ounieo ouvdoanc otny Kevtpikn aykpapa, mexpi va akoouotc eva klik.
NCTIOAb3OBAHNE-MEPbI IPEAOCTOPOXHOCTN
KATEGOPN 3KcPJIyATAUIN
| ABTOKPECAO "Car seat SuperTres i-Size" | ABTOKPECAO "Car seat SuperTres i-Size" c ochobahnei m i-Size |
| Авторесло "Car seat SuperTres i-Size" кренистая в对我说юсы спомочьюштathoro 3-toчeurно ремня бezоноаноctи. | Авторесло "Car seat SuperTres i-Size" кренистая в对我说юсы спомочьюштathoro 3-toчeurно ремнябezоноаноctи. |
PpeDynpexdene
-
Данhoe DeTCKoe ydepxnBaOuSee yctpoNCTBO «i-Size» npoJno TInOBbIe nCnblTaHnB CootBcTcBn c PerlaMeHToM No 129 dJa EKcnjyatauHn Ha aBTOMobnJIbHbIX cndeHbAx, «COBMecTmblx co cTaHdapTom i-Size» - cm. INΦOpMaUHO, yka3bIBaEmy O npOn3BOIDTeJIaMn ABTOTpAHcNOpTHbIX cpeIcTB B COOTBeTcByOuXpykoBoDcTBax NO 3KcnJyatauHn.
-
При ВОЗнКовен ComHeHи образпесь К ИЗROTOВТЕЛЮ удржИBAIOцero yctpoIcTBA ИПИ K ДИСТРИБTOPOY.
BAKHO: abokpecno "Car seat SuperTres i-Size" Bmecte c ochobahnem "X i-Size" npedctabnaret co6oynepxnbouyocntemy i-Size, omolnpobahnyo cornacho Permaenty ECE R129 dIa deteH poCTOM ot 40 do 85 cm n C MaKcImaJIbHbIM BECOM 13 kr.
BAXHO
BHNMaTeJbHO npOHTHe n yAChHe BCE INHCTpyKcHn, B OTHOWeHn DeTCKHX ydePxNBAIOUx yCTPOICTB, pINBeDEHHbIe B DaHHOM pyKOBOdCTBe N B pyKOBoDCTBe K aBTOMoBnIIO. YCTaHOBIne I nCNoJIb3yIte aBTOKpeCNo KaK OINCAHO B pyKOBOdCTBe NO 3KcNpYatauH. HecobIoJeHne 3Tnx INHCTpyKcHm MOXET HeRaTINBHO OTPa3NTbcra Ha 6e3OpaCHocTH nIi CTAb IIpruHOn cepbe3HbIX TpaBM nII cMePTn pe6eHka. DaHHyo INHCTpyKcHIO nO 3KcNpYatauHn Heo6XODIMO XpaHtB dJIg 6yUxN KOHCyJIbTaUaN B CPeuaJIbHOM OTceKe aBTOKpeCJa Ha npOTJxHn BCero nePnoDa erO nCNoJIb3OBaHnJ.
BAXHO
B cnyuae HeoHHeHbIX TeTei HOBOpKdEHHbIX C Hn3KIM BECOM, neped nCpOJIb3OBaHNem ydePKNBaIOSeI OyCTPOIcTBA Heo6XoJIMO npOKOHcyJIbTIpoBaTbcra y BpaA iIy CpeuIaN3INPOBaHHOrO MeDInHCKOrO nepcoHaJa o BO3MOxHOCTN nCpOJIb3OBaHNja ABTOKpeCna.
- BHHIMAHNE! Автокесно "Car seat SuperTres i-Size" установinaетсу.Tолько пOTиВ XODA ДВИЖЕня ABTOMOБЛЯ.
"Car seat SuperTres i-Size" MoKeT yCTaHaBJIbBaTbcS Ha OCHOBaHne "X i-Size" Ha cnIeHbIx, COBMeCTnMbIX CO CTaHdApTOM i-Size - cm. INΦopMaζHQ, yKa3bIbAeMyI ΠpOu3BoDInTeJEm B pyKoBOdCTBe IIO 3KcPJIyataζN aBTOTpaHCnOpTHOrO cpeIcTBa.
- Ecni aBTOMO6nIb He yKOMnJIeKTOBaH cnIeHbEm i-Size, To yCTaHOBka MoXeT ocUeCTBJIaTBcR Ha cnIeHbR ISOFIX B aBTOMo6nIax, yKa3aHHbIX B npnilaraemOM.
- Пероче abTOtrpaHcNOpTHbIX cpeIcTB, KOToPbI TaKxe pa3MeIeH ha caITe www.foppapedretti.it.
- ABtokpecno "Car seat SuperTres i-Size" MoKet KpeNITbCra OTdEInbHo, NocpeIcTBOM TOnbKO 3-ToueHOro peMn6e3OpaCHocTn, CTaTnueckoro nII INHePzIOHOrO, OMOJIoRpoBaHOrO cOrIaCHO PerJaMaENTy UN/ECE No 16 li6o dpyrIM aHaIOruHbIM cTaHdApTaM.
- Перацпобразець вом, уTo aBtOKpeCNo COBmecTmo CBaIM m aBTOMOBJIeM. Пи BO3HKnHOBeHn COMHeHn PpOKOHcYbTnpyITeCb C n3rOToBHTeJem aBtOKpeCna JIn6o c npOdaBc0m.
PPEyPPEKDEHNA
ПЕДУПЕХДECHNЯ
- YctaHaBnBaTb abToKpeCNo MOxHO TOnbKO Ha cnDeHb, paCnoJIoXeHHbIe NO XoDy DmXeHnA aBTOMO6nJIa. CornaCHO cTaTnCTnke, 3aHnE cnDeHbA aBTOMO6nJIa 6e3OpacHee dJa nepeBO3Kn DeTei, Yem npeEdHne.
HE nCnoJb3OBaTb aBToKpeCNo, ecn OHO NOdBeprIocb CnIbHbIM yIapam B pe3yIbTaTe abapnn. Abapn Ma MoIa Bbl3BaTb BHyTpEHnE NOLOMKn, KOTOpbie He3aMeTHbI cHapxN.
Xopoio 3aФNKcnpuTe NOdBnKHbIe PpeDMeTbI, HapnpMep: 6araJ nn KnRn, BHyTpN aBTOMo6nJI. Prn abapnn He3akpePHeHHbIe PpeDMeTbIMOryr Bbl3BaTb TpaBMbl naccaxnupOB.
TBePdbIe 3JIeMeHTbI IN PIIaCTMaCCOBbIe YactN DetCKOTo yDepeKnBaIOUeero UcTPOiCTBa DoJXHbI 6bITb paCNoJIOKeHbI N UcTaHOBJIeHbI TaKIM O6pa3OM, UTO6bI Prn HOpMaJIbHOM IcNoJIb3OBAHm n ABTOMo6nJIa OHI He 3aCTpeBaJIu NOD IOdBnXHbIM CnDEHbEM IIN B IpoEme DBePcbl.
3APPEUAETCa ydaTb 3TNKeTKn,HaHeceHHbIe Ha ydepxNBAIOueyctpoiCTBO.
Ha 3tikekax coepkntcBaxnHa INΦopMaun.
3APPEUAETCnOJb3OBaTb ydepxNBAIOoee ycTPOIcTBO ecn erO acTIN cIOMaHbI INIOTCYTCTBYOT.
3APPEUAAETCnOJb3OBaTb BHyTpEHnpeMHn nIIN peMHn 6e30NaCHOCtN, 149ecnHa HnX NMeOTc NOBpeKdEHHn nIIN ecn OHn n3HOseHbl.
3APPEUCAETCBAINONHb KaKne-Jn6o MoNΦkaun ydepxnbauoero yctpoiCTBa. - ChnMaTb yndePknBaIOoee yCTpoiCTBO cJeNyET B CToPORom COOTBeTCTBnN C nHCTpyKcIyAMN.
HE nCnoIb3OBA Tb aBToKpeCNo, ecn OHO NOdBeprIocb CnIbHbIM yIapam B pe3yIbTaTe abapu. ABaPna MOrIa Bbl3BaTb BHyTpEHnE NOLOMKn, KOTOpbIe He3aMeTHbI cHapxN.
3APPEUAETCa 3aMeHbO6uBky IIN BHyTpEHnpe pEmn Ha dpyrne, OTIInyHbE OT peKOMeHDoBaHHbIX PpON3BOdnteIeM, NocKOJIbKy pa6oTa ydePjKBaHOSeO yCTPOcTBA 3aBNCIT OT HNX HAnpMyIO.
HINKOДA HE npio6peTaIe 6bIBWee B ynoTpe6JIeHN aBTOKpeCNo, NOCKOJIbKy HeIN3BeCTHO IOBepraIocb IIN OHO ydapam B pe3yIbTaTe CToJIKHOBeHn I
PPEyPPEKDEHNA
aBapn.
- Поберп, чTo abTOKpeCNo He 3aCTpeBaet Ha NOdBnXHOM nI INCKlaIbIbAUoSEmc rCnDeHbe, a TaKKe B pOeMe DBepCuMaunHbl.
3APPEAETCnNoB3OBaTB KOHpypaun, He yka3aHHbIe B INHCTpyKuIN NO 3KcNpyataun.
- Дя креленя abTOKpeCna 3aIpeUaETcЯ nCNoIb3OBaTb NOrCHoJ peMeHb 6e3ONaCHOCTN C dByXTOUeYHbIM KpelenHeHem.
3APPEAETCnOJb30BaTb HnpaBnaUoune peMHe, OTnHbIe OT yka3aHHbIX B INcTpkyKcN.
HE no3BOJnTe DeTm nIpaTb C yCTPOJCTBOM nII nperyJnpoBaTb DeTCKoe ydepxJBauOuSe e yCTPOJCTBO.
- Pered kajdbim nCnoIb3OBaHnem npOBepntb, yTo ydepxBaIOuue yCTpoiCTBO n BHyTpehHne pemn npabNtBHO npNCTeHyTbl.
3APPEUAETCnOJb3OBaTb ABTOKpeCNo Ha naccaxnpcknx cndeHbX, 60bpyoDBaHHbIX NOyUkoB 6e3OanacHOCTN, 3a NCKJIIOUeHNEm CnyuaeB, KOrda H3ROTOBNTJIb ABTOMO6nIraPANTHyET, YTO TAKoe NcNOJb3OBaHne He npedCTabJIeT ONaCHOCTN.
- YdepxnBaHooee yctpoiCTBO doJxHO 6bITb Bcerda HaJeXHO 3aΦnKcnpoBaHO Ha cnDeHbe aBTOMO6nJI, daJce eCNI B daHHbIMOMeHT OHO He NCNoIb3yETc. B cnyae abapnn nII pe3KOrO TOPMOxEHNr He3aKpeJIeHHoe aBTOKpeCNO MOxET HAnecTn TpaBMbl NaCCaxNupam.
Xopoio 3aФнксуITE NOdBnKHbIe PpeDMeTbI, HapnpMep: 6araJ nn KnRn, BHyTpI aBTOMO6nJI. Ipr aBapIn He3aKpePJIeHHbIe PpeDMeTbI MOryT Bbl3BaTb TpaBMbl naccaxnupOB.
- HNKOДA He octabnayTe pe6eHka B aBTOMObIne 6e3 npncMoTpa, daKe ha He npdoJXntelbHoe BpeMra.
3NAPEUCAETCByHIMMaTbpe6eHka n3 aBtOKpecna BO BpEmy DnJxEHHa ABTOMO6nla.
3APPEUAETCa nCnoB3OBaTb 3TO dETCKoe ydepxnBaIOoee ycTroNCTBO 6e3 O6NBKN.
OCTOPOXKHO, TOPAHO! HkpbBaIte aBTOKpeCNo MaTePnei, KOrda OHO HaxoNTcno npmbln coJIHeuHbIMn JyUamN. OTdJIbHbIe yactn aBTOKpeCna MOryt Upe3MepHo HaPeTbcra N Bbl3BaTb OxKOrn pe6eHka. Ipeed Tem KaK YcaINTb pe6eHka, Bcerda npOBepaTpy aBTOKpeCna.
- INCIOJIb3OBATb TOnbKO ToUkN CoPnKoCHOBeHnЯ NOD HArpy3KoI, OINcaHHbIe B INHCTpyKcII N OTMeueHHbIe Ha ydepxNBAIoUeM yCTpOiCTBe.
Tbepe 3JemeHbI n pnaCTMaCCOBbie yactn DetCKORO ydepXnBaIOoero yctpoiCTBa DOJIKNbI 6bITb paCNOJOKeHbI n yCTaHOBJeHbI TaKIM O6pa3OM, YTO6bl npn HopMaJIbHOM IcNoJIb3OBAHnn aBTOMO6nJa OHN He 3aCTpeBaJIu NOD
PPEyPPEKDEHNA
IIOBnKbIM CndeHbem IIN B PPOeMe DBepuI.
HaTaNHe BCE peMHn, nCNoJb3yeMbIe dJa KpeJIeHn yJePxNBAUoIero UcTPOIcTBa K aBTOMO6nIIO n OTpeYIpuYte BHyTpEHnE peMHn, yDepXnBaHOuIne pe6eHka. CJeInte 3a TeM, YTo6bl peMHn He nepeKpyuBaJIncb.
BAJHO! Поберп, чTo поясая Лямka BHyTpehnIX peMHeн НхODNTcB CamOM HIXHem NOLOXeHIn, ChObI NaDExKHO ydepxNBaTb Ta3 pe6eHka.
3APPEUJAETCA nCnOJb3OBaTb 3TO yIepKINBaIOoee ycTpoiCTBO B COeTaHnC 6a30o, OTnNCHoI OT yKa3aHHoN I3rOTOBiTJeM.
- BCEΓДА npOBeРЯnte,ЧTo peMeHb aBTOMOБиЯ n peMHn, ydepxNBAIOUnepe6eHka, a TaKKe BHyTpEHHne peMHn aBTOKpeCna He nepeKpyeHbl.
- HNKOДA He octabTnIe pe6eHka B aBtOKpeCJIe, ecJIu BHyTpEHHne peMHn He 3aCTeRHyTbI nII N 3aCTeRHyTbI HenpaBnIbHO.
HE octabJnTe pebeHka B DeTcKOM ydePknBaIOUeM ycToiCTBe Ha dIITeJIbHOe BpeM.
- BCEΓДA yctaHaBnBaIte 3TO aBtOKpeCNo npOTnB XoJa DnJxHnna aBTOMO6nJa.
- HNKOДA He yctaHaBnBaIte 3TO aBtOKpeCNo NO XOdy DnJxHEny aBTOMo6nJIy.
3APPEAETCnOJb30BaTb HnpaBnaUoune peMHei, OTnHbIe OT yka3aHHbIX B 3Tom pyKOBoDCTBe.
- ПОВЕРбTE, чTo BCE складыВаюшеся/пдвиЖьie сидэня праВиьно 3a6лokнрованы.
- BCE naccaxnbl, nyTeWeCTByIOUne B aBTOMo6nle, doJXhbl 6bITb npncTeHytbl peMnMn 6e3Oanachoctn. B clyuae abapnn HenpncTeHytble naCCaxnbl MOryT
Hahectn TpaBmbl dpyrmn naccxnpam.
- Праздем раимсгь peбень в кpresе, ПPOBEPbTE, чTo pyka abTOKpecna, CBJNTecb C n3rTOBHTeIem DeTCKOTo ydepxnBaIoцero yctpoiCTBa.
- Празночтельно установи вать abtokpecno Ha 3aД Hee cndeHbe, HeCMOTpr Na To, YTO npabnamn Дорожного DBIXeHna pa3peShaetcYCTaHaBnBaTb abtokpecno n Ha nepeDHee cndeHbe.
Bcerda npOBepaIte, yTo B 3amKe HET KPOWeK IN Dpyrnx NpOobHbIX BeIecTB.
3nMoH He npncTeRnBaIte pe6eHka B obbemhblx OdeJdx. aBTOKpeCna OTperyIInpOBAHa n 3a6IokIpOBAHa B BepTnKaJIbHOM PNOJKeHN.
- HNKOДA He cTaBbTe aBtOKpeCNo nIi DeTCKoe ydepxnBaHOuSee ycToPoiCTBO Ha KpaIO NOBepxHOCTei, pIINoDnYbIX NaI 3eMJIe, nIi Ha MmKne NOBepXHOCTN,
- HapnMep: NOdykU nn MaTpac. ABToKpeCNo MOKeT yNaCTb N Bbl3BaTb TpaBMbl nn daJxe CMeptb pe6eHka.
3APPEUAAETCCTaBntb aBtOKpeCNO B TeJexKy dIy NOKynok.
BAHMEM
- Ecni y Bac BO3HKnB BonpoCbI NO yCTaHOBKe I npaBnBHomy nCNoJb3OBaHIO.
Поберы:
- YTO BHYTpEHHne peMHn He NOBpeXdEhbl Hc N3HOWeHbI
IpoBepbTe, yTo pe6eHok nonadaet B daHny rpynny noIb3OBaTeJe:
-чToBecpe6eHkaOT0do13Kr.
IpoTINB XOda DvIXeHnA bTOMo6nla Ha 6e3OnaChoe MeCTO aBTOMo6nla:
TOIbKO Ha cndeHb, paCnoJIOXeHHbIe no XOy DnIXeHnA bTOMo6nJa pyKoYTKa DoJIxHa 6bITb 3a6NOKnpOBaHa B nOIOXeHn, KOtOpoe yKa3aHO B DaHHOM pyKoBOdCTBe;
aBTOKpeCNo DOJXHO 6bITb yCTaHOBNeHO nPoTnB XoJa DnIXeHnA aBTOMO6nIe cIIN dJIra CnDEHbI pPeDyCMOTpeHa NODUwka 6e3OpacHOCTN, OHa DoJXHa 6bITb OTKJIHOyeHa;
- Дя саи abTokpeса Ипь3OBaТ b Tолько ремь 6e30naCHOCTN c TpextOueHbIM KpenJIeHnEM;
- pemHn He doJxHbI 6bITb nepeKpyeHbI;
- INCNoIb3OBaTb yKa3aHHbIe HAnpaBIAUOJIe peMHei;
aBTOKpeCNo DOJXHO 6bITb HaJeXHO 3aΦNkCnpoBaHO Ha CnDeHbe.
IpaBnIbHo npncTeHnTe pe6eHka K KpeCny:
- Лямки НEOбхODиmo OTpergулроваТь NO Bblcote;
- pemHn He doJxHbI 6bITb nepeKpyeHbI;
- NOYCHOI peMeHb DoJXeH 6bITb 3aФNKcIPOBaH BHN3y, HAD Ta3OM pe6eHa;
BHyTpEHHne peMHn DoJXHbI 6bITb npaBnIbHO 3aCTeHyTbl.
эКсплuyataцьВ ABTOMOBиЛe
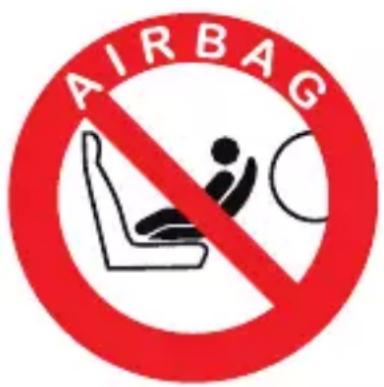
3APPEUAETCYUCTAHABJINBATb ABTOKPECJIO HA NACCAJKPCKOE CNDHBE, OCHAUENHOE NOyUKOJE3ONACHOCTN.
Onacho! B cnyae B3pbBa NOdyuKn 6e30nacHocTn aBTOkpeCNo MOKeT NOLyuHTb ydap N pRNUHHTb pe6eHky cepbe3HyTO TpaBMy, BnIOMb Do CMePTN.
Co6IIOaIe HNCTpyKcH, PnIBeDeHHbIe B pyKOBoDCTBe I0 3KcIIyatauia aBTOMO6JIa B pa3dJe, NocBraUeHHOM IcNoJIb3OBaHHIO DeTCKNX aBTOKpeCJI.
KATEGOPNUECKN 3APPEUCAETC KpeNTb aBtOKpecNo K cndeHbIO 2-x TOneUHbIM peMHem 6e3ONaChocTn. POnb3yIteCb TOnbKO 3-x ToeUHbIMn peMHm 6e3ONaChocTn.
Co6IIOdaIte Tpe6ObaHna, DeiCTByUoIne B CtpaHe 3KcIIpyatauIN aBTOMo6nla.
KATEGOPUHECKN 3APPEUAAETCRA KpeNTb aBTOKpeCNo K cndeHbIO 2-x TOueHbIM peHMem 6e30NaCHOCTN.
Пре徳назауен�OTьКОИСКЛHOUHTeьНОДЯИSCNoIb3OBaHЯВaBTOTpaHCnOptHBIX cpeДCTBax, OCHAшЕньix 3-х TOUeyHbIM peMHem 6e3OJaCHOCtN, KOTOpbI MOKET 6byTb CTaTNueCKIM LIn6O C MExaHN3MOM BTRAIBaHЯ N IMeTB OMOJOraциIO, COOTBETCTByIoUyIO TexHnueCKIM ПvreпсаняМ UN/ECE № 16 Ил ИнБIM 3KBIVBaJIeHTHbIM CTaHДapTaM.
Kateropnueckn 3anpeaetc yctaHaBnBaTb aBtOKpecno Ha nepeDHee naccaxnpckoe cndeHbe, ochaueHHoe BkIoueHHoN IOdykoN 6e3OpaCHOCTN.
YCTAHOBKA B ABTOMOБиь C 3-X TOUeyHbIM PEMHEM BE3OПACHOCTN ABTOMOБиЯ

Bo3MOxHbI cAeDyUoJne BapNaHTbI yCTaHOBKn aBTOKpeCla:
y6eIntecb B TOM, yTO JAMKn He nepeKpyTINNCb.
OtperynpyTe 3aunTHbIe HarpydnKn no ceHTpy npeu pe6eHa.
PEGYIINPOBKA YDEPJKNAIOUX PEMHEI BE3OJACHOCTN
Ocna6nne JAMOK (pnc 3): HaxmTe KHONky dnypeRyIuropOBKn, paCnoJIOKeHHyHO B nepeDHeY qactn aBTOKpeCna, n OndHOBpeMeHHo C 3TtM NOTAHte oBe JAmKn, YTO6bI Ocna6ntb peMeHb.
HaTjXeHne ydePbBaIOx npHe (pnc. 4): NotaHnte peRyInpoBouhbl pemeHb, TTo6bl npaBnIbHO HaTAYb BHyTpEHHne pemHn. PemHn HataHytbl npaBnIbHO, ecn paCCTOHN MeKdy BHyTpEHNM pemHmN pe6eHKOM paBHO TOJIuHHe OndHO rNaIbca.
BAxHO! KoHeu peRyIupoBouHOro pemHcJeDuYeT TAnHyTb HApJx, a He no HnPaBLeHnIO BBePx Nn Bn3.
Bo BpemnpeHockn (npn HaxoJdeHn BHe aBtOMObIa) perynpoBOHybI peMeHbdoJIxeh 6bITb y6paH B cneuaJIbHbI OTcEK.
Поберъ,чTo peMeHb He nepeKpyTnIcR nIIr He 3aIeNJIcR, nHaTЯHITe erO pnc.20.
PPEyIPEXDEHNA:
3APPEUCAETCЯФKcnpoBaTb ABTOKpeCNo nHaYe, Yem 3TO yKa3aHO B pyKOBOIDCTBe.
- Дя сэрпавок CBяжntecь с haшев сужбов подержк.
3APPEAETCnNoB3OBaTb DByxToeHbI pEmHb 6e3oNaChOCTn dIyΦHKcauN 3TOrO DetCKOrO ydePknBaHOeRo yctpoiCTBa. 3TO aBtOKpeCNO DOJXHO 6bITb BcERda yCTaHOBNeHO npOTNB XODa DBHXeHNr ABTOMO6NJr I DOJXHO 6bITb yCTaHOBNeHO Ha cnDEHbe, paCNOJIOKeHHOM nO XODy DBHXeHNr ABTOMO6NJr.
- Поберъ, уTo peбенok праиьно ппстетнуТ BHyтpeHHIMN peMHЯМN, И уTo aBtOKpeCNo HaDEЖHO 3aФИКсИрOBaHO B aBTOMOБиJe.

Bcerda npoBepaTe, yTo aBtOKpeCNo npaBnIbHo yCTaHOBJeHO Btoomobne
PEGYJINPOBKA KANIOHOHA
Kanioohdna3auntbotcOnHcaJeRkopeynpyeTc8(pnc.21).
Oh o6ecneuHbaet cnoKoHbI OToBix MaIbIy, 3aunuae erO OT COJIHeHbIX IyuEi.
TEXHINYECKOE OBCAYKINBAHNE
TAPAHNTHbIE O6ra3ATEJIbCTBA
HnKeyka3aHHbIe nOJoxeHnB BCTynaOT B DeIcTBHe c 01.01.2005 r. nNoJIHOCTbIO 3aMeHnT IIO6yIO dpyrYIO HΦOpMaunIO, UTO KacaETcra rapaHTn, PpeIoCTaBnaEmoKOMpaHneFoppa Pedretti S.p.A., ABJRAcb.
TAPAHTHbIE O83ATEJIbCTBA
KOMnHn Foppa Pedretti S.p.A.,OfHuaJIbHO 3aperHcTnpoBaHHo no aDpcy: Grumello del Monte (Italia) Via Volta 11, KOTopar rapaHTpyet HENOCpeCDtBeHHo NOpTeJIIO, UTO DaHHoe N3deJIne, TOJbKO YTO BbIyueHHoe C fApNIKN, He IMeET DeΦeKTOB HN MaTePnaIIOB, HN PPOeTKpOBAHNA, HN POn3BOdCTBeHHbIX, IN COOTBeTCTByeT 3aABLeHHbIM XapaKTepNCtIKaM. HAcToaJra rapaHTnA DeIcTBNTeJIbHa BO BCex cTpaHax- YleHax E3C n He NCKJIouaET n He OrpaHnUHbAe T npaba PoIb3ObaTeJIa, B COOTBeTCTBNI C 3aKOHoDaTeJIbCTBOM, perJaMeHTnpuOUM B3aHMOOTHoHeHnC PpOn3BOdnteJIem N3deJIIn.
YTO6bl BOCNoIb30BaTbcra DaHHoI rapaHTnei, IOTpe6ntelb DOJKeH npInHeCTn DeΦeKTHoe H3dJIe NpOaBuy, npeOcTaBvB DOKyMeHT, ydoCTOBepaUoN O npno6peTeHN N3dJIeN, c neaTbIO N pOtnscBIO PpOaBua N yka3aHHeM Ha3BaHnRA 3dJIeN RA, KaK aIbTePHaTHBa, fNCKaJIbHbIK KaccOBbI YeK, 6e3 KaKHX-JIN6O N3MeHEn, N3 KOtOporo YETKO BnDa BCr yKa3aHHa Do 3TOrO INΦopMaun. TapaHTna IMeet CpOK DeIcTBnA DBeHaDcaTb (12) MecaueBC dAtbI npno6peTeHN N3dJIeN.
B TeueHne Bblweyka3aHHoro cpoKa KomnHa Foppa Pedretti S.p.A. 6b3yeTc8 OTpeMOHTnpOBaTb NIN 3aMeHNTb, Ha CBOI Bbl6Op, DeΦeKTHoe N3dJIne. TapaHTn IpeoCTabLЯETc KOneUHOMy POKynaTeJIO N3dJIIn (Pob3OBaTeJIO) N He NCKJIouaet N He orpaHnUHbAet npab DaHHoro POb3OBaTeJIA, PpeDyCMOTpeHHbIX DeNCTBYUOIM 3aKHOdaTeJIbCTBOM N/ININ ppaAMN Pob3OBaTeJIA, Na ppeDbYBJIeHne CBOx npab B aDPEC DnIepa/PpOdaBaua N3dJIIn.
HE NOKPbIBAOTCRA TAPAHTNEI.
TapaHTneH He NOKpbIbAeTcYuep6,CBra3aHHbICNPOJIb3OBAHHeM H3dJIIny, BO3HNKUnHnNo CLeDyUoUM npuHnAm: HenpaBnIbHoe
HcnoJb3OBaHne, He COOTBeTCTByIOUeeyKa3aHnM, CoepkaIIMCBAKlaDbIwe C HNCTpyKzIyMn NO MOHTaXy N 3KcNlYaTaUIn, yApbl I NaDeHnry N3dJIy, N3dJIye NODBepraLoCb BO3dEINCTBnIO BLaXHOCTN IIN 3KCTpeMaJIbHbIM TeMnpaTypam HHe6laROpnpyTHbIM YcLObNMy OKpyKaIOUe Cpebl C NOCTOAHHO CMEHOn 3TNX ycIOBn, Koppo3HN I OKNCJIeHIO, a TAKKe HecanHKUOHPOBaHHOMy peMOHTy IINI MoHΦnKaUu, N3dJIne HCNoJIb30BaJIoCb He No Ha3NaYeHNO IINI HEnpaBnIbHo, 6e3 C6JIIODeHnry Yka3aHn B INHCTpyKUHX IO MOHTaKy I 3KcNlyaTaUu, PnI PINOxOM YxoJe IINI OTCyTCTBn TAKOBOrO, peMOHTe C HcnoJb3OBaHnEM HeOpnIHHaJIbHbIX 3aNCAteN, IIN PrnHyHe HEnpaBnIbHO C6OpKn, aBapN, BO3dEINCTBnI NII HAINTKOB, XMMueCKNX BeIeCTB, a TaKKe BCJeDCTBne Upe3BbIuaHbIX 6cTOrTeJIbCTB.
B IIO6OM clyuae, KOMnHnna Foppa Pedretti S.p.A. He HecET HNKAKO ITBETCTBEHHOCTH 3a yUeep6, npuHHeHHbI JIOJAMnHnnpedMeTaM, OTINuHbIM OT N3deJIIn, no npuHne Heco6IIODeHnY kA3aHN / npednncAHn / npedynpeXdEHN, COePkaunxC8 B daHHom pyKOBODCTBe nHn, KaK aJIbTePHaTnBa, B "INcTpyKUnn PO MOHTaKy IN 3KcNlyaTaUN", conpOBoXdaIoUe Kajdoe N3dJeNe H npedHa3NaueHNo EIN BlaDeIbua/ NOIb30BaTeJI. (HaNPmEp, YnCTO B KaYeCTBe npimepa, B clyuae DeTcKO KnPOBaTKN: "HnkOrDa He OCTabLJaTe 6e3 npNCMOtpa pe6eHka. KOHTpOInpyuTe, UTObl TOnoBa pe6eHka He OKa3aJAcB POKpbITOn pOcTBHeIO nII OJeJOM...").
KoMaHnFoppa Pedretti S.p.A., Kpome npOyeo, He HecET HnKaKOJ OTBeTCTBHeHOct3a yUeP6, npuHHbI JIOdAm NInmUyEcTBy, ecnnoLOMka eepoDyKcN CBy3aHa c pa3pyuWeHEm KOMNoHETOB N3dEJIra, noDBepraembIX HopMaIbHOMy n3Hocy. KomNoHentamn, noDBepraUzIMncr HopMaIbHOMy n3Hocy, CHTaOTcB BCE nlaCTMacCOBbie KOMNoHENTbl N3deJIra.
Dijelovi autosjedalice PAG 144


- ASSEMBLY
- FITTING THE FOOTMUFF (fig.46)
- FITTING THE PUSHCHAIR RAINCOVER (fig.47)
- USING THE TRAVEL SYSTEM ACCESSORIES
- ADJUST THE BACKREST (fig.55)
- WARNING
- CARRYCOT
- STROLLER
- CARRYCOT COMPONENT - PRODUCT MAINTENANCE
- WARNING!
- Lining
- RAINCOVER
- FORMAL GUARANTEE
- EXCLUSIONS TO THE FORMAL GUARANTEE.
- MONTAGE
- PYOMIeH THs KOYKO'YAA
- SYNTHPHsH TOY IPOIONTO
- ΣYMBATIKH EΓγHY∑H
- EAEPEZEI THZ SYMBATIKH EFGYHHS
- MOHTAX IEPEDHIX KOJIEC (pnc.1, pnc.2, pnc.3, pnc.4, pnc.5)
- MOHTAX 3AaHnX KOJIeC (pnc.6, pnc.7, pnc.8, pnc.9, pnc.10)
- PACKJIADbIBAHNE IPOIyoHOn KOJIACKn (pnc.11, pnc.12, pnc.13)
- CTOHAUHbI TOPMO3 (pnc.14)
- PEYUNPOBKA PUKN (pnc.15)
- MOHTAX IPEDOXPAHNTIELBOHON PUYKN-BAMNEPA (pnc.16, pnc.17, pnc.18, pnc.19, pnc.20)
- YCTAHOBKA CINDEHb8 (pnc.21, pnc.22, pnc.23, pnc.24)
- MOHTAX
- PERYUNPOBKA KANIIOWOHA
- MOHTAK
- NcNoJIb3OBAHNE C DOnOJIHHTeJIbHbIMN UCTPOICTBAMN
- TAPAHNTHbIEOB3ATEJIbCTBA
- TAPAHINHbIE OBA3ATEJIbCTBA
- HE NOKPbIBAiotcraTAPAHTHEN.
- SASTAVLJANJE
- POSTAVLJANJE PREDNJIH KOTAÇA (sl.1, sl.2, sl.3, sl.4, sl.5)
- POSTAVLJANJE STRAZNJIH KOTACA (sl.6, sl.7, sl.8, sl.9, sl.10)
- CAR SEAT COMPONENTS
- CATEGORIES OF USE
- IMPORTANT
- CHECKS BEFORE USE
- Inspect:
- Verify Child within Size Range:
- Install Child Restraint Rearward-facing in Safe Location in Vehicle:
- Secure Child Properly in Child Restraint:
- INSTALLATION IN THE VEHICLE
- USE IN THE CAR
- ICLE
- WITH 3-POINT CAR SEAT BELT
- You can install the car seat as follows:
- USING THE CAR SEAT
- PLACING YOUR CHILD IN THE CAR SEAT
- USING THE BUCKLE
- ADJUSTING THE SEAT BELT (HARNESsS)
- Ensuring that your child is properly secured with the harness.
- To ensure the safety of your child, check that.....
- TO ADJUST THE HEADREST AND STRAPS
- ADJUST THE HANDLE (fig. 9)
- WARNING:
- FITTING YOUR CAR SEAT INTO THE CAR
- To secure the car seat in the vehicle with the 3-point seat belt, proceed as follows:
- ADJUST CANOPY
- OPTIONAL
- MAINTENANCE - Cleaning
- The car seat must not be used without the lining.
- REMOVING THE CANOPY (fig. 22)
- Removing the lining
- How to remove the harness buckle
- How to replace the harness buckle
- How to remove the harness
- X'H\S H T\(\Sigma\) N'OP\P(\)T\(\Sigma\)
- NCTIOAb3OBAHNE-MEPbI IPEAOCTOPOXHOCTN
- KATEGOPN 3KcPJIyATAUIN
- PpeDynpexdene
- BAXHO
- PPEyPPEKDEHNA
- ПЕДУПЕХДECHNЯ
- BAHMEM
- Поберы:
- IpoBepbTe, yTo pe6eHok nonadaet B daHny rpynny noIb3OBaTeJe:
- IpoTINB XOda DvIXeHnA bTOMo6nla Ha 6e3OnaChoe MeCTO aBTOMo6nla:
- IpaBnIbHo npncTeHnTe pe6eHka K KpeCny:
- эКсплuyataцьВ ABTOMOBиЛe
- YCTAHOBKA B ABTOMOБиь C 3-X TOUeyHbIM PEMHEM BE3OПACHOCTN ABTOMOБиЯ
- Bo3MOxHbI cAeDyUoJne BapNaHTbI yCTaHOBKn aBTOKpeCla:
- PEGYIINPOBKA YDEPJKNAIOUX PEMHEI BE3OJACHOCTN
- PPEyIPEXDEHNA:
- Bcerda npoBepaTe, yTo aBtOKpeCNo npaBnIbHo yCTaHOBJeHO Btoomobne
- PEGYJINPOBKA KANIOHOHA
- TEXHINYECKOE OBCAYKINBAHNE
- TAPAHNTHbIE O6ra3ATEJIbCTBA
- TAPAHTHbIE O83ATEJIbCTBA
- HE NOKPbIBAOTCRA TAPAHTNEI.
Brand : Foppapedretti
Model : SuperTres
Category : Stroller