Blitzeis - Air Conditioning OneConcept - Free user manual and instructions
Find the device manual for free Blitzeis OneConcept in PDF.
User questions about Blitzeis OneConcept
0 question about this device. Answer the ones you know or ask your own.
Ask a new question about this device
Download the instructions for your Air Conditioning in PDF format for free! Find your manual Blitzeis - OneConcept and take your electronic device back in hand. On this page are published all the documents necessary for the use of your device. Blitzeis by OneConcept.
USER MANUAL Blitzeis OneConcept
Congratulations on purchasing this equipment. Please read this manual carefully and take care of the following hints to avoid damages. Any failure caused by ignoring the mentioned items and cautions mentioned in the instruction manual are not covered by our warranty and any liability.
Contents
Technical Data 7
Safetx Instructions 7
Product Description 8
Assembly 9
Use and Operation 9
Cleaning and Care 10
Hints on Disposal 11
Declaration of Conformity 11
Technical Data
Item number 10031517, 10031518
Power supply 220-240 V ~ 50-60 Hz
Safety Instructions
- Use this FAN only as described in this manual. Any other use not recommended by the manufacturer may cause fire, electrical shock, or injury to persons.
- Remove the package and ensure that the FAN is undamaged. In case of doubt do not use FAN and contact with your supplier.
- Don not let children play parts of package.
- Before use the FAN, check if the voltage marked on the rating label corresponds to the mains in your home
- Extreme caution is necessary when the FAN is used by or near children or Invalids and whenever the FAN is left operating unattended.
- Avoid using extension cord as the extension cord may overheat and cause a risk of fire.
- Do not pull the power cord to disconnect with power source. Always grasp the plug to pull out.
- Do not insert any objects into the FAN as it may cause an electric shock or injure or damage to the FAN. Do not block or tamper with the FAN in any manner while it is in operation.
-
Do not leave the FAN unattended. Always unplug FAN when not in use.
-
This FAN is not intended for use in wet or damp locations. Never locate a FAN where it may fall into a bathtub or other water container.
- Do not use FAN outdoors.
- Disconnect the fan from the mains power when not in use, and before servicing or performing any maintenance.
- Always disconnect the fan from the power supply when moving it from one location to another.
- Keep the fan clean and maintain in good condition (use an authorized service agent).
- Use recommended parts only (non genuine parts may be dangerous, and will invalidate your warranty).
- When not in use store in a safe, dry, childproof location.
IMPORTANT: The Main Power Switch and the On/Off switch should not be used as the sole means of disconnecting power. Always unplug the power cord before servicing or moving the unit.
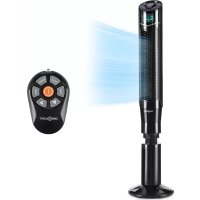
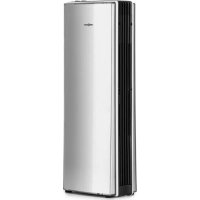
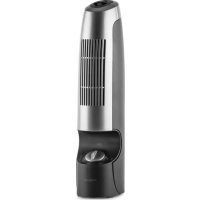
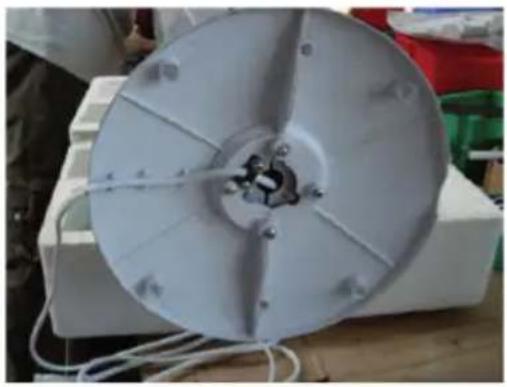
Product Description
1 Control Panel
2 LED Display
3 Housing
4 Air outlet
5 Extension stand
6 Base


Assembly
- Snap the two parts of the base together and secure with the three screws using a Phillips (cross-head) screwdriver.
- Pass the Power Cord through the center hole of the base, after snapping the two pieces together (The back piece is the one with the power cord securing channel).

- Line up the Tower fan on the base. Fix with the 3 long screws, with a Phillips (Cross-Head) screwdriver.
Remote Control
- Install one "mercury" (not included) battery.
- The Remote Control Power button is labeled as such. All the functions performed with the Remote Control work identically to the Manual Controls.
Use and Operation
The FAN may be operated by the manual controls located on the FAN or by your remote control.
Place the FAN on a stable flat surface. Plug the cord set into a 230V A.C electrical outlet.
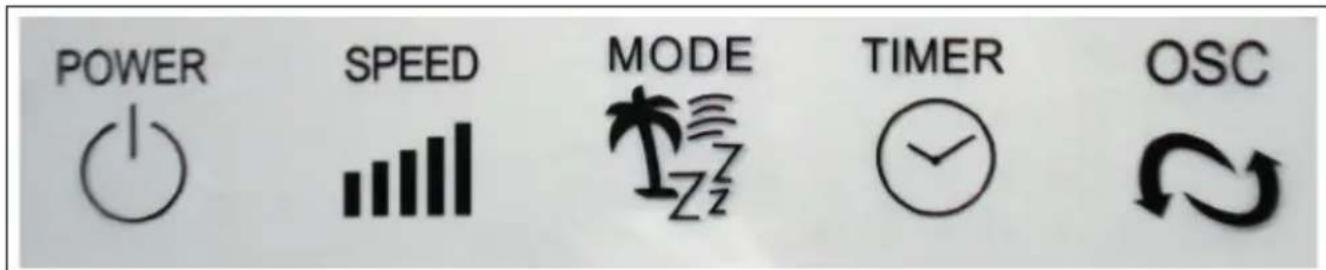
Modes and Functions
| POWER Turn | the FAN on by pressing the 'POWER' button; Turn the FAN off by pressing the 'POWER' button again. |
| SPEED You can | adjust the fan speed to the desired level: low (I), medium (II), or high (III) by pressing 'SPEED'. The speed setting is displayed on the LED panel. |
| MODE Pressing | the 'MODE' button will set the FAN into NORMAL (NM), NATURAL (NT), and SLEEP (SL) mode. |
| TIMER The fan | is equipped with a timer that allows you to set it's length of operation from 0.5 hour to 7.5 hours. |
| OSC Pressing | the 'OSC' button will start and stop the oscillation function. The symbol is displayed on the LED panel. |
Display and Indicator Lights

Cleaning and Care
- This can only be done by an authorized service agent such as your local Sealer dealer or any agent qualified to undertake electrical repairs.
- If the unit requires external cleaning make sure it is switched off and unplugged from the mains supply. Use a soft tissue or cloth for general cleaning. To remove more persistent dirt or grime wipe down with a cloth that has been dampened with warm soapy water. Do not use any solvents (such as thinners) as these may damage the plastic casing.
Hints on Disposal
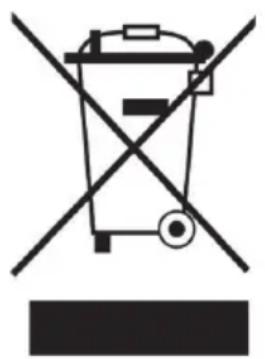
According to the European waste regulation 2012/19/EU this symbol on the product or on its packaging indicates that this product may not be treated as household waste. Instead it should be taken to the appropriate collection point for the recycling of electrical and electronic equipment. By ensuring this product is disposed of correctly, you will help prevent potential negative consequences for the environment and human health, which could otherwise be caused by inappropriate waste handling of this product. For more detailed information about recycling of this product, please contact your local council or your household waste disposal service.
Your product contains batteries covered by the European Directive. 2006/66/EC, which cannot be disposed of with normal household waste. Please check local rules on separate collection of batteries. The correct disposal of batteries helps prevent potentially negative consequences on the environment and human health.
Declaration of Conformity

Producer: Chal-Tec GmbH, Wallstraße 16, 10179 Berlin, Germany.
This product is conform to the following European Directives:
2014/30/EU (EMC)
2014/35/EU (LVD)
2011/65/EU (RoHS)
206/2012/EU (ErP)