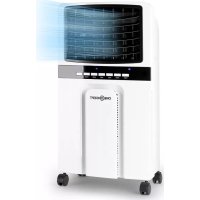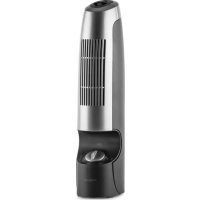
St. Oberholz 2G - Air Conditioning OneConcept - Free user manual and instructions
Find the device manual for free St. Oberholz 2G OneConcept in PDF.



User questions about St. Oberholz 2G OneConcept
0 question about this device. Answer the ones you know or ask your own.
Ask a new question about this device
Download the instructions for your Air Conditioning in PDF format for free! Find your manual St. Oberholz 2G - OneConcept and take your electronic device back in hand. On this page are published all the documents necessary for the use of your device. St. Oberholz 2G by OneConcept.
USER MANUAL St. Oberholz 2G OneConcept
Congratulations on purchasing this equipment. Please read this manual carefully and take care of the following hints to avoid damages. Any failure caused by ignoring the mentioned items and cautions mentioned in the instruction manual are not covered by our warranty and any liability.
Technical Data
| Item number 10030985, 10030986 | |
| Power supply (mains adapter) DC 12V 500 mA | |
| Power consumption 10 W | |
Safety Instructions
To reduce the risk of fire, electric shock and damage:
- Do not expose this device to rain.
- Do not playe objects on the unit filled with liquids, such as vases.
- Use recommended accessories only.
- Do not repair this device yourself. Refer repairs to qualified service personnel.
- Do not drop any metal objects into this unit.
- Do not place heavy objects on top of this unit.
Power cord / power supply
- Make sure that the power supply voltage corresponds to the specifications on this unit.
- Plug the power cord into the outlet securely.
- Do not pull the cable, do not bend it and do not place heavy objects on it.
- Do not handle the plug with wet hands.
- Grasp the plug when pulling out of the electrical outlet.
- Do not use a damaged power plug or a damaged electrical outlet.
- Install this unit so that the power cord can be unplugged immediately when a problem occurs.
Small objects / Packaging Parts
Store small objects (eg screws and other mounting hardware, memory cards) and packaging parts out of the reach of children. Do not let you play with the film. Risk of suffocation!
Location
- Set the appliance on a dry, flat, waterproof and heat-resistant surface.
- The socket must be readily accessible to disconnect the unit quickly in an emergency from the electrical circuit.
- Do not install or position this unit in a bookcase, built-in wardrobe or any other confined space. Ensure good ventilation of the unit.
- Do not place near to an amplifier or other equipment that may be hot. The heat can damage the unit.
- Do not expose this unit to direct sunlight, high temperatures, excessive moisture and excessive vibration.
AC Adapter
- The power adapter can operate on AC 220-240 V only. Use a suitable plug adapter if the plug does not fit into the power outlet.
Intended Use
- This device is used for refreshening the air indoors. It is exclusively meant for this purpose and must only be used for this purpose. It may only be used in the manner as described in this manual.
- This product is not designed for use by persons (including children) who have reduced physical, sensory or mental capacities or persons with no experience or knowledge, unless they are instructed and supervised in the use of the appliance by a person responsible for their safety.
Transport and Cleaning
- Please keep the original packaging. To an adequate protection during transport of the device, pack the unit in its original packaging.
- Do not use volatile liquids, such as insecticide spray. Dont wipe the surfaces with strong pressure, otherwise they may be damaged. Rubber or plastic should not be in contact with the unit over a longer period.
Repairs
- Repairs to the appliance should only be carried out by an authorized service center.
- A remodeling or modification of the affected product safety. Risk of injury!
- Open the product never arbitrarily and perform repairs never yourself!
- Incorrect reassembly may result in malfunction or total failure.
- Open in no case the unit. We assume no liability for consequential damages. The warranty expires at foreign interference with the device.
Use and Operation
- For best air circulation, make sure that the Ionizer is at least 1 ft. away from wall or any large objects.
- Place the unit on a desk, table or shelf.
- Before connecting the unit, make sure that the Collection Grid is inserted properly.
- Press on the Tab with thumb to open and pull out the Collection Grid starting at the top.
- To insert the Grid back in, first, slide down the bottom part of Collection Grid into the ionizer. Then, push in the top of the Collection Grid to lock it in place.
- KEEP FINGERS AWAY FROM THE SHARP SURFACES.
- Insert the power cord into the back of the unit first, then plug the adapter (included) into the electric outlet.
- Turn the Switch to Whisper or Turbo position. Whisper Operation operates using negative ions that pull in polluted air, trap GRID contaminants, and release clean, healthy air.
Turbo Operation
Use it to eliminate strong odors fast. It uses the same technique as the quiet operation, with the addition of a Built-in Fan, which increases air circulation therefore making the purifier more effective.
Cleaning and Care
Note: After extended use of the Ionizer, its collection grid needs to be cleaned. Clean it at least once a month, or more often depending on the area where the unit is placed.
- Make sure to unplug the unit from electrical outlet.
- Remove the Collection Grid out, press on the Tab with thumb to open and pull out the grid.
- Using the damp cloth, wipe the dust off. KEEP FINGERS AWAY FROM THE SHARP SURFACES. Do not use any cleaning solution to wet the cloth, use WATER ONLY. Make sure that the Collection Grid is not wet before inserting it back in. Wipe dry if there is any water remaining on the grid, or just air dry until it is completely dry.
- Place the Collection Grid back inside the unit.
Hints on Disposal
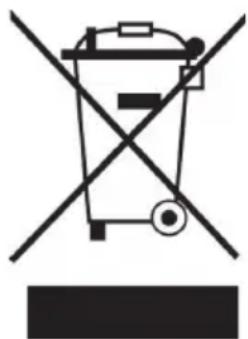
According to the European waste regulation 2012/19/EU this symbol on the product or on its packaging indicates that this product may not be treated as household waste. Instead it should be taken to the appropriate collection point for the recycling of electrical and electronic equipment. By ensuring this product is disposed of correctly, you will help prevent potential negative consequences for the environment and human health, which could otherwise be caused by inappropriate waste handling of this product. For more detailed information about recycling of this product, please contact your local council or your household waste disposal service.
Declaration of Conformity
Producer: Chal-Tec GmbH, Wallstraße 16, 10179 Berlin, Germany.

This product is conform to the following European Directives:
2014/30/EU (EMC)
2011/65/EU (RoHS)
2014/35/EU (LVD)