
34034 - Alarm system CHACON - Free user manual and instructions
Find the device manual for free 34034 CHACON in PDF.
| Product Type | Wireless alarm system with voice siren |
| Brand | CHACON |
| Model | 34034 |
| Category | Alarm system |
| Central unit power | 3 AAA 1.5V batteries (not included) |
| Motion detector power | 2 AAA 1.5V batteries (not included) |
| Opening detector power | 1 CR2032 battery (included) |
| Remote control power | 1 CR2032 battery (included) |
| Alarm volume | ≤ 80 dB |
| Detection distance (motion) | 7 m (open field) |
| Detection angle (motion) | 90° |
| Standby current (motion detector) | ≤ 20 µA |
| Alarm current (motion detector) | ≤ 20 mA |
| Standby current (opening detector) | ≤ 3 µA |
| Alarm current (opening detector) | ≤ 15 mA |
| Operating frequency | 433 MHz |
| Operating temperature | -10 °C to 55 °C |
| Number of zones | 4 (buttons 1, 2, 3, 4) |
| Chime mode | 32 melodies available |
| Voice recording | Yes, in disarmed mode |
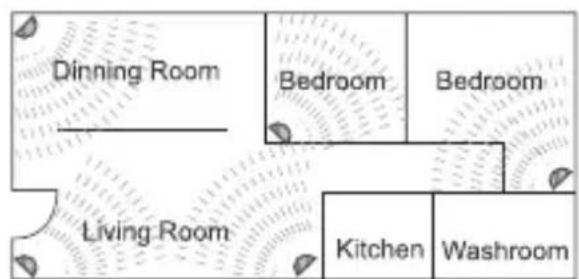
| Motion detector installation | Recommended height 2 meters, tilted forward |
| Maintenance | Test every 3 months, replace batteries if low indicator |
| Safety | Do not expose to water, do not disassemble |
| Replaceable batteries | Yes, all batteries are replaceable |
Frequently Asked Questions - 34034 CHACON
User questions about 34034 CHACON
0 question about this device. Answer the ones you know or ask your own.
Ask a new question about this device
Download the instructions for your Alarm system in PDF format for free! Find your manual 34034 - CHACON and take your electronic device back in hand. On this page are published all the documents necessary for the use of your device. 34034 by CHACON.
USER MANUAL 34034 CHACON
WIRELESS ALARM WITH VOICE WARNER
EN Registering the guarantee
To register your warranty, fill in the online form at www.chacon.com/warranty
PréSENTATION du produit / Productpresentatie / Presentación del producto / Apresentação do produit / Presentazione del prodotto / Product overview
| FR NL ES PT | ||||
| 1. Sirenne Sirene Sirena Sirene | ||||
| 2. LED 5 LED 5 LED 5 LED 5 | ||||
| 3. Mode Carillon Deurbelmodus Modo del tiempo Moodo de carrilhão | ||||
| 4. Bouton zone 1 Zone 1 knop Botón de la zona 1 | Botão de zona 1 | |||
| 5. LED 1 LED 1 LED 1 LED 1 | ||||
| 6. LED 3 LED 3 LED 3 LED 3 | ||||
| 7. Bouton Zone 3 | Zone 3 knop | Botón de la zona 3 | Botão de zona 3 | |
| 8. Volume Volume | Volumen | Volume | ||
| 9. LED 6 LED 6 LED 6 LED 6 | ||||
| 10. Bouton d'armement et désarmement | Alarm in- en uitschakelen knop | Botón de armado y desarmado | Botão de armar e desarmar | |
| 11. Bouton zone 2 | Zone 2 knop | Botón de la zona 2 | Botão de zona 2 | |
| 12. LED 2 LED 2 LED 2 LED 2 | ||||
| 13. LED 4 LED 4 LED 4 LED 4 | ||||
| 14. Bouton zone 4 | Zone 4 knop | Botón de la zona 4 | Botão de zona 4 | |
| 15. Micro | Microfoon | Micro | Microfone | |
| IT EN | ||
| 1. Sirena Siren | ||
| 2. LED 5 LED 5 | ||
| 3. Modo del campanello Chime mode | ||
| 4. Pulsante zona 1 Zone 1 button | ||
| 5. LED 1 LED 1 | ||
| 6. LED 3 LED 3 | ||
| 7. Pulsante zona 3 Zone 3 button | ||
| 8. Volume Volume | ||
| 9. LED 6 LED 6 | ||
| 10. Pulsante di attivazione e disattivazione | Arming and disarming button | |
| 11. Pulsante zona 2 Zone 2 button | ||
| 12. LED 2 LED 2 | ||
| 13. LED 4 LED 4 | ||
| 14. Pulsante zona 4 Zone 4 button | ||
| 15. Microfono Micro | ||
| 1 2 3 | |||
| FR Indicateur LED Détecteur de | mouvement Indicateur LED | ||
| NL LED-indicator Bewegingsme | der LED-indicator | ||
| ES Indicador LED Detector de | movimiento Indicador LED | ||
| PT Indicador LED Detector de | movimiento Indicador LED | ||
| IT Indicatore LED Rilevatore di | movimento Indicatore LED | ||
| EN LED indicator Motion detector | LED indicator |
| 1 2 | 3 | 4 | ||
| FR | Indicateur LED | Armer | Désarmer | Bouton d'urgence |
| NL | LED-indicator | Inschakelen | Uitschakelen | Noodknop |
| ES | Indicador LED | Armar | Desarme | Botón de emergencia |
| PT | Indicador LED | Armar | Desarmar | Botão de emergência |
| IT | Indicatore LED | Armare | Disarmare | Pulsante di emergenza |
| EN | LED indicator | Arm | Disarm | Emergency button |
0.Introduction
7. Installation murale
Thank you for using this product.
- Please read all instructions carefully before using the product.
- Do not attempt to disassemble or repair the product yourself, as this will invalidate the warranty.
- Remove the tab from each product before using them.
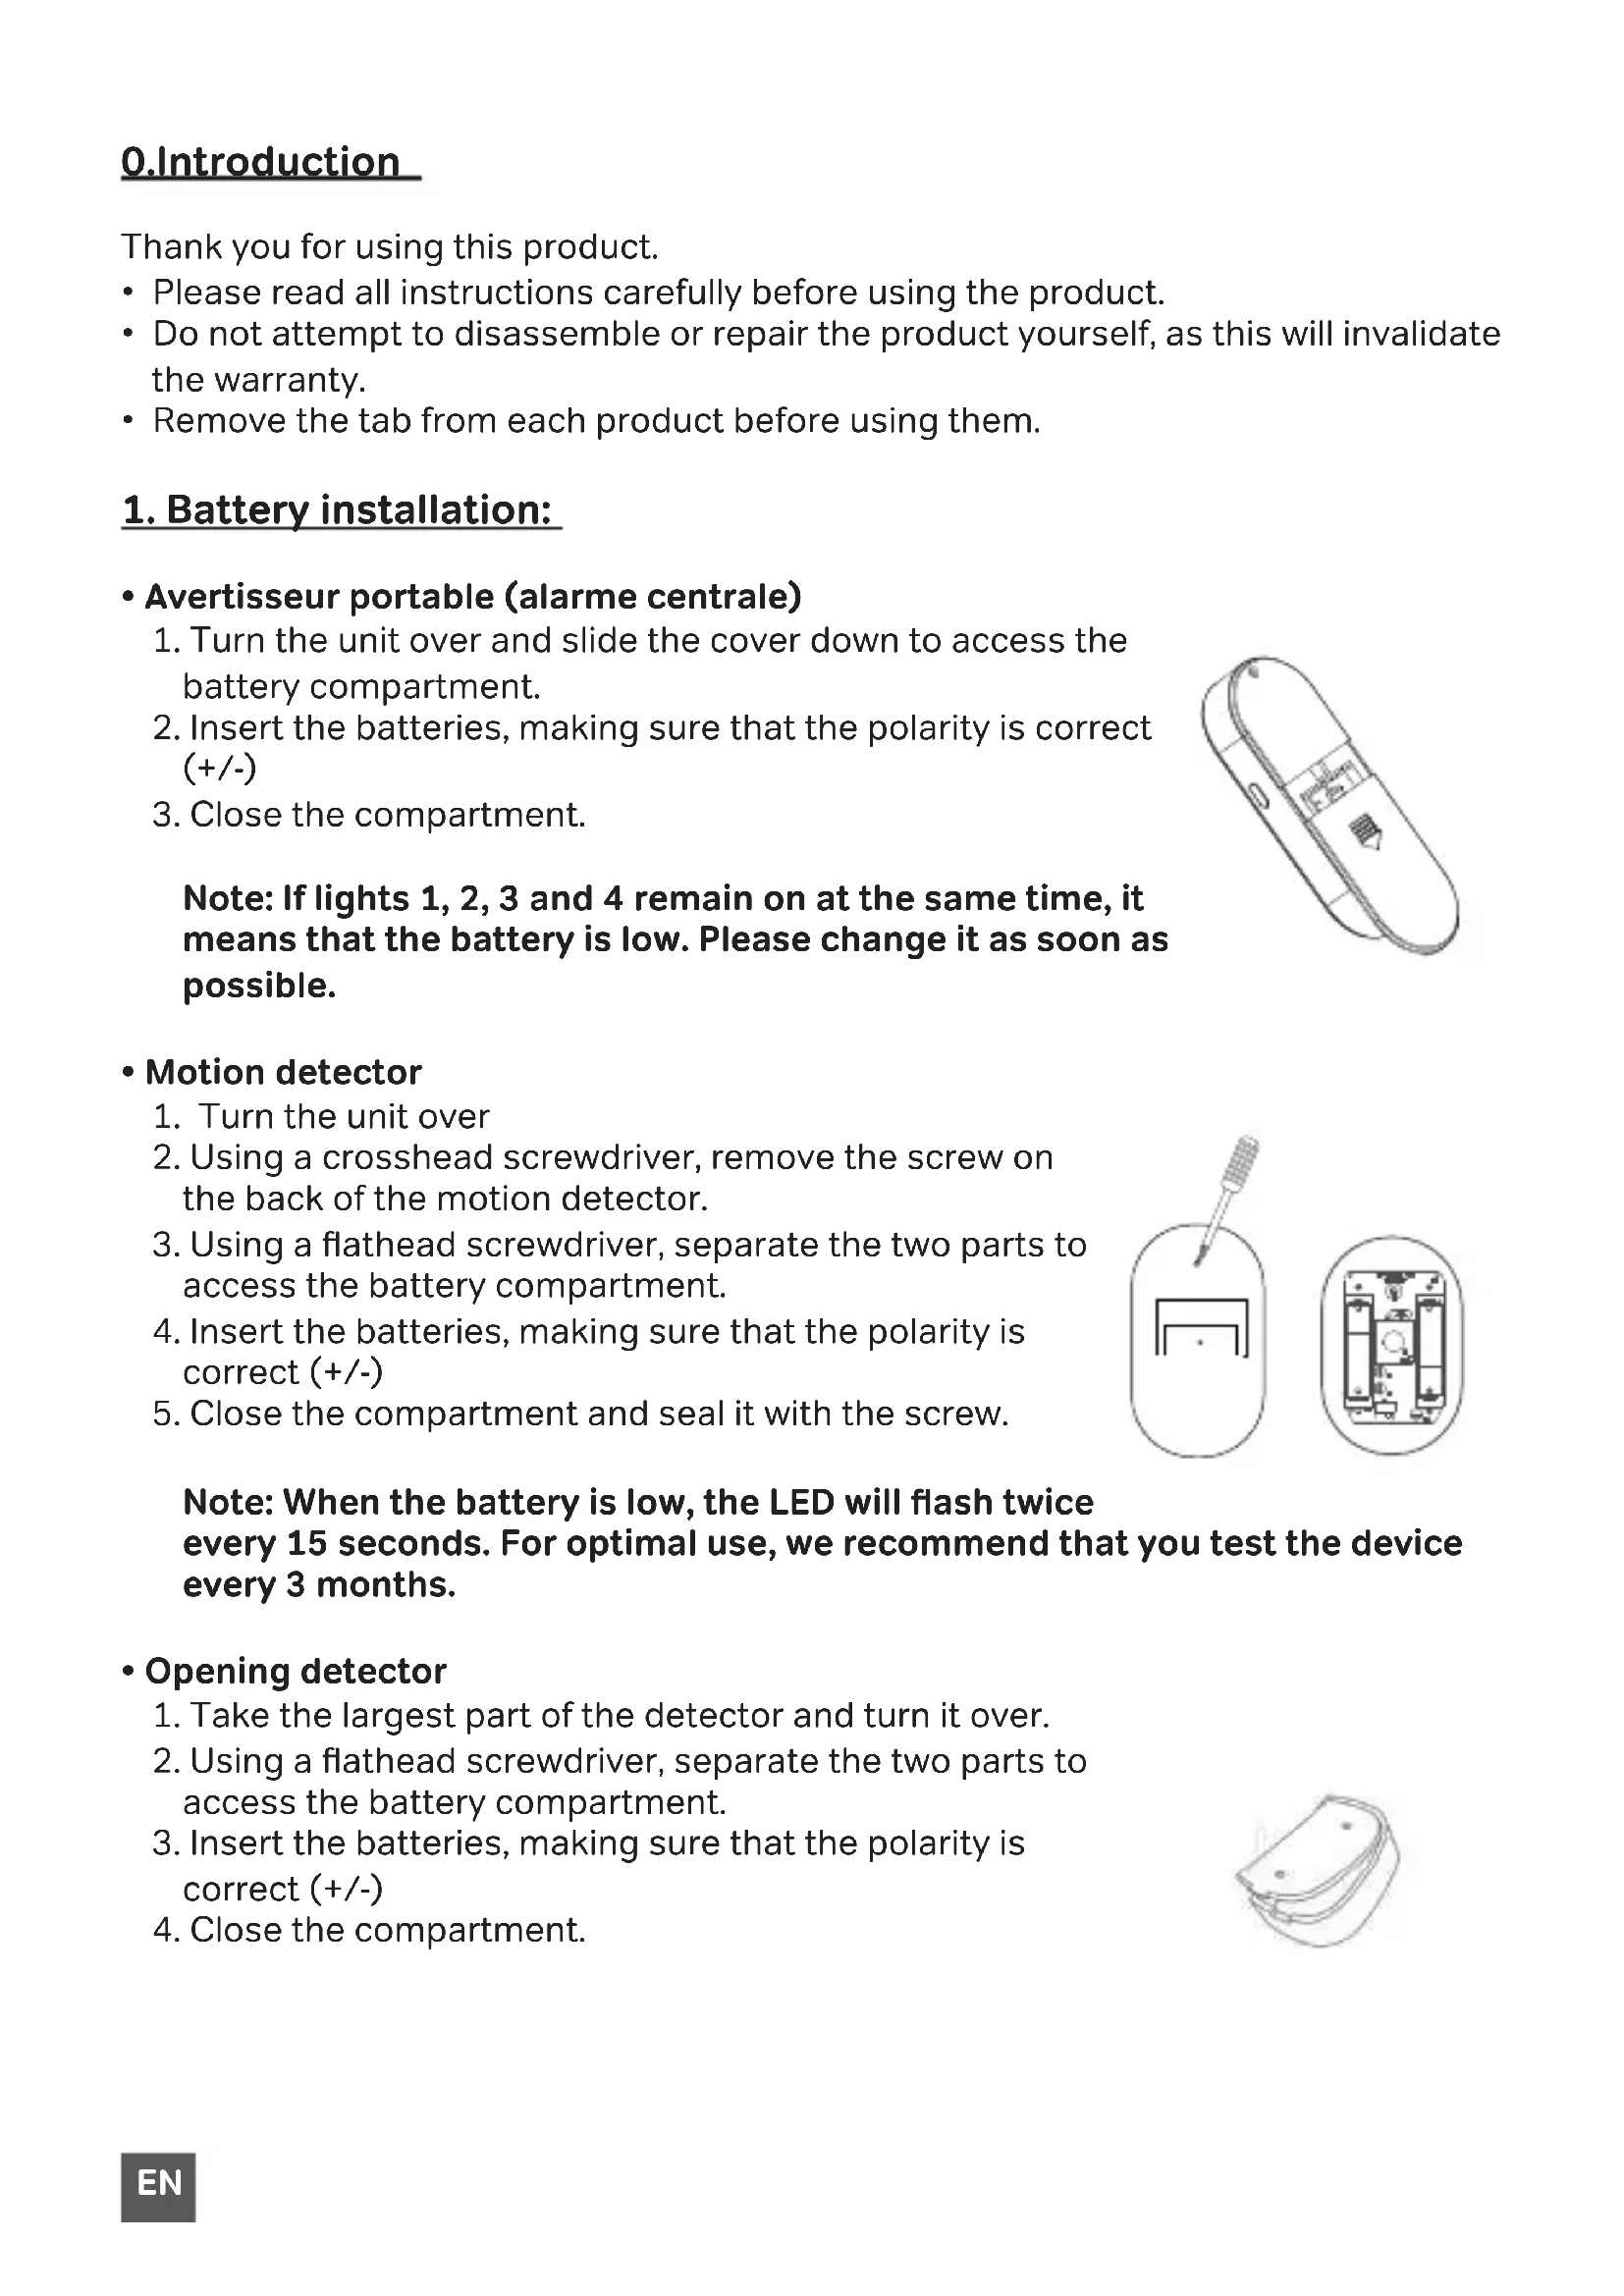
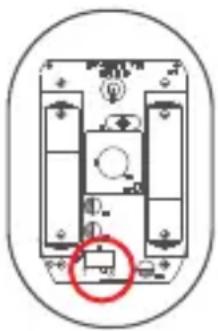
1. Battery installation:
- Turn the unit over and slide the cover down to access the battery compartment.
- Insert the batteries, making sure that the polarity is correct (+/-)
- Close the compartment.
Note: If lights 1, 2, 3 and 4 remain on at the same time, it means that the battery is low. Please change it as soon as possible.

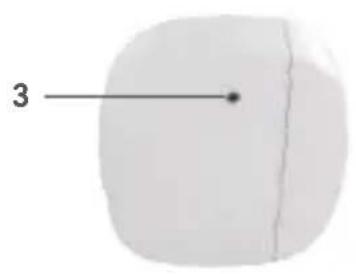
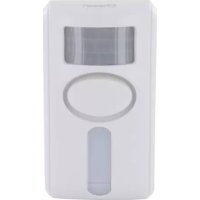
Motion detector
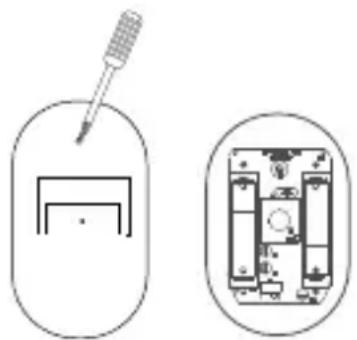
- Turn the unit over
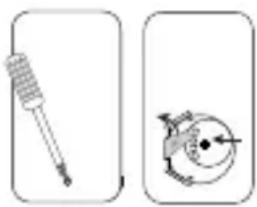
- Using a crosshead screwdriver, remove the screw on the back of the motion detector.
- Using a flathead screwdriver, separate the two parts to access the battery compartment.
- Insert the batteries, making sure that the polarity is correct (+/-)
- Close the compartment and seal it with the screw.
Note: When the battery is low, the LED will flash twice every 15 seconds. For optimal use, we recommend that you test the device every 3 months.
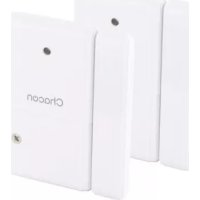
- Opening detector
- Take the largest part of the detector and turn it over.
- Using a flathead screwdriver, separate the two parts to access the battery compartment.
- Insert the batteries, making sure that the polarity is correct (+/-)
- Close the compartment.
Remote control
- Turn the remote control over
- Using a small crosshead screwdriver, remove the screw on the back of the remote control.
- Separate the two parts to access the battery compartment.
- Lift the metal part with the + marking before inserting the CR2032 battery
- Insert the batteries, making sure that the polarity is correct (+/-)
- Close the remote control compartment and seal it with the screw.
Note: If the indicator led doesn't light up or dims when you press the button, please replace the batteries.
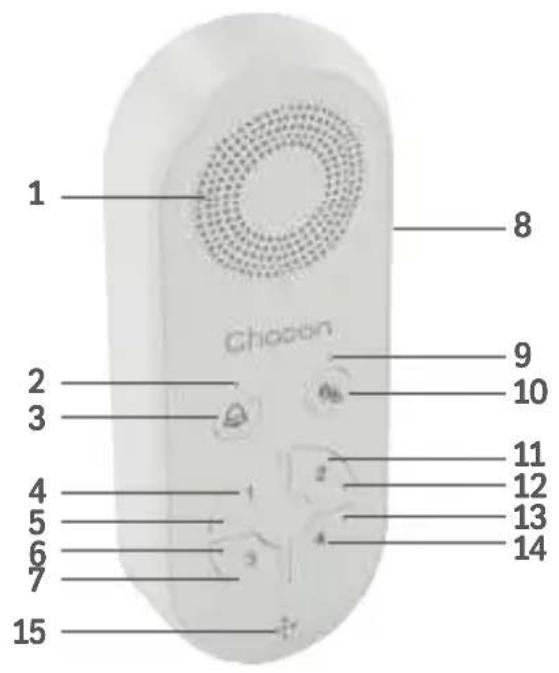
2. Button's explanations: central alarm
On this alarm there are various buttons. Let's go through them quickly for ease of use.
| 1 2 3 4 | Buttons 1,2,3 and 4 represent zones. Each zone can correspond to different rooms in your house/apartment/business so that you can detect where the intrusion is coming from. Example; Zone 1 = Bedroom, Zone 2 = Garage, Zone 3 = Veranda... and so on... |
| By combining your accessories on this chime mode, you will receive a musical notification when the opening or motion detector is triggered. This can be useful when you run a business to know when someone is entering or leaving your shop. Note: You can choose from 32 different melodies | |
| Arming and disarming your alarm. | |
| The side button has several functions: • Volume: decrease, increase or mute (vibrate) • Change melodies (chime mode) • Record a voice message (only in disarmed mode) |
Note: Each element of this kit can be associated to only one zone (max 10/ zone). You can also buy a second kit and associate it with your current kit. Being 100% compatible, you will be able to associate the same opening detector with several alarm control units. This allows you, for example, to leave one alarm in your living room and another in your bedroom.
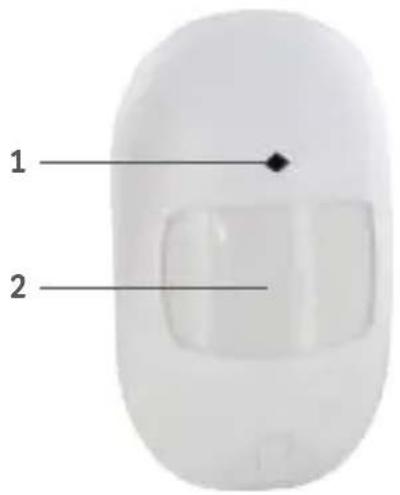
3. Motion detector
When you open the detector, you will see a switch with the letters «T» and «S» written. This allows you to choose between two monitoring modes.
- "T" mode: This is the energy saving mode. As soon as the detector detects a movement, the alarm sounds. Then starts the sleep mode. If within 60 seconds a second movement is detected, the detector will count down 60 seconds before a second alarm can be issued.
- "S" mode: As soon as the detector detects movement, the alarm sounds. Then it will take about 60 seconds for another alarm to sound. (Recommended mode).
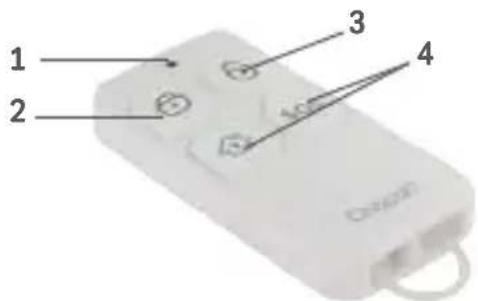
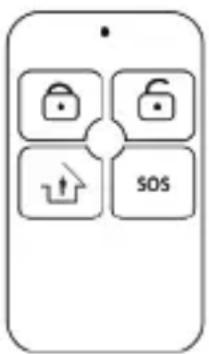
4. Remote control button
- Padlock closed: Alarm on.
- Padlock open: Alarm deactivated. However, you still receive a voice alert (see point 8)
- SOS Mode / Home Mode: When you press either button, the alarm will be activated directly. You will have to press the button on the remote control or on the central alarm to deactivate it.
5. Synchronisation of devices
1. Opening detector :
a. Press the button for the zone of your choice (1,2,3,4) until you hear a «beep».
b. Separate the two ends of the opening detector.
c. A beep will follow to let you know that the synchronization was successful.
2. Motion detector :
a. Place the face of the motion detector on a table and wait one minute before synchronising.
b. Press the button of the zone of your choice (1,2,3,4) until you hear a «beep».
c. Turn the detector over and make a move in front of the detector.
d. A beep will follow to let you know that the synchronization was successful.
3. Remote control :
a. Press the button of the zone of your choice (1,2,3,4) until you hear a «beep».
b. Press a button on your remote control.
c. A beep will follow to let you know that the synchronisation was successful.
Note: if you hear a double beep, it means that the pairing didn't work.
6. Chime mode
To synchronize your detectors to your central alarm unit in chime mode, the principle is the same as for the synchronization by zone.
- Press the « button, until you hear a «beep».
- Synchronize the opening or motion detector by following the steps in point 3.
7. Wall installation
7.1. Central alarm unit (voice alarm)
Thanks to its magnetic plate at the back of the device, you can easily hang it on the doors of your refrigerator, on your microwave... or simply leave it near you on a table or a piece of furniture.
7.2.Motion detector
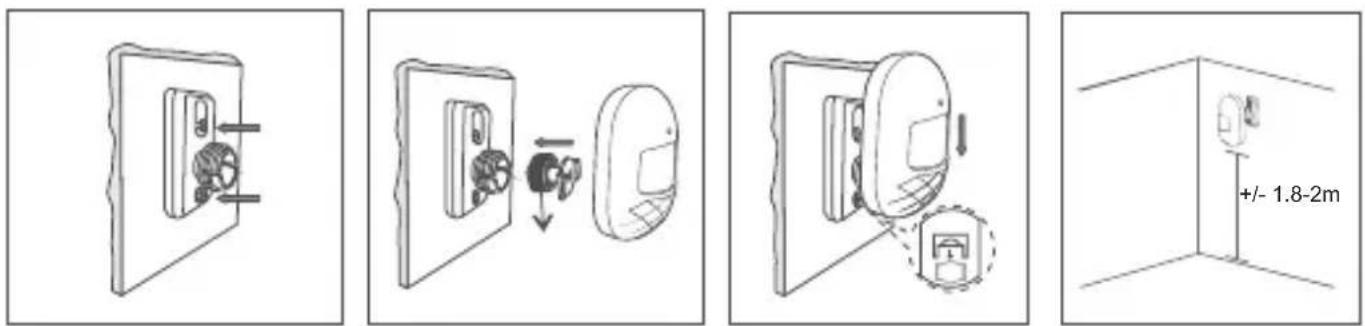
When choosing a location for your motion detector, always ensure that it is placed at a height of 2 metres from the ground and slightly tilted forward. Try to install it in places with the best possible field of vision. (See diagram)
You can opt for installation with double-sided adhesive or with screws.
Tip: Don't place the detector under a heat source and avoid direct sunlight as much as possible.
8. Voice recording
- Press the side button until you hear a «beep».
- Press the button for the area of your choice, you will hear a «beep» to alert you that the message is being recorded.
- When you finished your message, press the zone button chosen in the previous point.
- You will see the LED for your zone and the one with the two locks flashing.
- Press your zone button to listen to your message again.
- Satisfied? Confirm and press the side button.
Note: Voice recording notification is only possible in disarm mode.
9.Unpairing devices from a zone
- Press the zone button that you want to reset until you hear a «beep».
- After the «beep» sound, press again the zone button.
- You will hear a different «beep» meaning that the desynchronization has worked.
10. Resetting the device
- Remove the batteries so that the device is completely switched off.
- Press and hold the «3» and «4» buttons at the same time for about 10 seconds.
- Reinsert the batteries into the device to turn it on. You will hear a «beep» indicating that the reset was successful.
Note: After restoration, all added accessories will be deleted.
11. Safety advice
- Don't mix new and used batteries.
- Please use only the type of battery specified in the manual.
- Don't leave used batteries lying around in the unit, as this may damage the unit.
- Don't place the control panel against a heat source or where it may be exposed to direct sunlight, rain or strong light.
- The unit isn't waterproof. Don't expose it to rain or immerse it in water.
- Don't attempt to disassemble or repair the product by yourself
- Please keep these instructions in a safe place.
- Incorrect use of the battery may damage nearby objects and risk fire or serious injury.
- Please keep batteries away from children.
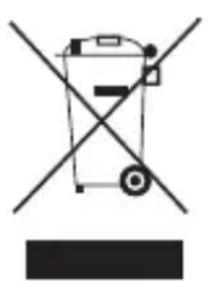
- Recycle used batteries in accordance with environmental protection practices
12. Technical specifications
- Central alarm - voice alarm :
- Alarm volume: ≤ 80dB
- Battery: 3x AAA 1.5V (not included)
- Motion detector :
- Detection distance: 7 m (free field)
Detection angle: 90 - Standby current: ≤ 20uA
- Alarm current: ≤ 20mA
- Battery: 2x AAA 1.5V (not included)
- Opening detector:
- Standby current: ≤ 3uA
- Alarm current: ≤ 15mA
- Battery: 1xCR2032 (Included)
- Remote control :
- Battery: 1xCR2032 (Included)
Frequency: 433 MHz
- Operating temperature: -10^ 55^

EN: For indoor use only
This product must be treated in accordance with European Directive 2002/96/EC with the aim of being recycled or dismantled to minimise its impact on the environment. For further information, please contact your local or regional authorities.
FR:
Hereby, Chacon declares that the radio equipment type 34034 is in compliance with Directive 2014/53/EU.
The full text of the EU declaration of conformity is available at the following internet address: www.chacon.com/conformity

- WIRELESS ALARM WITH VOICE WARNER
- EN Registering the guarantee
- PréSENTATION du produit / Productpresentatie / Presentación del producto / Apresentação do produit / Presentazione del prodotto / Product overview
- 0.Introduction
- Installation murale
- Battery installation:
- Motion detector
- - Opening detector
- Remote control
- Button's explanations: central alarm
- Motion detector
- Remote control button
- Synchronisation of devices
- Opening detector :
- Motion detector :
- Remote control :
- Chime mode
- Wall installation
- Central alarm unit (voice alarm)
- 7.2.Motion detector
- Voice recording
- 9.Unpairing devices from a zone
- Resetting the device
- Safety advice
- Technical specifications
- - Central alarm - voice alarm :
- - Motion detector :
- - Opening detector:
- - Remote control :
Brand : CHACON
Model : 34034
Category : Alarm system