BC8000DV - Baby monitors Neonate - Free user manual and instructions
Find the device manual for free BC8000DV Neonate in PDF.
User questions about BC8000DV Neonate
0 question about this device. Answer the ones you know or ask your own.
Ask a new question about this device
Download the instructions for your Baby monitors in PDF format for free! Find your manual BC8000DV - Neonate and take your electronic device back in hand. On this page are published all the documents necessary for the use of your device. BC8000DV by Neonate.
USER MANUAL BC8000DV Neonate
natural_image
Black neonate phone with camera lens and display buttons (no readable text beyond branding)QUICKGUIDE
QUICKGUIDE
6 ENGLISH
22 NORSK
34 DANSK
46 SVENSKA
58 SUOMEA
70 FRANÇAIS
82 DEUTSCH
94 NEDERLANDS
PU
Screen options Parent Unit

text_image
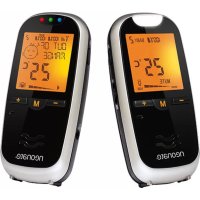
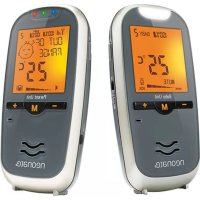
BABY'S ROOM TEMPERATURE BATTERY STATUS INDICATOR OF BABY UNIT SIGNAL STRENGTH BU Y 26°C 65% P1 80% BATTERY STATUS INDICATOR Parent Unit AUDIO LCD VIDEO ONLY ON/OFF VOX neonate
Speaker volume symbol

Microphone sensitivity symbol

LCD brightness symbol

Flip image symbol

Night light symbol

text_image
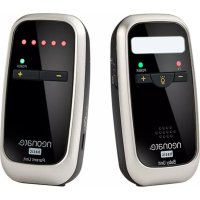
NO 1 BLUE NO 2 GREEN NO 3 RED NO 4 WHITE LED level meter INDICATES SOUND LEVEL FROM BABY BU# PRESS = SWITCH BETWEEN BABY UNITS POWER PRESS / HOLD - TALK-BACK TO BABY UNIT POWER GREEN - POWER ON FLASH GREEN = LOW BATTERY RED = CHARGING NO LIGHT = FULLY CHARGED [when unit is switched OFF] MIC + KEY PRESS = VOLUME UP ZOOM ACTIVATED - PRESS TO ZOOM IN PRESS TO GO DOWN IN MENU MENU key PRESS / HOLD = ENTER MENU PRESS = ACTIVATE / DEACTIVATE ZOOM FUNCTION - KEY PRESS = VOLUME DOWN ZOOM ACTIVATED - PRESS TO ZOOM OUT PRESS TO GO UP IN MENU neonate AUDIO ONLY key ONLY AUDIO TRANSMITTING WHEN SOUND IS DETECTED LCD ON/OFF key SWITCH ON LCD EVEN WHEN NO SOUND IS DETECTED VIDEO VOX key AUDIO AND VIDEO TRANSMITTING WHEN SOUND IS DETECTED
text_image
NIGHT LIGHT INFRARED LED LIGHT SENSOR POWER KEY Power LED Baby Unit MIC LINK INDICATOR SPEAKER neonateWarning!
- Read the instructions for the baby monitor and the safety instructions thoroughly before use.
- This baby monitor is only intended as an aid to monitor your baby, it is not a substitute for responsible adult supervision.
- Keep the baby monitor completely out of reach of your baby. The baby monitor is not a toy, and your baby must not play with any of the units or any accessories.
- Be aware of strangulation hazard of the cord/cable and neck strap (when included) and keep cord/cable/neck strap out of reach of your baby.
- Do not expose the baby monitor or battery to direct sunlight, high temperatures, water or excessive moisture or dusty environment.
- Do not cover the baby monitor with towels, clothes, blankets, other fabrics or any other items.
- Only use original batteries in the units. If you need to replace batteries, check instructions or contact local dealer or Neonate who will provide instructions on how to remove and replace batteries.
- Only use original charger when charging the batteries/units. Only charge the batteries/units when you are present and can monitor the charging. Ensure the charger and units/batteries do not get unusually hot when charging. If the units/batteries do not charge, or charging takes longer than usual, stop the charging and contact your local dealer or Neonate. When batteries/units are charged, remove them from charger and unplug electrical connections.
- Do not modify, pierce, damage or dismantle the product or the battery. Dismantling the product invalidates the guarantee of the product. If product or batteries get damaged, stop using them. The same applies if the units or batteries get unusually hot under use, smells or in any way deviate from their normal condition. All repairs must only be done by qualified service personnel. Neonate can, in some circumstances, guide and allow end-users to replace certain parts in the products.
- The baby monitor and batteries contain electrical components and chemicals. This means that any disposal of such products must be done according to local regulations and environmental considerations.
Batteries requires caution!
When charging a battery there is always a small risk that a short-circuit or a malfunction can cause the battery to overheat and catch fire. It is highly recommended that you never charge a battery in an unsupervised environment.
Warning!
- Do not charge the battery without regular supervision.
- Do not charge the batteries through the night.
- Avoid charging the batteries in direct sunlight.
- Keep batteries away from moist environments and steam.
- Do not bend, twist, pierce or deform the battery.
The life of your battery will increase if you try to:
• charge the battery between 25-80%
- keep the battery from going to 0% or 100% .
- avoid charging the battery beyond 100% .
It is recommended to replace battery after 600 cycles of charging and discharging.
All Neonate batteries has a 2 year warranty.
Instructions for safe removal of the batteries or accumulators.
Remove the back cover of the device which you intend to remove the battery from. Lift the battery carefully without pulling on the wires. Grasp the wire between the battery and the white battery connector within the battery compartment. Pull gently on the wires so that these are stretched and apply pressure to the white battery connector. Make sure not to pull on the wires placed on the actual battery. The battery connector at the end of the wire should now disconnect from the PCB card within the battery compartment.
The following batteries or accumulators are contained in this electrical device.
Battery type:
Lithium Ion Polymer rechargeable battery
Chemical system:
Lithium Cobalt Dioxide and Graphite
Pairing (connecting) units / Disconnecting paired units
NOTE! PU and BU are already paired and ready to use out of the box. Nevertheless, we recommend you to pair the units again to ensure a private connection. If you want to connect another baby unit (or extra baby unit) to the parent unit you need pair the units again.
Prerequisites:
Baby unit must be switched off.
Parent unit must be turned on.
Touch sensitive buttons must be activated (are activated / deactivated by ON / OFF button)
1 Baby unit: Press and hold the (POWER) button for 6 seconds until the «LINK» symbol is flashing rapidly. (The «LINK» symbol is flashing and pairing is possible for 30 seconds)
2 Parent unit: Press and hold the (•) button for 2 seconds to enter the menu
(Parent unit must be turned on and touch sensitive buttons activated)
3 Parent unit: Use the (- / + ) buttons to navigate (up/down) and select CONNECTING in menu. Confirm choice by pressing () button. If you like, you can now change the number to the baby unit you would like to pair - 1, 2, 3 or 4 - default is 1. Changing baby unit number is not necessary if desired number already is chosen and displayed to the right of BABY in menu.
4 Parent unit: Use the (- / + ) buttons (up/down) to navigate and select CONNECTED in menu. Confirm choice by pressing () button. The menu text will now change from CONNECTED to CONNECTING... and back to CONNECTED again when units are paired and are connected.
Repeat step 1-4 if you wish to pair more baby units to the same parent unit. If more than one baby unit is paired, you must choose different baby unit numbers in step 3
If you wish to disconnect a baby unit which is already paired with parent unit, just repeat step 2-4. When you confirm by pressing (•) button (step 4), the menu text will now change from CONNECTED to DISCONNECTED.
| MAIN MENU | |
| DISPLAY | |
| ◎ CONNECTING | BU's:1 |
| BABY SETTINGS | |
| TEMP ALARM | |
| VIBRATION | OFF |
| KEY TONE | ON |
| LCD AUTO OFF | |
| EXIT | |
| UNIT SELECT | |
| BABY | 1 |
| ◎ CONNECTEDRETURN MENU | |
| UNIT SELECT | |
| BABY | 1 |
| CONNECTING . . . . | |
| RETURN MENU | |
Pairing BC-6500D/BC-6900D baby unit to BC-8000DV parent unit
A Baby unit BC-6500D/BC-6900D: Press and hold the (PAGE) button and set the (ON/OFF) switch to ON position. Do not release (PAGE) button before PAIR appears in display.
B Parent unit BC-8000DV: Follow step 2, 3 and 4.
C Baby unit BC-6500D/BC-6900D: Choose same baby unit number as on parent unit BC-8000DV by using (-/+), then press (M) button twice. Parent unit BC-8000DV display shows 6X00D CONNECTED.
2 Parent unit: Press and hold the (•) button for 2 seconds to enter the menu
(Parent unit must be turned on and touch sensitive buttons activated)
3 Parent unit: Use the (- / + ) buttons to navigate (up/down) and select CONNECTING in menu. Confirm choice by pressing () button. If you like, you can now change the number to the baby unit you would like to pair - 1, 2, 3 or 4 - default is 1. Changing baby unit number is not necessary if desired number already is chosen and displayed to the right of BABY in menu.
4 Parent unit: Use the (-/+) buttons (up/down) to navigate and select CONNECTED in menu. Confirm choice by pressing (•) button. The menu text will now change from CONNECTED to CONNECTING... and back to CONNECTED again when units are paired and are connected.
How does the different modes work?
AUDIO ONLY mode – LCD display is off, when baby is making noise, only sound is transmitted to parent unit
Advantages:
Reduced battery consumption and radiation to a minimum. Provides the maximum audio range when needed.
Disadvantages:
Less visual warning (no LCD) when there is sound from the baby.
LCD ON/OFF mode – LCD is always on and video signal is transmitting continuously, sound is transmitted to parent unit only when baby is making noise. You can choose in main menu how long the LCD stays on before the LCD turns off automatically (default is 30 seconds).
Advantages:
Gives you opportunity to check the baby (visually) even if there is no noise activating the camera/baby unit
Disadvantages:
When LCD is activated, video is transmitting continuously which is increasing both battery consumption and radiation. Use this mode in as short periods of time as possible.
VIDEO VOX mode - LCD display is activated and is transmitting both video and sound when baby is making noise
Advantages:
Gives you an effective battery consumption combined with an extra visual warning from any activity from the baby.
Disadvantages:
If there is a lot of noise coming from the baby (or if baby unit's microphone is set too high), the LCD display will be activated often which leads to increased battery consumption and radiation.
Turn on and adjusting the temperature alarm (upper and lower limit)
Prerequisites:
Parent unit must be turned on Touch sensitive buttons must be activated (are activated / deactivated by ON / OFF button)
1 Parent unit: Press and hold the (•) button for 2 seconds to enter the menu
2 Parent unit: Use the (- / + ) buttons to select TEMP ALARM in menu. Confirm choice by pressing () button. Now choose HIGH LIMIT or LOW LIMIT and confirm choice by pressing () button. Now use the (- / + ) buttons to select the upper or lower temperature limit. Confirm choice by pressing () button
If current temperature exceeds the chosen upper temperature limit, the temperature alarm will be activated.
If current temperature goes below the chosen lower temperature limit the temperature alarm will be activated.
If you would like to change the temperature limit on a different baby unit, then you need to change the number to the right of BABY (showing BABY 1 in below picture).
| MAIN MENU | |
| DISPLAY | |
| CONNECTING | BU's:1 |
| BABY SETTINGS | |
| TEMP ALARM | |
| VIBRATION | OFF |
| KEY TONE | ON |
| LCD AUTO OFF | |
| EXIT | |
| TEMP ALARM | |
| BABY | 1 |
| LOW LIMIT | -1°C |
| HIGH LIMIT | 35°C |
| RETURN MENU | |
Zoom funksjon
Prerequisites:
The units must be paired and within communication range Baby unit must be turned on Parent unit must be turned on and LCD ON mode activated Touch sensitive buttons must be activated (are activated / deactivated by ON / OFF button)
Parent unit: Press the (•) button, LCD display will show «ZOOM X1», you can now use (-/+) buttons to zoom in/out. Press (+) to zoom in (LCD display will now show «ZOOM X2»).
ZOOM X2

Adjusting the microphone sensitivity of the baby unit(s)
Prerequisites:
Parent unit must be turned on Touch sensitive buttons must be activated (are activated / deactivated by ON / OFF button)

Parent unit: Press and hold the (•) button for 2 seconds to enter the menu.

Parent unit: Use the (- / + ) buttons to select BABY SETTINGS in menu. Confirm choice by pressing () button. Now choose MIC SENS and confirm choice by pressing () button. Now use the (- / + ) buttons to adjust the sensitivity of the microphone. Confirm choice by pressing () button
(If you would like to change the microphone sensitivity on a different baby unit, then you need to change the number to the right of BABY (showing BABY 1 in below picture).
| MAIN MENU | |
| DISPLAY | |
| CONNECTING | BU's:1 |
| ● BABY SETTINGS | |
| TEMP ALARM | |
| VIBRATION | OFF |
| KEY TONE | ON |
| LCD AUTO OFF | |
| EXIT | |
| BABY SETTINGS | |
| BABY | 1 |
| NIGHT LIGHT | VOX |
| ⊙ MIC SENS | 3 |
| VOLUME | 3 |
| RANGE ALARM | ON |
| RETURN MENU | |


Adjusting the speaker volume of the baby unit (used in talk-back-function)
Prerequisites:
Parent unit must be turned on. Touch sensitive buttons must be activated (are activated / deactivated by ON / OFF button)
1 Parent unit: Press and hold the (•) button for 2 seconds to enter the menu
2 Parent unit: Use the (- / + ) buttons to select BABY SETTINGS in menu. Confirm choice by pressing () button. Now choose VOLUME and confirm choice by pressing () button. Now use the (- / + ) buttons to adjust the baby unit volume. Confirm choice by pressing () button
If you would like to change the volume on a different baby unit, then you need to change the number to the right of BABY (showing BABY 1 in below picture).
Adjusting the speaker volume - parent unit
Prerequisites:
Parent unit must be turned on.
Touch sensitive buttons must be activated (are activated / deactivated by ON / OFF button)
Parent unit: Use the (+/-) buttons to adjust the volume. The volume bar graph at the bottom of the display will change accordingly to show the current speaker volume.

| MAIN MENU | |
| DISPLAY | |
| CONNECTING | BU's:1 |
| ● BABY SETTINGS | |
| TEMP ALARM | |
| VIBRATION | OFF |
| KEY TONE | ON |
| LCD AUTO OFF | |
| EXIT | |
| BABY SETTINGS | |
| BABY | 1 |
| NIGHT LIGHT | VOX |
| MIC SENS | 3 |
| VOLUME | 3 |
| RANGE ALARM | ON |
| RETURN MENU | |

Turn on night light in baby unit / change to voice activated (VOX) night light
Prerequisites:
Parent unit must be turned on. Touch sensitive buttons must be activated (are activated / deactivated by ON / OFF button)
1 Parent unit: Press and hold the (•) button for 2 seconds to enter the menu
2 Parent unit: Use the (- / + ) buttons to select BABY SETTINGS in menu. Confirm choice by pressing () button. Now choose NIGHT LIGHT and confirm choice by pressing () button. Now use the (- / + ) buttons to choose whether the the night light should be ON constantly, voice activated - VOX or OFF. Confirm choice by pressing () button.
If you would like to change the night light settings on a different baby unit, then you need to change the number to the right of BABY (showing BABY 1 in below picture).
| MAIN MENU | |
| DISPLAY | |
| CONNECTING | BU's:1 |
| ● BABY SETTINGS | |
| TEMP ALARM | |
| VIBRATION | OFF |
| KEY TONE | ON |
| LCD AUTO OFF | |
| EXIT | |
| BABY SETTINGS | |
| BABY | 1 |
| ◎ NIGHT LIGHT | VOX |
| MIC SENS | 3 |
| VOLUME | 3 |
| RANGE ALARM | ON |
| RETURN MENU | |

Change brightness level on LCD display
Prerequisites:
Baby unit must be turned on Parent unit must be turned on Touch sensitive buttons must be activated (are activated / deactivated by ON / OFF button)
1 Parent unit: Press and hold the (•) button for 2 seconds to enter the menu
2 Parent unit: Use the (- / + ) buttons to select DISPLAY in menu. Confirm choice by pressing () button. Now choose BRIGHTNESS and confirm choice by pressing () button. Now use the (- / + ) buttons to adjust the brightness level. Confirm choice by pressing () button.
| MAIN MENU | |
| ◎ DISPLAYCONNECTING BU's:1BABY SETTINGSTEMP ALARMVIBRATION OFFKEY TONE ONLCD AUTO OFFEXIT |
| DISPLAY MENU | |
| BABY | 1 |
| ◎ BRIGHTNESS | 3 |
| FLIP | 0° |
| RETURN MENU | |

How to avoid (turn off) OUT-OF-RANGE alarm when changing from using one or more baby units with a single parent unit
Prerequisites:
Parent unit must be turned on.
Touch sensitive buttons must be activated (are activated / deactivated by ON / OFF button)
When the parent unit is connected (paired) with more than one baby unit, the parent unit will constantly search for signals from all connected baby units. That means if you pair two baby units to your parent unit but decide to use just one of one them (by turning only one BU on), the parent unit will activate the OUT-OF-RANGE alarm indicating that it has lost contact with one baby unit.
If you would like to change range alarm settings on a different baby unit, then you need to change the number to the right of BABY (showing BABY 1 in below picture).
NOTE! To avoid the possibility that parents forget to activate the out-of-range alarm again after it has been disabled, the out-of-range alarm is automatically activated after the unit is turned off and on again. We do not recommend turning off the out-of-range alarm when the parents will not be notified if parent unit loses contact with baby unit. There are several reasons to parent unit loses contact with baby unit; 1) units are outside communication range, 2) baby unit is turned off intentionally or 3) baby unit is turned off without purpose (e.g. by empty battery).
1 Parent unit: Press and hold the (•) button for 2 seconds to enter the menu
2 Parent unit: Use the (- / + ) buttons to select BABY SETTINGS in menu. Confirm choice by pressing () button. Now choose RANGE ALARM and confirm choice by pressing () button. Now use the (- / + ) buttons to choose whether range alarm should be ON or OFF. Confirm choice by pressing () button.
| MAIN MENU | |
| DISPLAY | |
| CONNECTING | BU's:1 |
| ◎ BABY SETTINGSTEMP ALARM | |
| VIBRATION | OFF |
| KEY TONE | ON |
| LCD AUTO OFF | |
| EXIT | |
| BABY SETTINGS | |
| BABY | 1 |
| NIGHT LIGHT | VOX |
| MIC SENS | 3 |
| VOLUME | 3 |
| ⊗ RANGE ALARM | ON |
| RETURN MENU | |
Flip display image 180°
Prerequisites:
Baby unit must be turned on Parent unit must be turned on Touch sensitive buttons must be activated (are activated / deactivated by ON / OFF button)
1 Parent unit: Press and hold the (•) button for 2 seconds to enter the menu
2 Parent unit: Use the (- / + ) buttons to select DISPLAY in menu. Confirm choice by pressing () button. Now choose FLIP and confirm choice by pressing () button. Now use the (- / + ) buttons to choose flipping the image 180^ . Confirm choice by pressing () button.
| MAIN MENU | |
| ◎ DISPLAYCONNECTING BU's:1BABY SETTINGSTEMP ALARMVIBRATION OFFKEY TONE ONLCD AUTO OFFEXIT |
| DISPLAY MENU | |
| BABY | 1 |
| BRIGHTNESS | 3 |
| FLIP | 0° |
| RETURN MENU | |

Using the talk-back-function (two-way communication)
Prerequisites:
The units must be paired and within communication range Baby unit must be turned on Parent unit must be turned on
Parent unit: Press and hold the button while speaking to baby (unit). Release the button to reopen communication from baby to parent unit again.
You can select which baby unit you would like to talk to by pressing the (BU#) button until the desired baby unit is selected.
Changing between baby units in standby mode
(no transmission of sound or image*)
Prerequisites:
More than one baby unit is paired and within communication range to parent unit Baby unit must be turned on Parent unit must be turned on
Parent unit: Press the (BU#) button to select from which baby unit you would like to see information about temperature, battery status and signal strength (signal strength only possible to see in LCD ON mode).
* Note! When using (BU#) button in LCD ON mode, you will choose which baby unit to receive video (image) from (only video, no audio will be transmitted while in stand-by-mode).
Turn on/off vibration
Prerequisites:
Parent unit must be turned on Touch sensitive buttons must be activated (are activated/deactivated by ON/OFF button)
1 Parent unit: Press and hold the (•) button for 2 seconds to enter the menu
2 Parent unit: Use the (- / + ) buttons to navigate (up/down) and select VIBRATION in menu. Activate choice by pressing () button. Now use the (- / + ) buttons to choose whether vibration should be ON or OFF. Confirm choice by pressing () button.
Turn on/off key tone
Prerequisites:
Parent unit must be turned on Touch sensitive buttons must be activated (are activated/deactivated by ON/OFF button)
1 Parent unit: Press and hold the (•) button for 2 seconds to enter the menu
2 Parent unit: Use the (- / + ) buttons to navigate (up/down) and select KEY TONE in menu. Activate choice by pressing () button. Now use the (- / + ) buttons to choose whether key tone should be ON or OFF. Confirm choice by pressing () button.
Changing between baby units in transmit mode
Prerequisites:
The units must be paired and within communication range Baby unit must be turned on Parent unit must be turned on More than one baby unit is transmitting sound/image to parent unit simultaneously
Parent unit: Press the (BU#) button to select from which baby unit you would like hear sound and see image from (in addition to temperature, battery status and signal strength).
When sound is transmitted from baby unit to parent unit, a LED diode above the LCD display on parent unit will be lit constantly. There are four LED diodes with different colours (blue, green, red and white). The colour of the LED diode indicates which baby unit that is currently transmitting sound. If more than one baby unit is transmitting sound at the same time, one of the LED diodes will be lit constantly, while the other LED diodes will be flashing. A LED diode which is flashing indicates the baby unit is receiving sound from baby but cannot be heard in the parent unit's speaker. A LED diode lit constantly indicates the baby unit which is transmitting sound and image (only audio in audio mode) and can be heard in the parent unit's speaker and viewed in parent unit's LCD display (only audio in audio mode). If all baby units transmit sound simultaneously, the sound/image from baby unit no. 1 has priority over baby unit no. 2, which again has priority over baby unit no. 3 and so on.
$$ \begin{array}{l} B U 1 = b l u e \ B U 2 = \text { g r e e n } \ \mathrm{BU} 3 = \text { red } \ B U 4 = \text { white } \ \end{array} $$
Adjusting the time before LCD automatically turn off while in LCD ON/OFF mode
Prerequisites:
Parent unit must be turned on Touch sensitive buttons must be activated (are activated / deactivated by ON / OFF button)
1 Parent unit: Press and hold the (•) button for 2 seconds to enter the menu.
2 Parent unit: Use the (- / + ) buttons to select LCD AUTO OFF in menu. Confirm choice by pressing () button. Now use the (- / + ) buttons to adjust the time before LCD automatically turn off while in LCD ON/OFF mode. Confirm choice by pressing () button
| MAIN MENU | |
| DISPLAY | |
| CONNECTING | BU's:1 |
| BABY SETTINGS | |
| TEMP ALARM | |
| VIBRATION | OFF |
| KEY TONE | ON |
| LCD AUTO OFF | |
| EXIT | |
| LCD AUTO OFF |
| 30 SECONDS √1 MINUTE5 MINUTES10 MINUTES30 MINUTESRETURN MENU |
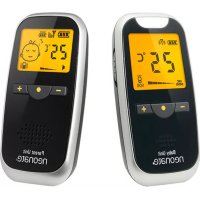
The BC-8000DV video monitor is not designed to use as a surveillance unit to watch the child constantly with the screen enabled all the time, but rather to allow parents to check on the baby when needed by using the LCD ON/OFF mode (when the child is sleeping). When the child makes sound, the device will nevertheless alert the parents in both AUDIO ONLY (Audio only) and VIDEO VOX MODE (the screen automatically turns on and sends a video with audio). In LCD ON/OFF mode, only the picture/video will be displayed without sound as long as the child is asleep while the sound is transmitted only when the child makes a sound which activates the microphone on the camera (baby unit). With its large battery, the devices are designed to be used in different places where socket is not available. The LCD ON MODE will quickly drain the batteries even though the batteries have high capacity. We recommend using the LCD ON/OFF MODE as little as possible to reduce radiation and save battery power and increase battery life time.
Alarms / Alerts
«OUT-OF-RANGE» alarm/alert is activated after approximately 30 seconds if baby- and parent unit is beyond communication range, when baby unit is turned off or if baby unit for some reason is unable to send signal to parent unit (e.g. if battery is completely empty). The sound alarm is activated, LCD-display shows «BOTH VIDEO AND AUDIO OUT OF RANGE» and the «LED level meter» light flashes.
Note!
If parent unit loses contact with a baby unit while it picks up sound from another baby unit, the “OUT-OF-RANGE” alarm will not be activated as long as sound is transmitting from one baby unit.
Because the video signal has a shorter range than the audio signal, the video signal falls outside the maximum transmit range easily than the audio signal. When the video signal is out of reach but the audio signal is in range, the sound signal from the child can be transmitted and notify the parents, you will see the following notification in the parent unit's display;
«VIDEO OUT OF RANGE AUDIO STILL IN RANGE»
«VIDEO OUT OF RANGE AUDIO STILL IN RANGE» displayed in different modes;
AUDIO ONLY mode
- Never (only sound is transmitted in this mode)
VIDEO VOX mode
- Only when sound is received from baby unit
LCD ON/OFF mode
- Always (LCD ON means that video signal is transmitted continuously)
TEMPERATUR alarm sound is activated and text is shown in parent unit's display if;
1 the actual temperature exceeds the selected high temperature limit - display shows:
BABY #
HIGH TEMPERATURE ALARM
( # = number of baby unit that is registered too high temperature)
2 the actual temperature goes below the selected low temperature limit - display shows:
BABY #
LOW TEMPERATURE ALARM
(# = number of baby unit that is registered too low temperature)
LOW BATTERY sound alarm/alert is activated in parent unit, «POWER LED» indicator flashes green on the unit (on baby- or parent unit) that has low battery and if LCD-display is turned on, the battery symbol will flash. Text will appear in parent unit's display if the;
baby unit battery power is low:
BABY #
BU BATTERY LOW
(#= indicates the number of the baby unit which has low battery power)
parent unit battery power is low:
PU BATTERY LOW
Note! In case the parent unit is in LCD ON/OFF mode and the baby unit's night vision is activated (is automatically activated when the room is dark), the heat generated inside baby unit may affect the accuracy of the temperature sensor and indicate an incorrect higher temperature reading. Under such circumstances, pull out the sensor from lever and keep it far away from unit cabinet.

text_image
Lever Sensor
Information concerning the disposal of exhausted batteries
The pictured symbol on the left side on batteries, the packing or the enclosed documents signifies that the batteries should not be disposed of at the end of their life cycle together with the domestic waste. Possible added letters under the waste bin signify that the battery contains lead (Pb), cadmium (Cd) or mercury (Hg). You as consumer are obliged by law to render all kind of batteries (both rechargeable as well as non-rechargeable) inclusive button cells at local places of collection or at the retail market. This is at no charge. The proper disposal enables the recycling of valuable resources and avoids possible negative effects on humans and the environment.

Information concerning the disposal of old electric and electronic products
The pictured symbol on the product, the packing or the enclosed documents signifies that the product should not be disposed of after the end of its life cycle together with the domestic waste. You as consumer are obliged by law to render electric and electronic products at a local place of collection for electronic equipment. This is at no charge. Please take out the batteries before disposal of the product. The proper disposal enables the recycling of valuable resources and avoids possible negative effects on humans and the environment. For further information please contact your local authority or the vendor of the product.
Mounting Kit
Installation of baby unit to BC-8000DV support base

natural_image
Line drawing of a portable electronic device with a stand and top-mounted base (no text or symbols)1 Turn BU clockwise to screw into support base.

text_image
90°2 Set the BU stand up straight 90° to support base.

natural_image
Simple line drawing of a device with a speaker and a paper sheet, no text or symbols present3 To lock tight, insert the supplied tool into the hexagonal hole and hold tight the tool while turning the BU clockwise, then remove the tool.

natural_image
Technical line drawing of a mechanical device with two views: top shows a curved housing, bottom shows a vertical support structure (no text or symbols)4 Adjust the BU to angle you prefer.
5 To unscrew BU from base, first set the BU straight up as per step 2, repeat step 3 but turning the BU counter-clockwise.

natural_image
Line drawing of a portable electronic device with a stand and top-mounted base (no text or symbols)natural_image
Simple line drawing of a device with a speaker and a paper sheet, no text or symbols presentnatural_image
Technical line drawing of a mechanical device with two views: top shows a curved housing, bottom shows a vertical support structure (no text or symbols)4 Juster babyenheten i den vinkelen du ønsker
LOW TEMPERATURE ALARM
(#= nummer på den babyenhed, der registrerer for lav temperatur)
natural_image
Line drawing of a portable electronic device with a handle and top mount (no text or symbols)natural_image
Simple line drawing of a handheld device with a circular head and a magnifying glass, no text or symbols present.natural_image
Technical line drawing of a vacuum cleaner with airflow indicators (no text or symbols)natural_image
Mechanical assembly diagram showing exploded view of a device with internal components and rotation arrows (no text or labels)
natural_image
Diagram showing a device with a cylindrical component and a vertical rod, enclosed in a dashed circle (no text or symbols)
natural_image
Diagram showing a mechanical device with a bracket and a magnified view of its lever mechanism (no text or symbols present)
natural_image
Illustration of a stroller and a gun with mechanical components, enclosed in a dashed circle (no text or symbols)
LOW TEMPERATURE ALARM
natural_image
Line drawing of a portable electronic device with a stand and top-mounted base (no text or symbols)natural_image
Simple line drawing of a person using a handheld device to interact with a device (no text or symbols present)natural_image
Technical line drawing of a mechanical device with two views: top shows a curved component, bottom shows a vertical support structure (no text or symbols)natural_image
Mechanical assembly diagram showing exploded view of a device with internal components and rotation arrows (no text or labels)
natural_image
Pure electrical circuit lines without any symbols
natural_image
Simple line drawing of a mechanical device with a bracket and a cylindrical component, no text or symbols present.
natural_image
Illustration showing a stroller and a mechanical device with no visible text or symbols
LOW TEMPERATURE ALARM
natural_image
Line drawing of a portable electronic device with a handle and control panel (no text or symbols)natural_image
Simple line drawing of a handheld device with a circular button and a pointer, no text or symbols present.natural_image
Technical line drawing of a mechanical device with two views: top shows a curved component, bottom shows a vertical support structure (no text or symbols)natural_image
Diagram showing mechanical assembly steps with no visible text or symbols
natural_image
Diagram showing a mechanical device with a bracket and a vertical rod, enclosed in a dashed circle (no text or symbols)
natural_image
Diagram showing a mechanical device mounted on a vertical pole with a circular annotation highlighting its components (no text or symbols present)
natural_image
Illustration of a stroller and a mechanical device with a magnified view of the device (no text or symbols)
text_image
Technical diagram showing three-step installation of a portable device with labeled parts and angular measurements.
natural_image
Line drawings of a vacuum cleaner with directional arrows indicating motion (no text or symbols)text_image
Technical diagram showing three-step assembly of a device with labeled parts and angular measurement
natural_image
Technical line drawing of a vacuum cleaner with directional arrows indicating motion (no text or symbols)NEDERLANDS
text_image
Technical diagram showing three-step assembly steps of a device with labeled parts and angular measurement
natural_image
Technical line drawing of a mechanical device with two views: top shows a curved component, bottom shows a vertical arm mechanism (no text or symbols)General Specifications

natural_image
Black neonate mobile phone with a sleeping photo on screen (no visible text or symbols on device body)BC-8000DV PU
Parent Unit
Dimension
126 x 63 x 31mm
Power supply
1 Internal battery : Lithium polymer battery(3.7V/ 2000mAh)
2 External power supply : 5V/1A
Battery life time
1 Continuous reception : around 5.5 hours
2 Standby : around 25 hours
Subject to battery fully charged up
Screen
2.4 inch TFT
Resolution : 320 x 240 (RGB)
Number of colors 262K
Operating condition
Temperature: -10°C to +50°C
Humidity ≤90%
Range
Video : 300M (open space)
Audio : 800M (open space)

natural_image
Black neonate phone with camera lens and control buttons (no visible text or symbols on device body)BC-8000DV BU
Baby Unit
Dimension
126 x 63 x 31mm
Power supply
1 Internal battery : Lithium polymer battery (3.7V/ 2000mAh)
2 External AC adapter: 5V/1A
Battery life time
1 Continuous transmission : around 5.5 hours
2 Standby : around 25 hours
Subject to following conditions :
1 Battery fully charged up
2 Infrared LED not switched on
Video transmission
Format: QVGA
No. of Channel : 64
Operation method : FHSS
Audio transmission
No. of channels : 53
Operation method : FHSS
Night vision
Infrared LED x 8 pcs
λ:850nm
Effective distance : >5M
Operating condition
Temperature: -10^ to +50^
Humidity ≤90%
Camera
1/6 inch CMOS (640 x 480
pixel)
DECLARATION OF CONFORMITY
Noricon AS
Nandrups vei 1 b
0490 Oslo
NORGE
Declares that the following produkt:
Model Neonate BC-8000DV is compliant
with the following relative harmonized
standards:
• EN 300 220-1 V3.1.1 (2017-02)
• EN 300 220-2 V3.2.1 [2018-06]
• EN 300 328 V2.2.2 (2019-07)
• EN 301 489-1 V2.2.3 (2019-11)
• EN 301 489-3 V2.1.1(2019-03)
• EN 301 489-17 V3.2.4 (2020-09)
• EN 62368-1: 2014+A11: 2017
• EN IEC 62311:2020
In accordance with the requirements set forth by the RED directive (2014/53/EU) regarding radio and telecommunications terminal equipment and mutual recognition of their conformity.
Name: Glenn Ulverud
Position: CEO
www.neonate.no
Date: 30.12.2020
Glen Vler
Signature


Operating frequency
Video : 2404-2478.5MHz
Audio : 863-870MHz
Output Power
Video : 17dBm for both BU and PU
Audio : 12dBm for both BU and PU
EU AUTHORISED REPRESENTATIVE
NORICON AS, CVR-NR. DK35493867
THOMAS BERGS GADE 12
DK-9900 FREDERIKSHAVN
DENMARK