BC6900D - Baby monitors Neonate - Free user manual and instructions
Find the device manual for free BC6900D Neonate in PDF.
Frequently Asked Questions - BC6900D Neonate
User questions about BC6900D Neonate
0 question about this device. Answer the ones you know or ask your own.
Ask a new question about this device
Download the instructions for your Baby monitors in PDF format for free! Find your manual BC6900D - Neonate and take your electronic device back in hand. On this page are published all the documents necessary for the use of your device. BC6900D by Neonate.
USER MANUAL BC6900D Neonate
- Read the instructions for the baby monitor and the safety instructions thoroughly before use.
- This baby monitor is only intended as an aid to monitor your baby, it is not a substitute for responsible adult supervision.
- Keep the baby monitor completely out of reach of your baby. The baby monitor is not a toy, and your baby must not play with any of the units or any accessories.
- Be aware of strangulation hazard of the cord/cable and neck strap (when included) and keep cord/cable/neck strap out of reach of your baby.
- Do not expose the baby monitor or battery to direct sunlight, high temperatures, water or excessive moisture or dusty environment.
- Do not cover the baby monitor with towels, clothes, blankets, other fabrics or any other items.
-
Only use original batteries in the units. If you need to replace batteries, check instructions or contact local dealer or Neonate who will provide instructions on how to remove and replace batteries.
-
Only use original charger when charging the batteries/units. Only charge the batteries/units when you are present and can monitor the charging. Ensure the charger and units/batteries do not get unusually hot when charging. If the units/batteries do not charge, or charging takes longer than usual, stop the charging and contact your local dealer or Neonate. When batteries/units are charged, remove them from charger and unplug electrical connections.
- Do not modify, pierce, damage or dismantle the product or the battery. Dismantling the product invalidates the guarantee of the product. If product or batteries get damaged, stop using them. The same applies if the units or batteries get unusually hot under use, smells or in any way deviate from their normal condition. All repairs must only be done by qualified service personnel. Neonate can, in some circumstances, guide and allow end-users to replace certain parts in the products.
- The baby monitor and batteries contain electrical components and chemicals. This means that any disposal of such products must be done according to local regulations and environmental considerations.

Information concerning the disposal of exhausted batteries
The pictured symbol on the left side on batteries, the packing or the enclosed documents signifies that the batteries should not be disposed of at the end of their life cycle together with the domestic waste. Possible added letters under the waste bin signify that the battery contains lead (Pb), cadmium (Cd) or mercury (Hg) . You as consumer are obliged by law to render all kind of batteries (both rechargeable as well as non-rechargeable) inclusive button cells at local places of collection or at the retail market. This is at no charge. The proper disposal enables the recycling of valuable resources and avoids possible negative effects on humans and the environment.

Information concerning the disposal of old electric and electronic products
The pictured symbol on the product, the packing or the enclosed documents signifies that the product should not be disposed of after the end of its life cycle together with the domestic waste. You as consumer are obliged by law to render electric and electronic products at a local place of collection for electronic equipment. This is at no charge. Please take out the batteries before disposal of the product. The proper disposal enables the recycling of valuable resources and avoids possible negative effects on humans and the environment. For further information please contact your local authority or the vendor of the product.
Batteries requires caution!
When charging a battery there is always a small risk that a short-circuit or a malfunction can cause the battery to overheat and catch fire. It is highly recommended that you never charge a battery in an unsupervised environment.
Warning!
- Do not charge the battery without regular supervision.
- Do not charge the batteries through the night.
- Avoid charging the batteries in direct sunlight.
- Keep batteries away from moist environments and steam.
- Do not bend, twist, pierce or deform the battery.
The life of your battery will increase if you try to:
- charge the battery between 25 - 80%
- keep the battery from going to 0% or 100% .
- avoid charging the battery beyond 100% .
It is recommended to replace battery after 600 cycles of charging and discharging.
All Neonate batteries has a 2 year warranty.
Instructions for safe removal of the batteries or accumulators.
Remove the back cover of the device which you intend to remove the battery from. Lift the battery carefully without pulling on the wires. Grasp the wire between the battery and the white battery connector within the battery compartment. Pull gently on the wires so that these are stretched and apply pressure to the white battery connector. Make sure not to pull on the wires placed on the actual battery. The battery connector at the end of the wire should now disconnect from the PCB card within the battery compartment.
The following batteries or accumulators are contained in this electrical device.
Battery type:
Lithium Ion Polymer rechargeable battery
Chemical system:
Lithium Cobalt Dioxide and Graphite
Pairing (connecting) units
NOTE: PU and BU are already paired and ready to use out of the box. Nevertheless, we recommend you to pair the units again to ensure a private connection. If you want to connect another baby unit (or extra baby unit) to the parent unit you need pair units again.
Parent unit: Press and hold the "BU#" button and set the ON/OFF switch to ON position. Do not release the "BU#" button before PAIR is showing in display.


2 Baby unit: Press and hold the "TIMER" button and set the ON/OFF switch to ON position. Do not release the "BU#" button before PAIR is showing in display.


3 Baby unit: Use the + / - buttons to select the baby unit's number 1, 2 or 3). Press the "M" button to confirm your choice. The number you have selected will stop flashing.
4 Baby unit: Press "M" again to confirm the pairing between PU and BU. Two beep sounds will confirm that the units are paired.
Repeat step 2, 3 and 4 if you wish to pair more baby units to the same parent unit.
Both units: Turn the units off and on by setting the ON/OFF switch to OFF, and then back to ON again. The units are now ready to use.
NOTE: If you wish to pair more than one baby unit to the parent unit, you will have pair all the baby units before you proceed with step 5. It is not possible to add/connect more baby units later without pairing them all again.
Turn on and adjusting the temperature alarm
The parent unit must be turned on.
Parent unit: Press and hold the "M" button for 2 seconds. SLEEP TIMER will appear steady and ON or OFF will be flashing in display.
2 Parent unit: Press the "M" button three times. The display changes from SLEEP TIMER to TEMP ALARM HIGH.

3 Parent unit: Use the + / - buttons to select the upper tempera ture limit. If current temperature exceeds chosen temperature, the temperature alarm will go off.
4 Parent unit: Press the "M" button once. The display changes from TEMP ALARM HIGH to TEMP ALARM LOW.

5 Parent unit: Use the + / - buttons to select the lower tempera ture limit. If current temperature goes below chosen temperature, the temperature alarm will go off.
6 Parent unit: Press the "M" button once more. The parent unit will return to standby mode. The upper and lower temperature limits are now adjusted/defined.
NOTE: Both the upper and lower temperature limit can be turned off completely. The upper temperature limit can be turned off by pressing the "+" button until the temperature limit is set at +50^ , and then pressing the "+" button once more. The lower temperature limit can be turned off by pressing the "-" button until the temperature limit is set at -19^ , and then pressing the "-" button once more (OFF will show in display instead of selected temperature limit).
Adjusting the microphone sensitivity of the baby unit(s)
The baby unit must be turned on.
1 Baby unit: Use the + / - buttons to adjust the sensitivity of the microphone. The MIC SENS bar graph at the bottom of the display will be adjusted at the same time to show the current microphone sensitivity. When sensitivity is turned up, lower sounds will be detected easier. When the sensitivity is turned down, the sound has to be louder for the microphone and thereby the baby unit to be activated.
Adjusting the speaker volume of the baby unit
The speaker volume of the baby unit is relevant when the talkback function is used on the parent unit.
The baby unit must be turned on.
1 Baby unit: Press the "M" button once. The speaker icon will appear instead of the MIC SENS icon in the lower left corner on the display.
2 Baby unit: Use the + / - buttons to adjust the volume. The MIC SENS icon will reappear after 5 seconds.
Adjusting the microphone sensitivity of the baby unit(s) through parent unit
The baby unit and the parent unit must be turned on and connected.
1 Parent unit: Press and hold the "M" button for 2 seconds. SLEEP TIMER will appear steady and ON or OFF will be flashing in display.
2 Parent unit: Press the "M" button once. The display changes from SLEEP TIMER to MIC SENSE.
3 Parent unit: Use the + / - buttons to adjust the sensitivity of the microphone. The MIC SENS bar graph at the bottom of the display on the baby unit will be adjusted at the same time to show the current microphone sensitivity. When sensitivity is turned up, lower sounds will be detected easier. When the sensitivity is turned down, the sound needs to be louder for the microphone and thereby the baby unit to be activated.
4 Parent unit: Press the "M" button to confirm chosen microphone sensitivity and to return to standby mode screen.
Using the talkback function (two-way communication)
The baby unit and the parent unit must be turned on and connected.
1 Parent unit: Press and hold the "talk back" button while speaking to baby(unit). Release the button to reopen communication from baby- to parent unit again.
You can select which baby unit you are talking to (up to three different) by pressing the "BU#" button until the correct baby unit is selected.
Turn on night light in baby unit / Change to voice activated (VOX) night light
1 Baby unit: Set the ON/OFF switch to "ON with night light" position.
2 Baby unit: Press the "Night light VOX" button to change if the night light should be on constantly or voice activated (VOX).
Using sleep TIMER function to record sleeping time - how to activate, deactivate, reset and check recorded sleeping hours.
Sleep TIMER function can be activated, deactivated or reset on either baby or parent unit.
1 Baby unit: Press and hold "TIMER" button for 2 seconds to activate or deactivate TIMER function. To reset TIMER function press shortly on "TIMER" button.
2 Parent unit: Press and hold the "M" button for 2 seconds. SLEEP TIMER will appear steady and ON or OFF will be flashing in display.
3 Parent unit: Use the + / - buttons to turn the TIMER function on or off
4 Parent unit: Press the "M" button to confirm your choice.
To check earlier recorded sleeping hours, press "M" button on Parent unit shortly and scroll with + / - buttons.
10 ENGLISH
How to avoid OUT-OF-RANGE alarm when changing from using one or more baby units with a single parent unit
When the parent unit is connected (paired) with more than one baby unit, the parent unit will constantly search for signals from all baby units it is connected with. That means if you pair two baby units to your parent unit but decide to use just one of one them (by turning one BU off) the parent unit will activate the OUT-OF-RANGE alarm indicating that it has lost contact with one baby unit. You can avoid this RANGE alarm in three different ways where we recommend the method described in Section A.:
A When OUT-OF-RANGE is displayed in parent unit (and the baby unit you do not want to use is turned off) you can see a number in the upper right corner indicating which baby unit it has lost contact with.
Parent unit: Press the button once and the display now shows USE + / - BUTTON
(Pressing the M button again will return to display OUT-OF-RANGE)
2 Parent unit: Press + button and the display shows ALARM OFF?
3 Parent unit: Press the M button and display shows ALARM IS OFF
This method is recommended because OUT-OF-RANGE alarm is activated as soon as you decide to turn on the baby unit again.
B Pair only the devices you want to use again. This method is more comprehensive because it requires that you have access to both baby and parent unit and force you to pair each time you change the number of baby units you want to use.
C Enable Zero Radiation Function in the unit that you do not want to use anymore. This will turn off OUT-OF-RANGE alarm permanently and is therefore not recommended because you will not get notice later if the parent unit loses contact with the baby unit. This method requires that the baby unit is turned on at the same time with the parent unit. The method is described further in section on "Turning off / on the Zero-Radiation Function (ZRF)."
Changing between baby units in standby mode
The baby units and the parent unit must be turned on and connected.
1 Parent unit: Press the "BU#" button to select from which baby unit you would like to see information about temperature and battery status.
Changing between baby units in transmit/sending mode
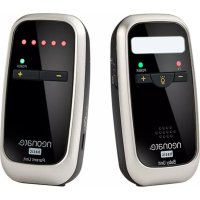
When sound is transmitted from baby unit to parent unit, a LED diode above the LCD display on the parent unit will be lit constantly. There are three LED diodes with different colours (blue, green and red). The colour of the LED diode indicates which baby unit that is currently transmitting sound. If more than one baby unit is transmitting sound at the same time, one of the LED diodes will be lit constantly, while one or two (depending on whether there are one or two other baby units currently transmitting sound) LED diodes will be flashing. A LED diode which is flashing indicates that the baby unit is transmitting sound, but cannot be heard in the parent unit's speaker. A LED diode lit constantly indicates the baby unit is transmitting sound and can be heard in the parent unit's speaker. If all baby units transmits simultaneously, the sound from baby unit no 1 has priority over baby unit no 2, which again has priority over baby unit no 3. (BU 1 = blue, BU 2 = green, BU 3 = red).
When more than one baby unit transmits sound;
Parent unit: Press the "BU#" button to select which baby unit you want to hear through PU's speaker. The LED diodes will update their status (flashing / constant light) when you choose between baby units in transmit mode.

Turning off/on the Zero-Radiation-Function (ZRF)
Activating the Zero Radiation Function makes the baby units stop transmitting signals to the parent unit in standby mode. Radiation = Zero. In standby mode (when the microphone in baby unit is not detecting sound), you will not see temperature or battery status from the baby unit that has activated ZRF. Although, this information will be displayed when the baby is making sound because the information then will be transmitted together with sound signal.
NOTE: When the ZRF is activated, the out-of-range alarm will be deactivated. For this reason, only use the ZRF when you know that the units are within range.
The baby and the parent unit must be turned on and connected to each other.
1 Parent unit: Press and hold the "M" key for 2 seconds. SLEEP TIMER will appear steady and ON or OFF will be flashing in display.
2 Parent unit: Press the "M" button two times. The display changes from SLEEP TIMER to ZRF.
Parent unit: Use the + / - " buttons to turn the Zero Radiation Function on or off. If you activate ZRF, the ZRF icon will appear in both baby and parent unit display.
4 Parent unit: Press the "M" button to confirm your choice.
Repeat step 3 and 4 if there are more than one baby unit connected to parent unit.
5 Parent unit: Press the "M" button three more times to return to standby mode.


Alarms /Warnings
OUT-OF-RANGE alarm/alert is activated after 30 seconds when:
baby- and parent unit is beyond communication range
baby unit is turned off
3 baby unit's power is suddenly cut off (battery completely empty).
An alarm will be heard, LCD-display will show OUT OF RANGE and LCD-light will flash.
TEMPERATURE alarm/alert is activated if
the actual temperature exceeds the selected temperature high limit.
the actual temperature goes below the selected low temperature limit.
An alarm will be heard, LCD-display will show TEMP ALARM and actual temperature will flash together with HIGH or LOW.
LOW BATTERY alarm/alert is activated if
the baby unit's battery power level falls below a certain limit.
he parent unit's battery power level falls below a certain limit.
An alarm will be heard and the battery status indicator (of either baby or parent unit) will flash and LCD-display will show BATTERY POWER LOW.
SMOKE alarm/alert is only working if the smoke detector accessory is purchased. If smoke is detected an alarm will be heard and LCD-display will show SMOKE.
B Par kun de enheder, du onsker at benyte pa ny. Denne metode er mere omfattende, fordi den kraver, at du har adgang til bade baby- og forelderenhed, og fordi du skal oprette parring, hver gang du andrer pa antallet af babyenheder, der skal benyttes. Metoden er beskvet yderligere under punktet "Parring (sammenkobling) af enheder".
C Aktiver nulstrålingsfunktionen (ZRF) i den ench, du不同程度 in the range of the different types of children. The children are divided into two groups: preterm and adult. The preterm children are those children who are born at birth with a normal weight. The adult children are those children who are born at birth with a child's abnormal weight.
The monting kit allows you to position your baby monitor conveniently where you need it.


BELTCLIP
Join the belt clip with the back casing and attach to: belt / inside of stroller hood / wall
CLIP ON HOLDER & VELCRO STRAP
Join the Velcro strap with the back casing and attach to: baby crib / Stroller handle
SUCTION CAP
Join the suction cup with the back casing and attach to: smooth surfaces (furniture) / window
DECLARATION OF CONFORMITY
Noricon AS
Nandrups vei 1 b
0490Oslo
NORGE
Declaresthatthe followingprodukt:
Model Neonate BC-6900D is compliant
with the following relative harmonized
standards:
EN300220-1V3.1.1[2017-02]
EN 300 220-2 V3.2.1 [2018-06]
EN301489-1V2.2.3[2019-11]
EN301489-3V2.1.1[2019-03]
EN 62368-1:2014+A11:2017
EN62479:2010
EN 50663:2017
In accordance with the requirements set forth by the RED directive (2014/53/EU) regarding radio and telecommunications terminal equipment and mutual recognition of their conformity.
Name: Glenn Ulverud
Position: CEO
Date: 20.10.2020

www.neonate.no
DECLARATION OF CONFORMITY
Noricon AS
Nandrups vei 1 b
0490Oslo
NORGE
Declarethat the followingprodukt:
Model Neonate BC-6500D is compliant
with the following relative harmonized
standards:
EN300220-1V3.1.1[2017-02]
EN300220-2V3.2.1[2018-06]
EN301489-1V2.2.3[2019-11]
EN301489-3V2.1.1[2019-03]
EN62368-1:2014+A11:2017
EN 62479:2010
EN 50663:2017
In accordance with the requirements set forth by the RED directive (2014/53/EU) regarding radio and telecommunications terminal equipment and mutual recognition of their conformity.
Name: Glenn Ulverud
Position: CEO
Date: 20.10.2020

www.neonate.no


Operating frequency: 863-870MHz
Output Power :
Baby unit : 12dBm
Parent unit:12dBm
EU AUTHORISED REPRESENTATIVE
NORICON AS, CVR-NR. DK35493867
THOMAS BERGS GADE 12
DK-9900 FREDERIKSHAVN
DENMARK
neonate
www.neonate.no