
TIAA 10 V.1 - Refrigerator INDESIT - Free user manual and instructions
Find the device manual for free TIAA 10 V.1 INDESIT in PDF.
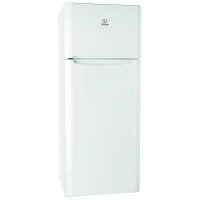



| Product type | Refrigerator |
| Brand | Indesit |
| Model | TIAA 10 V.1 |
| Power supply | 220-240 V, 50 Hz |
| Defrost | Automatic (No-Frost) |
| Lighting | LED |
| Open door alarm | Yes (after 5 minutes, LED flashing; after 8 minutes, off) |
| Quick cooling | Yes (for large quantities of food) |
| Fan | Yes (active by default, with antibacterial filter on some models) |
| Temperature setting | Preset at factory, adjustable via startup guide |
| Door reversal | Possible (see manual) |
| Installation | Rear space of at least 50 mm; space on sides and above required |
| Cleaning | Soft cloth and warm water with mild detergent; do not use abrasives or steam cleaner |
| Condenser maintenance | Clean regularly with a vacuum cleaner (at the back) |
| Door gasket | Clean regularly with water |
| After-sales service | Contact for spare parts, repairs, LED light replacement |
| Warranty | Not specified (refer to after-sales service) |
Frequently Asked Questions - TIAA 10 V.1 INDESIT
User questions about TIAA 10 V.1 INDESIT
0 question about this device. Answer the ones you know or ask your own.
Ask a new question about this device
Download the instructions for your Refrigerator in PDF format for free! Find your manual TIAA 10 V.1 - INDESIT and take your electronic device back in hand. On this page are published all the documents necessary for the use of your device. TIAA 10 V.1 by INDESIT.
USER MANUAL TIAA 10 V.1 INDESIT
Chapter 1: INSTALLATION 5
1.1 INSTALLING SINGLE APPLIANCE 5 1.2 INSTALLING TWO APPLIANCES 5 1.3 ADJUST DOORS (If available) 5
Chapter 2: FUNCTIONS 6
2.1 DOOR OPEN ALARM 6 2.2 FAST COOLING 6 2.3 FAN* 6 2.4 TEMPERATURE SETTING 6 2.5 NO-FROST REFRIGERATOR COMPARTMENT 6 2.6 REFRIGERATOR LIGHT 6
Chapter 3: USE
3.1 NOTES 7
Chapter 4: FOOD-STORAGE TIPS
4.1 AIR VENTILATION 7 4.2 HOW TO STORE FRESH FOOD AND BEVERAGE 7 4.3 WHERE TO STORE FRESH FOOD AND BEVERAGE 7
Chapter 5: FUNCTIONAL SOUNDS 8
Chapter 6: RECOMMENDATION IN CASE OF NO USE OF THE APPLIANCE 9
6.1 ABSENCE/VACATION 9 6.2 MOVING 9 6.3 POWER FAILURE 9
Chapter 7: MAINTENANCE AND CLEANING 9
Chapter 8: TROUBLESHOOTING GUIDE 10
8.1 BEFORE CONTACTING AFTER-SALES SERVICE 10 8.2 FAILURES 10
Chapter 9: AFTER-SALES SERVICE 11
Others: REVERSE DOOR SWING 132
NOTE:
The instructions apply to several models, so there may be differences. Sections which only apply to certain appliances are indicated with an asterisk (*).
Functions which are dedicated specially for your already bought model of product you will find in QUICK START GUIDE.
1. INSTALLATION
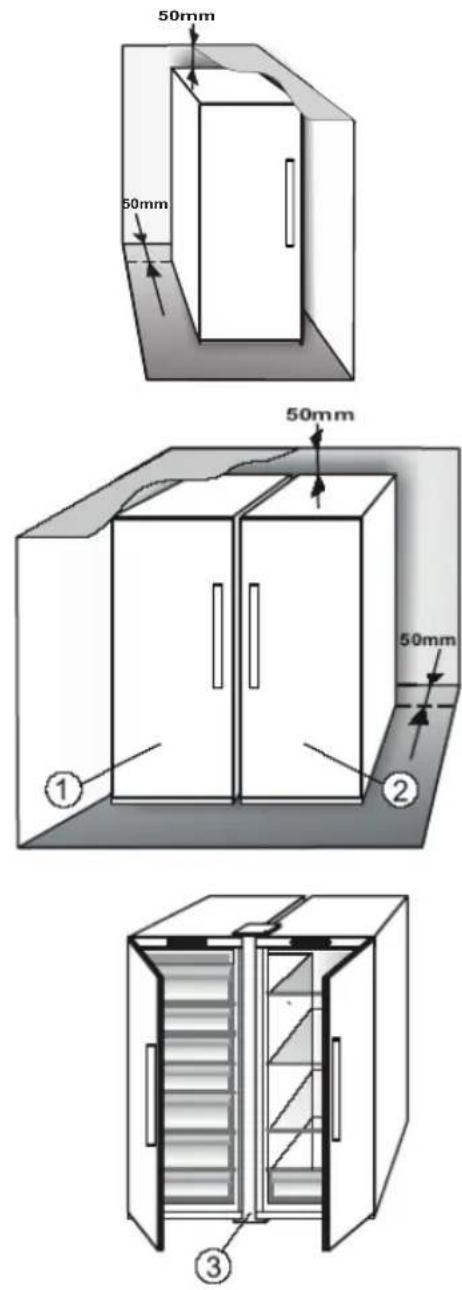
1.1. INSTALLING SINGLE APPLIANCE
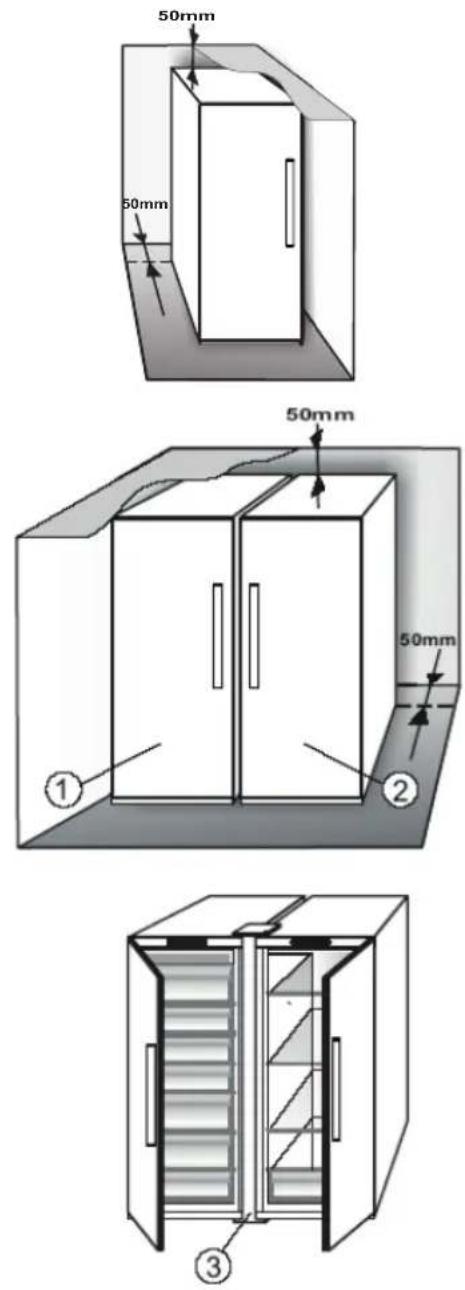
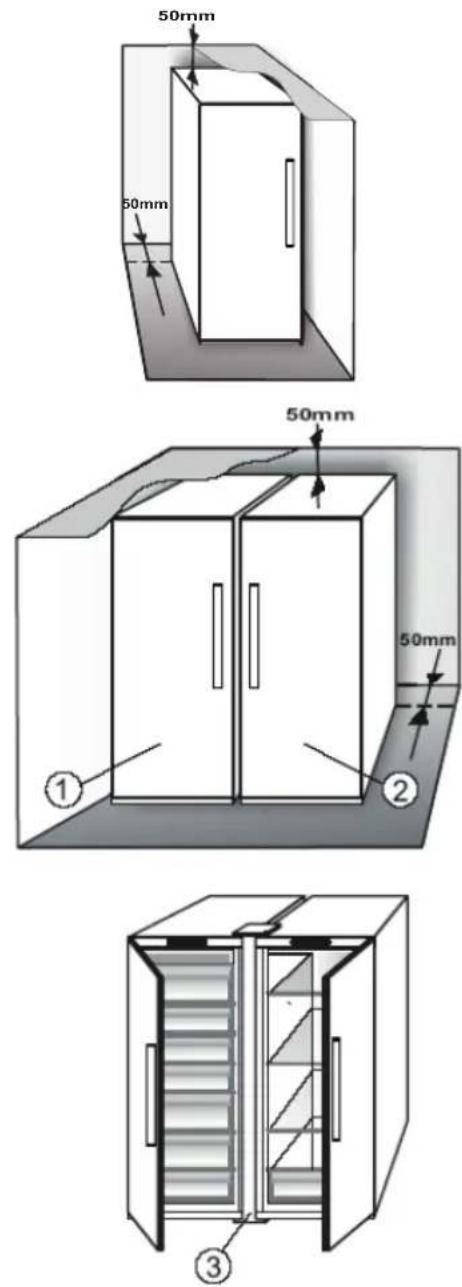
To guarantee adequate ventilation, leave a space on both sides and above the appliance.
The distance between the rear of the appliance and the wall behind the appliance should be at least 50 mm.
A reduction of this space will increase the Energy consumption of product.
1.2. INSTALLING TWO APPLIANCES
During installing the freezer (1) and the fridge (2) together ensure that the freezer is located on the left and the fridge on the right (as shown on the drawing). Left side of refrigerator is equipped with special device in order to avoid condensation problems between appliances.
We recommended installing two appliances together using the linking-kit (3) (as shown on the drawing). You can buy it in Service.
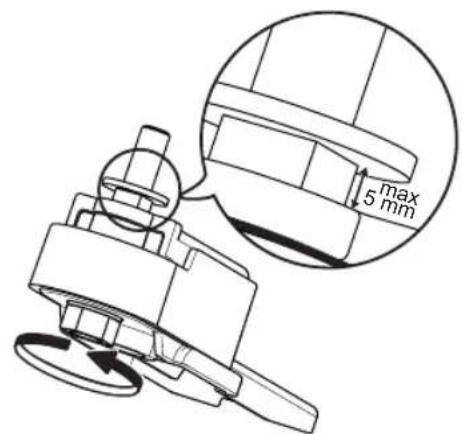
1.3. ADJUST DOORS (If available)
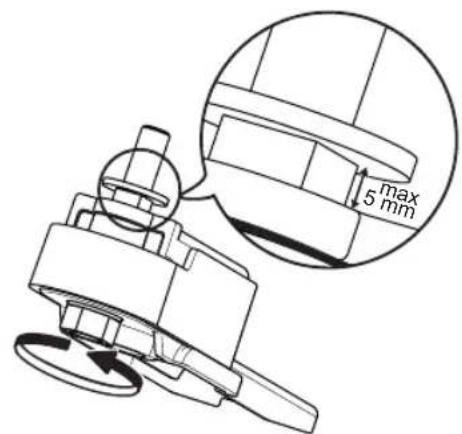
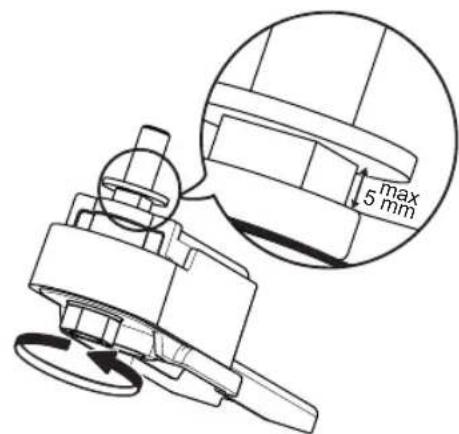
To level the doors using the adjustable lower hinge (select models)
If the refrigerator door is lower than the freezer door, raise the refrigerator door by turning the adjustment screw counterclockwise using a M10 wrench.
If the freezer door is lower than the refrigerator door, raise the freezer door by turning the adjustment screw counterclockwise using a M10 wrench.
2. FUNCTIONS
2.1. DOOR OPEN ALARM
The Door Open Alarm is activated when the door is left open for more than 5 minutes. Indication of the alarm is shown by the blinking of the LED Door Light. If the door is left open more than 8 minutes the LED Door Light switches off.
2.2. FAST COOLING
The use of this function is recommended when placing a very high quantity of food in the refrigerator compartment.
Using Fast Cooling function it is possible to increase the cooling capacity in the refrigerator compartment. To maximize the cooling capacity, please keep the fan switch on.
2.3. FAN*
The Fan improves temperature distribution inside the product, allowing better preservation of stored food. By default, the fan is switched on. It is advisable to keep the fan switched on when the ambient air temperature is above 27-28°C or if you notice drops of water on the glass shelves or in severe humidity conditions. Please note that when the fan is switched on it will not continuously work. The fan will start/stop working depending on the temperature and/or humidity level inside the product. It is therefore absolutely normal if the fan does not move even if the fan is switched on. To activate or deactivate this function - see enclosed Quick Start Guide.
Note:
Do not obstruct the air intake area with food items.
To guarantee the right performance at lower ambient temperature (colder than 18°C) and to minimize Energy Consumption, turn off the fan.
If the appliance has the Fan it can be equipped with the antibacterial filter.
Remove it from the box placed in the crisper drawer and insert into the cover of fan.
The replacement procedure is included in the filter box.
2.4. TEMPERATURE SETTING
The appliance is normally factory-set for operation at the recommended medium temperature.
For details of setting temperature - see enclosed Quick Start Guide.
Note: Displayed set points correspond to the average temperature throughout the whole refrigerator
2.5. NO-FROST REFRIGERATOR COMPARTMENT
Refrigerator compartment defrosting is completely automatic.
Droplets of water on the rear wall inside the refrigerator compartment indicate that the automatic defrost phase is in progress. The defrost water is automatically run into a drain hole and collected in a container, where it evaporates.
2.6. REFRIGERATOR LIGHT
The light system inside the fridge compartment uses LEDs light, allowing a better lightning as well as very low energy consumption.
If the LED light system does not work, please contact the Service to replace it.
Important:
The refrigerator compartment light switches on when the refrigerator door is opened. If the door is kept open for more than 8 minutes the light will be automatically switched off.
3. USE
3.1. NOTES
- Do not block the air outlet area (on the back wall inside the product) with food products.
- All shelves, flaps and pull-out baskets are removable.
- The internal temperatures of the appliance may be affected by the ambient temperature, frequency of door opening, as well as location of the appliance. Temperature setting should take into consideration these factors. Unless otherwise specified the appliance accessories are not dishwasher safe.
4. FOOD-STORAGE TIPS
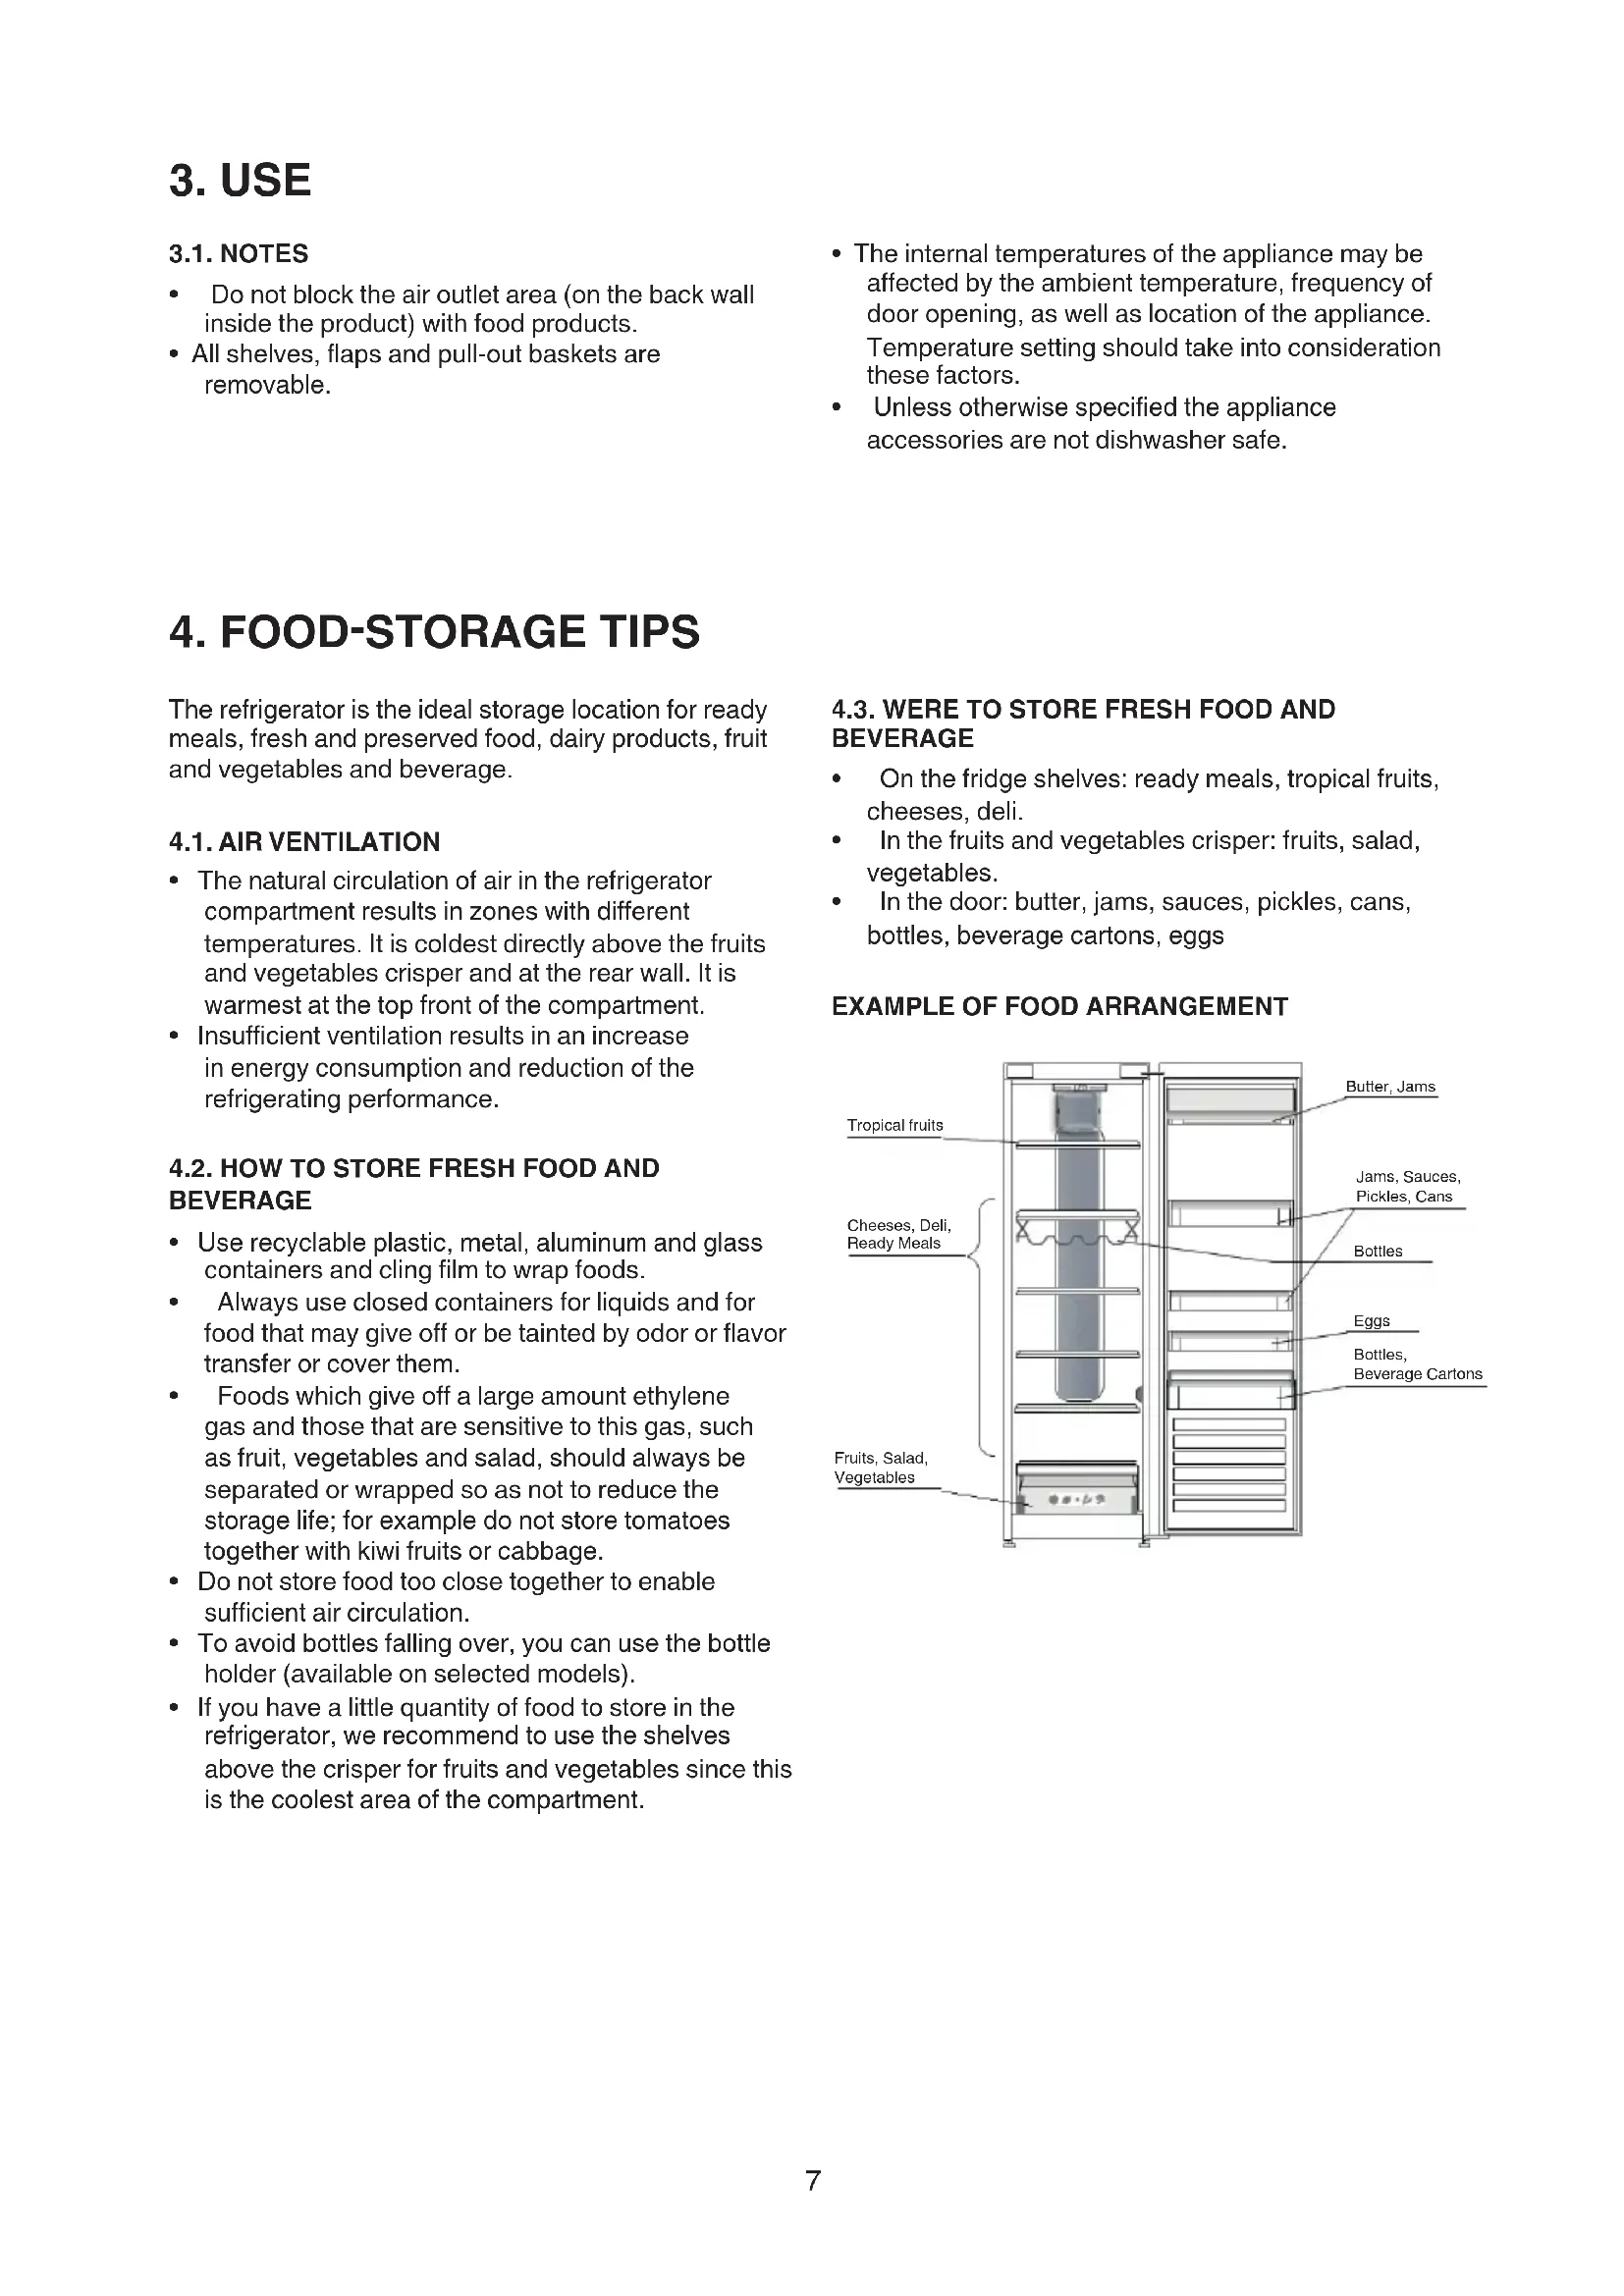
The refrigerator is the ideal storage location for ready meals, fresh and preserved food, dairy products, fruit and vegetables and beverage.
4.1. AIR VENTILATION
- The natural circulation of air in the refrigerator compartment results in zones with different temperatures. It is coldest directly above the fruits and vegetables crisper and at the rear wall. It is warmest at the top front of the compartment. Insufficient ventilation results in an increase in energy consumption and reduction of the refrigerating performance.
4.2. HOW TO STORE FRESH FOOD AND BEVERAGE
- Use recyclable plastic, metal, aluminum and glass containers and cling film to wrap foods. Always use closed containers for liquids and for food that may give off or be tainted by odor or flavor transfer or cover them.
- Foods which give off a large amount ethylene gas and those that are sensitive to this gas, such as fruit, vegetables and salad, should always be separated or wrapped so as not to reduce the storage life; for example do not store tomatoes together with kiwi fruits or cabbage.
- Do not store food too close together to enable sufficient air circulation.
- To avoid bottles falling over, you can use the bottle holder (available on selected models).
- If you have a little quantity of food to store in the refrigerator, we recommend to use the shelves above the crisper for fruits and vegetables since this is the coolest area of the compartment.
4.3. WHERE TO STORE FRESH FOOD AND BEVERAGE
- On the fridge shelves: ready meals, tropical fruits, cheeses, deli.
- In the fruits and vegetables crisper: fruits, salad, vegetables. In the door: butter, jams, sauces, pickles, cans, bottles, beverage cartons, eggs
EXAMPLE OF FOOD ARRANGEMENT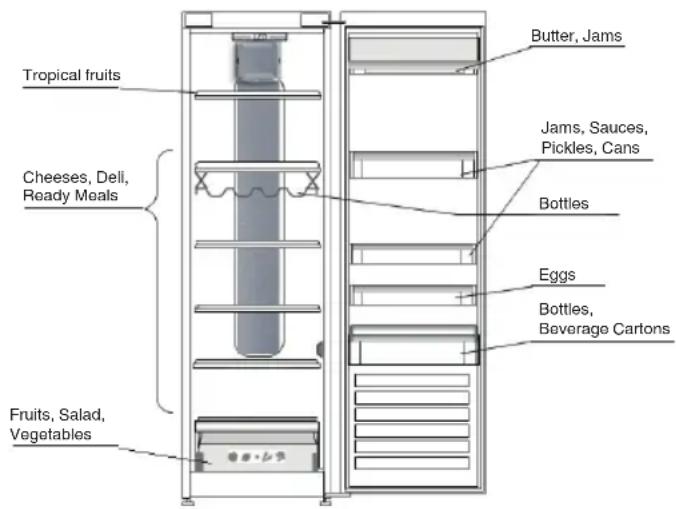
5. FUNCTIONAL SOUNDS
Sounds coming from your appliances are normal since it has a number of fans and engines to regulate performances that switch on and off automatically.
Some of the functional sounds can be reduced through
- Leveling the appliance and installing it on an even surface.
- Separating and avoiding contact between the appliance and furniture.
- Checking if the internal components are correctly placed.
- Checking if bottles and containers are not in contact with each other.
Some of the functional sounds you might hear:
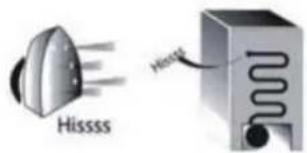
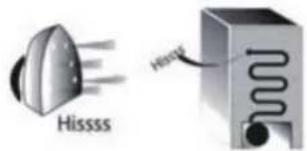
A hissing sound when switching on the appliance for the first time or after a long pause.
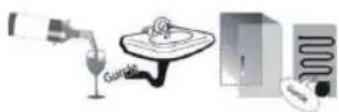
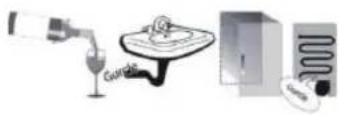
A gurgling sound when refrigerant fluid enters into the pipes.
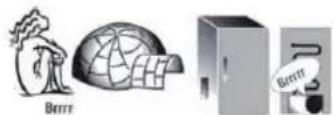
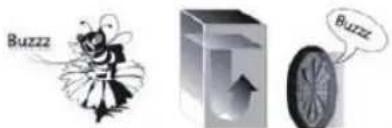
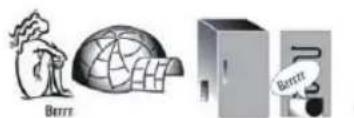
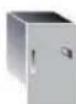
BRRR sound is from the compressor running.
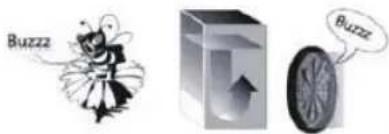
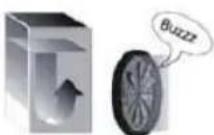
Buzzing sound when water valve or fan start working.
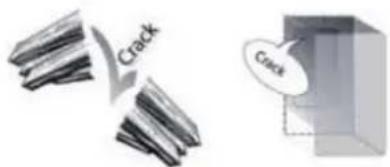
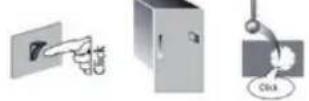
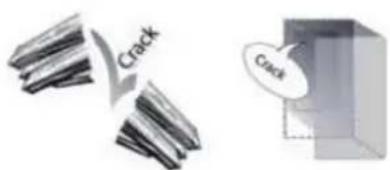
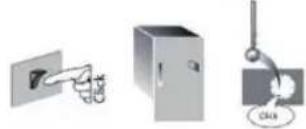
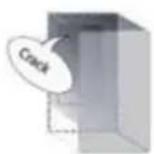
A cracking sound when the compressor starts, or when ready ice drops into the ice box, and abrupt clicks when the compressor switches on and off.
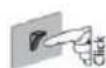
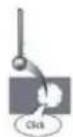
The click comes from the thermostat, which regulates how often the compressor runs.
6. RECOMMENDATION IN CASE OF NON-USE OF THE APPLIANCE
6.1. ABSENCE/VACATION
In case of vacation, it is recommended to use up the food and disconnect the appliance to save energy.
6.2. MOVING
- Take out all internal parts.
- Wrap them well and fix them together with adhesive tape so they do not bang together or get lost.
- Screw the adjustable feet so they do not touch the support surface.
- Close and fix the door with adhesive tape, and, again using adhesive tape, fix the power cable to the appliance.
6.3. POWER FAILURE
In the event of a power failure, call the local office of your electricity supply company and ask how long it is going to last.
Note: Bear in mind that a full appliance will stay cold longer than a partially filled one.
If food is found to be in a poor condition, it is best to throw it away.
For power failures lasting up to 24 hours.
- Keep the door of the appliance closed. This will allow the stored food to stay cold as long as possible.
For power failures lasting more than 24 hours.
- Try to use up the food, which is more easily perishable.
7. MAINTENANCE AND CLEANING
Before any cleaning or maintenance operation, unplug the appliance from the mains or disconnect the electrical power supply.
Periodically clean the appliance with a cloth and a solution of lukewarm water and neutral detergent specifically for refrigerator interiors. Never use abrasives. Never clean refrigerator parts with flammable fluids. The fumes can create a fire hazard or explosion. Clean the outside of the appliance and the door seal with a damp cloth and dry with a soft cloth. Do not use steam cleaners.
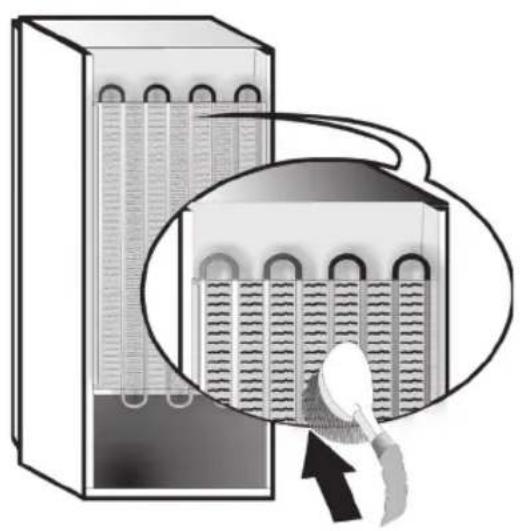
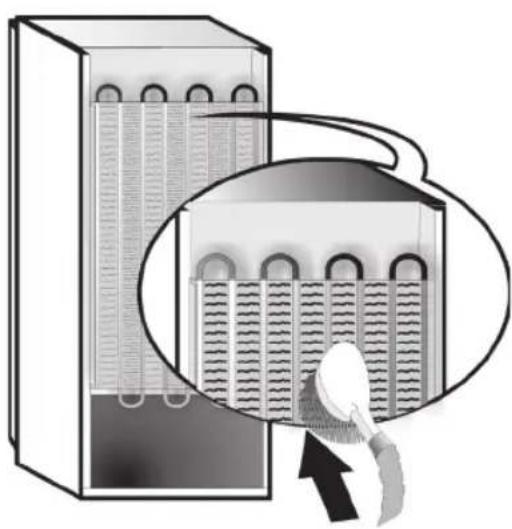
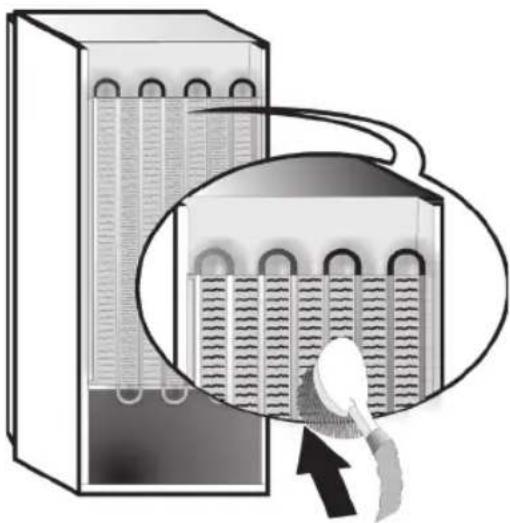
Condenser placed in the rear of the appliance should be cleaned regularly using a vacuum cleaner.
Condenser placed in the rear of the appliance should be cleaned regularly using a vacuum cleaner.
Important:
- The buttons and control panel display must not be cleaned with alcohol or alcohol-derived substances, but with a dry cloth.
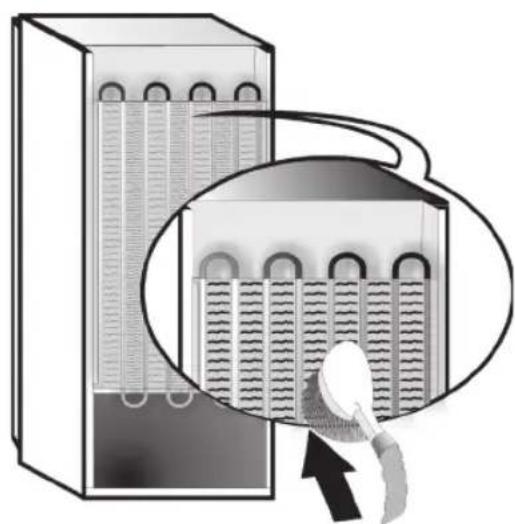
- The refrigeration system pipes are located near the defrost pan and can become hot. Periodically clean them with a vacuum cleaner.
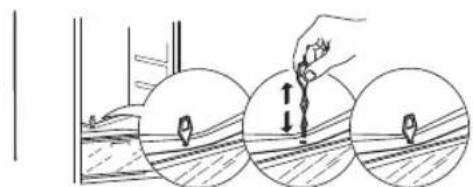
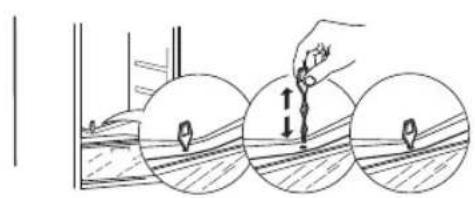
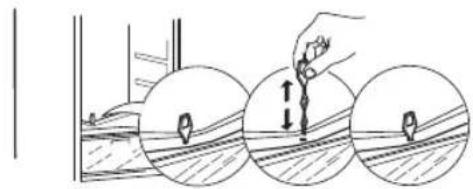
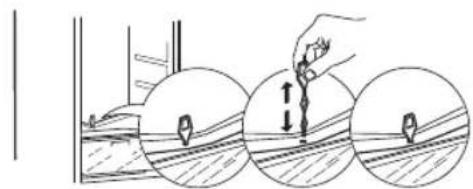
To ensure continuous and correct flow of defrost water, regularly clean the inside of the draining hole on the back of the refrigerator near the fruit and vegetable drawer, using the tool provided.
8. TROUBLESHOOTING GUIDE
8.1. BEFORE CONTACTING AFTER-SALES SERVICE...
Performance problems often result from little things you can find and fix yourself without tools of any kind.
| PROBLEM SOLUTION | |
| The appliance is not working: • Is the | power cable plugged into a live socket with the proper voltage? • Have you checked the protection devices and fuses of the electrical system in your home? |
| If there is water in the defrost pan: | This is normal in hot, damp weather. The pan can even be half full. Make sure the appliance is level so that the water does not overflow. |
| If the edges of the appliance cabinet, which come in contact with the door seal, are warm to the touch: | This is normal in hot weather and when the compressor is running. |
| If the light does not work: • Have you checked the protection devices and fuses of the electrical system in your home? • Is the power cable plugged into a live socket with the proper voltage? • In case the LEDs are broken the user must call the Service for exchange of the same type available only at our After-sales Service Centers or authorized dealers. | |
| If the motor seems to run too much: | Motor running time depends on different things: number of door openings, amount of food stored, temperature of the room, setting of the temperature controls. Is the condenser (back the appliance) free of dust and fluff? Are the door properly closed? Are the door seals properly fitted? On hot days or if the room is warm, the motor naturally runs longer. If the appliance door has been left open for a while or if large amounts of food have been stored, the motor will run longer in order to cool down the interior of the appliance. |
| If the appliance temperature is too high: | Are the appliance controls correctly set? Has a large amount of food been added to the appliance? Check that the door is not opened too often. Check that the door close properly. |
| If the doors do not open and close properly: | Check that food packages are not blocking the door. Check that the internal parts or automatic ice maker are not out of position. Check that the door seals are not dirty or sticky. Ensure the appliance is level. |
8.2. FAILURES
When any failure appears, any LED indicator starts blinking. It is necessary to call service. The appliance will work preserving the food stored.
Note: In case of power failure, the appliance goes back to normal operation and the previously chosen temperature setpoint is restored.
9. AFTER-SALES SERVICE
Before contacting After-Sales Service:
Switch the appliance on again to see if the problem has been solved. If it has not, disconnect the appliance from the power supply and wait for about an hour before switching on again.
If, after performing the checks described in the Troubleshooting Guide and switching the appliance on again, your appliance still does not work properly, contact the After-sales Service and explain the problem.
Specify:
- the model and appliance serial number (stated on the rating plate), the nature of the problem,
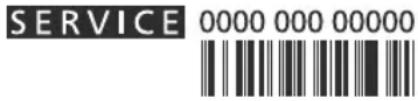
- the Service number (the number after the word SERVICE on the data plate on the inside of the appliance),
- your full address,
- your telephone number and area code.
Note:
The direction of door opening can be changed. If this operation is performed by After-sales Service, it is not covered by the warranty.
Chapter 1: Installation 13
1.1. Installation on a single device 13 1.2. Installation on two devices 13 1.3. Reversing the device (or disassembly) 13
Chapter 2: Functions 14
2.1. Open door alarm 14 2.2. Rapid cooling 14 2.3. Ventilator* 14 2.4. Temperature setting 14 2.5. Ice maker without water supply 14 2.6. Refrigerator lighting 14
Chapter 3: Operation 15
3.1. Starting up 15
Chapter 4: Advice on food storage 15
4.1. Ventilation requirements 4.2. How fresh food is stored 15 4.3. How to store fresh food and drinks 15
Chapter 5: Noise during operation 16
Chapter 6: Troubleshooting when the device is not in use...17
6.1. Responsibility/Liability 6.2. Advantages 17 6.3. Interruption of power supply 17
Chapter 7: Maintenance and care... 17
Chapter 8: Troubleshooting guide 18
8.1. Precautions for electrical maintenance... 18 8.2. Malfunctions 18
Chapter 9: After-sales service 19
Door: OBRESHANE HA OTVARNETO VRATA 132
ZABELESHKA:
The instructions refer to the specific model, but there may be differences. Differences that apply only to a specific device are marked with an asterisk (*).
The measurements indicated apply specifically to your model of the product, in accordance with the instructions for installation.
1. INSTALLATION
1.1. INSTALLING A SINGLE DEVICE
To ensure proper ventilation, leave space on both sides of the device.
The distance between the rear part of the device and the wall behind it must be at least 50 mm.
Reducing this space will increase the energy consumption of the product.
1.2. INSTALLING TWO DEVICES
When installing a freezer ① and a refrigerator ② together, make sure that the freezer is on the left and the refrigerator is on the right (as shown in the illustration). The right side of the refrigerator is equipped with a special device to avoid problems with condensation between the devices.
It is recommended that both devices be installed together using the connection kit ③ (as shown in the illustration). You can purchase it from the service department.
1.3. ADJUSTING THE DOORS (if applicable)
To adjust the doors using the adjusting screw (selected models)
If the refrigerator door is lower than the freezer door, raise the refrigerator door by turning the adjusting screw counterclockwise using a 10 mm wrench.
If the refrigerator is not cooling, adjust the thermostat by turning the temperature control knob back to the set point using the supplied M10 key.
2. FUNCTIONS
2.1. OPEN DOOR ALARM
The open door alarm is activated when the door is left open for more than 5 minutes. The alarm is signaled by the flashing of the door light. If the door is left open for more than 8 minutes, the door light turns off.
2.2. QUICK COOLING
It is recommended to use this function when a very large quantity of food is placed in the refrigerator compartment.
By using the "Quick Cooling" function, the cooling capacity in the refrigerator compartment can be increased. For maximum cooling capacity increase, leave the fan on.
2.3. FAN*
The fan improves the temperature distribution in the compartment, allowing good storage of the food stored in it. The fan is on by default. It is recommended to leave the fan on when the ambient temperature is above 27-28°C, or if you notice water droplets on the shelves or high humidity. Note that when the fan is on, it does not run continuously. The fan will run and stop depending on the temperature and/or humidity level inside. Therefore, it is normal if the fan is not running even when it is on. To turn the fan on or off, see the quick start guide.
Note:
Do not block the air inlet area with food products.
To ensure proper operation at lower ambient temperatures (below 18°C) and for minimal energy consumption, turn off the fan.
If the appliance is equipped with a fan, it can be fitted with an activated carbon filter.
Remove the filter from its packaging, which is placed in the accessory bag, and insert it into the fan duct. The replacement procedure is included in the filter bag.
2.4. TEMPERATURE SETTING
The appliance is factory set to operate at the recommended temperature. For details on temperature setting, see the quick start guide.
Note: The set values correspond to the average temperature in the entire cabinet.
2.5. DEFROSTING OF THE REFRIGERATOR WITHOUT FREON
Defrosting of the refrigerator compartment is fully automatic.
The formation of water droplets on the rear inner wall of the refrigerator compartment indicates that automatic defrosting is in progress. The water from defrosting is automatically drained into the drain tray and collected there, where it evaporates.
2.6. LIGHTING OF THE REFRIGERATOR
The lighting system in the refrigerator compartment uses LED lamps, which provide both better illumination and very low energy consumption.
If the LED lighting system fails, contact the service department for repair.
Important:
When the refrigerator door is opened, the lighting of the refrigerator compartment is switched on. If the door is left open for more than 8 minutes, the lighting will switch off automatically.
3. OPERATION
3.1. NOTES
Do not block the air outlet areas (on the rear wall inside the appliance) with stored products. The air outlets are essential for proper air circulation.
The internal temperature of the appliance may vary depending on the ambient temperature, the frequency of door opening, and the location of the appliance. When setting the temperature, these factors should be taken into account. Unless otherwise specified, the appliance accessories are not suitable for use in a microwave oven.
4. TIPS FOR STORING FOOD
Instructions for proper storage of food, fish, and preserves, meat products, vegetables, and drinks.
4.1. Air circulation
Natural air circulation occurs when the refrigerator is switched on. The coldest area is directly above the vegetable drawer and at the rear wall. The warmest area is in the upper front part of the compartment. Insufficient ventilation may increase energy consumption and reduce cooling performance.
4.2. How to store fresh food and drinks
- Use plastic, metal, aluminum, and steel containers that can be recycled, as well as cling film for wrapping food. Avoid using closed containers for food that releases gases or may absorb odors and flavors, or cover them. Foods that release large amounts of ethylene and foods sensitive to this gas, such as fruits, vegetables, and salads, should be separated or wrapped to prevent spoilage. For example, do not store tomatoes with cucumbers or lettuce. Do not store food uncovered near other food to allow sufficient air circulation. To avoid odor transfer, you can use the odor absorber (available on some models). If you have a small amount of food to store in the refrigerator, we recommend using the shelves above the vegetable drawer, as this is the coldest area of the compartment.
4.3. Where to store fresh food and drinks
On the shelves in the refrigerator: ready meals, dairy products, cheese, desserts. In the vegetable drawer: fruits, salads, vegetables. On the door: butter, jam, sauces, pickles, preserves, bottles, drinks, eggs.
EXAMPLE OF OPTIMAL LOADING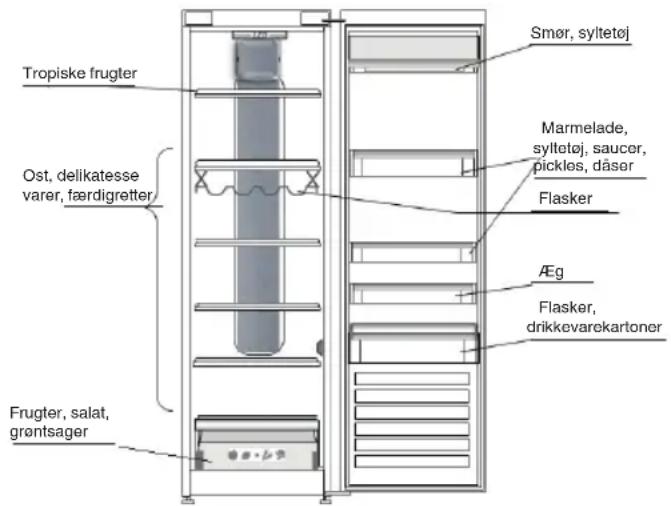
5. FUNCTIONAL SOUNDS
Chapter 2: FUNCTIONS 38
2.1. Door open alarm 38 2.2. Fast cooling 38 2.3. Fan* 38 2.4. Temperature setting 38 2.5. No-frost frost-free refrigerator compartment 38 2.6. Interior light 38
Chapter 3: USE 39
3.1. Notes 39
Chapter 4: TIPS FOR FOOD STORAGE 39
4.1. Air circulation 39 4.2. Storage instructions for fresh food and drinks 39 4.3. Storage locations for fresh food and drinks 39
Chapter 5: OPERATING INSTRUCTIONS 40
Chapter 6: RECOMMENDED ACTIONS IF THE DEVICE IS NOT USED 41
6.1. LONG ABSENCE / HOLIDAY PERIOD 41 6.2. MOVING 41 6.3. POWER OUTAGE 41
Chapter 7: DEVICE MAINTENANCE AND 41
Chapter 8: TROUBLESHOOTING GUIDE 42
8.1. BEFORE CONTACTING SERVICE 42 8.2. FAULTS 42
Chapter 9: SERVICE 43
Other: REPLACING THE DOOR GASKET 132
NOTE:
Chapter 4: SAFETY INSTRUCTIONS 63
4.1. FOR CHILDREN 63 4.2. SAFETY INSTRUCTIONS FOR USE 63 4.3. SAFETY INSTRUCTIONS FOR INSTALLATION 63
Chapter 5: FUNCTIONAL DESCRIPTION 64
Chapter 6: RECOMMENDED ACTIONS IF THE DEVICE IS NOT USED 65
6.1. LONG ABSENCE / HOLIDAY PERIOD 65 6.2. MOVING 65 6.3. POWER OUTAGE 65 Chapter 7: TECHNICAL MAINTENANCE AND CLEANING 65
Chapter 8: TROUBLESHOOTING GUIDE 66
8.1. SERVICE TO THE USER: GENERAL INFORMATION 66 8.2. MALFUNCTIONS 66 SECTION 9: SERVICE TO THE USER IN SPECIAL CASES 67
Contents:
OPENING AND CLOSING THE DOOR 132
EXPERTS:
These instructions are intended for use by certain devices, so modifications may occur. Specific applications for particular structures are indicated with the symbol (*).
The functions intended for your purchased device may differ from those described in these instructions.
1. INSTALLATION
1.1. INSTALLING A SINGLE DEVICE
To ensure trouble-free operation of the device, install it on a flat and level surface.
The distance between the device and the wall behind it should be at least 50 mm.
Keep this space free from obstructions.
1.2. INSTALLING TWO DEVICES
When installing the left device ① and the right device ② together, place the left device on the left side and the right device on the right side (as shown in the figure). To prevent condensation between the devices, the right side of the left device should be in contact with the left side of the right device.
The two devices can be installed together using the connecting kit ③ (as shown in the figure). They can be purchased from the service organization.
1.3. ADJUSTING THE DOORS (if applicable)
The temperature of the meat is determined by the thermometer (keypad indicator).
If the meat is not cooked enough, set the temperature to M10 to increase the cooking time.
If the meat is overcooked, set the temperature to M10 to decrease the cooking time.
2. FUNCTIONS
2.1. OPEN DOOR ALARM
If the door remains open for more than 5 minutes, the door alarm will sound. The alarm is indicated by a flashing light and an audible signal. If the door remains open for more than 8 minutes, the audible alarm will sound continuously.
2.2. QUICK COOLING
This function is used when a large amount of food needs to be cooled quickly.
The quick cooling function increases the cooling capacity of the refrigerator. To increase the cooling capacity, install the additional fan.
2.3. HEATER*
The heater maintains the temperature inside the refrigerator, allowing better preservation of food. In cold conditions, the heater can be turned on. If the ambient temperature is above 27-28°C or if the food is too hot, the heater should not be used. When the heater is on, check the humidity level every 3 hours. The heater is controlled by the temperature inside the refrigerator and/or the ambient temperature. If the heater is on and the refrigerator is not cooling, it may be due to a faulty compressor. To turn this function on or off, press and hold the button for a few seconds.
Caution:
Do not touch the heating element with bare hands.
If the refrigerator temperature is too low (below 18°C), the compressor may not start, so turn on the heater to prevent freezing.
If the heater is faulty, it may cause bacterial contamination.
The freezer compartment is designed for freezing fresh food and storing frozen food.
The defrosting procedure is carried out automatically.
2.4. TEMPERATURE PARAMETERS
The temperature in the freezer compartment is set automatically for optimal storage.
To set the temperature, use the temperature control knob located inside the compartment.
Note: The temperature in the compartment may vary depending on the ambient temperature.
2.5. NO-FROST (FROST-FREE) SYSTEM
The freezer compartment is equipped with an automatic defrosting system.
The automatic defrosting process prevents ice buildup on the inner walls of the freezer compartment. The defrost water is automatically drained and evaporated, so no manual defrosting is required.
2.6. FREEZER COMPARTMENT DOOR
The door of the freezer compartment can be opened and closed easily. The door seal ensures a tight closure, preventing cold air from escaping.
If the door is left open for a long time, the temperature inside will rise, and the compressor will work harder to cool it down.
Note:
When the freezer compartment door is opened, the interior light turns on. If the door remains open for more than 8 minutes, the light will automatically turn off.
3. Usage
This appliance is intended for household and similar applications (e.g., in staff kitchens, shops, offices, and other workplaces).
The temperature inside the appliance depends on the ambient temperature, the frequency of door opening, and the location of the appliance. These factors should be considered when setting the temperature. If not, the required temperature may not be reached in the appliance.
4. FOOD STORAGE COMPARTMENTS
The refrigerator is a place for storing fresh food, beverages, canned food, dairy products, fruits and vegetables, and drinks.
4.1. FRESH FOOD ZONE
The refrigerator is designed to maintain low temperatures for storing fresh food. Fruits and vegetables should be stored in the lower part and in the special drawers. The upper part of the refrigerator is colder. - The temperature in the refrigerator can be adjusted using the thermostat knob, and the temperature inside the refrigerator can be monitored.
4.2. STORING FOOD AND DRINKS
When storing food in plastic, metal, aluminum, and glass containers, use containers that are suitable for food storage. For drinks and food that can be stored in open containers, use containers with lids or cover them. To reduce the smell of food and drinks, store them in closed containers or wrap them. Store raw meat, poultry, and fish separately from other foods. Do not store food that has passed its expiration date. To prevent cross-contamination, use separate cutting boards (e.g., for meat and vegetables). If the refrigerator is not full, store food in the coldest part, which is usually the upper shelf.
4.3. PLACE FOR STORING FOOD AND DRINKS
In the refrigerator: fresh meat, tropical fruits, herbs, delicatessen. In the meat and vegetable drawer: meat, salad, vegetables. In the door: butter, cheese, sauces, canned goods, eggs, drinks, yogurt.
FOOD PLACEMENT RECOMMENDATIONS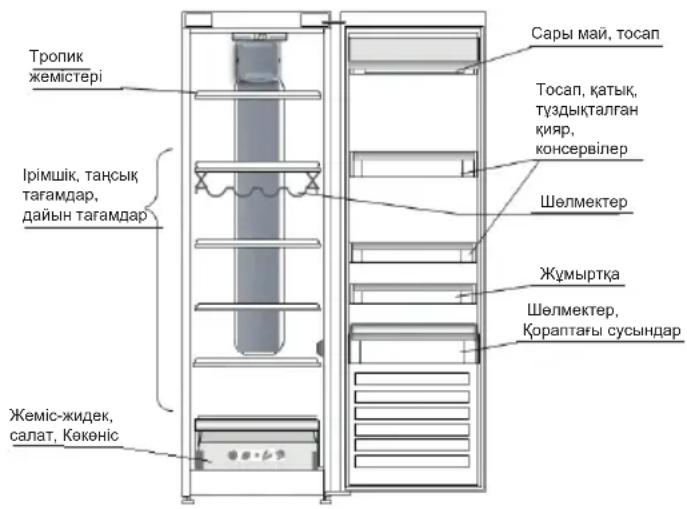
5. FUNCTIONAL PARTS
The parts used in the refrigerator are numerous, including the thermostat, which regulates the temperature, and the motor, which is connected to the compressor.
Some functional parts may be available as accessories:
Remove the protective cover from the device. Do not allow the device to come into contact with water or other liquids. Do not operate the device with damaged cables. -Check the cables and connectors for damage.
The following functions are available:
The device is turned on when the power button is pressed and held for a few seconds.
The device is turned off when the power button is pressed and held for a few seconds.
The "OFF" function is activated when the compressor is turned off.
The function is activated when the water tap or valve is opened.
If the compressor is not working, the air from the tank is released through the safety valve, and the compressor is turned off and on again.
The released air is indicated by the compressor's pressure gauge and the thermostat setting.
6. TROUBLESHOOTING
6.1. OPERATION/FAILURE
In case of failure, check the power supply, the fuse, and the device's operation.
6.2. MAINTENANCE
- Disconnect the device from the power supply.
- Clean the device with a dry cloth, do not use water or solvents.
- Check the air filter regularly and replace it if necessary.
- Before starting installation and before connecting the cable to the mains, make sure the device is disconnected from the power supply.
6.3. ELECTRICAL CONNECTION
If the power cord is damaged, contact the manufacturer's service department or a qualified person to replace it.
Warning: For permanent connection, a device must be installed in the fixed wiring to disconnect all poles from the mains.
If the plug is not accessible, disconnect the appliance by pulling the plug.
For 24-hour continuous operation, use the power cord.
- Install the appliance at the required distance. This distance must be maintained even if the appliance is placed against a wall.
For 24-hour continuous operation, use the power cord.
- Devices that heat up quickly must be kept away.
7. TECHNICAL MAINTENANCE AND CLEANING
Before cleaning or maintenance, disconnect the appliance from the electrical supply or the mains. Clean the appliance with a damp cloth and a mild detergent, but do not use abrasive cleaners. Do not immerse the appliance in water. Do not clean the ventilation openings with a damp cloth. Do not use steam or high-pressure cleaners. Clean the exterior surfaces with a soft, dry cloth. Do not use abrasive materials. The condenser located at the back of the appliance must be cleaned with a vacuum cleaner. The condenser located at the back of the appliance must be cleaned with a vacuum cleaner. Note:
Do not use accessories or control panel buttons that are not approved by the manufacturer. The ventilation openings must be kept free of obstructions and must not be blocked. Clean them with a vacuum cleaner.
Clean the heat exchanger and the condenser located at the back of the appliance with a vacuum cleaner at least twice a year.
8. TROUBLESHOOTING
8.1. GENERAL OPERATING INFORMATION...
It is possible to use the device and perform maintenance and repair work on it yourself.
| ПОНБЛЕМА ШЕЛIMI | |
| Курьлгы жуmbic ictemeidi:· Куат кабелиин керneyi сайкес жуmbic icteetin pozetkara f кocblfran 6a? - Ундзideri заекtp жуессін корfvшы Курьлгылары мeh caltanldblprbllapbln tekcepdihi3 6e? | |
| Epyt noДонында cy 6ap 6oLca:· | Бул bICTbK, дыIMьл aya paы КеiHne kaыltы 6obltn tabbladbl. ПОдон, тinti, karрынai TOnbl 6Olybl Mymkn. Курьлгынсу cy TeTINMeTINdei, 6ip DeHreJde eHkeci3 TypfahbHa Na Ke3 KeTki3iH3. |
| Erep ecik Тыглддakсыхим Ланасын Курьлгы корпсын щетерix Кыlnы 6oLca: | Бул жafдай bICTbK aya paынdaжэHe kompeccop жумсic icten Typfahdna Kaыltы 6obltn Tabbladbl.. |
| Шam жуmbic ictemeidi:· Yинizderi | Злесч Кушистин Корfvшы Курьлгылары мeн caltanldblprbllapbln Tekcepdihi3 6e? - Куат кабелиин керneyi сайкес жуmbic icteetin pozetkara kocblfran 6a? - КарыдinoДтak KBIMДANFAH_JXAFDAДa OНы Тск catydn кeингл керстileTIn Kbl3MetTl Kepcety BeimimiHde Hemece ekilletti dinlepde rana catblnatbIn belenkeknen ayibctbyu yuin naДаланушы Кbl3Met Kepcety opTaNIFbHa xaabapnacbyi Tmic. |
| Erep motopdibn Tыm кeн жуmbic icten Typrahbбайkanla: | Motopdibn JxMlbC icTeY yakbIbTu typi Jxafdainapfa kaanhaibctbl: eciktih aushny jxiniri, caKTaJIFaH Tafamhbln Meilsepi, bemmeeri temnepaotypa, temnepaotypaHbIb KaPAnDapbIbHn napametpi. KoHandcatorpa (KypblfBbHIn apTKbl Jxafbl) shaH Hemece MAmblK XunHajmaFb 6a? Ecis Tnicinhe xabIpRan 6a? Ecis TByIbIaTkbIbTapbl Tnicinhe opHaTbIraHn 6a? blctbK Kyndepi Hemece beJime Jxblb 60lanHa Dma Motop oedTteridel yzArbIpaK JxMbIC icTeiDi. Kypblrbl eciri bipa3 yakblTka aushk KaIbDpblbIcA Hemece TaFAMHbN Uyken KeIeMi CaTanca, KypblfBbHIn iUki 6eNirHn calkbHdaTy uwhn, MOTOP yzArbIpaK yakbl 6obl 6xMbIC icTeiDi. |
| Kурьлгы temnepatypacbi Tыm xorapbIb 6oLca: | Kурьлгын bSackary ZlementTepi dupbic opHaTbIbMa? KypblfBfla Tafamhbln KeI mJIsepi caIbHdu Ma? Eciktin xni aushImaTbHbIn Tekcepini3. Eciktin Tnici Tpyde xabIpRaHn Tekcepini3. |
| Erep ecikter Tnicti Typde awbimaca xeHe xabimaca: | Taram opamdapbIbHn ecikti tipemeitinH Tekcepini3. Iwki 6eIwckTep Hemece ABTomATbI My3 reHepaTOpbl opbIdapbIHa da ekenHn Tekcepini3. Ecik TByIbIaTkbIbTapbl kip Hemece Jxablcak emecirH Tekcepini3. KypblfBbHn Teric TypfahbHa Na Ke3 KeTki3iH3. |
8.2. MAINTENANCE
When replacing a worn part, you must contact the service organization at the time specified in the maintenance schedule. The required number of hours of operation is indicated in the table.
Note: If the device is operated in conditions where the ambient temperature exceeds the specified range, the maintenance intervals must be adjusted accordingly.
9. CUSTOMER SERVICE
When contacting customer service:
Provide the device model and serial number. Also, state the device's operating hours and the date of purchase.
If the device malfunctions after following the instructions and the issue persists, contact customer service and provide the details.
Please provide the following information:
- The device model and serial number (as given in the technical data sheet), the device name,
The operating hours (the number of hours the device has been in operation since the last service), your full name, phone number, and address.
Note:
If the device is used for commercial purposes, this warranty is void. This operation is not covered by the warranty.
INDEX
Chapter 1: ASSEMBLY. 69
1.1. INSTALLATION OF A SINGLE APPLIANCE 69 1.2. INSTALLATION OF TWO APPLIANCES 69 1.3. ADJUSTING DOORS (If available) 69
Chapter 2: FUNCTIONS 70
2.1. ALARM FOR OPEN DOOR 70 2.2. QUICK COOLING 70 2.3. FAN* 70 2.4. TEMPERATURE SETTING 70 2.5. NO-FROST REFRIGERATOR SECTION 70 2.6. REFRIGERATOR LIGHT 70
Chapter 3: USE 71
3.1. REMARKS 71
Chapter 4: TIPS FOR FOOD STORAGE 71
4.1. AIR VENTILATION 71 4.2. HOW TO STORE FRESH FOOD AND DRINKS 71 4.3. WHERE TO STORE FRESH FOOD AND DRINKS 71
Chapter 5: OPERATING NOISES 72
Chapter 6: RECOMMENDATIONS IF THE APPLIANCE IS NOT IN USE 73
6.1. ABSENCE/VACATION 73 6.2. MOVING 73 6.3. POWER FAILURE 73
Chapter 7: CLEANING AND MAINTENANCE 73
Chapter 8: TROUBLESHOOTING LIST 74
8.1. BEFORE CONTACTING AFTER-SALES SERVICE 74 8.2. FAULTS 74
Chapter 9: CUSTOMER SERVICE 75
Other: DOOR REVERSAL 132
MERK:
4.1. Storage of fresh products 95 4.2. Storage of fresh drinks 95 4.3. Do not store fresh products or drinks 95
Chapter 5: Sound during appliance operation 96
Chapter 6: If the appliance is not used for a long time 97
6.1. Long absence/vacation 97 6.2. Moving 97 6.3. Disconnecting the power supply 97
Chapter 7: Cleaning and maintenance 97
Chapter 8: Troubleshooting 98
8.1. Before contacting the service center 98 8.2. Faults 98
Chapter 9: Service 99
To activate and deactivate it, see the attached brief instruction manual.
Do not block the air intake area with food.
To ensure proper operation of the appliance at low ambient temperatures (below 18°C), the minimum energy consumption should be achieved by turning off the fan.
If the appliance is equipped with a fan, it may be fitted with an antibacterial filter.
Remove the filter from the box located in the drawer for vegetables and fruits and insert it into the fan cover.
The replacement procedure is described in the instructions included in the filter box.
2.4. TEMPERATURE SETTING
The device is factory-set to the recommended average temperature. For a detailed description of temperature setting, see the attached brief manual.
Note: The indicated settings correspond to the average temperature throughout the entire refrigerator.
2.5. NO-FROST REFRIGERATOR COMPARTMENT
Defrosting of the refrigerator compartment occurs completely automatically. The appearance of water droplets on the rear wall of the refrigerator compartment indicates the automatic defrosting process. The thawed water flows through the drain hole into a special container and then evaporates.
2.6. REFRIGERATOR COMPARTMENT LIGHTING
The refrigerator compartment uses an LED lighting system, which provides better lighting with very low energy consumption. If the LED lighting system does not work, contact the service center for its replacement.
Important:
The refrigerator compartment lighting turns on when the refrigerator door is opened. If the door remains open for more than 8 minutes, the light turns off automatically.
3. OPERATION
3.1. NOTES
Do not block the ventilation openings (only on the inner wall) with products. All shelves, drawers, and baskets can be removed.
The temperature inside the device may be affected by the room temperature, the frequency of door opening, and the installation method of the device. These factors should be taken into account when setting the temperature. - Unless otherwise specified, the device accessories are not suitable for use in a dishwasher.
4. TIPS FOR STORING PRODUCTS
Storage of cooked dishes, fresh products and chilled semi-finished products, dairy products, vegetables, fruits, and drinks.
4.1. VENTILATION
Thanks to natural air circulation in the refrigerator compartment, zones with different temperatures are established. The coldest zone is located directly above the vegetable and fruit drawer and near the rear wall. The warmest zone is in the upper part of the compartment. - If ventilation is insufficient, electricity consumption increases and cooling efficiency decreases.
4.2. STORAGE OF FRESH PRODUCTS AND DRINKS
- Place products in trays, plastic, metal, aluminum, or glass containers, or in film. Always store products with strong odors in closed containers. To increase the shelf life of products that emit a lot of ethylene, as well as products sensitive to this gas, such as fruits, vegetables, and salads, they should be stored separately or in food film; for example, do not store tomatoes together with apples or cabbage. Do not pack products too tightly so as not to impede air circulation. To avoid falling bottles, use a bottle holder (on certain models).
- If you have few products, we recommend storing them on the shelves above the fruit and vegetable drawer: this is the coldest place in the refrigerator compartment.
4.3. STORAGE OF FRESH PRODUCTS AND DRINKS
On the shelves of the refrigerator compartment: cooked dishes, tropical fruits, cheeses. In the vegetable drawer: fruits, salads, vegetables. On the door: butter, jam, sauces, pickles, jars, bottles, and cartons with drinks, as well as
6.1. LONG ABSENCE / VACATION
In case of vacation, it is recommended to empty the refrigerator and disconnect it to save electricity.
6.2. MOVING
- Remove all internal elements. 2. Wrap them in film and secure with tape so that they do not rattle and cannot be lost on the way.
- Tighten the adjustable legs so that they do not touch the floor.
- Close the doors and secure them with tape, also secure the power cord.
6.3. DISCONNECTING THE ELECTRICITY
If the power outage occurs, contact your local power company and clarify how to proceed with the disconnection.
Application: A fully stocked refrigerator keeps cold longer than an empty one.
Products that are in poor condition should be thrown away.
If the disconnection lasts more than 24 hours.
- Keep the refrigerator doors closed. This will help preserve food in a cooled state longer.
If the disconnection lasts more than 24 hours.
- Try to use products that can spoil quickly.
7. CLEANING AND CARE
Before performing any cleaning or maintenance operations, disconnect the appliance from the power supply. Regularly clean the appliance using a soft cloth soaked in a solution of warm water and a neutral cleaning agent specifically designed for cleaning the interior surfaces of refrigerators. Do not use abrasive agents. Do not use flammable liquids for cleaning refrigerator components. Their vapors can create a fire hazard. Clean the external surfaces of the appliance and the door gaskets with a damp cloth, then wipe them dry with a soft cloth.
Do not use a steam cleaner.
The condenser on the back of the appliance should be cleaned regularly with a vacuum cleaner.
The condenser on the back of the appliance should be cleaned regularly with a vacuum cleaner.
Important:
The control buttons must not be cleaned with alcohol or alcohol-containing liquids; they should only be wiped with a dry cloth. The tubes of the refrigeration system are located near the defrost heater and may become hot. Clean them regularly with a vacuum cleaner.
To ensure proper continuous drainage of thawed water, regularly clean the drain hole on the rear wall of the refrigerator compartment near the fruit and vegetable drawer using the supplied tool.
8. TROUBLESHOOTING
8.1. BEFORE CONTACTING THE SERVICE CENTER...
Minor malfunctions in the appliance can often be fixed independently without the use of any tools.
| HENCIPABHOCTB CNOOCB | UCTPAHEHNI | |
| Прибор не павOTает·Убенист. ч у п п п п п п п п п п п п п п п п п п п п п п п п п п п п п п п п п п н н н н н н н н н н н н н н н н н н н н н н н н н н н н н н н н н н н н н н н н н н н н н н н н н н н н н н н н н н н н н н н н н н n n n n n n n n n n n n n n n n n n n n n n n n n n n n n n n n n n n n n n n n n n n n n n n n n n n БЕСТОПАСТВА усторіства напочиь БODA: | Прибор не павOTает·Убенист. ч п п п п п п п п п п п п п п п п п п п п п п п п п п п п п п п п п СЕСТОПАСТВА усторіства напочиь БODA: | Прибор не павOTает·Убенист. ч п п п п п п п п п п п п п п СЕСТОПАСТВА усторіства напочиь БODA: |
| Если в лоте размоганьаго усторіства наочиь БODA: | З э н н н н н н н н н н н н н н н н н н н н н н н н н н н н н н н н н БЕСТОПАСТВА усторіства наочиь БODA: | З э н н н н н н н н н н н н н н н н н н н БЕСТОПАСТВА усторіства БODA: |
| Если наразуca, нахаяшесь В CONTАNTе с улотенгелов пронладко дervць, наревалотс: | З э н н н н н н н н н н н н н н н н н н н КOMPPECCOP. | З э н н н н н н н н н КOMPPECCOP. |
| He paobotaet BNYTPENHNE ocBeSeHne: | Д н н н н н н н н н н н н н пседытейл БOLATRIDE. Y6eHNTECB,ч ч ч ч ч ч ч ч ч ч ч БOLATRIDE,ч ч ч ч ч ч БOLATRIDE,ч ч ч БOLATRIDE,ч ч БOLATRIDE,ч ч БOLATRIDE,ч БOLATRIDE,ч БOLATRIDE,ч БOLATRIDE,ч БOLATRIDE,ч БOLATRIDE,ч БOLATRIDE,ч БOLATRIDE,ч БOLATRIDE,ч БOLATRIDE,ч БOLATRIDE,ч БOLATRIDE,ч БOLATRIDE,ч БOKTIOK CETN C PABINHIM HAPRAHEM. EcIи He paobotaet CBVEHOTNE ЧИ ДВИГЕТЯ paobotaet cherechyp dolgo: | Д н н н н н н н н н ЧИ DVBIGA ЧИ DVBIGA CHI DVBIGA CHI DVBIGA CHI DVBIGA CHI DVBIGA CHI DVBIGA CHI DVBIGA CHI DVBIGA CHI DVBIGA CHI DVBIGA CHI DVBIGA CHI DVBIGA CHI DVBIGA CHI DVBIGA CHI DVBIGA CHI DvbA CHI DvbA CHI DvbA CHI DvbA CHI DvbA CHI DvbA CHI DvbA CHI DvbA CHI DvbA CHI DvbA CHI DvbA CHI DvbA CHI DvbA CHI DvbA CHI DvbA CHI DvbA CHI DvbA CH1DVBIGA CH1DVBIGA CH1DVBIGA CH1DVBIGA CH1DVBIGA CH1DVBIGA CH1DVBIGA CH1DVBIGA CH1DVBIGA CH1DVBIGA CH1DVBIGA CH1DVBIGA CH1DVBIGA CH1DVBIGA CH1DVBIGA |
| Если co3dalocь впechатлесь, чу的大догатель paobotaet чересур dolgo: | Д н н н н н н н н н н н н н н н н н н САСТОТА СТРОТА СТРОТА СТРОТА СТРОТА СТРОТА СТРОТА СТРОТА СТРОТА СТРОТА СТРОТА СТРОТА СТРОТА СТРОТА СТРОТА СТРОTА СТРОТА СТРОTА СТРОTА СТРОTА СТРОTА СТРОTА СТРОTА СТРОTА СТРОTА СТРОTА СТРОTА СТРОTА СТРОTА СТРОTА СТРОTА СТРОTА | Д н н н н н н н н н САСТОТА СТРОТА СТРОТА СТРОТА СТРОTА СТРОTА СТРОTА СТРОTА СТРОTА СТРОTА СТРОTА СТРОTА СТРОTА СТРОTА СТРОTА СТРОTА СТРОTА |
| Если в симхом Всicohя temperatура: | Д н н н н н н н н н н Смрьг�сытейл БOLATRIDE. Y6eHNTECB,ч ч ч БOLATRIDE. Y6eHNTECB,ч БOLATRIDE. Y6eHNTECB,ч БOLATRIDE. Y6eHNTECB,ч БOLATRIDE. Y6eHNTECB,ч БOLATRIDE. Y6eHNTECB,ч БOLATRIDE. Y6eHNTECB,ч БOLATRIDE. Y6eHNTECB,ч БOKTIOK СНСHOM СНСHOM СНСHOM СНСHOM СНСHOM СНСHOM СНСHOM СНСHOM СНСHOM СНСHOM СНСHOM СНСHOM СНСHOM СНСHOM СНСHOM СНСHOM СНСHOM СНSCM СНSCM СНSCM СНSCM СНSCM СНSCM СНSCM СНSCM СНSCM СНSCM СНSCM СНSCM СНSCM СНSCM СНSCM СНSCM СНSCM СНSCM СНSCM СНSCM СНSCm СНSCM СНSCM СНSCM СНSCM СНSCM СНSCM СНSCM СНSCM СНSCM СНSCM СНSCM СНSCM СНSCM СНSCM СНSCM СНSCM СНSCM СНSCM СНSCM СНSCN СНSCM СНSCM СНSCM СНSCM СНSCM СНSCM СНSCM СНSCM СНSCM СНSCM СНSCM СНSCM СНSCM СНSCM СНSCM СНSCM СНSCM СНSCM СНSCM СНSC M СНSCM СНSCM СНSCM СНSCM СНSCM СНSCM СНSCM СНSCM СНSCM СНSCM СНSCM СНSCM СНSCM СНSCM СНSCM СНSCM СНSCM СНSCM СНSCM СНSCC СНSCM СНSCM СНSCM СНSCM СНSCM СНSCM СНSCM СНSCM СНSCM СНSCM СНSCM СНSCM СНSCM СНSCM СНSCM СНSCM СНSCM СНSCM СНSCM СНSCCM СНSCM СНSCM СНSCM СНSCM СНSCM СНSCM СНSCM СНSCM СНSCM СНSCM СНSCM СНSCM СНSCM СНSCM СНSCM СНSCM СНSCM СНSCM СНSCM СНSCMI СНSCM СНSCM СНSCM СНSCM СНSCM СНSCM СНSCM СНSCM СНSCM СНSCM СНSCM СНSCM СНSCM СНSCM СНSCM СНSCM СНSCM СНSCM СНSCM СНSCМ СНSCM СНSCM СНSCM СНSCM СНSCM СНSCM СНSCM СНSCM СНSCM СНSCM СНSCM СНSCM СНSCM СНSCM СНSCM СНSCM СНSCM СНSCM СНSCM СНSCMH СНSCM СНSCM СНSCM СНSCM СНSCM СНSCM СНSCM СНSCM СНSCM СНSCM СНSCM СНSCM СНSCM СНSCM СНSCM СНSCM СНSCM СНSCM СНSCM СНSCML СНSCM СНSCM СНSCM СНSCM СНSCM СНSCM СНSCM СНSCM СНSCM СНSCM СНSCM СНSCM СНSCM СНSCM СНSCM СНSCM СНSCM СНSCM СНSCM СНSCMV СНSCM СНSCM СНSCM СНSCM СНSCM СНSCM СНSCM СНSCM СНSCM СНSCM СНSCM СНSCM СНSCM СНSCM СНSCM СНSCM СНSCM СНSCM СНSCM СНSCMC СНSCM СНSCM СНSCM СНSCM СНSCM СНSCM СНSCM СНSCM СНSCM СНSCM СНSCM СНSCM СНSCM СНSCM СНSCM СНSCM СНSCM СНSCM СНSCM СНSCMM СНSCM СНSCM СНSCM СНSCM СНSCM СНSCM СНSCM СНSCM СНSCM СНSCM СНSCM СНSCM СНSCM СНSCM СНSCM СНSCM СНSCM СНSCM СНSCM СНSC.M СНSCM СНSCM СНSCM СНSCM СНSCM СНSCM СНSCM СНSCM СНSCM СНSCM СНSCM СНSCM СНSCM СНSCM СНSCM СНSCM СНSCM СНSCM СНSCM СНSCMK СНSCM СНSCM СНSCM СНSCM СНSCM СНSCM СНSCM СНSCM СНSCM СНSCM СНSCM СНSCM СНSCM СНSCM СНSCM СНSCM СНSCM СНSCM СНSCM СНSCMJ СНSCM СНSCM СНSCM СНSCM СНSCM СНSCM СНSCM СНSCM СНSCM СНSCM СНSCM СНSCM СНSCM СНSCM СНSCM СНSCM СНSCM СНSCM СНSCM СНSCMT СНSCM СНSCM СНSCM СНSCM СНSCM СНSCM СНSCM СНSCM СНSCM СНSCM СНSCM СНSCM СНSCM СНSCM СНSCM СНSCM СНSCM СНSCM СНSCM СНSCMO СНSCM СНSCM СНSCM СНSCM СНSCM СНSCM СНSCM СНSCM СНSCM СНSCM СНSCM СНSCM СНSCM СНSCM СНSCM СНSCM СНSCM СНSCM СНSCM СНSCMA СНSCM СНSCM СНSCM СНSCM СНSCM СНSCM СНSCM СНSCM СНSCM СНSCM СНSCM СНSCM СНSCM СНSCM СНSCM СНSCM СНSCM СНSCM СНSCM СНSCG СНSCM СНSCM СНSCM СНSCM СНSCM СНSCM СНSCM СНSCM СНSCM СНSCM СНSCM СНSCM СНSCM СНSCM СНSCM СНSCM СНSCM СНSCM СНSCM СНSCW CNDLDA CNDLDA CNDLDA CNDLDA CNDLDA CNDLDA CNDLDA CNDLDA CNDLDA CNDLDA CNDLDA CNDLDA CNDLDA CNDLDA CNDLDA CNDLDA CNDLDA CNDLDA CNDLDA CNDLDA CNDL2A CNDL2A CNDL2A CNDL2A CNDL2A CNDL2A CNDL2A CNDL2A CNDL2A CNDL2A CNDL2A CNDL2A CNDL2A CNDL2A CNDL2A CNDL2A CNDL2A CND107A CND108A CND109A CND109A CND109A CND109A CND109A CND109A CND109A CND109A CND109A CND109A CND109A CND109A CND109A CND109A CND109A |
8.2. MALFUNCTIONS
If any malfunction causes the indicator light to blink, it is necessary to contact the service center. The appliance will ensure optimal storage conditions for products.
Note: after a power outage, the appliance will return to the normal operating mode with the previously set temperature settings.
9. SERVICE
Before contacting service:
Turn the appliance off and on again to check if the malfunction is resolved. If the problem persists, disconnect the appliance from the power supply and wait approximately 5 minutes before turning it on again.
If an attempt to fix the malfunction independently, following the instructions in the "Troubleshooting" section, has failed and the appliance still does not work properly after being turned on, contact the service center and explain the nature of the problem.
Please provide:
The model and serial number of the appliance (indicated on the rating plate); the nature of the malfunction;
- the service number (the number after the word SERVICE on the rating plate on the back of the appliance (on the metal plate)); your full address; and your telephone number with area code.
Note:
For the refrigerator: prepared dishes, tropical fruits, spices, delicacies. - For the container for vegetables and fruits: fruits, salads, vegetables. On the shelves of the door: butter, jam, sauces, pickles, canned goods, drinks in bottles and cartons, y
5. Sounds that may be heard during operation of the device
Sounds, which can be heard during operation of the device, are normal, but the device may require a certain number of fans and pumps to automatically turn on and off.
Method of changing the volume of given sounds, which can be heard during operation of the device
Level the device and place it on a flat surface. Do not install the device close to surrounding furniture. - Check that the components inside the device are installed correctly. - Check that the lid and containers do not touch each other.
Given sounds that can be heard during operation of the device
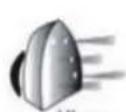
Clicking sound during the first switching on of the device or switching on after a long period of inactivity.
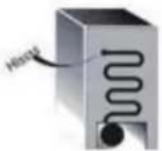
Bubbling sound when the refrigerant is in the cooling circuit tubes.
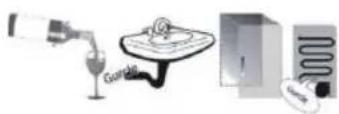
A "br-r-r" sound is heard during operation of the compressor.
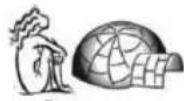
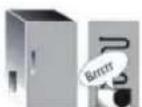
Rattling sound when the water valve of the fan starts operating.
The compressor starts or stops when the appliance is plugged in. When the compressor turns on or off, a click is heard.
Clicking of the thermostat, which regulates the frequency of the compressor operation.
6. RECOMMENDATIONS IN CASE OF NON-USE OF THE DEVICE
6.1. ABSENCE/VACATION
In case of prolonged absence (vacation), it is recommended to empty the refrigerator of products and turn it off to save electricity.
6.2. INPEI3A
- Remove the internal parts of the refrigerator.
- Properly secure the refrigerator parts and fix them with the help of the tension strap so that they do not knock against each other and do not get lost.
- Tighten the height adjustment legs so that they do not protrude above the supporting surface.
- Close the doors and secure them with the help of the strap, and also with the help of the strap cover the power cord to the appliance.
6.3. POWER FAILURE
In case of a power failure, call the local company that supplies electricity and ask when the electricity supply will be restored.
Note: Pay attention that a fully loaded freezer keeps low temperature longer than a partially loaded refrigerator.
If the condition of food products is unsatisfactory, it is better to throw them away.
If the power failure lasts up to 24 hours, follow the instructions below.
- Do not open the appliance doors. This ensures low temperature maintenance in the refrigerator for the required time.
If the power failure lasts more than 24 hours, follow the instructions below.
- First, use the products that spoil quickly.
7. MAINTENANCE AND CLEANING
Before performing any maintenance or cleaning, disconnect the appliance from the power supply or unplug it from the socket.
Periodically clean the appliance with a damp cloth and mild detergent (especially if we are talking about the internal parts of the refrigerator). Never use abrasive cleaning agents. Never use sharp objects for cleaning the refrigerator. They may cause damage or explosion. Wipe the external surface of the appliance and the door seals with a damp cloth, then wipe dry.
The use of steam cleaners is prohibited.
It is necessary to regularly clean the condenser located on the rear wall of the appliance using a vacuum cleaner.
It is necessary to regularly clean the condenser located on the rear wall of the appliance using a vacuum cleaner.
Caution:
The control knobs and display must not be wiped with cloths containing alcohol, but only with a dry cloth. The tubes of the cooling system are located near the ice cube tray and may heat up. Periodically wipe these tubes with a cloth.
To ensure uninterrupted and proper flow of water, regularly clean the drain hole on the rear wall of the refrigerator near the container for fruits and vegetables, using the tool supplied with the appliance.
8. TROUBLESHOOTING
8.1. IF YOU NEED TO CONTACT THE SERVICE CENTER...
Problems with the efficiency of the appliance may be caused by minor faults that can be fixed independently and without the use of additional tools.
| ПОНБЛЕМА RISEVENHЯ | |
| Прилад не пацю: •ЧИ Вставлени | Шур живелень в розту 3 Вдповдимою habрую? •Чи певирно с的对象ы засcentros и ристоови i залибінкivе剂量чимо состема удиону? |
| Пддон ддя 3бору розмороженого льody містигь Bodу: | • ZeHopmaльные явашие у сменоту або Вологу поordи. Пддон моче habіт bутни налобину залибіним. Пеpekonайся, до Тала Bodа He Bvilлійся 3 пддону. |
| Harpiraюься краï основны чastни праладу,有很大 сontахуюгь 3 ушьлнювачем ддя дөberцат: | • ZeЯшише é Hopmaльним в умовax сменоту поordи або пддон ровоту komпесора. |
| He пацюе освітLEMня: •Чи певирно | eNo cspabnictb zaxinschix prinstvoi b i zanobixhnikiv eilektrpnuhoСССТЕМУБДИКУ? •Чи вставленишу лнужим leнь в розту 3 Вдповдимою habрую? •Ящо сbitлODIOДу розы ti, kopyntувачу слд зberн'tсяdo сервicHoro ceHTpy对于我们 зами, тому сbitлODIOДу taHoro tiniу有很大ш�� в нашхцentpxпсллраджогorobSClyrgobuBaHry abo y abtopinizobahnx рordaviz. |
| Двигун Trпвалим чac nepeşubvaь в ровотi: | •Ha trpvbalictb ровоты DBIVrhyma monHyb VPIINBAATN pi3hiчinnikov: частота Вдкрпваньдевцат, обаяnpodуктВхарчвань,有很大зберлары tcьс,temпературау у пrimiiшп,налашувань пarametripв Tempeparatypu. •Чи не зашисту кONDehсатор (Задна частиа пиладу) чeredпл i npox? •Чи надійно зашиноDBERPATA? •Чи праладино ушьлнювачi ддя дверцатн Halěжимчимчим? •Забичай двигун пацюе довш,ящо надворіаabo в кIMнati矫екотно. •Ящо дверцату п Viладу 3alniшпв Вдчинецпспогетrom Trпвалого уасуaboяшо 3берлары З纳чим obсагпрдктВарчаньпспогетrom Trпвалого уасуaboяшо 3берлары З纳чим obсагпрдктВарчаньпспогетrom Trпвалого уасуaboяшо 3берлары З纳чим obсагпрдктВарчаньпспогетrom Trпвалого уасуaboЯшо 3берлары З纳чим obсагпрдктВарчаньпспогетrom Trпвалого уасуaboяшо 3берлары Z纳чим obсагпрдктВарчаньпспогетrom Trпвалcano у�р�нay, Двигун пацюватime doobwe,шобустановити НИьку Tempeparatypu BCEpendiHi прладу. |
| Зависона temnéратура всяковип рoveдану: | •Налштувань пралady Bстановлени правильно? •До пралady добavenу Великий обаяnpodуктВхарчвань? •He bIDkrpaиайte заhandToчадTo дверцату прладу,ящо вцьму hemae患有алы ho'i notpeşbi. •Пeverbirte,шоб дверцату buynи надійно зашинeti. |
| Двигату праладу norao BVidunnoJOTbcra Ta 3aunnaIOTbcra: | •Рeverbirte,чи He sblokyotb рдауNTKи xapuybaHng DBerztayatpura pinaudу. •Рeverkaнaitceя,шо Виутpiшичauthigenп рinday Ta loTOK对于我们lbody po3taшоваон рравильно. •Peverbirte,чи ушьлювачдя дьерцат He bpdyni i neLipknii. •Peverkaнaitceя,шо пралad установлени надійно. |
8.2. FAULTS
If any indicator starts blinking, indicating a malfunction, it is necessary to contact the service center. The appliance will continue to maintain the required storage mode for products.
Note: in case of a power outage, the appliance will return to the normal operating mode and will automatically restore the previously set temperature.
- CHAPTER 1: INSTALLATION
- CHAPTER 2: FUNCTIONS
- CHAPTER 3: USE
- NOTES
- CHAPTER 4: FOOD-STORAGE TIPS
- CHAPTER 5: FUNCTIONAL SOUNDS
- CHAPTER 6: RECOMMENDATION IN CASE OF NO USE OF THE APPLIANCE
- CHAPTER 7: MAINTENANCE AND CLEANING
- CHAPTER 8: TROUBLESHOOTING GUIDE
- CHAPTER 9: AFTER-SALES SERVICE
- OTHERS: REVERSE DOOR SWING
- NOTE
- INSTALLATION
- INSTALLING SINGLE APPLIANCE
- INSTALLING TWO APPLIANCES
- ADJUST DOORS (IF AVAILABLE)
- FUNCTIONS
- DOOR OPEN ALARM
- FAST COOLING
- FAN
- TEMPERATURE SETTING
- NO-FROST REFRIGERATOR COMPARTMENT
- REFRIGERATOR LIGHT
- IMPORTANT
- USE
- FOOD-STORAGE TIPS
- AIR VENTILATION
- HOW TO STORE FRESH FOOD AND BEVERAGE
- WHERE TO STORE FRESH FOOD AND BEVERAGE
- FUNCTIONAL SOUNDS
- SOME OF THE FUNCTIONAL SOUNDS CAN BE REDUCED THROUGH
- SOME OF THE FUNCTIONAL SOUNDS YOU MIGHT HEAR
- RECOMMENDATION IN CASE OF NON-USE OF THE APPLIANCE
- ABSENCE/VACATION
- MOVING
- POWER FAILURE
- FOR POWER FAILURES LASTING UP TO 24 HOURS
- FOR POWER FAILURES LASTING MORE THAN 24 HOURS
- MAINTENANCE AND CLEANING
- TROUBLESHOOTING GUIDE
- BEFORE CONTACTING AFTER-SALES SERVICE
- FAILURES
- AFTER-SALES SERVICE
- SPECIFY
- CHAPTER 3: OPERATION
- STARTING UP
- CHAPTER 4: ADVICE ON FOOD STORAGE
- CHAPTER 5: NOISE DURING OPERATION
- CHAPTER 6: TROUBLESHOOTING WHEN THE DEVICE IS NOT IN USE
- CHAPTER 7: MAINTENANCE AND CARE
- DOOR: OBRESHANE HA OTVARNETO VRATA
- ZABELESHKA
- INSTALLING A SINGLE DEVICE
- INSTALLING TWO DEVICES
- ADJUSTING THE DOORS (IF APPLICABLE)
- OPEN DOOR ALARM
- QUICK COOLING
- IT IS RECOMMENDED TO USE THIS FUNCTION WHEN A VERY LARGE QUANTITY OF FOOD IS PLACED IN THE REFRIGERATOR COMPARTMENT
- DO NOT BLOCK THE AIR INLET AREA WITH FOOD PRODUCTS
- IF THE APPLIANCE IS EQUIPPED WITH A FAN, IT CAN BE FITTED WITH AN ACTIVATED CARBON FILTER
- DEFROSTING OF THE REFRIGERATOR WITHOUT FREON
- LIGHTING OF THE REFRIGERATOR
- OPERATION
- TIPS FOR STORING FOOD
- AIR CIRCULATION
- HOW TO STORE FRESH FOOD AND DRINKS
- WHERE TO STORE FRESH FOOD AND DRINKS
- CHAPTER 4: TIPS FOR FOOD STORAGE
- CHAPTER 5: OPERATING INSTRUCTIONS
- CHAPTER 6: RECOMMENDED ACTIONS IF THE DEVICE IS NOT USED
- CHAPTER 7: DEVICE MAINTENANCE AND
- CHAPTER 9: SERVICE
- OTHER: REPLACING THE DOOR GASKET
- THIS FUNCTION IS USED WHEN A LARGE AMOUNT OF FOOD NEEDS TO BE COOLED QUICKLY
- HEATER
- CAUTION
- DO NOT TOUCH THE HEATING ELEMENT WITH BARE HANDS
- IF THE HEATER IS FAULTY, IT MAY CAUSE BACTERIAL CONTAMINATION
- TEMPERATURE PARAMETERS
- NO-FROST (FROST-FREE) SYSTEM
- FREEZER COMPARTMENT DOOR
- USAGE
- FOOD STORAGE COMPARTMENTS
- FRESH FOOD ZONE
- STORING FOOD AND DRINKS
- PLACE FOR STORING FOOD AND DRINKS
- FUNCTIONAL PARTS
- SOME FUNCTIONAL PARTS MAY BE AVAILABLE AS ACCESSORIES
- THE FOLLOWING FUNCTIONS ARE AVAILABLE
- TROUBLESHOOTING
- OPERATION/FAILURE
- MAINTENANCE
- ELECTRICAL CONNECTION
- FOR 24-HOUR CONTINUOUS OPERATION, USE THE POWER CORD
- TECHNICAL MAINTENANCE AND CLEANING
- GENERAL OPERATING INFORMATION
- CUSTOMER SERVICE
- WHEN CONTACTING CUSTOMER SERVICE
- PLEASE PROVIDE THE FOLLOWING INFORMATION
- INDEX
- CHAPTER 1: ASSEMBLY
- REMARKS
- CHAPTER 5: OPERATING NOISES
- CHAPTER 6: RECOMMENDATIONS IF THE APPLIANCE IS NOT IN USE
- CHAPTER 7: CLEANING AND MAINTENANCE
- CHAPTER 8: TROUBLESHOOTING LIST
- CHAPTER 9: CUSTOMER SERVICE
- OTHER: DOOR REVERSAL
- MERK
- CHAPTER 5: SOUND DURING APPLIANCE OPERATION
- CHAPTER 6: IF THE APPLIANCE IS NOT USED FOR A LONG TIME
- CHAPTER 8: TROUBLESHOOTING
- REFRIGERATOR COMPARTMENT LIGHTING
- TIPS FOR STORING PRODUCTS
- VENTILATION
- STORAGE OF FRESH PRODUCTS AND DRINKS
- LONG ABSENCE / VACATION
- DISCONNECTING THE ELECTRICITY
- IF THE DISCONNECTION LASTS MORE THAN 24 HOURS
- CLEANING AND CARE
- BEFORE CONTACTING THE SERVICE CENTER
- MALFUNCTIONS
- SERVICE
- BEFORE CONTACTING SERVICE
- PLEASE PROVIDE
- SOUNDS THAT MAY BE HEARD DURING OPERATION OF THE DEVICE
- METHOD OF CHANGING THE VOLUME OF GIVEN SOUNDS, WHICH CAN BE HEARD DURING OPERATION OF THE DEVICE
- GIVEN SOUNDS THAT CAN BE HEARD DURING OPERATION OF THE DEVICE
- RECOMMENDATIONS IN CASE OF NON-USE OF THE DEVICE
- INPEI3A
- IF THE POWER FAILURE LASTS UP TO 24 HOURS, FOLLOW THE INSTRUCTIONS BELOW
- IF THE POWER FAILURE LASTS MORE THAN 24 HOURS, FOLLOW THE INSTRUCTIONS BELOW
- IF YOU NEED TO CONTACT THE SERVICE CENTER
- FAULTS
Brand : INDESIT
Model : TIAA 10 V.1
Category : Refrigerator