IAN 103005 - Electric scooter Playtive - Free user manual and instructions
Find the device manual for free IAN 103005 Playtive in PDF.



| Product type | Children's scooter (toy) |
| Brand | Playtive |
| Model | IAN 103005 |
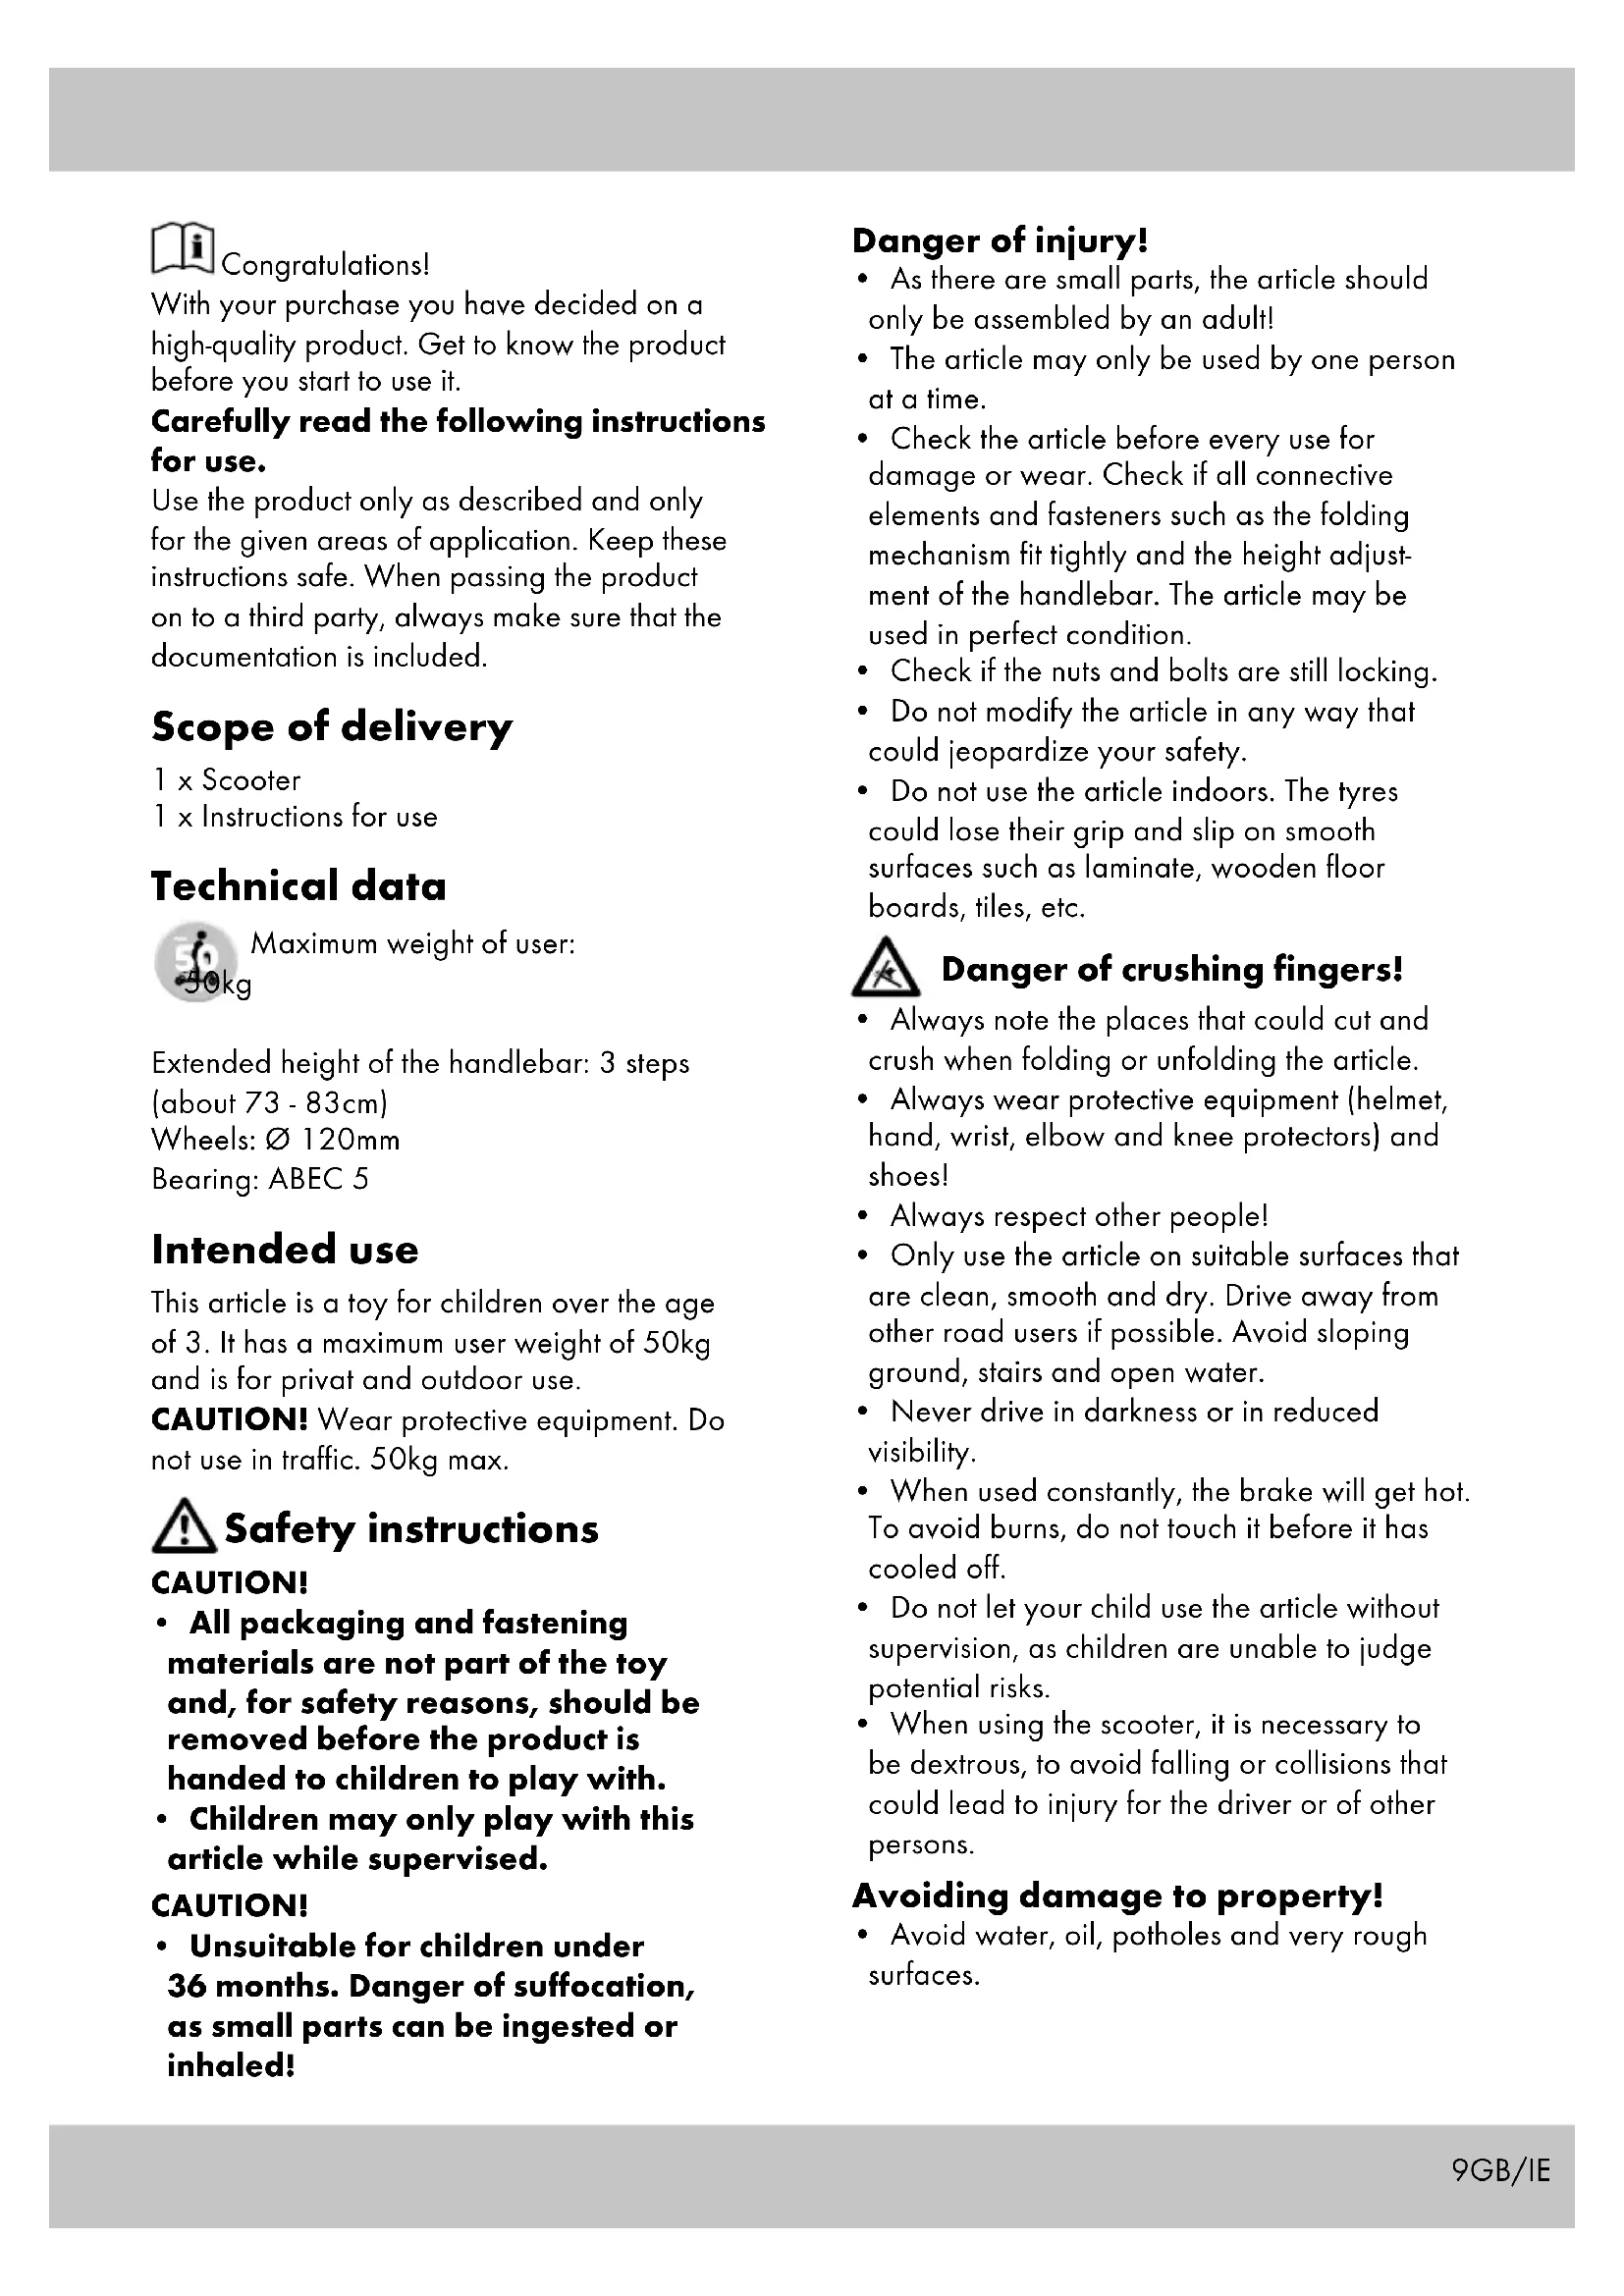
| Maximum user weight | 50 kg |
| Recommended age | From 3 years (under supervision) |
| Handlebar height adjustment | 3 levels (approx. 73 to 83 cm) |
| Wheel diameter | 120 mm |
| Bearing type | ABEC 5 |
| Brake | Rear plate brake |
| Folding mechanism | Yes, with quick release |
| Usage | Outdoor, smooth and dry surfaces |
| Required protective equipment | Helmet, wrist guards, knee pads, elbow pads |
| Maintenance | Clean and dry after use, grease bearings |
| Spare parts | Available at www.delta-sport.com |
| Warranty | 3 years |
Frequently Asked Questions - IAN 103005 Playtive
User questions about IAN 103005 Playtive
0 question about this device. Answer the ones you know or ask your own.
Ask a new question about this device
Download the instructions for your Electric scooter in PDF format for free! Find your manual IAN 103005 - Playtive and take your electronic device back in hand. On this page are published all the documents necessary for the use of your device. IAN 103005 by Playtive.
USER MANUAL IAN 103005 Playtive
SCOOTER
Inducations for use
(N)
STEP Cebruksaonwiing EB PATINETE Instruetiones de Uso


()
Before reading, fold out the ilustrative page and get to know all of the functions of your unit.
Varlster 03/2017 Oct to Spot 14:K5-10:04
IAN 283035IAN 283035
With your purchase you have decided on a high-quality product. Get to know the product before you start to use it.
Carefully read the following instructions for use.
Use the product only as described and only for the given areas of application. Keep these instructions safe. When passing the product on to a third party, always make sure that the documentation is included.
Scope of delivery
1 x Scooter
1 x Instructions for use
Technical data

Maximum weight of user:
Extended height of the handlebar: 3 steps
(about 73 - 83cm)
Wheels: 120mm
Bearing: ABEC 5
Intended use
This article is a toy for children over the age of 3. It has a maximum user weight of 50kg and is for privat and outdoor use.
CAUTION! Wear protective equipment. Do not use in traffic. 50kg max.

Safety instructions
CAUTION!
- All packaging and fastening materials are not part of the toy and, for safety reasons, should be removed before the product is handed to children to play with.
Children may only play with this article while supervised.
CAUTION!
- Unsuitable for children under 36 months. Danger of suffocation, as small parts can be ingested or inhaled!
Danger of injury!
- As there are small parts, the article should only be assembled by an adult!
The article may only be used by one person at a time. - Check the article before every use for damage or wear. Check if all connective elements and fasteners such as the folding mechanism fit tightly and the height adjustment of the handlebar. The article may be used in perfect condition.
- Check if the nuts and bolts are still locking.
- Do not modify the article in any way that could jeopardize your safety.
- Do not use the article indoors. The tyres could lose their grip and slip on smooth surfaces such as laminate, wooden floor boards, tiles, etc.

Danger of crushing fingers!
Always note the places that could cut and crush when folding or unfolding the article.
Always wear protective equipment (helmet, hand, wrist, elbow and knee protectors) and shoes!
Always respect other people!
- Only use the article on suitable surfaces that are clean, smooth and dry. Drive away from other road users if possible. Avoid sloping ground, stairs and open water.
- Never drive in darkness or in reduced visibility.
- When used constantly, the brake will get hot. To avoid burns, do not touch it before it has cooled off.
- Do not let your child use the article without supervision, as children are unable to judge potential risks.
- When using the scooter, it is necessary to be dextrous, to avoid falling or collisions that could lead to injury for the driver or of other persons.
Avoiding damage to property!
- Avoid water, oil, potholes and very rough surfaces.
Fitting
For transport, the article is delivered folded up. To make the product ready for use, proceed as follows:
Unfolding (Fig. A)
- Loosen the bottom quick fastener (1).
- Pull the lever (2) upwards and push the handlebar (3) forward until it clicks in.
- Secure the folding mechanism by locking the lower quick fastener.
Fitting the handles (Fig. B)
- Loosen the handles (4) from the brackets (5).
- Press the lock buttons (6) on the handles downwards and push the handles in the T-bar (7) of the handlebar. The lock buttons have to audibly lock into the drilled holes (8).
Adjusting the height of the handlebar (Fig. C)
The handlebar is adjustable to three different heights. The article may only be used when the lock button is clicked into one of the drilled holes provided and the handlebar is subsequently locked with the quick fastener!
- Loosen the quick fastener (9) at the handlebar.
- Pull the handlebar (10) upwards, until the lock button (11) clicks into one of the three drilled holes (12).
- Secure the handlebar by locking the quick fastener.
Headset (Fig. D)
When the article is delivered, the headset is pre-adjusted. Should the handlebar be too loose or too stiff after a certain time, have the headset adjusted by a specialist dealer or a cycle shop.
Making the article ready for transport (Fig. E)
- Loosen the quick fastener (1) at the handlebar, press the lock button, push the handlebar in fully, lock the quick fastener.
- Press the lock buttons of the handles, pull the handles out of the T-bar and fasten them on the brackets.
- Loosen the quick fastener and pull the bar (2) upwards, push the handlebar direction deck, until it clicks in. Lock lower quick fastener.
Use
Driving, braking (Fig. F)
- Put one leg on the deck (13) and propel yourself forward by regularly pushing off with the other leg. The scooter can be steered by moving the handlebar, moving your weight and by a combination of both.
- For braking, step onto the brake plate (14).
Maintenance
Changing the wheels (Fig. G) Important! Please observe the technical data. Wheels with a different diameter can change the handling characteristics and may lead to danger for the user. Never use wheels that cannot be fitted properly. Never fit larger wheels than the original wheels of the article.
The wheels wear. Wear is dependent on many factors, such as the ground, the height and width of the user, the weather conditions, the material of the wheels and their hardness. Therefore, it is necessary to change them from time to time.
- Loosen the axle bolts (15) using two Allen keys size 5.
Pull out the axle bolts and remove the roll. - Insert a new roll (16) and fasten it, using the axle screws.
After the exchange: Should the wheel rub on the side, do not use it! Ensure that all screws are still tight after a few minutes of driving and that nothing has loosened or come loose. Tighten the wheel again, to ensure, that it runs smoothly and that there are no bearing noises.
Swapping the ball bearings (Fig. H)
- Remove the roll (16) as described.
- Press the bearing out by pressing onto the spacer (17) using an Allen key and remove the spacer.
- Press the other bearing (18) out by pressing with an Allen key.
- Press in a new bearing. Turn the wheel around, insert the distance pieces and press in a second new bearing.
- Fasten the wheels again.
Maintenance, storage
We recommend to clean and dry the article thoroughly after use. Remove little stones or other objects that possibly have become stuck on your wheels. Dry wet or damp ball bearings with a clean cloth. Grease the bearings from the outside with a suitable bearing grease, to prevent rusting on the outside. Store the article in a dry place.
Disposal
Dispose of the article and the packaging materials in accordance with current local regulations. Packaging materials such as foil bags are not suitable to be given to children. Keep the packaging materials out of the reach of children.
3-year warranty
The product was produced with great care and under constant supervision. You receive a three-year warranty for this product from the date of purchase. Please retain your receipt.
The warranty applies only to material and workmanship and does not apply to misuse or improper handling. Your statutory rights, especially the warranty rights, are not affected by this warranty.
With regard to complaints, please contact the following service hotline or contact us by e-mail.
Our service employees will advise as to the subsequent procedure as quickly as possible.
We will be personally available to discuss the situation with you.
Any repairs under the warranty, statutory guarantees or through goodwill do not extend the warranty period. This also applies to replaced and repaired parts.
Repairs after the warranty are subject to a charge.
IAN:283035
GB Service Great Britain
Tel.: 0871 5000 720 (£ 0.10/Min.)
E-Mail: deltasport@lidl.co.uk
IE Service Ireland
Tel.: 1890 930 034
(0,08 EUR/Min., (peak))
(0,06 EUR/Min., (off peak))
E-Mail: deltasport@lidl.ie
You can also find spare parts for your product at: www.delta-sport.com, category Service - Lidl Spare Parts Service

Felicitations!
Specifications techniques


- CAREFULLY READ THE FOLLOWING INSTRUCTIONS FOR USE
- SCOPE OF DELIVERY
- TECHNICAL DATA
- INTENDED USE
- SAFETY INSTRUCTIONS
- CAUTION
- DANGER OF INJURY
- DANGER OF CRUSHING FINGERS
- AVOIDING DAMAGE TO PROPERTY
- FITTING
- UNFOLDING (FIG. A)
- FITTING THE HANDLES (FIG. B)
- ADJUSTING THE HEIGHT OF THE HANDLEBAR (FIG. C)
- THE HANDLEBAR IS ADJUSTABLE TO THREE DIFFERENT HEIGHTS. THE ARTICLE MAY ONLY BE USED WHEN THE LOCK BUTTON IS CLICKED INTO ONE OF THE DRILLED HOLES PROVIDED AND THE HANDLEBAR IS SUBSEQUENTLY LOCKED WITH THE QUICK FASTENER
- HEADSET (FIG. D)
- MAKING THE ARTICLE READY FOR TRANSPORT (FIG. E)
- USE
- DRIVING, BRAKING (FIG. F)
- MAINTENANCE
- CHANGING THE WHEELS (FIG. G) IMPORTANT! PLEASE OBSERVE THE TECHNICAL DATA. WHEELS WITH A DIFFERENT DIAMETER CAN CHANGE THE HANDLING CHARACTERISTICS AND MAY LEAD TO DANGER FOR THE USER. NEVER USE WHEELS THAT CANNOT BE FITTED PROPERLY. NEVER FIT LARGER WHEELS THAN THE ORIGINAL WHEELS OF THE ARTICLE
- SWAPPING THE BALL BEARINGS (FIG. H)
- MAINTENANCE, STORAGE
- DISPOSAL
- 3-YEAR WARRANTY
- SPECIFICATIONS TECHNIQUES
Brand : Playtive
Model : IAN 103005
Category : Electric scooter